

When it comes to preparing dinner for my family of five, quick and easy recipes are my absolute lifesavers. I love trying out a variety of dishes that are not only tasty but also simple to make. From creamy one-pot chicken Alfredo to zesty lemon garlic salmon, there are so many delicious options to choose from. These meals save me precious time and keep everyone satisfied and full. Want to explore my other favorite dishes? Let’s get cooking!
One-Pot Creamy Chicken Alfredo
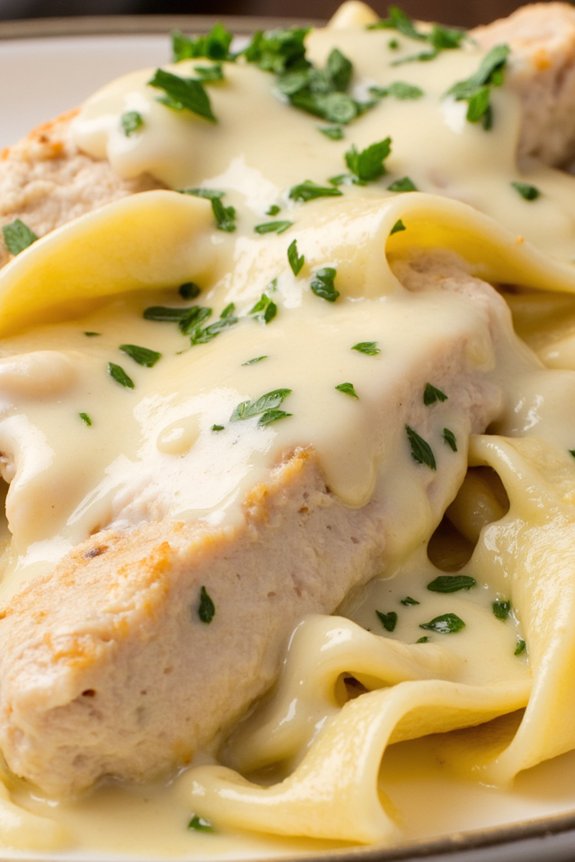
One-Pot Creamy Chicken Alfredo is a delicious and satisfying meal that can be prepared quickly, making it perfect for busy weeknights. This dish combines tender pieces of chicken with a rich and creamy Alfredo sauce, all cooked in a single pot to minimize cleanup.
The simplicity of the recipe doesn’t compromise on flavor, as the sauce is enhanced with garlic and Parmesan cheese, providing a comforting meal that the whole family will love.
This recipe is ideal for a family of five, with enough servings to potentially have leftovers for lunch the next day. The use of a single pot not only makes the cooking process easier but also allows the flavors to meld together beautifully. By the end of the cooking process, you’ll have a delectable dish that’s both creamy and hearty, ready to be devoured by your loved ones.
Ingredients (Serves 4-6):
- 1 tablespoon olive oil
- 1 pound boneless, skinless chicken breasts (cut into bite-sized pieces)
- Salt and pepper to taste
- 4 cloves garlic (minced)
- 4 cups chicken broth
- 1 cup heavy cream
- 12 ounces fettuccine pasta
- 1 cup grated Parmesan cheese
- 2 tablespoons chopped fresh parsley (optional)
Instructions:
- Prepare the Chicken: Heat olive oil in a large pot over medium-high heat. Season the chicken pieces with salt and pepper. Add the chicken to the pot and cook until golden brown, about 5-7 minutes. Remove the chicken from the pot and set aside.
- Sauté the Garlic: In the same pot, add the minced garlic and sauté for about 1 minute, until fragrant. Be careful not to burn the garlic.
- Combine Ingredients: Pour in the chicken broth and heavy cream, then bring the mixture to a simmer. Add the fettuccine pasta, ensuring it’s submerged in the liquid.
- Cook the Pasta: Cover the pot and let the pasta cook for about 10-12 minutes, stirring occasionally, until the pasta is tender and the liquid has reduced to a creamy sauce.
- Incorporate Chicken and Cheese: Return the cooked chicken to the pot and stir in the Parmesan cheese. Cook for another 2-3 minutes, or until the cheese is melted and the chicken is heated through.
- Finish and Serve: Sprinkle with chopped fresh parsley before serving, if desired. Serve the Alfredo hot, directly from the pot.
Extra Tips:
When preparing One-Pot Creamy Chicken Alfredo, feel free to adjust the seasoning to your taste. Adding a pinch of red pepper flakes can provide a subtle kick for those who enjoy a bit of spice.
If you prefer a thicker sauce, allow the dish to sit off the heat for a few minutes before serving, as this will help the sauce thicken further. For an added touch of freshness, consider serving with a side of steamed vegetables or a crisp salad.
Easy Beef Tacos
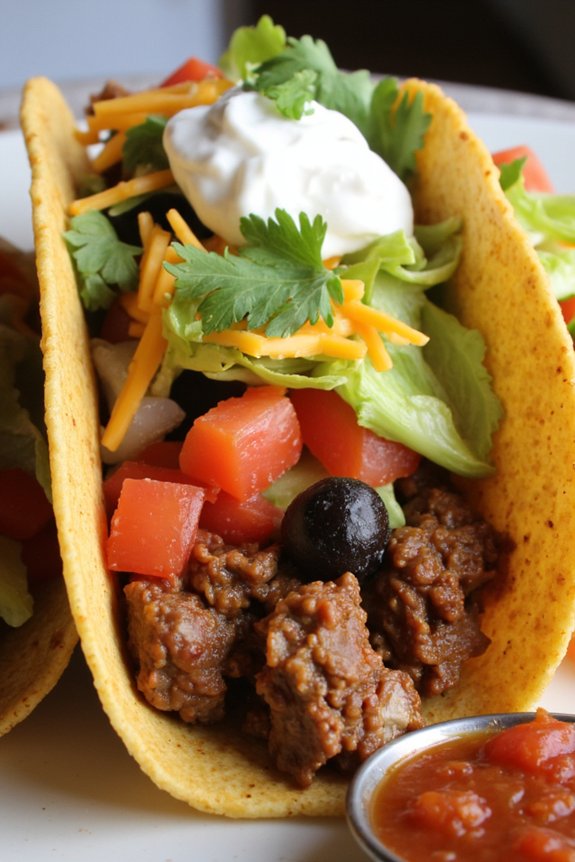
If you’re looking for a quick and delicious dinner option that the whole family will enjoy, seek no further than these Easy Beef Tacos. Perfect for busy weeknights, this recipe isn’t only simple to prepare but also packed with flavor and can be customized to suit everyone’s taste.
Whether you prefer your tacos spicy or mild, loaded with toppings or plain and simple, this recipe provides a versatile base that you can adapt to fit your family’s preferences.
These Easy Beef Tacos are designed to serve 4-6 people, making them ideal for larger families or for those who enjoy having leftovers for lunch the next day. With a few simple ingredients and minimal prep time, you’ll have a delicious meal on the table in no time.
Pair with a side of rice or a fresh salad for a complete meal that satisfies every appetite.
Ingredients (serving size: 4-6 people):
- 1 pound ground beef
- 1 small onion, diced
- 2 cloves garlic, minced
- 1 packet taco seasoning mix
- 1/2 cup water
- 12 taco shells or soft tortillas
- 1 cup shredded lettuce
- 1 cup diced tomatoes
- 1 cup shredded cheddar cheese
- 1/2 cup sour cream
- 1/2 cup salsa
- Optional toppings: sliced jalapeños, chopped cilantro, sliced olives
Cooking Instructions:
- Cook the Beef: In a large skillet over medium heat, add the ground beef. Cook for about 5-7 minutes, breaking it apart with a spatula, until it’s browned and fully cooked. Drain any excess fat from the skillet.
- Add Onion and Garlic: Add the diced onion and minced garlic to the skillet with the beef. Cook for an additional 2-3 minutes, stirring occasionally, until the onion becomes translucent and the garlic is fragrant.
- Season the Beef: Sprinkle the taco seasoning mix over the beef mixture, then pour in 1/2 cup of water. Stir well to combine, ensuring the beef is evenly coated with the seasoning. Allow it to simmer for 5 minutes until the sauce thickens.
- Prepare the Taco Shells: While the beef simmers, warm the taco shells or tortillas according to the package instructions. This can typically be done in the oven or microwave, depending on your preference.
- Assemble the Tacos: Once the beef mixture is ready and the taco shells are warm, start assembling your tacos. Spoon a generous amount of the beef mixture into each shell, then top with shredded lettuce, diced tomatoes, and shredded cheddar cheese.
- Add Toppings and Serve: Finish off your tacos with a dollop of sour cream and a spoonful of salsa. You can also add any optional toppings you desire. Serve immediately while warm.
Extra Tips:
For a healthier version, consider using ground turkey or chicken in place of beef. You can also add black beans or corn to the beef mixture for extra flavor and texture.
If you prefer a spicier taco, add a pinch of cayenne pepper or a few dashes of hot sauce to the beef while it cooks.
Finally, for added convenience, you can prepare the beef mixture in advance and store it in the refrigerator for up to three days, making meal prep even quicker on busy nights.
Quick Teriyaki Chicken Stir-Fry
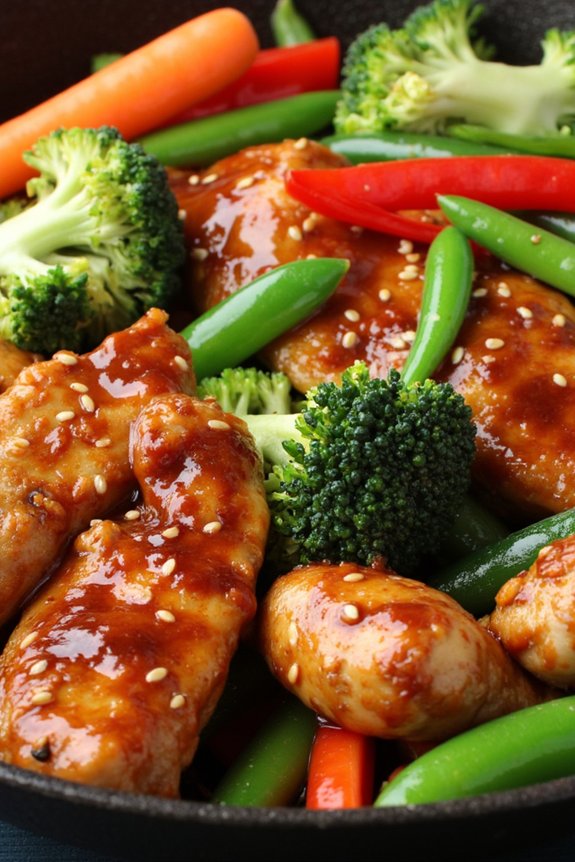
Quick Teriyaki Chicken Stir-Fry is a delightful and speedy meal perfect for busy weeknights, especially when you need something that pleases the whole family. This dish combines tender chicken pieces with vibrant vegetables, all enveloped in a savory and slightly sweet teriyaki sauce. Not only is it packed with flavor, but it also offers a nutritious balance, making it an ideal choice for a family of five. You can have this meal ready in under 30 minutes, which means more time to relax and enjoy the company of your loved ones.
The beauty of this Quick Teriyaki Chicken Stir-Fry lies in its versatility. You can easily adjust the vegetables based on what you have on hand or according to your family’s preferences. The key is to maintain a balance of colors and textures to keep the dish exciting. With just a few simple ingredients, you can transform an ordinary dinner into a memorable one. Serve it over a bed of steamed rice or noodles for a complete meal that will leave everyone satisfied.
Ingredients for 4-6 servings:
- 1 1/2 pounds boneless, skinless chicken breasts, sliced into thin strips
- 2 tablespoons vegetable oil
- 1 red bell pepper, sliced
- 1 cup broccoli florets
- 1 cup sugar snap peas
- 1 medium carrot, thinly sliced
- 3 cloves garlic, minced
- 1 teaspoon grated fresh ginger
- 1/2 cup teriyaki sauce
- 2 tablespoons soy sauce
- 1 tablespoon honey
- 1 tablespoon cornstarch mixed with 2 tablespoons water
- 4 green onions, sliced
- Sesame seeds for garnish (optional)
Cooking Instructions:
- Prepare the Ingredients: Begin by slicing the chicken breasts into thin strips. This guarantees they cook quickly and evenly. Also, prepare the vegetables by slicing the bell pepper, carrot, and green onions, and separating the broccoli into small florets.
- Heat the Oil: In a large skillet or wok, heat the vegetable oil over medium-high heat. Once hot, add the sliced chicken strips. Cook for about 5-7 minutes, stirring occasionally, until the chicken is browned and cooked through.
- Add Aromatics: Add the minced garlic and grated ginger to the chicken. Stir well and cook for about 1 minute until fragrant. This step enhances the flavor of the dish considerably.
- Cook the Vegetables: Add the red bell pepper, broccoli florets, sugar snap peas, and carrot to the skillet. Stir-fry for another 4-5 minutes until the vegetables are tender-crisp.
- Make the Sauce: In a small bowl, combine the teriyaki sauce, soy sauce, and honey. Pour this mixture over the chicken and vegetables in the skillet. Stir well to coat everything evenly.
- Thicken the Sauce: Add the cornstarch slurry (cornstarch mixed with water) to the skillet. Continue to cook for another 2-3 minutes, stirring constantly, until the sauce thickens.
- Finish and Serve: Sprinkle the sliced green onions over the stir-fry and give it a final stir. Garnish with sesame seeds if desired. Serve hot over steamed rice or noodles.
Extra Tips:
For an even quicker preparation, consider using pre-cut vegetables available at most grocery stores. This can save time without compromising the taste or nutritional value of the dish.
If you prefer a spicier version, add a pinch of red pepper flakes or a splash of Sriracha sauce to the teriyaki mixture.
Keep an eye on the vegetables while cooking to retain their vibrant color and crunch, which enhances both the visual appeal and texture of the dish.
Sheet Pan Lemon Garlic Salmon

Sheet Pan Lemon Garlic Salmon is a delightful and nutritious meal that brings together the vibrant flavors of citrus and garlic with tender, flaky salmon. This dish is perfect for busy weeknights when you need to prepare a quick and satisfying dinner for your family of five. By using a sheet pan, you simplify the cleanup process and guarantee that the flavors meld beautifully as everything cooks together in the oven.
The beauty of this recipe lies in its simplicity and balance. The lemon and garlic not only enhance the natural taste of the salmon but also infuse the accompanying vegetables with a zesty kick. This one-pan meal isn’t only easy to prepare but also visually appealing, making it a great choice for family dinners or casual gatherings. Plus, it’s packed with healthy fats and nutrients, ensuring a wholesome meal for everyone.
Ingredients for 4-6 servings:
- 2 pounds of salmon fillets
- 1/4 cup of olive oil
- 3 tablespoons of freshly squeezed lemon juice
- Zest of 1 lemon
- 4 cloves of garlic, minced
- 1 teaspoon of salt
- 1/2 teaspoon of freshly ground black pepper
- 1 pound of baby potatoes, halved
- 1 bunch of asparagus, trimmed
- 1 teaspoon of dried thyme
- Lemon slices for garnish
- Fresh parsley, chopped, for garnish
Cooking Instructions:
- Preheat the Oven: Start by preheating your oven to 400°F (200°C). This guarantees that the salmon and vegetables cook evenly and achieve a nice caramelization.
- Prepare the Marinade: In a small bowl, whisk together the olive oil, lemon juice, lemon zest, minced garlic, salt, and black pepper. This marinade will coat the salmon and infuse the vegetables with flavor.
- Arrange the Ingredients: On a large sheet pan, arrange the salmon fillets skin-side down. Scatter the halved baby potatoes around the salmon, followed by the asparagus. Drizzle the marinade over the salmon and vegetables, ensuring everything is well-coated.
- Season and Garnish: Sprinkle the dried thyme over the potatoes and asparagus for an added layer of flavor. Add lemon slices on top of the salmon for an extra burst of citrus as it cooks.
- Bake the Dish: Place the sheet pan in the preheated oven and bake for 20-25 minutes, or until the salmon is cooked through and flakes easily with a fork, and the potatoes are tender.
- Serve and Enjoy: Once done, remove the sheet pan from the oven. Let it cool for a few minutes before garnishing with freshly chopped parsley. Serve warm and enjoy with your family.
Extra Tips:
When preparing Sheet Pan Lemon Garlic Salmon, make sure the salmon fillets are of even thickness to guarantee they cook uniformly. If your fillets are particularly thick, you may need to increase the cooking time slightly.
For an added burst of flavor, consider marinating the salmon for 15-30 minutes before baking. Additionally, keep an eye on the asparagus as it can cook faster than the potatoes; you may want to add it to the pan during the last 10-15 minutes of cooking to prevent it from becoming too soft.
30-Minute Vegetable Stir-Fry

Stir-frying is one of the quickest and most versatile cooking methods, making it a perfect option for a busy family meal. This Minute Vegetable Stir-Fry isn’t only quick to prepare but also packed with colorful vegetables and vibrant flavors.
It’s a great way to introduce more veggies into your family’s diet while spending minimal time in the kitchen. The secret to a successful stir-fry lies in having all ingredients prepped and ready to go before you start cooking, guaranteeing everything cooks evenly and maintains its delicious crunch.
This recipe is designed to serve a family of five, with enough leftovers for an extra portion or two. Feel free to customize the vegetables based on your family’s preferences or what’s available in your fridge. Pair it with steamed rice or noodles for a complete meal.
Whether you’re a seasoned cook or new to stir-frying, this recipe will guide you through a delicious, nutritious dinner in no time.
Ingredients (Serves 4-6):
- 2 tablespoons vegetable oil
- 1 medium onion, sliced
- 2 cloves garlic, minced
- 1 red bell pepper, sliced
- 1 yellow bell pepper, sliced
- 1 cup broccoli florets
- 1 cup snap peas
- 1 cup sliced mushrooms
- 2 medium carrots, julienned
- 3 tablespoons soy sauce
- 1 tablespoon oyster sauce
- 1 tablespoon sesame oil
- 1 teaspoon grated ginger
- 1 teaspoon cornstarch mixed with 2 tablespoons water
- Salt and pepper to taste
- Optional: sesame seeds and chopped green onions for garnish
Instructions:
1. Prepare Ingredients:
Before you start cooking, confirm all your vegetables are washed, sliced, and ready to go. This is essential for quick cooking.
2. Heat the Pan:
Place a large wok or frying pan over high heat. Add the vegetable oil and allow it to heat until shimmering but not smoking.
3. Cook Aromatics:
Add the sliced onion and minced garlic to the pan. Stir-fry for about 30 seconds until fragrant.
4. Add Vegetables:
Add the red and yellow bell peppers, broccoli, snap peas, mushrooms, and carrots. Stir-fry for about 3-4 minutes or until the vegetables are vibrant and crisp-tender.
5. Flavor the Stir-Fry:
Add the soy sauce, oyster sauce, sesame oil, and grated ginger. Toss everything together to coat the vegetables in the sauce.
6. Thicken the Sauce:
Pour the cornstarch mixture into the pan, stirring constantly. Cook for another minute until the sauce thickens and evenly coats all the vegetables.
7. Season and Serve:
Taste and season with salt and pepper as needed. Remove from heat and garnish with sesame seeds and chopped green onions if desired. Serve immediately over rice or noodles.
Extra Tips:
For the best results, make sure your pan is very hot before adding the vegetables; this guarantees they sear quickly and retain their crispness.
Cut all vegetables into similar-sized pieces to guarantee even cooking. Feel free to add protein like tofu, chicken, or shrimp to make this dish more filling.
Finally, if you prefer your vegetables softer, add a splash of water and cover the pan for a minute to steam them slightly before serving.
Simple Baked Ziti

Baked Ziti is a classic Italian-American dish that’s perfect for busy weeknights when you need a comforting meal that can feed the whole family. This delicious casserole is made with ziti pasta, savory marinara sauce, creamy ricotta, and gooey mozzarella cheese, all baked together to bubbly perfection.
It’s a dish that’s easy to prepare and can be adapted to suit your family’s taste preferences. Whether you’re feeding a family of five or hosting a small dinner gathering, this recipe is sure to be a hit.
One of the best things about Simple Baked Ziti is that it can be assembled ahead of time and then baked when you’re ready to eat. This makes it an ideal choice for those nights when you have a packed schedule but still want to serve a homemade meal.
With minimal prep work and a quick bake time, this dish will quickly become a staple in your dinner rotation. Plus, it makes great leftovers that can be enjoyed for lunch or dinner the next day.
Ingredients (Serves 4-6):
- 1 pound ziti pasta
- 1 tablespoon olive oil
- 1 pound ground beef or Italian sausage
- 3 cups marinara sauce
- 1 teaspoon dried Italian seasoning
- 1/2 teaspoon garlic powder
- 1/4 teaspoon red pepper flakes (optional)
- Salt and pepper to taste
- 1 cup ricotta cheese
- 2 cups shredded mozzarella cheese
- 1/2 cup grated Parmesan cheese
- Fresh basil, for garnish (optional)
Cooking Instructions:
- Preheat and Prepare: Begin by preheating your oven to 375°F (190°C). Grease a 9×13 inch baking dish with a little olive oil and set aside.
- Cook the Pasta: In a large pot, bring salted water to a boil. Add the ziti pasta and cook according to package instructions until al dente. Drain the pasta and set aside.
- Cook the Meat: In a large skillet over medium heat, heat the olive oil. Add the ground beef or Italian sausage, breaking it up with a spoon. Cook until browned and cooked through, about 5-7 minutes. Drain excess fat.
- Make the Sauce: Stir in the marinara sauce, Italian seasoning, garlic powder, red pepper flakes (if using), and salt and pepper. Let it simmer for about 5 minutes to blend the flavors.
- Combine Pasta and Sauce: In a large bowl, combine the cooked pasta with the meat sauce. Stir in the ricotta cheese until well mixed.
- Assemble the Dish: Spread half of the pasta mixture into the prepared baking dish. Sprinkle with half of the mozzarella cheese. Add the remaining pasta mixture, and top with the remaining mozzarella and Parmesan cheese.
- Bake: Cover the dish with aluminum foil and bake in the preheated oven for 20 minutes. Remove the foil and bake for an additional 10 minutes, or until the cheese is melted and bubbly.
- Serve: Remove from the oven and let it cool slightly before serving. Garnish with fresh basil if desired.
Extra Tips:
For a vegetarian version of Simple Baked Ziti, simply omit the meat and add in some sautéed vegetables like bell peppers, mushrooms, or zucchini.
If you prefer a spicier dish, feel free to increase the amount of red pepper flakes. Additionally, this dish can be frozen before baking; just cover tightly and freeze. When ready to eat, bake from frozen, adding an additional 15-20 minutes to the bake time.
Quick and Easy Chicken Quesadillas

Quick and Easy Chicken Quesadillas are a perfect dinner choice for families seeking a meal that’s both delicious and simple to prepare. Filled with tender chicken, melted cheese, and flavorful spices, these quesadillas are sure to become a family favorite.
Whether you’re juggling a busy weeknight or want to whip up something special without spending hours in the kitchen, this recipe will help you serve a satisfying meal in no time.
Ideal for serving 4-6 people, these quesadillas offer a versatile taste experience that can be customized with a variety of toppings and sides. Pair them with salsa, guacamole, or sour cream to enhance the flavors, and you’ll have a wholesome meal that everyone will enjoy.
With minimal prep work and a quick cooking time, these Chicken Quesadillas are bound to be a hit at your dinner table.
Ingredients:
- 2 cups cooked chicken, shredded
- 1 cup shredded cheddar cheese
- 1 cup shredded Monterey Jack cheese
- 1 tablespoon olive oil
- 1 teaspoon ground cumin
- 1 teaspoon chili powder
- 1/2 teaspoon garlic powder
- 1/2 teaspoon onion powder
- Salt and pepper to taste
- 8 flour tortillas (8-inch)
- Cooking spray
- Optional toppings: salsa, guacamole, sour cream, diced tomatoes, chopped cilantro
Instructions:
1. Prepare the Chicken Filling:
In a large mixing bowl, combine the shredded chicken, cheddar cheese, Monterey Jack cheese, olive oil, ground cumin, chili powder, garlic powder, onion powder, salt, and pepper. Mix well until all ingredients are thoroughly blended.
2. Assemble the Quesadillas:
Lay four tortillas flat on a clean surface. Evenly distribute the chicken mixture over the tortillas, spreading it out to cover the entire surface. Place the remaining tortillas on top to form a sandwich.
3. Cook the Quesadillas:
Heat a large non-stick skillet or griddle over medium heat and lightly coat with cooking spray. Carefully place one quesadilla in the skillet and cook for about 3 minutes on each side, or until the tortillas are golden brown and the cheese is melted.
Repeat this process for the remaining quesadillas.
4. Serve and Enjoy:
Once cooked, transfer the quesadillas to a cutting board and let them cool slightly. Use a sharp knife or pizza cutter to slice each quesadilla into quarters. Serve hot with your choice of optional toppings such as salsa, guacamole, sour cream, diced tomatoes, or chopped cilantro.
Extra Tips:
For an added layer of flavor, consider marinating the chicken in lime juice and a bit of cilantro before cooking.
If you prefer a spicier dish, add some diced jalapeños or a splash of hot sauce to the chicken mixture. Additionally, these quesadillas can be prepared in advance and stored in the refrigerator; simply reheat them in the oven or on a skillet for a quick meal.
Finally, using a combination of cheeses can enhance the flavor profile, so feel free to experiment with different cheese varieties.
Speedy Shrimp Scampi
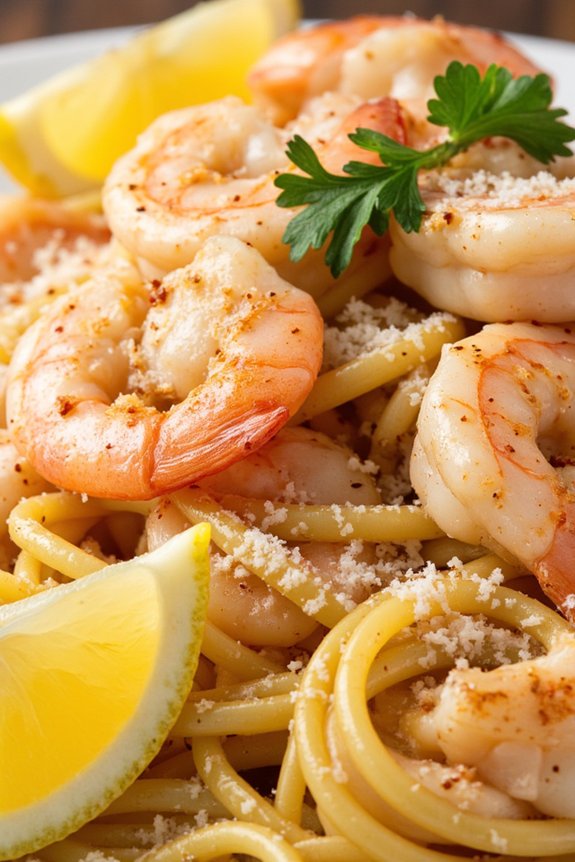
If you’re looking for a quick yet delightful dinner option for your family, this Speedy Shrimp Scampi recipe is the perfect choice. With simple ingredients and a preparation time of less than 30 minutes, this dish combines the rich flavors of garlic, lemon, and Parmesan to create a savory meal that everyone will love.
It’s a versatile dish that pairs beautifully with pasta, rice, or crusty bread, making it a satisfying choice for a family of five. Shrimp Scampi isn’t only delicious but also packed with nutrients, thanks to the shrimp, which are high in protein and low in calories.
The addition of fresh parsley and lemon juice brightens the dish and enhances its flavor profile, making it both invigorating and aromatic. Perfect for a busy weeknight or a special family gathering, this recipe will quickly become a staple in your household.
Ingredients (Serving Size: 4-6 people):
- 1.5 pounds large shrimp, peeled and deveined
- 8 ounces linguine or spaghetti
- 4 tablespoons unsalted butter
- 3 tablespoons olive oil
- 5 cloves garlic, minced
- 1/2 teaspoon red pepper flakes (optional)
- 1/4 cup dry white wine or chicken broth
- Juice of 1 lemon
- Salt and freshly ground black pepper, to taste
- 1/4 cup freshly grated Parmesan cheese
- 1/4 cup chopped fresh parsley
- Lemon wedges, for serving
Cooking Instructions:
- Prepare the Pasta: Begin by bringing a large pot of salted water to a boil. Cook the linguine or spaghetti according to the package instructions until al dente. Drain and set aside, reserving about 1/2 cup of pasta water.
- Cook the Shrimp: In a large skillet over medium-high heat, melt 2 tablespoons of butter with 2 tablespoons of olive oil. Add the shrimp in a single layer and cook for 2-3 minutes on each side until they turn pink and opaque. Remove the shrimp from the skillet and set aside.
- Sauté the Garlic: Lower the heat to medium, and in the same skillet, add the remaining butter and olive oil. Add the minced garlic and red pepper flakes (if using) and sauté for about 1 minute, or until the garlic is fragrant but not browned.
- Deglaze the Pan: Add the white wine or chicken broth to the skillet, scraping up any bits from the bottom of the pan. Let it simmer for 2-3 minutes until slightly reduced.
- Combine Ingredients: Return the shrimp to the skillet and add the lemon juice, salt, and pepper. Toss to coat the shrimp in the sauce. Then, add the cooked pasta to the skillet, along with the reserved pasta water, if needed, to loosen the sauce. Stir in the Parmesan cheese and chopped parsley.
- Serve: Transfer the shrimp scampi to a serving platter or individual plates. Garnish with additional parsley and serve with lemon wedges on the side.
Extra Tips:
For an added depth of flavor, consider marinating the shrimp in olive oil, garlic, and lemon juice for about 15 minutes before cooking. If you prefer a creamier sauce, you can add a splash of heavy cream or half-and-half to the skillet before adding the shrimp back in.
To avoid overcooking, keep a close eye on the shrimp as they cook quickly, and remove them from the heat as soon as they turn pink. Enjoy your Speedy Shrimp Scampi with a crisp green salad or a side of steamed vegetables for a complete meal.
Fast and Flavorful Beef Stir-Fry

The Fast and Flavorful Beef Stir-Fry is a perfect solution for busy weeknights when you need to whip up a nutritious meal quickly. It’s a vibrant dish that combines tender slices of beef with colorful vegetables, all coated in a savory sauce that’s sure to please every member of your family.
This recipe isn’t only quick to prepare, taking just about 30 minutes from start to finish, but it also offers a delightful balance of flavors and textures that will leave everyone satisfied. Whether served over steamed rice or noodles, this stir-fry is a versatile and delicious option for a family of five.
One of the great aspects of this dish is its adaptability. You can easily swap out the vegetables for whatever you have on hand or modify the spices to suit your family’s taste preferences. The key to achieving that restaurant-quality taste at home is in the preparation and cooking technique.
By guaranteeing your pan is hot and not overcrowded, you’ll achieve perfectly seared beef and crisp-tender vegetables. This dish not only promises speed and flavor but also provides a nutritious meal packed with protein and vitamins.
Ingredients (Serves 4-6):
- 1 ½ pounds flank steak, thinly sliced against the grain
- 3 tablespoons soy sauce
- 2 tablespoons oyster sauce
- 1 tablespoon cornstarch
- 1 tablespoon vegetable oil
- 1 red bell pepper, sliced
- 1 yellow bell pepper, sliced
- 1 cup broccoli florets
- 1 cup sugar snap peas
- 3 cloves garlic, minced
- 1 tablespoon fresh ginger, minced
- ½ cup beef broth
- 2 tablespoons hoisin sauce
- 1 tablespoon sesame oil
- Cooked rice or noodles, for serving
- Optional: sesame seeds and sliced green onions for garnish
Cooking Instructions:
- Marinate the Beef: In a large bowl, combine the soy sauce, oyster sauce, and cornstarch. Add the sliced flank steak and toss to coat. Let it marinate for 10-15 minutes while you prepare the vegetables.
- Prepare the Stir-Fry Sauce: In a small bowl, mix together the beef broth, hoisin sauce, and sesame oil. Set this aside as it will be used later to flavor the stir-fry.
- Cook the Beef: Heat the vegetable oil in a large wok or non-stick skillet over high heat. Once the oil is hot, add the marinated beef in a single layer. Cook for about 2-3 minutes, stirring occasionally, until the beef is browned and just cooked through. Remove the beef from the pan and set it aside.
- Stir-Fry the Vegetables: In the same pan, add the garlic and ginger, sautéing for about 30 seconds until fragrant. Then add the bell peppers, broccoli, and sugar snap peas. Stir-fry the vegetables for 4-5 minutes, until they’re vibrant and just tender.
- Combine and Finish: Return the cooked beef to the pan with the vegetables. Pour in the prepared stir-fry sauce and toss everything together, making sure the beef and vegetables are well coated. Cook for another 2 minutes until the sauce is heated through.
- Serve: Remove from heat and serve immediately over cooked rice or noodles. Garnish with sesame seeds and sliced green onions if desired.
Extra Tips:
For the best results, make certain your beef is sliced thinly and consistently. This ensures even cooking and helps the beef absorb the marinade more effectively.
Additionally, to keep the vegetables crisp and vibrant, avoid overcrowding the pan, which can lead to steaming rather than stir-frying. If necessary, cook the vegetables in batches.
Finally, feel free to adjust the seasoning according to your family’s taste, adding a splash of soy sauce or a pinch of chili flakes for extra flavor.
Classic Margherita Pizza

Classic Margherita Pizza is a timeless favorite that combines the simplicity of fresh ingredients with the rich flavors of Italian cuisine. Perfect for a family of five, this pizza isn’t only quick and easy to make but also allows for a delightful family cooking experience. The combination of fresh mozzarella, ripe tomatoes, fragrant basil, and a perfectly crisp crust makes it an irresistible choice for dinner.
Preparing a homemade Classic Margherita Pizza allows you to control the quality of ingredients while keeping the meal budget-friendly. Using high-quality fresh ingredients elevates the taste and guarantees a healthier option than many takeout alternatives. This recipe provides a delightful balance of flavors and textures that will have everyone reaching for another slice.
Ingredients (Serving Size: 4-6 people):
- 1 pound pizza dough
- 1/2 cup tomato sauce
- 8 ounces fresh mozzarella cheese, sliced
- 2 medium ripe tomatoes, sliced
- 1/4 cup fresh basil leaves
- 2 tablespoons olive oil
- 1 teaspoon salt
- 1/2 teaspoon freshly ground black pepper
- Optional: cornmeal for dusting
Cooking Instructions:
- Preheat the Oven: Preheat your oven to 475°F (245°C). For best results, place a pizza stone or an inverted baking sheet in the oven to heat up as well.
- Prepare the Dough: On a lightly floured surface, roll out the pizza dough into a 12-inch circle. If you prefer a crispier crust, you can roll it thinner. Transfer the rolled dough onto a piece of parchment paper, which will make it easier to transfer to the oven later.
- Add the Sauce: Spread the tomato sauce evenly over the surface of the dough, leaving a small border around the edges for the crust. Use the back of a spoon to guarantee an even distribution.
- Layer the Toppings: Place the sliced fresh mozzarella evenly over the sauce, followed by the tomato slices. Scatter fresh basil leaves on top, reserving a few for garnish after baking.
- Season and Drizzle: Sprinkle salt and freshly ground black pepper over the toppings for seasoning. Drizzle the olive oil over the entire pizza to enhance the flavors and assist in browning.
- Bake the Pizza: Carefully slide the parchment paper with the assembled pizza onto the preheated pizza stone or baking sheet. Bake for 10-12 minutes, or until the cheese is melted and bubbly and the crust is golden brown.
- Serve: Remove the pizza from the oven and allow it to cool for a minute. Garnish with the remaining fresh basil leaves. Slice and serve immediately.
Extra Tips:
For a crispy crust, consider dusting the parchment paper or pizza stone with a light layer of cornmeal before placing the dough. If you don’t have a pizza stone, an inverted baking sheet can help mimic the effect by retaining heat.
Fresh mozzarella can release moisture when baking, so blotting it with a paper towel before adding it to the pizza can help prevent a soggy crust. If you like a little extra flavor, consider adding a sprinkle of grated Parmesan cheese or a pinch of red pepper flakes before serving.