

When it comes to dinnertime, we all crave meals that are both tasty and wholesome. I’ve gathered 12 easy recipes that will delight everyone at the table. From vibrant veggie-packed dishes to savory one-pot wonders, these meals are about balance and simplicity. Picture coming home to a flavorful spread that nourishes your family. Ready to see what’s cooking?
Veggie-Packed Turkey Meatballs
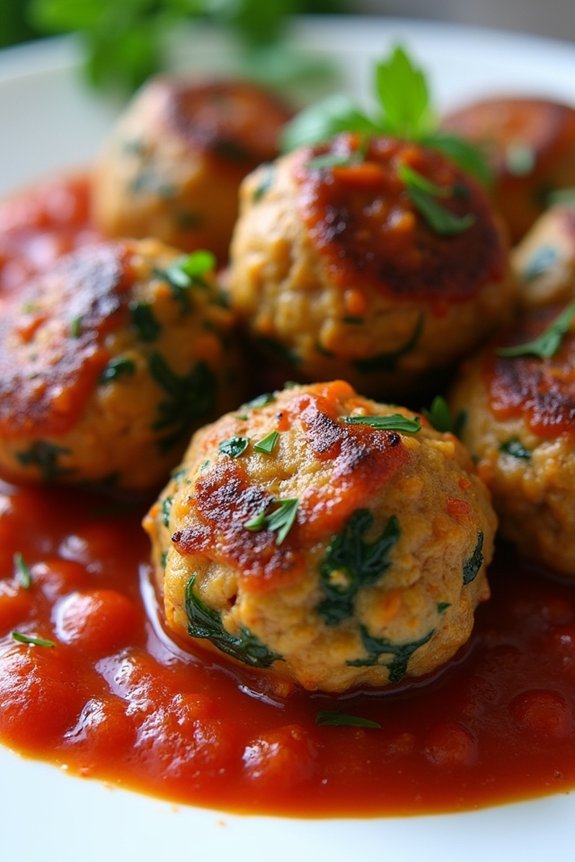
Veggie-Packed Turkey Meatballs are a delightful and nutritious way to enjoy a family dinner that’s both healthy and satisfying. These meatballs are filled with a variety of finely chopped vegetables, adding not only flavor but also a boost of vitamins and minerals. By using lean ground turkey, this recipe offers a lean protein source that’s lower in saturated fat compared to traditional beef meatballs. The addition of vegetables like zucchini, carrots, and spinach guarantees that you’re sneaking in some extra fiber and nutrients, making it a perfect dish for both adults and kids alike.
These meatballs are incredibly versatile and can be served with pasta, in a sub sandwich, or alongside a fresh salad. They’re also great for meal prep, as they can be stored in the refrigerator or freezer for later use. Not only are they delicious, but they’re quite simple to prepare, making them a great go-to option for busy weeknights. The following recipe serves 4-6 people, guaranteeing there’s enough to go around or even to have some leftovers for the next day.
Ingredients:
- 1 pound ground turkey
- 1 cup breadcrumbs
- 1/2 cup grated zucchini
- 1/2 cup grated carrots
- 1/2 cup finely chopped spinach
- 1/4 cup grated Parmesan cheese
- 2 cloves garlic, minced
- 1 egg
- 1 tablespoon fresh parsley, chopped
- 1 teaspoon dried oregano
- 1 teaspoon salt
- 1/2 teaspoon black pepper
- 2 tablespoons olive oil
- 1 jar (24 oz) marinara sauce
Instructions:
- Preheat the Oven: Start by preheating your oven to 400°F (200°C). This guarantees the oven is hot and ready to cook the meatballs evenly.
- Prepare the Meatball Mixture: In a large mixing bowl, combine the ground turkey, breadcrumbs, grated zucchini, grated carrots, chopped spinach, Parmesan cheese, minced garlic, egg, parsley, oregano, salt, and pepper. Mix all the ingredients thoroughly until well combined. You can use your hands or a spoon to guarantee that the ingredients are evenly distributed.
- Form the Meatballs: Using your hands, shape the mixture into small balls, approximately 1.5 inches in diameter. This size is perfect for even cooking and easy serving.
- Brown the Meatballs: Heat the olive oil in a large skillet over medium heat. Once the oil is hot, add the meatballs in batches, making sure not to overcrowd the pan. Cook them for about 3-4 minutes per side, until they’re browned all over. This step adds flavor and helps the meatballs hold their shape.
- Bake the Meatballs: Transfer the browned meatballs to a baking dish. Pour the marinara sauce over the top, guaranteeing all the meatballs are covered. Place the dish in the preheated oven and bake for 20-25 minutes, or until the meatballs are cooked through and reach an internal temperature of 165°F (74°C).
- Serve: Once cooked, remove the meatballs from the oven and let them cool slightly before serving. They can be served over pasta, in a sandwich, or with a side of vegetables.
Extra Tips:
For the best results, make sure the vegetables are finely chopped or grated, so they integrate smoothly into the meatball mixture. If the mixture feels too wet, you can add a bit more breadcrumbs to achieve the desired consistency.
These meatballs can be made ahead of time and stored in the refrigerator for up to 3 days, or frozen for up to 2 months. Just reheat them in the oven or on the stovetop when ready to serve.
One-Pot Lemon Herb Chicken
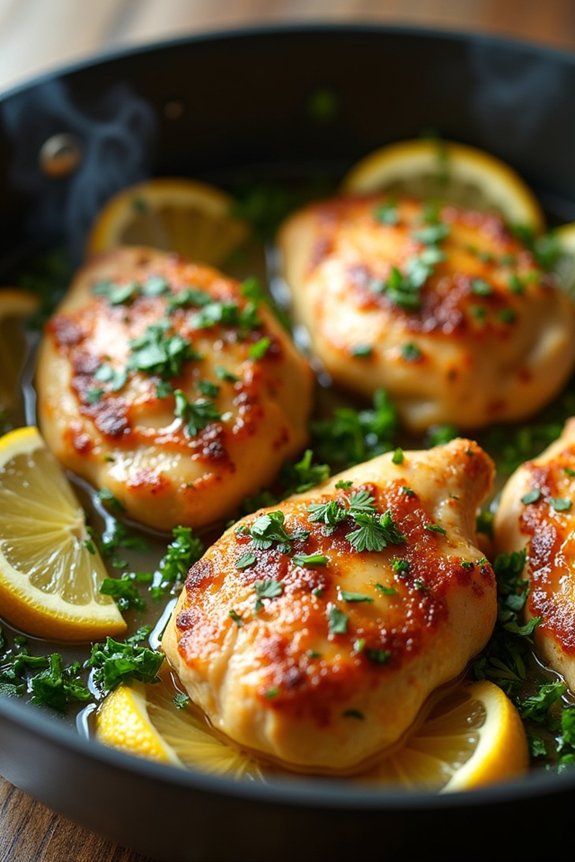
One-Pot Lemon Herb Chicken is a delightful and wholesome dish perfect for a family dinner. This recipe combines juicy chicken pieces with a medley of fresh herbs and zesty lemon, all cooked together in one pot for a convenient and flavorful meal. The simplicity of this dish allows the natural flavors to shine, making it a favorite for both busy weeknights and relaxed weekend gatherings.
With just a few steps, you can create a healthy and satisfying meal that your family will love. The beauty of a one-pot meal is the ease of preparation and cleanup. One-Pot Lemon Herb Chicken not only minimizes the time spent in the kitchen but also maximizes the taste with its aromatic blend of herbs and citrus.
This dish is well-balanced, providing protein from the chicken, while the herbs and lemon add invigorating and bright notes. Serve it with a side of steamed vegetables or a simple green salad for a complete and nutritious dinner that appeals to both adults and children alike.
Ingredients (serves 4-6):
- 4-6 chicken thighs, bone-in and skin-on
- 1 tablespoon olive oil
- 1 teaspoon salt
- 1/2 teaspoon black pepper
- 1 lemon, sliced
- 4 cloves garlic, minced
- 1 cup chicken broth
- 1 teaspoon dried oregano
- 1 teaspoon dried thyme
- 1 teaspoon dried rosemary
- Fresh parsley, chopped (for garnish)
Cooking Instructions:
- Preheat and Prepare: Preheat your oven to 375°F (190°C). Pat the chicken thighs dry with paper towels to guarantee a crispy skin when cooked.
- Season the Chicken: Season the chicken thighs with salt and black pepper on both sides.
- Sear the Chicken: In a large ovenproof pot or Dutch oven, heat the olive oil over medium-high heat. Place the chicken thighs skin-side down into the pot and sear for about 5-7 minutes, or until the skin is golden brown and crispy. Flip the chicken and cook for an additional 3 minutes on the other side. Remove the chicken from the pot and set aside.
- Prepare the Base: In the same pot, add the minced garlic and sauté for about 1 minute until fragrant. Be careful not to burn the garlic.
- Add Liquid and Seasonings: Pour in the chicken broth and scrape up any brown bits from the bottom of the pot. This adds flavor to the dish. Add the lemon slices, oregano, thyme, and rosemary to the pot, stirring to combine.
- Combine and Bake: Return the chicken thighs to the pot, skin-side up, ensuring they’re nestled into the lemon and herb mixture. Transfer the pot to the preheated oven and bake for 25-30 minutes, or until the chicken is cooked through and the internal temperature reaches 165°F (74°C).
- Garnish and Serve: Once cooked, remove the pot from the oven and let it rest for a few minutes. Garnish with freshly chopped parsley before serving.
Extra Tips:
To guarantee maximum flavor, marinate the chicken with the herbs and lemon slices for at least 30 minutes before cooking. If time allows, let it marinate overnight in the refrigerator.
You can also experiment with different herbs or add a splash of white wine to the chicken broth for a richer taste. If you prefer a crispier skin, broil the chicken for an additional 2-3 minutes after baking. Don’t forget to serve the dish with some crusty bread to soak up the delicious sauce!
Zucchini Noodle Stir-Fry
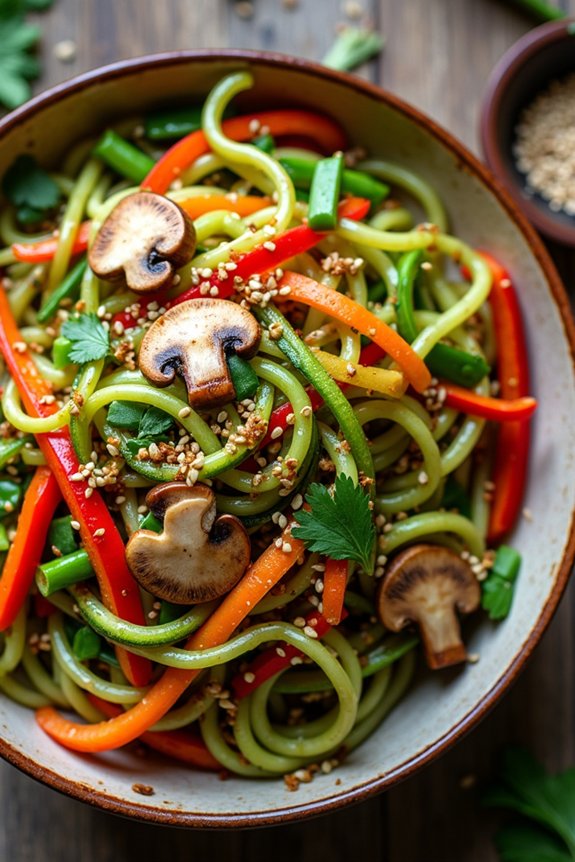
Zucchini Noodle Stir-Fry is a fresh and vibrant dish that combines the delightful crunch of vegetables with the bold flavors of a savory sauce. This healthy family dinner is perfect for those looking to incorporate more vegetables into their diet without sacrificing taste. The zucchini noodles, or “zoodles,” are a fantastic low-carb alternative to traditional pasta, making it an ideal choice for a nutritious meal.
With the added benefit of being quick and easy to prepare, this dish is sure to become a staple in your dinner rotation. This recipe serves 4-6 people and can be easily adjusted to suit your family’s taste preferences. It’s an excellent way to use up any leftover veggies you have in your fridge and is highly customizable.
Whether you’re a seasoned cook or a novice in the kitchen, you’ll find this Zucchini Noodle Stir-Fry both satisfying and simple to make. Gather your ingredients and get ready to enjoy a delicious and healthy meal with your loved ones!
Ingredients:
- 4 medium zucchinis, spiralized
- 1 red bell pepper, thinly sliced
- 1 yellow bell pepper, thinly sliced
- 1 cup sliced mushrooms
- 1 cup snap peas
- 1 medium carrot, julienned
- 1 small onion, thinly sliced
- 2 cloves garlic, minced
- 1 tablespoon fresh ginger, grated
- 3 tablespoons soy sauce
- 2 tablespoons olive oil
- 1 tablespoon sesame oil
- 1 tablespoon honey
- 1 tablespoon rice vinegar
- 1 teaspoon chili flakes (optional)
- Salt and pepper, to taste
- 2 tablespoons toasted sesame seeds
- 2 green onions, chopped
- Fresh cilantro, for garnish (optional)
Instructions:
- Prepare the Zucchini Noodles: Use a spiralizer to create zucchini noodles from the zucchinis. If you don’t have a spiralizer, you can use a julienne peeler or buy pre-made zucchini noodles from the store.
- Make the Sauce: In a small bowl, whisk together the soy sauce, sesame oil, honey, rice vinegar, and chili flakes (if using). Set aside.
- Cook the Vegetables: Heat the olive oil in a large skillet or wok over medium-high heat. Add the onion, garlic, and ginger, and sauté for about 2 minutes until fragrant.
- Add the Veggies: Add the bell peppers, mushrooms, snap peas, and carrot. Stir-fry for about 5-7 minutes until the vegetables are tender but still crisp.
- Cook the Zucchini Noodles: Add the zucchini noodles to the skillet and stir-fry for an additional 2-3 minutes until they’re just tender.
- Combine the Ingredients: Pour the sauce over the vegetables and noodles, tossing everything together so that the sauce coats all the ingredients evenly. Cook for another 1-2 minutes.
- Season and Serve: Season with salt and pepper to taste. Remove from heat, sprinkle with toasted sesame seeds, and garnish with chopped green onions and fresh cilantro if desired. Serve immediately.
Extra Tips:
When making Zucchini Noodle Stir-Fry, it’s important not to overcook the zucchini noodles as they can become mushy. Aim for a slight bite to them for the best texture.
Feel free to add your choice of protein such as tofu, chicken, or shrimp to make the dish more filling. You can also adjust the level of spice by altering the amount of chili flakes according to your preference. Enjoy this stir-fry piping hot for the best flavor and texture!
Quinoa and Black Bean Chili
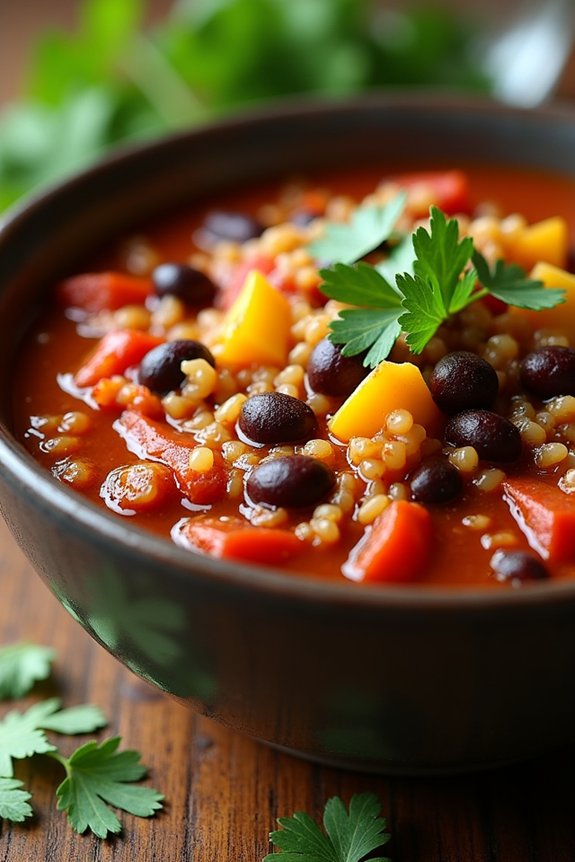
Quinoa and Black Bean Chili is a hearty and nutritious dish perfect for a healthy family dinner. This chili is packed with protein-rich quinoa and black beans, making it a satisfying meal that’s also vegetarian-friendly. The combination of spices, tomatoes, and vegetables creates a rich and flavorful base that will warm you up on a cold day.
Not only is this dish delicious, but it’s also easy to prepare and can be made in under an hour, making it an ideal choice for busy weeknights. As you cook, the quinoa absorbs the flavors of the spices and vegetables, while the black beans add a creamy texture to the chili.
This recipe serves 4-6 people, ensuring there’s enough to go around, and possibly even some leftovers for the next day. Serve it with a side of crusty bread or a green salad for a balanced meal. Below are the ingredients and steps needed to create this delicious and wholesome dish.
Ingredients:
- 1 cup quinoa, rinsed
- 2 tablespoons olive oil
- 1 medium onion, diced
- 3 cloves garlic, minced
- 1 red bell pepper, chopped
- 1 yellow bell pepper, chopped
- 2 cans (15 ounces each) black beans, drained and rinsed
- 1 can (28 ounces) diced tomatoes, with juice
- 2 cups vegetable broth
- 1 tablespoon chili powder
- 1 teaspoon cumin
- 1 teaspoon paprika
- 1/2 teaspoon cayenne pepper (optional, for heat)
- Salt and pepper to taste
- 1 lime, juiced
- Fresh cilantro, chopped (for garnish)
Cooking Instructions:
- Prepare the Quinoa: In a medium saucepan, bring 2 cups of water to a boil. Add the rinsed quinoa, reduce the heat to low, cover, and simmer for about 15 minutes or until the quinoa is cooked and the water is absorbed. Set aside.
- Sauté the Vegetables: In a large pot, heat the olive oil over medium heat. Add the diced onion and sauté for about 5 minutes until soft and translucent. Stir in the minced garlic and cook for an additional 1 minute.
- Add Peppers and Spices: Add the red and yellow bell peppers to the pot. Cook for another 5 minutes until the peppers begin to soften. Stir in the chili powder, cumin, paprika, and cayenne pepper (if using), cooking until the spices are fragrant, about 1 minute.
- Combine Ingredients: Add the black beans, diced tomatoes (with juice), and vegetable broth to the pot. Stir well to combine all the ingredients.
- Simmer the Chili: Bring the mixture to a boil, then reduce the heat to low. Cover the pot and let it simmer for 20-25 minutes, allowing the flavors to meld together.
- Incorporate Quinoa: Once the chili has simmered, stir in the cooked quinoa. Let the chili cook for an additional 5 minutes to heat through.
- Season and Serve: Stir in the lime juice and season the chili with salt and pepper to taste. Serve hot, garnished with fresh cilantro.
Extra Tips:
For a more robust flavor, try preparing this chili a day in advance. The flavors will deepen and meld together even better overnight.
You can also adjust the level of heat by varying the amount of cayenne pepper to suit your taste preferences. If you prefer a thicker consistency, let the chili simmer uncovered for an additional 10 minutes to reduce the liquid.
This dish is versatile and can be customized with additional toppings like avocado slices, shredded cheese, or a dollop of sour cream for extra richness. Enjoy your delicious and healthy Quinoa and Black Bean Chili!
Sheet Pan Salmon and Asparagus

Sheet Pan Salmon and Asparagus is a delightful and nutritious meal perfect for a family dinner. This recipe combines the rich flavors of tender salmon fillets with the fresh, crisp taste of asparagus, all cooked together on a single sheet pan for easy preparation and cleanup.
The dish is seasoned with a simple yet flavorful blend of lemon, garlic, and herbs, making it both healthy and delicious. It’s perfect for a weeknight meal when you want something quick and satisfying without sacrificing nutrition or taste.
This recipe is designed to serve 4-6 people, making it great for a family gathering or a small dinner party. The use of a sheet pan guarantees even cooking and minimal mess, allowing you to spend more time enjoying the meal and less time cleaning up.
With just a few fresh ingredients and simple steps, you’ll have a wholesome meal on the table in no time. Whether you’re looking to impress your family with your culinary skills or simply want a healthy, home-cooked meal, this Sheet Pan Salmon and Asparagus recipe is a great choice.
Ingredients for 4-6 servings:
- 4-6 salmon fillets (about 6 ounces each)
- 1 pound asparagus, trimmed
- 2 tablespoons olive oil
- Juice of 1 lemon
- 4 garlic cloves, minced
- 1 teaspoon dried dill or 2 teaspoons fresh dill, chopped
- Salt and pepper to taste
- Lemon wedges, for serving
Cooking Instructions:
- Preheat the Oven: Start by preheating your oven to 400°F (200°C). This will make sure that everything cooks evenly and at the right temperature.
- Prepare the Sheet Pan: Line a large sheet pan with parchment paper or aluminum foil for easy cleanup. This will also prevent the salmon and asparagus from sticking to the pan.
- Season the Salmon: Place the salmon fillets skin-side down on one side of the prepared sheet pan. Drizzle them with 1 tablespoon of olive oil and the lemon juice. Sprinkle the minced garlic and dill evenly over the fillets. Season with salt and pepper to taste.
- Prepare the Asparagus: On the other side of the sheet pan, arrange the asparagus spears in a single layer. Drizzle with the remaining 1 tablespoon of olive oil and season with salt and pepper.
- Bake the Dish: Place the sheet pan in the preheated oven and bake for 12-15 minutes, or until the salmon is cooked through and flakes easily with a fork, and the asparagus is tender-crisp.
- Serve: Remove the sheet pan from the oven. Serve the salmon and asparagus immediately, garnished with lemon wedges for an extra burst of citrus flavor.
Extra Tips: When cooking Sheet Pan Salmon and Asparagus, it’s important to verify that the asparagus spears are roughly the same thickness to guarantee even cooking.
If the spears are particularly thick, you may want to peel the stalks slightly or cut them in half lengthwise. Additionally, be cautious not to overcook the salmon; it should remain moist and slightly translucent in the center for the best texture.
Finally, you can customize the seasoning to your liking by adding other herbs or spices, such as paprika or parsley, to enhance the flavors.
Whole Wheat Spaghetti With Spinach Pesto
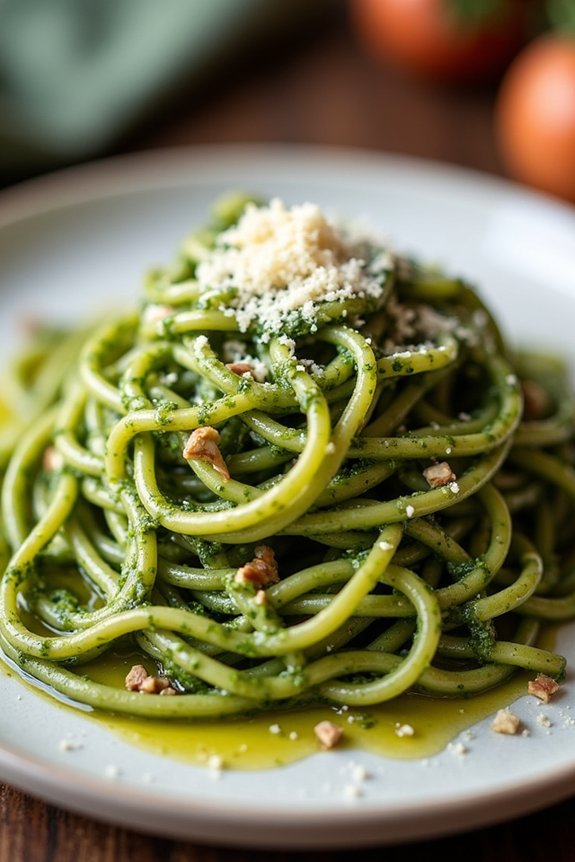
Whole Wheat Spaghetti With Spinach Pesto is an excellent choice for a healthy and delicious family dinner. This dish combines the nutty flavor of whole wheat spaghetti with a vibrant homemade spinach pesto, making it both nutritious and satisfying. The spinach pesto is packed with fresh spinach leaves, nuts, cheese, and garlic, blended together to create a creamy and aromatic sauce. Not only is this dish simple to prepare, but it also provides a hearty meal that can be enjoyed by both adults and children alike.
This recipe is perfect for when you want to serve something nutritious without spending too much time in the kitchen. Whole wheat spaghetti is a great source of fiber, and the addition of spinach pesto adds a boost of vitamins and minerals to the meal. Whether for a busy weeknight or a relaxed weekend dinner, this dish is sure to become a family favorite. With just a few key ingredients and straightforward cooking instructions, you can whip up this healthy and delicious meal in no time.
Ingredients (Serves 4-6):
- 16 ounces whole wheat spaghetti
- 4 cups fresh spinach leaves
- 1/2 cup grated Parmesan cheese
- 1/2 cup walnuts or pine nuts
- 2 cloves garlic
- 1/2 cup olive oil
- Salt and pepper to taste
- Juice of 1 lemon
Cooking Instructions:
- Cook the Spaghetti: Begin by bringing a large pot of salted water to a boil. Add the whole wheat spaghetti and cook according to package instructions until al dente. Drain the spaghetti, reserving about 1 cup of the pasta water, and set it aside.
- Prepare the Spinach Pesto: In a food processor, combine the fresh spinach leaves, grated Parmesan cheese, walnuts or pine nuts, and garlic cloves. Pulse until the ingredients are finely chopped.
- Blend the Pesto: With the food processor running, slowly drizzle in the olive oil until the mixture is smooth and creamy. Add salt, pepper, and lemon juice to taste, blending until everything is well combined.
- Combine Pasta and Pesto: In a large mixing bowl, add the cooked spaghetti and the spinach pesto. Toss everything together until the pasta is well coated with the pesto. If the sauce is too thick, gradually add the reserved pasta water until you reach the desired consistency.
- Serve and Enjoy: Divide the spaghetti among serving plates, and garnish with additional Parmesan cheese if desired. Serve immediately and enjoy this nutritious meal with your family.
Extra Tips:
When preparing the spinach pesto, feel free to experiment with different types of nuts, such as almonds or cashews, to add a unique flavor to the sauce.
If you prefer a bit of spice, consider adding a pinch of red pepper flakes to the pesto for a subtle kick.
To save time, the pesto can be made in advance and stored in an airtight container in the refrigerator for up to three days.
Additionally, try adding some grilled chicken or roasted vegetables to the dish for extra protein and flavor.
Cauliflower Crust Margherita Pizza
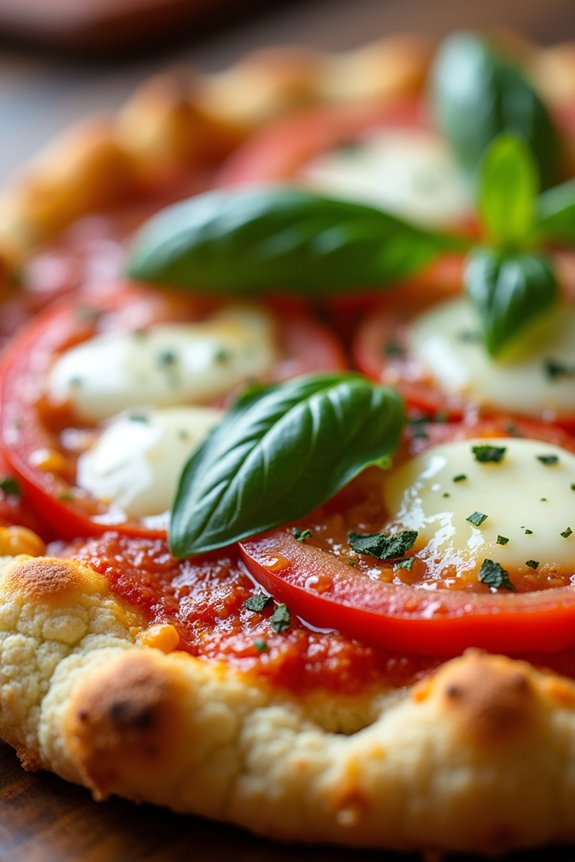
Cauliflower Crust Margherita Pizza is a delightful and healthy twist on the traditional Margherita pizza. This recipe uses a cauliflower-based crust, which not only reduces the carbohydrate content but also adds a unique and delicious flavor to the pizza. Perfect for those looking to cut down on gluten or simply want to enjoy a lighter meal, this pizza doesn’t compromise on taste.
Topped with fresh mozzarella, ripe tomatoes, and fragrant basil, it captures the essence of a classic Margherita, making it a family favorite. This Cauliflower Crust Margherita Pizza is great for a family dinner, serving 4-6 people. The combination of crispy cauliflower crust and the rich, savory toppings guarantees that even the pickiest eaters will be coming back for seconds.
Whether you’re catering to dietary preferences or simply exploring new culinary adventures, this recipe is sure to please. Let’s explore the ingredients and steps needed to create this wonderful dish.
Ingredients:
- 1 large head of cauliflower (about 4 cups riced)
- 1/4 cup grated Parmesan cheese
- 1/4 cup shredded mozzarella cheese
- 1/2 teaspoon dried oregano
- 1/2 teaspoon garlic powder
- 1/4 teaspoon salt
- 2 large eggs
- 1 cup marinara sauce
- 2 cups fresh mozzarella, sliced
- 2 large tomatoes, sliced
- Fresh basil leaves
- Olive oil for brushing
Instructions:
- Preheat the Oven: Begin by preheating your oven to 450°F (230°C). This guarantees that the oven is hot enough to crisp up the cauliflower crust.
- Prepare the Cauliflower: Cut the cauliflower into florets and place them in a food processor. Pulse until the texture resembles rice. You should have about 4 cups of cauliflower rice.
- Cook the Cauliflower Rice: Transfer the cauliflower rice to a microwave-safe bowl and microwave for about 5-7 minutes, until soft. Let it cool slightly, then transfer it to a clean kitchen towel or cheesecloth. Squeeze out as much moisture as possible. This step is vital to achieving a crispy crust.
- Make the Cauliflower Dough: In a large bowl, combine the cauliflower rice, Parmesan cheese, mozzarella cheese, oregano, garlic powder, salt, and eggs. Mix until well combined.
- Form the Crust: Line a baking sheet with parchment paper. Spread the cauliflower mixture onto the parchment paper and shape it into a pizza crust, about 1/4 inch thick. Brush the top with a little olive oil.
- Bake the Crust: Place the crust in the preheated oven and bake for 15-20 minutes, or until golden brown and firm to the touch.
- Add Toppings and Bake Again: Remove the crust from the oven and spread the marinara sauce over it. Arrange the fresh mozzarella and tomato slices on top. Return the pizza to the oven and bake for an additional 10-12 minutes, or until the cheese is melted and bubbly.
- Finish with Basil: Once baked, remove the pizza from the oven and sprinkle fresh basil leaves over the top. Let it cool for a few minutes before slicing and serving.
Extra Tips:
For the best results, make sure that the cauliflower is very dry after microwaving; this prevents the crust from becoming soggy. If you prefer a slightly thicker crust, adjust the thickness when forming it on the baking sheet.
Feel free to experiment with additional toppings such as olives or mushrooms for added flavor. Also, using parchment paper is essential to prevent sticking and guarantee easy removal from the baking sheet. Enjoy your healthy and delicious Cauliflower Crust Margherita Pizza!
Slow Cooker Chicken Tortilla Soup
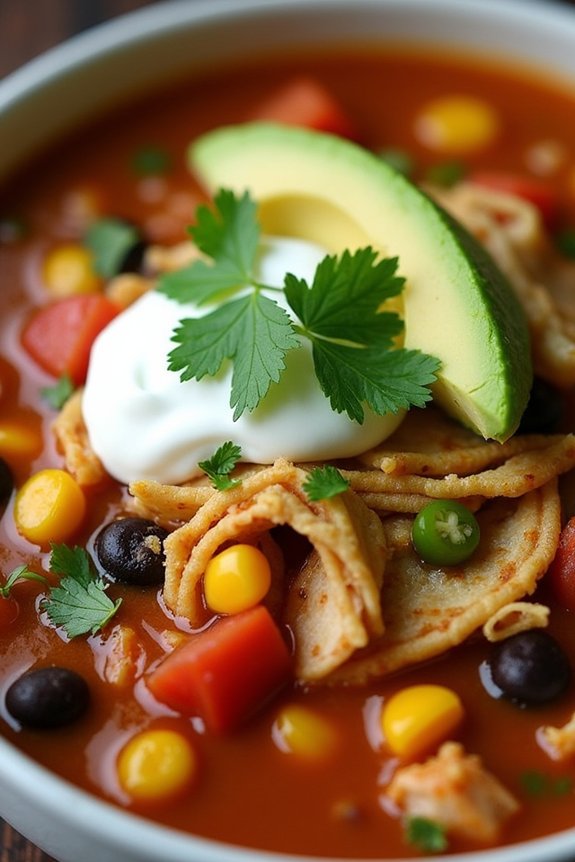
Slow Cooker Chicken Tortilla Soup is a comforting and flavorful dish that’s perfect for family dinners. This recipe allows the slow cooker to do most of the work, resulting in a richly seasoned broth with tender chicken and a variety of vegetables. The combination of spices and toppings such as avocado, cheese, and tortilla strips provides a delightful texture and taste that everyone at the table will enjoy.
It’s a wonderful way to enjoy a warm meal without spending too much time in the kitchen. This recipe serves 4-6 people, making it ideal for family gatherings or meal prep for the week. The ingredients used are simple and can easily be found at your local grocery store. With the convenience of a slow cooker, you can set it and forget it until it’s time to eat. A few fresh toppings added just before serving can elevate the dish, making it a family favorite.
Ingredients:
- 1.5 pounds boneless, skinless chicken breasts
- 1 tablespoon olive oil
- 1 medium onion, chopped
- 3 cloves garlic, minced
- 2 teaspoons ground cumin
- 1 teaspoon chili powder
- 1 teaspoon smoked paprika
- 1/2 teaspoon salt
- 1/4 teaspoon black pepper
- 1 (15-ounce) can black beans, drained and rinsed
- 1 (15-ounce) can corn, drained
- 1 (14.5-ounce) can diced tomatoes
- 4 cups chicken broth
- 1 (4-ounce) can diced green chilies
- 1/4 cup chopped fresh cilantro
- Juice of 1 lime
- Tortilla strips, for serving
- Optional toppings: diced avocado, shredded cheese, sour cream, sliced jalapeños
Instructions:
- Prepare the Ingredients: Start by placing the boneless, skinless chicken breasts at the bottom of the slow cooker. Drizzle with olive oil to keep them moist as they cook.
- Add Aromatics: Add the chopped onion and minced garlic over the chicken. These will infuse the soup with rich flavors as they cook slowly.
- Season the Soup: Sprinkle the cumin, chili powder, smoked paprika, salt, and black pepper over the chicken and vegetables. This seasoning mix adds warmth and depth to the soup.
- Combine Canned Ingredients: Pour in the black beans, corn, diced tomatoes, and green chilies. These add texture and flavor, making the soup hearty and satisfying.
- Add the Broth: Pour the chicken broth over the mixture. Confirm everything is submerged in the liquid for even cooking.
- Cook the Soup: Cover the slow cooker and cook on low for 6-7 hours or on high for 3-4 hours until the chicken is fully cooked and tender.
- Shred the Chicken: Once cooked, remove the chicken breasts from the slow cooker. Shred the meat using two forks and return it to the pot.
- Finish and Serve: Stir in the chopped cilantro and lime juice. Taste and adjust seasoning if necessary. Serve hot with tortilla strips and your choice of optional toppings.
Extra Tips:
For added flavor, consider sautéing the onions and garlic in the olive oil before adding them to the slow cooker. This step isn’t necessary but can enhance the overall taste of the soup.
Don’t skip the lime juice; it adds a revitalizing acidity that balances the spices. If you prefer a thicker soup, you can mash some of the beans before adding them to the pot.
To save time on a busy day, you can prepare all the ingredients the night before and store them in the refrigerator, then start the slow cooker in the morning for a ready-to-eat dinner.
Mediterranean Stuffed Bell Peppers
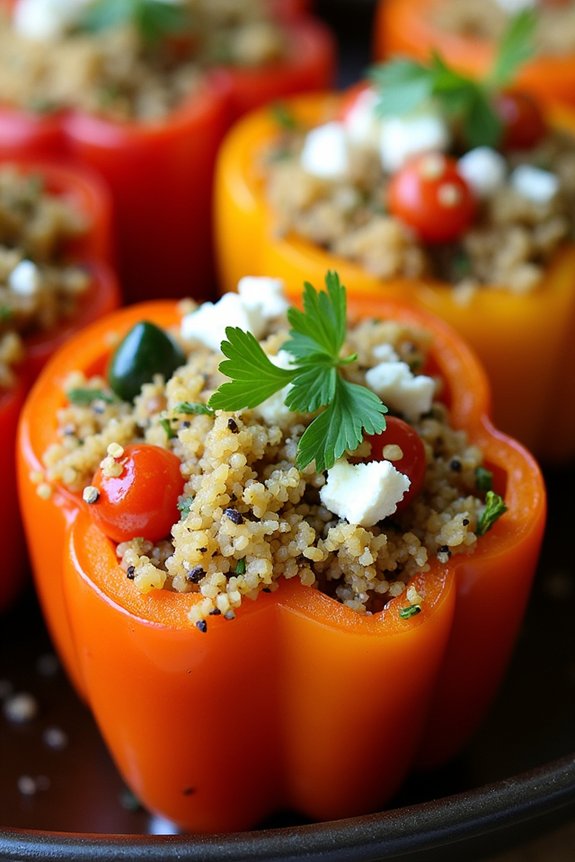
Mediterranean Stuffed Bell Peppers offer a delightful explosion of flavors, combining the vibrant essence of the Mediterranean diet with the classic comfort of stuffed vegetables. This dish isn’t only visually appealing but also packed with nutrients, making it a perfect family dinner option that satisfies both taste and health goals.
The dish features bell peppers filled with a savory mixture of quinoa, fresh vegetables, herbs, and feta cheese, creating a wholesome and hearty meal. Perfect for a family of 4-6 people, these stuffed peppers can be a complete meal on their own or served as a side.
They’re easy to prepare and can be made ahead of time, which makes them ideal for busy weeknights. Whether you’re familiar with Mediterranean cuisine or trying it for the first time, these stuffed bell peppers are sure to become a family favorite.
Ingredients (Serves 4-6):
- 6 large bell peppers (any color)
- 1 cup quinoa
- 2 cups vegetable broth
- 1 tablespoon olive oil
- 1 medium onion, diced
- 2 cloves garlic, minced
- 1 medium zucchini, diced
- 1 cup cherry tomatoes, halved
- 1 teaspoon dried oregano
- 1 teaspoon dried basil
- Salt and pepper to taste
- 1 cup crumbled feta cheese
- 2 tablespoons chopped fresh parsley
- Lemon wedges, for serving
Cooking Instructions:
- Prepare the Peppers: Preheat your oven to 375°F (190°C). Slice off the tops of the bell peppers and remove the seeds and membranes. Lightly oil a baking dish and arrange the peppers cut-side up.
- Cook the Quinoa: Rinse the quinoa under cold water. In a medium saucepan, combine the quinoa and vegetable broth. Bring to a boil, reduce the heat to low, cover, and simmer for about 15 minutes, or until the quinoa is tender and the liquid is absorbed. Fluff with a fork and set aside.
- Sauté the Vegetables: In a large skillet, heat olive oil over medium heat. Add the diced onion and sauté for 3-4 minutes until translucent. Add the minced garlic and cook for another minute. Stir in the zucchini and cook for about 5 minutes until softened.
- Add the cherry tomatoes, dried oregano, dried basil, salt, and pepper. Cook for an additional 3 minutes.
- Combine the Filling: In a large mixing bowl, combine the cooked quinoa, sautéed vegetables, and crumbled feta cheese. Mix thoroughly.
- Stuff the Peppers: Spoon the quinoa mixture evenly into each bell pepper, pressing down gently to fit as much filling as possible. Place the filled peppers into the prepared baking dish.
- Bake the Peppers: Cover the baking dish with aluminum foil and bake in the preheated oven for 30 minutes. Remove the foil and bake for an additional 15 minutes, or until the peppers are tender and the tops are slightly golden.
- Serve and Garnish: Remove from the oven and let cool slightly. Garnish with fresh parsley and serve with lemon wedges on the side for an extra burst of flavor.
Extra Tips:
For added flavor, consider incorporating chopped olives or sun-dried tomatoes into the filling. If you prefer a bit of spice, add a pinch of red pepper flakes while sautéing the vegetables.
You can also prepare the stuffed peppers a day in advance and store them in the refrigerator; simply bake them when ready to serve. This dish can also be made vegetarian by omitting the feta cheese or substituting it with a plant-based alternative.
Baked Sweet Potato and Bean Tacos
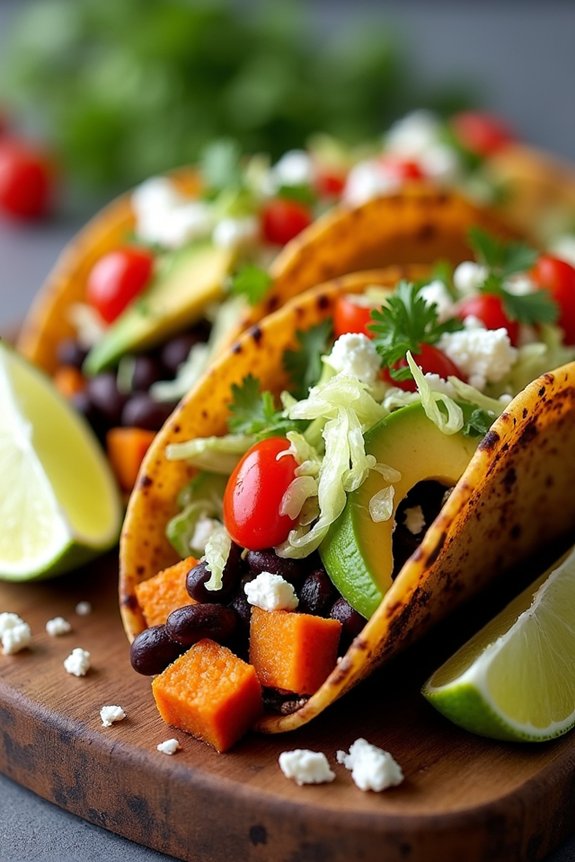
Baked Sweet Potato and Bean Tacos are a delightful and nutritious choice for a family dinner, perfect for those looking to enjoy a meal that’s both satisfying and packed with flavor.
These tacos feature the natural sweetness of baked sweet potatoes combined with the hearty texture of black beans, all wrapped in a soft taco shell. With the addition of fresh toppings, they offer a burst of fresh flavors and a pleasing variety of textures. Ideal for a weeknight meal, this recipe is simple to prepare and certain to be a hit with the whole family.
Incorporating sweet potatoes into your diet provides an excellent source of vitamins and fiber, while black beans are a great plant-based source of protein. Not only are these tacos healthy, but they’re also versatile, allowing you to add or substitute ingredients based on your family’s preferences.
Whether you’re a seasoned home cook or a beginner, this recipe is straightforward and rewarding, providing a delicious dinner for 4-6 people.
Ingredients:
- 3 medium-sized sweet potatoes
- 1 can (15 oz) black beans, drained and rinsed
- 1 tablespoon olive oil
- 1 teaspoon chili powder
- 1/2 teaspoon cumin
- Salt and pepper to taste
- 8-12 taco shells (soft or hard, according to preference)
- 1 cup shredded lettuce
- 1 cup diced tomatoes
- 1/2 cup chopped red onion
- 1 avocado, sliced
- 1/2 cup crumbled feta or cotija cheese
- Lime wedges for serving
Cooking Instructions:
- Preheat the Oven: Start by preheating your oven to 400°F (200°C).
- Prepare the Sweet Potatoes: Peel and cube the sweet potatoes into bite-sized pieces. Place them on a baking sheet, drizzle with olive oil, and sprinkle with chili powder, cumin, salt, and pepper. Toss the sweet potatoes until well-coated.
- Bake the Sweet Potatoes: Spread the seasoned sweet potatoes in an even layer on the baking sheet. Bake in the preheated oven for about 25-30 minutes, or until they’re tender and slightly caramelized at the edges, stirring halfway through to guarantee even cooking.
- Warm the Beans: While the sweet potatoes are baking, heat the black beans in a small saucepan over medium heat until warmed through. You can add a pinch of salt and pepper for additional flavor if desired.
- Prepare the Toppings: While the potatoes are baking and beans are warming, prepare the toppings. Chop the lettuce, dice the tomatoes, chop the onion, and slice the avocado.
- Assemble the Tacos: Once the sweet potatoes are done, remove them from the oven. Warm the taco shells according to package instructions. To assemble the tacos, start by adding a layer of baked sweet potatoes, followed by a spoonful of black beans, and then top with lettuce, tomatoes, red onion, avocado, and cheese.
- Serve: Serve the assembled tacos with lime wedges on the side for squeezing over the top, adding a fresh, tangy flavor.
Extra Tips:
When preparing Baked Sweet Potato and Bean Tacos, feel free to get creative with the toppings. Adding a dollop of sour cream or a sprinkle of cilantro can enhance the flavors.
For an added crunch, consider topping the tacos with some crushed tortilla chips. If you enjoy a bit of heat, include some sliced jalapeños or a dash of hot sauce.
Remember to taste and adjust the seasoning of the sweet potatoes and beans to your liking, as this can vary based on personal preference. Enjoy your meal with a side of Mexican rice or a simple green salad to complete the dinner experience.
Broccoli Cheddar Stuffed Chicken Breasts

Broccoli Cheddar Stuffed Chicken Breasts is a delightful and nutritious dish perfect for family dinners. This recipe combines tender chicken breasts stuffed with a flavorful mixture of broccoli and cheddar cheese, creating a meal that isn’t only delicious but also visually appealing.
The creamy and cheesy filling complements the juicy chicken perfectly, making it a hit with both kids and adults. This dish is also a great way to incorporate more vegetables into your family’s diet in a tasty and satisfying way.
Preparing Broccoli Cheddar Stuffed Chicken Breasts is relatively simple and doesn’t require a lot of time, making it an excellent choice for busy weeknights. The process involves creating a pocket in the chicken breasts to hold the savory filling, which is then sealed and baked to perfection.
The end result is a beautifully golden-brown chicken breast with a gooey, cheesy center. Complete this dish with a side salad or roasted vegetables for a balanced meal that everyone will love.
Ingredients (serves 4-6):
- 4 large boneless, skinless chicken breasts
- 1 cup fresh broccoli florets, finely chopped
- 1 cup sharp cheddar cheese, shredded
- 2 cloves garlic, minced
- 1 tablespoon olive oil
- 1 teaspoon salt
- 1/2 teaspoon black pepper
- 1/2 teaspoon paprika
- 1/2 teaspoon onion powder
- 1 tablespoon fresh parsley, chopped
Cooking Instructions:
- Preheat the Oven: Start by preheating your oven to 375°F (190°C). This will guarantee the oven is hot enough to cook the chicken evenly.
- Prepare the Chicken: Pat the chicken breasts dry with paper towels. Using a sharp knife, carefully create a pocket in each chicken breast by slicing horizontally, being careful not to cut all the way through.
- Make the Filling: In a medium bowl, combine the chopped broccoli, cheddar cheese, minced garlic, olive oil, salt, black pepper, and paprika. Mix well until the ingredients are thoroughly combined.
- Stuff the Chicken: Spoon the broccoli and cheddar mixture into each chicken breast pocket, dividing the filling evenly among the four breasts. Use toothpicks to secure the openings if needed.
- Season the Chicken: Sprinkle the outside of each stuffed chicken breast with onion powder, a bit of extra salt and pepper, and a dash more paprika for color.
- Bake the Chicken: Place the stuffed chicken breasts on a baking sheet or in a baking dish. Bake in the preheated oven for 25-30 minutes, or until the chicken is cooked through and reaches an internal temperature of 165°F (74°C).
- Garnish and Serve: Once cooked, remove the chicken from the oven and let it rest for a few minutes. Garnish with freshly chopped parsley before serving.
Extra Tips: When making Broccoli Cheddar Stuffed Chicken Breasts, ascertain the chicken breasts are of similar size to promote even cooking. If the chicken breasts are particularly thick, consider using a meat mallet to pound them to an even thickness before cutting the pockets.
This will help prevent overcooking the edges while ensuring the center is fully cooked. Additionally, for a crispy outer layer, you can sear the stuffed chicken breasts in a hot skillet with a little olive oil for a few minutes on each side before baking. This adds a delightful texture to the final dish.
Thai-Inspired Coconut Curry Shrimp
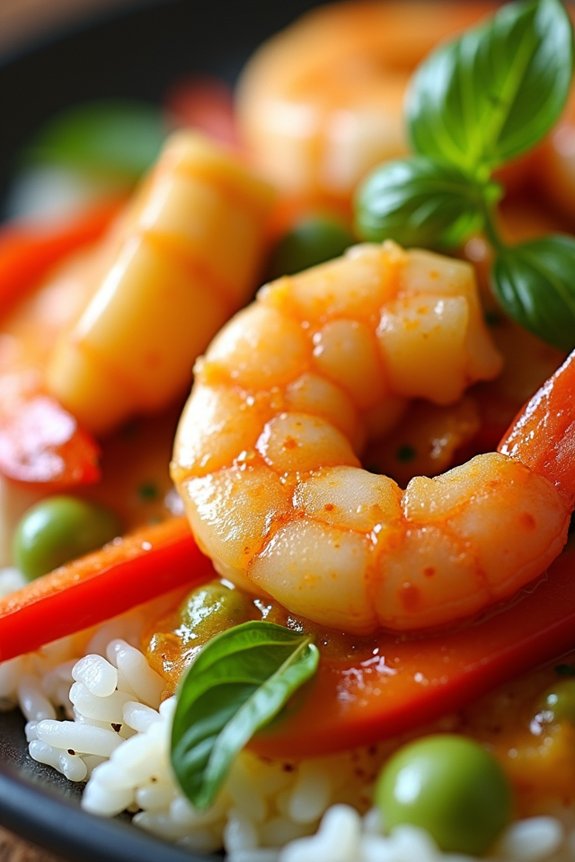
Transport your family to the vibrant streets of Thailand with this delicious Thai-Inspired Coconut Curry Shrimp. This dish is a beautiful fusion of juicy shrimp, creamy coconut milk, and a medley of spices that create a symphony of flavors in every bite.
It’s a perfect dish for a healthy family dinner, as it’s both nutritious and satisfying. The aromatic curry is infused with the bold flavors of garlic, ginger, and lemongrass, while the coconut milk brings a rich, velvety texture that complements the tender shrimp perfectly.
This Thai-Inspired Coconut Curry Shrimp isn’t only delicious but also quick and easy to prepare, making it ideal for busy weeknights. The recipe serves 4-6 people, offering a generous portion that can be enjoyed with steamed jasmine rice or your favorite noodles.
With its vibrant colors and tantalizing aroma, this dish is sure to be a hit at the dinner table, offering a taste of Thai cuisine that delights both the eyes and the palate.
Ingredients:
- 1 ½ pounds shrimp, peeled and deveined
- 2 tablespoons vegetable oil
- 1 onion, finely chopped
- 3 cloves garlic, minced
- 1 tablespoon fresh ginger, grated
- 1 tablespoon lemongrass, minced
- 2 tablespoons Thai red curry paste
- 1 can (14 ounces) coconut milk
- 1 tablespoon fish sauce
- 1 tablespoon brown sugar
- 1 red bell pepper, sliced
- 1 cup snap peas
- 1 lime, juiced
- Fresh basil leaves, for garnish
- Salt and pepper, to taste
- Cooked jasmine rice or noodles, for serving
Instructions:
- Prepare the Shrimp: Rinse the shrimp under cold water and pat them dry with paper towels. Make sure they’re peeled and deveined, then season them lightly with salt and pepper.
- Cook the Aromatics: In a large skillet or wok, heat the vegetable oil over medium heat. Add the chopped onion and sauté until it becomes translucent. Stir in the garlic, ginger, and lemongrass, cooking until fragrant, about 1-2 minutes.
- Add the Curry Paste: Stir in the Thai red curry paste, mixing it with the aromatics until it’s well incorporated and starts to release its aroma.
- Simmer the Coconut Milk: Pour in the coconut milk, stirring to combine with the curry paste. Bring the mixture to a gentle simmer.
- Season the Curry: Add the fish sauce and brown sugar to the skillet, stirring to dissolve the sugar. Taste and adjust seasoning as needed with additional salt or sugar.
- Cook the Vegetables: Add the sliced red bell pepper and snap peas to the skillet. Cook for 3-4 minutes, or until the vegetables are tender but still crisp.
- Cook the Shrimp: Add the shrimp to the skillet, stirring to coat them in the curry sauce. Cook until the shrimp are pink and opaque, about 3-4 minutes.
- Finish the Dish: Remove the skillet from the heat and stir in the lime juice. Garnish with fresh basil leaves before serving.
- Serve: Serve the coconut curry shrimp over cooked jasmine rice or your choice of noodles, spooning extra sauce over the top.
Extra Tips:
For the best results, use fresh shrimp and high-quality coconut milk for a richer flavor. Adjust the level of heat by adding more or less curry paste according to your preference.
If you don’t have lemongrass, you can substitute it with a bit of lime zest. To enhance the flavor, you can also add a splash of fish sauce or soy sauce at the end of cooking.
Remember not to overcook the shrimp, as they can become rubbery; they should just turn pink and opaque for the perfect texture. Enjoy this dish with a side of fresh cucumber salad for a cooling contrast.