

As someone who cherishes family time, I’ve discovered that cooking dinner together can be such a heartwarming experience. Finding budget-friendly and simple recipes can be a bit tricky, though. That’s why I’ve curated a list of 15 easy and affordable meals perfect for family nights. These dishes require only a few ingredients but are packed with flavor. Ready to explore these tasty options?
One-Pot Cheesy Taco Pasta
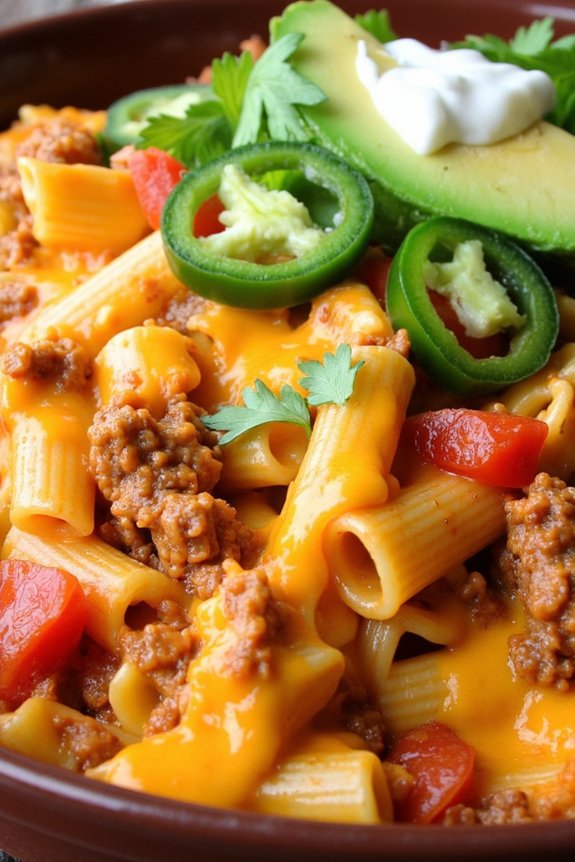
One-Pot Cheesy Taco Pasta is a delightful fusion of Mexican and Italian cuisines that promises to be a hit on your next family night. This dish combines the savory flavors of a classic taco with the comforting, creamy texture of pasta, all cooked in a single pot for easy preparation and cleanup.
The combination of ground beef, taco seasoning, and melted cheese creates a rich and hearty meal that’s perfect for satisfying hungry appetites, making it a go-to recipe for busy weeknights.
This recipe serves 4-6 people and is designed to be both simple and delicious. The beauty of One-Pot Cheesy Taco Pasta lies in its versatility and the ability to customize it with your family’s favorite toppings. Whether you choose to add sour cream, avocado, or a sprinkle of fresh cilantro, this dish is sure to become a family favorite.
Let’s plunge into the ingredients and steps needed to create this mouthwatering meal.
Ingredients (for serving size of 4-6 people):
- 1 pound ground beef
- 1 packet taco seasoning mix
- 1 can (14.5 ounces) diced tomatoes
- 1 can (8 ounces) tomato sauce
- 1 ½ cups chicken or beef broth
- 3 cups uncooked pasta (such as rotini or penne)
- 1 ½ cups shredded cheddar cheese
- ½ cup diced onion
- 1 tablespoon olive oil
- Salt and pepper to taste
- Optional toppings: chopped cilantro, diced avocado, sour cream, sliced jalapeños
Cooking Instructions:
- Prepare the Ingredients: Start by gathering all your ingredients. Dice the onion and measure out the pasta, cheese, and other ingredients to guarantee a smooth cooking process.
- Cook the Ground Beef: In a large pot or Dutch oven, heat the olive oil over medium heat. Add the diced onion and sauté until translucent, about 3-4 minutes. Add the ground beef, breaking it up with a spoon, and cook until browned. Drain excess fat if necessary.
- Season the Beef: Sprinkle the taco seasoning over the browned beef and stir well to combine. This will infuse the meat with that distinct taco flavor.
- Add Liquids and Pasta: Pour in the diced tomatoes (with their juice), tomato sauce, and chicken or beef broth. Stir to mix everything together. Add the uncooked pasta, ensuring it’s submerged in the liquid.
- Simmer the Pasta: Increase the heat to bring the mixture to a boil. Once boiling, reduce the heat to low, cover the pot, and let it simmer for about 12-15 minutes, or until the pasta is tender and most of the liquid is absorbed. Stir occasionally to prevent sticking.
- Incorporate the Cheese: Once the pasta is cooked, remove the pot from heat and stir in the shredded cheddar cheese. Mix until the cheese is fully melted and the dish becomes creamy and cohesive.
- Season to Taste: Add salt and pepper to taste. At this point, you can adjust the seasoning or add a little more broth if the pasta seems too thick.
- Serve and Garnish: Serve the One-Pot Cheesy Taco Pasta hot, garnished with your choice of optional toppings like chopped cilantro, diced avocado, sour cream, or sliced jalapeños.
Extra Tips:
When cooking One-Pot Cheesy Taco Pasta, it’s important to monitor the liquid levels. If the pasta absorbs too much liquid and appears dry, feel free to add a splash of broth or water.
For a spicier kick, consider using spicy taco seasoning or adding a dash of hot sauce. Remember, this dish is highly customizable, so feel free to experiment with different types of pasta or cheeses to suit your family’s preferences. Enjoy your meal!
Sheet Pan Chicken Fajitas
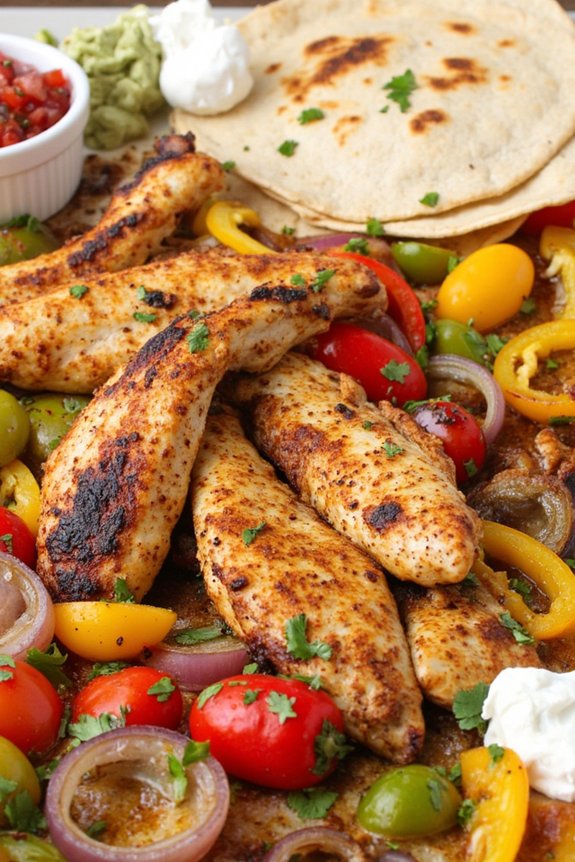
Sheet Pan Chicken Fajitas are a quick and delicious option for family nights, offering a blend of vibrant flavors and minimal cleanup. This recipe combines marinated chicken, colorful bell peppers, and onions baked together on a single sheet pan to create a delightful meal. The simplicity of the preparation, along with the fresh ingredients, makes it an ideal choice for those busy evenings when you want to enjoy a homemade meal without spending hours in the kitchen.
The beauty of sheet pan meals lies in their versatility. You can easily customize these chicken fajitas to suit your family’s taste preferences by adjusting the level of spiciness or adding different vegetables. Served with warm tortillas and your favorite toppings, these fajitas will quickly become a family favorite. Plus, the entire meal comes together in about 30 minutes, making it perfect for those nights when you need a delicious dinner on the table fast.
Ingredients for 4-6 people:
- 1 1/2 pounds boneless, skinless chicken breasts, sliced into thin strips
- 1 red bell pepper, sliced
- 1 yellow bell pepper, sliced
- 1 green bell pepper, sliced
- 1 large onion, sliced
- 2 tablespoons olive oil
- 1 tablespoon chili powder
- 1 teaspoon cumin
- 1 teaspoon garlic powder
- 1 teaspoon paprika
- 1/2 teaspoon onion powder
- 1/2 teaspoon salt
- 1/4 teaspoon black pepper
- Juice of 1 lime
- Warm tortillas, for serving
- Optional toppings: sour cream, guacamole, salsa, shredded cheese, chopped cilantro
Cooking Instructions:
- Preheat Oven: Begin by preheating your oven to 400°F (200°C). This will guarantee the oven is hot enough to cook the chicken and vegetables evenly.
- Prepare Ingredients: In a large bowl, combine the sliced chicken breasts, bell peppers, and onion. Pour in the olive oil, lime juice, and all the spices (chili powder, cumin, garlic powder, paprika, onion powder, salt, and black pepper).
- Mix and Coat: Toss the chicken and vegetables in the bowl until they’re well coated with the oil and spice mixture. Make sure everything is evenly distributed.
- Arrange on Sheet Pan: Spread the chicken and vegetable mixture evenly on a large sheet pan in a single layer. This will guarantee they’re roasted evenly.
- Bake: Place the sheet pan in the preheated oven and bake for about 20-25 minutes, or until the chicken is cooked through and the vegetables are tender.
- Serve: Remove from the oven and let it cool slightly. Serve with warm tortillas and your choice of toppings like sour cream, guacamole, salsa, shredded cheese, and cilantro.
Extra Tips: For best results, try to slice the chicken and vegetables to similar sizes to guarantee even cooking. Feel free to add a bit of spice by including sliced jalapeños if your family enjoys a bit of heat.
For an extra touch, warm the tortillas in the oven for a few minutes or on a skillet before serving. You can also prepare the chicken and vegetable mixture in advance, marinate it, and store it in the refrigerator for a few hours or overnight to enhance the flavors.
Slow Cooker Beef Stroganoff
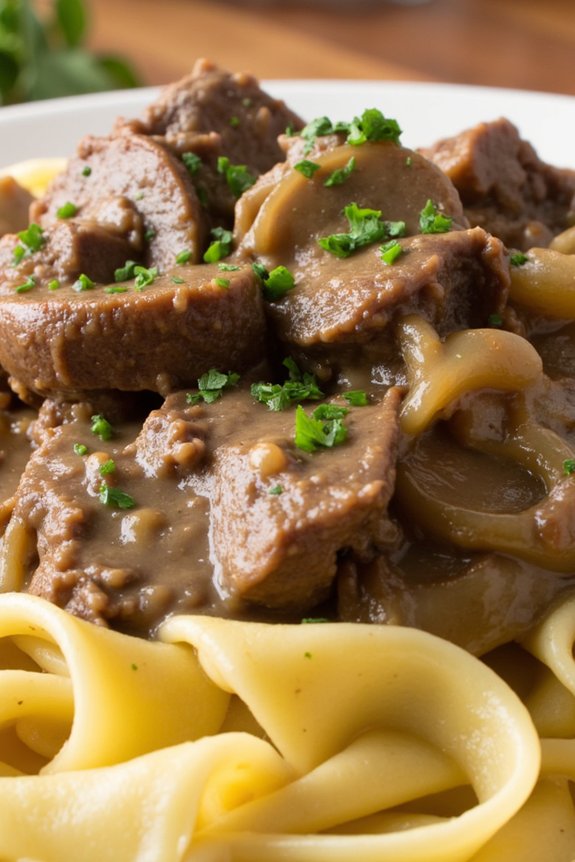
Slow Cooker Beef Stroganoff is a comforting and hearty dish perfect for family nights. This classic recipe takes the traditional flavors of beef stroganoff and simplifies the cooking process by using a slow cooker. The dish features tender pieces of beef, mushrooms, and onions, all enveloped in a rich and creamy sauce. The slow cooker method allows the flavors to meld together beautifully, resulting in a delicious meal that requires minimal effort.
This recipe is perfect for busy families who want to enjoy a homemade meal without spending hours in the kitchen. Simply prepare the ingredients in the morning, set your slow cooker, and come home to a savory dinner that will please everyone at the table. Serve it over egg noodles or rice to complete the meal. This recipe serves 4-6 people, making it an ideal choice for family nights or when you have guests over.
Ingredients:
- 1 ½ pounds of beef stew meat or chuck roast, cut into 1-inch cubes
- 1 medium onion, chopped
- 3 cloves garlic, minced
- 8 ounces of mushrooms, sliced
- 1 cup beef broth
- 1 tablespoon Worcestershire sauce
- 1 teaspoon salt
- ½ teaspoon black pepper
- 1 teaspoon paprika
- 1 tablespoon Dijon mustard
- 1 cup sour cream
- 2 tablespoons cornstarch
- 3 tablespoons water
- Cooked egg noodles or rice, for serving
- Chopped parsley, for garnish
Instructions:
- Prepare the Ingredients: Begin by cutting the beef into 1-inch cubes if not already done. Chop the onion and mince the garlic. Slice the mushrooms and set them aside.
- Assemble in the Slow Cooker: In your slow cooker, add the beef cubes, chopped onion, minced garlic, and sliced mushrooms. Pour in the beef broth and Worcestershire sauce. Sprinkle in the salt, black pepper, and paprika. Stir everything to combine.
- Cook: Cover the slow cooker with its lid and set it to cook on low for 6-8 hours or on high for 3-4 hours. The beef should be tender and the flavors well combined.
- Thicken the Sauce: Once the cooking time is complete, mix the cornstarch and water in a small bowl to create a slurry. Stir this mixture into the slow cooker. Then, add the Dijon mustard and sour cream, stirring until the sauce is smooth and well incorporated.
- Finish and Serve: Allow the stroganoff to cook for an additional 15-20 minutes until the sauce has thickened. Taste and adjust seasoning if necessary. Serve the beef stroganoff over cooked egg noodles or rice. Garnish with chopped parsley before serving.
Extra Tips: For best results, use beef with some marbling, like chuck roast, as it will become more tender during the slow cooking process. If you desire a thicker sauce, you can add an extra tablespoon of cornstarch mixed with water. To enhance the flavor, you may also add a splash of red wine or a dash of nutmeg to the sauce.
Remember to taste and adjust the seasoning before serving, as slow cooking can sometimes mellow the spices. Enjoy your Slow Cooker Beef Stroganoff with a side of fresh vegetables or a green salad for a balanced meal.
Quick and Easy Chicken Stir Fry

Looking for a speedy yet nutritious meal that the whole family will love? This Quick and Easy Chicken Stir Fry is your go-to solution for busy weeknights. With tender chicken pieces, vibrant vegetables, and a savory sauce, this dish combines flavor and convenience in one pan. The best part? It takes less than 30 minutes to get from stovetop to table, making it a perfect fit for family nights when time is of the essence. Packed with protein and fresh veggies, this stir fry isn’t only delicious but also a well-balanced meal that will leave everyone satisfied.
The versatility of this recipe allows you to customize it with your favorite vegetables or whatever you have in the fridge, making it a practical choice for using up leftovers. Whether you’re a novice or seasoned cook, this recipe’s simplicity guarantees that you can whip up a delightful dish without any fuss. So gather your ingredients, heat up your wok or skillet, and get ready to enjoy a flavorful dinner that will soon become a family favorite.
Ingredients (serves 4-6):
- 1 1/2 pounds boneless, skinless chicken breasts, thinly sliced
- 2 tablespoons vegetable oil
- 1 red bell pepper, sliced
- 1 yellow bell pepper, sliced
- 1 cup broccoli florets
- 1 cup snap peas
- 1 medium carrot, thinly sliced
- 3 cloves garlic, minced
- 1 tablespoon fresh ginger, grated
- 1/4 cup soy sauce
- 2 tablespoons oyster sauce
- 1 tablespoon cornstarch
- 1 tablespoon water
- 1 tablespoon sesame oil
- Cooked white or brown rice, for serving
Cooking Instructions:
- Prepare the Chicken and Vegetables: Begin by slicing the chicken breasts into thin strips. Slice the bell peppers and carrot, and prepare the broccoli and snap peas. Mince the garlic and grate the ginger.
- Cook the Chicken: Heat 1 tablespoon of vegetable oil in a large skillet or wok over medium-high heat. Add the chicken strips to the pan and stir-fry for about 5-7 minutes until they’re cooked through and golden brown. Remove the chicken from the pan and set aside.
- Stir-Fry the Vegetables: In the same pan, add the remaining tablespoon of vegetable oil. Add the garlic and ginger, stirring for about 30 seconds until fragrant. Add the sliced bell peppers, broccoli, snap peas, and carrot. Stir-fry for 4-5 minutes until the vegetables are tender-crisp.
- Make the Sauce: In a small bowl, mix the soy sauce, oyster sauce, cornstarch, and water until smooth. Pour this mixture over the vegetables in the pan.
- Combine and Finish: Return the cooked chicken to the pan and stir everything together to coat with the sauce. Drizzle the sesame oil over the stir fry and stir to combine. Cook for an additional 1-2 minutes until everything is heated through and the sauce has thickened slightly.
- Serve: Serve the chicken stir fry over cooked rice, and enjoy your quick and easy family dinner!
Extra Tips:
For an extra kick of flavor, consider adding a dash of red pepper flakes or a splash of rice vinegar to the sauce. If you prefer a thicker sauce, increase the amount of cornstarch slightly. To save even more time, use pre-cut vegetables available at most grocery stores.
Remember to keep the heat high and stir constantly to guarantee even cooking and to retain the vibrant colors and crunch of the vegetables. Enjoy the flexibility of this dish by swapping or adding different veggies like mushrooms, zucchini, or baby corn based on your family’s preferences.
Vegetarian Black Bean Chili
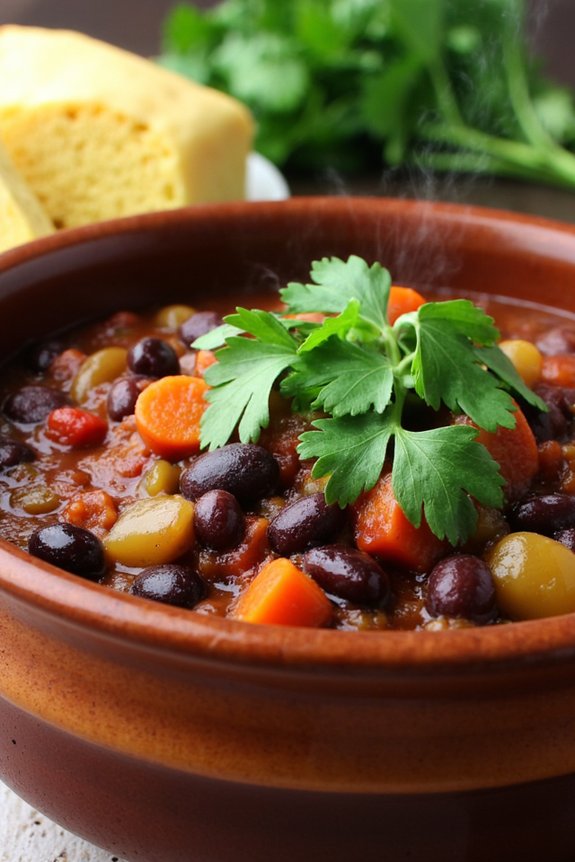
Vegetarian Black Bean Chili is a hearty and satisfying dish that’s perfect for family nights. This recipe isn’t only delicious but also packed with nutrients, making it an ideal option for those who want a healthy and fulfilling meal. Black beans are the star of the show, providing a rich source of protein and fiber, while a medley of vegetables and spices add layers of flavor.
Whether you’re a vegetarian or simply looking to incorporate more plant-based meals into your diet, this chili is sure to please everyone at the table. This Vegetarian Black Bean Chili is great for those colder nights when you crave something warm and comforting. It’s also incredibly easy to prepare, making it perfect for busy evenings.
The recipe uses canned black beans for convenience, but you can also opt for dried beans if you have more time. The combination of ingredients creates a rich and savory chili that can be enjoyed on its own or served with your choice of toppings like avocado, sour cream, or shredded cheese. This dish serves 4-6 people, ensuring there’s enough to go around for everyone to enjoy.
Ingredients for 4-6 servings:
- 2 tablespoons olive oil
- 1 large onion, diced
- 3 cloves garlic, minced
- 1 red bell pepper, diced
- 1 green bell pepper, diced
- 2 medium carrots, peeled and diced
- 2 tablespoons chili powder
- 1 tablespoon ground cumin
- 1 teaspoon smoked paprika
- 1 teaspoon dried oregano
- 1/4 teaspoon cayenne pepper (optional)
- 2 (15-ounce) cans black beans, drained and rinsed
- 1 (28-ounce) can crushed tomatoes
- 2 cups vegetable broth
- Salt and pepper to taste
- Juice of 1 lime
- Fresh cilantro, for garnish
Cooking Instructions:
- Prepare the vegetables: Start by heating the olive oil in a large pot over medium heat. Add the diced onion and garlic, cooking until they become soft and translucent, about 5 minutes.
- Add the vegetables: Stir in the diced red and green bell peppers and carrots, cooking for another 5 minutes until they begin to soften.
- Season the vegetables: Add the chili powder, ground cumin, smoked paprika, dried oregano, and cayenne pepper. Stir well to coat the vegetables evenly with the spices and cook for an additional 2 minutes to release their flavors.
- Combine beans and tomatoes: Add the drained black beans and crushed tomatoes to the pot, stirring to combine everything thoroughly.
- Simmer the chili: Pour in the vegetable broth and bring the mixture to a boil. Once boiling, reduce the heat to low and let the chili simmer uncovered for 30-40 minutes, stirring occasionally until the flavors meld together and the chili thickens to your desired consistency.
- Season and serve: Season the chili with salt and pepper to taste. Just before serving, stir in the lime juice. Ladle the chili into bowls and garnish with fresh cilantro.
Extra Tips: For a thicker chili, you can mash some of the beans with the back of a spoon while cooking. If you prefer more heat, add extra cayenne pepper or a dash of hot sauce.
This chili can also be made in advance and stored in the refrigerator for up to 3 days or frozen for longer storage. When reheating, you may need to add a bit of water or broth to reach your desired consistency. Enjoy your chili with a side of cornbread or over a bed of rice for a complete meal.
Baked Ziti With Sausage

This baked ziti recipe is designed to serve 4-6 people and is perfect for those who are looking for a simple yet flavorful dinner option. The use of sausage adds an extra depth of flavor to the traditional baked ziti, and when combined with the creamy cheese layers, it creates a delightful contrast in textures.
Whether you’re an experienced cook or a beginner, this recipe is straightforward and can be adjusted to suit your family’s taste preferences.
Ingredients for 4-6 servings:
- 1 pound ziti pasta
- 1 tablespoon olive oil
- 1 pound Italian sausage, casings removed
- 1 medium onion, diced
- 3 cloves garlic, minced
- 1 teaspoon dried oregano
- 1 teaspoon dried basil
- 1/4 teaspoon crushed red pepper flakes (optional)
- 1 jar (24 ounces) marinara sauce
- 1 cup ricotta cheese
- 1 large egg
- 2 cups shredded mozzarella cheese
- 1/2 cup grated Parmesan cheese
- Salt and pepper to taste
- Fresh basil or parsley for garnish (optional)
Cooking Instructions:
- Preheat the Oven: Set your oven to 375°F (190°C) to prepare for baking.
- Cook the Pasta: Bring a large pot of salted water to a boil. Add the ziti pasta and cook until al dente, according to package instructions. Drain and set aside.
- Prepare the Sausage Mixture: In a large skillet, heat the olive oil over medium heat. Add the sausage, breaking it up with a spoon, and cook until browned.
- Add the diced onion and garlic, and sauté until the onion is translucent. Stir in the oregano, basil, and red pepper flakes, cooking for another minute to release the flavors.
- Make the Sauce: Pour the marinara sauce into the skillet with the sausage mixture. Stir to combine and let it simmer for about 10 minutes. Season with salt and pepper to taste.
- Prepare the Ricotta Mixture: In a bowl, mix the ricotta cheese with the egg and a pinch of salt and pepper.
- Assemble the Dish: In a large baking dish, spread a thin layer of the sausage sauce on the bottom. Add half of the cooked ziti, then layer with half of the ricotta mixture, half of the mozzarella cheese, and a third of the Parmesan cheese.
- Repeat the layers, ending with the remaining sauce and cheeses on top.
- Bake: Cover the dish with foil and bake in the preheated oven for 20 minutes. Remove the foil and bake for an additional 10-15 minutes, or until the cheese is bubbly and golden brown.
- Garnish and Serve: Let the baked ziti cool for a few minutes before serving. Garnish with fresh basil or parsley, if desired.
Extra Tips: For a spicier version, consider adding more crushed red pepper flakes or using hot Italian sausage.
You can also customize the cheese blend by adding provolone or a sprinkle of Asiago for a more robust flavor. If you’re making this dish ahead of time, assemble it up to the baking step, cover tightly, and refrigerate for up to 24 hours; simply add a few extra minutes to the baking time if cooking from cold.
Enjoy this baked ziti with a side salad and garlic bread for a complete meal.
Simple Garlic Butter Shrimp

If you’re looking for a quick and delicious meal to serve on family nights, Simple Garlic Butter Shrimp is an excellent choice. This dish isn’t only easy to prepare but also incredibly flavorful, thanks to the combination of fresh shrimp, garlic, and butter. The simplicity of the ingredients allows the natural sweetness of the shrimp to shine through, while the garlic and butter create a rich and savory sauce that perfectly complements the seafood.
Whether you’re a seasoned cook or a beginner in the kitchen, this recipe is sure to impress your family and become a staple in your weeknight dinner rotation.
Simple Garlic Butter Shrimp can be prepared in under 30 minutes, making it ideal for busy weeknights when you want to serve something nutritious and tasty without spending hours in the kitchen. The recipe is versatile and can be paired with a variety of sides such as rice, pasta, or a fresh salad, making it adaptable to your family’s preferences.
Additionally, this dish is a crowd-pleaser that can be easily scaled up or down depending on the number of people you’re serving. Let’s explore the ingredients and instructions needed to create this delectable dish that serves 4-6 people.
Ingredients:
- 2 pounds large shrimp, peeled and deveined
- 6 tablespoons unsalted butter
- 6 cloves garlic, minced
- 1 teaspoon salt
- 1/2 teaspoon black pepper
- 2 tablespoons lemon juice
- 1 tablespoon chopped fresh parsley
- Lemon wedges, for serving
Cooking Instructions:
- Prepare the Shrimp: Start by rinsing the peeled and deveined shrimp under cold water and patting them dry with paper towels. This guarantees they cook evenly and absorb the flavors of the garlic butter sauce.
- Melt the Butter: In a large skillet over medium heat, add the unsalted butter. Allow it to melt completely and become slightly bubbly but not browned, which takes about 1-2 minutes.
- Add Garlic: Stir in the minced garlic and cook for about 1 minute, or until it’s fragrant. Be careful not to burn the garlic, as it can become bitter.
- Cook the Shrimp: Add the shrimp to the skillet, spreading them out in a single layer. Sprinkle with salt and black pepper. Cook for 2-3 minutes on one side until they turn pink and opaque.
- Flip the Shrimp: Flip the shrimp over and cook for another 1-2 minutes on the other side. The shrimp should be cooked through but still tender and juicy.
- Add Lemon Juice and Parsley: Remove the skillet from heat and stir in the lemon juice and chopped parsley. Toss the shrimp in the sauce until they’re well coated.
- Serve: Transfer the shrimp to a serving platter and serve immediately with lemon wedges on the side for added zest.
Extra Tips:
When cooking Simple Garlic Butter Shrimp, it’s important to monitor the heat closely. Too high a heat can cause the butter to burn, and the shrimp can become overcooked and rubbery.
Keeping the heat at medium allows for a gentle simmer, guaranteeing the shrimp remain tender. If you prefer a little heat, consider adding a pinch of red pepper flakes to the garlic butter sauce.
Additionally, always use fresh lemon juice for the best flavor, as it adds a bright and tangy contrast to the richness of the butter.
Budget-Friendly Chicken Alfredo

Chicken Alfredo is a classic Italian-American dish loved for its creamy sauce and comforting flavors. For family nights, it’s a perfect choice as it brings everyone together around the table with its delicious, satisfying taste.
While traditional Chicken Alfredo may be considered a bit indulgent, this budget-friendly version guarantees you can enjoy a fantastic meal without breaking the bank. With a few smart substitutions and efficient cooking techniques, you can create a delightful dish that everyone in the family will enjoy.
This recipe serves 4-6 people and focuses on combining simple ingredients to create a rich and creamy sauce that coats tender pieces of chicken and pasta. By using pantry staples and cost-effective ingredients, this Chicken Alfredo recipe is both affordable and easy to prepare. Follow the steps below, and you’ll have a delicious family meal ready in no time!
Ingredients:
- 1 lb (450g) boneless, skinless chicken breasts
- 12 oz (340g) fettuccine pasta
- 2 cups (480ml) milk
- 1 cup (240ml) chicken broth
- 1 cup (100g) grated Parmesan cheese
- 2 tablespoons (30g) butter
- 2 tablespoons (15g) all-purpose flour
- 2 cloves garlic, minced
- 1 tablespoon (15ml) olive oil
- Salt and pepper to taste
- Chopped fresh parsley for garnish (optional)
Cooking Instructions:
- Prepare the Chicken: Begin by cutting the chicken breasts into bite-sized pieces. Season them with salt and pepper. Heat olive oil in a large skillet over medium-high heat. Add the chicken pieces and cook for 5-7 minutes, or until they’re golden brown and cooked through. Remove the chicken from the skillet and set aside.
- Cook the Pasta: In a large pot, bring salted water to a boil and cook the fettuccine pasta according to package instructions until al dente. Drain the pasta and set aside.
- Make the Alfredo Sauce: In the same skillet used for the chicken, melt the butter over medium heat. Add the minced garlic and sauté for about 1 minute until fragrant. Sprinkle the flour over the garlic and butter, and stir continuously for another minute to make a roux.
- Add Liquid Ingredients: Gradually pour the milk and chicken broth into the skillet, whisking constantly to combine with the roux. Continue to cook, stirring frequently, until the mixture begins to simmer and thicken.
- Incorporate Cheese and Chicken: Reduce the heat to low and stir in the grated Parmesan cheese until it melts into the sauce. Return the cooked chicken to the skillet, stirring to coat it in the creamy sauce.
- Combine with Pasta: Add the drained fettuccine pasta to the skillet, tossing everything together until the pasta is well coated with the Alfredo sauce. If the sauce is too thick, you can add a little more milk or broth to reach your desired consistency.
- Serve: Taste and adjust seasoning with salt and pepper as needed. Garnish with chopped fresh parsley, if desired, and serve immediately.
Extra Tips:
For an even more cost-effective dish, consider using frozen chicken breast strips or leftover rotisserie chicken.
If you’re looking to boost the nutritional value, you can add steamed broccoli florets or sautéed mushrooms to the sauce.
Keep in mind that freshly grated Parmesan cheese tends to melt better than pre-grated varieties.
If you prefer a richer sauce, you can substitute half of the milk with heavy cream.
Finally, always make sure to whisk the sauce continuously to prevent any lumps from forming. Happy cooking!
Easy Vegetable Fried Rice
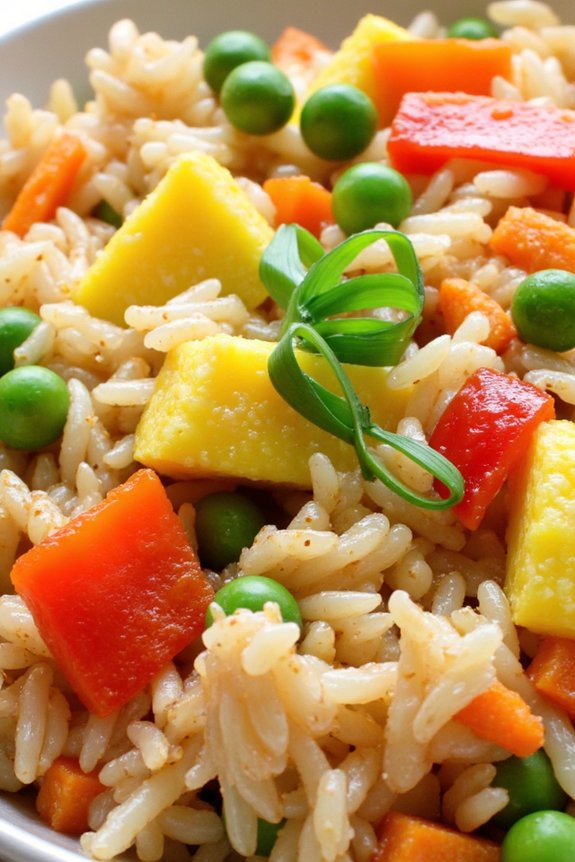
Easy Vegetable Fried Rice is a quick and delicious option for family nights when you want to whip up something tasty without spending too much time in the kitchen. This dish isn’t only packed with flavor, but it’s also a great way to use up leftover rice and any vegetables you have on hand. The combination of colorful vegetables, soy sauce, and sesame oil results in a savory dish that will please even the pickiest eaters.
Plus, it’s entirely customizable, allowing you to add your favorite proteins or keep it vegetarian. This version of Easy Vegetable Fried Rice serves 4-6 people, making it perfect for family dinners. It’s a versatile recipe that can be adapted to suit your family’s taste preferences.
Whether you prefer mild or spicy, you can easily adjust the seasonings to make it just right. The key to a great fried rice is using cold, day-old rice, which helps achieve a perfect texture. Let’s explore the ingredients you’ll need and the steps to create this delightful dish.
Ingredients:
- 4 cups of cold, cooked rice (preferably day-old)
- 2 tablespoons vegetable oil
- 1 cup diced carrots
- 1 cup frozen peas
- 1 bell pepper, diced
- 1 small onion, diced
- 3 cloves garlic, minced
- 2 eggs, beaten
- 3 tablespoons soy sauce
- 1 tablespoon sesame oil
- Salt and pepper to taste
- 2 green onions, chopped for garnish
Instructions:
- Prepare the Ingredients: Begin by gathering all your ingredients. Dice the vegetables, and confirm the cooked rice is cold and separated to avoid clumping.
- Heat the Oil: In a large, non-stick skillet or wok, heat the vegetable oil over medium-high heat. Once hot, add the diced onion and sauté for about 2 minutes until translucent.
- Add Vegetables: Stir in the carrots and bell pepper. Cook for another 3-4 minutes until the vegetables start to soften. Add the minced garlic and cook for an additional minute until fragrant.
- Cook the Eggs: Push the vegetables to the side of the skillet, creating space. Pour the beaten eggs into the open space and scramble them until fully cooked, breaking them into small pieces as they cook.
- Combine Rice and Peas: Add the cold rice to the skillet along with the peas. Stir everything together to break up any clumps of rice and mix with the vegetables and eggs.
- Season the Fried Rice: Pour the soy sauce and sesame oil over the rice mixture. Stir continuously for about 5-7 minutes until the rice is heated through and evenly coated with the sauce. Season with salt and pepper to taste.
- Garnish and Serve: Remove the skillet from the heat and stir in the chopped green onions. Serve hot and enjoy!
Extra Tips: For best results, always use cold, day-old rice as it prevents the fried rice from becoming mushy. If you only have fresh rice, try spreading it on a baking sheet and refrigerating it for at least 30 minutes to cool it down quickly.
Feel free to customize the dish by adding proteins like diced chicken or shrimp, or extra vegetables like broccoli or snap peas. Adjust the soy sauce and sesame oil to suit your taste preference, and for a spicy kick, add a dash of chili sauce or crushed red pepper flakes.
Crispy Baked Chicken Thighs

Crispy Baked Chicken Thighs are a delightful and simple recipe perfect for family nights. These chicken thighs are seasoned to perfection and baked to achieve a wonderfully crispy skin while remaining juicy and tender inside. This dish isn’t only mouthwatering but also easy to prepare, making it an ideal choice for a hassle-free dinner that the whole family will love.
With just a few ingredients and minimal prep time, you can create a delicious meal that feels gourmet but requires little effort. The secret to achieving the perfect crispiness lies in the combination of the right seasoning and baking technique. By using bone-in, skin-on chicken thighs, you retain moisture and flavor, while the skin crisps up beautifully in the oven.
This recipe is versatile and can be paired with a variety of side dishes such as roasted vegetables, mashed potatoes, or a fresh green salad, making it a versatile centerpiece for any family meal.
Ingredients (Serves 4-6):
- 6 bone-in, skin-on chicken thighs
- 2 tablespoons olive oil
- 2 teaspoons salt
- 1 teaspoon black pepper
- 1 teaspoon garlic powder
- 1 teaspoon onion powder
- 1 teaspoon smoked paprika
- 1 tablespoon fresh thyme leaves (optional)
- Lemon wedges, for serving (optional)
Instructions:
- Preheat the Oven: Set your oven to 425°F (220°C) and let it preheat while you prepare the chicken thighs. This high temperature is essential to achieving that crispy skin.
- Prepare the Chicken: Pat the chicken thighs dry with paper towels. This step is vital as it removes excess moisture, which helps the skin to crisp up in the oven.
- Season the Chicken: In a small bowl, mix together the salt, pepper, garlic powder, onion powder, and smoked paprika. Rub this seasoning mix all over the chicken thighs, ensuring each piece is well-coated. Drizzle olive oil over the thighs and rub it in to help the spices adhere.
- Bake the Chicken: Place the seasoned chicken thighs on a baking sheet lined with parchment paper or a lightly greased baking dish, skin side up. Make sure the thighs are spaced apart to allow air to circulate, promoting even cooking. Bake in the preheated oven for 35-45 minutes until the skin is golden brown and crispy, and the internal temperature reaches 165°F (75°C).
- Rest and Serve: Remove the chicken from the oven and let it rest for a few minutes. This resting period helps retain the juices within the meat. Serve the chicken with lemon wedges for a fresh burst of flavor and garnish with fresh thyme leaves if desired.
Extra Tips:
For extra crispy skin, you can broil the chicken for an additional 2-3 minutes at the end of the baking time, keeping a close eye to prevent burning. If you prefer a spicier flavor, consider adding a pinch of cayenne pepper to the seasoning mix.
For enhanced flavor, marinate the chicken thighs in the seasoning mix for a few hours or overnight in the refrigerator before baking. This dish can be stored in an airtight container for up to three days, and reheated in the oven to maintain crispiness.
Classic Sloppy Joes

There’s nothing quite like the comforting, savory goodness of Classic Sloppy Joes to bring the family together for a fun, delicious dinner night. This timeless dish has been a staple in many households due to its simplicity and rich, tangy flavors.
Perfect for those busy weeknights, Sloppy Joes are quick to prepare and can be served up hot in no time, ensuring that everyone leaves the table satisfied. Whether you’re feeding picky eaters or a crowd of hungry teenagers, this meal is sure to be a hit.
Originating from the American Midwest, Sloppy Joes combine ground beef with a flavorful sauce made from pantry staples like ketchup, mustard, and Worcestershire sauce, all served on a soft hamburger bun. It’s a dish that not only pleases the palate but also allows for easy customization with toppings like cheese, pickles, or even coleslaw.
For a serving size of 4-6 people, gather your ingredients and follow these simple steps to create a memorable meal that everyone will enjoy.
Ingredients:
- 1 1/2 pounds ground beef
- 1 medium onion, finely chopped
- 1/2 green bell pepper, finely chopped
- 3 cloves garlic, minced
- 1 cup ketchup
- 2 tablespoons brown sugar
- 1 tablespoon Worcestershire sauce
- 1 tablespoon yellow mustard
- 1 teaspoon chili powder
- Salt and pepper to taste
- 6 hamburger buns
Cooking Instructions:
- Cook the Beef and Vegetables: In a large skillet over medium heat, add the ground beef. Cook until browned, breaking it up with a spoon, for about 5-7 minutes. Drain any excess fat.
- Add Aromatics: Stir in the chopped onion, green bell pepper, and minced garlic. Cook for another 3-4 minutes until the vegetables are tender and the onion is translucent.
- Prepare the Sauce: In the same skillet, add the ketchup, brown sugar, Worcestershire sauce, mustard, and chili powder. Stir everything together until well combined.
- Simmer: Lower the heat and let the mixture simmer for about 10-15 minutes, allowing the flavors to meld and the sauce to thicken. Stir occasionally to prevent sticking. Season with salt and pepper to taste.
- Toast the Buns: While the meat mixture simmers, toast the hamburger buns on a separate pan or in a toaster to your desired level of crispiness.
- Assemble: Spoon the Sloppy Joe mixture generously onto the bottom half of each hamburger bun. Top with additional condiments or toppings if desired, then place the top half of the bun over the filling.
Extra Tips:
For a healthier alternative, you can substitute ground turkey or chicken for the ground beef. If you prefer a spicier kick, consider adding a dash of hot sauce or a pinch of cayenne pepper to the sauce.
Additionally, you can make the Sloppy Joe mixture ahead of time and store it in the refrigerator for up to two days; simply reheat before serving. For a balanced meal, serve these Sloppy Joes with a side salad or some crisp, oven-baked fries.
Creamy Tomato Basil Soup

Creamy Tomato Basil Soup is a timeless classic that brings warmth and comfort to any family dinner night. This rich and velvety soup is perfect for those evenings when you crave a comforting meal that’s both easy to prepare and packed with flavor. The combination of ripe tomatoes, fresh basil, and creamy textures creates a delightful harmony that will leave everyone at the dinner table satisfied.
Whether served as a starter or paired with a crusty bread or grilled cheese sandwich for a heartier meal, this soup is a versatile addition to your family dinner repertoire. What makes this soup truly special is its simplicity and the way it allows the fresh ingredients to shine. With just a few basic steps, you’ll have a delicious and wholesome meal ready to enjoy.
The creaminess is balanced perfectly with the acidity of the tomatoes and the fragrant aroma of basil, making it a crowd-pleaser for both kids and adults alike. Not only is it soul-warming, but it’s also a healthy option that can easily be adapted to suit various dietary preferences.
Ingredients (Serves 4-6):
- 2 tablespoons olive oil
- 1 medium onion, chopped
- 3 cloves garlic, minced
- 2 cans (28 ounces each) whole peeled tomatoes
- 1 cup vegetable broth
- 1 teaspoon sugar
- 1 teaspoon salt
- 1/2 teaspoon black pepper
- 1 cup heavy cream
- 1/4 cup fresh basil leaves, chopped
- Optional: grated Parmesan cheese for garnish
Cooking Instructions:
- Prepare the Base: In a large pot, heat the olive oil over medium heat. Add the chopped onion and minced garlic, sautéing until the onion becomes translucent and fragrant, about 5 minutes.
- Add Tomatoes: Stir in the whole peeled tomatoes, including their juices. Use a wooden spoon to break the tomatoes into smaller pieces as they cook.
- Simmer: Pour in the vegetable broth and add the sugar, salt, and black pepper. Bring the mixture to a gentle simmer, then reduce the heat to low. Let it simmer uncovered for about 20 minutes, allowing the flavors to meld together.
- Blend: Remove the pot from heat. Use an immersion blender to puree the soup until smooth. If you don’t have an immersion blender, carefully transfer the soup in batches to a countertop blender and puree until smooth, then return it to the pot.
- Add Cream and Basil: Stir in the heavy cream and chopped basil. Return the pot to a low heat and let the soup warm through for another 5 minutes, stirring occasionally.
- Serve: Ladle the soup into bowls. If desired, garnish with grated Parmesan cheese and additional fresh basil for an extra touch of flavor.
Extra Tips:
For an even deeper flavor, try roasting the tomatoes in the oven with a little olive oil before adding them to the pot. This step will enhance the sweetness and add a smoky undertone to your soup.
If you prefer a thicker consistency, reduce the amount of vegetable broth or let the soup simmer for a longer period to thicken naturally. For a dairy-free version, substitute the heavy cream with coconut milk or a plant-based cream alternative.
Teriyaki Chicken and Broccoli
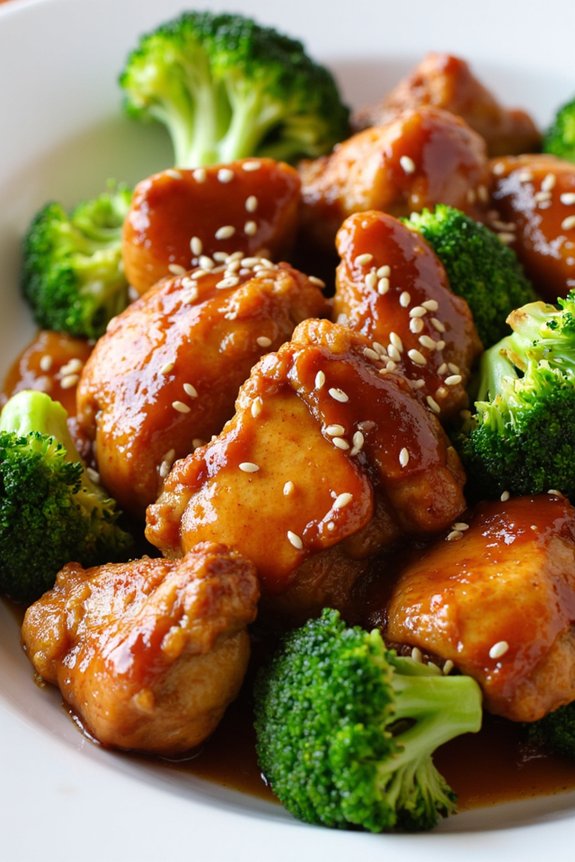
Teriyaki Chicken and Broccoli is a delightful dish that combines savory and sweet flavors with a nutritious punch. Perfect for family nights, this easy-to-make meal brings together tender chicken pieces with crisp broccoli in a luscious teriyaki sauce.
Whether you’re looking to impress your family with a delicious dinner or simply want a quick and wholesome meal, this recipe is sure to satisfy everyone at the table.
This dish can be prepared in under 30 minutes, making it an ideal choice for busy weeknights. The succulent chicken is marinated in a homemade teriyaki sauce, which adds depth and richness to the dish, while the broccoli contributes a burst of freshness and color.
Serve it over steamed rice or alongside your favorite noodles for a complete family-friendly meal that serves 4-6 people.
Ingredients:
- 1 ½ lbs boneless, skinless chicken breasts, cut into bite-sized pieces
- 4 cups broccoli florets
- 1 tablespoon vegetable oil
- 1 cup soy sauce
- ½ cup water
- ½ cup brown sugar
- 2 tablespoons honey
- 2 tablespoons rice vinegar
- 1 tablespoon sesame oil
- 2 cloves garlic, minced
- 1 tablespoon cornstarch
- 1 tablespoon water (for the cornstarch slurry)
- Salt and pepper to taste
- Sesame seeds (optional, for garnish)
- Cooked rice or noodles for serving
Instructions:
- Prepare the Teriyaki Sauce: In a medium bowl, whisk together the soy sauce, ½ cup water, brown sugar, honey, rice vinegar, sesame oil, and minced garlic until well combined. Set aside.
- Cook the Chicken: Heat the vegetable oil in a large skillet over medium-high heat. Add the chicken pieces to the skillet, season with salt and pepper, and cook until browned on all sides and fully cooked through, about 6-8 minutes. Remove the chicken from the skillet and set aside.
- Steam the Broccoli: In the same skillet, add the broccoli florets. Pour in a few tablespoons of water, cover the skillet, and steam the broccoli until tender-crisp, about 3-4 minutes. Remove the broccoli and set aside with the chicken.
- Thicken the Sauce: Return the skillet to medium heat. Pour the teriyaki sauce mixture into the skillet and bring it to a simmer. In a small bowl, mix the cornstarch with 1 tablespoon of water to create a slurry. Gradually add the slurry to the simmering sauce, stirring constantly until the sauce thickens, about 2-3 minutes.
- Combine Ingredients: Add the cooked chicken and broccoli back into the skillet with the thickened teriyaki sauce. Stir well to coat everything evenly in the sauce. Cook for an additional 2 minutes until everything is heated through.
- Serve: Garnish with sesame seeds if desired. Serve the Teriyaki Chicken and Broccoli over cooked rice or noodles for a complete meal.
Extra Tips:
For best results, allow the chicken to marinate in the teriyaki sauce for at least 15-30 minutes before cooking, if time permits. This enhances the flavor and tenderness of the chicken.
Additionally, feel free to customize the dish by adding other vegetables like bell peppers or snap peas for extra color and nutrition.
Be mindful of the saltiness of the soy sauce; you can opt for a low-sodium version if preferred. Finally, verify the broccoli retains its vibrant green color by not overcooking it during the steaming process.
Skillet Shepherd’s Pie

Shepherd’s Pie is a comforting and hearty dish that combines savory ground meat with a rich vegetable medley, all topped with creamy mashed potatoes. This skillet version simplifies the process, allowing you to create this classic dish in one pan, making it perfect for a family night dinner.
The flavors meld beautifully as the pie bakes, creating a satisfying meal that will warm your family’s hearts and fill their bellies.
This Skillet Shepherd’s Pie serves 4-6 people and is an excellent choice for a mid-week dinner or a cozy weekend meal. The convenience of cooking everything in a single skillet not only minimizes clean-up but also enhances the flavor as all the ingredients cook together.
Whether you’re an experienced cook or just starting out, this recipe is straightforward and guarantees a delicious outcome every time.
Ingredients:
- 1 tablespoon olive oil
- 1 medium onion, chopped
- 2 cloves garlic, minced
- 1 pound ground beef or lamb
- 2 cups mixed frozen vegetables (e.g., peas, carrots, corn)
- 2 tablespoons tomato paste
- 1 tablespoon Worcestershire sauce
- 1 cup beef broth
- 1 teaspoon dried thyme
- Salt and pepper to taste
- 4 cups mashed potatoes (prepared from scratch or instant)
- 1 cup shredded cheddar cheese
Instructions:
- Preheat and Prepare: Preheat your oven to 400°F (200°C). Heat the olive oil in a large oven-safe skillet over medium heat.
- Cook the Aromatics: Add the chopped onion and minced garlic to the skillet. Sauté for about 3-4 minutes until the onion becomes translucent and fragrant.
- Brown the Meat: Add the ground beef or lamb to the skillet. Cook, breaking it apart with a spoon, until it’s browned and fully cooked through, about 5-7 minutes.
- Add Vegetables: Stir in the mixed frozen vegetables, tomato paste, Worcestershire sauce, beef broth, and dried thyme. Season with salt and pepper. Allow the mixture to simmer for about 10 minutes, or until the vegetables are tender and the sauce has thickened slightly.
- Layer with Mashed Potatoes: Remove the skillet from heat. Carefully spread the prepared mashed potatoes over the meat mixture, smoothing it out with a spatula to create an even layer.
- Add Cheese Topping: Sprinkle the shredded cheddar cheese evenly over the top of the mashed potatoes.
- Bake the Pie: Transfer the skillet to the preheated oven. Bake for 20 minutes, or until the cheese is melted and slightly golden brown.
- Serve and Enjoy: Allow the Shepherd’s Pie to cool for a few minutes before serving. This will help the layers set slightly for easier serving.
Extra Tips:
When preparing the mashed potatoes, consider adding a bit of butter and cream to enhance their flavor and creaminess.
If you prefer a more golden top, switch the oven to broil for the last few minutes of baking, but keep a close eye to prevent burning.
For a vegetarian version, replace the meat with lentils or a plant-based meat alternative.
Leftovers can be stored in an airtight container in the refrigerator for up to three days. Reheat in the oven or microwave until warmed through.
Homemade Margherita Pizza

Hosting a family night can be a delightful experience, especially when you have a delicious homemade Margherita pizza on the menu. This classic Italian dish isn’t only simple to prepare but also a crowd-pleaser that everyone, from children to adults, will enjoy.
With its fresh ingredients and vibrant flavors, a Margherita pizza is the perfect centerpiece for a cozy evening spent with loved ones. Made with a crispy thin crust, tangy tomato sauce, fresh mozzarella cheese, and fragrant basil leaves, this pizza embodies simplicity and elegance, making it a staple in any home cook’s repertoire.
Preparing a Margherita pizza from scratch allows you to appreciate the freshness and quality of the ingredients, which are key to achieving its authentic taste. Whether you’re a seasoned chef or a cooking novice, this recipe is straightforward and rewarding.
The following recipe provides enough servings for 4-6 people, making it ideal for a small family gathering or a casual dinner with friends. Prepare to initiate a culinary journey to Italy with this easy-to-follow recipe that promises to deliver both flavor and satisfaction.
Ingredients (Serves 4-6):
- 2 ½ cups all-purpose flour
- 1 cup warm water (about 110°F)
- 1 packet (2 ¼ teaspoons) active dry yeast
- 1 teaspoon sugar
- 1 teaspoon salt
- 2 tablespoons olive oil
- 1 cup tomato sauce
- 12 ounces fresh mozzarella cheese, sliced
- 1/4 cup fresh basil leaves
- 1 teaspoon dried oregano (optional)
- 1 teaspoon crushed red pepper flakes (optional)
- Extra olive oil for drizzling
Cooking Instructions:
- Prepare the Dough: In a large bowl, combine the warm water and sugar, then sprinkle the yeast over the top. Let it sit for about 5 minutes until it becomes frothy. Add the flour, salt, and olive oil, and mix until a dough begins to form. Knead the dough on a lightly floured surface for about 8-10 minutes until it becomes smooth and elastic.
- Let the Dough Rise: Place the dough in a lightly oiled bowl, cover it with a damp cloth, and let it rise in a warm, draft-free area for about 1-1.5 hours, or until it has doubled in size.
- Preheat the Oven: Preheat your oven to 475°F (245°C). If using a pizza stone, place it in the oven while preheating to get it hot.
- Shape the Pizza: Once the dough has risen, punch it down and divide it into two equal portions. Roll out each portion on a floured surface to about 12 inches in diameter for a thin crust.
- Assemble the Pizza: Transfer the rolled-out dough to a parchment-lined baking sheet or preheated pizza stone. Spread a thin layer of tomato sauce over each crust, leaving a small border for the crust. Arrange the mozzarella slices evenly over the sauce and sprinkle with dried oregano and crushed red pepper flakes if desired.
- Bake the Pizza: Bake each pizza in the preheated oven for about 10-15 minutes, or until the crust is golden brown and the cheese is bubbling and slightly browned.
- Add Fresh Toppings: Remove the pizza from the oven, and immediately scatter fresh basil leaves over the top. Drizzle a little olive oil over the pizza for added flavor.
- Serve and Enjoy: Allow the pizza to cool for a few minutes before slicing. Serve warm and enjoy your homemade Margherita pizza with family and friends.
Extra Tips:
For the best results, verify your oven is fully preheated before baking the pizza to achieve a crispy crust. Fresh mozzarella releases moisture, so it’s advisable to pat it dry with a paper towel before adding it to the pizza to prevent sogginess.
If you prefer a more rustic look, tear the basil leaves instead of leaving them whole. Additionally, experimenting with different types of flour, such as bread flour, can create a different texture and flavor profile for your pizza dough.