

I’m always on the lookout for delicious meals that keep health in mind, and I’ve gathered 14 fantastic low-calorie dinner ideas just for you. Picture the sizzle of lemon herb grilled chicken or the vibrant colors of a Mediterranean chickpea salad. These meals are designed to satisfy your taste buds while promoting healthy eating habits. Perfect for families who want to be mindful of portion sizes. Let’s explore these satisfying and nutritious dinners that everyone will love.
Zesty Lemon Herb Grilled Chicken

Zesty Lemon Herb Grilled Chicken is a delightful and healthy dinner option perfect for families looking to enjoy a flavorful meal without the excess calories. This dish combines the invigorating zing of lemon with a medley of herbs to create a juicy and aromatic chicken that’s both satisfying and nutritious. Ideal for a weeknight dinner, this recipe is simple to prepare and certain to please even the pickiest of eaters.
The key to this dish is the marinade, which infuses the chicken with vibrant flavors and guarantees that it remains tender and moist during grilling. The lemon juice not only enhances the taste but also acts as a tenderizer, while the herbs and spices add depth and complexity to the overall flavor profile. Whether you’re serving it with a side of vegetables or a light salad, this Zesty Lemon Herb Grilled Chicken is sure to become a family favorite.
Ingredients (serves 4-6):
- 4-6 boneless, skinless chicken breasts
- 1/4 cup fresh lemon juice
- 1/4 cup olive oil
- 2 cloves garlic, minced
- 1 tablespoon fresh thyme, chopped
- 1 tablespoon fresh rosemary, chopped
- 1 tablespoon fresh parsley, chopped
- 1 teaspoon salt
- 1/2 teaspoon black pepper
- Lemon slices for garnish (optional)
Cooking Instructions:
- Prepare the Marinade: In a medium-sized bowl, combine the lemon juice, olive oil, minced garlic, chopped thyme, rosemary, parsley, salt, and black pepper. Whisk the ingredients together until they’re well blended.
- Marinate the Chicken: Place the chicken breasts in a large resealable plastic bag or a shallow dish. Pour the marinade over the chicken, making sure each piece is well coated. Seal the bag or cover the dish with plastic wrap and refrigerate for at least 30 minutes, or up to 2 hours for more intense flavor.
- Preheat the Grill: Preheat your grill to medium-high heat. If using a charcoal grill, make sure the coals are evenly distributed and have a light coating of ash.
- Grill the Chicken: Remove the chicken from the marinade, letting any excess drip off. Place the chicken breasts on the grill and cook for 6-7 minutes on each side, or until the internal temperature reaches 165°F (75°C) and the chicken is no longer pink in the center.
- Rest and Serve: Remove the chicken from the grill and let it rest for about 5 minutes before serving. This allows the juices to redistribute, keeping the chicken moist.
- Garnish and Enjoy: Garnish with lemon slices if desired and serve with your choice of sides.
Extra Tips:
To guarantee even cooking, try to select chicken breasts that are similar in size and thickness. If some pieces are noticeably thicker, consider pounding them to an even thickness before marinating.
For added flavor, reserve a small amount of the marinade (before adding the chicken) to brush over the chicken during grilling. Be cautious not to brush with marinade that has been in contact with raw chicken to avoid cross-contamination.
Spaghetti Squash Primavera
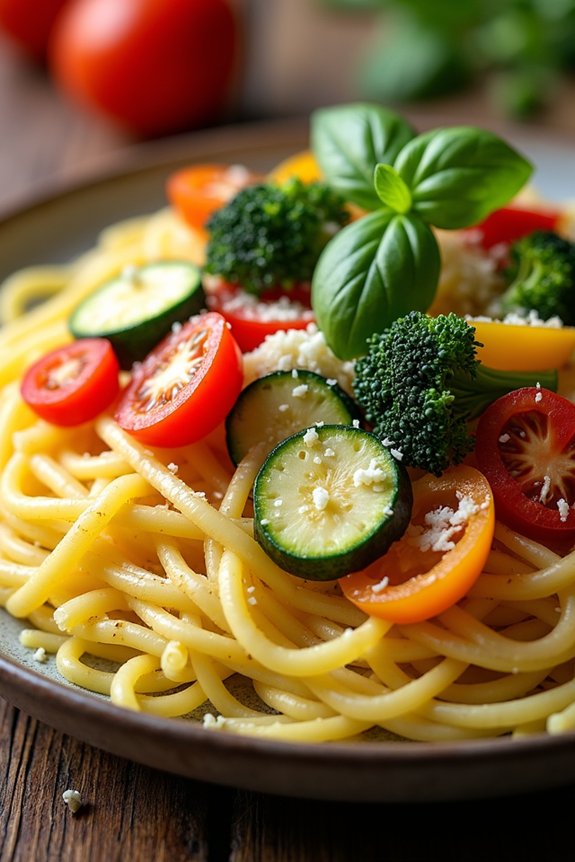
Spaghetti Squash Primavera is a delightful, low-calorie dinner option perfect for families looking to enjoy a healthy yet satisfying meal. This dish brings together the natural sweetness and unique texture of spaghetti squash with a vibrant medley of fresh vegetables. The result is a colorful and nutritious meal that’s as pleasing to the eye as it’s to the palate.
It’s an ideal way to incorporate more vegetables into your family’s diet without sacrificing flavor or comfort. This dish isn’t only easy to prepare but also versatile, allowing you to customize the vegetables based on your family’s preferences or seasonal availability.
Spaghetti Squash Primavera is a perfect choice for a weeknight dinner or a special occasion, as it’s filling yet light, leaving you satisfied without feeling weighed down. Plus, it’s a great way to introduce children to the joys of vegetables in a fun and engaging way.
Ingredients (serving size: 4-6 people):
- 1 large spaghetti squash
- 2 tablespoons olive oil
- Salt and pepper to taste
- 1 red bell pepper, sliced
- 1 yellow bell pepper, sliced
- 1 zucchini, sliced
- 1 cup cherry tomatoes, halved
- 1 cup broccoli florets
- 3 cloves garlic, minced
- 1 teaspoon Italian seasoning
- 1/4 cup Parmesan cheese, grated
- Fresh basil leaves, for garnish
Cooking Instructions:
- Prepare the Spaghetti Squash: Preheat your oven to 400°F (200°C). Cut the spaghetti squash in half lengthwise and scoop out the seeds. Drizzle the insides with 1 tablespoon of olive oil and season with salt and pepper. Place the halves cut-side down on a baking sheet lined with parchment paper. Roast in the oven for about 40-45 minutes or until the flesh is tender and can be easily scraped with a fork.
- Prepare the Vegetables: While the squash is roasting, heat the remaining tablespoon of olive oil in a large skillet over medium heat. Add the minced garlic and sauté for about 1 minute until fragrant. Add the sliced bell peppers, zucchini, broccoli florets, and Italian seasoning. Sauté the vegetables for about 5-7 minutes or until they’re tender-crisp.
- Add the Tomatoes: Add the halved cherry tomatoes to the skillet and cook for an additional 2-3 minutes until they start to soften. Season the vegetable mixture with salt and pepper to taste.
- Combine the Ingredients: Once the spaghetti squash is done roasting, remove it from the oven and let it cool slightly. Use a fork to scrape the flesh into spaghetti-like strands. Add the spaghetti squash strands to the skillet with the sautéed vegetables and gently toss to combine.
- Finish and Serve: Sprinkle the grated Parmesan cheese over the top and toss again until the cheese is melted and evenly distributed. Garnish with fresh basil leaves before serving.
Extra Tips:
When selecting a spaghetti squash, look for one that feels heavy for its size and has a firm, even skin. This will guarantee the best texture and flavor.
If you’re short on time, you can microwave the spaghetti squash instead of roasting it; simply pierce it with a fork several times and microwave on high for about 10-12 minutes until tender.
Feel free to add your family’s favorite vegetables or even some cooked chicken or shrimp for added protein. Finally, if you prefer a creamier texture, consider adding a splash of cream or a dollop of ricotta cheese when combining the squash and vegetables.
Cauliflower Rice Stir-Fry With Tofu
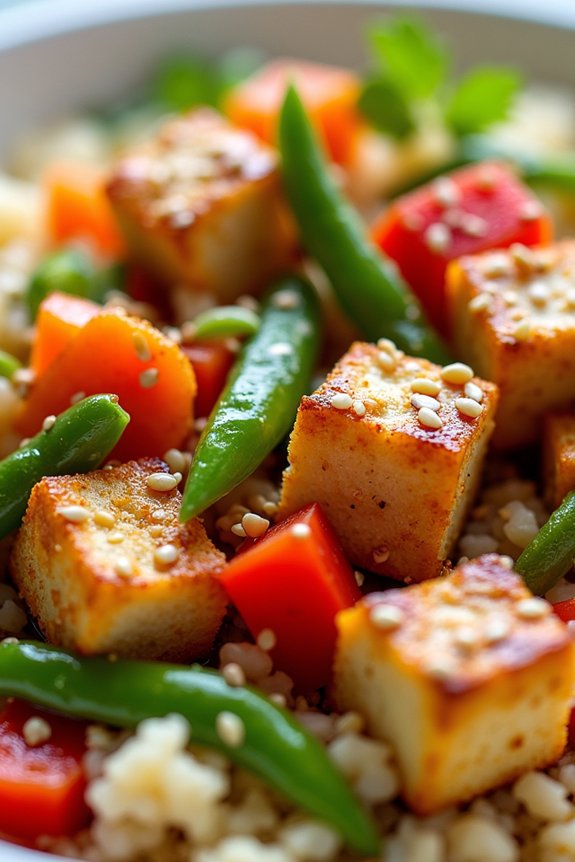
Cauliflower Rice Stir-Fry With Tofu is a delicious and healthy dinner option that’s perfect for families looking to enjoy a low-calorie meal without sacrificing flavor. This dish combines the versatility of cauliflower rice with the protein-rich benefits of tofu, creating a satisfying vegetarian entrée that’s both nutritious and filling.
The use of fresh vegetables and aromatic spices guarantees that this meal is vibrant and full of taste, making it a hit with both adults and children. This recipe isn’t only quick to prepare but also customizable to cater to your family’s taste preferences. You can easily incorporate a variety of vegetables depending on what’s in season or on hand in your kitchen.
Whether you’re a seasoned chef or a beginner in the kitchen, this Cauliflower Rice Stir-Fry With Tofu is simple to make and will quickly become a staple in your weekly meal rotation.
Ingredients (Serves 4-6):
- 1 medium head of cauliflower, grated into rice-sized pieces
- 1 block (14 oz) firm tofu, drained and pressed
- 2 tablespoons soy sauce
- 1 tablespoon sesame oil
- 2 tablespoons olive oil
- 1 red bell pepper, diced
- 1 cup snap peas, trimmed
- 1 carrot, julienned
- 3 cloves garlic, minced
- 1 tablespoon fresh ginger, grated
- 3 green onions, chopped
- 2 tablespoons low-sodium soy sauce
- 1 tablespoon rice vinegar
- Salt and pepper to taste
- Optional garnish: sesame seeds and chopped cilantro
Cooking Instructions:
- Prepare the Tofu: Cut the drained and pressed tofu into 1-inch cubes. In a large non-stick skillet, heat 1 tablespoon of olive oil over medium-high heat. Add the tofu cubes and cook until all sides are golden brown and crispy, about 8-10 minutes. Remove the tofu from the skillet and set aside.
- Cook the Vegetables: In the same skillet, add the remaining tablespoon of olive oil. Add the minced garlic and grated ginger, sautéing for about 1 minute until fragrant. Add the diced red bell pepper, snap peas, and julienned carrot. Stir-fry the vegetables for 4-5 minutes, or until they start to soften but still retain their crunch.
- Prepare the Cauliflower Rice: Push the vegetables to one side of the skillet and add the sesame oil to the other side. Add the grated cauliflower to the skillet, stirring occasionally. Cook for about 5-7 minutes, until the cauliflower is tender.
- Combine Ingredients: Add the crispy tofu back into the skillet with the vegetables and cauliflower rice. Pour in the low-sodium soy sauce and rice vinegar, stirring well to combine all ingredients. Cook for another 2-3 minutes to ascertain everything is heated through.
- Final Touches: Season the stir-fry with salt and pepper to taste. Sprinkle the chopped green onions over the top and stir to incorporate. Remove from heat and serve hot, garnished with sesame seeds and cilantro if desired.
Extra Tips:
For a more flavorful tofu, consider marinating it in soy sauce and a hint of garlic prior to cooking. If you prefer a spicier dish, add a pinch of red pepper flakes or a drizzle of sriracha sauce for extra heat.
To make the meal even more nutritious, feel free to add other vegetables like broccoli or mushrooms. Remember to press the tofu well to remove excess moisture, which helps achieve a crispy texture when cooked. Enjoy this delightful dish alongside a simple salad or as a standalone meal for a complete and satisfying dinner.
Mediterranean Chickpea Salad
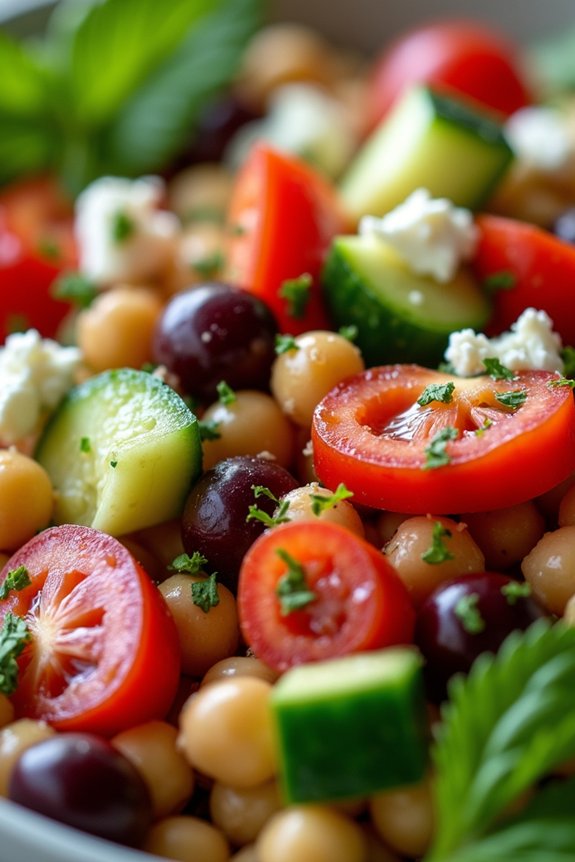
The Mediterranean Chickpea Salad is a vibrant and revitalizing dish that brings together the wholesome flavors of the Mediterranean region. This salad isn’t only nutritious but also incredibly satisfying, making it a perfect low-calorie dinner option for the entire family.
Packed with protein-rich chickpeas, fresh vegetables, and a zesty dressing, this dish is sure to be a hit at your dinner table. The combination of textures and flavors provides a delightful eating experience, making it a great way to enjoy a healthy meal without compromising on taste.
Ideal for a serving size of 4-6 people, this Mediterranean Chickpea Salad is easy to prepare and can be made ahead of time, making it convenient for busy weeknights. The ingredients are simple yet flavorful, and the preparation process is quick, allowing you to focus on enjoying time with your family.
Whether served as a main dish or a side, this salad is a versatile addition to any meal plan, and its vibrant colors are sure to brighten up any dining table.
Ingredients:
- 2 cans (15 oz each) chickpeas, drained and rinsed
- 1 cup cherry tomatoes, halved
- 1 cucumber, diced
- 1 red bell pepper, diced
- 1/2 red onion, finely chopped
- 1/2 cup kalamata olives, pitted and sliced
- 1/4 cup fresh parsley, chopped
- 1/4 cup feta cheese, crumbled
- 3 tbsp extra-virgin olive oil
- 2 tbsp lemon juice
- 1 clove garlic, minced
- 1 tsp dried oregano
- Salt and pepper, to taste
Cooking Instructions:
- Prepare the Vegetables: Begin by washing all the vegetables thoroughly. Halve the cherry tomatoes, dice the cucumber and red bell pepper, and finely chop the red onion. Place all the prepared vegetables into a large mixing bowl.
- Add the Chickpeas and Olives: Drain and rinse the canned chickpeas to remove excess sodium, then add them to the bowl along with the sliced kalamata olives.
- Mix in the Fresh Herbs and Cheese: Add the chopped fresh parsley and crumbled feta cheese to the bowl. These ingredients add a burst of flavor and creaminess to the salad.
- Prepare the Dressing: In a small bowl, whisk together the extra-virgin olive oil, lemon juice, minced garlic, and dried oregano. Season the dressing with salt and pepper to taste.
- Combine and Toss: Pour the prepared dressing over the salad ingredients in the large mixing bowl. Gently toss everything together until the salad is well coated with the dressing.
- Chill and Serve: For the best flavor, cover the salad and let it chill in the refrigerator for at least 30 minutes before serving. This allows the flavors to meld together beautifully.
Extra Tips:
For added convenience, you can prepare this salad a day in advance and store it in the refrigerator. This allows the flavors to deepen and makes it an excellent option for meal prep.
If you prefer a bit of heat, consider adding a pinch of red pepper flakes to the dressing. Additionally, feel free to experiment with other fresh herbs like mint or dill for a different twist.
Turkey and Spinach Stuffed Peppers
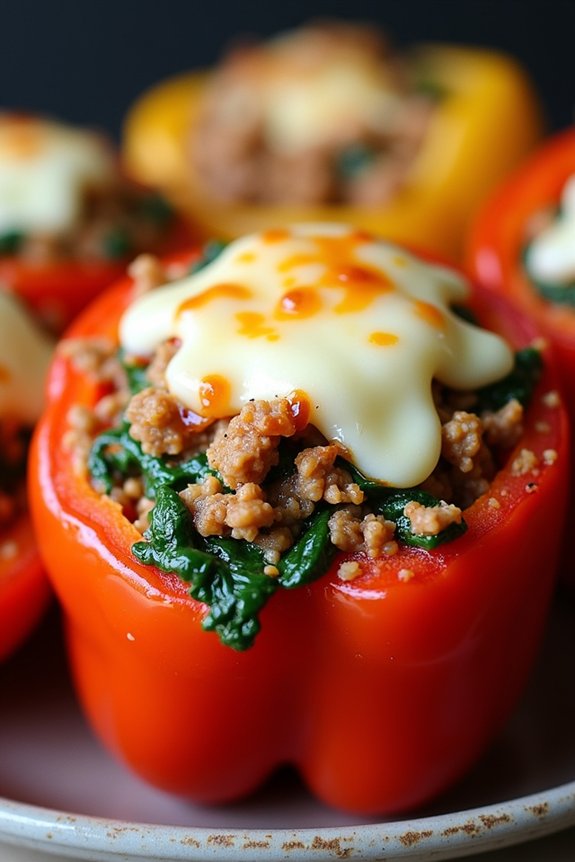
Turkey and Spinach Stuffed Peppers are a delightful and nutritious dinner option for families seeking low-calorie meals that don’t compromise on flavor. This dish combines the lean protein of ground turkey with the nutrient-rich benefits of spinach, all encased in colorful bell peppers. The combination isn’t only visually appealing but also packed with vitamins, minerals, and fiber, making it a balanced meal that will satisfy without the guilt.
Perfect for a family of 4-6, this recipe is easy to prepare and can be customized with your favorite spices and herbs to suit everyone’s taste buds. The peppers, once baked, become tender and savory, perfectly complementing the spiced turkey and spinach filling. Whether you’re looking for a healthy weeknight dinner or an impressive dish for a casual gathering, Turkey and Spinach Stuffed Peppers are sure to please.
Ingredients (Serves 4-6):
- 6 medium bell peppers (any color)
- 1 tablespoon olive oil
- 1 medium onion, finely chopped
- 3 cloves garlic, minced
- 1 pound lean ground turkey
- 1 teaspoon ground cumin
- 1 teaspoon smoked paprika
- 1/2 teaspoon salt
- 1/4 teaspoon black pepper
- 3 cups fresh spinach, chopped
- 1 cup cooked quinoa or brown rice
- 1 cup canned diced tomatoes, drained
- 1 cup shredded mozzarella cheese
- 1/4 cup fresh parsley, chopped
Cooking Instructions:
- Prepare the Peppers: Preheat your oven to 375°F (190°C). Cut the tops off the bell peppers and remove the seeds and membranes. Place the peppers cut-side up in a baking dish and set aside.
- Sauté Aromatics: In a large skillet, heat the olive oil over medium heat. Add the chopped onion and minced garlic, sautéing until the onion is translucent and fragrant, about 3-4 minutes.
- Cook the Turkey: Add the ground turkey to the skillet with the onion and garlic. Cook, breaking up the meat with a wooden spoon, until browned and cooked through, approximately 6-8 minutes.
- Season and Add Spinach: Stir in the cumin, smoked paprika, salt, and black pepper. Add the chopped spinach, stirring until wilted, about 2-3 minutes.
- Combine Filling Ingredients: Remove the skillet from heat and mix in the cooked quinoa (or brown rice) and drained diced tomatoes. Stir until all ingredients are well combined.
- Stuff the Peppers: Spoon the turkey and spinach mixture evenly into each prepared bell pepper. Top each stuffed pepper with shredded mozzarella cheese.
- Bake: Cover the baking dish with aluminum foil and bake in the preheated oven for 30 minutes. Remove the foil and bake for an additional 10-15 minutes, or until the peppers are tender and the cheese is melted and bubbly.
- Garnish and Serve: Once baked, remove the peppers from the oven and let them cool slightly. Sprinkle with fresh chopped parsley before serving.
Extra Tips:
For added flavor, consider using a mix of red, yellow, and green peppers, which not only looks appealing but also offers a variation in taste. If you prefer a bit of heat, add a pinch of red pepper flakes to the turkey mixture.
Leftovers can be stored in an airtight container in the refrigerator for up to 3 days and reheated in the oven. To make the dish even lower in calories, use reduced-fat cheese or skip the cheese topping altogether. Enjoy your healthy and delicious Turkey and Spinach Stuffed Peppers!
Grilled Shrimp Tacos With Avocado Salsa
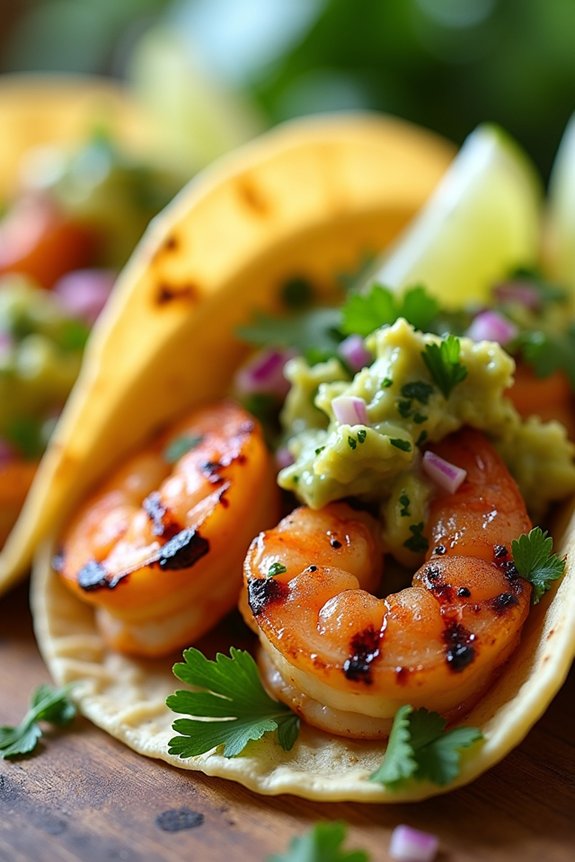
Grilled Shrimp Tacos with Avocado Salsa is a delightful and vibrant meal that combines the smoky flavor of grilled shrimp with the creamy texture of avocado salsa. This dish isn’t only low in calories but also packed with nutrients, making it a perfect choice for a healthy family dinner.
The combination of fresh ingredients and bold flavors will please both adults and children, offering a revitalizing twist to your regular taco night. This recipe is designed to serve 4-6 people, providing a generous portion of succulent shrimp wrapped in soft corn tortillas, topped with a zesty avocado salsa.
The preparation is simple and straightforward, allowing you to enjoy a gourmet meal at home without spending hours in the kitchen. Whether you’re looking for a quick weeknight dinner or a special weekend treat, these Grilled Shrimp Tacos with Avocado Salsa are sure to become a family favorite.
Ingredients:
- 1 1/2 pounds large shrimp, peeled and deveined
- 2 tablespoons olive oil
- 1 teaspoon chili powder
- 1 teaspoon ground cumin
- 1/2 teaspoon paprika
- Salt and pepper, to taste
- 12 corn tortillas
- 2 ripe avocados, diced
- 1 small red onion, finely chopped
- 1 jalapeño, seeded and minced
- 1/4 cup fresh cilantro, chopped
- 2 tablespoons lime juice
- Lime wedges, for serving
Cooking Instructions:
- Prepare the Shrimp: In a large bowl, combine olive oil, chili powder, ground cumin, paprika, salt, and pepper. Add the shrimp to the bowl, tossing them until they’re evenly coated with the spice mixture. Let them marinate for at least 15 minutes to enhance the flavor.
- Grill the Shrimp: Preheat your grill to medium-high heat. Thread the shrimp onto skewers for easy handling. Grill the shrimp for about 2-3 minutes on each side, or until they’re opaque and cooked through. Remove from the grill and set aside.
- Make the Avocado Salsa: In a mixing bowl, combine the diced avocados, chopped red onion, minced jalapeño, cilantro, and lime juice. Gently mix the ingredients until they’re well combined. Season with salt and pepper to taste.
- Warm the Tortillas: Heat the corn tortillas on a dry skillet over medium heat for about 30 seconds on each side, or until they’re warm and pliable. Wrap them in a clean kitchen towel to keep them warm.
- Assemble the Tacos: Place a few grilled shrimp onto each warm tortilla. Top with a generous spoonful of avocado salsa. Serve the tacos with lime wedges on the side for an extra burst of citrus flavor.
Extra Tips:
For the best results, use fresh, high-quality shrimp and avocados. If you’re using wooden skewers for grilling, soak them in water for at least 30 minutes beforehand to prevent them from burning.
Feel free to customize the heat level of the salsa by adjusting the amount of jalapeño or leaving it out entirely for a milder version. If you prefer, you can also grill the tortillas directly on the grill for a slightly charred flavor.
Enjoy your Grilled Shrimp Tacos with Avocado Salsa with a side of Mexican rice or a fresh salad for a complete meal.
Baked Salmon With Asparagus
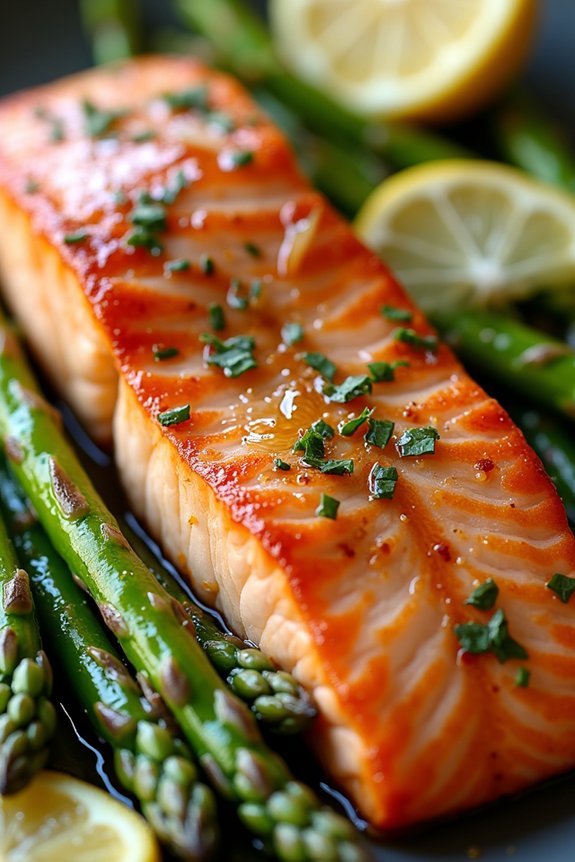
Baked Salmon with Asparagus is a delightful low-calorie dinner option perfect for families looking to enjoy a healthy and delicious meal together. This dish combines the rich, savory flavors of salmon with the fresh, crisp texture of asparagus, creating a harmonious balance that’s both satisfying and nutritious.
Not only is this meal visually appealing with its vibrant colors, but it’s also packed with essential nutrients, such as omega-3 fatty acids from the salmon and vitamins A, C, and K from the asparagus.
Preparing Baked Salmon with Asparagus is straightforward and requires minimal ingredients, making it an excellent choice for busy weeknights. The salmon is seasoned to perfection and baked until tender and flaky, while the asparagus is roasted to maintain a slight crunch, complementing the delicate texture of the fish.
This recipe serves 4-6 people, guaranteeing you have enough to feed the entire family or enjoy leftovers the next day.
Ingredients (serving size: 4-6 people):
- 4-6 salmon fillets (about 6-8 ounces each)
- 1 pound of fresh asparagus, trimmed
- 2 tablespoons olive oil
- 2 tablespoons lemon juice
- 3 cloves garlic, minced
- 1 teaspoon salt
- 1/2 teaspoon black pepper
- 1 teaspoon dried dill (optional)
- Lemon slices (for garnish)
Cooking Instructions:
- Preheat the Oven: Begin by preheating your oven to 400°F (200°C). This will make sure that it’s hot enough to bake the salmon evenly and roast the asparagus to perfection.
- Prepare the Baking Sheet: Line a large baking sheet with parchment paper or aluminum foil. This step makes for easy cleanup and prevents the salmon and asparagus from sticking to the pan.
- Arrange the Salmon and Asparagus: Place the salmon fillets on the baking sheet, skin-side down if the skin is on. Arrange the asparagus spears around the salmon, ensuring they’re evenly distributed for even cooking.
- Season the Ingredients: In a small bowl, mix together the olive oil, lemon juice, minced garlic, salt, black pepper, and dried dill (if using). Drizzle this mixture over the salmon fillets and asparagus, ensuring each piece is well coated.
- Bake the Dish: Place the baking sheet in the preheated oven and bake for 12-15 minutes, or until the salmon is cooked through and flakes easily with a fork, and the asparagus is tender yet still crisp.
- Serve and Garnish: Remove the baking sheet from the oven and transfer the salmon and asparagus to a serving platter. Garnish with lemon slices for an extra burst of citrus flavor. Serve immediately.
Extra Tips:
For the best results when cooking Baked Salmon with Asparagus, make sure to select fresh, high-quality ingredients. Fresh salmon fillets will have vibrant pink flesh and a mild scent, while fresh asparagus should be firm with bright green stalks.
If you prefer a bit more flavor, you can add a pinch of red pepper flakes or a sprinkle of Parmesan cheese before baking. Additionally, if you have leftovers, store them in an airtight container in the refrigerator for up to two days. Reheat gently to avoid overcooking the salmon.
Quinoa and Black Bean Chili
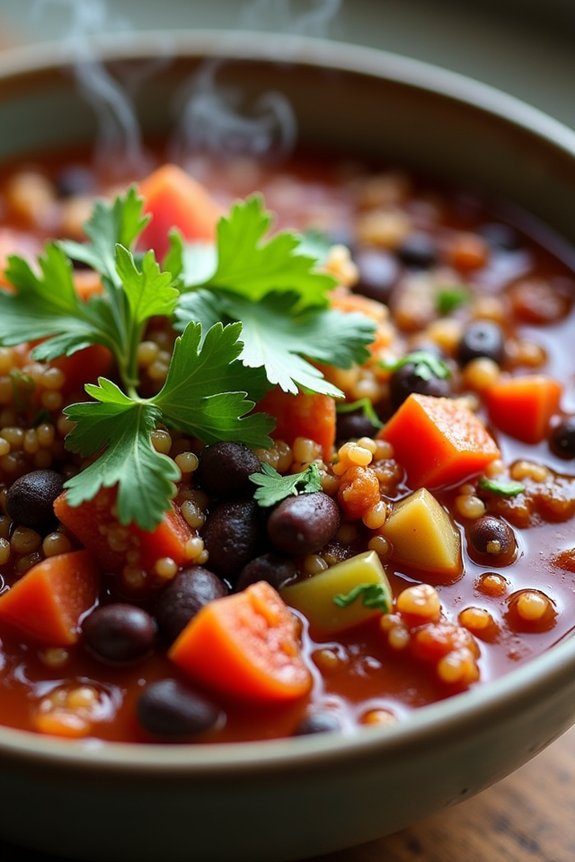
Quinoa and Black Bean Chili is a hearty and nutritious meal that’s perfect for a low-calorie family dinner. This delightful dish is packed with protein and fiber, thanks to the combination of quinoa and black beans, making it filling and satisfying without being heavy. The rich flavors of spices and vegetables come together in a delicious harmony that’s certain to please both kids and adults alike.
Whether you’re trying to maintain a healthy diet or simply looking for a delicious new recipe to try, this chili is an excellent choice.
One of the best things about this Quinoa and Black Bean Chili is its adaptability and ease of preparation. It requires minimal ingredients and is simple to make, yet offers a depth of flavor that tastes like it’s been simmering all day. Ideal for busy weeknights, this dish can be prepared in under an hour, and it’s versatile enough to be customized with your family’s favorite toppings.
Plus, it’s a one-pot meal, which means less cleanup and more time to enjoy with your family.
Ingredients (serving size: 4-6 people):
- 1 cup quinoa, rinsed
- 1 tablespoon olive oil
- 1 medium onion, diced
- 3 cloves garlic, minced
- 1 red bell pepper, diced
- 1 green bell pepper, diced
- 1 jalapeño, seeded and diced (optional for heat)
- 1 can (15 oz) black beans, drained and rinsed
- 1 can (15 oz) kidney beans, drained and rinsed
- 1 can (28 oz) diced tomatoes
- 2 tablespoons tomato paste
- 2 cups vegetable broth
- 1 tablespoon chili powder
- 2 teaspoons cumin
- 1 teaspoon smoked paprika
- Salt and pepper to taste
- Juice of 1 lime
- Fresh cilantro, chopped (for garnish)
Cooking Instructions:
- Prepare Quinoa: Rinse the quinoa under cold water in a fine mesh sieve. In a medium saucepan, bring 2 cups of water to a boil. Add the rinsed quinoa, cover, and reduce the heat to low. Cook for about 15 minutes, or until the water is absorbed and the quinoa is fluffy. Set aside.
- Sauté Vegetables: In a large pot, heat the olive oil over medium heat. Add the diced onion and sauté for about 5 minutes, or until the onion becomes translucent. Add the minced garlic, red and green bell peppers, and jalapeño. Cook for an additional 3-4 minutes, stirring occasionally, until the peppers begin to soften.
- Add Spices and Beans: Stir in the chili powder, cumin, and smoked paprika, cooking for about 1 minute until the spices are fragrant. Add the black beans, kidney beans, diced tomatoes (with juice), and tomato paste. Stir to combine.
- Simmer the Chili: Pour in the vegetable broth and bring the mixture to a gentle boil. Once boiling, reduce the heat to low, cover the pot, and let it simmer for about 20-25 minutes, stirring occasionally. This allows the flavors to meld together beautifully.
- Finish the Dish: After the chili has thickened, stir in the cooked quinoa and lime juice. Season with salt and pepper to taste. Simmer for an additional 5 minutes to guarantee everything is heated through.
- Serve and Garnish: Serve the Quinoa and Black Bean Chili hot, garnished with fresh cilantro. You can also add toppings like avocado slices, shredded cheese, or a dollop of sour cream if desired.
Extra Tips:
For an added depth of flavor, you can roast the bell peppers before adding them to the chili. This can be done by placing them under a broiler or over an open flame until the skins are charred. Once charred, place them in a sealed container for a few minutes to steam, then peel off the skins and chop.
Additionally, if you prefer a spicier chili, feel free to leave the seeds in the jalapeño or add a pinch of cayenne pepper. This recipe can also be made in advance and stored in the refrigerator for up to three days, making it a great option for meal prepping.
Thai Chicken Lettuce Wraps
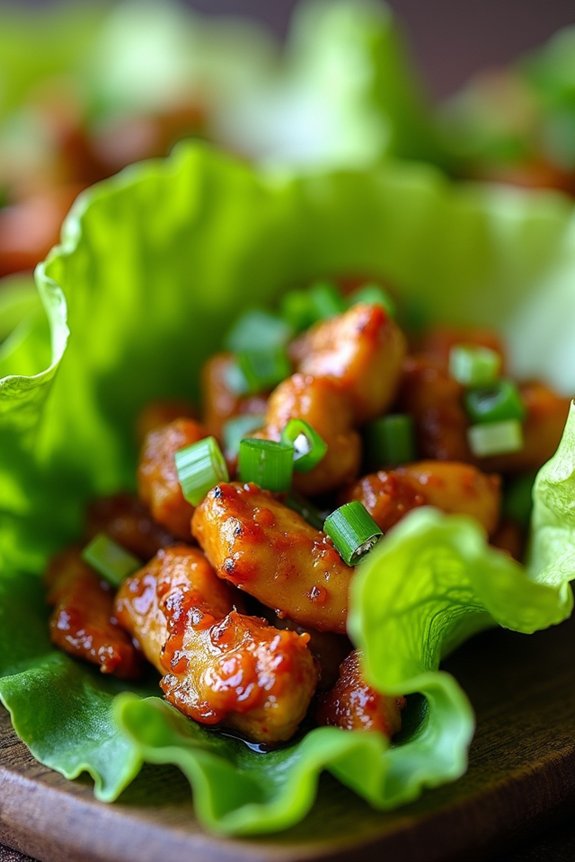
Thai Chicken Lettuce Wraps are a delightful, low-calorie meal option that packs a punch of flavor without compromising on health. Perfect for family dinners, these wraps are a great way to introduce fresh, vibrant ingredients into your weekly meal rotation.
The combination of tender chicken, aromatic herbs, and a savory sauce wrapped in crisp lettuce leaves makes for a satisfying and invigorating dish that everyone will enjoy. Not only are they easy to prepare, but they also allow for customization, making them a versatile choice for different taste preferences and dietary needs.
This recipe is designed to serve 4-6 people, making it ideal for family dinners or entertaining guests. The key to these wraps lies in balancing the flavors and textures. With the right blend of lean protein, fresh vegetables, and zesty sauce, Thai Chicken Lettuce Wraps offer a deliciously wholesome meal that’s both light and filling.
Whether you’re looking to impress with a new dish or simply want to enjoy a quick, healthy dinner with your loved ones, these wraps are sure to become a household favorite.
Ingredients:
- 1 1/2 pounds ground chicken
- 2 tablespoons vegetable oil
- 1 cup diced onion
- 2 cloves garlic, minced
- 1 tablespoon fresh ginger, minced
- 1/4 cup hoisin sauce
- 2 tablespoons soy sauce
- 1 tablespoon rice vinegar
- 1 tablespoon Sriracha (optional, for heat)
- 1 can (8 oz) water chestnuts, drained and chopped
- 2 green onions, thinly sliced
- 1/4 cup chopped fresh cilantro
- 1 head of butter lettuce or iceberg lettuce, leaves separated
- Salt and pepper to taste
Cooking Instructions:
- Prepare Ingredients: Begin by gathering all your ingredients. Rinse the lettuce leaves and pat them dry with a towel. Mince the garlic and ginger, chop the water chestnuts, and slice the green onions and cilantro.
- Cook the Chicken: Heat the vegetable oil in a large skillet over medium-high heat. Add the diced onions and cook for about 3 minutes until they begin to soften. Next, add the minced garlic and ginger, cooking for another minute until fragrant.
- Add the Chicken: Introduce the ground chicken to the skillet. Break it up with a wooden spoon and cook until it’s browned and cooked through, about 5-7 minutes. Season with salt and pepper to taste.
- Incorporate Sauces: Pour in the hoisin sauce, soy sauce, rice vinegar, and Sriracha (if using). Stir well to combine all the flavors. Let the mixture simmer for about 3 minutes, allowing the sauce to thicken slightly.
- Add Vegetables and Herbs: Stir in the chopped water chestnuts, green onions, and cilantro. Mix thoroughly and cook for an additional 2 minutes, making sure everything is evenly coated with the sauce.
- Serve: Remove the skillet from heat. Spoon the chicken mixture into the center of each lettuce leaf. Serve immediately, allowing each person to wrap their own lettuce leaf around the filling.
Extra Tips:
When preparing Thai Chicken Lettuce Wraps, consider using ground turkey or tofu as a substitute for chicken to cater to different dietary preferences.
Confirm the lettuce leaves are crisp and fresh for the best texture. You can prepare the filling ahead of time and reheat it when needed, making this dish convenient for busy schedules.
For an added crunch, sprinkle some crushed peanuts on top before serving. Adjust the level of spice according to your family’s taste by varying the amount of Sriracha or by adding a dash of chili flakes.
Eggplant Parmesan With Fresh Basil
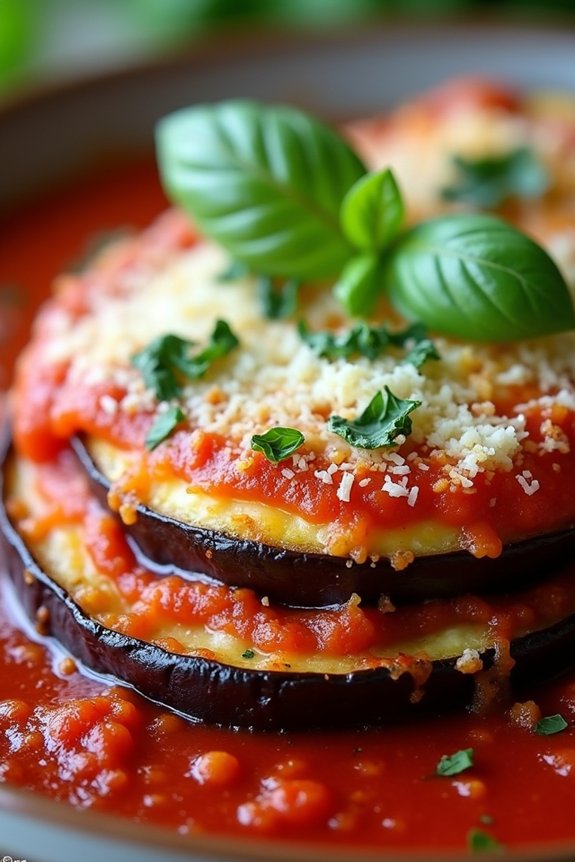
Eggplant Parmesan with Fresh Basil is a delightful and satisfying low-calorie dinner option that the whole family can enjoy. This dish takes a healthy twist on the classic Italian favorite by baking instead of frying the eggplant, and using fresh, flavorful ingredients to enhance the taste without adding extra calories. The combination of tender eggplant slices, savory marinara sauce, melted cheese, and aromatic basil creates a delicious meal that’s both nutritious and comforting.
Perfect for a family meal, this Eggplant Parmesan can be prepared in under an hour, making it a convenient choice for busy weeknights. It’s a great way to introduce more vegetables into your diet while still indulging in a dish that feels rich and hearty. The use of fresh basil not only adds a burst of flavor but also provides a beautiful garnish that makes the dish look as good as it tastes.
Here’s how you can make this delicious meal for 4 to 6 people:
Ingredients:
- 2 large eggplants, sliced into 1/4-inch rounds
- 1 teaspoon salt
- 2 cups marinara sauce
- 2 cups shredded mozzarella cheese
- 1 cup grated Parmesan cheese
- 1 cup all-purpose flour
- 4 large eggs, beaten
- 2 cups panko breadcrumbs
- 1/4 cup olive oil
- 1/4 cup fresh basil leaves, chiffonade
- Cooking spray
Cooking Instructions:
- Prepare the Eggplant: Start by placing the eggplant slices on a large baking sheet. Sprinkle evenly with salt and let them sit for about 20 minutes. This will help draw out excess moisture and reduce bitterness. Afterward, rinse the slices under cold water and pat dry with paper towels.
- Preheat the Oven: Preheat your oven to 375°F (190°C). Line two baking sheets with parchment paper and lightly coat with cooking spray.
- Coat the Eggplant: Set up a breading station with three shallow dishes: one with flour, one with beaten eggs, and one with panko breadcrumbs. Dredge each eggplant slice first in flour, then dip in the egg, and finally coat with breadcrumbs, pressing gently to adhere.
- Bake the Eggplant: Arrange the breaded eggplant slices on the prepared baking sheets and drizzle with olive oil. Bake in the preheated oven for 25-30 minutes, flipping halfway through, until they’re golden brown and crispy.
- Assemble the Dish: In a large baking dish, spread a thin layer of marinara sauce on the bottom. Layer half of the baked eggplant slices over the sauce. Spoon half of the remaining marinara sauce over the eggplant, and sprinkle with half of the mozzarella and Parmesan cheese. Repeat the layering with the remaining ingredients.
- Bake the Parmesan: Cover the dish with aluminum foil and bake for 20 minutes. Remove the foil and bake for an additional 10 minutes, or until the cheese is bubbly and golden brown.
- Garnish and Serve: Remove from the oven and let it cool for a few minutes. Garnish with fresh basil leaves before serving.
Extra Tips:
To enhance the flavor even further, consider adding a pinch of red pepper flakes to the marinara sauce for a subtle kick. If you prefer a gluten-free option, substitute the all-purpose flour and panko breadcrumbs with gluten-free versions.
Additionally, using a mandoline slicer can help achieve evenly sliced eggplant, ensuring uniform cooking. Make sure to watch the eggplant closely while baking to prevent over-browning. Enjoy your Eggplant Parmesan with a side salad or whole-grain pasta for a complete low-calorie family dinner.
Vegetable and Lentil Soup
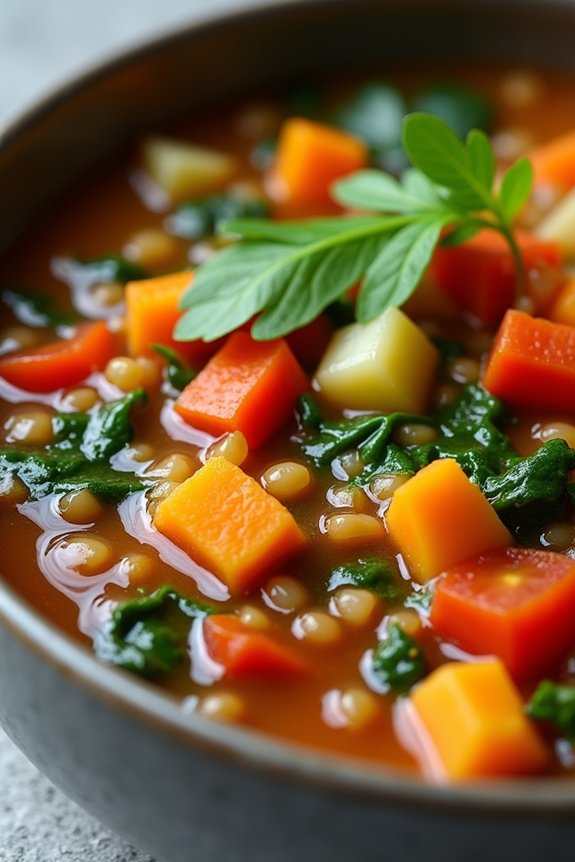
Vegetable and Lentil Soup is a hearty and nutritious option for a low-calorie dinner that the whole family can enjoy. This soup is packed with a variety of colorful vegetables and protein-rich lentils, offering a satisfying meal that’s both delicious and healthy. The combination of ingredients provides a wholesome balance of flavors and textures, making it not only a great choice for dinner but also an excellent way to incorporate more plant-based meals into your diet.
The soup is easy to prepare and can be customized to include your family’s favorite vegetables, making it a versatile dish that can be enjoyed year-round. Whether you’re trying to cut calories or simply looking for a comforting meal, this Vegetable and Lentil Soup is a wonderful addition to your dinner repertoire.
It’s perfect for those busy weeknights when you need a quick yet nutritious meal that doesn’t require much effort. By using a variety of fresh vegetables and spices, you can create a delicious soup that’s full of flavor without the extra calories. Plus, since this recipe makes enough for 4-6 servings, it’s ideal for serving the whole family or having leftovers for the next day.
Ingredients (serves 4-6):
- 2 tablespoons olive oil
- 1 large onion, chopped
- 3 cloves garlic, minced
- 2 carrots, diced
- 2 celery stalks, sliced
- 1 red bell pepper, chopped
- 1 zucchini, sliced
- 1 cup dried lentils (brown or green), rinsed
- 8 cups vegetable broth
- 1 can (14.5 oz) diced tomatoes
- 1 teaspoon dried thyme
- 1 teaspoon ground cumin
- 1/2 teaspoon smoked paprika
- Salt and pepper to taste
- 2 cups fresh spinach leaves
- Juice of 1 lemon
- Fresh parsley, chopped (for garnish)
Cooking Instructions:
- Prepare the Vegetables: Begin by chopping the onion, garlic, carrots, celery, red bell pepper, and zucchini. This will guarantee that all your ingredients are ready to go once you start cooking.
- Sauté the Aromatics: In a large soup pot, heat the olive oil over medium heat. Add the chopped onion and garlic, sautéing them until the onion becomes translucent, about 3-4 minutes.
- Add the Vegetables: Stir in the diced carrots, celery, red bell pepper, and zucchini. Cook for about 5 minutes, allowing the vegetables to soften slightly.
- Incorporate the Lentils and Broth: Add the rinsed lentils, vegetable broth, and diced tomatoes to the pot. Stir in the dried thyme, ground cumin, smoked paprika, salt, and pepper. Bring the mixture to a boil.
- Simmer the Soup: Once boiling, reduce the heat to low, cover the pot, and let the soup simmer for about 25-30 minutes, or until the lentils are tender.
- Add the Spinach and Lemon Juice: Stir in the fresh spinach leaves and lemon juice. Cook for an additional 5 minutes until the spinach is wilted.
- Finish and Serve: Taste the soup and adjust the seasoning if necessary. Ladle the soup into bowls and garnish with fresh parsley. Serve hot.
Extra Tips:
When cooking Vegetable and Lentil Soup, feel free to customize the vegetables based on what you have on hand or what’s in season. Other great additions could include sweet potatoes, kale, or green beans.
If you prefer a thicker soup, you can blend a portion of it before adding the spinach. For extra flavor, consider adding a bay leaf during the simmering process and removing it before serving.
Additionally, to save time on busy evenings, you can prepare the vegetables ahead of time and store them in the refrigerator until you’re ready to cook. This soup is also great for meal prep, as it tastes even better the next day once the flavors have had time to meld.
Zucchini Noodles With Pesto
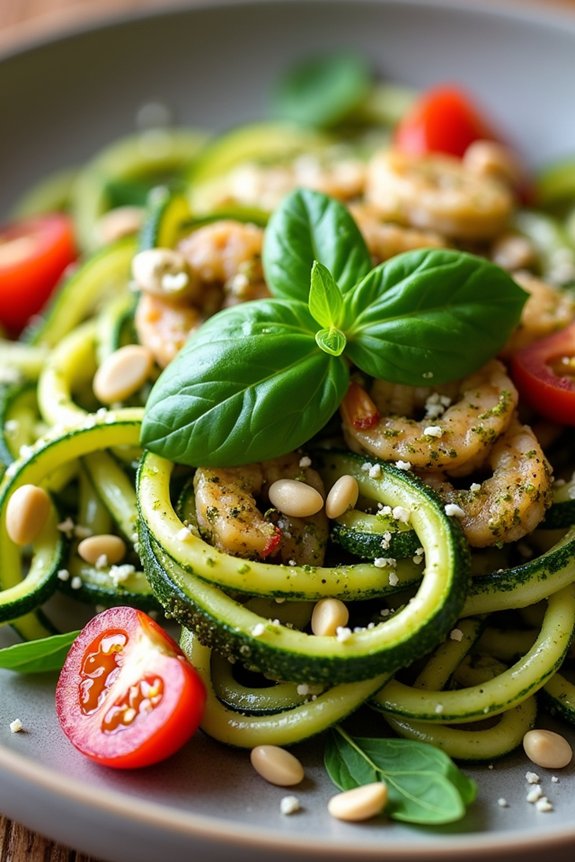
Zucchini Noodles With Pesto is a delightful and low-calorie dish that’s perfect for families looking to enjoy a healthy dinner together. This dish features fresh zucchini that’s spiralized into noodles, offering a nutritious alternative to traditional pasta. The zucchini noodles are then tossed with a vibrant and aromatic pesto sauce made from fresh basil, pine nuts, garlic, Parmesan cheese, and extra virgin olive oil. This combination not only provides a burst of flavor but also guarantees the dish remains light and satisfying.
Ideal for families of 4-6 people, Zucchini Noodles With Pesto isn’t only easy to prepare but also quick, making it a great choice for busy weeknights. The recipe is versatile, allowing you to add your choice of protein such as grilled chicken or shrimp for a more filling meal. Whether you’re catering to vegetarians or simply looking to cut down on calories without sacrificing taste, this dish is sure to be a hit at the dinner table.
Ingredients (for 4-6 servings):
- 4 medium zucchini
- 2 cups fresh basil leaves
- 1/2 cup grated Parmesan cheese
- 1/3 cup pine nuts
- 2 cloves garlic, minced
- 1/2 cup extra virgin olive oil
- Salt and pepper to taste
- Lemon juice (optional)
- Optional: Grilled chicken, shrimp, or cherry tomatoes for garnish
Cooking Instructions:
- Prepare the Zucchini Noodles: Begin by washing the zucchini thoroughly. Using a spiralizer, cut the zucchini into noodle-like shapes. If you don’t have a spiralizer, you can use a vegetable peeler to make thin strips. Set the zucchini noodles aside.
- Make the Pesto Sauce: In a food processor, combine the basil leaves, Parmesan cheese, pine nuts, and minced garlic. Pulse until the mixture is finely chopped. Gradually add the olive oil while continuing to process until the pesto reaches a smooth consistency. Season with salt and pepper to taste. Add a splash of lemon juice if desired for extra brightness.
- Cook the Noodles: In a large skillet, heat a small amount of olive oil over medium heat. Add the zucchini noodles and cook for 3-4 minutes, stirring occasionally, until they’re just tender but not mushy. Be careful not to overcook them, as they’ll release too much water.
- Combine and Serve: Remove the skillet from the heat and add the pesto sauce to the zucchini noodles, tossing gently to coat them evenly. If desired, add grilled chicken, shrimp, or cherry tomatoes for added flavor and protein. Serve immediately.
Extra Tips:
When preparing Zucchini Noodles With Pesto, it’s essential to recognize that zucchini can release a lot of moisture when cooked. To prevent the dish from becoming too watery, you can sprinkle the zucchini noodles with a little salt after spiralizing and let them sit for a few minutes. This will draw out excess moisture, which can then be dabbed away with a paper towel before cooking.
Additionally, if you prefer your pesto to have more texture, you can toast the pine nuts lightly before adding them to the food processor for a richer flavor.
Moroccan Spiced Roasted Vegetables
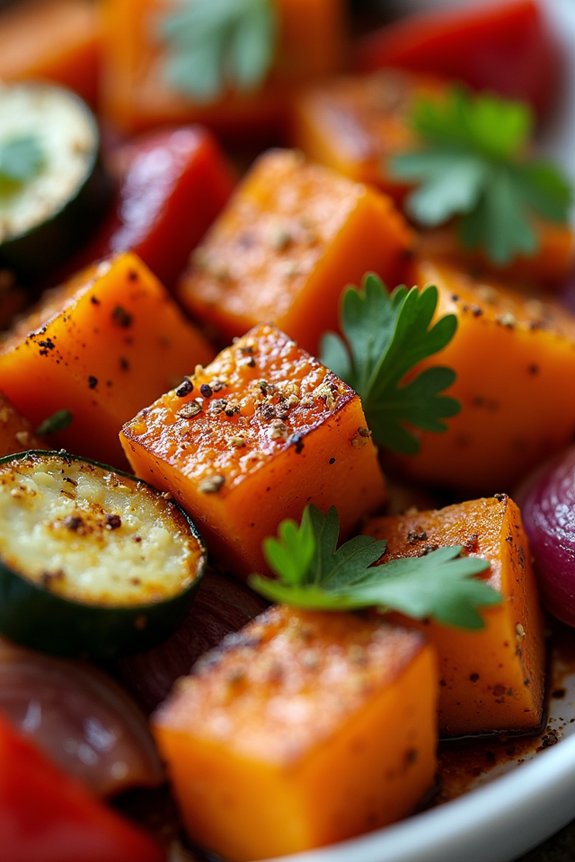
Moroccan Spiced Roasted Vegetables is a flavorful and healthy dish that’s perfect for families looking to enjoy a low-calorie dinner. This dish combines a variety of seasonal vegetables with aromatic Moroccan spices, offering a delicious and nutritious meal that’s certain to satisfy everyone at the table.
The roasting process brings out the natural sweetness and deep flavor of the vegetables, transforming them into a mouth-watering treat that’s both comforting and exotic.
This recipe isn’t only easy to prepare but also versatile, allowing you to customize the vegetables according to your family’s preferences or what’s available in your kitchen. The blend of spices such as cumin, coriander, and cinnamon gives these vegetables a distinctive and irresistible taste.
Served as a main course or a side dish, Moroccan Spiced Roasted Vegetables is an excellent addition to any meal plan, keeping it both healthy and exciting for the entire family.
Ingredients for 4-6 people:
- 2 large carrots, peeled and sliced
- 1 large sweet potato, peeled and diced
- 1 large red bell pepper, chopped
- 1 zucchini, sliced
- 1 red onion, chopped
- 3 tablespoons olive oil
- 1 teaspoon ground cumin
- 1 teaspoon ground coriander
- 1/2 teaspoon ground cinnamon
- 1/2 teaspoon smoked paprika
- 1/4 teaspoon cayenne pepper
- Salt and pepper to taste
- 1/4 cup fresh cilantro, chopped (for garnish)
- 1 lemon, cut into wedges (for serving)
Cooking Instructions:
- Preheat the Oven: Begin by preheating your oven to 400°F (200°C). This guarantees that the oven is at the right temperature to roast the vegetables evenly.
- Prepare the Vegetables: Wash and dry all the vegetables. Peel the carrots and sweet potatoes, then slice the carrots and dice the sweet potatoes. Chop the red bell pepper and red onion, and slice the zucchini. Confirm all pieces are of similar size to allow even cooking.
- Mix the Spices: In a small bowl, combine the ground cumin, ground coriander, ground cinnamon, smoked paprika, cayenne pepper, salt, and pepper. This spice mix will be used to coat the vegetables.
- Coat the Vegetables: Place the prepared vegetables in a large mixing bowl. Drizzle with olive oil, then sprinkle the spice mix over the vegetables. Toss everything together until the vegetables are evenly coated with the oil and spices.
- Roast the Vegetables: Spread the spiced vegetables in a single layer on a large baking sheet lined with parchment paper. Place the baking sheet in the preheated oven and roast for 25-30 minutes, or until the vegetables are tender and slightly caramelized, stirring halfway through the cooking time.
- Garnish and Serve: Once roasted, remove the vegetables from the oven. Transfer them to a serving platter and garnish with freshly chopped cilantro. Serve with lemon wedges on the side for an extra burst of freshness.
Extra Tips:
To verify your Moroccan Spiced Roasted Vegetables are perfectly cooked, make sure not to overcrowd the baking sheet; this allows the hot air to circulate properly, resulting in evenly roasted vegetables.
You can also experiment with adding other vegetables you have on hand, such as cauliflower or eggplant, to add more variety to the dish. If you prefer a little extra sweetness, consider adding a handful of raisins or dried apricots halfway through the roasting process.
Chicken and Broccoli Brown Rice Casserole

Chicken and Broccoli Brown Rice Casserole is a wholesome, nutritious meal that’s perfect for families looking to enjoy a healthy, low-calorie dinner. This dish combines lean protein, whole grains, and fresh vegetables into a comforting casserole that’s both satisfying and easy to prepare. The creamy texture, achieved without heavy creams or excessive cheese, makes it a delightful option for those watching their calorie intake.
It’s a fantastic way to incorporate more vegetables into your family’s diet while still providing a hearty meal that everyone will love. This casserole takes advantage of simple ingredients that are likely already in your pantry or fridge, making it a convenient option for busy weeknights. The combination of tender chicken, vibrant broccoli, and nutty brown rice comes together with a light sauce, seasoned to perfection.
As it bakes, the casserole develops a golden, bubbly top that’s irresistible. Not only is this dish nutritious, but it also freezes well, making it a great option for meal prep. Let’s jump into the ingredients and steps to make this delicious, family-friendly dinner.
Ingredients (Serves 4-6):
- 1 1/2 pounds boneless, skinless chicken breasts, cubed
- 2 cups broccoli florets
- 1 cup brown rice, uncooked
- 1 1/2 cups low-sodium chicken broth
- 1 cup non-fat Greek yogurt
- 1 cup shredded reduced-fat cheddar cheese
- 1 medium onion, chopped
- 2 cloves garlic, minced
- 1 tablespoon olive oil
- 1 teaspoon salt
- 1/2 teaspoon black pepper
- 1/2 teaspoon dried thyme
- 1/4 teaspoon red pepper flakes (optional)
Cooking Instructions:
- Preheat and Prep: Preheat your oven to 375°F (190°C). Lightly grease a 9×13 inch baking dish with cooking spray or a small amount of olive oil.
- Cook the Rice: In a medium saucepan, bring the chicken broth to a boil. Add the brown rice, reduce the heat to low, cover, and simmer for about 30-35 minutes, or until the rice is tender and the liquid is absorbed. Set aside.
- Sauté the Chicken: In a large skillet, heat olive oil over medium heat. Add the cubed chicken and season with salt, pepper, and thyme. Cook the chicken for 6-8 minutes, stirring occasionally, until it’s cooked through and lightly browned. Remove the chicken from the skillet and set aside.
- Cook the Vegetables: In the same skillet, add the chopped onion and minced garlic. Sauté for 2-3 minutes until the onion is translucent. Add broccoli florets and cook for an additional 3-4 minutes, or until tender-crisp.
- Combine Ingredients: In a large mixing bowl, combine the cooked rice, chicken, sautéed vegetables, Greek yogurt, and half of the shredded cheese. Mix well until all ingredients are evenly distributed.
- Transfer to Baking Dish: Pour the mixture into the prepared baking dish, spreading it out evenly. Sprinkle the remaining cheese on top.
- Bake the Casserole: Place the casserole in the preheated oven and bake for 20-25 minutes, or until the cheese is melted and bubbly and the top is golden brown.
- Serve: Remove the casserole from the oven and let it rest for a few minutes before serving. Enjoy this hearty and healthy meal with your family.
Extra Tips:
To enhance the flavor profile, consider adding a dash of nutmeg or a splash of lemon juice to the mixture before baking. If you have leftover rotisserie chicken, you can use it in place of the raw chicken breasts to save time.
For a vegetarian version, swap the chicken with chickpeas or tofu. Always verify that the casserole is fully baked and golden on top for the best texture and taste. Finally, this dish can be stored in the fridge for up to three days or frozen for up to three months, making it an excellent option for batch cooking.