

Spring has sprung, and it’s time to embrace the season with fresh and healthy dinner ideas. Picture lemon herb grilled chicken sizzling on the grill, paired with crisp asparagus. Think about a zesty quinoa salad with fresh mint that delights your taste buds. These dishes are perfect for busy weeknights or family gatherings. Each meal offers a burst of flavor, leaving you excited to explore more of the menu.
Lemon Herb Grilled Chicken With Asparagus
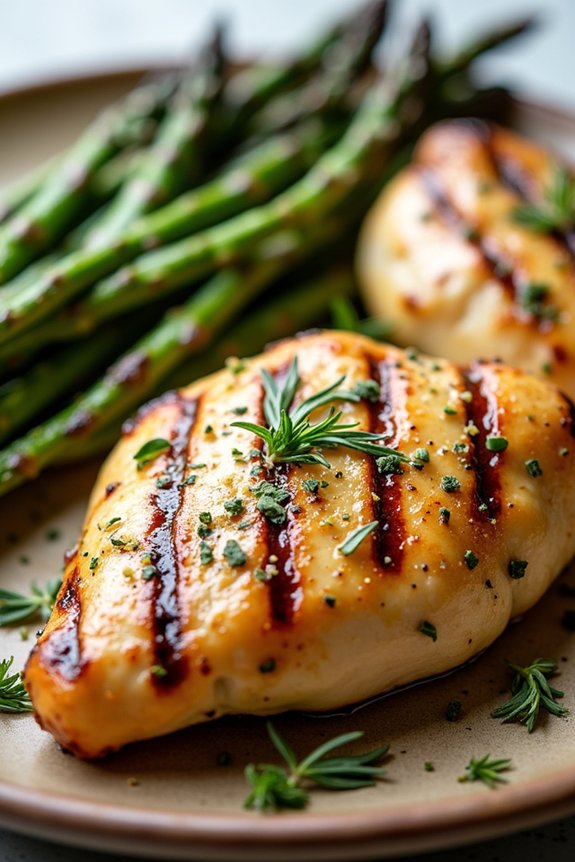
Lemon Herb Grilled Chicken With Asparagus is a delightful dish that perfectly embodies the freshness of spring. This recipe combines juicy grilled chicken breast with the crisp and tender texture of asparagus, all brought together with a zesty lemon herb marinade. It’s a vibrant and healthy option for family dinners, offering a delicious way to enjoy seasonal produce.
The bright flavors of lemon and herbs add a revitalizing touch that complements the natural sweetness of asparagus and the savory taste of grilled chicken. This dish isn’t only nutritious but also simple to prepare, making it a great choice for busy weeknights or weekend gatherings.
The lemon herb marinade infuses the chicken with flavor while keeping it moist and tender. Grilling adds a smoky depth to the dish, enhancing the overall taste. Served alongside perfectly cooked asparagus, this meal is a complete and satisfying option for families looking to enjoy healthy, home-cooked dinners.
Ingredients (Serving Size: 4-6 people):
- 4 boneless, skinless chicken breasts
- 1 pound of asparagus, trimmed
- 1/4 cup olive oil
- Juice of 2 lemons
- Zest of 1 lemon
- 4 cloves garlic, minced
- 1 tablespoon fresh thyme leaves
- 1 tablespoon fresh rosemary, chopped
- Salt and pepper to taste
Instructions:
- Prepare the Marinade: In a small bowl, combine olive oil, lemon juice, lemon zest, minced garlic, fresh thyme, rosemary, salt, and pepper. Mix well to create a uniform marinade.
- Marinate the Chicken: Place the chicken breasts in a large resealable plastic bag or shallow dish. Pour half of the marinade over the chicken, making sure each piece is well-coated. Seal the bag or cover the dish and refrigerate for at least 30 minutes, up to 2 hours for maximum flavor.
- Preheat the Grill: Before grilling, preheat your grill to medium-high heat. This guarantees a nice sear on the chicken and helps cook it evenly.
- Grill the Chicken: Remove the chicken from the marinade, allowing excess to drip off. Place the chicken on the grill and cook for about 6-7 minutes per side, or until the internal temperature reaches 165°F (75°C). Remove from the grill and let it rest for a few minutes.
- Prepare the Asparagus: While the chicken is grilling, toss the asparagus with the remaining marinade in a separate bowl. Verify that each spear is well-coated.
- Grill the Asparagus: Place the asparagus on the grill perpendicular to the grates. Grill for about 5-7 minutes, turning occasionally, until the asparagus is tender and has grill marks.
- Serve: Arrange the grilled chicken and asparagus on a serving platter. Optionally, garnish with additional lemon slices and fresh herbs before serving.
Extra Tips:
For the best results, verify your grill is properly preheated; this helps to prevent sticking and allows for those desirable grill marks.
Be mindful not to over-marinate the chicken, as acidic ingredients like lemon juice can break down the proteins and alter texture if left too long.
When grilling asparagus, choose spears that are similar in thickness for even cooking. If you prefer, you can also add a sprinkle of parmesan cheese over the asparagus right before serving for an extra layer of flavor.
Spring Vegetable Stir-Fry With Tofu
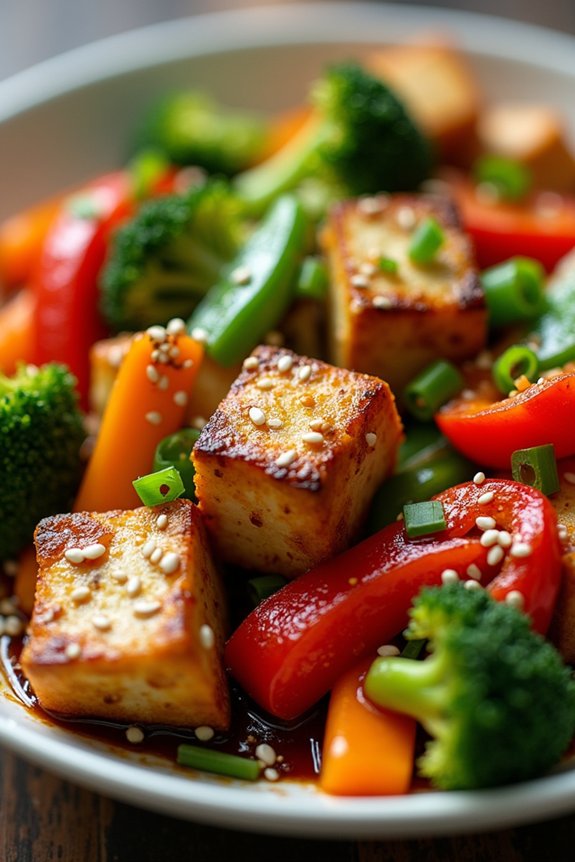
Spring is the perfect time to incorporate fresh, vibrant vegetables into your meals, and a Spring Vegetable Stir-Fry with Tofu is a delightful way to do just that. This dish isn’t only colorful and nutritious, but it also offers a delicious balance of flavors and textures. The tofu adds a protein-rich element, while the assortment of spring vegetables provides a rejuvenating and crunchy contrast.
It’s a versatile dish that can be enjoyed by the whole family and is suitable for vegetarians and vegans, making it an excellent addition to your healthy spring dinner lineup. This stir-fry is quick to prepare, making it ideal for busy weeknights when you want to serve something wholesome and homemade without spending hours in the kitchen.
The key to this dish is in the selection and preparation of the vegetables, which should be fresh and crisp to retain their natural sweetness and nutrients. With the right balance between the tofu and the vegetables, and a flavorful sauce to tie it all together, this dish will surely become a family favorite. Serve it with rice or noodles, and you have a complete meal that’s both satisfying and light.
Ingredients (Serving Size: 4-6 people)
- 14 ounces (400g) firm tofu, cut into 1-inch cubes
- 2 tablespoons vegetable oil
- 2 cloves garlic, minced
- 1-inch piece ginger, grated
- 1 red bell pepper, sliced
- 1 cup sugar snap peas, trimmed
- 1 cup broccoli florets
- 1 carrot, julienned
- 4 green onions, sliced
- 2 tablespoons soy sauce
- 1 tablespoon oyster sauce (or vegetarian oyster sauce)
- 1 teaspoon sesame oil
- 1 tablespoon cornstarch mixed with 2 tablespoons water
- Salt and pepper to taste
- Sesame seeds for garnish (optional)
Cooking Instructions
- Prepare the Tofu: Begin by pressing the tofu to remove excess moisture. Wrap it in a clean kitchen towel and place a weight on top for about 15 minutes. This will help the tofu retain its shape during cooking and absorb more flavor.
- Cook the Tofu: Heat 1 tablespoon of vegetable oil in a large skillet or wok over medium-high heat. Add the tofu cubes and cook until all sides are golden brown, about 8-10 minutes. Remove the tofu from the skillet and set aside.
- Stir-Fry the Aromatics: In the same skillet, add the remaining tablespoon of vegetable oil. Add the minced garlic and grated ginger, and stir-fry for about 30 seconds until fragrant.
- Add the Vegetables: Increase the heat to high and add the red bell pepper, sugar snap peas, broccoli florets, and julienned carrot. Stir-fry for 3-4 minutes until the vegetables are vibrant and tender-crisp.
- Combine with Tofu: Return the tofu to the skillet and toss to combine with the vegetables.
- Add the Sauce: Pour in the soy sauce, oyster sauce, and sesame oil. Stir everything together to confirm the tofu and vegetables are well-coated with the sauce.
- Thicken the Sauce: Add the cornstarch-water mixture to the skillet, stirring continuously until the sauce thickens and coats the vegetables and tofu, about 1-2 minutes.
- Season and Garnish: Taste and adjust seasoning with salt and pepper. Garnish with sliced green onions and sesame seeds, if using, before serving.
Extra Tips
When preparing this Spring Vegetable Stir-Fry with Tofu, remember that the key to a successful stir-fry is high heat and quick cooking. This ensures that the vegetables remain crisp and the tofu doesn’t become soggy.
You can also customize the vegetable selection based on your family’s preferences or what’s in season. For added flavor, consider marinating the tofu in a little soy sauce and sesame oil before cooking. If you prefer a spicier dish, add some red pepper flakes or a dash of chili oil to the sauce. Enjoy this vibrant and healthy meal as a standalone dish or pair it with steamed rice or noodles for a more filling dinner.
Zesty Quinoa Salad With Fresh Mint
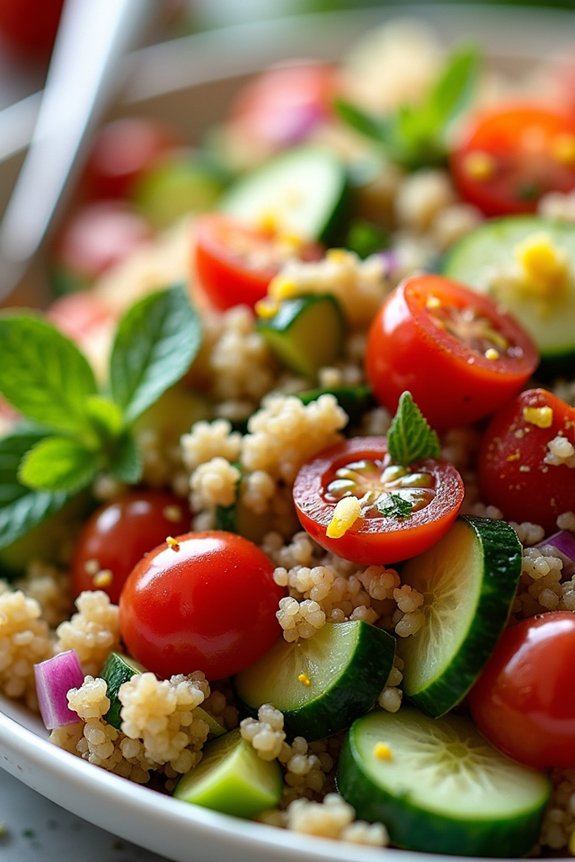
Zesty Quinoa Salad With Fresh Mint is a revitalizing and invigorating dish that perfectly encapsulates the essence of spring. This salad is a delightful combination of fluffy quinoa, fresh mint, and a medley of colorful vegetables, tossed in a tangy lemon dressing. It’s a vibrant and nutritious meal that isn’t only pleasing to the eye but also to the palate.
This dish is ideal for family dinners, offering a healthy option that everyone can enjoy, from the youngest to the oldest family member. Quinoa, a superfood packed with protein and fiber, provides a satisfying base for this salad. The fresh mint adds a burst of freshness, while the zesty lemon dressing ties all the flavors together, creating a harmonious blend.
The addition of fresh vegetables like cucumber, cherry tomatoes, and bell peppers enhances the salad’s nutritional value and adds a wonderful crunch. This Zesty Quinoa Salad With Fresh Mint is perfect for serving 4-6 people, making it a great choice for a family meal or a gathering with friends.
Ingredients (Serves 4-6):
- 1 cup quinoa
- 2 cups water
- 1/4 teaspoon salt
- 1 cup cherry tomatoes, halved
- 1 cucumber, diced
- 1 red bell pepper, diced
- 1/2 cup red onion, finely chopped
- 1/4 cup fresh mint leaves, chopped
- 1/4 cup fresh parsley, chopped
- 1/4 cup olive oil
- 3 tablespoons lemon juice
- Zest of 1 lemon
- Salt and pepper to taste
Cooking Instructions:
- Cook the Quinoa: Rinse the quinoa under cold water to remove any bitterness. Combine quinoa, water, and 1/4 teaspoon of salt in a medium saucepan. Bring to a boil over medium-high heat, then reduce the heat to low, cover, and simmer for about 15 minutes until the quinoa is fluffy and all the water is absorbed.
- Prepare the Dressing: In a small bowl, whisk together the olive oil, lemon juice, lemon zest, salt, and pepper. Adjust the seasoning to taste.
- Chop the Vegetables: While the quinoa is cooking, prepare the vegetables. Halve the cherry tomatoes, dice the cucumber and bell pepper, and finely chop the red onion. Chop the fresh mint and parsley as well.
- Combine Ingredients: Once the quinoa is cooked, transfer it to a large salad bowl and let it cool slightly. Add the cherry tomatoes, cucumber, bell pepper, red onion, mint, and parsley.
- Add the Dressing: Pour the lemon dressing over the salad ingredients. Gently toss everything together until the quinoa and vegetables are evenly coated with the dressing.
- Chill and Serve: For the best flavor, let the salad chill in the refrigerator for at least 30 minutes before serving. This allows the flavors to meld together beautifully.
Extra Tips: For an extra burst of flavor, consider adding a sprinkle of feta cheese or toasted nuts, such as almonds or pine nuts, to the salad before serving. If you prefer a bit of heat, a pinch of red pepper flakes can be a pleasant addition.
This salad can be prepared in advance, making it a convenient option for a busy day. Just keep it chilled and give it a good stir before serving to redistribute the dressing.
Balsamic Glazed Salmon With Roasted Tomatoes
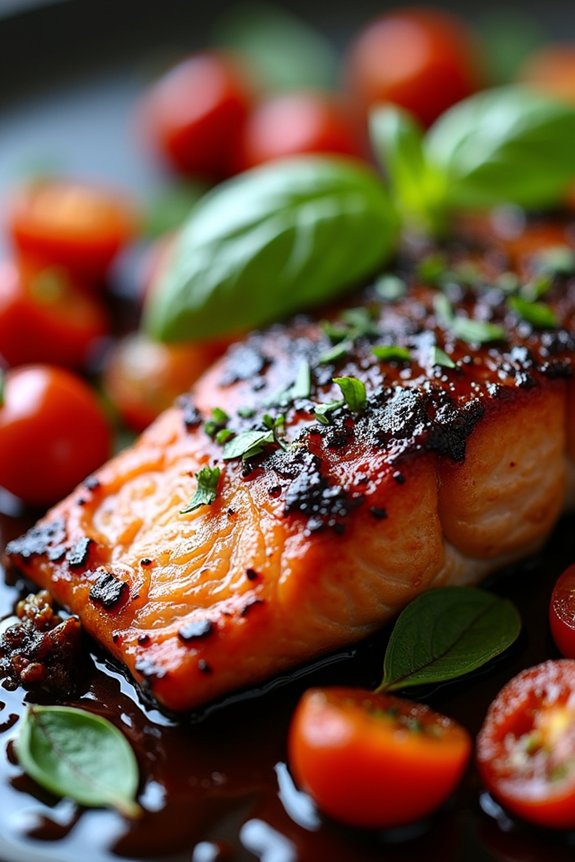
Balsamic Glazed Salmon With Roasted Tomatoes is a delightful dish perfect for a healthy spring family dinner. This recipe combines the rich, savory flavors of salmon with the sweet tanginess of balsamic vinegar, complemented by the natural sweetness of roasted cherry tomatoes.
It’s a balanced meal that not only tastes great but also provides essential nutrients and omega-3 fatty acids from the salmon. This dish isn’t only visually appealing with its vibrant colors but also relatively simple to prepare, making it an excellent choice for a weeknight dinner or a special family gathering.
The balsamic glaze adds a sophisticated touch to the salmon, perfectly offsetting its natural richness. Roasted tomatoes add bursts of flavor, enhancing the overall taste experience. This recipe serves 4-6 people, making it ideal for a small family or for having leftovers for lunch the next day.
Pair it with a simple salad or some steamed vegetables for a complete meal that everyone will enjoy.
Ingredients (Serves 4-6):
- 4-6 salmon fillets (about 6 ounces each)
- 1 pint cherry tomatoes, halved
- 2 tablespoons olive oil
- Salt and pepper, to taste
- 1/4 cup balsamic vinegar
- 2 tablespoons honey
- 1 teaspoon Dijon mustard
- 2 cloves garlic, minced
- Fresh basil leaves, for garnish
Cooking Instructions:
1. Prepare the Oven and Baking Sheet:
Preheat your oven to 400°F (200°C). Line a large baking sheet with parchment paper or lightly grease it with olive oil.
2. Roast the Tomatoes:
In a medium bowl, toss the halved cherry tomatoes with 1 tablespoon of olive oil, salt, and pepper. Spread them out in a single layer on half of the prepared baking sheet.
3. Prepare the Salmon:
Place the salmon fillets on the other half of the baking sheet. Drizzle with the remaining tablespoon of olive oil and season with salt and pepper.
4. Make the Balsamic Glaze:
In a small saucepan, combine the balsamic vinegar, honey, Dijon mustard, and minced garlic. Heat over medium heat, stirring occasionally, until the mixture begins to simmer. Reduce heat to low and let it simmer until the mixture thickens slightly, about 5 minutes.
5. Glaze the Salmon:
Brush the balsamic glaze generously over the salmon fillets. Make sure to cover them well to allow the flavors to infuse during baking.
6. Bake the Salmon and Tomatoes:
Place the baking sheet in the preheated oven and bake for 12-15 minutes, or until the salmon is cooked through and flakes easily with a fork, and the tomatoes are soft and slightly caramelized.
7. Serve:
Once done, remove the baking sheet from the oven. Transfer the salmon and roasted tomatoes to serving plates. Garnish with fresh basil leaves. Serve immediately.
Extra Tips:
For the best results, choose fresh, high-quality salmon fillets. You can also experiment with different types of tomatoes, such as grape or heirloom, for a variety of flavors.
If you prefer a thicker glaze, allow the balsamic mixture to reduce further on the stove. To add a bit of texture, consider sprinkling some toasted pine nuts or slivered almonds over the dish before serving.
Remember that cooking times may vary based on the thickness of the salmon fillets, so keep an eye on them to avoid overcooking.
Spinach and Feta Stuffed Chicken Breasts
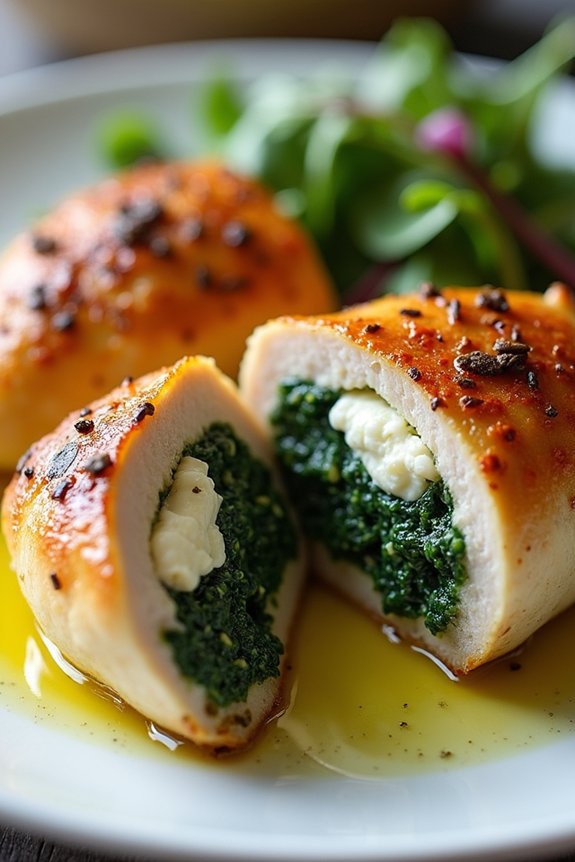
Spinach and Feta Stuffed Chicken Breasts are a perfect way to bring the fresh flavors of spring into your dinner routine. This dish combines tender, juicy chicken breasts with a delicious filling of spinach and feta, creating a delightful harmony of taste and texture.
It’s an elegant meal that’s surprisingly easy to prepare, making it suitable for both weeknight dinners and special occasions. With its beautiful presentation and vibrant flavors, this dish is bound to become a family favorite.
The stuffed chicken breasts aren’t only nutritious but also visually appealing, with the green spinach and creamy white feta peeking out from the golden-brown chicken. The combination of these ingredients guarantees a satisfying meal that’s rich in protein, vitamins, and minerals.
Serve with a side of roasted vegetables or a fresh salad for a complete meal that will delight both the eyes and the palate.
Ingredients (Serves 4-6 people):
- 4 large boneless, skinless chicken breasts
- 1 tablespoon olive oil
- 1 cup fresh spinach, chopped
- 1/2 cup crumbled feta cheese
- 2 cloves garlic, minced
- 1 teaspoon lemon zest
- Salt and pepper to taste
- 1 teaspoon dried oregano
- Toothpicks or kitchen twine
Cooking Instructions:
- Preparation: Preheat your oven to 375°F (190°C). Line a baking sheet with parchment paper or lightly grease it with oil.
- Prepare Chicken: Using a sharp knife, carefully slice each chicken breast horizontally to create a pocket. Be cautious not to cut all the way through the chicken.
- Make Filling: In a mixing bowl, combine the chopped spinach, crumbled feta, minced garlic, lemon zest, salt, pepper, and oregano. Mix until well combined.
- Stuff Chicken: Spoon the spinach and feta mixture into each chicken breast pocket. Use toothpicks or kitchen twine to secure the openings, making sure the filling doesn’t spill out during cooking.
- Sear Chicken: Heat olive oil in a large oven-safe skillet over medium-high heat. Add the stuffed chicken breasts and sear for 3-4 minutes on each side until golden brown.
- Bake: Transfer the skillet to the preheated oven and bake for 20-25 minutes, or until the chicken is cooked through and reaches an internal temperature of 165°F (75°C).
- Serve: Remove toothpicks or twine before serving. Let the chicken rest for a few minutes, then slice and serve with your choice of sides.
Extra Tips:
For an added layer of flavor, consider marinating the chicken breasts in olive oil, lemon juice, and herbs for an hour before stuffing. This enhances the overall taste and keeps the chicken moist.
If you don’t have an oven-safe skillet, you can sear the chicken in a regular pan, then transfer them to a baking dish to finish cooking in the oven. Additionally, feel free to customize the stuffing by adding sun-dried tomatoes or chopped olives for a Mediterranean twist.
Citrus and Avocado Shrimp Salad
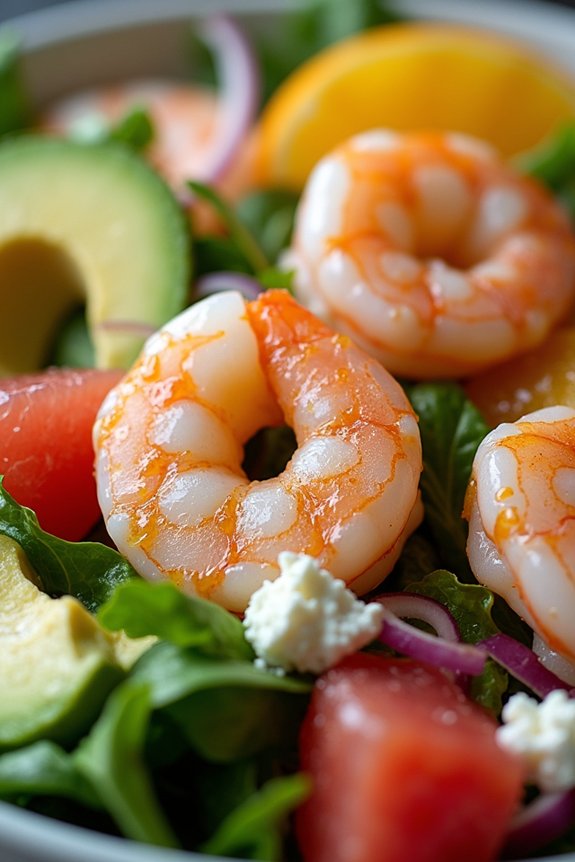
This invigorating Citrus and Avocado Shrimp Salad is a perfect dish to usher in the vibrant flavors of spring. Combining the succulent taste of shrimp with the zesty freshness of citrus fruits and the creamy texture of avocados, this salad is both nutritious and satisfying. Perfect for a family dinner, it serves as a light yet filling meal that everyone will enjoy.
The combination of flavors and textures makes it a delightful dish to both prepare and eat, and it’s sure to become a family favorite. Not only is this salad delicious, but it’s also packed with nutrients. Shrimp is a great source of protein and essential vitamins, while avocados provide healthy fats that are good for the heart.
The citrus fruits add a boost of vitamin C, and the greens offer fiber and antioxidants. This dish isn’t only a feast for the taste buds but also a treat for your body, making it an ideal choice for a healthy spring dinner.
Ingredients for 4-6 servings:
- 1 1/2 pounds large shrimp, peeled and deveined
- 2 tablespoons olive oil
- Salt and pepper to taste
- 4 cups mixed salad greens (such as arugula, spinach, and romaine)
- 2 avocados, peeled, pitted, and sliced
- 2 large oranges, peeled and segmented
- 1 grapefruit, peeled and segmented
- 1/4 cup red onion, thinly sliced
- 1/4 cup fresh cilantro leaves, roughly chopped
- 1/4 cup feta cheese, crumbled
For the dressing:
- 1/4 cup freshly squeezed lime juice
- 1 tablespoon honey
- 1/4 cup olive oil
- Salt and pepper to taste
Cooking Instructions:
- Prepare the Shrimp: Start by seasoning the shrimp with salt and pepper. Heat 2 tablespoons of olive oil in a large skillet over medium heat. Add the shrimp and cook for 3-4 minutes on each side or until they’re pink and opaque. Remove from heat and set aside to cool slightly.
- Make the Dressing: In a small bowl, whisk together the lime juice, honey, and olive oil. Season with salt and pepper to taste. Set aside.
- Assemble the Salad: In a large salad bowl, combine the mixed greens, avocado slices, orange segments, grapefruit segments, and red onion. Add the cooked shrimp on top.
- Add the Dressing: Drizzle the prepared dressing evenly over the salad. Gently toss all the ingredients together to guarantee everything is well-coated with the dressing.
- Finish with Toppings: Sprinkle the salad with fresh cilantro leaves and crumbled feta cheese before serving.
Extra Tips:
For an extra burst of flavor, try grilling the shrimp instead of pan-cooking them. This will add a smoky taste that pairs beautifully with the citrus and avocado.
If you prefer a spicier kick, consider adding a pinch of red pepper flakes to the dressing. When choosing avocados, opt for ones that are ripe but not too soft to maintain their shape in the salad.
Finally, for a vegetarian alternative, you can replace the shrimp with grilled tofu or chickpeas for a protein-packed option.
Herb-Crusted Cod With Lemon Butter
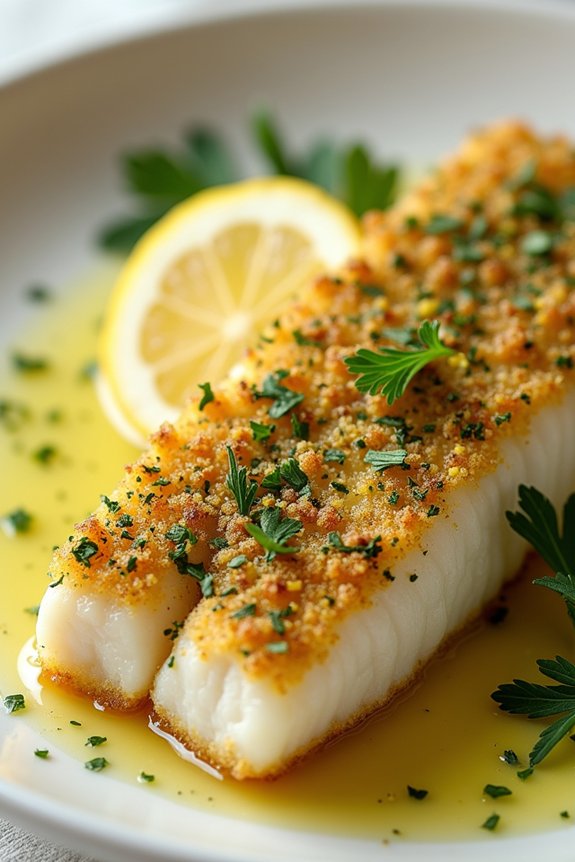
Herb-Crusted Cod With Lemon Butter is a delightful, light, and flavorful dish that makes for a perfect spring family dinner. This dish features tender cod fillets enveloped in a fragrant herb crust and topped with a luscious lemon butter sauce, creating a harmonious blend of fresh and zesty flavors.
It’s not only a treat for the palate but also a healthy option that’s rich in proteins and omega-3 fatty acids, making it an ideal choice for those looking to indulge in nutritious meals. The combination of fresh herbs and lemon zest in the crust provides a revitalizing contrast to the buttery richness of the sauce.
This dish is simple enough to make on a weeknight, but impressive enough to serve at a family gathering. The preparation is straightforward, and the results are sure to please even the most discerning of eaters. Best of all, it requires minimal cleanup, so you can spend more time enjoying the meal with your loved ones.
Ingredients (Serves 4-6):
- 4-6 cod fillets (about 6 oz each)
- 1 cup panko breadcrumbs
- 2 tablespoons fresh parsley, finely chopped
- 2 tablespoons fresh dill, finely chopped
- 2 tablespoons fresh chives, finely chopped
- 1 teaspoon lemon zest
- 1/2 teaspoon salt
- 1/4 teaspoon black pepper
- 4 tablespoons unsalted butter, melted
- 2 tablespoons olive oil
- 2 tablespoons lemon juice
- Lemon slices, for garnish
Cooking Instructions:
- Preheat the Oven: Preheat your oven to 400°F (200°C). This will guarantee the oven is at the right temperature when you’re ready to bake the cod.
- Prepare the Herb Crust: In a mixing bowl, combine the panko breadcrumbs, parsley, dill, chives, lemon zest, salt, and pepper. Mix thoroughly to confirm the herbs and seasonings are evenly distributed.
- Coat the Fillets: Pat the cod fillets dry with paper towels. Brush each fillet lightly with olive oil, then press the top side into the herb mixture, ensuring a generous coating. Place the fillets on a baking sheet lined with parchment paper, herb side up.
- Bake the Cod: Place the baking sheet in the preheated oven and bake for 12-15 minutes, or until the cod is opaque and flakes easily with a fork. Cooking time may vary depending on the thickness of the fillets.
- Prepare the Lemon Butter Sauce: While the cod is baking, prepare the sauce. In a small saucepan over low heat, melt the butter. Once melted, add the lemon juice and stir to combine. Keep the sauce warm until ready to serve.
- Serve the Dish: Once the cod is cooked, remove it from the oven and let it rest for a minute. Drizzle the lemon butter sauce over the herb-crusted fillets. Garnish with lemon slices and additional parsley, if desired.
Extra Tips:
For the best results, use fresh herbs rather than dried ones, as they provide a more vibrant flavor and aroma. If you prefer a spicier kick, consider adding a pinch of red pepper flakes to the herb mixture.
Additionally, when selecting cod, opt for fillets that are uniform in thickness to ensure even cooking. If cod is unavailable, this recipe works well with other white fish such as haddock or halibut.
Finally, serve the dish with a side of steamed vegetables or a fresh salad to complete your healthy spring dinner.
Light Pasta Primavera With Seasonal Vegetables
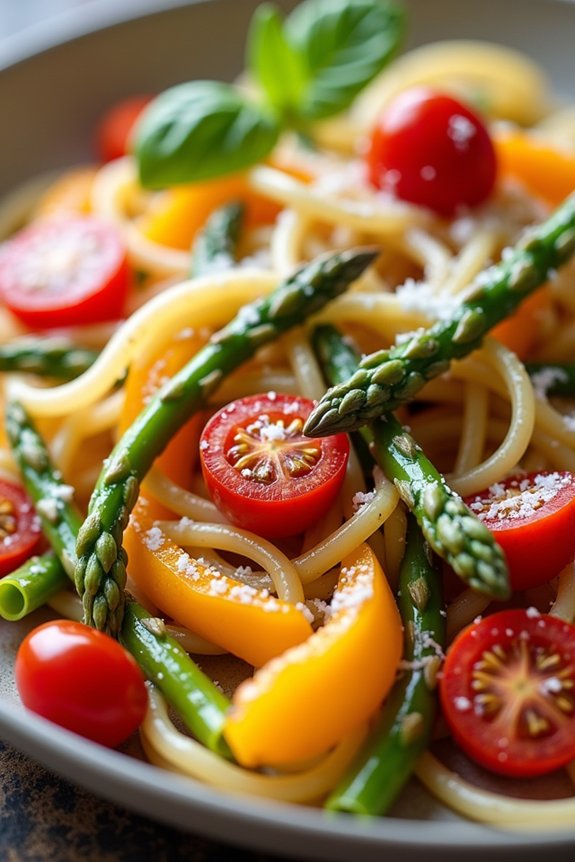
Light Pasta Primavera With Seasonal Vegetables is a delightful and nutritious meal that celebrates the fresh, vibrant flavors of spring. This dish is perfect for a family dinner, as it combines the delicate taste of al dente pasta with a medley of colorful vegetables that are at their peak during this season.
The recipe isn’t only simple to prepare but also versatile, allowing you to use whatever vegetables are available and in season. By incorporating a variety of seasonal vegetables, such as asparagus, cherry tomatoes, and bell peppers, you can guarantee that your family is getting a healthy dose of vitamins and minerals.
The light and invigorating sauce, typically made with olive oil, garlic, and a hint of lemon juice, ties all the ingredients together, creating a meal that’s both satisfying and wholesome. This Light Pasta Primavera is a great way to enjoy the bounty of spring produce while keeping your meals light and healthy.
Ingredients (Serves 4-6)
- 12 oz (340g) of your choice of pasta (e.g., penne or farfalle)
- 2 tablespoons olive oil
- 3 cloves garlic, minced
- 1 medium red bell pepper, sliced
- 1 medium yellow bell pepper, sliced
- 1 small bunch of asparagus, trimmed and cut into 1-inch pieces
- 1 cup cherry tomatoes, halved
- 1 medium zucchini, sliced into half moons
- 1/2 cup freshly grated Parmesan cheese
- Juice of 1 lemon
- Salt and pepper to taste
- Fresh basil leaves for garnish
Cooking Instructions
- Cook the Pasta: Bring a large pot of salted water to a boil. Add the pasta and cook according to package instructions until al dente. Reserve 1 cup of pasta water, then drain the pasta and set aside.
- Prepare the Vegetables: While the pasta is cooking, heat the olive oil in a large skillet over medium heat. Add the minced garlic and sauté for about 1 minute until fragrant.
- Cook the Vegetables: Add the sliced bell peppers and asparagus to the skillet. Cook for about 3-4 minutes, stirring occasionally, until they begin to soften.
- Add More Veggies: Add the cherry tomatoes and zucchini to the skillet. Continue to cook for another 3-4 minutes until all the vegetables are tender but still crisp.
- Combine Pasta and Vegetables: Add the cooked pasta to the skillet with the vegetables. Toss everything together gently to combine.
- Add the Finishing Touches: Pour the reserved pasta water into the skillet a little at a time to help create a light sauce. Stir in the grated Parmesan cheese, lemon juice, salt, and pepper to taste.
- Garnish and Serve: Remove the skillet from heat. Garnish with fresh basil leaves and serve immediately.
Extra Tips
When preparing Light Pasta Primavera With Seasonal Vegetables, feel free to substitute or add other spring vegetables such as peas, spinach, or artichokes for variety.
To enhance the flavor, consider adding a pinch of red pepper flakes for a subtle kick. It’s important to guarantee that the vegetables remain crisp-tender, so be mindful of cooking times.
Finally, for a more filling meal, you can add grilled chicken or shrimp to the dish. Enjoy this vibrant and healthy meal with your family!
Grilled Vegetable and Hummus Wraps
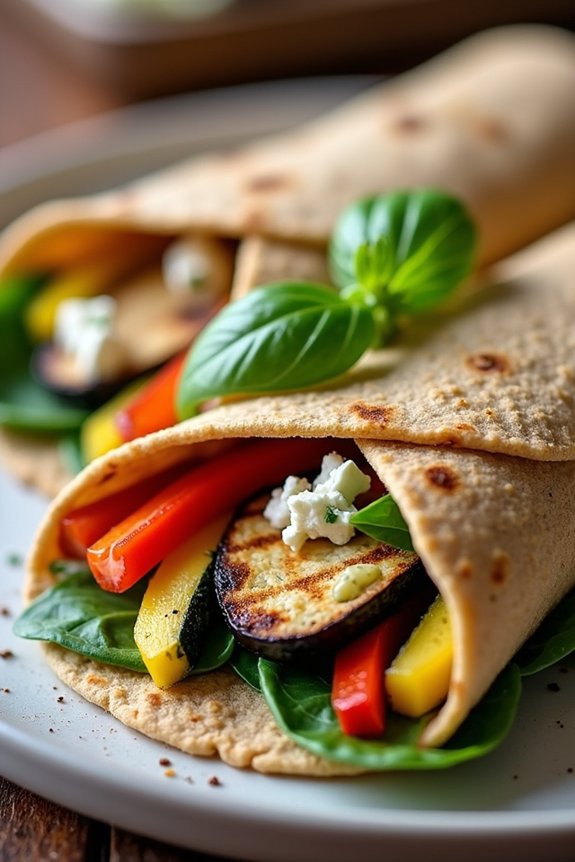
Grilled Vegetable and Hummus Wraps are a delightful and healthy addition to any spring dinner menu. This dish combines the smokiness of grilled vegetables with the creamy richness of hummus, all wrapped up in a warm tortilla.
It’s a versatile meal that’s perfect for family dinners, offering a burst of flavors and textures with every bite. The combination of fresh vegetables and protein-packed hummus makes it not only delicious but also nutritious, catering to both vegetarians and those looking to incorporate more plant-based meals into their diet.
These wraps are an excellent option for busy weeknights or casual gatherings, as they’re easy to prepare and can be customized to suit individual tastes. You can choose your favorite vegetables to grill, and even add a touch of spice or extra toppings to elevate the dish further.
The wraps can be served warm off the grill or at room temperature, making them suitable for various occasions. Below is a recipe for serving 4-6 people, guaranteeing everyone at the table can enjoy this healthy spring creation.
Ingredients (serving size: 4-6 people):
- 2 medium zucchini, sliced
- 1 red bell pepper, sliced
- 1 yellow bell pepper, sliced
- 1 red onion, sliced
- 1 eggplant, sliced
- 2 tablespoons olive oil
- Salt and pepper to taste
- 1 teaspoon dried oregano
- 1 teaspoon garlic powder
- 6 large whole wheat tortillas
- 1 cup hummus
- 1 cup baby spinach leaves
- 1/2 cup feta cheese, crumbled (optional)
- 1/4 cup fresh basil leaves
Cooking Instructions:
- Prepare the Vegetables: Wash and slice the zucchini, bell peppers, onion, and eggplant into uniform sizes. This guarantees even grilling.
- Season the Vegetables: In a large bowl, toss the sliced vegetables with olive oil, salt, pepper, oregano, and garlic powder until well coated.
- Preheat the Grill: Heat your grill to medium-high. If using a grill pan, make sure it’s hot before adding the vegetables.
- Grill the Vegetables: Place the seasoned vegetables on the grill. Cook for about 4-5 minutes on each side or until they’re tender and have nice grill marks. Remove from the grill and set aside.
- Warm the Tortillas: On the grill or in a skillet, warm each tortilla for about 30 seconds on each side, just until pliable.
- Assemble the Wraps: Spread a generous layer of hummus on each tortilla. Add a portion of grilled vegetables, a handful of baby spinach, a sprinkle of feta cheese (if using), and a few basil leaves.
- Wrap and Serve: Fold in the sides of the tortilla, then roll it up tightly. Slice in half if desired and serve immediately.
Extra Tips:
When making Grilled Vegetable and Hummus Wraps, feel free to experiment with different vegetables, such as asparagus or carrots, depending on what’s in season.
For a spicier version, add a sprinkle of red pepper flakes to the vegetables before grilling. To make the wraps even more filling, you can add grilled chicken or chickpeas.
Finally, if you don’t have a grill, a hot oven or stovetop grill pan will work just as well to achieve those delicious charred flavors. Enjoy your culinary creation with a side salad or a rejuvenating spring beverage for a complete meal.
Minty Pea and Feta Risotto
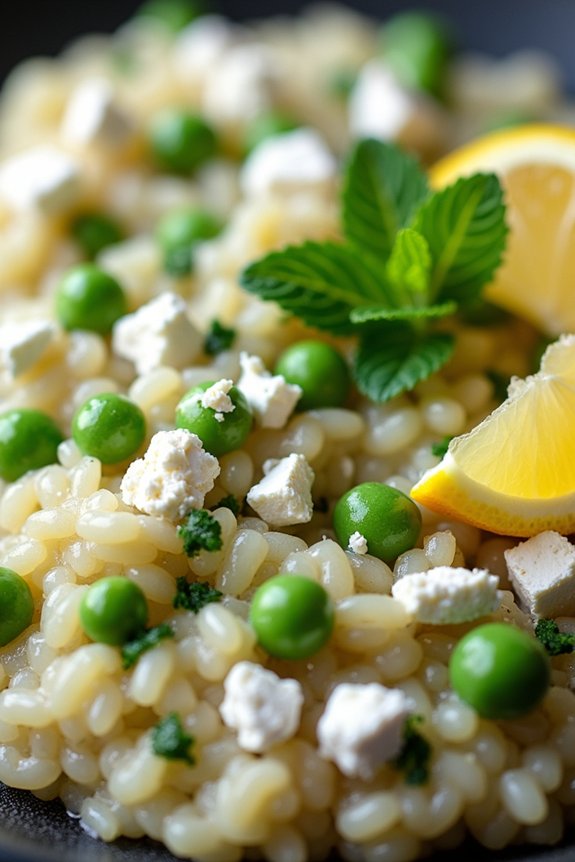
Minty Pea and Feta Risotto is a delightful and invigorating dish perfect for a healthy spring family dinner. This dish combines creamy Arborio rice with the fresh, vibrant flavors of mint and peas, all enhanced by the tangy, salty notes of feta cheese.
It’s a comforting yet light meal that brings the essence of spring to your dining table. The risotto is both satisfying and nutritious, making it an ideal choice for those looking to enjoy a wholesome meal with their loved ones.
The key to a great risotto is patience and attention to detail. The slow addition of broth allows the rice to absorb the liquid gradually, resulting in a perfectly creamy texture. The mint adds a burst of freshness, while the peas provide a pop of sweetness that complements the creamy risotto base.
With feta sprinkled on top, each bite is a delightful mix of flavors and textures. This dish is sure to become a family favorite, offering a balance of indulgence and health.
Ingredients (serves 4-6):
- 1 1/2 cups Arborio rice
- 1 cup fresh or frozen peas
- 1 cup crumbled feta cheese
- 1/4 cup fresh mint leaves, chopped
- 1 small onion, finely chopped
- 2 cloves garlic, minced
- 4 cups vegetable or chicken broth
- 1/2 cup dry white wine
- 3 tablespoons olive oil
- 1 tablespoon butter
- Salt and pepper to taste
- Lemon wedges for serving
Cooking Instructions:
- Prepare the Ingredients: Begin by finely chopping the onion and mincing the garlic. Chop the fresh mint leaves and set them aside. If using frozen peas, defrost them by running under warm water and draining.
- Heat the Broth: In a saucepan, warm the vegetable or chicken broth over medium heat. Keep it at a low simmer to use later.
- Sauté the Aromatics: In a large pan, heat the olive oil over medium heat. Add the chopped onion and garlic, sautéing until the onion becomes translucent and fragrant, about 5 minutes.
- Cook the Rice: Add the Arborio rice to the pan with the onions and garlic. Stir continuously for about 2 minutes until the rice is lightly toasted and coated with oil.
- Deglaze with Wine: Pour in the dry white wine, stirring until it’s mostly absorbed by the rice.
- Add Broth Gradually: Begin adding the warmed broth one ladle at a time, stirring frequently. Allow the liquid to be absorbed before adding the next ladle. Continue this process until the rice is creamy and cooked to al dente, about 18-20 minutes.
- Incorporate Peas and Mint: Stir in the peas and chopped mint leaves, cooking for an additional 2-3 minutes until the peas are tender.
- Finish with Feta and Butter: Remove the risotto from heat and gently fold in the crumbled feta cheese and butter. Season with salt and pepper to taste.
- Serve: Serve the risotto warm, with lemon wedges on the side for an extra zesty kick.
Extra Tips: When making risotto, remember that stirring is essential. It helps release the starch from the rice, giving it that creamy texture. However, avoid over-stirring as it can break the grains.
If you prefer a creamier texture, you can add a splash of cream or a bit more butter at the end. Additionally, always taste and adjust the seasoning before serving to verify the flavors are balanced. Enjoy your Minty Pea and Feta Risotto as a main course or a delightful side dish!
Turkey and Zucchini Skewers With Yogurt Sauce
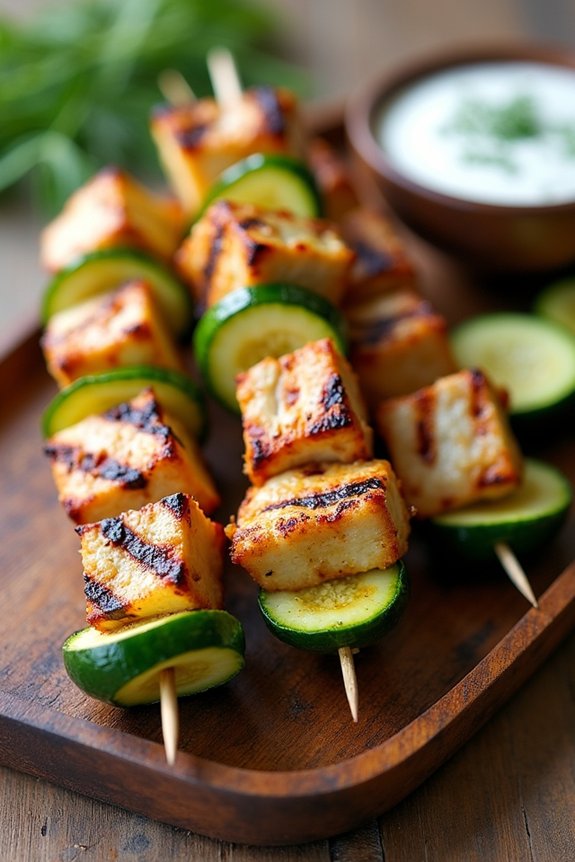
Turkey and Zucchini Skewers with Yogurt Sauce is a delightful and healthy dish perfect for family dinners in the spring. This recipe combines lean turkey and fresh zucchini, which are both low in calories and high in nutrients, making it a great choice for a light yet satisfying meal. The dish is complemented by a tangy yogurt sauce that adds a creamy texture and a burst of flavor, enhancing the overall taste.
These skewers aren’t only delicious but also visually appealing, making them a great addition to any dinner table. Ideal for a serving size of 4-6 people, these skewers are easy to prepare and cook, allowing you to spend more time enjoying the meal with your loved ones. The combination of turkey and zucchini on the skewers guarantees a balanced meal that’s both nutritious and flavorful.
The yogurt sauce, made with simple ingredients, provides a revitalizing contrast to the grilled skewers, making this dish a family favorite. Whether you’re hosting a gathering or simply having a quiet dinner at home, these Turkey and Zucchini Skewers with Yogurt Sauce are sure to impress.
Ingredients:
- 1.5 pounds of turkey breast, cut into 1-inch cubes
- 2 medium zucchinis, sliced into 1/2-inch rounds
- 2 tablespoons olive oil
- 1 teaspoon garlic powder
- 1 teaspoon onion powder
- Salt and pepper to taste
- Wooden or metal skewers
For the Yogurt Sauce:
- 1 cup plain Greek yogurt
- 1 tablespoon lemon juice
- 1 tablespoon fresh dill, chopped
- 1 clove garlic, minced
- Salt and pepper to taste
Cooking Instructions:
- Prepare the Skewers: Soak wooden skewers in water for at least 30 minutes to prevent burning if using wooden skewers. If using metal skewers, this step can be skipped.
- Marinate the Turkey: In a large bowl, combine olive oil, garlic powder, onion powder, salt, and pepper. Add the turkey cubes and toss to coat evenly. Let the turkey marinate for at least 15 minutes to absorb the flavors.
- Assemble the Skewers: Alternate threading turkey cubes and zucchini slices onto the skewers. Make sure there’s a small amount of space between each piece to allow even cooking.
- Preheat the Grill: Preheat your grill to medium-high heat. Lightly oil the grill grates to prevent sticking.
- Grill the Skewers: Place the assembled skewers on the grill. Cook for about 10-12 minutes, turning occasionally, until the turkey is fully cooked and has grill marks, and the zucchini is tender.
- Prepare the Yogurt Sauce: While the skewers are grilling, prepare the yogurt sauce. In a small bowl, combine Greek yogurt, lemon juice, fresh dill, minced garlic, salt, and pepper. Mix well and adjust seasoning to taste.
- Serve: Once the skewers are cooked, remove them from the grill. Serve immediately with the yogurt sauce on the side for dipping or drizzling over the skewers.
Extra Tips:
To guarantee even cooking, try to cut the turkey and zucchini into uniform pieces. This will help them cook at the same rate and prevent any pieces from being over or undercooked.
If you prefer a bit more spice, consider adding a pinch of cayenne pepper or red pepper flakes to the marinade for a subtle kick. The yogurt sauce can be prepared in advance and stored in the refrigerator for up to 2 days, allowing the flavors to meld together for a more robust taste.
Additionally, if you’re short on time, consider using a store-bought Greek yogurt sauce to simplify the preparation process.
Asparagus and Lemon Ricotta Tart
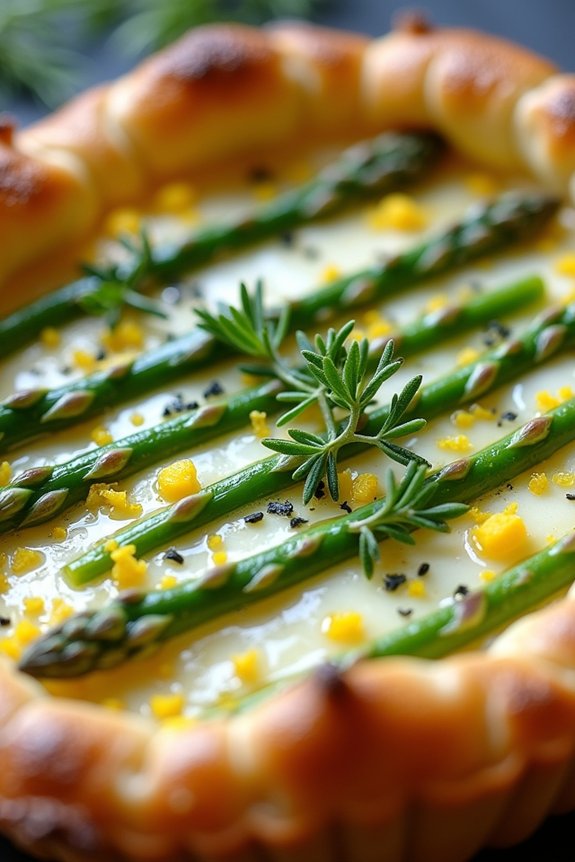
Spring is the perfect season to indulge in fresh, vibrant flavors, and this Asparagus and Lemon Ricotta Tart perfectly captures the essence of the season. Combining the tender crunch of asparagus with the creamy, zesty goodness of lemon-infused ricotta, this dish makes for a delightful dinner option.
The tart isn’t only visually stunning with its green and yellow hues but also a nutritious choice, thanks to asparagus being packed with vitamins and lemon adding a revitalizing zing. Ideal for a family gathering or a casual dinner with friends, this tart serves 4-6 people and is sure to be a hit.
The flaky pastry provides a perfect base for the savory filling, while the baking process enhances the flavors of the fresh ingredients. With a few simple steps, you can create a dish that’s both comforting and elegant, making it perfect for a healthy spring dinner.
Ingredients for 4-6 servings:
- 1 sheet of puff pastry (thawed)
- 1 bunch of asparagus, trimmed
- 1 cup ricotta cheese
- 1/2 cup grated Parmesan cheese
- 1 lemon (zested and juiced)
- 1 egg
- Salt and pepper to taste
- 2 tablespoons olive oil
- 1 tablespoon fresh thyme leaves
- Optional: a handful of baby arugula for garnish
Cooking Instructions:
- Prepare the Puff Pastry:
- Preheat your oven to 400°F (200°C). Roll out the thawed puff pastry on a lightly floured surface to fit a 9×13-inch tart pan or baking tray. Carefully press the pastry into the pan, trimming any excess. Prick the base with a fork to prevent it from puffing too much during baking.
- Prepare the Ricotta Mixture:
- In a medium bowl, combine the ricotta cheese, Parmesan cheese, lemon zest, lemon juice, and egg. Season with salt and pepper to taste. Mix until well combined and smooth.
- Assemble the Tart:
- Spread the ricotta mixture evenly over the prepared puff pastry base. Arrange the trimmed asparagus spears on top of the ricotta mixture, alternating directions for a decorative pattern. Drizzle with olive oil and sprinkle fresh thyme leaves over the asparagus.
- Bake the Tart:
- Place the tart in the preheated oven and bake for 20-25 minutes, or until the pastry is golden brown and the asparagus is tender. Keep an eye on the tart to verify it doesn’t over-bake.
- Serve:
- Once baked, remove the tart from the oven and let it cool slightly before slicing. Optionally, garnish with a handful of baby arugula for added freshness and a pop of color.
Extra Tips:
When preparing the Asparagus and Lemon Ricotta Tart, make sure to use fresh, firm asparagus for the best texture and flavor. If you prefer a more pronounced lemon flavor, consider adding a bit more lemon zest or juice to the ricotta mixture.
Additionally, if you find the pastry edges browning too quickly in the oven, cover them with foil to prevent burning. This dish pairs beautifully with a light salad, making it a complete and satisfying meal. Enjoy experimenting with additional herbs like basil or parsley for a personalized touch!
Thai Basil Chicken Lettuce Wraps

Thai Basil Chicken Lettuce Wraps are a delightful and healthy spring dinner option that brings together flavors of savory chicken, aromatic basil, and crisp lettuce. This dish is perfect for family dinners, offering a fun and interactive way to enjoy a meal together.
The wraps aren’t only light and invigorating but also packed with protein and fresh ingredients, making them a nutritious choice. The combination of spicy, sweet, and tangy elements in the sauce elevates the taste, providing a satisfying experience that everyone at the table will love.
Ideal for a serving size of 4-6 people, these wraps are quite simple to prepare and are versatile enough to cater to different taste preferences. You can easily adjust the level of spiciness or sweetness in the sauce, or add additional vegetables to suit your family’s liking.
Whether you’re looking for a quick weeknight meal or a dish to impress guests, Thai Basil Chicken Lettuce Wraps are sure to be a hit.
Ingredients:
- 1 ½ pounds of ground chicken
- 2 tablespoons vegetable oil
- 1 medium onion, finely chopped
- 4 cloves garlic, minced
- 2 red bell peppers, diced
- 2 tablespoons soy sauce
- 2 tablespoons fish sauce
- 1 tablespoon oyster sauce
- 2 tablespoons brown sugar
- 1 tablespoon lime juice
- 1 teaspoon chili paste (adjust for spice preference)
- 1 cup fresh Thai basil leaves
- 1 head of butter lettuce or iceberg lettuce, separate leaves carefully
- 4 green onions, sliced
- 1/4 cup chopped peanuts (optional for garnish)
Cooking Instructions:
- Prepare Ingredients: Begin by prepping all your ingredients. Chop the onion, garlic, and red bell peppers, and separate the lettuce leaves carefully to prevent tearing.
- Cook the Chicken: Heat the vegetable oil in a large skillet over medium-high heat. Add the ground chicken to the skillet and cook, breaking it apart with a spatula, until it’s browned and cooked through, about 5-7 minutes.
- Add Aromatics: Add the chopped onion and minced garlic to the cooked chicken. Stir well and cook until the onions are soft and translucent, about 2-3 minutes.
- Incorporate Vegetables: Stir in the diced red bell peppers and continue to cook for another 2-3 minutes, until they start to soften.
- Make the Sauce: In a small bowl, mix together the soy sauce, fish sauce, oyster sauce, brown sugar, lime juice, and chili paste. Pour this mixture over the chicken and vegetables in the skillet.
- Simmer the Mixture: Stir everything together in the skillet and let it simmer for about 5 minutes, allowing the flavors to meld and the sauce to thicken slightly.
- Add Basil: Turn off the heat and stir in the Thai basil leaves. The residual heat will wilt the leaves perfectly, infusing the dish with their aroma.
- Assemble the Wraps: Serve the chicken mixture in a bowl, surrounded by lettuce leaves, and provide garnishes like sliced green onions and chopped peanuts if desired. Let each person spoon the chicken mixture into a lettuce leaf, wrap it up, and enjoy.
Extra Tips:
For an extra burst of flavor, consider adding a splash of rice vinegar or a sprinkle of sesame seeds before serving. If Thai basil isn’t available, you can substitute with regular basil, though the taste will be slightly different.
To make the wraps even more filling, you can add cooked rice noodles or quinoa to the chicken mixture. Be sure to wash and dry your lettuce leaves thoroughly, as they should be crisp and dry to hold the filling well.
Adjust the chili paste according to your preference for spice; you can even serve it on the side to let each person control their level of heat.