

Cooking for picky eaters can be a real challenge, but I’ve got some delicious solutions. These 12 family dinner recipes work wonders, trust me. With hidden veggies in mac and cheese and crispy baked chicken tenders, even the fussiest eaters will be satisfied. Each recipe blends familiar flavors with a nutritious twist, making meals enjoyable for everyone. Curious to see how you can win over those selective palates?
Hidden Veggie Mac and Cheese
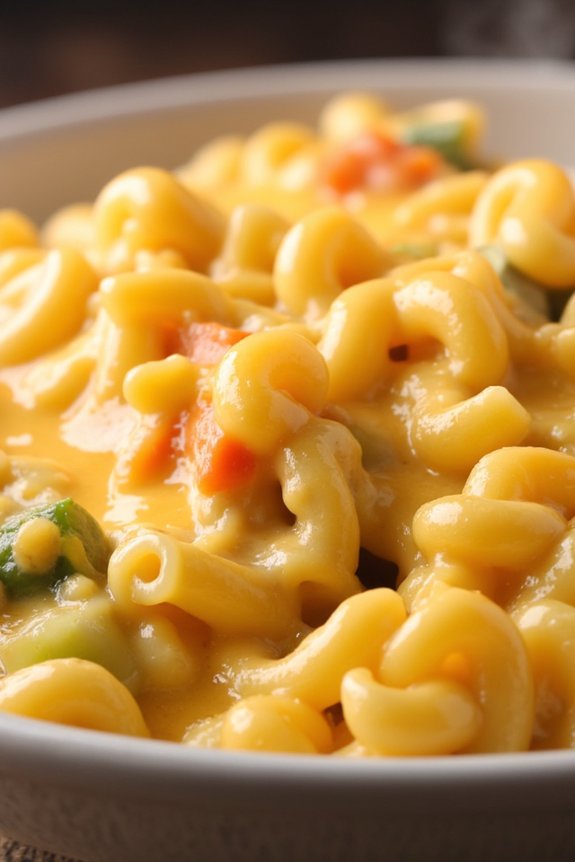
If you’re looking for a way to sneak some extra vegetables into your family’s diet without sacrificing flavor, this Hidden Veggie Mac and Cheese is the perfect solution. It’s a creamy, cheesy dish that cleverly incorporates pureed vegetables, ensuring even the pickiest of eaters won’t notice the healthy additions. By blending the veggies into the cheese sauce, you maintain the classic mac and cheese taste while adding a boost of nutrition. This dish is perfect for family dinners and is sure to become a household favorite.
Not only is this recipe a hit with kids, but it also offers a quick and easy solution for busy weeknights. The preparation is straightforward and can be completed in under an hour. The creamy texture and rich flavor are complemented by the hidden veggies, making it a comforting meal that satisfies both parents and children alike. Serve it as a main dish or a side, and enjoy the peace of mind knowing your family is getting some extra vitamins and minerals with every bite.
Ingredients (serving size: 4-6 people):
- 12 oz elbow macaroni
- 1 cup broccoli florets
- 1 cup cauliflower florets
- 1 medium carrot, peeled and chopped
- 2 tablespoons butter
- 2 tablespoons all-purpose flour
- 2 cups milk
- 2 cups shredded cheddar cheese
- 1 teaspoon garlic powder
- 1 teaspoon onion powder
- Salt and pepper to taste
Cooking Instructions:
- Prepare the Vegetables: In a large pot of boiling salted water, cook the broccoli, cauliflower, and carrot until tender, about 8-10 minutes. Drain and set aside to cool slightly.
- Cook the Pasta: In the same pot, bring water to a boil and cook the elbow macaroni according to package instructions until al dente. Drain and set aside.
- Blend the Vegetables: Once the vegetables are cool enough to handle, place them in a blender or food processor and blend until smooth. You may need to add a splash of water to help it blend evenly.
- Make the Cheese Sauce: In a medium saucepan over medium heat, melt the butter. Add the flour and whisk continuously for about 1 minute until it forms a paste. Slowly add the milk, whisking constantly to avoid lumps. Bring the mixture to a gentle simmer and cook until thickened, about 3-5 minutes.
- Combine Ingredients: Stir in the pureed vegetables, cheddar cheese, garlic powder, onion powder, salt, and pepper into the sauce. Mix until the cheese is melted and the sauce is smooth.
- Mix with Pasta: Add the cooked macaroni to the cheese sauce and stir until the pasta is well coated with the sauce.
- Serve: Transfer the mac and cheese to a serving dish and enjoy while hot.
Extra Tips:
For an even creamier texture, you can add a small amount of cream cheese or Greek yogurt to the cheese sauce. If you find the sauce too thick, simply add more milk until you reach your desired consistency.
Feel free to experiment with different vegetables like zucchini or spinach for a variation in flavors and nutrients. To add a crispy topping, sprinkle some breadcrumbs over the mac and cheese and bake it in the oven for a few minutes until golden brown. This dish can also be made ahead of time and reheated, making it a convenient option for meal prep.
Crispy Baked Chicken Tenders

Crispy Baked Chicken Tenders are a family favorite, especially when catering to picky eaters. These tenders are a healthier alternative to the traditional fried version, yet they maintain the same satisfying crunch and juicy interior. Perfectly seasoned and baked to golden perfection, these chicken tenders can be served with a variety of dipping sauces, making them versatile and appealing to all taste buds.
Whether you’re preparing a quick weeknight dinner or a weekend meal, these tenders will surely be a hit with the whole family.
The secret to achieving the perfect crispy exterior lies in the coating, which is a delightful blend of breadcrumbs and simple seasonings. By baking rather than frying, you cut down on unnecessary oils while still delivering that irresistible crunch. This recipe isn’t only easy to make but also customizable, allowing you to adjust the seasonings to cater to your family’s preferences.
With a few simple ingredients and minimal preparation, you can have a delicious meal on the table that everyone will enjoy, including the pickiest of eaters.
Ingredients (Serves 4-6):
- 1 ½ pounds of chicken tenders
- 1 cup all-purpose flour
- 2 large eggs
- 1 tablespoon water
- 2 cups panko breadcrumbs
- 1 teaspoon garlic powder
- 1 teaspoon onion powder
- ½ teaspoon paprika
- Salt and pepper to taste
- Cooking spray
Instructions:
- Preheat the Oven: Start by preheating your oven to 400°F (200°C). Line a baking sheet with parchment paper or lightly grease it with cooking spray to prevent sticking.
- Prepare the Coatings: Set up a breading station with three shallow bowls. In the first bowl, place the flour. In the second bowl, whisk together the eggs and water until well combined. In the third bowl, mix the panko breadcrumbs with garlic powder, onion powder, paprika, salt, and pepper.
- Coat the Chicken Tenders: Take each chicken tender and first dredge it in the flour, shaking off any excess. Next, dip it into the egg mixture, making certain it’s fully coated. Finally, roll it in the seasoned panko breadcrumbs, pressing gently to adhere the crumbs.
- Arrange on Baking Sheet: Place the coated chicken tenders onto the prepared baking sheet in a single layer, making sure they don’t touch each other. This allows for even cooking and crispiness.
- Bake the Tenders: Lightly spray the tops of the chicken tenders with cooking spray. Bake in the preheated oven for 20-25 minutes, or until the chicken is cooked through and the coating is golden brown and crispy. Turn the tenders halfway through the baking time for even browning.
- Serve: Once cooked, remove from the oven and let them cool slightly before serving. Pair with your choice of dipping sauces such as honey mustard, barbecue, or ranch.
Extra Tips: For even crispier chicken tenders, you can toast the panko breadcrumbs in a dry skillet over medium heat until they’re lightly golden before using them in the recipe. This pre-toasting step enhances the crunch and adds a richer flavor profile to the coating.
Additionally, if you prefer a spicier version, consider adding a pinch of cayenne pepper to the breadcrumb mixture. Always verify the chicken reaches an internal temperature of 165°F (74°C) for safe consumption.
Sneaky Spaghetti Bolognese

If you have picky eaters at home, getting them to enjoy a nutritious meal can be a challenge. That’s why Sneaky Spaghetti Bolognese is a perfect solution. This dish cleverly incorporates hidden vegetables into a classic Bolognese sauce, making it both delicious and nutritious. The rich and savory flavors of the sauce are sure to please even the fussiest of eaters, while the hidden veggies guarantee they get the essential nutrients they need.
This recipe serves 4-6 people and is perfect for a family dinner. The key to this dish is finely chopping or grating the vegetables so they blend seamlessly into the sauce. By using a combination of carrots, zucchini, and mushrooms, you’ll add depth to the sauce without drawing attention to the veggies. Serve it over your favorite spaghetti or pasta of choice, and watch as your family devours it without a clue that they’re eating a healthy meal.
Ingredients:
- 1 tablespoon olive oil
- 1 onion, finely chopped
- 2 cloves garlic, minced
- 2 carrots, finely grated
- 1 zucchini, finely grated
- 1 cup mushrooms, finely chopped
- 1 pound ground beef or turkey
- 1 can (14 oz) crushed tomatoes
- 2 tablespoons tomato paste
- 1 teaspoon dried oregano
- 1 teaspoon dried basil
- Salt and pepper to taste
- 1/4 cup grated Parmesan cheese
- 12 oz spaghetti or pasta of choice
Cooking Instructions:
- Prepare the Ingredients: Start by preparing all your vegetables. Finely chop the onion, mince the garlic, grate the carrots, and zucchini, and finely chop the mushrooms to guarantee they blend well into the sauce.
- Sauté the Aromatics: Heat the olive oil in a large skillet over medium heat. Add the chopped onion and garlic, and sauté for 2-3 minutes until the onion becomes translucent and aromatic.
- Cook the Veggies: Add the grated carrots, zucchini, and chopped mushrooms to the skillet. Stir well and cook for an additional 5 minutes, allowing the vegetables to soften and release their juices.
- Brown the Meat: Increase the heat to medium-high and add the ground beef or turkey. Cook, breaking it up with a spoon, until it’s browned all over and fully cooked through, about 8-10 minutes.
- Build the Sauce: Reduce the heat to medium. Stir in the crushed tomatoes, tomato paste, oregano, basil, and season with salt and pepper. Mix everything well to combine.
- Simmer: Allow the sauce to simmer gently for 15-20 minutes, stirring occasionally. This will help the flavors meld together and deepen the taste of the sauce.
- Cook the Pasta: While the sauce is simmering, cook the spaghetti or pasta according to the package instructions. Drain and set aside.
- Combine and Serve: Once the sauce is ready, mix in the grated Parmesan cheese, stirring until melted and well combined. Serve the Sneaky Spaghetti Bolognese over the cooked spaghetti, and enjoy!
Extra Tips:
To make this dish even more nutritious, consider adding a handful of spinach or kale to the sauce during the last few minutes of simmering. The heat will wilt the greens, and they’ll blend nicely into the sauce.
If you’re catering to a vegetarian crowd, you can substitute the ground meat with plant-based alternatives or lentils. Additionally, you can double the recipe and freeze half of the sauce for a quick future meal, making it a great time-saver for busy weeknights.
Cheesy Cauliflower Pizza

Cheesy Cauliflower Pizza is a delicious and healthy alternative to traditional pizza, perfect for families with picky eaters. This recipe combines a crispy cauliflower crust with a cheesy topping that even the fussiest eaters will love.
It’s a great way to sneak in some extra vegetables without sacrificing flavor. Plus, you can customize the toppings to suit everyone’s tastes, making it a versatile option for family dinners.
This recipe serves 4-6 people and offers a fun cooking experience for the whole family. The cauliflower crust isn’t only gluten-free but also provides a good source of fiber and vitamins. The cheesy topping adds a savory touch, and you can choose from a variety of vegetables and meats to make it your own.
Whether you’re aiming for a veggie-packed meal or a classic pepperoni pizza, this recipe is sure to please.
Ingredients:
- 1 large head of cauliflower, cut into florets
- 2 large eggs
- 1 ½ cups shredded mozzarella cheese (divided)
- ½ cup grated Parmesan cheese
- 1 teaspoon dried oregano
- 1 teaspoon garlic powder
- Salt and pepper to taste
- 1 cup pizza sauce
- ½ cup sliced bell peppers
- ½ cup sliced mushrooms
- ½ cup sliced olives
- ½ cup pepperoni slices (optional)
- Fresh basil leaves for garnish
Cooking Instructions:
- Prepare the Cauliflower Crust: Preheat your oven to 425°F (220°C). Place the cauliflower florets in a food processor and pulse until they resemble rice. Transfer the cauliflower to a microwave-safe bowl and microwave on high for about 8 minutes, until softened.
- Form the Dough: Allow the cauliflower to cool slightly, then place it in a clean kitchen towel and squeeze out as much moisture as possible. In a large mixing bowl, combine the cauliflower, eggs, 1 cup of mozzarella, Parmesan, oregano, garlic powder, salt, and pepper. Mix until a dough-like consistency forms.
- Shape the Crust: Line a baking sheet with parchment paper. Spread the cauliflower mixture onto the sheet and press it into a circular shape, about ¼ inch thick.
- Bake the Crust: Bake in the preheated oven for 20 minutes, or until the crust is golden brown and firm to the touch.
- Add the Toppings: Remove the crust from the oven and spread the pizza sauce evenly over it. Sprinkle the remaining mozzarella cheese on top, followed by the bell peppers, mushrooms, olives, and pepperoni if using.
- Final Bake: Return the pizza to the oven and bake for an additional 10 to 15 minutes, or until the cheese is melted and bubbly.
- Garnish and Serve: Remove from the oven, let it cool for a minute, then garnish with fresh basil leaves. Slice and serve hot.
Extra Tips:
For an even crispier crust, make sure to squeeze out as much moisture as possible from the cauliflower after microwaving. This step is essential for achieving the desired texture.
You can also experiment with different cheese blends or add a bit of crushed red pepper to the crust mixture for an added kick. If you’re short on time, pre-riced cauliflower available at grocery stores can be a convenient alternative.
Creamy Chicken Alfredo With Broccoli
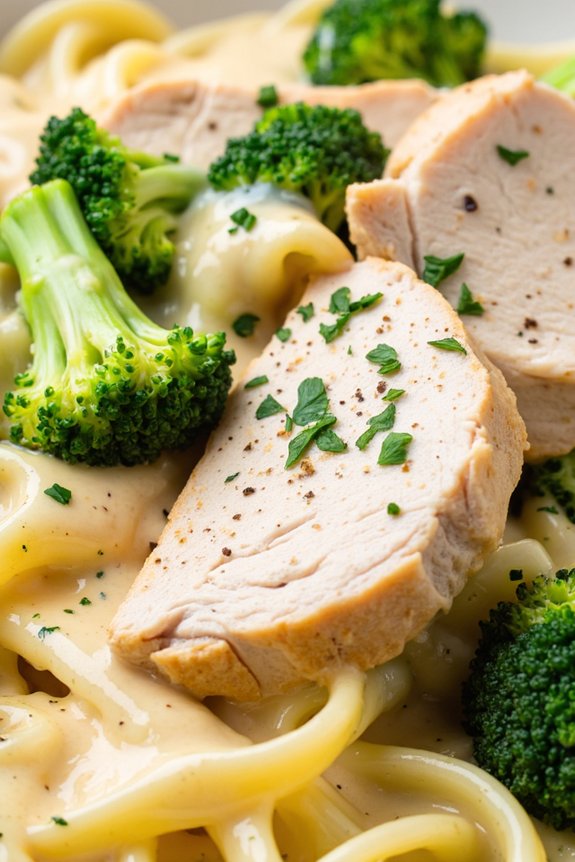
Creamy Chicken Alfredo With Broccoli is a perfect dish for family dinners, especially when catering to picky eaters. This dish combines tender pieces of chicken and fresh broccoli florets with a rich and creamy Alfredo sauce, all tossed with your choice of pasta. The mild flavors of the chicken and broccoli are enhanced by the creamy sauce, making it a delightful meal that appeals to both children and adults.
This dish isn’t only delicious but also balanced, providing protein, vegetables, and carbohydrates in one wholesome meal. The recipe is straightforward and can be prepared in about 30 minutes, making it an excellent choice for a busy weeknight dinner. The creamy Alfredo sauce is made from scratch, offering a fresh and flavorful alternative to store-bought versions.
The addition of broccoli not only adds a pop of color but also boosts the nutritional value of the dish. Serve it with a side of garlic bread or a simple green salad for a complete meal that the whole family will love.
Ingredients (Serves 4-6):
- 1 pound boneless, skinless chicken breasts
- Salt and pepper to taste
- 2 tablespoons olive oil
- 3 cups broccoli florets
- 12 ounces fettuccine or pasta of choice
- 2 cups heavy cream
- 1 cup grated Parmesan cheese
- 3 cloves garlic, minced
- 1 tablespoon unsalted butter
- 1 teaspoon Italian seasoning
- Fresh parsley, chopped (optional for garnish)
Cooking Instructions:
- Prepare the Chicken: Season the chicken breasts with salt and pepper on both sides. In a large skillet, heat olive oil over medium heat. Add the chicken breasts and cook for 6-7 minutes on each side or until golden brown and cooked through. Remove from skillet and set aside to rest.
- Cook the Broccoli: In the same skillet, add broccoli florets and sauté for 3-4 minutes until they’re bright green and slightly tender. Remove from the skillet and set aside.
- Cook the Pasta: Meanwhile, cook the fettuccine or your pasta of choice according to package instructions. Drain and set aside, reserving 1 cup of pasta water.
- Make the Alfredo Sauce: In the same skillet, melt butter over medium heat. Add minced garlic and sauté until fragrant, about 1 minute. Pour in the heavy cream and bring to a simmer. Stir in the Parmesan cheese and Italian seasoning, stirring constantly until the cheese is melted and the sauce thickens, about 3-4 minutes.
- Combine Ingredients: Slice the cooked chicken into strips. Add the cooked pasta, chicken strips, and broccoli to the Alfredo sauce in the skillet. Toss everything together to guarantee the pasta and vegetables are well-coated with the sauce. If the sauce is too thick, add reserved pasta water a little at a time until desired consistency is achieved.
- Serve: Garnish with chopped fresh parsley if desired and serve immediately.
Extra Tips: When cooking the chicken, make certain it isn’t overcrowded in the pan to achieve a nice golden crust. If you prefer a lighter version of the sauce, you can substitute half of the heavy cream with milk or use half-and-half.
Adjust the seasoning according to your taste; a little extra Parmesan cheese or a pinch of nutmeg can enhance the flavor of the sauce. Always taste the sauce before serving to make sure it’s to your liking. Enjoy your meal with a sprinkle of freshly cracked black pepper for an added kick!
Veggie-Packed Meatloaf
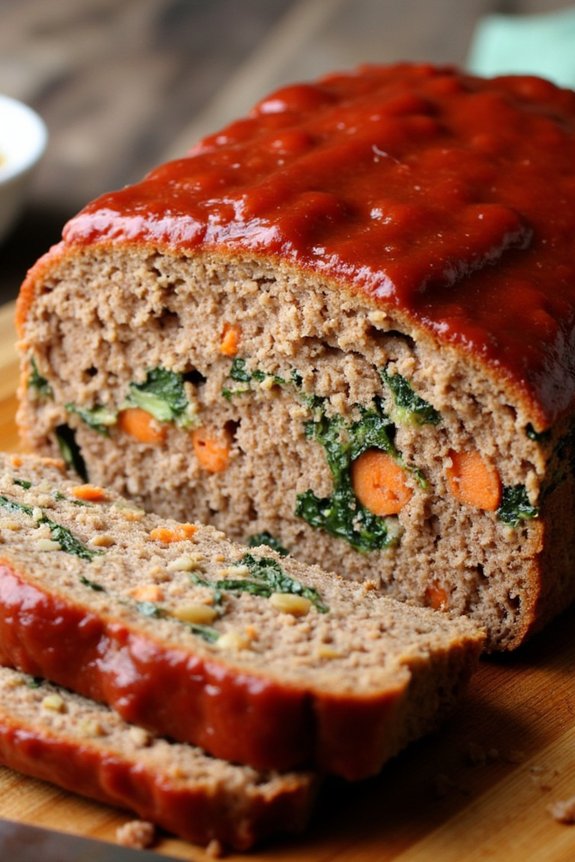
Veggie-Packed Meatloaf is a delicious and nutritious twist on a classic family dinner favorite. Perfect for households with picky eaters, this recipe cleverly incorporates a variety of vegetables into the meatloaf, adding both flavor and nutrients without compromising on the traditional taste.
This dish is ideal for a family meal, providing a balanced diet with its blend of proteins and vegetables, all wrapped in a comforting, savory loaf. The addition of veggies not only boosts the nutritional value but also helps keep the meatloaf moist and tender.
This recipe serves 4-6 people and is a great way to introduce more vegetables into meals without overwhelming those who might typically turn their noses up at them. By finely chopping or even grating the vegetables, they blend seamlessly with the meat, allowing you to sneak in a healthy portion without detection.
The end result is a juicy, flavorful meatloaf that’s sure to please even the most discerning palates. Serve this hearty dish with a side of mashed potatoes or a fresh salad for a complete meal.
Ingredients:
- 1 1/2 pounds ground beef or turkey
- 1 cup finely chopped onion
- 1 cup grated carrots
- 1 cup finely chopped spinach
- 1/2 cup breadcrumbs
- 2 eggs
- 1/2 cup milk
- 1 tablespoon Worcestershire sauce
- 1 teaspoon garlic powder
- 1 teaspoon salt
- 1/2 teaspoon black pepper
- 1/2 cup ketchup (plus extra for topping)
- 1 tablespoon olive oil
Cooking Instructions:
- Prepare the Vegetables: Preheat your oven to 375°F (190°C). In a large skillet, heat the olive oil over medium heat. Add the chopped onion and grated carrots, cooking until they’re soft, about 5 minutes. Stir in the chopped spinach and cook for another 2 minutes until wilted. Remove from heat and let cool slightly.
- Mix the Ingredients: In a large mixing bowl, combine the ground beef or turkey, cooked vegetables, breadcrumbs, eggs, milk, Worcestershire sauce, garlic powder, salt, and pepper. Mix everything until fully combined, but be careful not to overmix as this can make the meatloaf tough.
- Shape the Meatloaf: Transfer the meat mixture to a greased loaf pan or shape it into a loaf on a baking sheet lined with parchment paper. Press the mixture down to make sure there are no air pockets. Spread a thin layer of ketchup on top of the meatloaf for added flavor and a nice glaze.
- Bake the Meatloaf: Place the meatloaf in the preheated oven and bake for 45-55 minutes. The internal temperature should reach 160°F (70°C). Remove from the oven and let it rest for about 10 minutes before slicing. This resting period helps the juices redistribute throughout the meatloaf, making it more flavorful and tender.
- Serve: Slice the meatloaf and serve it warm. Pair it with mashed potatoes, a green salad, or steamed vegetables for a complete and balanced meal.
Extra Tips:
To guarantee your Veggie-Packed Meatloaf is a hit, consider using a food processor to finely chop or grate the vegetables, which helps them integrate better into the meat mixture.
If using turkey, which is generally leaner than beef, be cautious with the cooking time to prevent it from drying out. Experiment with different vegetables like zucchini or bell peppers to keep the meal interesting and to sneak in even more nutrients.
Finally, for a little extra flavor, try adding a sprinkle of your favorite cheese on top during the last 10 minutes of baking.
Sweet and Tangy BBQ Meatballs

Sweet and Tangy BBQ Meatballs are a delightful dish that even the pickiest of eaters will enjoy. Combining the savory taste of ground meat with the sweet and tangy flavors of a homemade BBQ sauce, these meatballs are perfect for a family dinner. The juicy meatballs, coated in a rich sauce, can be served with a variety of sides such as mashed potatoes, rice, or even a simple salad to create a balanced meal that everyone will love.
This recipe is designed to serve 4-6 people, making it ideal for a family gathering or a weeknight dinner. Not only are these meatballs delicious, but they’re also quite easy to prepare. By following the steps below, you’ll have a crowd-pleasing dish ready in no time. Whether you’re an experienced cook or a beginner, these Sweet and Tangy BBQ Meatballs are sure to become a staple in your dinner rotation.
Ingredients:
- 1 pound ground beef
- 1/2 cup breadcrumbs
- 1/4 cup milk
- 1 egg
- 1 teaspoon garlic powder
- 1 teaspoon onion powder
- Salt and pepper to taste
- 1 cup BBQ sauce
- 1/4 cup honey
- 2 tablespoons soy sauce
- 1 tablespoon apple cider vinegar
- 1 teaspoon Worcestershire sauce
- 1 tablespoon olive oil
Instructions:
- Preheat the Oven: Begin by preheating your oven to 375°F (190°C). This will guarantee that your oven is at the right temperature when it’s time to bake the meatballs.
- Prepare the Meatball Mixture: In a large bowl, combine the ground beef, breadcrumbs, milk, egg, garlic powder, onion powder, salt, and pepper. Mix thoroughly until all ingredients are well combined. The mixture should be slightly sticky but firm enough to hold a shape.
- Form the Meatballs: Using your hands or a small scoop, shape the mixture into 1-inch meatballs. You should have around 20-24 meatballs, depending on the size.
- Cook the Meatballs: In a large skillet, heat the olive oil over medium heat. Add the meatballs in batches and cook until they’re browned on all sides. This should take about 5-7 minutes. Once browned, transfer the meatballs to a baking dish.
- Make the BBQ Sauce: In a separate bowl, whisk together the BBQ sauce, honey, soy sauce, apple cider vinegar, and Worcestershire sauce. Make sure the ingredients are well combined to create a smooth sauce.
- Coat and Bake: Pour the BBQ sauce mixture over the meatballs in the baking dish, ensuring each meatball is well coated. Cover the dish with aluminum foil and bake in the preheated oven for 25-30 minutes, or until the meatballs are cooked through.
- Serve: Once baked, remove the meatballs from the oven and let them rest for a few minutes. Serve hot with your choice of sides.
Extra Tips:
For an extra burst of flavor, consider adding a pinch of smoked paprika or chili powder to the meatball mixture. If you find the meatball mixture too wet, add a bit more breadcrumbs until it reaches the desired consistency.
To make the dish even more appealing to kids, serve with a side of homemade mac and cheese or corn on the cob. For a slightly different taste, try experimenting with different types of BBQ sauce, such as a spicy or honey-flavored variety. Enjoy!
One-Pot Cheesy Taco Pasta
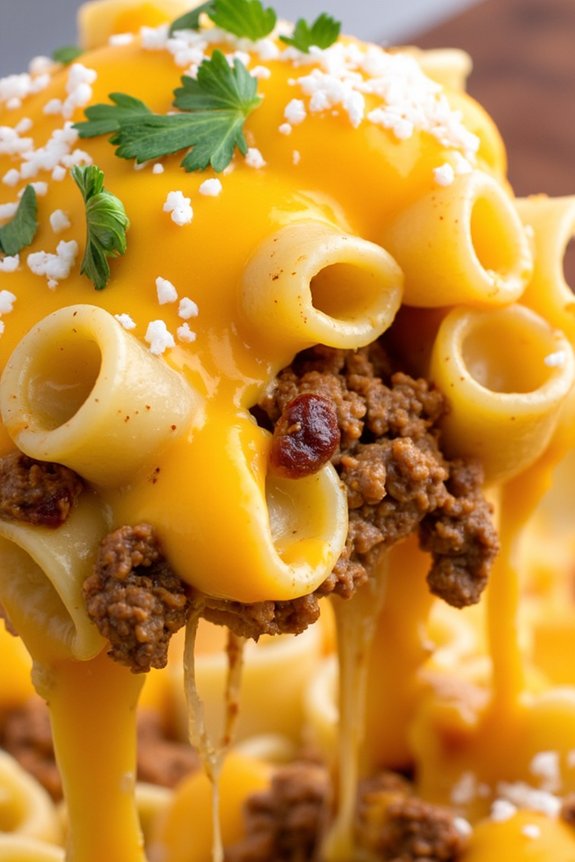
One-Pot Cheesy Taco Pasta is a delicious and easy-to-make meal that’s perfect for family dinners, especially for picky eaters. This dish combines the rich flavors of tacos with the comforting taste of pasta, creating a unique and satisfying meal that both adults and kids will love. The best part is that it all comes together in one pot, making cleanup quick and easy.
This recipe is perfect for serving 4-6 people, making it an ideal option for family meals. The creamy cheese sauce, seasoned meat, and tender pasta create a harmonious blend of flavors that will have everyone asking for seconds. Plus, with just a few simple ingredients, you can have a tasty meal on the table in no time.
Ingredients for 4-6 servings:
- 1 pound ground beef
- 1 small onion, diced
- 2 cloves garlic, minced
- 1 packet taco seasoning
- 1 can (14.5 oz) diced tomatoes, undrained
- 2 cups beef broth
- 8 oz pasta shells or elbow macaroni
- 1 cup shredded cheddar cheese
- 1/2 cup sour cream
- Salt and pepper to taste
- Fresh cilantro or parsley for garnish (optional)
Cooking Instructions:
- Brown the Beef: In a large pot or deep skillet, cook the ground beef over medium-high heat until browned. Break it up into small pieces as it cooks. Drain any excess fat.
- Cook Aromatics: Add the diced onion and minced garlic to the pot with the beef. Sauté for about 2-3 minutes until the onion becomes translucent and fragrant.
- Add Seasoning and Tomatoes: Stir in the taco seasoning, ensuring that the beef and onion mixture is well coated. Then, pour in the can of diced tomatoes, including the juice, and mix well.
- Add Pasta and Broth: Pour in the beef broth and bring the mixture to a boil. Once boiling, add the pasta shells or elbow macaroni. Stir to combine, ensuring the pasta is submerged in the liquid.
- Simmer: Reduce the heat to low, cover the pot, and let it simmer for about 10-12 minutes, or until the pasta is cooked to al dente. Stir occasionally to prevent sticking.
- Add Cheese and Sour Cream: Once the pasta is cooked, remove the pot from the heat. Stir in the shredded cheddar cheese until melted and creamy. Then, add the sour cream and mix until everything is well combined. Season with salt and pepper to taste.
- Serve and Garnish: Serve the cheesy taco pasta in bowls. If desired, garnish with chopped fresh cilantro or parsley for a burst of freshness.
Extra Tips:
For a bit of extra flavor, consider adding some chopped bell peppers or jalapeños during the onion and garlic cooking step. You can also use ground turkey or chicken instead of beef for a lighter option.
To make the dish spicier, add a pinch of cayenne pepper or a few dashes of hot sauce. If you prefer a thicker sauce, reduce the beef broth by a quarter cup. Remember, the key to this dish is in the seasoning, so feel free to adjust the taco seasoning to suit your taste preferences.
Zucchini and Corn Fritters

Zucchini and Corn Fritters are a delightful and easy-to-make dish that can please even the pickiest of eaters. These fritters are packed with the freshness of zucchini and the natural sweetness of corn, making them a great addition to any family dinner. With a crispy exterior and a tender interior, these fritters aren’t only delicious but also nutritious. They can be served as a side dish, appetizer, or even a light main course.
The versatility of Zucchini and Corn Fritters means they can be paired with a variety of dips or sauces, such as sour cream, yogurt, or a spicy aioli, to enhance their flavor. This recipe makes enough for a serving size of 4-6 people, guaranteeing there’s plenty to go around. Whether you’re dealing with a selective eater or just looking to add some vegetables to your meal, these fritters are the perfect solution.
Ingredients (Serves 4-6):
- 2 medium zucchinis, grated
- 1 cup fresh corn kernels (or canned, drained)
- 1 small onion, finely chopped
- 2 cloves of garlic, minced
- 2 large eggs
- 1 cup all-purpose flour
- 1/2 cup grated Parmesan cheese
- 1 teaspoon baking powder
- Salt and pepper, to taste
- 1/4 cup fresh parsley, chopped
- 1/4 cup milk
- Olive oil, for frying
Cooking Instructions:
- Prepare the Zucchini: Grate the zucchinis using a box grater and place them in a clean kitchen towel. Squeeze out as much moisture as possible from the zucchini to prevent soggy fritters.
- Mix the Ingredients: In a large bowl, combine the grated zucchini, corn kernels, chopped onion, minced garlic, eggs, flour, Parmesan cheese, baking powder, salt, pepper, and parsley. Add the milk and mix until all the ingredients are well incorporated into a batter.
- Heat the Oil: In a large frying pan, heat a few tablespoons of olive oil over medium heat. You want enough oil to coat the bottom of the pan for frying.
- Cook the Fritters: Once the oil is hot, drop spoonfuls of the batter into the pan, flattening them slightly with the back of the spoon to form fritters. Cook each side for about 3-4 minutes, or until golden brown and cooked through.
- Drain and Serve: Remove the fritters from the pan and place them on a paper towel-lined plate to drain any excess oil. Serve warm with your choice of dipping sauce.
Extra Tips: When making Zucchini and Corn Fritters, it’s essential to remove as much moisture as possible from the zucchini to make sure the fritters hold together well and become crispy.
You can experiment by adding different herbs or spices to the batter to suit your family’s taste preferences. If you’re using canned corn, make sure to drain it thoroughly to avoid adding extra moisture.
These fritters can also be made ahead of time and reheated in the oven for convenience.
Mini Chicken Pot Pies

Mini Chicken Pot Pies are a delightful and comforting dish that can please even the pickiest of eaters. These individual pot pies are perfect for family dinners, as they aren’t only delicious but also fun to eat. Encased in flaky golden pastry, these pies are filled with a creamy chicken and vegetable mixture that will have everyone coming back for seconds.
Whether you’re looking to sneak in some veggies for the kids or simply want to enjoy a hearty meal, Mini Chicken Pot Pies are a great choice. This recipe is designed to serve 4-6 people, making it ideal for a family gathering or a cozy dinner with friends. The mini pot pies are easy to prepare and can be a wonderful option for a make-ahead meal.
You can enjoy the warm and savory flavors without much hassle, as the ingredients are simple and the steps are straightforward. By following this recipe, you’ll have a delicious dinner on the table in no time, certain to be loved by even the most selective eaters.
Ingredients for 4-6 servings:
- 2 cups cooked chicken, diced
- 1 cup frozen mixed vegetables (peas, carrots, corn)
- 1 cup chicken broth
- 1 cup milk
- 1/2 cup butter
- 1/2 cup all-purpose flour
- 1 teaspoon salt
- 1/2 teaspoon black pepper
- 1 teaspoon dried thyme
- 1 package refrigerated pie crusts (2 crusts)
- 1 egg, beaten (for egg wash)
Cooking Instructions:
- Preheat the Oven: Preheat your oven to 375°F (190°C) to prepare for baking the pot pies.
- Prepare the Filling: In a medium saucepan, melt the butter over medium heat. Stir in the flour, salt, pepper, and thyme until well blended. Gradually whisk in the chicken broth and milk, continuing to whisk until the mixture is smooth and begins to thicken.
- Add Chicken and Vegetables: Stir in the cooked chicken and frozen vegetables. Cook for another 5 minutes, until the mixture is fully heated through and thickened. Remove from heat.
- Prepare the Pie Crusts: Roll out the refrigerated pie crusts on a floured surface. Cut out rounds that are slightly larger than the openings of your muffin tins to account for the depth of the cups.
- Assemble the Pies: Gently press the cut pie crusts into the cups of a muffin tin to form the base and sides of the mini pies. Fill each crust with the chicken and vegetable mixture.
- Top the Pies: Cut additional rounds from the remaining pie crusts for the tops of the pies. Place these over each filled muffin cup and press the edges to seal. Use a fork to crimp the edges for a decorative finish.
- Apply Egg Wash: Brush the tops of each pie with the beaten egg to guarantee a golden, glossy finish once baked.
- Bake the Pies: Place the muffin tin in the preheated oven and bake for 25-30 minutes, or until the crusts are golden brown and the filling is bubbly.
- Cool Slightly: Allow the mini pot pies to cool in the tin for a few minutes before carefully removing them. Serve warm.
Extra Tips:
For best results, verify your pie crusts are cold before working with them, as this will make them easier to handle and result in a flakier crust. If you find the filling too thick, you can add a bit more chicken broth or milk to reach your desired consistency.
Additionally, feel free to customize the vegetables based on your family’s preferences or what you have on hand. These pot pies can also be made ahead and frozen for a quick meal on a busy day—just bake them directly from the freezer, adding a few extra minutes to the baking time.
Kid-Friendly Stir-Fry
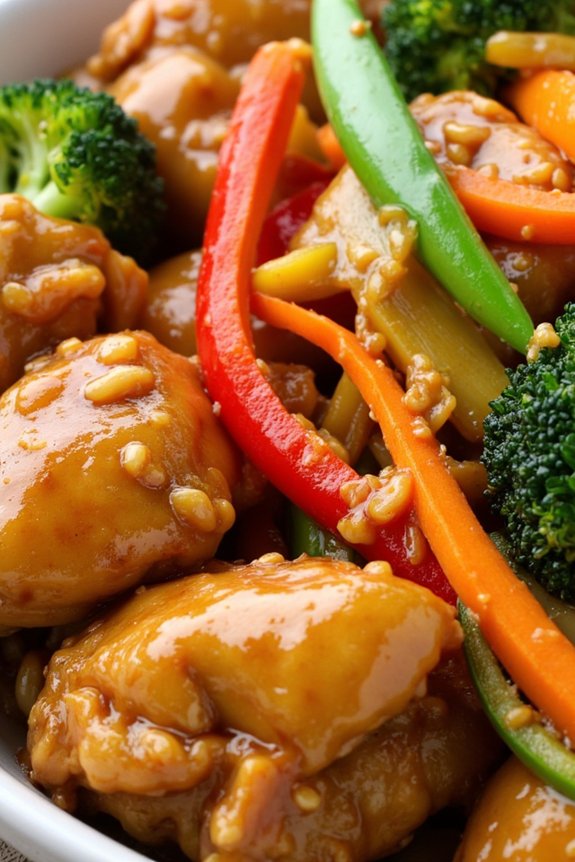
Stir-fry is a versatile and quick meal option perfect for families, especially those with picky eaters. This Kid-Friendly Chicken and Vegetable Stir-Fry recipe is designed to be both delicious and appealing to younger palates. With tender chicken pieces, colorful vegetables, and a savory yet mild sauce, it’s sure to be a hit at the dinner table.
Plus, it’s a great way to introduce kids to a variety of vegetables in one meal. This recipe is easy to customize based on personal preferences and dietary needs. Feel free to swap out vegetables or adjust the seasoning to suit your family’s taste. The key is to keep the ingredients simple and familiar, ensuring that even the fussiest eaters will enjoy every bite.
This recipe serves 4-6 people, making it perfect for family dinners or leftovers for the next day.
Ingredients:
- 1.5 lbs boneless, skinless chicken breasts, cut into bite-sized pieces
- 2 tablespoons vegetable oil
- 1 red bell pepper, sliced
- 1 cup broccoli florets
- 1 cup sugar snap peas
- 1 medium carrot, thinly sliced
- 3 cloves garlic, minced
- 1/4 cup soy sauce
- 2 tablespoons honey
- 1 tablespoon cornstarch
- 1/4 cup water
- Salt and pepper to taste
- Cooked white or brown rice (optional)
Cooking Instructions:
- Prepare the Sauce: In a small bowl, whisk together soy sauce, honey, cornstarch, and water until smooth. Set aside.
- Cook the Chicken: Heat 1 tablespoon of vegetable oil in a large skillet or wok over medium-high heat. Add the chicken pieces and season with salt and pepper. Cook for about 5-7 minutes, stirring occasionally, until the chicken is cooked through and no longer pink. Remove the chicken from the skillet and set aside.
- Cook the Vegetables: In the same skillet, add the remaining tablespoon of vegetable oil. Add the garlic and stir-fry for about 30 seconds until fragrant. Add the bell pepper, broccoli, sugar snap peas, and carrot. Stir-fry for about 5 minutes, or until the vegetables are tender-crisp.
- Combine Ingredients: Return the cooked chicken to the skillet with the vegetables. Stir the sauce once more and pour it over the chicken and vegetables. Stir everything together until the sauce thickens and evenly coats the chicken and vegetables, about 2-3 minutes.
- Serve: Remove from heat and serve immediately over cooked rice if desired.
Extra Tips:
For a more colorful and nutritious dish, feel free to add a variety of vegetables such as zucchini, mushrooms, or baby corn. If your kids are sensitive to stronger flavors, you can reduce the amount of garlic or omit it altogether.
For additional texture and flavor, consider sprinkling some toasted sesame seeds or chopped green onions on top before serving. Remember, the key to a successful stir-fry is to have all ingredients prepped and ready before starting to cook, as the process is quick and requires constant attention.
Tomato Basil Soup With Grilled Cheese Croutons

Tomato Basil Soup with Grilled Cheese Croutons is a delightful twist on the classic comfort food that will charm even the pickiest of eaters. The creamy, rich tomato soup is infused with the aromatic freshness of basil, offering a depth of flavor that’s both soothing and satisfying. Paired with crispy, golden-brown grilled cheese croutons, this dish is perfect for family dinners, especially on a chilly evening.
It’s a comforting meal that takes a beloved pairing and elevates it to a new culinary experience. The beauty of this recipe lies in its simplicity and the harmony of flavors that come together seamlessly. The soup is made from ripe tomatoes, blended with a hint of garlic and onion, then simmered with fresh basil leaves for a burst of herbal aroma.
The grilled cheese croutons add a fun and interactive element to the meal, offering crunchy, cheesy bites that perfectly complement the smooth texture of the soup. It’s not only a feast for the taste buds but also a visually appealing dish that will impress both young and old at the dinner table.
Ingredients (Serves 4-6):
- 2 tablespoons olive oil
- 1 medium onion, chopped
- 2 cloves garlic, minced
- 2 cans (28 ounces each) whole peeled tomatoes
- 2 cups vegetable broth
- 1/2 cup heavy cream
- 1/4 cup fresh basil leaves, chopped
- Salt and pepper to taste
- 8 slices of bread (preferably sourdough or country loaf)
- 4 tablespoons butter
- 2 cups shredded cheddar cheese
Cooking Instructions:
1. Prepare the Soup Base:
Heat the olive oil in a large pot over medium heat. Add the chopped onion and minced garlic, sautéing until the onion becomes translucent, about 5 minutes.
2. Add Tomatoes and Broth:
Pour in the canned whole peeled tomatoes with their juices and the vegetable broth. Bring the mixture to a boil, then reduce the heat and let it simmer for about 15 minutes.
3. Blend and Season:
Carefully transfer the soup into a blender or use an immersion blender to puree the mixture until smooth. Return the soup to the pot and stir in the heavy cream and chopped basil leaves. Season with salt and pepper to taste.
4. Prepare Grilled Cheese Sandwiches:
Butter one side of each bread slice. Place the buttered side down on a skillet over medium heat. Distribute the cheddar cheese evenly over 4 slices of bread and top with the remaining slices, buttered side up. Cook until the bread is golden brown and the cheese has melted, about 3-4 minutes per side.
5. Make Grilled Cheese Croutons:
Remove the sandwiches from the skillet and let them cool slightly. Cut each grilled cheese sandwich into bite-sized croutons.
6. Serve:
Ladle the hot soup into bowls and top with a handful of grilled cheese croutons. Garnish with additional fresh basil if desired.
Extra Tips:
For the best flavor, use ripe, high-quality canned tomatoes or fresh tomatoes if they’re in season. An immersion blender is a handy tool for this recipe, as it allows you to blend the soup directly in the pot without transferring hot liquid.
Feel free to adjust the amount of basil according to your taste preferences—more basil will make the soup more aromatic and fresh. If you prefer a thicker soup, reduce the amount of vegetable broth slightly. The grilled cheese croutons can be made with any type of cheese your family enjoys, such as mozzarella or Swiss, for a different flavor profile.