

As someone who cherishes the warmth of family dinners, I can’t help but reminisce about those classic 90s recipes that brought us all together. Picture a table filled with comforting dishes like meatloaf and cheesy casseroles, each bite a reminder of simpler times. Curious about how these nostalgic recipes can transform your next family meal into a trip down memory lane? Let’s explore these timeless treasures that are sure to spark joy and delicious memories.
Classic Meatloaf
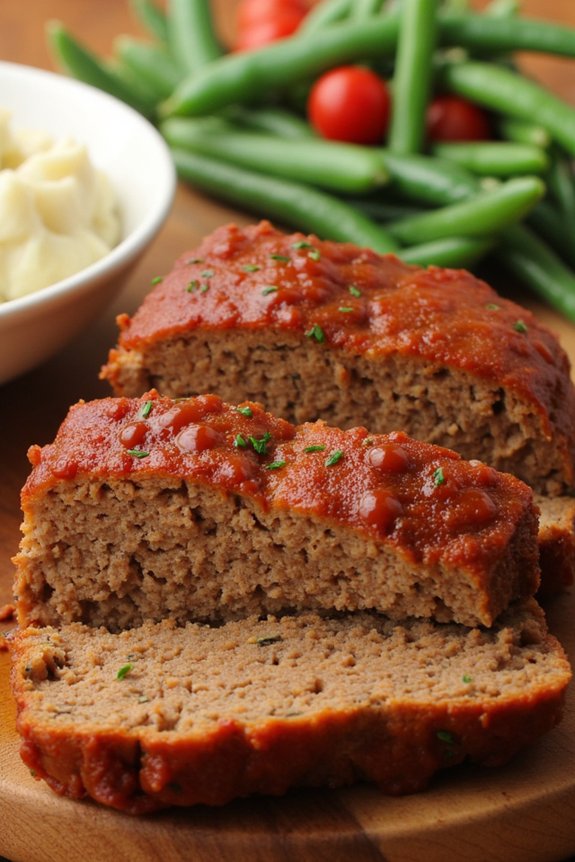
Transport yourself back to the wholesome family dinners of the 90s with a dish that epitomizes comfort and nostalgia—Classic Meatloaf. This beloved recipe combines savory ground beef with a harmonious blend of herbs and spices, creating a moist and flavorful loaf that’s sure to be the centerpiece of any meal. Topped with a tangy tomato glaze, each slice promises to be a perfect balance of taste and texture, making it a favorite for both young and old.
Perfect for a family of 4-6, this Classic Meatloaf recipe is both simple and satisfying. The preparation process is straightforward, allowing even novice cooks to achieve great results. By using fresh ingredients and a few pantry staples, you’ll create a dish that feels as warm and inviting as the era it hails from. Whether served with mashed potatoes or a side of green beans, this meatloaf is sure to bring smiles to the dinner table.
Ingredients for 4-6 servings:
- 1 ½ pounds ground beef
- 1 cup breadcrumbs
- 1/2 cup milk
- 2 large eggs
- 1 small onion, finely chopped
- 2 cloves garlic, minced
- 1 tablespoon Worcestershire sauce
- 1 tablespoon ketchup
- 1 teaspoon salt
- 1/2 teaspoon black pepper
- 1 teaspoon dried thyme
- 1/2 teaspoon dried oregano
For the glaze:
- 1/3 cup ketchup
- 2 tablespoons brown sugar
- 1 tablespoon Dijon mustard
Cooking Instructions:
- Preheat the Oven: Start by preheating your oven to 350°F (175°C). This guarantees that the oven is at the right temperature when you place the meatloaf inside, promoting even cooking.
- Prepare the Loaf Mixture: In a large mixing bowl, combine the ground beef, breadcrumbs, milk, eggs, chopped onion, minced garlic, Worcestershire sauce, ketchup, salt, pepper, thyme, and oregano. Mix everything thoroughly using your hands or a spoon until all the ingredients are well incorporated.
- Shape the Meatloaf: Transfer the meat mixture onto a parchment-lined baking sheet or a lightly greased loaf pan. Shape it into a loaf, ensuring it’s compact to hold together during baking.
- Prepare the Glaze: In a small bowl, mix together the ketchup, brown sugar, and Dijon mustard until smooth. This will be your glaze.
- Add the Glaze: Spread the glaze evenly over the top of the meatloaf, ensuring it’s fully covered. This glaze will caramelize during baking, adding a delicious layer of flavor.
- Bake the Meatloaf: Place the meatloaf in the preheated oven and bake for 1 hour, or until the internal temperature reaches 160°F (70°C). This guarantees that the meat is cooked through and safe to eat.
- Rest and Serve: Once baked, remove the meatloaf from the oven and let it rest for about 10 minutes. This allows the juices to redistribute, making it easier to slice. Serve warm with your choice of side dishes.
Extra Tips: For an even moister meatloaf, consider adding finely chopped vegetables like bell peppers or carrots to the meat mixture. Additionally, you can experiment with different types of ground meat, such as turkey or a beef-pork blend, to suit your taste preferences.
When mixing the ingredients, avoid overworking the meat to prevent a dense texture. Finally, if you don’t have a loaf pan, shaping the meat mixture directly on a baking sheet works just as well. Enjoy this taste of the 90s with memories that will warm both your heart and stomach!
Cheesy Broccoli Casserole

Cheesy Broccoli Casserole is a comforting and nostalgic dish that takes you back to the family dinners of the 90s. This classic casserole is a perfect combination of cheesy goodness and tender broccoli, making it not only delicious but also a great way to sneak some vegetables into your meal.
The creamy texture and rich flavors are sure to please both kids and adults alike, making it a perfect choice for a weeknight dinner or a potluck gathering. This casserole isn’t only filled with flavor but also incredibly easy to prepare. The preparation time is minimal, and the ingredients are simple and wholesome, allowing you to focus on spending more time with your family at the dinner table.
With a golden, bubbly cheese topping, this dish is both a feast for the eyes and the taste buds. Serve this Cheesy Broccoli Casserole alongside a roasted chicken or as part of a vegetarian spread, and watch it become a family favorite in no time.
Ingredients (Serves 4-6)
- 4 cups of broccoli florets
- 1/2 cup chopped onion
- 1 cup shredded cheddar cheese
- 1 can (10.5 oz) cream of mushroom soup
- 1/2 cup mayonnaise
- 1 large egg, beaten
- 1 cup cracker crumbs (such as Ritz)
- 2 tablespoons melted butter
- Salt and pepper to taste
Cooking Instructions
- Preheat and Prepare: Preheat your oven to 350°F (175°C). Grease a 9×13-inch baking dish with butter or cooking spray to prevent sticking.
- Cook Broccoli: In a large pot, bring water to a boil. Add the broccoli florets and cook for about 3-4 minutes until they’re tender-crisp. Drain the broccoli and set it aside.
- Mix Ingredients: In a large mixing bowl, combine the cooked broccoli, chopped onion, shredded cheddar cheese, cream of mushroom soup, mayonnaise, and beaten egg. Stir everything together until well combined. Season with salt and pepper to taste.
- Assemble Casserole: Pour the broccoli mixture into the prepared baking dish, spreading it evenly across the dish.
- Prepare Topping: In a separate bowl, mix the cracker crumbs with the melted butter until the crumbs are well coated. Sprinkle this mixture evenly over the top of the broccoli mixture.
- Bake: Place the dish in the preheated oven and bake for 25-30 minutes, or until the top is golden brown and the casserole is bubbling around the edges.
- Serve: Remove the casserole from the oven and let it cool for a few minutes before serving. Enjoy it warm as a side dish or a main course.
Extra Tips
For a bit of extra flavor, consider adding a pinch of paprika or garlic powder to the cracker topping before baking. If you prefer a more substantial casserole, you can add cooked chicken or turkey to the mixture.
Additionally, for those who want a bit more color and nutrients, feel free to add a handful of sliced mushrooms or diced bell peppers before baking. Always guarantee the broccoli is well-drained to avoid excess moisture in the casserole, which can prevent it from setting properly.
Spaghetti and Meatballs

Spaghetti and meatballs is a timeless dish that evokes memories of cozy family dinners from the 90s. This classic recipe combines tender, flavorful meatballs with a rich, savory tomato sauce served over perfectly cooked spaghetti. It’s a dish that brings warmth and comfort to the table, making it a favorite for family gatherings and weeknight meals alike.
Whether you’re reminiscing about your childhood or introducing this beloved meal to a new generation, spaghetti and meatballs is sure to delight everyone at the table.
This recipe is designed to serve 4-6 people, making it ideal for family dinners or a small gathering with friends. The key to achieving the perfect spaghetti and meatballs lies in the balance of flavors in the meatballs and sauce, along with cooking the pasta to al dente perfection. With a few simple ingredients and a bit of time, you’ll have a delicious meal that everyone will enjoy.
Ingredients:
- 1 pound ground beef
- 1/2 cup breadcrumbs
- 1/4 cup grated Parmesan cheese
- 1/4 cup chopped fresh parsley
- 1 large egg
- 2 cloves garlic, minced
- Salt and pepper, to taste
- 1 tablespoon olive oil
- 1 onion, chopped
- 1 can (28 ounces) crushed tomatoes
- 1 teaspoon dried oregano
- 1 teaspoon dried basil
- 1/2 teaspoon sugar
- 1/4 teaspoon red pepper flakes (optional)
- 1 pound spaghetti
- Fresh basil leaves, for garnish
- Additional grated Parmesan cheese, for serving
Cooking Instructions:
- Prepare the Meatballs: In a large mixing bowl, combine the ground beef, breadcrumbs, Parmesan cheese, chopped parsley, egg, minced garlic, salt, and pepper. Mix gently with your hands until all ingredients are well combined. Form the mixture into 1-inch meatballs and set aside.
- Brown the Meatballs: Heat the olive oil in a large skillet over medium heat. Add the meatballs in batches, making sure not to overcrowd the pan. Cook the meatballs for about 5-7 minutes, turning occasionally, until they’re browned on all sides. Remove the meatballs from the skillet and set them aside on a plate.
- Prepare the Sauce: In the same skillet, add the chopped onion and sauté until translucent, about 5 minutes. Add the crushed tomatoes, oregano, basil, sugar, and red pepper flakes (if using). Stir to combine and bring the sauce to a simmer.
- Simmer the Meatballs and Sauce: Return the browned meatballs to the skillet, nestling them into the sauce. Reduce the heat to low, cover the skillet, and let the meatballs simmer in the sauce for about 25-30 minutes, allowing the flavors to meld together.
- Cook the Spaghetti: While the meatballs are simmering, bring a large pot of salted water to a boil. Add the spaghetti and cook according to the package instructions until al dente. Drain the pasta and return it to the pot.
- Combine and Serve: Add the cooked spaghetti to the skillet with the meatballs and sauce, tossing gently to coat the pasta. Serve the spaghetti and meatballs hot, garnished with fresh basil leaves and additional grated Parmesan cheese.
Extra Tips:
For the best flavor, use freshly grated Parmesan cheese and fresh herbs when possible. The breadcrumbs in the meatballs help to keep them tender, so be sure not to skip this ingredient.
If you prefer a spicier sauce, adjust the amount of red pepper flakes to your liking. Finally, when cooking the spaghetti, be sure not to overcook it, as it will continue to absorb some of the sauce once combined. Enjoy your nostalgic meal!
Chicken Pot Pie

Chicken Pot Pie is a quintessential comfort food that brings back the warmth and nostalgia of family dinners in the 90s. This dish is a delightful combination of tender chicken, vibrant vegetables, and a creamy sauce, all enveloped in a flaky pie crust. Perfect for a cozy evening, this pie is sure to become a family favorite, just as it was for many households back in the day.
This recipe serves 4-6 people and is perfect for a hearty family dinner. The Chicken Pot Pie isn’t only delicious but also a great way to use up leftover chicken or vegetables. With its rich flavors and satisfying textures, it’s destined to be a hit at your dinner table.
Ingredients:
- 2 cups cooked chicken, diced
- 1 cup carrots, diced
- 1 cup peas
- 1 cup potatoes, diced
- 1/2 cup onion, chopped
- 1/4 cup butter
- 1/4 cup all-purpose flour
- 1 3/4 cups chicken broth
- 2/3 cup milk
- Salt and pepper to taste
- 1/2 teaspoon dried thyme
- 1/2 teaspoon dried rosemary
- 1 package refrigerated pie crusts (2 crusts)
Cooking Instructions:
- Preheat the Oven: Preheat your oven to 425°F (220°C) to guarantee it’s ready for baking once the pie is assembled.
- Prepare the Filling: In a large saucepan, melt the butter over medium heat. Add the chopped onions and cook until they become translucent, about 3-4 minutes.
- Cook the Vegetables: Stir in the carrots, peas, and potatoes. Cook for another 5 minutes, or until the vegetables start to soften.
- Create the Sauce: Sprinkle the flour over the vegetables and stir well to coat. Gradually add the chicken broth and milk, stirring constantly until the mixture thickens and comes to a gentle boil.
- Flavor the Filling: Add the diced chicken, salt, pepper, thyme, and rosemary. Mix everything until well combined. Remove from heat and set aside.
- Prepare the Pie Crust: Roll out one of the pie crusts and fit it into the bottom of a 9-inch pie dish. Make sure there’s enough crust hanging over the edge to crimp later.
- Assemble the Pie: Pour the chicken and vegetable mixture into the prepared pie crust, spreading it evenly. Cover with the second pie crust, crimping the edges to seal. Cut a few slits in the top crust to allow steam to escape during baking.
- Bake the Pie: Place the assembled pie on a baking sheet to catch any drips. Bake in the preheated oven for 30-35 minutes, or until the crust is golden brown and the filling is bubbly.
- Cool Before Serving: Allow the pie to cool for at least 10 minutes before serving. This helps the filling set and makes slicing easier.
Extra Tips:
For a richer flavor, you can substitute half-and-half for the milk. If you prefer a more rustic look, try using a lattice pattern for the top crust.
Additionally, feel free to customize the filling with your favorite vegetables or herbs. To save time, you can use pre-cooked rotisserie chicken.
Finally, if you’re making the pie ahead of time, you can freeze it before baking; just make sure it’s well-wrapped. When you’re ready to bake, thaw it in the refrigerator overnight before proceeding with the baking instructions.
Tuna Noodle Casserole
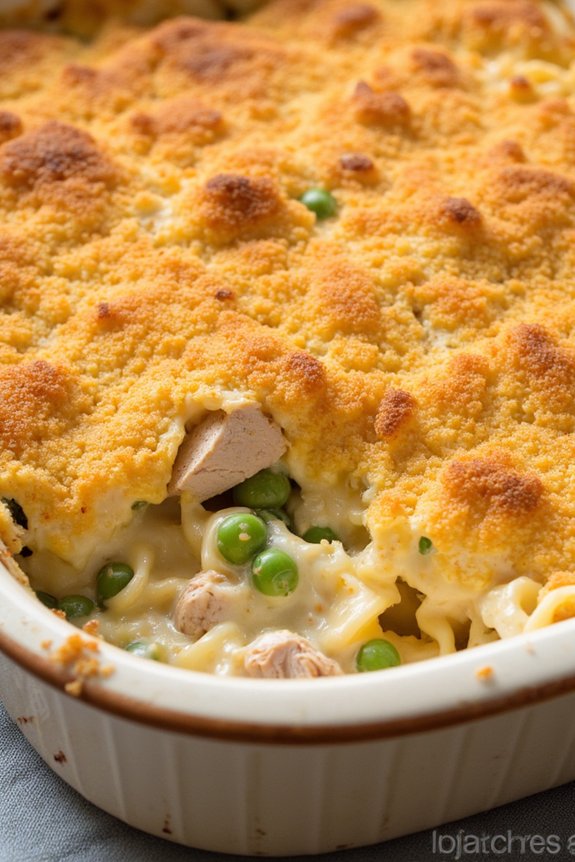
Tuna Noodle Casserole is a classic 90s family dinner recipe that brings a comforting blend of flavors with its creamy sauce, tender noodles, and chunks of tuna. This dish is perfect for a cozy family meal and is often loved for its simplicity and ease of preparation. The combination of rich, cheesy sauce and crunchy topping makes it a delightful treat for both adults and children.
This casserole can be prepared with pantry staples, making it convenient for weeknight dinners. It’s also a great way to incorporate protein and carbohydrates into one meal, ensuring a balanced dish that satisfies your hunger. With a prep time of about 20 minutes and a bake time of around 30 minutes, you can have this delicious meal ready in under an hour.
Ingredients (serving size: 4-6 people):
- 12 oz egg noodles
- 2 cans (10.5 oz each) cream of mushroom soup
- 1 cup milk
- 2 cups shredded cheddar cheese
- 2 cans (5 oz each) tuna, drained
- 1 cup frozen peas
- 1/2 cup breadcrumbs
- 1/4 cup grated Parmesan cheese
- 2 tablespoons butter, melted
- Salt and pepper to taste
Instructions:
- Preheat and Prepare: Preheat your oven to 350°F (175°C). Grease a 9×13 inch baking dish and set aside.
- Cook Noodles: In a large pot, bring water to a boil and cook the egg noodles according to the package instructions until al dente. Drain the noodles and set them aside.
- Mix Ingredients: In a large mixing bowl, combine the cream of mushroom soup, milk, and 1 1/2 cups of the shredded cheddar cheese. Mix until smooth. Season with salt and pepper to taste.
- Add Tuna and Peas: Gently fold in the drained tuna and frozen peas into the soup mixture. Stir until evenly distributed.
- Combine with Noodles: Add the cooked noodles to the mixture, stirring carefully to coat the noodles with the sauce without breaking them.
- Transfer to Baking Dish: Pour the noodle mixture into the prepared baking dish, spreading it out evenly.
- Prepare Topping: In a small bowl, combine the breadcrumbs, Parmesan cheese, and melted butter. Stir until the breadcrumbs are well-coated.
- Bake: Sprinkle the remaining 1/2 cup of cheddar cheese over the top of the casserole, followed by the breadcrumb mixture. Bake in the preheated oven for 25-30 minutes, or until the top is golden brown and the casserole is bubbly.
- Serve: Remove from the oven and let it cool for a few minutes before serving. Enjoy your comforting Tuna Noodle Casserole!
Extra Tips:
For an extra creamy casserole, you can add an additional 1/2 cup of milk or substitute half of the milk with heavy cream. If you prefer a little crunch, consider adding some chopped celery or sliced water chestnuts to the mixture before baking.
To make the dish more flavorful, you can also mix in a tablespoon of Dijon mustard or a dash of Worcestershire sauce. If you’re looking for a healthier option, try using whole wheat noodles and low-fat cheese.
Be sure not to overcook the noodles, as they’ll continue to cook slightly in the oven.
Sloppy Joes
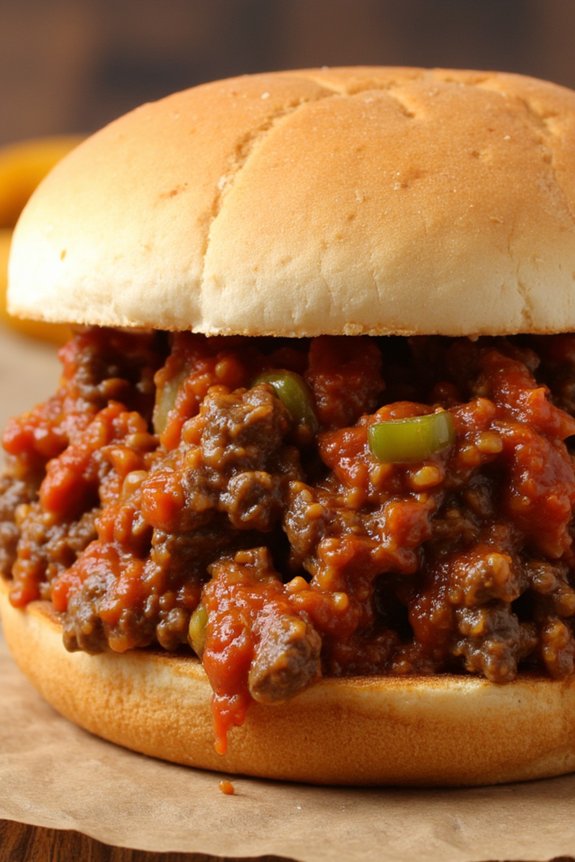
Sloppy Joes are a quintessential 90s family dinner recipe, embodying the essence of comfort food with their savory and slightly sweet flavors. This dish is perfect for feeding a crowd, especially when you have a family hungry for a hearty meal. The combination of ground beef simmered in a tangy tomato sauce and served on soft buns makes for a deliciously messy yet satisfying dinner.
Whether you’re reminiscing about childhood meals or introducing this classic to the next generation, Sloppy Joes are bound to please.
Easy to prepare and budget-friendly, Sloppy Joes can be whipped up in under 30 minutes, making them an ideal weeknight dinner option. This recipe serves 4-6 people and can be easily doubled for larger gatherings. The key to a great Sloppy Joe is the balance of flavors—sweet, tangy, and savory—all melded together in a rich sauce that perfectly clings to the beef.
Serve these with a side of coleslaw, potato chips, or a simple salad for a full meal that will transport you back to the nostalgic days of the 90s.
Ingredients for 4-6 servings:
- 1 1/2 pounds ground beef
- 1 medium onion, diced
- 1 green bell pepper, diced
- 2 cloves garlic, minced
- 1 cup ketchup
- 2 tablespoons brown sugar
- 1 tablespoon Worcestershire sauce
- 1 tablespoon yellow mustard
- 1 teaspoon smoked paprika
- Salt and pepper to taste
- 6 hamburger buns
Cooking Instructions:
- Prep the Ingredients: Begin by dicing the onion and green bell pepper, and mincing the garlic cloves. Set these aside as they’ll be added to the ground beef shortly.
- Cook the Beef: In a large skillet over medium-high heat, add the ground beef. Cook for about 5-7 minutes, stirring occasionally, until the beef is browned and cooked through. Drain any excess fat from the skillet.
- Sauté Vegetables: Add the diced onion, green bell pepper, and minced garlic to the browned beef. Cook for an additional 3-4 minutes, or until the onions become translucent and the vegetables are tender.
- Prepare the Sauce: Lower the heat to medium and stir in the ketchup, brown sugar, Worcestershire sauce, yellow mustard, and smoked paprika. Mix everything well to guarantee the beef and vegetables are fully coated in the sauce.
- Simmer the Mixture: Allow the Sloppy Joe mixture to simmer for about 10-15 minutes. This will help the flavors meld together and thicken the sauce to the desired consistency. Stir occasionally to prevent sticking.
- Toast the Buns: While the mixture is simmering, split the hamburger buns and lightly toast them in a toaster or on a skillet. This will prevent them from becoming soggy once the Sloppy Joe mixture is added.
- Assemble and Serve: Spoon the Sloppy Joe mixture generously onto the toasted buns. Serve immediately while hot, with your choice of side dishes.
Extra Tips:
To elevate the flavor of your Sloppy Joes, consider adding a dash of hot sauce or a pinch of chili powder for a subtle kick. You can also customize the recipe by using ground turkey or chicken as a leaner alternative to beef.
For an extra layer of flavor, try adding a tablespoon of apple cider vinegar or a splash of barbecue sauce to the mix. Finally, if you prefer a thicker sauce, allow the mixture to simmer a bit longer or add a tablespoon of tomato paste to achieve the desired consistency.
Macaroni and Cheese

The 90s were a time of comfort food, and nothing says comfort quite like a warm, gooey serving of macaroni and cheese. This classic dish was a staple at family dinners across America, bringing smiles to both adults and children alike. The beauty of macaroni and cheese lies in its simplicity—tender pasta smothered in a rich, creamy cheese sauce that satisfies the soul.
This recipe will take you back to those nostalgic family dinners with its authentic taste and heartwarming aroma. In this version of the classic 90s macaroni and cheese, we aim to replicate the creamy texture and cheesy goodness that made it a beloved family dish. Perfect for serving 4-6 people, this recipe uses a blend of cheeses to enhance the flavor profile, while maintaining the smooth, velvety sauce we all love. Whether you’re cooking for family or hosting a retro-themed dinner, this macaroni and cheese will surely be a hit.
Ingredients (Serving Size: 4-6 people):
- 16 oz elbow macaroni
- 4 tbsp unsalted butter
- 1/4 cup all-purpose flour
- 3 cups whole milk
- 1 cup heavy cream
- 2 cups sharp cheddar cheese, grated
- 1 cup mozzarella cheese, grated
- 1 tsp Dijon mustard
- Salt and pepper to taste
- Optional: 1/2 cup breadcrumbs for topping
Cooking Instructions:
- Cook the Pasta: Begin by bringing a large pot of salted water to a boil. Add the elbow macaroni and cook according to package instructions until al dente. Once cooked, drain the pasta and set it aside.
- Prepare the Cheese Sauce: In a large saucepan, melt the butter over medium heat. Once melted, add the flour, stirring constantly with a whisk to create a roux. Cook for about 1-2 minutes until the mixture is golden and bubbly.
- Add Milk and Cream: Gradually add the milk and cream to the roux, whisking continuously to avoid lumps. Continue to cook the mixture over medium heat until it thickens, about 5-7 minutes.
- Incorporate the Cheese: Reduce the heat to low and begin adding the grated cheddar and mozzarella cheeses, a handful at a time. Stir continuously until the cheese is completely melted and the sauce is smooth. Add the Dijon mustard, and season with salt and pepper to taste.
- Combine Pasta and Sauce: Add the cooked macaroni to the cheese sauce, stirring gently to confirm each piece is well coated with the sauce.
- Optional Topping: If desired, transfer the macaroni and cheese to a baking dish. Sprinkle breadcrumbs evenly over the top and place under the broiler for 3-5 minutes until the top is golden brown and crispy.
- Serve and Enjoy: Once done, serve the macaroni and cheese hot, and enjoy the creamy, cheesy delight with your family.
Extra Tips:
For an extra cheesy experience, feel free to experiment with different types of cheese such as Gruyère or Monterey Jack. If you prefer a bit of spice, consider adding a pinch of cayenne pepper or a dash of hot sauce to the cheese sauce.
To prevent the cheese from becoming grainy, make sure to use freshly grated cheese rather than pre-shredded varieties. Finally, if you want to save time, the macaroni and cheese can be made ahead of time and reheated in the oven before serving. Enjoy this delicious blast from the past!
Taco Night

Transport yourself back to the 90s with a classic Taco Night that the whole family will love. This recipe brings together all the nostalgic flavors of a traditional taco dinner, combining seasoned ground beef, fresh toppings, and warm taco shells. Perfect for a family gathering or a casual dinner, this recipe is both simple and delicious, providing a fun, interactive experience for everyone involved.
The joy of Taco Night is in its versatility, as each family member can personalize their taco to their liking, making it a hit with both kids and adults. The heart of this dish is the savory ground beef, cooked with a homemade taco seasoning that captures the essence of 90s family dinners.
Alongside the meat, you’ll prepare a selection of toppings including shredded lettuce, diced tomatoes, grated cheese, and salsa to guarantee a vibrant and flavorful meal. Serve everything buffet-style for a truly nostalgic experience, allowing each person to build their perfect taco. This recipe caters to a serving size of 4-6 people, making it ideal for a lively family dinner.
Ingredients (Serves 4-6):
- 1 ½ pounds ground beef
- 1 packet of taco seasoning or homemade blend
- 1 medium onion, diced
- 2 cloves garlic, minced
- 1 cup water
- 12 taco shells (hard or soft)
- 2 cups shredded lettuce
- 2 cups diced tomatoes
- 2 cups shredded cheddar cheese
- 1 cup salsa
- 1 cup sour cream
- 1 avocado, sliced (optional)
Instructions:
- Prepare the Meat: In a large skillet, cook the ground beef over medium heat until it’s browned, breaking it up with a wooden spoon. Once browned, drain any excess fat.
- Add Aromatics: Add the diced onion and minced garlic to the skillet with the beef. Cook for about 3-4 minutes, or until the onion becomes translucent and the garlic is fragrant.
- Season the Meat: Stir in the taco seasoning packet (or your homemade blend) and add a cup of water. Mix well to confirm the seasoning coats the meat evenly. Reduce the heat to low and let it simmer for about 10 minutes, stirring occasionally, until the mixture thickens.
- Prepare the Toppings: While the meat is simmering, prepare the toppings. Rinse and shred the lettuce, dice the tomatoes, grate the cheese, and slice the avocado if using. Arrange each topping in separate bowls for easy access.
- Heat the Taco Shells: Preheat the oven to 350°F (175°C). Place the taco shells on a baking sheet and warm them in the oven for about 5 minutes, or until they’re heated through.
- Assemble and Serve: Set up a taco bar with the meat, taco shells, and toppings. Let each family member assemble their tacos, starting with the meat and adding their choice of toppings like lettuce, tomatoes, cheese, salsa, sour cream, and avocado.
Extra Tips:
For an authentic 90s experience, consider pairing your tacos with classic sides like Mexican rice or refried beans. To make homemade taco seasoning, combine chili powder, cumin, paprika, onion powder, garlic powder, and a pinch of cayenne pepper.
If you prefer a spicier taco, add some chopped jalapeños to the toppings. Remember to have fun and encourage creativity; Taco Night is all about customizing your meal to suit your taste!
Chicken Alfredo
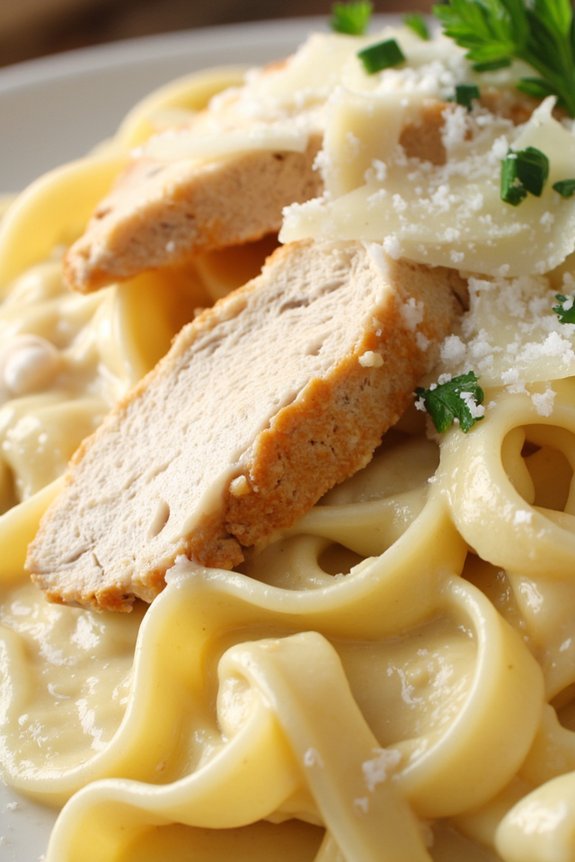
Chicken Alfredo is a classic 90s family dinner recipe that brings warmth and comfort to the dining table. This creamy pasta dish combines tender slices of chicken with a rich, velvety sauce made from butter, cream, and Parmesan cheese. It’s a favorite for its simplicity and indulgent flavors, making it an ideal recipe for family gatherings and weeknight dinners alike.
The beauty of Chicken Alfredo lies in its ability to satisfy both young and old with its creamy texture and delightful taste. With just a few ingredients, you can create a delectable meal that serves 4-6 people. The key to a perfect Chicken Alfredo is in balancing the flavors and ensuring the sauce is smooth and creamy.
Whether you’re a novice cook or a seasoned chef, this recipe is an excellent addition to your culinary repertoire and is sure to become a cherished family staple.
Ingredients:
- 1 pound boneless, skinless chicken breasts
- Salt and pepper, to taste
- 2 tablespoons olive oil
- 1 pound fettuccine pasta
- 1/2 cup unsalted butter
- 1 1/2 cups heavy cream
- 1 1/2 cups freshly grated Parmesan cheese
- 2 cloves garlic, minced
- 1/4 teaspoon nutmeg
- Fresh parsley, chopped (for garnish)
Cooking Instructions:
1. Prepare the Chicken: Season the chicken breasts with salt and pepper on both sides. Heat olive oil in a large skillet over medium-high heat. Add the chicken breasts to the skillet and cook for 5-7 minutes on each side or until cooked through and golden brown.
Remove the chicken from the skillet and let it rest on a cutting board before slicing it thinly.
2. Cook the Pasta: While the chicken is cooking, bring a large pot of salted water to a boil. Add the fettuccine and cook according to the package instructions until al dente.
Drain the pasta, reserving about 1 cup of pasta water, and set aside.
3. Make the Alfredo Sauce: In the same skillet used for the chicken, melt the butter over medium heat. Add the minced garlic and sauté for about 1 minute until fragrant.
Pour in the heavy cream and bring to a simmer. Stir in the grated Parmesan cheese and nutmeg, whisking continuously until the cheese has melted and the sauce is smooth and creamy.
4. Combine: Add the cooked fettuccine to the skillet with the Alfredo sauce, tossing to coat the pasta thoroughly.
If the sauce is too thick, gradually add the reserved pasta water, a little at a time, until the desired consistency is reached.
5. Serve: Arrange the sliced chicken over the pasta. Garnish with freshly chopped parsley and additional Parmesan cheese if desired.
Serve immediately while hot.
Extra Tips:
To enhance the flavor of your Chicken Alfredo, consider marinating the chicken for a few hours in a mixture of olive oil, garlic, and Italian herbs before cooking.
Always use freshly grated Parmesan cheese for the sauce, as pre-grated cheese can contain anti-caking agents that affect the sauce’s texture. If you prefer a lighter sauce, substitute half of the heavy cream with milk.
Remember to keep a close eye on the sauce to prevent it from curdling, and adjust the seasoning to your taste preference before serving. Enjoy your creamy Chicken Alfredo!
Shepherd’s Pie

Shepherd’s Pie is a comforting classic that graced many family dinner tables in the 90s. Known for its hearty and satisfying flavors, this dish is a delightful combination of seasoned minced lamb and vegetables, topped with a creamy layer of mashed potatoes. It’s a perfect all-in-one meal that brings warmth and nostalgia to any dinner setting. Though it’s traditionally made with lamb, variations often include beef, but for an authentic experience, lamb is the classic choice.
This recipe will guide you through creating a Shepherd’s Pie that serves 4-6 people, making it ideal for a family dinner or small gathering. The process involves preparing a savory meat and vegetable filling, which is then topped with smooth, buttery mashed potatoes and baked to golden perfection. The result is a comforting dish that combines textures and flavors in every bite.
Ingredients:
- 2 pounds of potatoes, peeled and quartered
- 1/2 cup milk
- 1/4 cup butter
- Salt and pepper to taste
- 1 tablespoon olive oil
- 1 onion, finely chopped
- 2 cloves garlic, minced
- 1 pound ground lamb
- 1 tablespoon tomato paste
- 1 tablespoon Worcestershire sauce
- 1 cup beef broth
- 1 cup frozen peas and carrots
- 1 teaspoon dried thyme
- 1 teaspoon dried rosemary
- 1 cup shredded cheddar cheese (optional)
Cooking Instructions:
- Prepare the Potatoes: Begin by boiling the potatoes in a large pot of salted water until they’re fork-tender, approximately 15-20 minutes. Drain the water and return the potatoes to the pot. Add the milk and butter, then mash until smooth. Season with salt and pepper to taste. Set aside.
- Cook the Filling: Heat the olive oil in a large skillet over medium heat. Add the chopped onion and garlic, sautéing until the onion is translucent. Add the ground lamb, cooking until browned. Be sure to break up the meat with a wooden spoon as it cooks.
- Season the Meat: Stir in the tomato paste, Worcestershire sauce, beef broth, frozen peas and carrots, thyme, and rosemary. Mix well and allow the mixture to simmer for about 10 minutes, or until the sauce has thickened slightly. Taste and adjust seasoning with salt and pepper as needed.
- Assemble the Pie: Preheat your oven to 400°F (200°C). Transfer the meat mixture into a baking dish and spread it evenly. Spoon the mashed potatoes over the top, smoothing them out to cover the meat entirely. If desired, sprinkle shredded cheddar cheese on top.
- Bake the Pie: Place the dish in the oven and bake for 25-30 minutes, or until the top is golden brown and the edges are bubbling. If you added cheese, it should be melted and slightly crispy.
- Serve: Allow the Shepherd’s Pie to cool for a few minutes before serving. This will help the layers set slightly, making it easier to scoop out servings.
Extra Tips:
For an even richer flavor, consider adding a splash of red wine to the meat mixture while it simmers. If you prefer a crustier top on your Shepherd’s Pie, use a fork to create ridges in the mashed potatoes before baking. This will enhance browning.
Additionally, if you’re short on time, instant mashed potatoes can be used as a substitute, though homemade offers the best texture and flavor. Finally, this dish can be made ahead of time and stored in the refrigerator for up to 2 days before baking, making it a convenient option for busy weeknights.
Beef Stroganoff
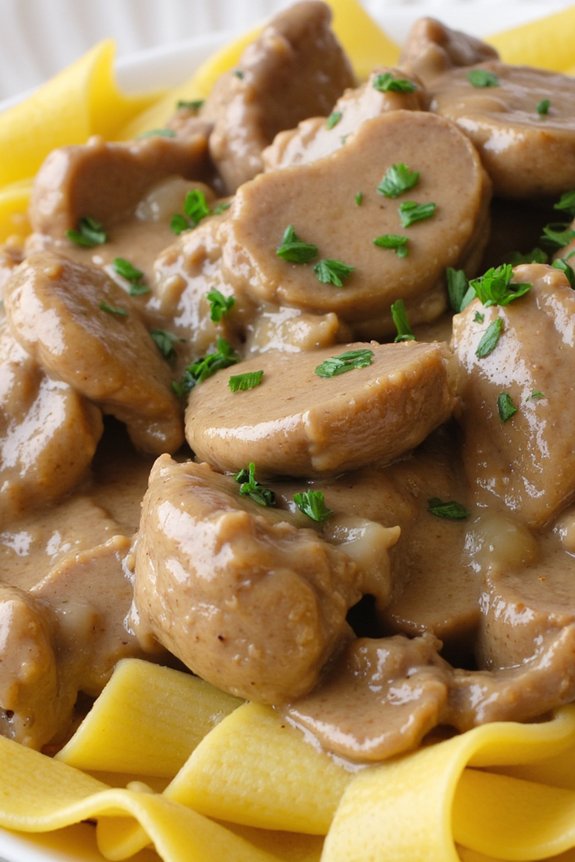
Beef Stroganoff is a classic comfort dish that evokes memories of hearty family meals around the dinner table in the 1990s. Originating from Russia, this dish became a staple in many American households, thanks to its creamy, savory sauce and tender strips of beef. Perfect for a weeknight dinner or a special occasion, Beef Stroganoff is both satisfying and simple to make, offering rich flavors that the whole family will love.
The key to a perfect Beef Stroganoff lies in its balance of flavors and textures—tender beef, earthy mushrooms, and a rich, tangy sauce served over a bed of egg noodles. This recipe is designed to serve 4-6 people, making it ideal for a family meal or a small gathering. With just a few ingredients and some simple steps, you can create a delicious dish that will take you back to the nostalgic dinners of the 90s.
Ingredients for Beef Stroganoff (serves 4-6):
- 1.5 lbs beef sirloin, sliced into thin strips
- 1 tablespoon olive oil
- 2 tablespoons butter
- 1 medium onion, finely chopped
- 2 cloves garlic, minced
- 8 oz mushrooms, sliced
- 1 cup beef broth
- 1 tablespoon Worcestershire sauce
- 1 teaspoon Dijon mustard
- 1 cup sour cream
- Salt and pepper to taste
- 12 oz egg noodles
- Fresh parsley, chopped (for garnish)
Cooking Instructions:
- Prepare the Beef: Begin by slicing the beef sirloin into thin strips. Season with salt and pepper to taste. This will guarantee that the meat is flavorful and tender when cooked.
- Cook the Beef: In a large skillet, heat the olive oil over medium-high heat. Add the beef strips and cook until browned on all sides, about 4-5 minutes. Remove the beef from the skillet and set aside.
- Sauté the Vegetables: In the same skillet, add butter and let it melt. Add the chopped onion and minced garlic, sautéing until the onion becomes translucent. Stir in the sliced mushrooms and cook until they’re golden brown and softened, about 5-6 minutes.
- Make the Sauce: Pour in the beef broth, Worcestershire sauce, and Dijon mustard. Stir well to combine. Let the mixture simmer for about 5 minutes, allowing the flavors to meld together.
- Add the Sour Cream: Reduce the heat to low and stir in the sour cream until the sauce is smooth and creamy. If the sauce is too thick, you can add a little more beef broth to reach the desired consistency.
- Combine with Beef: Return the cooked beef to the skillet, stirring to coat the beef with the creamy sauce. Simmer for another 5 minutes to confirm the beef is heated through.
- Cook the Noodles: While the beef and sauce are simmering, cook the egg noodles according to package instructions. Drain and transfer them to a serving dish.
- Serve: Pour the beef stroganoff over the cooked noodles and garnish with freshly chopped parsley. Serve immediately for best results.
Extra Tips:
To guarantee the beef is tender, slice it against the grain before cooking. This helps break down the muscle fibers and results in a more tender texture. Additionally, avoid overcooking the beef in the skillet to prevent it from becoming tough.
If you prefer a thicker sauce, you can mix a teaspoon of cornstarch with a tablespoon of water and add it to the sauce before adding the sour cream. This will help thicken the sauce without altering the flavor. Enjoy your nostalgic 90s Beef Stroganoff!