

As summer evenings cast their golden glow, I find myself inspired to whip up vibrant meals that truly celebrate the season’s bounty. Think grilled lemon herb chicken skewers or a refreshing watermelon feta salad. These recipes aren’t just about cooking; they’re about gathering and savoring moments together. Curious how zesty flavors and fresh ingredients can come alive? Let’s explore the culinary adventures waiting for us this summer.
Grilled Lemon Herb Chicken Skewers

The marinade for these skewers is a simple yet flavorful combination of lemon juice, fresh herbs, garlic, and olive oil. The acidity of the lemon tenderizes the chicken while the herbs and garlic impart a fragrant aroma and rich taste.
Once the chicken is marinated, it’s threaded onto skewers and grilled to perfection. The grill imparts a smoky char that complements the bright flavors of the marinade, creating a dish that’s both delicious and visually appealing.
Ingredients (Serves 4-6):
- 2 lbs boneless, skinless chicken breasts
- 1/4 cup olive oil
- 1/4 cup fresh lemon juice
- 3 cloves garlic, minced
- 1 tablespoon fresh rosemary, chopped
- 1 tablespoon fresh thyme, chopped
- Salt and pepper to taste
- Lemon wedges for serving
- Optional: fresh parsley for garnish
Cooking Instructions:
- Prepare the Marinade: In a medium-sized bowl, combine olive oil, lemon juice, minced garlic, chopped rosemary, and chopped thyme. Add salt and pepper to taste, then whisk together until well combined.
- Marinate the Chicken: Cut the chicken breasts into 1-inch cubes and place them in a large resealable plastic bag or a shallow dish. Pour the marinade over the chicken, making sure all pieces are well coated. Seal the bag or cover the dish and refrigerate for at least 30 minutes, allowing the flavors to infuse the chicken.
- Preheat the Grill: Once the chicken has marinated, preheat your grill to medium-high heat. If using wooden skewers, soak them in water for about 15-20 minutes to prevent burning.
- Assemble the Skewers: Thread the marinated chicken pieces onto the skewers, leaving a bit of space between each piece to guarantee even cooking.
- Grill the Skewers: Place the skewers on the preheated grill. Cook for about 5-7 minutes on each side, or until the chicken is cooked through and has a nice char. Use a meat thermometer to verify the internal temperature reaches 165°F for safe consumption.
- Serve: Remove the skewers from the grill and let them rest for a couple of minutes. Serve with lemon wedges and sprinkle with fresh parsley if desired.
Extra Tips:
To enhance the flavor of the Grilled Lemon Herb Chicken Skewers, consider adding other herbs such as oregano or basil to the marinade.
You can also experiment by adding vegetables like bell peppers, onions, or cherry tomatoes on the skewers for added color and nutrition.
Be sure to adjust the grilling time based on the size of the chicken pieces and the heat of your grill. For an added layer of flavor, consider applying a light glaze of honey during the last few minutes of grilling for a touch of sweetness that complements the lemony, herby chicken.
Summer Vegetable Pasta Salad
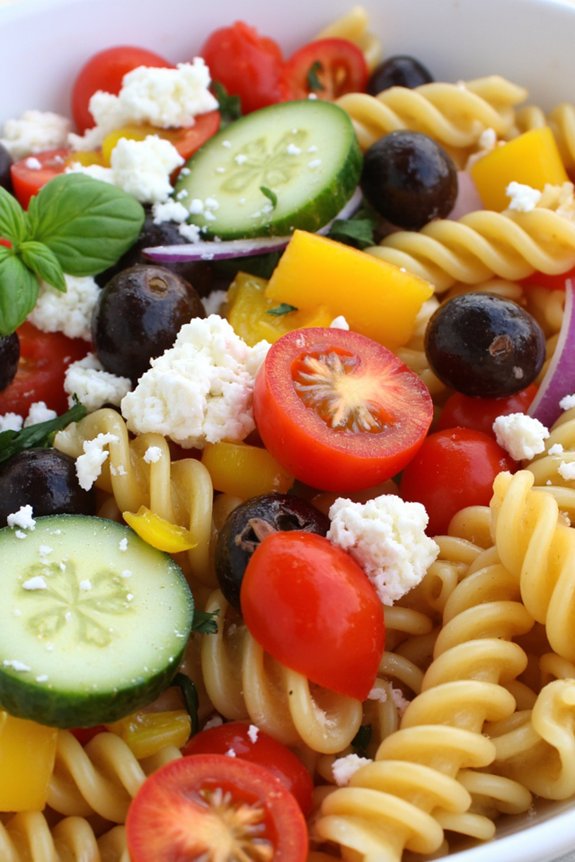
As the warm breeze of summer fills the air, there’s no better time to enjoy a fresh and vibrant dish like Summer Vegetable Pasta Salad. This dish is a delightful combination of seasonal vegetables, perfectly cooked pasta, and a zesty dressing that brings everything together. Ideal for family dinners or picnics, this salad isn’t only colorful and appetizing but also packed with nutrients.
The crunchy veggies provide a satisfying texture, while the pasta serves as a hearty base. This recipe is versatile, allowing you to use any vegetables you have on hand, making it a great way to enjoy the bounty of summer produce.
This recipe is designed to serve 4-6 people, making it perfect for a family meal or a gathering with friends. The preparation is straightforward, and most of the ingredients can be easily found at your local market. Whether you’re a seasoned cook or a kitchen novice, this Summer Vegetable Pasta Salad will be a hit at your table. It’s a light yet filling dish that can be served as a main course or a side, and it pairs beautifully with grilled meats or seafood.
Ingredients:
- 12 oz (340 g) of penne or fusilli pasta
- 1 cup cherry tomatoes, halved
- 1 medium cucumber, diced
- 1 red bell pepper, chopped
- 1 yellow bell pepper, chopped
- 1/2 red onion, thinly sliced
- 1/2 cup black olives, sliced
- 1/4 cup fresh basil leaves, chopped
- 1/4 cup fresh parsley, chopped
- 1/2 cup feta cheese, crumbled
- 1/4 cup olive oil
- 2 tablespoons red wine vinegar
- 1 tablespoon lemon juice
- 1 teaspoon Dijon mustard
- Salt and pepper to taste
Instructions:
- Cook the Pasta: Begin by bringing a large pot of salted water to a boil. Add the pasta and cook according to package instructions until al dente. Once cooked, drain the pasta and rinse it under cold water to stop the cooking process. Set aside to cool.
- Prepare the Vegetables: While the pasta is cooling, prepare the vegetables. Halve the cherry tomatoes, dice the cucumber, chop the red and yellow bell peppers, and thinly slice the red onion. Slice the black olives and set all the vegetables aside.
- Make the Dressing: In a small bowl, whisk together the olive oil, red wine vinegar, lemon juice, and Dijon mustard. Season the dressing with salt and pepper to taste.
- Combine the Ingredients: In a large mixing bowl, combine the cooled pasta, prepared vegetables, chopped basil, and parsley. Pour the dressing over the salad and toss everything together until well coated.
- Add the Cheese: Gently fold in the crumbled feta cheese, making sure it’s evenly distributed throughout the salad.
- Chill the Salad: Cover the salad and refrigerate it for at least 30 minutes before serving. This allows the flavors to meld and makes the salad taste even better.
Extra Tips:
When making this Summer Vegetable Pasta Salad, feel free to experiment with your favorite seasonal vegetables. You can add zucchini, corn, or even asparagus for extra flavor and variety.
If you prefer a stronger flavor, try adding a bit of minced garlic to the dressing. To save time, you can prepare the salad a day in advance; just add the feta cheese and fresh herbs right before serving to keep them fresh and vibrant.
Finally, remember to taste and adjust the seasoning before serving, as the flavors can change after chilling.
Citrus Glazed Salmon With Avocado Salsa
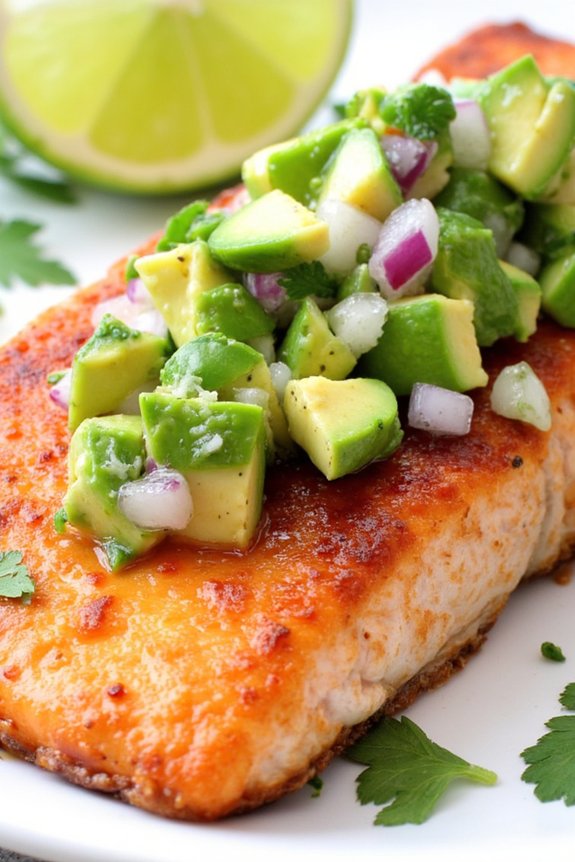
Citrus Glazed Salmon With Avocado Salsa is a vibrant and flavorful dish perfect for summer family dinners. This recipe pairs the rich, buttery taste of salmon with a revitalizing citrus glaze that highlights the natural flavors of the fish. The accompanying avocado salsa adds a creamy, slightly tangy contrast, creating a balanced dish that’s both satisfying and light.
It’s a meal that not only tantalizes the taste buds but also provides the nutritional benefits of omega-3 fatty acids and plenty of vitamins from the fresh ingredients. Ideal for those warm summer evenings, this dish is easy to prepare and can be ready in just under an hour, making it a great choice for busy families.
Whether you’re serving it for a special gathering or a simple weeknight meal, the Citrus Glazed Salmon With Avocado Salsa is sure to be a hit. With the combination of zesty citrus and creamy avocado, this recipe captures the essence of summer in every bite, leaving you and your loved ones satisfied and excited for more.
Ingredients for 4-6 servings:
- 4-6 salmon fillets
- 1/4 cup fresh orange juice
- 2 tablespoons fresh lemon juice
- 2 tablespoons honey
- 1 tablespoon soy sauce
- 2 teaspoons olive oil
- 2 ripe avocados, diced
- 1 small red onion, finely chopped
- 1 jalapeño, seeded and diced
- 1/4 cup fresh cilantro, chopped
- Salt and pepper to taste
- Lime wedges for serving
Cooking Instructions:
- Prepare the Citrus Glaze: In a small bowl, mix together the orange juice, lemon juice, honey, and soy sauce until well combined. Set aside.
- Season the Salmon: Pat the salmon fillets dry with paper towels. Season both sides with salt and pepper to taste.
- Cook the Salmon: Heat the olive oil in a large non-stick skillet over medium-high heat. Once hot, add the salmon fillets, skin-side down. Cook for about 4-5 minutes or until the skin is crispy and the salmon is halfway cooked.
- Add the Glaze: Reduce the heat to medium and pour the prepared citrus glaze over the salmon. Continue to cook for another 3-4 minutes, occasionally spooning the glaze over the top of the fillets, until the salmon is cooked through and the glaze has thickened slightly.
- Prepare the Avocado Salsa: In a mixing bowl, combine the diced avocados, red onion, jalapeño, and cilantro. Gently toss to combine. Season with salt and pepper to taste.
- Serve: Transfer the salmon fillets to a serving platter. Spoon the avocado salsa over the top of each fillet. Serve with lime wedges on the side for an extra citrusy kick.
Extra Tips:
For the best results, always use fresh ingredients, especially when it comes to citrus and avocado. If possible, prepare the avocado salsa just before serving to prevent the avocados from browning.
When cooking the salmon, be sure not to overcook it; salmon should be opaque and flake easily with a fork when done. Additionally, you can customize the heat level of the salsa by adjusting the amount of jalapeño or substituting it with a milder pepper if preferred.
Enjoy this dish with a side of quinoa or a fresh green salad to complete your summer meal.
Caprese Stuffed Portobello Mushrooms
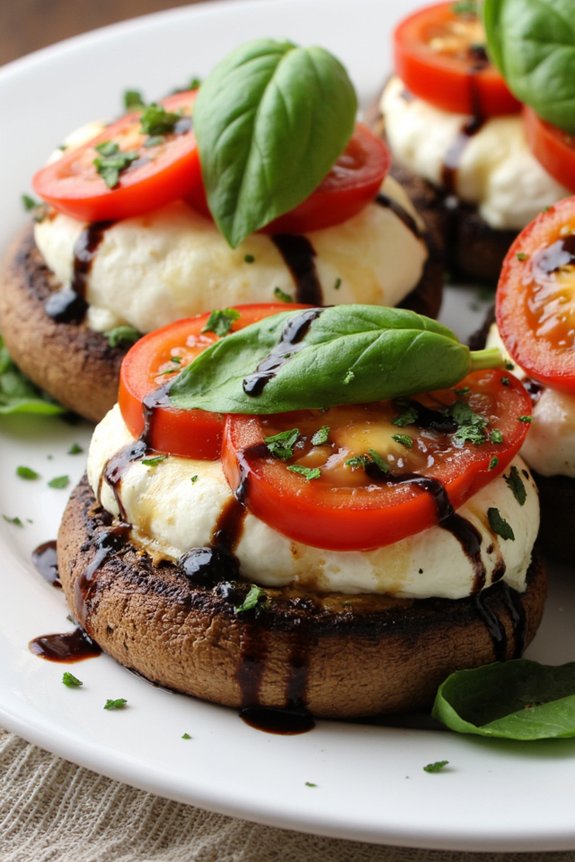
Caprese Stuffed Portobello Mushrooms are a delightful and flavorful addition to any summer family dinner. This dish combines the rich, earthy flavor of portobello mushrooms with the fresh, vibrant taste of a traditional Caprese salad. The large mushroom caps are filled with juicy tomatoes, creamy mozzarella, and aromatic basil, then baked to perfection.
It’s a vegetarian-friendly dish that can easily be enjoyed as a main course or a delectable side dish. Perfect for a warm evening, this recipe isn’t only delicious but also quick and easy to prepare. The simplicity of the ingredients allows each flavor to shine, making it a crowd-pleaser even among those who mightn’t typically favor mushrooms.
Whether you’re entertaining guests or enjoying a quiet meal with family, Caprese Stuffed Portobello Mushrooms are sure to captivate with their beautiful presentation and mouth-watering taste.
Ingredients (serving size: 4-6 people):
- 6 large portobello mushroom caps
- 2 cups cherry tomatoes, halved
- 1 cup fresh mozzarella balls (bocconcini), halved
- 1/2 cup fresh basil leaves, torn
- 2 tablespoons balsamic glaze
- 2 tablespoons olive oil
- 1 teaspoon salt
- 1 teaspoon black pepper
- 2 cloves garlic, minced
Instructions:
- Preheat the Oven: Preheat your oven to 375°F (190°C). This guarantees that the mushrooms will bake evenly and develop a nice, tender texture.
- Prepare the Mushrooms: Clean the portobello mushroom caps by gently wiping them with a damp paper towel to remove any dirt. Remove the stems and scoop out the gills with a spoon to create space for the filling.
- Season the Mushrooms: Brush the mushroom caps with olive oil on both sides and sprinkle with salt and pepper. This step adds flavor and helps prevent the mushrooms from drying out during baking.
- Prepare the Filling: In a medium bowl, combine the cherry tomatoes, mozzarella, basil, garlic, and a little salt and pepper. Toss the ingredients gently to guarantee even distribution of flavors.
- Stuff the Mushrooms: Place the mushroom caps on a baking sheet, gill side up. Evenly distribute the tomato and mozzarella mixture into each mushroom cap, pressing down slightly to pack the filling.
- Bake the Mushrooms: Place the baking sheet in the preheated oven and bake for 20-25 minutes, or until the cheese is melted and bubbly, and the mushrooms are tender.
- Add the Finishing Touch: Drizzle the baked mushrooms with balsamic glaze just before serving. This adds a sweet and tangy flavor that complements the richness of the mushrooms and cheese.
Extra Tips:
When selecting portobello mushrooms, try to choose ones that are similar in size for even cooking. If you prefer a bit of a kick, consider adding a pinch of red pepper flakes to the filling mixture.
For a more substantial meal, serve these stuffed mushrooms over a bed of arugula or alongside a crusty baguette. If fresh mozzarella balls aren’t available, you can substitute with sliced mozzarella, cutting it into smaller pieces to fit the mushroom caps.
BBQ Pulled Pork Sliders

Summertime is the perfect season for enjoying a meal with family, and BBQ Pulled Pork Sliders are an ideal choice for a casual yet satisfying dinner. These sliders are packed with savory, slow-cooked pork that’s been infused with smoky barbecue flavors, all nestled within soft slider buns. The contrast between the tender meat and the slightly toasted bread is sure to be a hit with everyone around the table.
Plus, they’re easy to prepare ahead of time, making them a stress-free option for any summer gathering. The beauty of BBQ Pulled Pork Sliders lies in their versatility—you can serve them as a main dish or as part of a larger spread. Pair them with a rejuvenating coleslaw or a tangy potato salad to balance the rich flavors of the pork.
With minimal prep and lots of hands-off cooking time, this recipe allows you to enjoy more of the sunshine and spend less time in the kitchen. Let’s plunge into the recipe for making these delicious sliders for a serving size of 4-6 people.
Ingredients:
- 2 lbs pork shoulder or pork butt
- 1 cup barbecue sauce
- 1 tablespoon smoked paprika
- 1 tablespoon brown sugar
- 1 teaspoon garlic powder
- 1 teaspoon onion powder
- 1 teaspoon ground black pepper
- 1 teaspoon salt
- 1 tablespoon olive oil
- 1 cup chicken broth
- 12 slider buns
- Optional: coleslaw for topping
- Optional: pickles for garnish
Cooking Instructions:
- Prepare the Pork: Start by patting the pork shoulder dry with paper towels. In a small bowl, mix together the smoked paprika, brown sugar, garlic powder, onion powder, ground black pepper, and salt. Rub this mixture all over the pork, confirming it’s evenly coated.
- Sear the Pork: Heat the olive oil in a large skillet over medium-high heat. Once the oil is hot, add the pork shoulder and sear it on all sides until it’s browned, about 3-4 minutes per side. This step helps to lock in the flavors.
- Slow Cook the Pork: Transfer the seared pork into a slow cooker. Pour the chicken broth around the pork and cover with the lid. Cook on low for 8-10 hours or on high for 4-5 hours, until the pork is tender and easily pulls apart with a fork.
- Shred the Pork: Once cooked, remove the pork from the slow cooker and place it on a large cutting board or a platter. Using two forks, shred the pork into bite-sized pieces.
- Add Barbecue Sauce: Return the shredded pork to the slow cooker and pour the barbecue sauce over it. Stir the pork to confirm it’s well coated with the sauce. Let it cook on low for an additional 30 minutes to allow the flavors to meld.
- Assemble the Sliders: Toast the slider buns lightly if desired. Spoon a generous amount of the BBQ pulled pork onto the bottom half of each bun. Top with coleslaw and pickles if using. Place the top half of the bun on each slider and serve immediately.
Extra Tips:
When selecting pork for this recipe, a well-marbled piece like pork shoulder or pork butt is ideal, as it will stay moist and tender during the long cooking process. If you’re short on time, you can prepare the pork a day in advance and simply reheat it with the barbecue sauce before serving.
For an extra kick, consider adding a dash of hot sauce to the barbecue mixture. Finally, if you prefer a smokier flavor, you can add a few drops of liquid smoke to the slow cooker along with the chicken broth. Enjoy your BBQ Pulled Pork Sliders with a cold beverage to complement the meal perfectly.
Mango and Black Bean Tacos

Mango and Black Bean Tacos are a revitalizing and vibrant meal perfect for a summer family dinner. This dish combines the sweet juiciness of mangoes with the hearty texture of black beans, creating a flavorful and nutritious filling. Wrapped in a warm tortilla and topped with fresh ingredients, these tacos aren’t only easy to prepare but also bursting with taste and color.
They offer a delightful balance of sweet, savory, and spicy flavors that will surely be a hit at your next family gathering. This recipe is designed for a serving size of 4-6 people, making it ideal for a family meal or a small gathering. The combination of fresh produce and simple ingredients guarantees that these tacos aren’t only delicious but also healthy.
Whether you’re a seasoned cook or a beginner, this recipe is straightforward and can be easily adapted to suit your taste preferences.
Ingredients:
- 2 ripe mangoes, peeled and diced
- 2 cans (15 oz each) black beans, drained and rinsed
- 1 small red onion, finely chopped
- 1 red bell pepper, diced
- 1 jalapeño, seeded and finely chopped
- 1/4 cup fresh cilantro, chopped
- Juice of 2 limes
- Salt and pepper to taste
- 1 teaspoon cumin powder
- 1 teaspoon chili powder
- Corn or flour tortillas (8-10)
- Optional toppings: diced avocado, sour cream, cheese, and hot sauce
Instructions:
- Prepare the Mango and Bean Mixture: In a large mixing bowl, combine the diced mangoes, drained black beans, finely chopped red onion, diced red bell pepper, and chopped jalapeño. Mix well to guarantee even distribution of ingredients.
- Season the Mixture: Add the chopped cilantro, lime juice, cumin powder, and chili powder to the mango and bean mixture. Season with salt and pepper to taste. Stir everything together until well combined and set aside to let the flavors meld.
- Warm the Tortillas: Heat a skillet over medium heat. Warm each tortilla for about 30 seconds on each side or until they’re soft and pliable. You can also wrap the tortillas in foil and heat them in a 350°F (175°C) oven for about 10 minutes.
- Assemble the Tacos: Place a warm tortilla on a plate. Spoon a generous amount of the mango and black bean mixture onto the center of the tortilla. Add your choice of optional toppings such as diced avocado, sour cream, cheese, or hot sauce.
- Serve: Fold the tortillas and serve the tacos immediately while they’re warm and fresh.
Extra Tips:
For a more robust flavor, consider grilling the red bell pepper and jalapeño before adding them to the mixture. This will bring out a smoky sweetness that complements the mango.
If you prefer a milder taste, reduce the amount of jalapeño or omit it altogether. Additionally, these tacos can be made vegan by skipping the cheese and sour cream or by using plant-based alternatives.
To save time, prepare the filling up to a day in advance and store it in the refrigerator. This will also allow the flavors to develop more fully.
Mediterranean Couscous With Grilled Vegetables
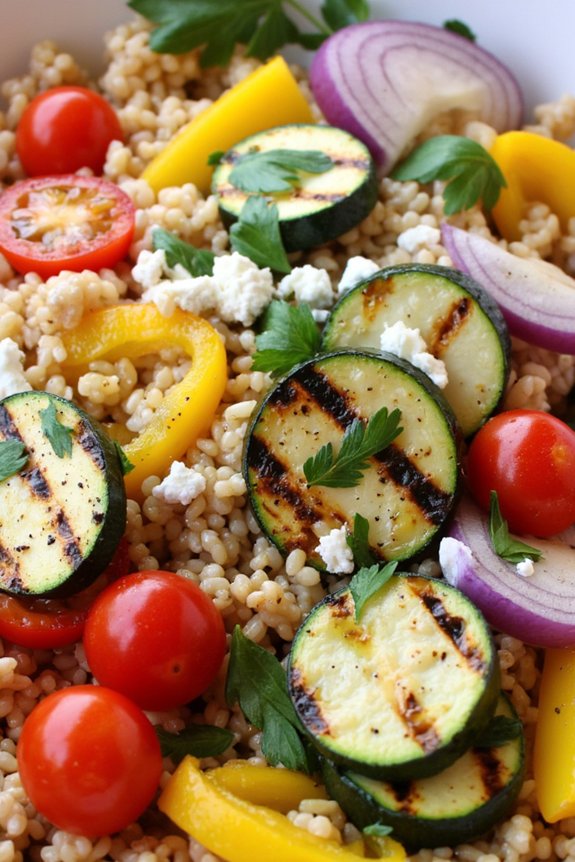
Mediterranean Couscous With Grilled Vegetables is a delightful and vibrant dish that perfectly embodies the fresh and zesty flavors of summer. This dish combines the nutty taste of couscous with an array of colorful grilled vegetables, making it both a nutritious and visually appealing option for family dinners.
The Mediterranean-inspired flavors are enhanced by a tangy lemon dressing, making this dish a revitalizing addition to any summer meal. Ideal for serving 4-6 people, this recipe isn’t only easy to prepare but also adaptable, allowing you to incorporate your favorite seasonal vegetables.
The couscous serves as a perfect base, soaking up the flavors of the grilled vegetables and dressing. Whether you’re hosting a casual weeknight dinner or a weekend gathering, this dish is sure to impress with its simplicity and vibrant taste.
Ingredients (serving size for 4-6 people):
- 1 1/2 cups couscous
- 2 cups vegetable broth
- 1 medium zucchini, sliced
- 1 red bell pepper, sliced
- 1 yellow bell pepper, sliced
- 1 red onion, sliced
- 1 cup cherry tomatoes, halved
- 1/4 cup olive oil
- 2 tablespoons lemon juice
- 2 teaspoons dried oregano
- Salt and pepper to taste
- 1/4 cup chopped fresh parsley
- 1/4 cup crumbled feta cheese (optional)
Cooking Instructions:
- Prepare the Couscous: In a medium saucepan, bring the vegetable broth to a boil. Remove from heat and stir in the couscous. Cover and let it sit for about 5 minutes, or until the liquid is absorbed. Fluff the couscous with a fork and set aside.
- Preheat Grill: Preheat your grill to medium-high heat. This will guarantee that the vegetables cook evenly and acquire a nice char.
- Prepare Vegetables: In a large bowl, toss the zucchini, red and yellow bell peppers, red onion, and cherry tomatoes with olive oil, salt, and pepper until well coated.
- Grill Vegetables: Place the vegetables on the grill. Cook for about 10-12 minutes, turning occasionally, until they’re tender and have nice grill marks. Remove from the grill and let them cool slightly.
- Make the Dressing: In a small bowl, whisk together the olive oil, lemon juice, dried oregano, and a pinch of salt and pepper.
- Combine Ingredients: In a large serving bowl, combine the couscous, grilled vegetables, and dressing. Toss everything together gently until well combined.
- Garnish and Serve: Top the couscous mixture with chopped parsley and crumbled feta cheese. Serve warm or at room temperature.
Extra Tips:
For added flavor, consider marinating the vegetables in the olive oil and lemon dressing for about 30 minutes before grilling. This will infuse them with even more taste.
Additionally, if you don’t have access to a grill, you can roast the vegetables in the oven at 425°F (220°C) for about 20 minutes, or until they’re tender and slightly caramelized.
Adjust the seasoning to your taste, and feel free to add other Mediterranean herbs like thyme or basil for extra flavor.
Garlic Lime Shrimp With Quinoa
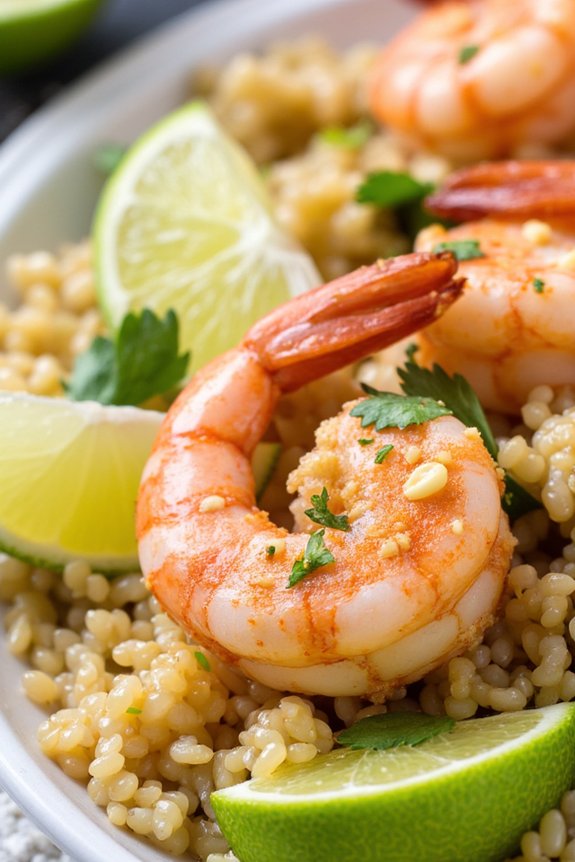
Garlic Lime Shrimp With Quinoa is a delightful and invigorating dish perfect for summer family dinners. This recipe combines succulent shrimp marinated in a zesty garlic lime sauce with fluffy quinoa, creating a harmonious blend of flavors and textures. It’s light yet satisfying, making it an ideal choice for a warm evening meal.
The tangy lime and aromatic garlic add a revitalizing kick to the shrimp, while the quinoa provides a wholesome and nutritious base. This dish isn’t only delicious but also quick and easy to prepare, making it perfect for busy summer days. The ingredients are straightforward and readily available, and the cooking process is simple enough for even novice cooks to follow.
Whether you’re hosting a family gathering or simply enjoying a quiet dinner at home, Garlic Lime Shrimp With Quinoa is sure to please everyone at the table. The recipe serves 4-6 people, making it an excellent option for sharing.
Ingredients for Garlic Lime Shrimp With Quinoa (serves 4-6):
- 1 1/2 pounds large shrimp, peeled and deveined
- 1 cup quinoa
- 2 cups water or chicken broth
- 3 tablespoons olive oil
- 4 cloves garlic, minced
- 2 limes, juiced and zested
- 1 teaspoon ground cumin
- 1/2 teaspoon red pepper flakes (optional)
- Salt and pepper, to taste
- 1/4 cup chopped fresh cilantro
- Lime wedges, for garnish
Cooking Instructions:
- Prepare the Quinoa: Rinse the quinoa under cold water to remove any bitterness. In a medium saucepan, combine the quinoa and 2 cups of water or chicken broth. Bring to a boil over medium-high heat. Once boiling, reduce the heat to low, cover, and let simmer for 15-20 minutes until the quinoa is cooked and the liquid is absorbed. Fluff with a fork and set aside.
- Marinate the Shrimp: In a large bowl, combine the shrimp, olive oil, minced garlic, lime juice and zest, ground cumin, red pepper flakes, salt, and pepper. Toss the shrimp until evenly coated with the marinade. Cover and refrigerate for at least 15 minutes to allow the flavors to meld.
- Cook the Shrimp: Heat a large skillet over medium-high heat. Add the marinated shrimp to the skillet, arranging them in a single layer. Cook for 2-3 minutes on each side, or until the shrimp are pink and opaque. Be careful not to overcook them, as they can become tough and rubbery.
- Combine and Serve: Once the shrimp are cooked, remove the skillet from heat. Gently stir in the cooked quinoa until well combined. Add the chopped cilantro and mix thoroughly. Taste and adjust the seasoning if necessary. Serve the Garlic Lime Shrimp With Quinoa warm, garnished with lime wedges.
Extra Tips: For the best results, use fresh shrimp rather than frozen, as they tend to have better texture and flavor. If fresh shrimp are unavailable, verify the frozen shrimp are thoroughly thawed before marinating.
Additionally, you can customize the spice level by adjusting the amount of red pepper flakes. If you prefer a milder dish, simply omit them. Finally, this dish pairs wonderfully with a side salad or grilled vegetables, adding a colorful and healthy touch to your summer dinner.
Watermelon Feta Salad
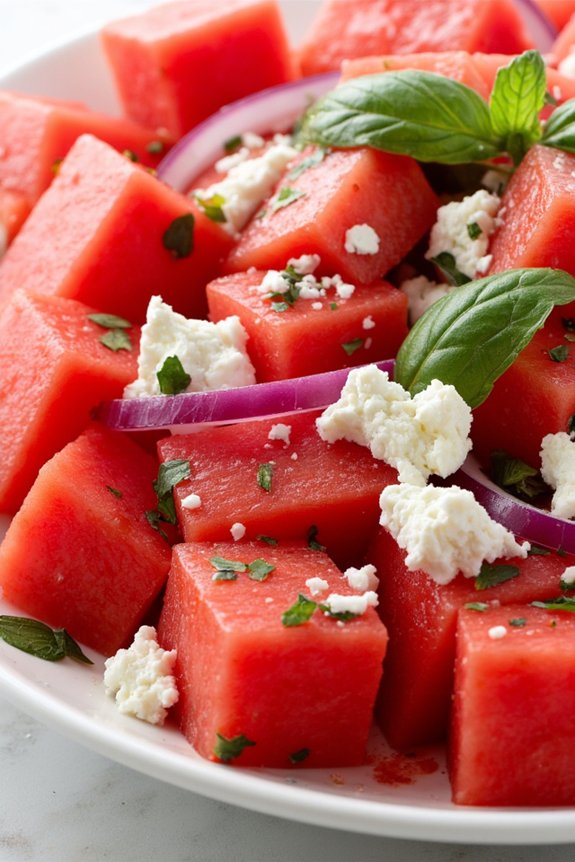
As the sun shines brightly and the temperatures rise, summer beckons for light, invigorating meals that are easy to prepare and delicious to enjoy. One such dish that perfectly embodies the spirit of summer is the Watermelon Feta Salad. This vibrant and colorful salad combines the sweetness of ripe watermelon with the tangy and creamy texture of feta cheese, creating a delightful balance of flavors.
It’s a perfect addition to any family dinner, offering a burst of freshness and a pop of color that’s simply irresistible. This Watermelon Feta Salad isn’t only a feast for the taste buds but also a visual treat. The juicy watermelon cubes provide a hydrating and rejuvenating base, while the crumbled feta adds a savory depth. Fresh mint leaves lend an aromatic note, and a splash of lime juice brings a zesty finish.
This salad is a harmonious blend of sweet and savory, making it an ideal choice for a summer evening with family or friends. It’s quick to prepare, requires minimal cooking, and is sure to be a hit for gatherings or a simple family dinner at home.
Ingredients (Serves 4-6):
- 4 cups of seedless watermelon, cubed
- 1 cup of feta cheese, crumbled
- 1/4 cup of fresh mint leaves, chopped
- 1/4 cup of red onion, thinly sliced
- 2 tablespoons of olive oil
- 1 tablespoon of fresh lime juice
- Salt and black pepper to taste
Instructions:
- Prepare the Watermelon: Start by cutting the watermelon into bite-sized cubes, guaranteeing they’re uniform in size for even distribution of flavors. Transfer the cubes into a large salad bowl.
- Add the Feta Cheese: Crumble the feta cheese over the watermelon cubes. The salty feta complements the sweetness of the watermelon, creating a perfect flavor balance.
- Incorporate Fresh Mint: Chop the fresh mint leaves and sprinkle them over the salad. The mint adds a revitalizing and aromatic touch to the dish.
- Include Red Onion: Thinly slice the red onion and add it to the bowl. The onion adds a subtle sharpness that enhances the overall flavor profile.
- Dress the Salad: Drizzle the olive oil and lime juice over the salad. These ingredients help to meld the flavors together and add a zesty finish.
- Season and Toss: Season the salad with salt and black pepper to taste. Gently toss all the ingredients together until well combined, taking care not to crush the watermelon cubes.
- Serve: Serve immediately for the freshest taste, or refrigerate for up to an hour before serving to allow the flavors to meld.
Extra Tips: For the best results, choose a ripe and sweet watermelon to guarantee the salad has the perfect level of sweetness. If possible, use high-quality feta cheese, as its creaminess and flavor will greatly enhance the dish.
Feel free to adjust the amount of lime juice and mint leaves according to your personal taste preferences. If you want a bit more crunch, consider adding a handful of toasted pine nuts or slivered almonds. Enjoy your invigorating Watermelon Feta Salad as a side dish or a light main course, perfect for any summer occasion!
Grilled Peach and Prosciutto Flatbreads

As summer evenings beckon us outdoors, Grilled Peach and Prosciutto Flatbreads offer a delightful way to savor the season’s bounty. This dish marries the sweet juiciness of grilled peaches with the savory, salty allure of prosciutto, all on a crispy flatbread base. The addition of creamy goat cheese and a sprinkle of fresh arugula and balsamic glaze makes each bite a symphony of flavors, perfect for a family dinner under the stars or a casual gathering with friends.
Not only is this recipe visually appealing, but it also comes together with simplicity, making it an ideal choice for those warm summer nights when you want something light yet satisfying. The grilled peaches add a caramelized sweetness, while the prosciutto provides an umami punch. The flatbreads can be served as an appetizer or a main course, and the combination of textures and flavors guarantees that it will be a hit with both adults and kids alike.
Ingredients (serves 4-6):
- 4 flatbreads or naan
- 4 ripe peaches, halved and pitted
- 2 tablespoons olive oil
- 8 ounces goat cheese, softened
- 12 slices prosciutto
- 2 cups fresh arugula
- Balsamic glaze, for drizzling
- Salt and pepper, to taste
Instructions:
- Prepare the Grill: Preheat your grill to medium-high heat. Lightly oil the grates to prevent sticking.
- Grill the Peaches: Brush the peach halves with olive oil. Place them cut side down on the grill. Grill for about 3-4 minutes, until they’ve grill marks and are slightly softened. Remove from grill and let cool slightly. Once cooled, slice each half into wedges.
- Prepare the Flatbreads: Brush each flatbread with a little olive oil. Place them on the grill and cook for 1-2 minutes on each side until they’re lightly toasted and have grill marks.
- Assemble the Flatbreads: Spread a generous layer of goat cheese over each toasted flatbread. Arrange the grilled peach slices and prosciutto over the cheese.
- Final Touches: Scatter fresh arugula over the top of each flatbread. Drizzle with balsamic glaze and season with salt and pepper to taste.
- Serve: Slice the flatbreads into wedges and serve immediately, allowing everyone to enjoy the combination of warm and cool elements.
Extra Tips:
For an extra burst of flavor, consider adding a sprinkle of chopped fresh basil or mint leaves on top of the flatbreads before serving. If you’re short on time, you can use store-bought balsamic glaze, but making your own by reducing balsamic vinegar can add a personalized touch.
Also, if you don’t have a grill, a grill pan or even an oven broiler can be used to achieve similar results. Make sure to let the goat cheese sit at room temperature before spreading so it’s easier to work with, and for a vegetarian option, you can omit the prosciutto and add toasted pine nuts for a bit of crunch.
Spicy Chicken and Pineapple Skewers

Summer is the perfect time to fire up the grill and enjoy some vibrant flavors with family and friends. Spicy Chicken and Pineapple Skewers are a delicious choice for a family dinner, combining the juiciness of grilled chicken with the sweetness of pineapple, all elevated by a touch of spice. This dish isn’t only easy to prepare but also visually appealing, making it a great centerpiece for any summer gathering.
Whether you’re hosting a backyard BBQ or simply looking for a quick and satisfying meal, these skewers are certain to impress.
The key to a successful skewer is the marinade, which infuses the chicken with flavor and guarantees it remains tender and juicy when grilled. The combination of spices, soy sauce, and lime juice creates a savory and tangy base, while the heat from chili flakes balances the sweetness of the pineapple.
These skewers are best enjoyed fresh off the grill, offering a delightful contrast of textures and flavors. Serve them alongside a fresh salad or some grilled vegetables for a complete summer meal that everyone will love.
Ingredients for 4-6 servings:
- 1.5 pounds boneless, skinless chicken breasts, cut into 1-inch cubes
- 1 fresh pineapple, peeled, cored, and cut into 1-inch chunks
- 2 tablespoons soy sauce
- 2 tablespoons olive oil
- 1 tablespoon honey
- 1 tablespoon lime juice
- 1 teaspoon ground cumin
- 1 teaspoon smoked paprika
- 1/2 teaspoon garlic powder
- 1/2 teaspoon onion powder
- 1/2 teaspoon crushed red pepper flakes
- Salt and pepper to taste
- Wooden or metal skewers
Cooking Instructions:
- Prepare the Marinade: In a large mixing bowl, combine the soy sauce, olive oil, honey, lime juice, cumin, smoked paprika, garlic powder, onion powder, crushed red pepper flakes, salt, and pepper. Whisk together until all ingredients are well combined and smooth.
- Marinate the Chicken: Add the chicken cubes to the marinade and toss until all pieces are evenly coated. Cover the bowl with plastic wrap or a lid and let the chicken marinate in the refrigerator for at least 30 minutes, or up to 4 hours for more intense flavor.
- Preheat the Grill: While the chicken is marinating, preheat your grill to medium-high heat. If using wooden skewers, soak them in water for at least 30 minutes to prevent burning.
- Assemble the Skewers: Thread the marinated chicken and pineapple chunks onto the skewers, alternating between the two. Make sure to leave a little space between each piece for even cooking.
- Grill the Skewers: Place the skewers on the preheated grill and cook for about 10-12 minutes, turning occasionally, until the chicken is fully cooked and has nice grill marks. The internal temperature of the chicken should reach 165°F.
- Serve and Enjoy: Remove the skewers from the grill and let them rest for a few minutes before serving. Serve hot with your choice of side dishes and enjoy!
Extra Tips:
For added flavor, consider brushing the skewers with any remaining marinade during the last few minutes of grilling, but make sure it’s fully cooked to avoid raw chicken contamination.
If you prefer a milder dish, reduce or omit the crushed red pepper flakes. For a touch of freshness, garnish with chopped cilantro or a squeeze of fresh lime juice before serving.
Finally, remember that grilling times can vary based on the size of the chicken pieces and the heat of your grill, so keep an eye on them to avoid overcooking.
Zucchini Noodles With Pesto and Cherry Tomatoes
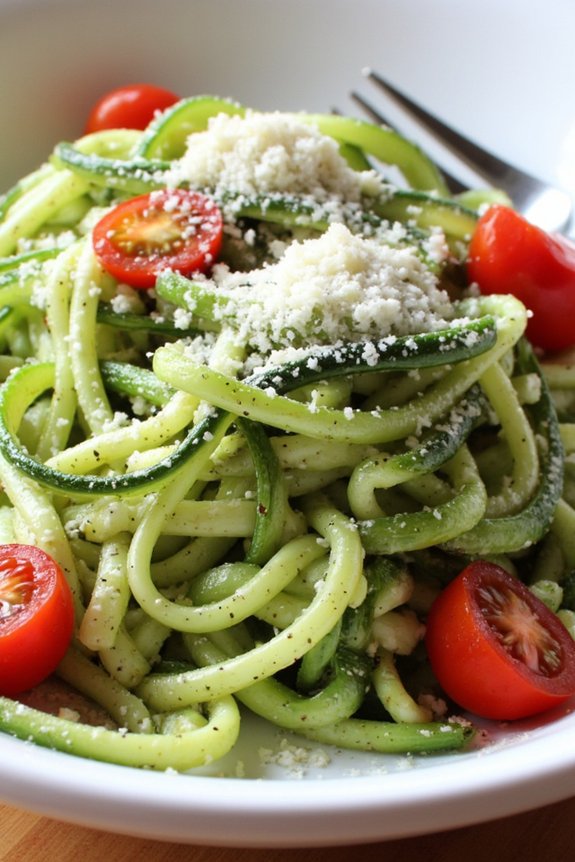
Zucchini Noodles With Pesto and Cherry Tomatoes is a light and invigorating dish that perfectly captures the essence of summer. This dish isn’t only healthy but also incredibly easy to prepare, making it an ideal choice for busy weeknights or casual family dinners. The zucchini noodles, often referred to as “zoodles,” serve as a nutritious alternative to traditional pasta, providing a low-carb option that doesn’t compromise on flavor.
When combined with the vibrant flavors of fresh pesto and the sweetness of cherry tomatoes, this meal becomes a delightful feast for the senses. The freshness of the ingredients is key to the success of this dish. Homemade pesto, made with fresh basil, garlic, Parmesan cheese, and pine nuts, elevates the flavor profile, while the cherry tomatoes add a burst of juiciness and color.
This recipe can be prepared in under 30 minutes, making it a convenient option for those hot summer days when you’d rather spend more time enjoying the sunshine than in the kitchen. Serve it as a main dish or a side; either way, it’s sure to be a hit with family and friends.
Ingredients for 4-6 people:
- 4 medium zucchini
- 2 cups cherry tomatoes, halved
- 1 cup fresh basil leaves
- 1/3 cup pine nuts
- 1/2 cup grated Parmesan cheese
- 2 cloves garlic
- 1/2 cup extra-virgin olive oil
- Salt and pepper to taste
- Optional: crushed red pepper flakes for garnish
Cooking Instructions:
- Prepare the Zucchini Noodles: Wash the zucchini thoroughly. Using a spiralizer, create noodles from the zucchini. If you don’t have a spiralizer, you can use a julienne peeler or a regular vegetable peeler to create long, thin strips resembling fettuccine.
- Make the Pesto: In a food processor, combine the fresh basil leaves, pine nuts, Parmesan cheese, and garlic. Pulse until the mixture is finely chopped. With the processor running, slowly drizzle in the olive oil until the pesto is well blended. Season with salt and pepper to taste.
- Sauté the Zucchini Noodles: In a large skillet, heat a tablespoon of olive oil over medium heat. Add the zucchini noodles and sauté for 2-3 minutes until they’re slightly tender but still firm (al dente). Be careful not to overcook them as they can become mushy.
- Combine and Serve: Add the cherry tomatoes and pesto to the skillet with the zucchini noodles. Toss gently to combine and make sure the noodles are well coated with pesto. Cook for an additional 1-2 minutes to warm the tomatoes through.
- Plate and Garnish: Transfer the zucchini noodles with pesto and cherry tomatoes to a serving platter. Sprinkle with extra Parmesan cheese and, if desired, a pinch of crushed red pepper flakes for a bit of heat. Serve immediately.
Extra Tips:
For the best flavor, use fresh and high-quality ingredients, especially when making the pesto. If you prefer, you can toast the pine nuts lightly in a dry skillet before adding them to the pesto mixture for an added depth of flavor.
If you’re short on time, store-bought pesto can be used, but homemade is always recommended for a fresher taste. Remember to taste and adjust seasoning as needed, and feel free to add other vegetables, like bell peppers or mushrooms, to suit your preference. Enjoy this vibrant dish with a chilled glass of white wine for the perfect summer meal.
Grilled Corn and Avocado Salad
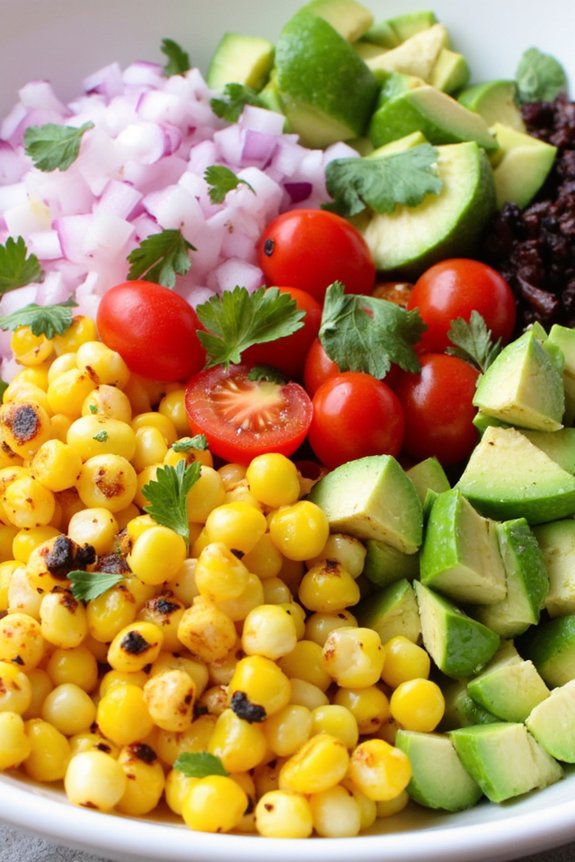
Grilled Corn and Avocado Salad is a perfect dish for those warm summer evenings when you want something light yet satisfying. This salad brings together the sweetness of grilled corn with the creamy texture of ripe avocados, all tied together with a zesty lime dressing.
Whether you’re hosting a family dinner or a casual get-together, this dish is sure to be a hit. Its vibrant colors and fresh flavors make it a delightful addition to any meal, and it’s just as nutritious as it’s delicious.
This recipe serves 4-6 people and is incredibly easy to prepare. With just a few ingredients and minimal preparation, you can create a salad that not only looks beautiful but is also packed with nutrients.
The combination of fresh vegetables and a tangy dressing makes this salad a revitalizing side or even a main course on a hot summer day. With its simple yet harmonious flavors, Grilled Corn and Avocado Salad is a dish you’ll want to make again and again.
Ingredients:
- 4 ears of corn, husked
- 2 ripe avocados, diced
- 1 pint cherry tomatoes, halved
- 1/2 small red onion, finely chopped
- 1/4 cup fresh cilantro, chopped
- Juice of 2 limes
- 3 tablespoons olive oil
- Salt and pepper to taste
- Optional: 1 jalapeño, seeded and finely chopped
Cooking Instructions:
1. Grill the Corn: Preheat your grill to medium-high heat. Place the husked corn directly on the grill and cook for about 10-12 minutes, turning occasionally, until the corn is charred in spots and tender.
Once done, remove the corn from the grill and let it cool slightly.
2. Prepare the Vegetables: While the corn cools, dice the avocados, halve the cherry tomatoes, finely chop the red onion, and chop the cilantro. If you’re adding jalapeño for some extra heat, seed and finely chop it as well.
3. Cut the Corn: Once the corn is cool enough to handle, use a sharp knife to cut the kernels off the cob. Hold the corn vertically and slice downward, letting the kernels fall into a large bowl.
4. Mix the Salad: In the bowl with the corn, add the diced avocados, cherry tomatoes, red onion, cilantro, and jalapeños if using. Drizzle the lime juice and olive oil over the top, and season with salt and pepper to taste.
5. Toss and Serve: Gently toss all the ingredients together until they’re well-combined and evenly coated with the dressing. Adjust seasoning if necessary. Serve immediately for the best texture and flavor.
Extra Tips:
When selecting avocados, look for ones that are ripe but still firm to the touch; this will help them hold their shape in the salad.
If you don’t have access to a grill, you can also roast the corn on a stovetop grill pan or even in the oven under the broiler. This salad can be made a few hours in advance, but add the avocados just before serving to prevent them from browning.
Feel free to adjust the amount of lime juice and cilantro according to your taste preferences.
Lemon Basil Grilled Swordfish
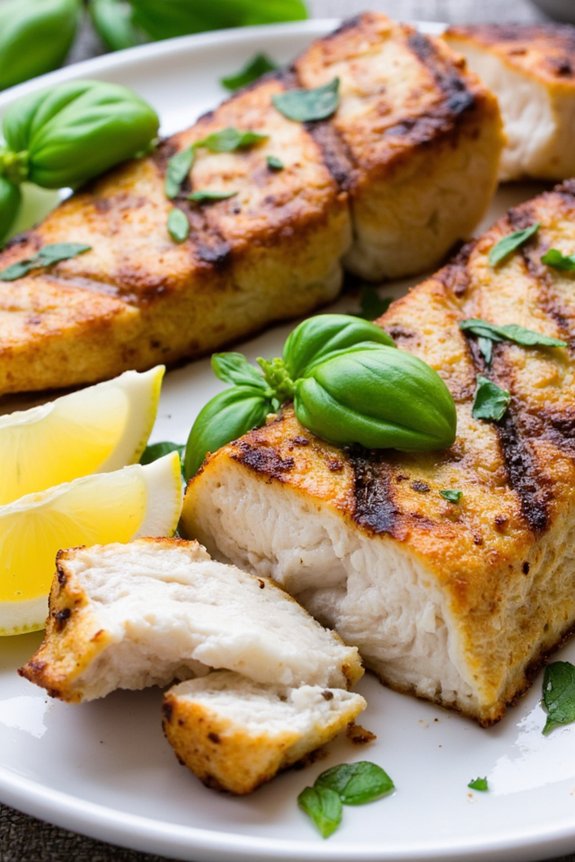
Lemon Basil Grilled Swordfish is a perfect dish to enjoy during the summer months. The combination of fresh lemon and aromatic basil brings a revitalizing balance to the rich, meaty texture of swordfish. This dish is easy to prepare, making it an excellent choice for a family dinner that can be enjoyed outdoors.
The bright citrus flavor paired with the gentle char from the grill creates a delightful entrée that’s both healthy and satisfying. Swordfish is known for its firm and hearty flesh, which stands up well to grilling. When marinated in a blend of lemon juice, olive oil, garlic, and basil, the fish absorbs these vibrant flavors, resulting in a deliciously tender and juicy dish.
This recipe serves 4-6 people, making it perfect for a small summer gathering or a family meal on a warm evening.
Ingredients:
- 4-6 swordfish steaks (about 6-8 ounces each)
- 1/4 cup olive oil
- 1/4 cup freshly squeezed lemon juice
- Zest of 1 lemon
- 3 cloves garlic, minced
- 1/4 cup fresh basil leaves, chopped
- Salt and pepper to taste
- Lemon wedges for serving
Cooking Instructions:
- Prepare the Marinade: In a medium-sized bowl, combine olive oil, lemon juice, lemon zest, minced garlic, and chopped basil. Whisk the ingredients together until well blended. Add salt and pepper to taste, making certain the marinade is well-seasoned.
- Marinate the Swordfish: Place the swordfish steaks in a shallow dish or a resealable plastic bag. Pour the marinade over the steaks, making sure they’re well coated. Seal the dish with plastic wrap or close the bag securely. Refrigerate and let the fish marinate for at least 30 minutes, but no longer than 1 hour.
- Preheat the Grill: Preheat your grill to medium-high heat. Make sure the grill grates are clean and lightly oiled to prevent sticking.
- Grill the Swordfish: Remove the swordfish from the marinade, allowing any excess to drip off. Place the steaks on the preheated grill. Cook for about 4-5 minutes on one side. Carefully flip the steaks and cook for another 4-5 minutes on the other side, until the fish is opaque and flakes easily with a fork.
- Serve: Transfer the grilled swordfish to a serving platter. Garnish with additional fresh basil leaves and lemon wedges. Serve immediately while hot.
Extra Tips:
To keep the swordfish moist and tender, avoid overcooking. Swordfish can quickly become dry if left on the grill too long. It’s best to keep an eye on the fish and use a meat thermometer if needed; the internal temperature should reach 145°F.
Additionally, allowing the swordfish to rest for a few minutes after grilling helps the juices redistribute throughout the meat, enhancing its flavor and texture. If you prefer a spicier version, consider adding a pinch of red pepper flakes to the marinade.