

There’s a special kind of magic in Southern family dinners that makes them unforgettable. The smell of crispy fried chicken and creamy mac and cheese feels like a cozy blanket wrapped around you. Growing up, Sunday dinners were more than just meals; they were moments filled with joy and connection. Let’s uncover some homestyle recipes that will bring warmth and love to your kitchen table.
Classic Southern Fried Chicken
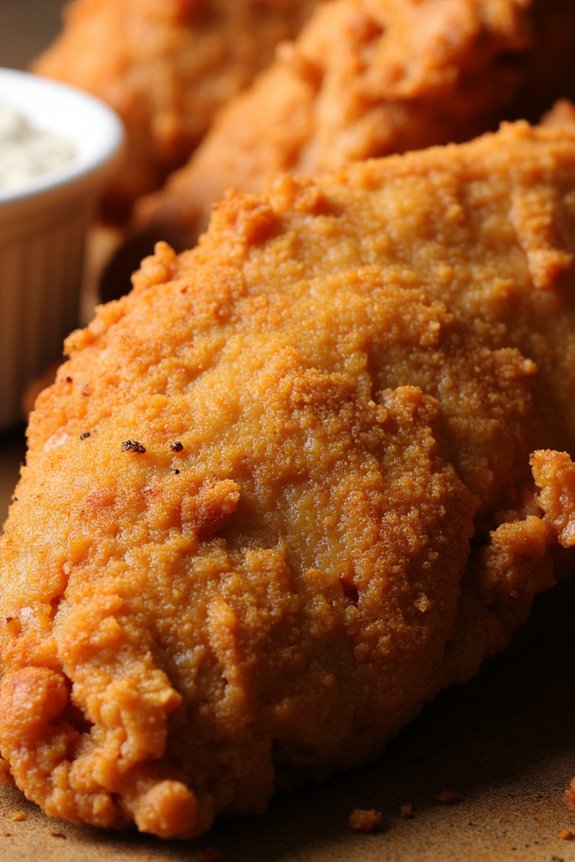
There’s something inherently comforting about the aroma of classic Southern fried chicken wafting through the kitchen. A staple at family gatherings, this dish is beloved for its crispy, golden exterior and juicy, tender interior. Southern fried chicken is often served with a variety of side dishes like mashed potatoes, collard greens, or cornbread, making it a versatile and satisfying meal.
The secret to achieving that perfect crispness lies in the seasoning and the frying technique, which has been passed down through generations of Southern cooks.
For a serving size of 4-6 people, this recipe guarantees that every piece of chicken is perfectly seasoned and fried to perfection. The process involves marinating the chicken in buttermilk, which tenderizes the meat and adds a subtle tanginess, followed by dredging it in a well-seasoned flour mixture. Frying in hot oil creates that signature crunchy crust, making each bite a delightful contrast of textures.
Ingredients:
- 3 to 4 pounds of chicken pieces (legs, thighs, breasts)
- 2 cups buttermilk
- 2 cups all-purpose flour
- 1 tablespoon paprika
- 1 tablespoon garlic powder
- 1 tablespoon onion powder
- 1 teaspoon cayenne pepper
- 1 teaspoon salt
- 1 teaspoon black pepper
- Vegetable oil for frying
Cooking Instructions:
- Marinate the Chicken: In a large bowl, pour the buttermilk over the chicken pieces, making sure they’re fully submerged. Cover and refrigerate for at least 2 hours, or overnight for best results. This step tenderizes the chicken and infuses it with flavor.
- Prepare the Flour Mixture: In a separate bowl, combine the flour, paprika, garlic powder, onion powder, cayenne pepper, salt, and black pepper. Mix thoroughly to make certain that the seasonings are evenly distributed.
- Dredge the Chicken: Remove the chicken from the buttermilk, allowing any excess to drip off. Dredge each piece in the seasoned flour mixture, pressing lightly to make sure the flour adheres well to the chicken.
- Heat the Oil: In a large, deep skillet or Dutch oven, pour enough vegetable oil to fill about halfway. Heat the oil over medium-high heat to 350°F (175°C). Use a thermometer to maintain the oil temperature for consistent frying.
- Fry the Chicken: Carefully add the chicken pieces to the hot oil, skin side down. Fry in batches to avoid overcrowding, which can lower the oil temperature. Cook each piece for about 12-15 minutes, turning occasionally, until golden brown and cooked through. The internal temperature should reach 165°F (74°C).
- Drain and Serve: Remove the fried chicken from the oil and place on a wire rack set over a baking sheet to drain excess oil. This helps maintain its crispiness. Serve hot with your choice of Southern side dishes.
Extra Tips:
For the crispiest chicken, make sure that the oil is at the correct temperature before adding the chicken. If the oil is too cool, the chicken will absorb more oil, resulting in a greasy texture. Conversely, if the oil is too hot, the outside will cook too quickly, leaving the inside undercooked.
Additionally, using a wire rack for draining helps air circulate around the chicken, preserving its crispiness. Adjust the seasoning to your preference, and consider adding a bit more cayenne pepper for an extra kick of heat.
Savory Collard Greens
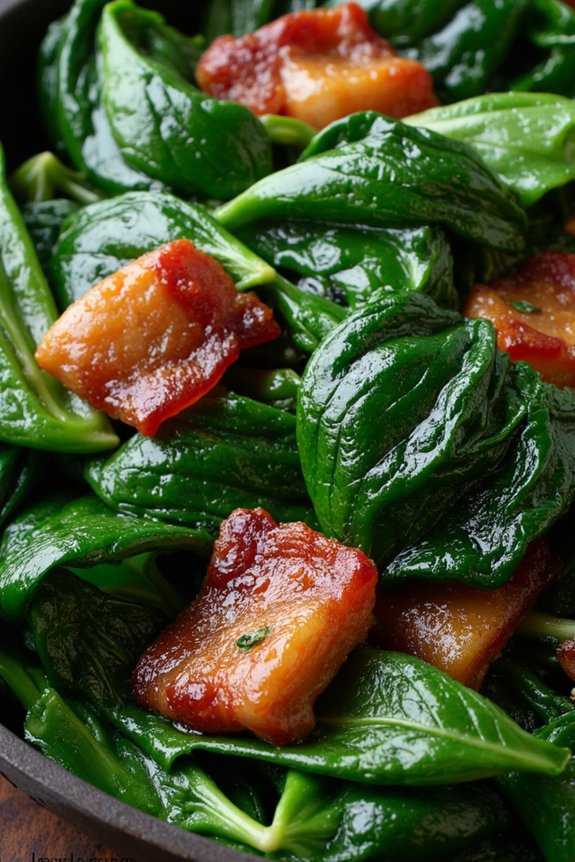
Collard greens are a quintessential part of Southern family dinners, offering a savory and comforting dish that brings people together around the table. This leafy green vegetable is known for its slightly bitter taste, which pairs perfectly with smoky and savory notes, creating a depth of flavor that’s both satisfying and memorable.
The preparation of collard greens involves slow-cooking them to tenderness, allowing the flavors to meld together and create a delicious side dish that complements a variety of main courses. Traditionally cooked with smoked meats, collard greens absorb the rich, smoky flavors, transforming them into a dish that’s both hearty and flavorful.
This recipe will guide you through the process of making Savory Collard Greens that serve 4-6 people, perfect for a family gathering or a cozy dinner at home. With a few simple ingredients and a bit of patience, you can create a dish that embodies the warmth and hospitality of Southern cooking.
Ingredients (serves 4-6):
- 2 pounds of fresh collard greens
- 1 tablespoon olive oil
- 1 medium onion, chopped
- 3 cloves garlic, minced
- 4 cups chicken broth
- 1 smoked ham hock or 4 slices of bacon
- 1 teaspoon salt
- 1 teaspoon black pepper
- 1 teaspoon red pepper flakes (optional)
- 2 tablespoons apple cider vinegar
Cooking Instructions:
- Prepare the Collard Greens: Begin by washing the collard greens thoroughly to remove any dirt or grit. Remove the tough stems and cut the leaves into strips or bite-sized pieces.
- Sauté the Aromatics: In a large pot, heat the olive oil over medium heat. Add the chopped onion and minced garlic, sautéing until the onion becomes translucent and the garlic is fragrant, about 3-4 minutes.
- Add the Ham Hock or Bacon: If using a ham hock, add it to the pot. If you opt for bacon, chop it into small pieces and cook until it begins to render its fat and become crispy.
- Cook the Greens: Add the prepared collard greens to the pot, stirring to coat them in the oil and onion mixture. Cook for about 5 minutes until they wilt slightly.
- Simmer: Pour in the chicken broth, ensuring the greens are mostly submerged. Add salt, black pepper, and red pepper flakes if desired. Bring the mixture to a boil, then reduce the heat to low and cover the pot. Let the greens simmer for about 45-60 minutes, or until they’re tender and flavorful.
- Finish with Vinegar: Once the greens are tender, stir in the apple cider vinegar. Taste and adjust seasoning if necessary, adding more salt or pepper to suit your preference.
Extra Tips:
When preparing collard greens, the freshness of the greens is essential for the best flavor. Choose vibrant, firm leaves without wilting or yellowing.
For added depth, try substituting the ham hock with smoked turkey wings or necks for a different smoky flavor. If you like your greens with a bit more heat, feel free to increase the amount of red pepper flakes.
The addition of apple cider vinegar at the end of cooking brightens the dish, balancing the flavors and adding a slight tang. Enjoy your Savory Collard Greens with cornbread or alongside your favorite Southern entrée for a truly authentic meal.
Creamy Mac and Cheese
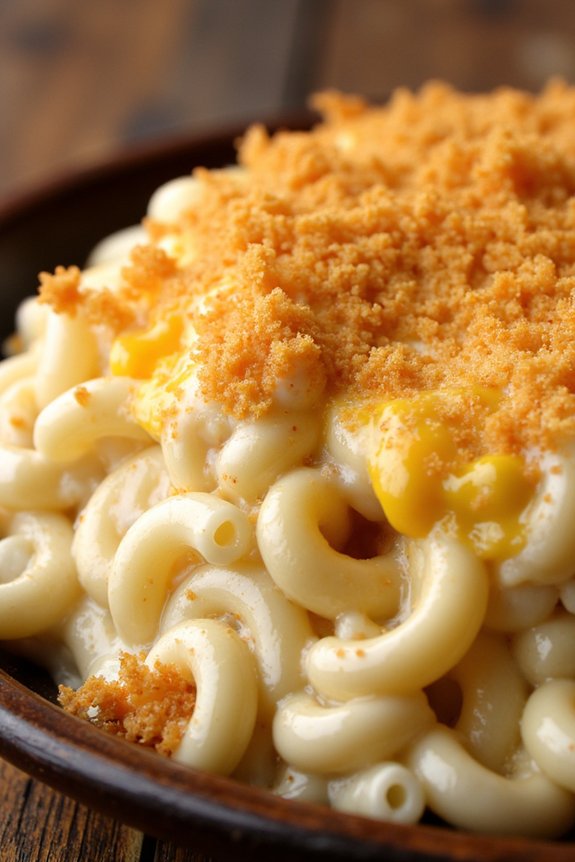
If you’re looking to bring a taste of southern comfort to your dinner table, creamy mac and cheese is a must-try dish. This beloved classic combines tender pasta with a rich, velvety cheese sauce, creating a perfect symphony of flavors that’s both comforting and indulgent.
Ideal as a side dish or a main course, this recipe will satisfy both kids and adults alike, making it a versatile addition to any family gathering or weeknight meal.
The secret to an unforgettable creamy mac and cheese lies in the cheese sauce, which should be smooth and flavorful without being overly heavy. The combination of sharp cheddar and creamy mozzarella offers a perfect balance of tanginess and creaminess, while a touch of mustard and paprika enhances the depth of flavor.
Finished with a crispy breadcrumb topping, this dish will certainly become a family favorite in no time.
Ingredients (serving size: 4-6 people):
- 12 ounces elbow macaroni
- 4 tablespoons unsalted butter
- 1/4 cup all-purpose flour
- 3 cups whole milk
- 2 cups shredded sharp cheddar cheese
- 1 cup shredded mozzarella cheese
- 1 teaspoon mustard powder
- 1/2 teaspoon paprika
- Salt and black pepper to taste
- 1/2 cup panko breadcrumbs
- 2 tablespoons grated Parmesan cheese
- 1 tablespoon olive oil
Instructions:
- Cook the Pasta: Begin by boiling a large pot of salted water. Add the elbow macaroni and cook until al dente, according to package instructions. Drain and set aside.
- Make the Roux: In a large saucepan over medium heat, melt the butter. Once melted, whisk in the flour, stirring continuously for about 1-2 minutes, until the mixture turns light golden brown.
- Prepare the Cheese Sauce: Gradually whisk in the whole milk to the roux, making certain no lumps form. Continue to stir until the sauce thickens, about 5-7 minutes. Reduce the heat to low and add the shredded cheddar and mozzarella cheeses, mustard powder, paprika, salt, and pepper. Stir until the cheese is completely melted and the sauce is smooth.
- Combine Pasta and Sauce: Add the cooked macaroni to the cheese sauce, gently stirring to make certain each piece is thoroughly coated.
- Prepare the Topping: In a small bowl, combine the panko breadcrumbs, grated Parmesan cheese, and olive oil. Mix until the breadcrumbs are evenly coated.
- Bake the Mac and Cheese: Preheat your oven to 350°F (175°C). Transfer the macaroni and cheese mixture to a greased baking dish. Sprinkle the breadcrumb mixture evenly over the top. Bake for 20-25 minutes, or until the top is golden brown and crispy.
- Serve: Remove from the oven and let it rest for a few minutes before serving. Enjoy your creamy mac and cheese while it’s warm.
Extra Tips:
For an even richer flavor, consider adding a dash of hot sauce or a teaspoon of garlic powder to the cheese sauce. If you prefer a more robust cheese flavor, you can experiment with different types of cheese such as Gruyere or Fontina.
Make sure that the cheese is fully melted into the sauce to prevent a grainy texture. Additionally, if you want to save time, you can prepare the cheese sauce ahead of time and store it in the fridge until you’re ready to bake.
Sweet Southern Cornbread
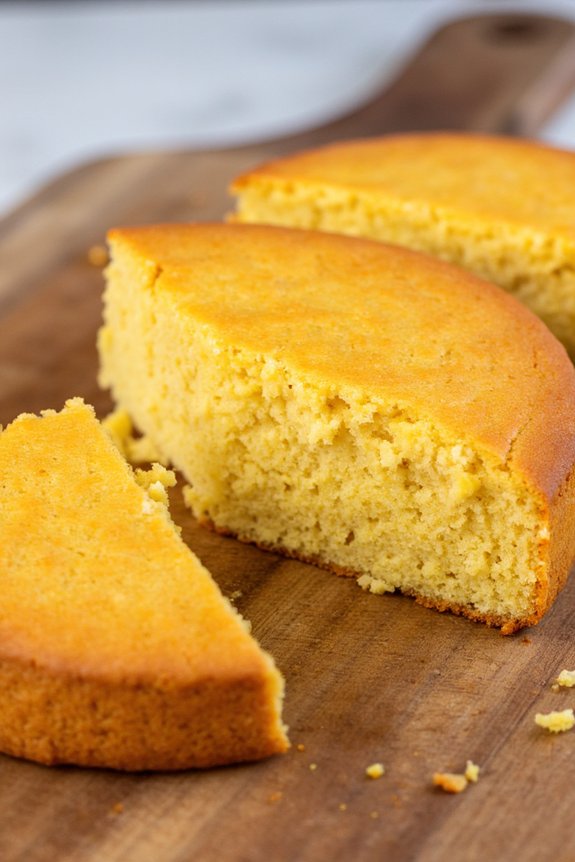
Sweet Southern Cornbread is a staple at any Southern family dinner. Its warm, fluffy texture and slightly sweet flavor create a comforting dish that pairs perfectly with a variety of Southern meals, from fried chicken to collard greens. This cornbread isn’t only easy to make, but it also embodies the essence of Southern hospitality with its simple yet delightful taste.
Whether you’re serving it at a family gathering or enjoying a quiet dinner at home, this cornbread is bound to be a hit.
The key to a perfect Sweet Southern Cornbread is using quality ingredients and taking care in its preparation. The sweetness comes from a touch of sugar, while the combination of cornmeal and flour guarantees a tender crumb. Buttermilk is essential as it provides a slight tanginess that balances the sweetness, and it also helps to keep the cornbread moist.
Once you’ve tasted this homemade version, you’ll never want to go back to any store-bought alternative.
Ingredients for 4-6 servings:
- 1 cup cornmeal
- 1 cup all-purpose flour
- 1/4 cup granulated sugar
- 1 tablespoon baking powder
- 1/2 teaspoon baking soda
- 1/2 teaspoon salt
- 1 cup buttermilk
- 2 large eggs
- 1/4 cup unsalted butter, melted
- 1/4 cup honey
Cooking Instructions:
- Preheat the Oven: Begin by preheating your oven to 400°F (200°C). This guarantees that your cornbread will bake evenly and develop a nice, golden crust.
- Prepare the Baking Pan: Grease a 9-inch round or square baking pan with some butter or non-stick cooking spray to prevent the cornbread from sticking.
- Mix Dry Ingredients: In a large mixing bowl, whisk together the cornmeal, flour, sugar, baking powder, baking soda, and salt until they’re well combined.
- Combine Wet Ingredients: In a separate bowl, beat together the buttermilk, eggs, melted butter, and honey until they’re fully mixed.
- Blend Wet and Dry Ingredients: Gradually pour the wet ingredients into the dry ingredients, stirring gently with a wooden spoon or spatula until just combined. Be careful not to overmix, as this can make the cornbread dense.
- Pour Batter into Pan: Transfer the batter into the prepared baking pan, spreading it evenly with a spatula to guarantee uniform cooking.
- Bake the Cornbread: Place the pan in the preheated oven and bake for 20-25 minutes, or until the top is golden brown and a toothpick inserted into the center comes out clean.
- Cool and Serve: Allow the cornbread to cool in the pan for about 5 minutes before slicing it into wedges or squares. Serve warm for the best flavor.
Extra Tips:
When making Sweet Southern Cornbread, it’s important to measure your ingredients accurately, especially the flour and cornmeal, to maintain the right consistency. If you prefer a more savory version, you can reduce the sugar to 2 tablespoons or omit the honey.
For an additional flavor boost, consider adding a cup of shredded cheddar cheese or a handful of chopped jalapeños to the batter before baking. Remember to store any leftovers in an airtight container to keep them fresh for up to two days. Reheat in the oven or microwave before serving for best results.
Shrimp and Grits

Shrimp and grits is a timeless Southern classic that brings hearty and comforting flavors to the dinner table. This dish combines succulent shrimp with creamy, buttery grits, creating a delightful harmony of textures and tastes. The roots of shrimp and grits can be traced back to the Lowcountry of South Carolina and Georgia, where it was traditionally enjoyed as a simple fisherman’s breakfast.
Today, it has evolved into a beloved staple of Southern cuisine, often served at family gatherings and special occasions.
To make a perfect plate of shrimp and grits, you need to balance the creamy richness of the grits with the savory, slightly spicy shrimp. The grits should be smooth and luscious, seasoned generously with butter and cheese, while the shrimp is cooked just right, with a hint of spice and a touch of lemon to enhance its natural sweetness. This recipe serves 4-6 people, making it ideal for a family dinner or a small gathering.
Ingredients:
- 1 cup stone-ground grits
- 4 cups water
- 1 cup sharp cheddar cheese, shredded
- 2 tablespoons unsalted butter
- Salt and pepper to taste
- 1 pound large shrimp, peeled and deveined
- 4 slices bacon, chopped
- 1 tablespoon olive oil
- 1 small onion, diced
- 2 cloves garlic, minced
- 1 teaspoon Cajun seasoning
- Juice of 1 lemon
- 2 tablespoons chopped fresh parsley
Cooking Instructions:
- Prepare the Grits: In a large pot, bring 4 cups of water to a boil. Slowly whisk in the grits, reduce the heat to low, and cover. Cook the grits, stirring occasionally, for about 20-25 minutes or until thickened and creamy. Stir in the shredded cheddar cheese, butter, salt, and pepper. Keep warm while preparing the shrimp.
- Cook the Bacon: In a large skillet over medium heat, cook the chopped bacon until crispy, about 5-7 minutes. Remove the bacon with a slotted spoon and set aside, leaving the bacon drippings in the skillet.
- Sauté the Vegetables: Add the olive oil to the skillet with the bacon drippings. Sauté the onion in the same skillet over medium heat until it becomes translucent, about 3-4 minutes. Add the garlic and cook for another minute until fragrant.
- Cook the Shrimp: Add the shrimp to the skillet, sprinkle with Cajun seasoning, and cook for 2-3 minutes on each side, or until they’re pink and opaque. Squeeze the lemon juice over the shrimp and stir in the cooked bacon and chopped parsley.
- Assemble the Dish: Serve the shrimp mixture over the warm, cheesy grits. Garnish with additional parsley if desired.
Extra Tips:
For the best results, use fresh, high-quality shrimp and stone-ground grits, as they’ll greatly enhance the flavor and texture of the dish. Adjust the level of Cajun seasoning to your taste preference, and feel free to add a splash of hot sauce if you like extra heat.
Be sure to keep the grits warm and creamy by stirring in a little extra water or milk if they start to thicken too much while sitting. This dish is best enjoyed immediately after preparation for the freshest taste and texture.
Southern-Style Meatloaf
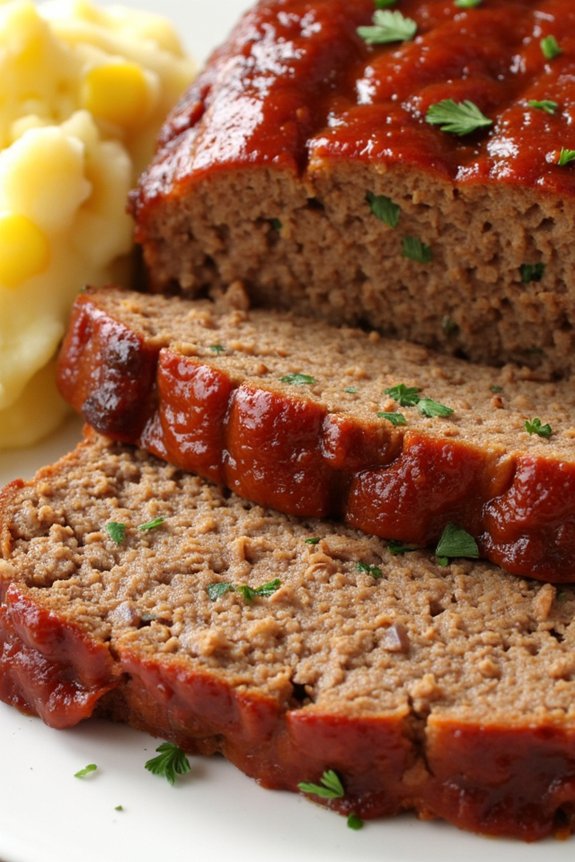
Southern-Style Meatloaf is a comforting and hearty dish that’s perfect for family dinners. This classic Southern recipe is known for its rich flavors and moist texture, making it a favorite in many households. The combination of ground beef, aromatic seasonings, and a sweet and tangy glaze creates a delicious meal that everyone will love.
Best served with creamy mashed potatoes or buttery corn, this meatloaf is certain to bring a taste of the South to your dinner table. This recipe is designed to serve 4-6 people, making it ideal for a family gathering or a cozy dinner with friends. The preparation is straightforward, requiring only a few simple ingredients that come together to create a mouthwatering dish.
By following the step-by-step instructions, you’ll have a perfectly cooked meatloaf that’s juicy on the inside with a slightly crispy crust on the outside. Let’s get started and bring some Southern comfort to your kitchen!
Ingredients:
- 2 lbs ground beef
- 1 cup bread crumbs
- 1/2 cup milk
- 2 large eggs
- 1 small onion, finely chopped
- 2 cloves garlic, minced
- 1/4 cup ketchup
- 2 tablespoons Worcestershire sauce
- 1 teaspoon salt
- 1/2 teaspoon black pepper
- 1/2 teaspoon paprika
- 1/4 cup chopped fresh parsley
- 1/2 cup ketchup (for glaze)
- 2 tablespoons brown sugar (for glaze)
- 1 tablespoon apple cider vinegar (for glaze)
Cooking Instructions:
- Preheat the Oven: Begin by preheating your oven to 350°F (175°C). This guarantees the oven is at the right temperature when you’re ready to bake the meatloaf.
- Prepare the Meatloaf Mixture: In a large mixing bowl, combine the ground beef, bread crumbs, milk, eggs, onion, garlic, 1/4 cup ketchup, Worcestershire sauce, salt, pepper, paprika, and parsley. Mix thoroughly using your hands or a spatula until all ingredients are well incorporated.
- Shape the Meatloaf: Transfer the meat mixture to a large baking dish or a loaf pan. Shape it into a loaf form, ensuring it’s evenly packed to cook uniformly.
- Prepare the Glaze: In a small bowl, whisk together 1/2 cup ketchup, brown sugar, and apple cider vinegar until smooth. This will be the sweet and tangy glaze for the meatloaf.
- Apply the Glaze: Spread the prepared glaze evenly over the top of the meatloaf using a spoon or brush. This will add flavor and help create a delicious crust.
- Bake the Meatloaf: Place the meatloaf in the preheated oven and bake for 60-75 minutes, or until the internal temperature reaches 160°F (71°C). This guarantees the meat is fully cooked and safe to eat.
- Rest and Serve: Once cooked, remove the meatloaf from the oven and let it rest for about 10 minutes. This allows the juices to redistribute, keeping the meatloaf moist. Slice and serve with your favorite sides.
Extra Tips:
When making Southern-Style Meatloaf, it’s essential not to over-mix the meat mixture, as this can make the meatloaf dense. For a spicier kick, consider adding a pinch of cayenne pepper to the glaze.
If you prefer a slightly firmer texture, you can substitute half of the ground beef with ground pork. Additionally, letting the meatloaf rest before slicing ensures it holds its shape and remains juicy. Enjoy your delicious Southern creation!
Hoppin’ John
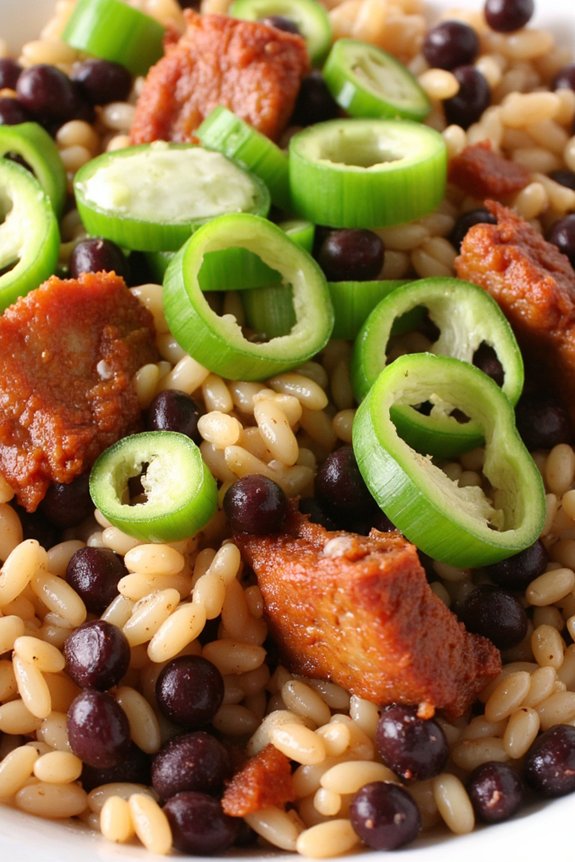
Southern cuisine is renowned for its rich flavors and comforting dishes, and Hoppin’ John is a classic example that embodies this tradition. Originating from the Lowcountry of South Carolina, Hoppin’ John is a savory dish traditionally served on New Year’s Day to bring good luck and prosperity. The combination of black-eyed peas, rice, and smoky meat creates a hearty and satisfying meal that’s perfect for a family dinner. This dish isn’t only delicious but also carries a cultural significance that makes it a cherished recipe for many Southern families.
The beauty of Hoppin’ John lies in its simplicity and the way it brings together staple ingredients to create something truly special. The black-eyed peas symbolize coins, and when paired with rice, they’re said to guarantee a prosperous new year. The dish is often accompanied by collard greens, which represent paper money, further enhancing its reputation as a lucky meal.
Whether you’re preparing it for New Year’s or simply as a comforting weeknight meal, Hoppin’ John is sure to be a hit with its savory, smoky flavors and satisfying texture.
Ingredients for Hoppin’ John (serves 4-6):
- 1 cup of dried black-eyed peas
- 4 cups of water
- 1 tablespoon of olive oil
- 1 medium onion, chopped
- 2 cloves of garlic, minced
- 1 green bell pepper, chopped
- 1 teaspoon of thyme
- 1 teaspoon of smoked paprika
- 1/2 teaspoon of cayenne pepper
- 1/2 pound of smoked ham hock or bacon
- 1 cup of long-grain white rice
- 2 cups of chicken broth
- Salt and black pepper to taste
- 2 green onions, sliced (for garnish)
Cooking Instructions:
- Prepare the Black-Eyed Peas: Rinse and sort the black-eyed peas. Place them in a large pot with 4 cups of water. Bring to a boil, then reduce the heat and let them simmer for about 30 minutes or until they’re tender but not mushy. Drain and set aside.
- Sauté Vegetables: In a large skillet, heat olive oil over medium heat. Add the chopped onion and cook until translucent, about 5 minutes. Stir in the minced garlic and chopped green bell pepper, cooking until the pepper is tender.
- Season the Mixture: Add thyme, smoked paprika, and cayenne pepper to the skillet. Stir well to combine, allowing the spices to cook for about 1 minute to enhance their flavors.
- Cook the Meat: Add the smoked ham hock or bacon to the skillet, cooking until the meat is browned and the fat is rendered, about 5-7 minutes. This step will infuse the dish with a rich, smoky flavor.
- Combine Ingredients: Stir in the rice, making sure it’s well-coated with the oil and spices. Add the cooked black-eyed peas and chicken broth to the skillet. Season with salt and black pepper to taste.
- Simmer the Dish: Bring the mixture to a gentle boil. Lower the heat, cover the skillet, and let it simmer for about 20 minutes, or until the rice is cooked and has absorbed all the liquid.
- Serve: Fluff the rice with a fork and adjust the seasoning if necessary. Serve hot, garnished with sliced green onions for a fresh touch.
Extra Tips:
When cooking Hoppin’ John, it’s important to keep an eye on the liquid levels to guarantee the rice cooks properly without burning. If the rice isn’t fully cooked by the time the liquid is absorbed, you can add a little more chicken broth or water as needed.
For a vegetarian version, you can omit the smoked ham hock or bacon and use vegetable broth instead. Adding a splash of hot sauce can also enhance the dish’s flavor for those who enjoy a bit of heat.
Chicken and Dumplings
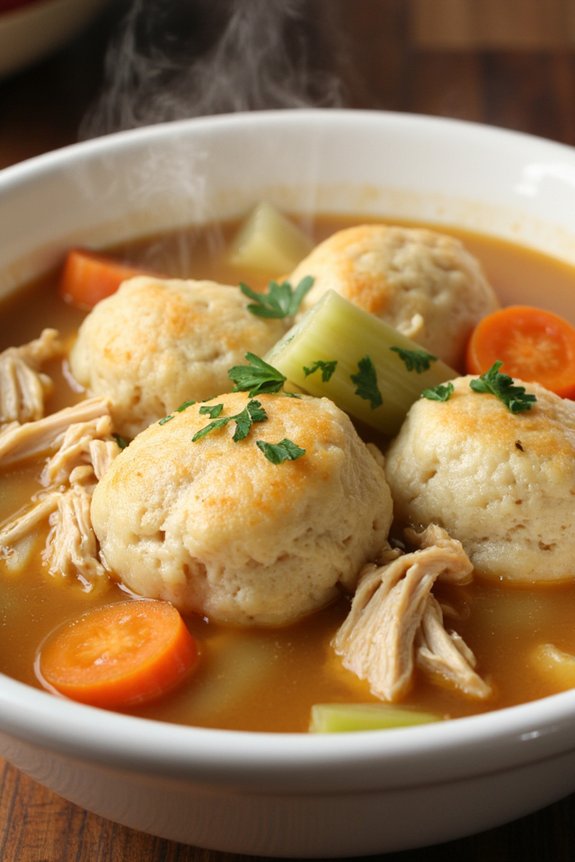
Chicken and Dumplings is a classic Southern dish that warms the soul and fills the belly. This comforting meal features tender, juicy chicken simmered in a rich, savory broth, accompanied by fluffy, pillowy dumplings. The combination of flavors and textures is both nostalgic and satisfying, making it a favorite for family dinners and gatherings. The dish is perfect for chilly evenings, offering a taste of the South that brings everyone to the table.
Creating Chicken and Dumplings from scratch is a rewarding experience that doesn’t require advanced culinary skills, just a bit of time and love. The key to a successful dish is in the balance of flavors and the texture of the dumplings. Whether you’re an experienced cook or a beginner in the kitchen, this recipe will guide you through each step to guarantee a delightful result. This recipe yields enough for 4-6 people, making it ideal for a family dinner or a small get-together with friends.
Ingredients:
- 1 whole chicken (about 3-4 pounds), cut into pieces
- 8 cups chicken broth
- 2 cups all-purpose flour
- 1 teaspoon baking powder
- 1/2 teaspoon salt
- 1/2 teaspoon black pepper
- 1 cup milk
- 2 tablespoons unsalted butter
- 2 carrots, sliced
- 2 celery stalks, sliced
- 1 onion, chopped
- 2 cloves garlic, minced
- 2 tablespoons fresh parsley, chopped
Instructions:
- Prepare the Chicken:
- In a large pot, add the chicken pieces and cover with chicken broth. Bring to a boil over medium-high heat, then reduce the heat to low and let it simmer for about 45 minutes, or until the chicken is cooked through and tender.
- Remove and Shred the Chicken:
- Carefully remove the chicken from the pot and set it aside to cool slightly. Once cool, shred the chicken, discarding the skin and bones. Set the shredded chicken aside.
- Prepare the Vegetables:
- In the same pot, add the chopped onion, sliced carrots, sliced celery, and minced garlic to the broth. Simmer for about 10 minutes, or until the vegetables are tender.
- Make the Dumplings:
- In a mixing bowl, combine the flour, baking powder, and salt. Cut in the butter until the mixture resembles coarse crumbs. Stir in the milk until the dough just comes together.
- Cook the Dumplings:
- Drop spoonfuls of the dumpling dough into the simmering broth. Cover the pot and let the dumplings cook for 15 minutes, without lifting the lid, until they’re light and fluffy.
- Combine with Chicken:
- Return the shredded chicken to the pot. Stir gently to combine with the broth and dumplings. Season with black pepper and adjust salt to taste.
- Finish and Serve:
- Stir in the fresh parsley just before serving. Serve hot in bowls, with a bit of extra parsley sprinkled on top for garnish.
Extra Tips:
For the best results, use a whole chicken as it provides rich flavor and tender meat. Feel free to add a splash of cream to the broth for added richness. When making the dumplings, be careful not to overmix the dough to guarantee light and fluffy dumplings. Additionally, resist the urge to lift the lid while the dumplings are cooking to maintain the steam that helps them rise.
Enjoy this hearty Southern classic with family and friends, and perhaps a side of cornbread for an authentic Southern meal.
Southern Pecan Pie

Southern Pecan Pie is a classic dessert that embodies the comforting and indulgent flavors of the South. This decadent pie is a perfect finale to a hearty Southern family dinner, offering a sweet and nutty taste that leaves everyone craving for more. The rich filling is made with a blend of buttery pecans, sweet syrup, and a hint of vanilla, all encased in a flaky, buttery crust that adds the perfect texture to this delightful dessert.
Creating a Southern Pecan Pie is an art that combines simple ingredients with a touch of love and care. Whether it’s for a special occasion or a casual family gathering, this pie is bound to impress your guests with its irresistible aroma and taste. The following recipe is designed to serve 4-6 people, making it ideal for a small family dinner or an intimate gathering with friends.
Ingredients (Serves 4-6)
- 1 9-inch pie crust (store-bought or homemade)
- 1 cup corn syrup
- 1 cup granulated sugar
- 3 large eggs
- 1/4 cup unsalted butter, melted
- 1 teaspoon vanilla extract
- 1 1/2 cups pecan halves
Cooking Instructions
- Preheat the Oven: Start by preheating your oven to 350°F (175°C), confirming the oven is ready by the time you finish preparing the pie.
- Prepare the Pie Crust: Roll out your pie crust and place it into a 9-inch pie pan, pressing it gently to fit the shape. Trim any excess dough from the edges and flute or crimp the edges as desired.
- Mix the Filling: In a large mixing bowl, whisk together the corn syrup, granulated sugar, and eggs until smooth. Add in the melted butter and vanilla extract, and continue whisking until all ingredients are well combined.
- Add the Pecans: Gently fold in the pecan halves into the filling mixture, making sure they’re evenly distributed throughout the mixture.
- Fill the Pie Shell: Pour the pecan filling into the prepared pie crust, spreading the pecans evenly with a spatula if necessary to guarantee a uniform distribution.
- Bake the Pie: Place the pie on the center rack of the preheated oven and bake for about 50-60 minutes, or until the filling is set and the top is golden brown. If the crust begins to brown too quickly, cover the edges with aluminum foil to prevent burning.
- Cool and Serve: Once baked, remove the pie from the oven and allow it to cool completely on a wire rack. This will help the filling to firm up. Serve at room temperature or slightly warm with a dollop of whipped cream or a scoop of vanilla ice cream.
Extra Tips
When making Southern Pecan Pie, it’s vital to keep an eye on the baking process to prevent overbaking, which can result in a dry filling.
If you prefer a deeper flavor, consider toasting the pecans lightly before adding them to the filling. Additionally, using a pie shield or foil for the crust edges can help guarantee they don’t over-brown during the long baking time.
Finally, for a richer taste, try using dark corn syrup instead of light, or mix the two for a balanced flavor profile.
Biscuits and Sausage Gravy
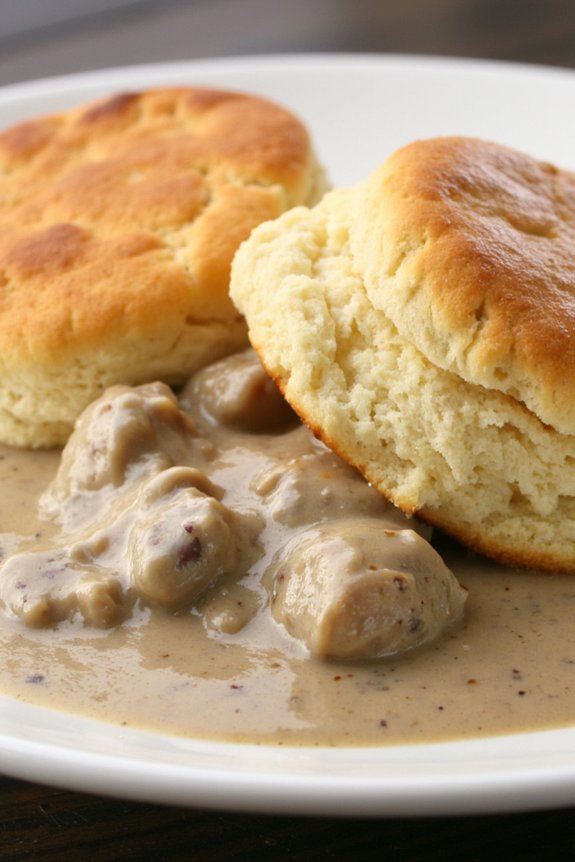
Biscuits and Sausage Gravy is a classic Southern comfort food that’s perfect for breakfast, brunch, or even dinner. This dish combines fluffy, buttery biscuits with a rich and flavorful sausage gravy, creating a hearty meal that’s guaranteed to satisfy. The creamy gravy made with seasoned sausage and milk is poured over freshly baked biscuits, making each bite a delicious and comforting experience.
This dish isn’t only easy to prepare but also brings a touch of Southern hospitality to your table. The origins of biscuits and gravy date back to the late 1800s in the Southern United States, where it became a staple for breakfast due to its simple ingredients and filling nature. The beauty of this dish lies in its simplicity, allowing the flavors of the sausage and the buttery biscuits to shine through.
Perfect for feeding a crowd or serving a family meal, this recipe serves 4-6 people and is bound to become a favorite in your household.
Ingredients (Serves 4-6)
- 2 cups all-purpose flour
- 1 tablespoon baking powder
- 1/2 teaspoon baking soda
- 1 teaspoon salt
- 1/2 cup unsalted butter, chilled and cubed
- 3/4 cup buttermilk
- 1 pound breakfast sausage
- 1/4 cup all-purpose flour
- 3 cups whole milk
- Salt and black pepper to taste
Cooking Instructions
- Preheat the Oven: Preheat your oven to 425°F (220°C) to confirm it’s hot enough for the biscuits to bake properly.
- Prepare the Biscuit Dough: In a large bowl, combine 2 cups of all-purpose flour, 1 tablespoon of baking powder, 1/2 teaspoon of baking soda, and 1 teaspoon of salt. Add the chilled, cubed butter and use a pastry cutter or your fingers to work the butter into the flour mixture until it resembles coarse crumbs.
- Add Buttermilk: Pour in 3/4 cup of buttermilk and mix until the dough comes together. Be careful not to overmix, as this can make the biscuits tough.
- Shape the Biscuits: Turn the dough out onto a floured surface and gently knead it a few times. Roll the dough out to about 1-inch thickness. Use a biscuit cutter to cut out biscuits and place them on a baking sheet lined with parchment paper.
- Bake the Biscuits: Bake in the preheated oven for 12-15 minutes, or until the biscuits are golden brown on top. Remove from the oven and let them cool on a wire rack.
- Cook the Sausage: In a large skillet over medium heat, cook the sausage until it’s browned and cooked through, breaking it up with a spatula as it cooks.
- Make the Gravy: Sprinkle 1/4 cup of flour over the cooked sausage and stir well until the flour is absorbed. Gradually add 3 cups of milk, stirring constantly to prevent lumps. Continue to cook and stir until the gravy thickens.
- Season the Gravy: Add salt and black pepper to taste, adjusting the seasoning as needed.
- Serve: Split the warm biscuits in half and ladle the sausage gravy over the top. Serve immediately.
Extra Tips
For the best biscuits, make sure your butter is very cold before incorporating it into the flour mixture, as this helps create the flakiness. If you don’t have buttermilk, you can make a substitute by adding a tablespoon of lemon juice or white vinegar to a cup of milk and letting it sit for a few minutes.
When making the gravy, maintain a medium heat to avoid scorching the milk. If the gravy becomes too thick, you can thin it with a little more milk. Enjoy your Southern-style biscuits and sausage gravy with a side of scrambled eggs or fresh fruit for a complete meal.
Red Beans and Rice
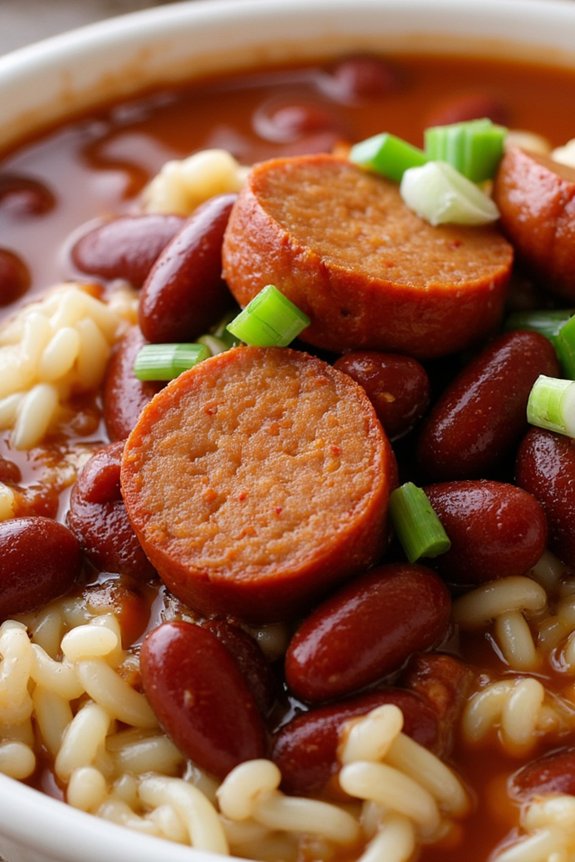
Red Beans and Rice is a classic Southern dish that embodies comfort and tradition. Originating from Louisiana, this dish is often enjoyed as a hearty meal on Mondays, a tradition that dates back to the days when Monday was laundry day, and the dish could simmer on the stove while chores were being completed. The combination of creamy red beans, fragrant spices, and smoked sausage or ham hock creates a rich and satisfying meal that’s perfect for a family dinner. Served over fluffy white rice, this dish isn’t only filling but also deeply flavorful, with each bite offering a taste of the South’s culinary heritage.
The beauty of Red Beans and Rice lies in its simplicity and the ability to feed a crowd with basic pantry staples. This dish is particularly loved for its versatility; it can be customized with various meats or made vegetarian to suit different dietary preferences. Whether you’re making it for a large family gathering or a simple weeknight meal, this recipe will guide you through creating an authentic Southern experience at your dinner table.
Ingredients (Serves 4-6):
- 1 pound dried red kidney beans
- 1 tablespoon olive oil
- 1 large onion, chopped
- 1 green bell pepper, chopped
- 2 celery stalks, chopped
- 3 garlic cloves, minced
- 1 teaspoon smoked paprika
- 1 teaspoon dried thyme
- 1 teaspoon cayenne pepper
- 1 bay leaf
- 1 pound smoked sausage, sliced (or ham hock)
- 4 cups chicken broth
- Salt and pepper to taste
- 4 cups cooked white rice
- 2 green onions, sliced (for garnish)
Instructions:
- Prepare the Beans: Rinse the dried beans under cold water to remove any debris. Place them in a large pot and cover with water. Soak the beans overnight or use the quick soak method by boiling them for 2 minutes, then letting them sit for an hour.
- Cook the Vegetables: In a large pot, heat the olive oil over medium heat. Add the chopped onion, bell pepper, and celery. Sauté for about 5 minutes until the vegetables are softened. Stir in the minced garlic and cook for another minute until fragrant.
- Season the Dish: Add the smoked paprika, dried thyme, cayenne pepper, and bay leaf to the pot. Stir well to combine the spices with the vegetables.
- Add the Protein and Beans: Add the sliced smoked sausage (or ham hock) to the pot, followed by the soaked beans. Pour in the chicken broth, ensuring the beans are covered by at least an inch of liquid. Bring to a boil.
- Simmer the Beans: Reduce the heat to low, cover the pot, and let the beans simmer gently for about 1.5 to 2 hours, or until the beans are tender and the liquid has thickened. Stir occasionally and add more water or broth if necessary to keep the beans submerged.
- Season and Serve: Once the beans are cooked, season with salt and pepper to taste. Remove the bay leaf before serving. Serve the red beans over a bed of cooked white rice, garnished with sliced green onions.
Extra Tips:
To enhance the flavor of your Red Beans and Rice, consider making it a day ahead, as the flavors tend to develop and deepen overnight. If you prefer a thicker consistency, use a potato masher to mash some of the beans against the side of the pot.
For those who like their dish spicier, feel free to adjust the cayenne pepper to your taste or add a splash of your favorite hot sauce. Finally, always taste and adjust the seasoning before serving, as the saltiness can vary based on the type of sausage or broth used.
Sweet Tea Brined Pork Chops
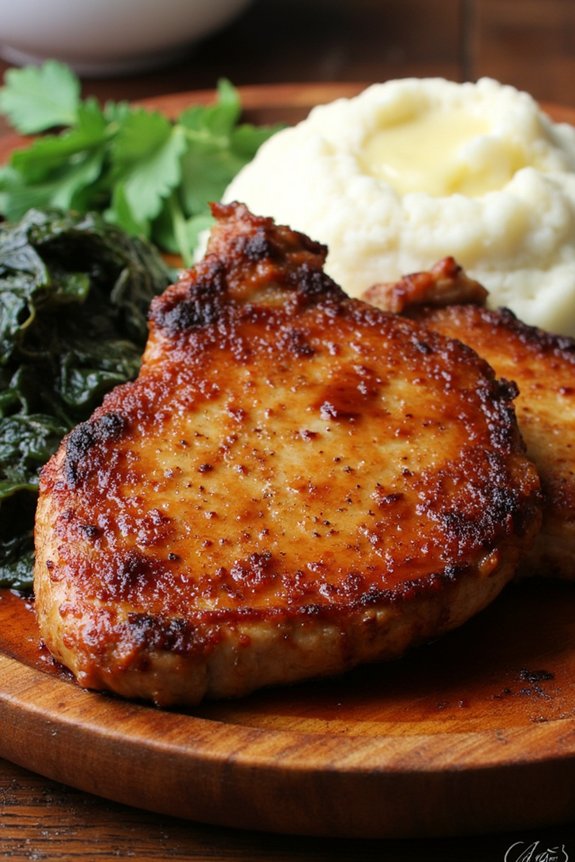
Sweet Tea Brined Pork Chops are a delightful and flavorful option for your Southern family dinner. This dish combines the classic Southern beverage, sweet tea, with savory pork chops to create a unique and mouthwatering meal. The brining process infuses the pork chops with moisture and flavor, ensuring that they remain tender and juicy when cooked. The result is a perfect balance of sweetness and spice, which pairs beautifully with traditional Southern sides like collard greens or mashed potatoes.
To prepare Sweet Tea Brined Pork Chops, you start by creating a brine with sweet tea, which not only tenderizes the meat but also imparts a subtle sweetness. The pork chops are then marinated in this brine for several hours, allowing the flavors to penetrate deeply. After brining, the pork chops are seasoned and cooked to perfection, resulting in a deliciously caramelized crust and juicy interior. This recipe is perfect for serving 4-6 people, making it an ideal choice for a family gathering or a special dinner with friends.
Ingredients (serves 4-6):
- 6 bone-in pork chops, about 1 inch thick
- 4 cups sweet tea
- 1/4 cup kosher salt
- 1/4 cup brown sugar
- 1 tablespoon black peppercorns
- 2 bay leaves
- 4 cloves of garlic, smashed
- 1 tablespoon vegetable oil
- Salt and pepper to taste
Cooking Instructions:
- Prepare the Brine: In a large pot, combine sweet tea, kosher salt, brown sugar, black peppercorns, bay leaves, and smashed garlic. Heat the mixture over medium heat, stirring occasionally, until the salt and sugar dissolve completely. Remove from heat and let it cool to room temperature.
- Brine the Pork Chops: Place the pork chops in a large resealable plastic bag or a shallow dish. Pour the cooled brine over the pork chops, ensuring they’re fully submerged. Seal the bag or cover the dish and refrigerate for at least 4 hours, or overnight for best results.
- Preheat the Grill or Pan: Preheat your grill to medium-high heat, or heat a large skillet over medium-high heat and add the vegetable oil.
- Season the Pork Chops: Remove the pork chops from the brine and pat them dry with paper towels. Discard the brine. Season both sides of the pork chops with salt and pepper.
- Cook the Pork Chops: Place the pork chops on the preheated grill or skillet. Cook for 4-5 minutes on each side, or until they reach an internal temperature of 145°F (63°C) and have a nice caramelized crust.
- Rest and Serve: Remove the pork chops from the heat and let them rest for 5 minutes before serving. This allows the juices to redistribute, ensuring the meat remains tender.
Extra Tips: For an extra layer of flavor, consider adding a pinch of cayenne pepper or smoked paprika to the seasoning before cooking. If using a grill, make sure to oil the grates well to prevent sticking. You can also add a splash of apple cider vinegar to the brine for a slightly tangy twist. Remember, the key to perfect pork chops isn’t to overcook them, so keep a close eye on the temperature and remove them from the heat promptly once they reach the desired internal temperature.