

Planning a family dinner that satisfies everyone can be a bit of a challenge, but don’t worry, I’ve got you covered with these ten mild recipes. From the creamy goodness of Chicken Alfredo Pasta to a wholesome Mildly Spiced Lentil Curry, these dishes are sure to please every palate without overwhelming spice. Picture the savory aroma of Honey Garlic Glazed Salmon or the comforting taste of Cheesy Broccoli Rice Casserole. Ready to check out the rest of these delicious options? Let’s explore together!
Creamy Chicken Alfredo Pasta
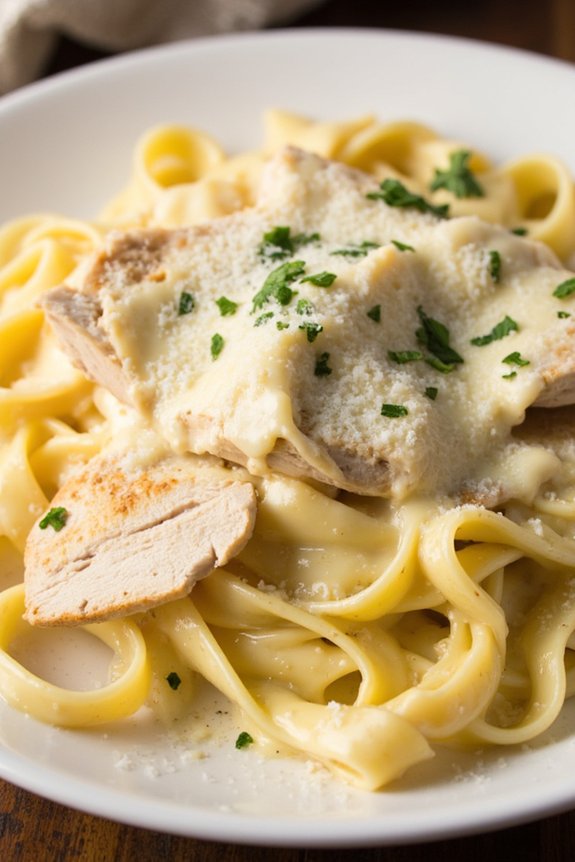
Creamy Chicken Alfredo Pasta is a delightful and comforting dish perfect for a family dinner. This classic Italian-American favorite combines tender chicken pieces with a rich and creamy Alfredo sauce, all tossed together with perfectly cooked pasta. The subtle flavors of garlic, Parmesan, and cream create a luscious sauce that clings to every strand of pasta, making each bite irresistible. Ideal for a gathering of 4-6 people, this dish brings warmth and joy to the dining table, guaranteeing everyone leaves satisfied.
The beauty of this dish lies in its simplicity and the harmony of flavors that come together effortlessly. The creamy sauce is made from scratch, which not only enhances the taste but also allows you to control the quality of the ingredients. By using freshly grated Parmesan and a touch of nutmeg, the Alfredo sauce reaches its full potential, complementing the juicy chicken and al dente pasta. This recipe is both indulgent and easy to prepare, making it a go-to option for any family meal.
Ingredients (Serves 4-6):
- 1 pound (450g) of fettuccine pasta
- 2 tablespoons olive oil
- 1 pound (450g) boneless, skinless chicken breasts, sliced
- Salt and pepper to taste
- 4 cloves garlic, minced
- 1 cup (240ml) heavy cream
- 1 cup (240ml) whole milk
- 1 1/2 cups (150g) freshly grated Parmesan cheese
- 1/4 teaspoon ground nutmeg
- 2 tablespoons unsalted butter
- Fresh parsley, chopped (for garnish)
Instructions:
- Cook the Pasta: Bring a large pot of salted water to a boil. Add the fettuccine pasta and cook according to package instructions until al dente. Drain and set aside, reserving 1 cup of pasta water.
- Cook the Chicken: Heat the olive oil in a large skillet over medium heat. Season the sliced chicken breasts with salt and pepper, then add them to the skillet. Cook for 5-7 minutes, or until the chicken is browned and cooked through. Remove the chicken from the skillet and set aside.
- Prepare the Alfredo Sauce: In the same skillet, add the minced garlic and sauté for about 1 minute until fragrant. Pour in the heavy cream and milk, stirring to combine. Bring the mixture to a gentle simmer.
- Add Cheese and Seasonings: Gradually add the grated Parmesan cheese, stirring constantly until the cheese is melted and the sauce is smooth. Stir in the ground nutmeg and butter, allowing the butter to melt completely into the sauce.
- Combine Pasta and Chicken: Return the cooked chicken to the skillet, and add the drained pasta. Toss everything together to coat the pasta and chicken in the creamy sauce. If the sauce is too thick, add some reserved pasta water, a little at a time, to reach the desired consistency.
- Garnish and Serve: Remove the skillet from heat, garnish with freshly chopped parsley, and serve immediately. Enjoy your Creamy Chicken Alfredo Pasta with a sprinkle of extra Parmesan cheese, if desired.
Extra Tips:
To guarantee maximum flavor, always use freshly grated Parmesan cheese rather than pre-grated varieties, as it melts better and enhances the sauce’s creaminess.
Consider experimenting with different pasta types, such as tagliatelle or pappardelle, for a change in texture. Additionally, if you prefer a lighter version, you can substitute half-and-half for heavy cream, but keep in mind that it may slightly alter the sauce’s richness.
Finally, for an added burst of flavor, toss in some steamed broccoli or spinach for a nutritious twist.
Mild Beef and Vegetable Stir-Fry

Stir-frying is a quick and healthy way to prepare a meal that’s packed with flavor and nutrients. The Mild Beef and Vegetable Stir-Fry is a delightful dish that combines tender beef strips with a colorful array of vegetables, all coated in a mild, savory sauce. Perfect for a family dinner, this dish brings together the rich umami flavors of beef with the fresh crispness of vegetables, creating a harmonious balance that’s certain to please everyone’s palate.
Whether you’re a seasoned chef or a beginner in the kitchen, this recipe is straightforward and quick to make, guaranteeing a delicious meal on the table in no time.
This stir-fry is designed to serve 4-6 people, making it ideal for a family dinner or small gathering. The key to a successful stir-fry is having all your ingredients prepped and ready to go before you begin cooking, as the process itself is fast and requires constant attention.
With a simple marinade to tenderize the beef and a mix of vibrant vegetables, this dish not only looks appealing but also provides a nutritious meal packed with protein, vitamins, and minerals. Follow the instructions below to create a satisfying stir-fry that will leave your family asking for seconds.
Ingredients (Serves 4-6):
- 1.5 lbs beef sirloin or flank steak, thinly sliced
- 2 tablespoons soy sauce
- 1 tablespoon oyster sauce
- 1 tablespoon cornstarch
- 2 tablespoons vegetable oil
- 1 red bell pepper, sliced
- 1 yellow bell pepper, sliced
- 1 cup broccoli florets
- 1 cup sugar snap peas
- 1 medium carrot, sliced into thin rounds
- 3 cloves garlic, minced
- 1-inch piece of ginger, grated
- 3 green onions, chopped
- Salt and pepper to taste
- Cooked rice or noodles, to serve
Cooking Instructions:
- Prepare the Beef: In a bowl, combine the sliced beef with soy sauce, oyster sauce, and cornstarch. Mix well until the beef is thoroughly coated. Allow the beef to marinate for at least 15 minutes to help tenderize the meat and infuse it with flavor.
- Heat the Oil: In a large wok or skillet, heat 1 tablespoon of vegetable oil over medium-high heat. Confirm the oil is hot before proceeding to sear the beef.
- Cook the Beef: Add the marinated beef to the hot wok in batches, if necessary, to avoid overcrowding. Stir-fry for 3-4 minutes until the beef is browned and cooked through. Remove the beef from the wok and set aside.
- Stir-Fry the Vegetables: In the same wok, add the remaining tablespoon of vegetable oil. Add garlic, ginger, and green onions, and stir-fry for about 30 seconds until fragrant. Then, add the bell peppers, broccoli, sugar snap peas, and carrots. Stir-fry the vegetables for 4-5 minutes until they’re crisp-tender.
- Combine and Season: Return the cooked beef to the wok. Toss everything together and stir-fry for another 1-2 minutes until everything is well mixed and heated through. Season with salt and pepper to taste.
- Serve: Transfer the stir-fry to a serving platter and serve immediately over cooked rice or noodles.
Extra Tips:
To achieve the best results, make sure your wok or skillet is adequately heated before adding the ingredients, as this guarantees that the beef and vegetables are cooked quickly and evenly.
Also, cutting the vegetables into uniform sizes helps them cook at the same rate, preventing any from becoming overcooked or undercooked.
For an extra flavor boost, consider adding a splash of sesame oil or a sprinkle of sesame seeds just before serving. Finally, feel free to customize the vegetable selection based on what you have available or your family’s preferences.
Classic Baked Macaroni and Cheese

Macaroni and cheese is the ultimate comfort food that has been a family favorite for generations. This classic baked version elevates the dish with a rich, creamy cheese sauce and a crispy breadcrumb topping that adds the perfect texture. It’s a versatile dish that can be served as a main course or as a delicious side dish.
Whether you’re cooking for a family dinner or a holiday gathering, this classic baked macaroni and cheese will surely be a crowd-pleaser. The beauty of this recipe lies in its simplicity and the ability to customize it to your taste. You can experiment with different types of cheeses for a unique flavor or add ingredients like bacon or jalapeños for an extra kick.
The recipe below serves 4-6 people, making it ideal for a family meal or small gathering. With a few ingredients and some time in the kitchen, you can create a dish that’s both nostalgic and satisfying.
Ingredients (serves 4-6):
- 8 ounces elbow macaroni
- 2 cups shredded sharp cheddar cheese
- 1 cup shredded mozzarella cheese
- 2 tablespoons unsalted butter
- 2 tablespoons all-purpose flour
- 2 cups milk
- 1/2 teaspoon salt
- 1/4 teaspoon black pepper
- 1/4 teaspoon smoked paprika
- 1/2 cup breadcrumbs
- 1 tablespoon olive oil
- 1/4 cup grated Parmesan cheese
Cooking Instructions:
- Preheat and Prepare: Preheat your oven to 350°F (175°C). Grease a 9×13 inch baking dish with butter or non-stick cooking spray.
- Cook the Pasta: Bring a large pot of salted water to a boil. Add the elbow macaroni and cook according to the package instructions until al dente. Drain the pasta and set aside.
- Make the Cheese Sauce: In a medium saucepan over medium heat, melt the butter. Once melted, add the flour and whisk continuously for about 1 minute until the mixture is smooth and begins to bubble.
- Add Milk and Cheese: Gradually whisk in the milk, continuing to whisk until the sauce thickens, about 5 minutes. Reduce the heat to low and add the shredded cheddar and mozzarella cheeses, stirring until completely melted and smooth. Season with salt, black pepper, and smoked paprika.
- Combine Pasta and Sauce: Add the cooked macaroni to the cheese sauce, stirring until the pasta is thoroughly coated. Pour the macaroni and cheese mixture into the prepared baking dish.
- Prepare the Topping: In a small bowl, combine the breadcrumbs, olive oil, and grated Parmesan cheese. Mix until the breadcrumbs are evenly coated.
- Bake: Evenly sprinkle the breadcrumb mixture over the macaroni and cheese. Bake in the preheated oven for 25-30 minutes, or until the top is golden brown and the cheese is bubbly.
- Serve: Allow the dish to cool for a few minutes before serving. Enjoy the classic comfort of baked macaroni and cheese!
Extra Tips:
For a creamier sauce, consider using half-and-half or heavy cream instead of milk. If you prefer a spicier dish, add a pinch of cayenne pepper to the cheese sauce.
To make the dish more substantial, you can mix in cooked bacon bits or sautéed vegetables such as bell peppers or mushrooms. Be sure to let the baked macaroni and cheese rest for a few minutes before serving, as this will help the sauce set up and make it easier to serve.
Honey Garlic Glazed Salmon
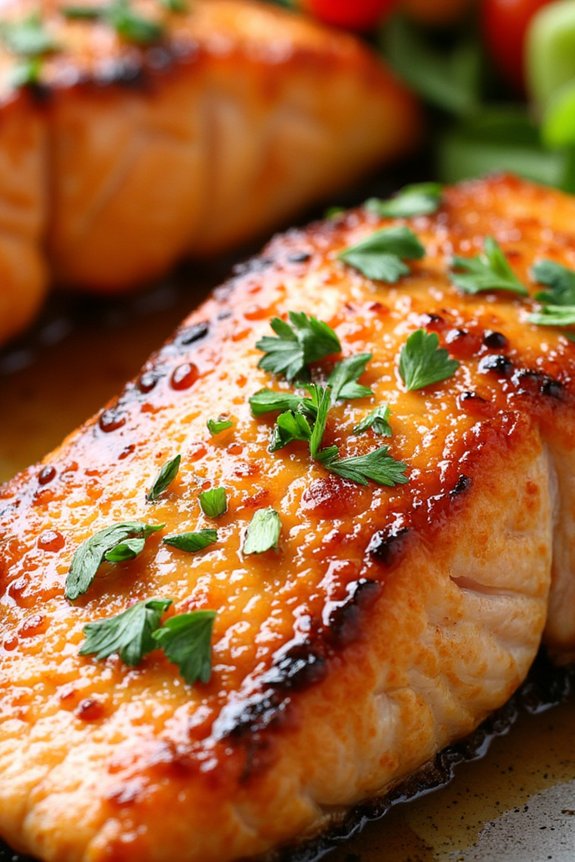
Honey Garlic Glazed Salmon is a delightful dish that combines the rich flavor of salmon with a sweet and savory glaze, making it a perfect option for a family dinner. This recipe isn’t only delicious but also quick and easy to prepare, allowing you to spend more time with your loved ones.
The combination of honey, garlic, and soy sauce creates a mouthwatering glaze that perfectly complements the tender and flaky salmon, resulting in a meal that’s both healthy and satisfying. Ideal for a serving size of 4-6 people, this recipe is sure to become a family favorite.
The recipe involves marinating the salmon in a delicious sauce before cooking it to perfection. Paired with your choice of side dishes, such as steamed vegetables or a fresh salad, this Honey Garlic Glazed Salmon will make for a memorable family dinner that everyone will enjoy.
Ingredients:
- 4-6 salmon fillets (approx. 6 oz each)
- 1/3 cup honey
- 1/4 cup soy sauce
- 2 tablespoons fresh lemon juice
- 3 cloves garlic, minced
- 1 tablespoon olive oil
- Salt and pepper to taste
- 1 tablespoon chopped fresh parsley (optional, for garnish)
Cooking Instructions:
- Prepare Marinade: In a medium-sized bowl, whisk together the honey, soy sauce, lemon juice, and minced garlic. This will be your marinade, which will infuse the salmon with flavor.
- Marinate Salmon: Place the salmon fillets in a shallow dish or a resealable plastic bag. Pour the marinade over the salmon, making sure all pieces are well-coated. Cover the dish or seal the bag, and let the salmon marinate in the refrigerator for at least 15-30 minutes. This allows the flavors to penetrate the fish.
- Preheat Oven: Preheat your oven to 375°F (190°C). While the oven is heating, remove the salmon from the refrigerator and allow it to come to room temperature.
- Sear Salmon: Heat the olive oil in a large oven-safe skillet over medium-high heat. Once the oil is hot, remove the salmon from the marinade (reserving the marinade) and season it with salt and pepper. Place the salmon fillets skin-side up in the skillet and sear for about 2-3 minutes, or until the top is golden brown.
- Bake Salmon: Turn the salmon fillets over so they’re skin-side down. Pour the reserved marinade over the salmon in the skillet. Transfer the skillet to the preheated oven and bake for 10-12 minutes, or until the salmon is cooked through and flakes easily with a fork.
- Garnish and Serve: Remove the skillet from the oven and let the salmon rest for a few minutes. Garnish with chopped fresh parsley, if desired, and serve immediately with your choice of sides.
Extra Tips:
When cooking Honey Garlic Glazed Salmon, make sure the salmon fillets are of even thickness, so they cook uniformly. If you don’t have an oven-safe skillet, you can transfer the seared salmon and marinade to a baking dish before placing it in the oven.
For added flavor, you can sprinkle sesame seeds over the salmon before baking. If you prefer a thicker glaze, you can reduce the marinade on the stovetop until it reaches your desired consistency.
Cheesy Broccoli and Rice Casserole

Cheesy Broccoli and Rice Casserole is a comforting and delightful dish that’s perfect for family dinners. This creamy and cheesy casserole combines tender broccoli florets, fluffy rice, and a rich cheese sauce, making it a hit with both kids and adults.
Whether you’re looking to add more greens to your meal or simply craving a warm, gooey casserole, this recipe is bound to satisfy. It’s a versatile dish that can easily accompany a variety of main courses or stand alone as a filling vegetarian option.
This casserole is incredibly easy to prepare, making it a great choice for busy weeknights. You can even prepare some components ahead of time to save even more time when you’re ready to cook. The combination of fresh ingredients and a cheesy sauce guarantees that each bite is bursting with flavor.
With minimal prep and cook time, this Cheesy Broccoli and Rice Casserole is an excellent go-to recipe for a quick, satisfying, and nutritious meal for the entire family.
Ingredients (serving size: 4-6 people):
- 2 cups of broccoli florets
- 1 cup of uncooked white rice
- 2 cups of water
- 2 tablespoons of butter
- 1 small onion, chopped
- 2 cloves of garlic, minced
- 1 can (10.5 oz) of condensed cream of mushroom soup
- 1 cup of milk
- 2 cups of shredded cheddar cheese
- Salt and pepper to taste
- 1/2 cup of breadcrumbs (optional)
- 2 tablespoons of grated Parmesan cheese (optional)
Instructions:
- Cook the Rice: In a medium saucepan, combine the rice and water. Bring to a boil over medium-high heat, then reduce the heat to low, cover, and simmer until the rice is tender and the water is absorbed, about 15-18 minutes. Set aside.
- Prepare the Broccoli: While the rice is cooking, steam the broccoli florets until they’re tender yet still bright green, about 4-5 minutes. You can do this using a steamer basket over boiling water or by microwaving them with a little water in a covered dish. Drain and set aside.
- Sauté Aromatics: Preheat your oven to 350°F (175°C). In a large skillet, melt the butter over medium heat. Add the chopped onion and minced garlic, sautéing until the onion becomes translucent and fragrant, about 3-4 minutes.
- Make the Sauce: Stir in the condensed cream of mushroom soup and milk into the onion and garlic mixture. Cook and stir until the sauce is smooth and bubbly. Then, add 1 1/2 cups of the shredded cheddar cheese, stirring until fully melted and incorporated. Season with salt and pepper to taste.
- Combine Ingredients: In a large mixing bowl, combine the cooked rice, steamed broccoli, and cheese sauce. Mix until all the ingredients are evenly combined and coated with the sauce.
- Assemble the Casserole: Transfer the mixture into a greased 9×13-inch casserole dish. Sprinkle the remaining 1/2 cup of shredded cheddar cheese evenly over the top. If using, mix the breadcrumbs and Parmesan cheese together and sprinkle over the casserole for a crispy topping.
- Bake: Place the casserole in the preheated oven. Bake for 25-30 minutes, or until the cheese is melted and the top is golden brown. Let it cool for a few minutes before serving.
Extra Tips: To enhance the flavor, consider adding a pinch of nutmeg to the cheese sauce for a subtle depth of flavor. If you prefer a bit of heat, you can also add a dash of cayenne pepper.
For a healthier twist, substitute brown rice for white rice, keeping in mind that it may require a longer cooking time. You can also add cooked chicken or turkey to make it a more protein-rich meal.
This casserole can be made ahead and stored in the refrigerator for up to two days before baking. Enjoy your Cheesy Broccoli and Rice Casserole fresh out of the oven for the best taste and texture.
Savory Herb-Roasted Chicken
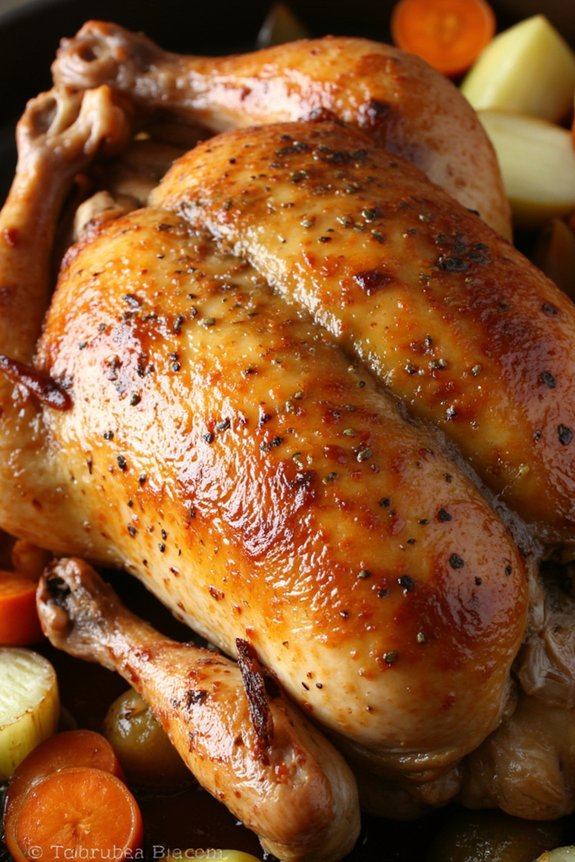
To begin with, this recipe involves marinating the chicken in a blend of herbs, garlic, and lemon to enhance its flavor. As it roasts, the chicken develops a crispy golden skin while remaining juicy and tender on the inside. Cooking this dish doesn’t require much expertise, making it a favorite for both novice and experienced cooks. Prepare this meal for a serving size of 4-6 people, ensuring everyone at the table enjoys a hearty portion.
Ingredients:
- 1 whole chicken (about 4-5 pounds)
- 3 tablespoons olive oil
- 1 lemon, zested and juiced
- 4 cloves garlic, minced
- 2 tablespoons fresh rosemary, chopped
- 2 tablespoons fresh thyme, chopped
- 2 tablespoons fresh parsley, chopped
- Salt and pepper to taste
- 1 onion, quartered
- 3 carrots, chopped into large pieces
- 3 stalks celery, chopped into large pieces
Cooking Instructions:
- Prepare the Marinade: In a small bowl, combine the olive oil, lemon zest, lemon juice, minced garlic, rosemary, thyme, parsley, salt, and pepper. Mix well to create a fragrant herb marinade.
- Marinate the Chicken: Rinse the chicken under cold water and pat dry with paper towels. Place the chicken in a large bowl or resealable plastic bag. Pour the herb marinade over the chicken, ensuring it’s evenly coated. Allow it to marinate in the refrigerator for at least 1 hour, or overnight for more intense flavor.
- Preheat the Oven: Preheat your oven to 425°F (220°C).
- Prepare the Roasting Pan: Arrange the onion, carrots, and celery in the bottom of a roasting pan. This will serve as a bed for the chicken and also add flavor to the drippings.
- Roast the Chicken: Place the marinated chicken on top of the vegetables in the roasting pan. Tuck the wing tips under the body of the chicken to prevent them from burning. Roast in the preheated oven for about 1 hour and 15 minutes, or until the internal temperature reaches 165°F (74°C) and the juices run clear when cut between the leg and the thigh.
- Rest the Chicken: Remove the chicken from the oven and let it rest for about 15 minutes before carving. This allows the juices to redistribute throughout the meat, ensuring a juicy result.
- Carve and Serve: Carve the chicken into serving pieces and arrange on a platter with the roasted vegetables. Serve immediately.
Extra Tips: For an even more flavorful dish, consider adding a splash of white wine or chicken broth to the bottom of the roasting pan before cooking. This will keep the vegetables moist and create a delicious base for a gravy. Additionally, if you prefer extra-crispy skin, increase the oven temperature to 450°F (232°C) for the last 10 minutes of roasting. Be sure to keep an eye on the chicken to prevent burning.
Sweet and Sour Pork Tenderloin
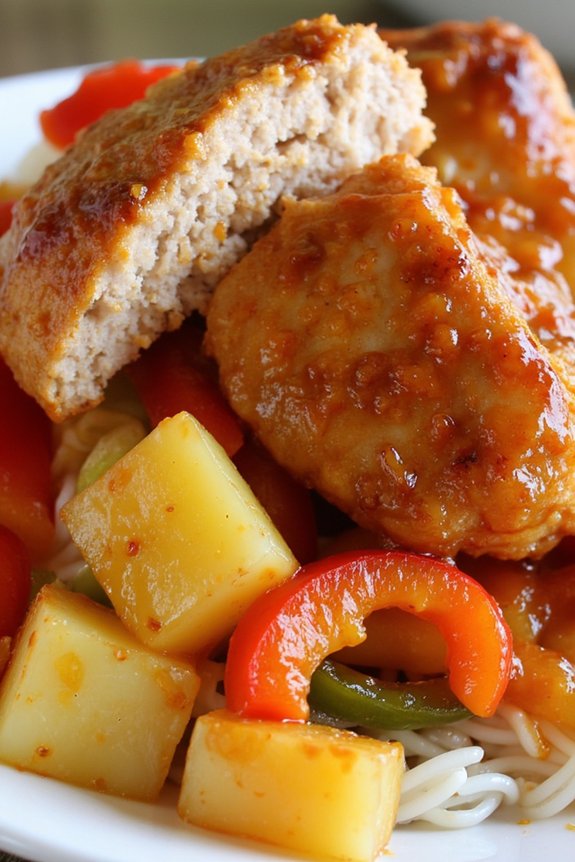
Sweet and Sour Pork Tenderloin is a deliciously tangy and flavorful dish that’s perfect for a family dinner. This dish combines succulent pork tenderloin with a sweet and tangy sauce made from a delightful blend of ingredients, including pineapple, vinegar, and soy sauce. The result is a mouthwatering meal that’s sure to please both children and adults alike.
Perfectly paired with steamed rice or noodles, this dish isn’t only satisfying but also visually appealing with its vibrant medley of colors from the vegetables and sauce.
Preparing Sweet and Sour Pork Tenderloin is relatively easy and requires minimal cooking skills, making it an ideal choice for busy weeknights or a leisurely weekend dinner. The key to this recipe is to balance the sweetness and sourness, ensuring that neither flavor overpowers the other.
By following this straightforward recipe, you’ll be able to create a restaurant-quality dish in the comfort of your own home, impressing your family and friends with your culinary prowess.
Ingredients (Serving size: 4-6 people)
- 2 lbs pork tenderloin
- 1 cup pineapple chunks (with juice)
- 1 red bell pepper, sliced
- 1 green bell pepper, sliced
- 1 medium onion, sliced
- 3 cloves garlic, minced
- 1/4 cup soy sauce
- 1/4 cup rice vinegar
- 1/2 cup brown sugar
- 2 tablespoons ketchup
- 1 tablespoon cornstarch
- 1/4 cup water
- Salt and pepper to taste
- 2 tablespoons vegetable oil
- Cooked rice or noodles for serving
Cooking Instructions
- Prepare the Pork: Trim any excess fat from the pork tenderloin and cut it into 1-inch thick medallions. Season lightly with salt and pepper.
- Brown the Pork: Heat the vegetable oil in a large skillet over medium-high heat. Add the pork medallions and sear for about 3-4 minutes on each side, until golden brown. Remove the pork from the skillet and set aside.
- Sauté the Vegetables: In the same skillet, add the minced garlic, sliced onions, and bell peppers. Sauté for about 5 minutes, or until the vegetables are tender but still crisp.
- Prepare the Sauce: In a small bowl, mix together the soy sauce, rice vinegar, brown sugar, ketchup, and pineapple juice. Pour this mixture over the sautéed vegetables.
- Thicken the Sauce: In another small bowl, dissolve the cornstarch in 1/4 cup of water. Add this slurry to the skillet and stir well to combine. Cook for about 2 minutes, or until the sauce has thickened.
- Combine and Simmer: Return the browned pork medallions to the skillet, along with the pineapple chunks. Reduce the heat to low and let simmer for about 10 minutes, allowing the pork to absorb the sweet and sour flavors.
- Serve: Once the pork is fully cooked and the sauce is thickened to your liking, remove from heat. Serve the Sweet and Sour Pork Tenderloin over cooked rice or noodles, spooning extra sauce over the top.
Extra Tips
When preparing Sweet and Sour Pork Tenderloin, be sure to not overcook the pork medallions during the browning process; they’ll finish cooking when simmered in the sauce.
For an extra burst of flavor, consider adding a splash of freshly squeezed lime or lemon juice just before serving. Additionally, you can customize the level of sweetness or sourness by adjusting the amount of sugar or vinegar to your personal taste.
For a more colorful presentation, consider adding additional vegetables like snow peas or carrots.
Vegetable and Cheese Quesadillas

Vegetable and Cheese Quesadillas are a delightful and easy-to-make meal perfect for family dinners. This dish combines the fresh flavors of assorted vegetables with the creamy texture of melted cheese, all wrapped in a crispy tortilla. It’s a versatile recipe that can be customized with your favorite vegetables and cheese, making it an excellent choice for a quick and nutritious family meal.
These quesadillas are sure to please both adults and kids, providing a satisfying and healthful dinner option. Perfect for serving 4-6 people, this recipe is ideal for those busy weeknights when you want something tasty yet uncomplicated. You can prepare your ingredients in advance and have this dish ready in no time.
By using a mix of colorful vegetables, you not only enhance the visual appeal but also boost the nutritional value of the meal. Paired with a side of salsa or guacamole, these quesadillas are sure to become a family favorite.
Ingredients (serving size: 4-6 people):
- 8 large flour tortillas
- 2 cups shredded cheddar cheese
- 1 red bell pepper, diced
- 1 green bell pepper, diced
- 1 small red onion, finely chopped
- 1 zucchini, sliced thinly
- 1 cup corn kernels (fresh or frozen)
- 2 tablespoons olive oil
- 1 teaspoon ground cumin
- 1 teaspoon chili powder
- Salt and pepper to taste
- Cooking spray or additional olive oil for greasing the pan
- Optional: salsa, sour cream, or guacamole for serving
Cooking Instructions:
- Prepare the Vegetables: Begin by washing all the vegetables thoroughly. Dice the red and green bell peppers, finely chop the red onion, and slice the zucchini thinly. If using fresh corn, remove the kernels from the cob.
- Cook the Vegetables: Heat the olive oil in a large skillet over medium heat. Add the chopped onion and sauté for about 2 minutes until it becomes translucent. Add the bell peppers, zucchini, and corn to the skillet. Season with cumin, chili powder, salt, and pepper. Cook for an additional 5-7 minutes until the vegetables are tender yet still crisp. Remove from heat and set aside.
- Assemble the Quesadillas: Lay one tortilla flat on a clean surface. Sprinkle a layer of shredded cheddar cheese over half of the tortilla. Spread a generous portion of the cooked vegetable mixture over the cheese, then top with another layer of cheese. Fold the tortilla in half to enclose the filling.
- Cook the Quesadillas: Heat a large non-stick skillet or griddle over medium heat. Lightly grease the pan with cooking spray or a small amount of olive oil. Place the folded quesadilla onto the skillet. Cook for 3-4 minutes on each side, or until the tortilla is golden brown and the cheese has melted. Repeat with the remaining tortillas and filling.
- Serve: Once cooked, remove the quesadillas from the skillet. Cut each quesadilla into wedges and serve immediately with salsa, sour cream, or guacamole on the side.
Extra Tips:
When cooking Vegetable and Cheese Quesadillas, it’s important to keep an eye on the heat to avoid burning the tortillas. Adjust the stovetop temperature as needed to make sure they cook evenly.
Additionally, feel free to experiment with different types of cheese like Monterey Jack or pepper jack for added flavor. If you’re looking to add some protein, consider including cooked chicken or black beans to the filling. Prepping the vegetables and cheese in advance can save time and make the cooking process even more efficient.
Enjoy your meal with a revitalizing side salad for a well-rounded dinner.
Mildly Spiced Lentil Curry

Mildly Spiced Lentil Curry is a comforting dish that offers a delightful balance of flavors, perfect for a family dinner. This curry is packed with protein-rich lentils and a medley of spices that provide warmth without overwhelming the palate. It’s an ideal choice for those who enjoy a bit of spice but prefer to keep it mild, making it a suitable dish for all members of the family, including children.
The curry’s creamy texture, combined with the aromatic spices, creates a satisfying meal when served with steamed rice or warm naan. This recipe is designed to serve 4-6 people, making it perfect for a cozy family meal. The preparation involves simple ingredients that are easily accessible, allowing you to create a hearty and wholesome dish without much hassle.
Whether you’re a seasoned cook or a beginner in the kitchen, this recipe is straightforward and rewarding, leading to a delicious result that everyone will enjoy.
Ingredients:
- 1 1/2 cups red lentils
- 1 tablespoon vegetable oil
- 1 large onion, finely chopped
- 3 cloves garlic, minced
- 1 tablespoon fresh ginger, grated
- 1 teaspoon ground cumin
- 1 teaspoon ground coriander
- 1/2 teaspoon turmeric powder
- 1/2 teaspoon garam masala
- 1 can (14 oz) diced tomatoes
- 1 can (14 oz) coconut milk
- Salt to taste
- Freshly ground black pepper to taste
- 2 cups vegetable broth
- 1-2 teaspoons lemon juice
- Fresh cilantro, chopped (for garnish)
Cooking Instructions:
- Prepare the Lentils: Rinse the red lentils thoroughly under cold water until the water runs clear. Drain and set aside.
- Cook the Aromatics: In a large pot, heat the vegetable oil over medium heat. Add the chopped onion and sauté until it becomes translucent, about 5 minutes. Stir in the garlic and ginger, cooking for another 2 minutes until fragrant.
- Add the Spices: Sprinkle in the cumin, coriander, turmeric, and garam masala. Stir continuously for about 1 minute to toast the spices, enhancing their flavors.
- Incorporate Tomatoes and Coconut Milk: Pour in the diced tomatoes with their juice and stir well. Add the coconut milk, mixing until fully combined with the tomato base.
- Simmer the Lentils: Add the rinsed lentils to the pot, followed by the vegetable broth. Stir everything together, ensuring the lentils are submerged in the liquid. Bring the mixture to a gentle boil.
- Cook the Curry: Reduce the heat to low, cover the pot, and let the curry simmer for about 25-30 minutes, or until the lentils are tender and the curry has thickened. Stir occasionally to prevent sticking.
- Season and Finish: Season the curry with salt and freshly ground black pepper to taste. Stir in the lemon juice for a hint of acidity that brightens the dish.
- Serve and Garnish: Once the curry is ready, remove it from heat and let it sit for a few minutes. Serve hot, garnished with freshly chopped cilantro, alongside steamed rice or naan.
Extra Tips:
For a richer flavor, consider using ghee instead of vegetable oil when sautéing the onions. If you prefer a spicier curry, add a pinch of cayenne pepper or a chopped green chili during the spice toasting step.
To save time, you can prepare the curry base (up to the point before adding lentils) a day in advance and refrigerate it. This dish can be stored in an airtight container in the refrigerator for up to 3 days, and it tastes even better the next day as the flavors meld together.
Homemade Chicken and Vegetable Pot Pie

Homemade Chicken and Vegetable Pot Pie is a comforting and hearty meal perfect for family dinners. This classic dish combines tender chicken, a variety of colorful vegetables, and a creamy sauce all encased in a flaky, golden pastry. It’s an ideal way to use leftover chicken or fresh ingredients you have on hand, and it’s sure to satisfy everyone at the dinner table.
Whether you’re a seasoned cook or trying your hand at homemade pies for the first time, this recipe is simple enough to make with rewarding results. The rich flavors come together beautifully as the pie bakes, filling your kitchen with an inviting aroma.
It’s a versatile dish that can be prepared ahead of time and popped in the oven when you’re ready, making it perfect for busy weeknights or a leisurely Sunday dinner. The following recipe will guide you through making a Homemade Chicken and Vegetable Pot Pie that serves 4-6 people, guaranteeing there’s plenty to go around.
Ingredients:
- 2 cups cooked chicken, shredded or diced
- 1 cup carrots, diced
- 1 cup peas
- 1 cup potatoes, diced
- 1 cup celery, diced
- 1/2 cup onion, chopped
- 3 tablespoons butter
- 3 tablespoons all-purpose flour
- 2 cups chicken broth
- 1 cup milk
- Salt and pepper to taste
- 1 teaspoon thyme
- 1 teaspoon parsley
- 2 pie crusts (store-bought or homemade)
- 1 egg, beaten (for egg wash)
Cooking Instructions:
- Preheat and Prep: Preheat your oven to 375°F (190°C). Prepare all your vegetables by chopping them into small, uniform pieces to guarantee even cooking.
- Cook the Vegetables: In a large skillet, melt the butter over medium heat. Add the onions, carrots, potatoes, and celery, and sauté for about 5 minutes until they begin to soften.
- Make the Sauce: Sprinkle the flour over the vegetables and stir to coat. Cook for an additional 2 minutes to eliminate the raw flour taste. Gradually whisk in the chicken broth and milk, ensuring there are no lumps. Continue to stir until the mixture thickens, about 5 minutes.
- Combine Filling: Add the shredded chicken, peas, thyme, parsley, salt, and pepper to the skillet. Stir well, ensuring everything is evenly coated in the sauce. Let the mixture simmer for another 5 minutes, then remove from heat.
- Assemble the Pie: Roll out one pie crust and place it in a 9-inch pie dish. Pour the chicken and vegetable mixture into the crust. Cover with the second pie crust, pinching the edges to seal. Cut small slits in the top crust to allow steam to escape.
- Bake the Pie: Brush the top with the beaten egg to create a golden finish. Place the pie dish on a baking sheet to catch any drips, and bake in the preheated oven for 30-35 minutes, or until the crust is golden brown and the filling is bubbly.
- Cool and Serve: Allow the pot pie to cool for at least 10 minutes before serving. This will help the filling set and make it easier to slice.
Extra Tips: If you prefer a creamier filling, you can increase the amount of milk slightly or add a splash of heavy cream. For added flavor, consider incorporating other herbs such as rosemary or sage.
If you want to save time, you can use pre-cooked rotisserie chicken and frozen mixed vegetables, which will cut down on prep time without sacrificing taste. Finally, to guarantee your pie crust doesn’t get soggy, make sure the filling isn’t too liquidy before assembling the pot pie.