

When it comes to family dinners, there’s something magical about the comforting allure of cheesy dishes that kids simply adore. Think of the classics like mac and cheese or a pizza casserole, brimming with delicious flavors. These meals have an undeniable way of gathering everyone around the table, bringing smiles and satisfying hungry tummies. Are you looking for more cheesy delights to become your family’s new go-to favorites? Let’s explore some scrumptious possibilities together!
Classic Mac and Cheese
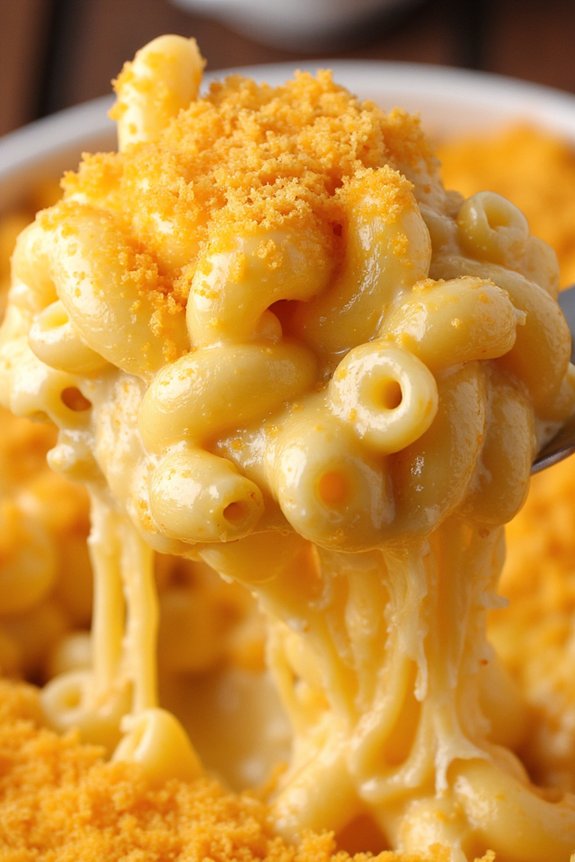
Mac and cheese is a beloved comfort food that has been a staple in family dinners for generations. This Classic Mac and Cheese recipe delivers a creamy, cheesy delight that’s perfect for a cozy family meal. Whether it’s a casual weeknight dinner or a special occasion, this dish promises to bring smiles to everyone’s faces. The combination of tender pasta and rich, melted cheese creates a satisfying texture that’s hard to resist.
Making Classic Mac and Cheese from scratch is surprisingly easy and rewarding. Using simple, quality ingredients can elevate the taste of this dish to new heights. The key is to create a smooth, velvety cheese sauce that coats every piece of pasta perfectly. Serve it as a main dish or a side, and enjoy the nostalgic flavors that bring everyone to the table. This recipe is designed to serve 4-6 people, making it ideal for a family gathering.
Ingredients:
- 1 pound elbow macaroni
- 4 tablespoons unsalted butter
- 1/4 cup all-purpose flour
- 4 cups milk
- 2 cups sharp cheddar cheese, shredded
- 1 cup mozzarella cheese, shredded
- 1 teaspoon salt
- 1/2 teaspoon black pepper
- 1/2 teaspoon paprika (optional)
- 1/2 cup grated Parmesan cheese
- 1/4 cup breadcrumbs (optional)
Cooking Instructions:
- Cook the Pasta: Bring a large pot of salted water to a boil. Add the elbow macaroni and cook according to the package instructions until al dente. Drain the pasta and set it aside.
- Prepare the Cheese Sauce: In a large saucepan, melt the butter over medium heat. Add the flour and whisk continuously for about 1-2 minutes until the mixture turns golden and bubbly. Gradually pour in the milk, whisking constantly to prevent lumps. Bring the mixture to a simmer and cook until it thickens, about 5-7 minutes.
- Add the Cheese: Remove the saucepan from the heat and stir in the cheddar and mozzarella cheeses until completely melted and smooth. Season the cheese sauce with salt, black pepper, and paprika (if using).
- Combine Pasta and Sauce: Add the cooked and drained macaroni to the cheese sauce, stirring well to guarantee every piece is coated with the creamy sauce.
- Bake (if desired): Preheat the oven to 350°F (175°C). Transfer the mac and cheese to a baking dish. If you like a crispy topping, sprinkle Parmesan cheese and breadcrumbs over the top. Bake for 15-20 minutes, or until the top is golden and bubbly.
- Serve: Remove from the oven and let it cool for a few minutes before serving. Enjoy your Classic Mac and Cheese while it’s warm and gooey.
Extra Tips:
For an extra creamy mac and cheese, use whole milk or a combination of milk and heavy cream. Experiment with different cheese varieties like Gruyère or Fontina for a unique flavor profile. If you’re short on time, you can skip the baking step and serve the mac and cheese directly from the stovetop.
To add some texture, consider mixing in cooked bacon bits or steamed broccoli before serving. Remember, the key to a smooth sauce is to whisk continuously and avoid overheating the cheese to prevent it from becoming grainy.
Cheesy Chicken Quesadillas

Cheesy Chicken Quesadillas are a delightful and easy-to-make dish that brings together the flavors of tender chicken, gooey cheese, and crispy tortillas. Perfect for a family dinner, these quesadillas provide a satisfying meal that both kids and adults will enjoy. The combination of melted cheese and seasoned chicken encased in a golden-brown tortilla makes for a comforting dish that can be paired with a variety of sides or enjoyed on its own.
This recipe yields enough Cheesy Chicken Quesadillas for 4-6 people, making it an ideal choice for a family meal or small gathering. The recipe is versatile, allowing you to adjust the ingredients to suit your taste preferences. You can also personalize the dish by incorporating additional toppings such as salsa, sour cream, or guacamole.
Here’s how you can make this delicious dish at home:
Ingredients:
- 2 cups cooked chicken breast, shredded
- 1 tablespoon olive oil
- 1 small onion, finely chopped
- 2 cloves garlic, minced
- 1 teaspoon ground cumin
- 1 teaspoon paprika
- Salt and pepper to taste
- 2 cups shredded cheddar cheese
- 6 large flour tortillas
- Butter or cooking spray for greasing
- Optional toppings: salsa, sour cream, guacamole
Cooking Instructions:
- Prepare the Chicken Filling: In a large skillet over medium heat, add olive oil and sauté the chopped onion until it becomes translucent. Add minced garlic and cook for an additional 1-2 minutes until fragrant.
- Season the Chicken: Add the shredded chicken to the skillet, along with cumin, paprika, salt, and pepper. Stir well to combine the ingredients, and cook for 3-4 minutes, allowing the chicken to warm through and absorb the flavors of the spices.
- Preheat the Cooking Surface: Using a griddle or a clean skillet, preheat over medium heat. Lightly grease the surface with butter or cooking spray to prevent sticking.
- Assemble the Quesadillas: Place a tortilla on the preheated surface. Evenly spread a portion of the chicken mixture over half of the tortilla, and sprinkle a generous amount of shredded cheese over the chicken. Fold the tortilla over to encase the filling.
- Cook the Quesadillas: Cook the quesadilla for 3-4 minutes on each side or until the tortilla is golden brown and crispy, and the cheese has melted. Use a spatula to gently flip the quesadilla halfway through cooking.
- Repeat and Serve: Remove the cooked quesadilla from the skillet and keep warm while you repeat the process with the remaining tortillas. Once all quesadillas are prepared, cut them into wedges and serve with optional toppings like salsa, sour cream, or guacamole.
Extra Tips: When cooking Cheesy Chicken Quesadillas, make sure not to overfill the tortillas to prevent the filling from spilling out during cooking. If you prefer a spicier version, consider adding chopped jalapeños or a dash of hot sauce to the chicken filling.
For a healthier alternative, whole-grain tortillas and low-fat cheese can be used without compromising the flavor. Finally, if you have leftover chicken, this recipe is a great way to repurpose it into a delicious meal.
Pizza Casserole Extravaganza
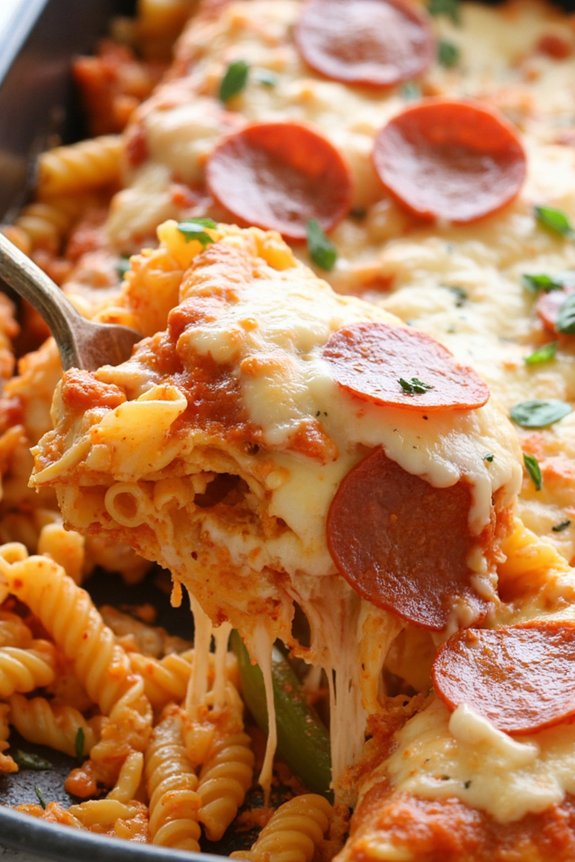
Indulge your family in a delightful and comforting meal with our Pizza Casserole Extravaganza. This dish combines the classic flavors of everyone’s favorite pizza with the heartiness of a baked casserole, making it perfect for a family dinner.
It’s an easy and fun recipe that brings together the best of both worlds, with layers of pasta, pepperoni, and gooey cheese, all baked to perfection. Whether it’s a busy weeknight or a special weekend gathering, this casserole promises to satisfy everyone’s pizza cravings and is sure to become a family favorite.
The Pizza Casserole Extravaganza is designed to serve 4-6 people, making it an ideal choice for a family meal or a small gathering. It’s a wonderful way to bring the family together around the dinner table, and it’s flexible enough to accommodate various tastes by adding different toppings or ingredients.
With its combination of convenience and flavor, this recipe is destined to be a hit in any household.
Ingredients (serves 4-6 people):
- 1 pound of rotini pasta
- 1 tablespoon olive oil
- 1 pound ground Italian sausage
- 1 small onion, chopped
- 2 cloves of garlic, minced
- 1 green bell pepper, chopped
- 24 ounces marinara sauce
- 1 teaspoon dried oregano
- 1 teaspoon dried basil
- 1/2 teaspoon crushed red pepper flakes
- 2 cups shredded mozzarella cheese
- 1 cup sliced pepperoni
- 1/2 cup grated Parmesan cheese
Cooking Instructions:
1. Preheat the Oven: Begin by preheating your oven to 350°F (175°C) to make sure it’s ready for baking once the casserole is assembled.
2. Cook the Pasta: Boil a large pot of salted water and cook the rotini pasta until al dente, according to package instructions. Drain the pasta and set it aside.
3. Prepare the Sauce: In a large skillet, heat the olive oil over medium heat. Add the ground Italian sausage and cook until browned, breaking it apart as it cooks. Remove any excess fat, then add the chopped onion, garlic, and green bell pepper.
Sauté until the vegetables are soft.
4. Combine the Ingredients: Stir in the marinara sauce, oregano, basil, and crushed red pepper flakes. Allow the mixture to simmer for about 5 minutes, letting the flavors meld together.
5. Assemble the Casserole: In a large baking dish, combine the cooked pasta with the sauce mixture. Mix thoroughly to make certain the pasta is evenly coated.
6. Layer the Toppings: Spread the shredded mozzarella cheese over the pasta and sauce mixture. Arrange the pepperoni slices on top, followed by the grated Parmesan cheese.
7. Bake: Place the assembled casserole in the preheated oven and bake for 25-30 minutes, or until the cheese is fully melted and bubbly.
8. Serve: Once done, remove the casserole from the oven and let it cool for a few minutes before serving. Enjoy your Pizza Casserole Extravaganza with a side salad or garlic bread.
Extra Tips:
For a more personalized touch, consider adding your family’s favorite pizza toppings like mushrooms, olives, or jalapeños. If you prefer a spicy kick, use hot Italian sausage instead of mild.
To save time, you can prepare the casserole ahead of time, refrigerate it, and bake it when ready to serve. If you have leftovers, they store well in the fridge and can be reheated for a quick meal the next day.
Creamy Alfredo Pasta Bake
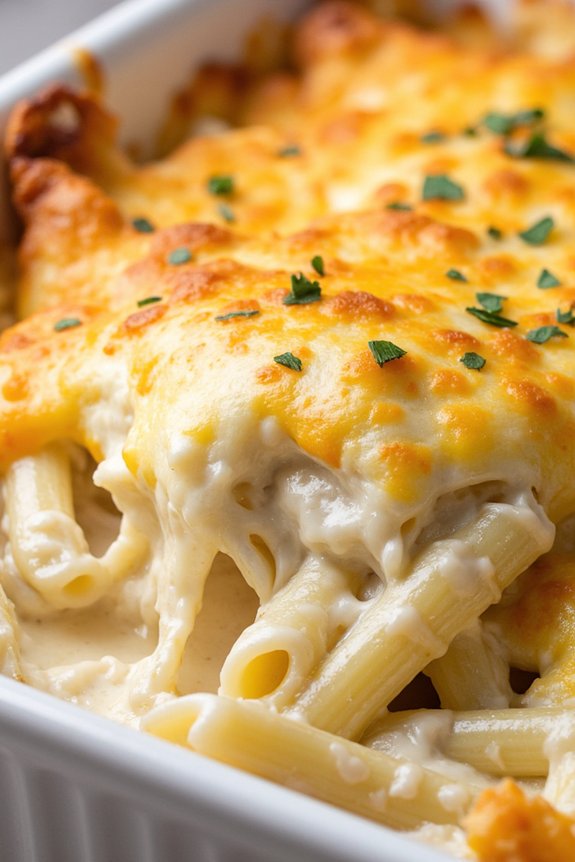
Creamy Alfredo Pasta Bake is a delicious and comforting dish that combines the rich flavors of Alfredo sauce with perfectly cooked pasta, all baked to golden perfection. This recipe is perfect for family dinners, offering a satisfying meal that will please both adults and children alike. The creamy sauce coats each piece of pasta, and when baked, it creates a bubbly, cheesy top layer that’s simply irresistible.
This dish isn’t only easy to prepare but also provides a hearty and warming meal that can be enjoyed any day of the week. The beauty of this Creamy Alfredo Pasta Bake is its versatility. You can customize the dish by adding your favorite proteins or vegetables, such as grilled chicken, shrimp, or broccoli, to make it even more nutritious and filling.
Whether you’re hosting a dinner party or simply want to treat your family to a delicious homemade meal, this recipe will surely become a staple in your kitchen. With its creamy texture and savory flavors, this pasta bake is a crowd-pleaser that brings everyone together around the dinner table.
Ingredients (Serves 4-6)
- 12 ounces penne pasta
- 2 tablespoons unsalted butter
- 3 cloves garlic, minced
- 2 cups heavy cream
- 1 cup grated Parmesan cheese
- 1/4 teaspoon ground nutmeg
- Salt and pepper to taste
- 1 cup shredded mozzarella cheese
- 1/4 cup chopped fresh parsley (optional, for garnish)
- Optional add-ins: cooked chicken, shrimp, or broccoli
Cooking Instructions
- Preheat Oven: Begin by preheating your oven to 375°F (190°C). Grease a 9×13 inch baking dish and set it aside for later use.
- Cook Pasta: Bring a large pot of salted water to a boil. Add the penne pasta and cook according to package instructions until al dente. Drain the pasta and set it aside.
- Prepare Alfredo Sauce: In a large saucepan, melt the butter over medium heat. Add the minced garlic and sauté for about 1 minute until fragrant. Pour in the heavy cream and bring it to a gentle simmer, stirring occasionally.
- Add Cheese and Seasoning: Reduce the heat to low and gradually whisk in the Parmesan cheese until fully melted and the sauce is smooth. Add the ground nutmeg, salt, and pepper to taste. Continue cooking for another 2 minutes, stirring constantly.
- Combine Pasta and Sauce: Add the cooked pasta to the saucepan with the Alfredo sauce, stirring to coat the pasta evenly. If you’re using any optional add-ins like chicken or broccoli, mix them in at this stage.
- Assemble the Bake: Transfer the pasta mixture to the prepared baking dish. Sprinkle the shredded mozzarella cheese evenly over the top.
- Bake: Place the dish in the preheated oven and bake for 20-25 minutes, or until the cheese is golden and bubbly.
- Garnish and Serve: Once baked, remove the dish from the oven and let it cool for a few minutes. Garnish with chopped fresh parsley, if desired, before serving.
Extra Tips
For a smoother sauce, make sure to whisk the Parmesan cheese into the cream slowly and consistently to avoid clumps. If you like a crispy top, you can broil the dish for an additional 2-3 minutes after baking, but watch closely to prevent burning.
Feel free to experiment with different cheeses, such as Gruyère or fontina, for a unique flavor twist. If you prefer a lighter version, substitute half of the heavy cream with milk or use a lower-fat cheese option. Enjoy your Creamy Alfredo Pasta Bake with a side salad or garlic bread for a complete meal.
Stuffed Cheesy Meatballs
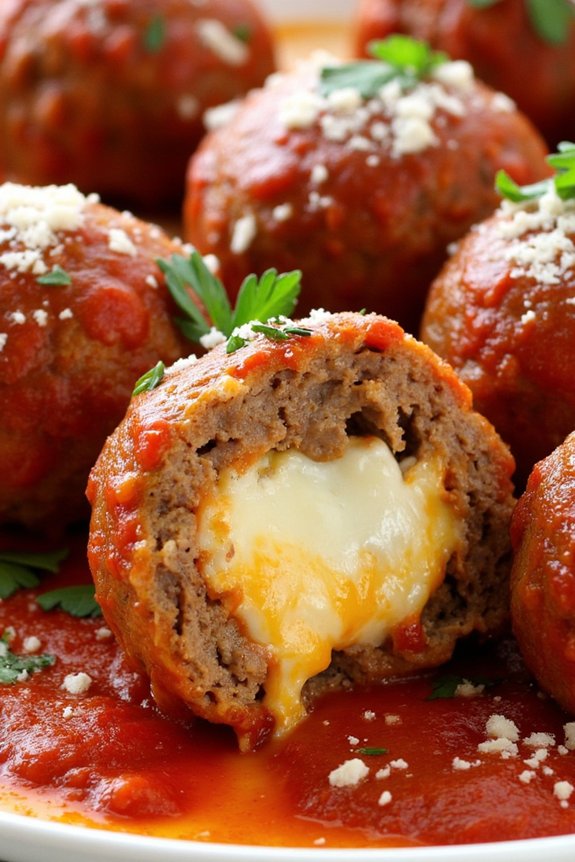
Stuffed Cheesy Meatballs are a delightful twist on the classic meatball recipe, perfect for a family dinner that everyone will love. Juicy and flavorful, these meatballs are filled with gooey cheese, making each bite a burst of deliciousness. They aren’t only easy to prepare but also a crowd-pleaser, guaranteeing that even the pickiest eaters will come back for seconds.
Whether served with pasta, on their own, or with a side of garlic bread, these meatballs make for a hearty and satisfying meal. The key to perfect Stuffed Cheesy Meatballs lies in the balance of flavors and textures. The meatball mixture should be well-seasoned, making certain that each bite is savory and delectable, while the cheese inside should melt beautifully, creating an irresistible center.
This recipe is designed for a serving size of 4-6 people, making it ideal for a family gathering or a cozy dinner at home. With this easy-to-follow recipe, you’ll be able to create a dish that’s both comforting and indulgent, perfect for any occasion.
Ingredients:
- 1.5 lbs ground beef
- 1 cup breadcrumbs
- 1/2 cup grated Parmesan cheese
- 1/4 cup chopped fresh parsley
- 2 cloves garlic, minced
- 1 teaspoon salt
- 1/2 teaspoon black pepper
- 1 teaspoon dried oregano
- 2 large eggs
- 4 oz mozzarella cheese, cut into small cubes
- 2 cups marinara sauce
- 2 tablespoons olive oil
Cooking Instructions:
- Prepare the Meatball Mixture: In a large mixing bowl, combine the ground beef, breadcrumbs, Parmesan cheese, parsley, minced garlic, salt, black pepper, and oregano. Mix well until all ingredients are evenly incorporated.
- Add the Eggs: Crack the eggs into the mixture and combine thoroughly to help bind the ingredients together. The mixture should be moist but firm enough to hold its shape.
- Shape the Meatballs: Take a small handful of the meat mixture, flatten it slightly, and place a cube of mozzarella cheese in the center. Shape the meat around the cheese to form a meatball, making sure the cheese is completely enclosed. Repeat with the remaining mixture and cheese cubes.
- Brown the Meatballs: In a large skillet, heat the olive oil over medium heat. Add the meatballs in batches, being careful not to overcrowd the pan. Cook for about 4-5 minutes on each side, or until browned all over. Remove from the skillet and set aside.
- Simmer in Marinara Sauce: Pour the marinara sauce into the same skillet and bring it to a simmer. Return the browned meatballs to the skillet, cover, and let them cook in the sauce for an additional 15-20 minutes, or until the meatballs are cooked through and the cheese is melted.
- Serve: Serve the Stuffed Cheesy Meatballs hot, garnished with extra parsley and Parmesan cheese if desired. They can be paired with pasta, rice, or enjoyed on their own.
Extra Tips:
When making Stuffed Cheesy Meatballs, it’s important to confirm that the cheese is fully enclosed in the meat to prevent it from leaking out during cooking. If you find that the meat mixture is too sticky to handle, you can lightly wet your hands with water or oil to make shaping the meatballs easier.
Additionally, for a healthier alternative, you can bake the meatballs in the oven at 375°F (190°C) for 25-30 minutes instead of browning them in a skillet. This method also works well if you’re preparing a larger batch.
Cheddar Broccoli Rice Casserole
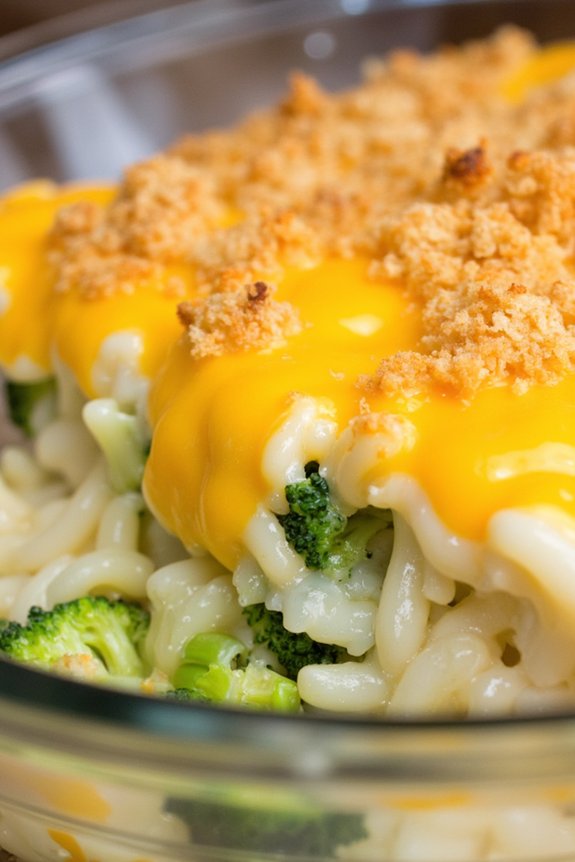
Cheddar Broccoli Rice Casserole is a warm, comforting dish that combines the creamy richness of cheddar cheese with the wholesome goodness of broccoli, all nestled in a bed of fluffy rice. This dish is perfect for a family dinner, as it’s both satisfying and easy to prepare. The combination of cheese and broccoli is a classic that’s loved by both children and adults alike.
Plus, by adding rice, you get a complete meal that’s both filling and nutritious. Whether you’re looking for a way to sneak some extra veggies into your family’s diet or you simply want to enjoy a deliciously cheesy meal, this Cheddar Broccoli Rice Casserole is a great choice.
It’s a versatile dish that can be served as a main course or a side dish, and it pairs well with a variety of proteins such as grilled chicken or baked fish. Best of all, it can be made in advance, making it a convenient option for busy weeknights or family gatherings.
Ingredients (Serves 4-6):
- 1 cup uncooked white rice
- 2 cups water
- 2 cups broccoli florets
- 2 tablespoons butter
- 1 small onion, diced
- 2 cloves garlic, minced
- 1 can (10.5 oz) condensed cream of mushroom soup
- 1 cup milk
- 2 cups shredded cheddar cheese
- Salt and pepper to taste
- 1/2 cup breadcrumbs (optional)
Cooking Instructions:
- Prepare the Rice: Begin by cooking the rice. In a medium saucepan, bring 2 cups of water to a boil. Add the rice, cover, and reduce the heat to low. Let it simmer for about 18-20 minutes, or until the rice is tender and the water is absorbed. Fluff with a fork and set aside.
- Cook the Broccoli: While the rice is cooking, steam the broccoli florets until they’re tender but still bright green, about 5-7 minutes. You can do this using a steamer basket over boiling water or by microwaving with a little water in a covered dish. Drain any excess water and set aside.
- Sauté Aromatics: In a large skillet, melt the butter over medium heat. Add the diced onion and garlic, and sauté until the onion becomes translucent and fragrant, about 3-4 minutes.
- Combine Ingredients: Preheat your oven to 350°F (175°C). In a large mixing bowl, combine the cooked rice, steamed broccoli, sautéed onion and garlic, cream of mushroom soup, milk, and 1 1/2 cups of the cheddar cheese. Mix everything together until well combined. Season with salt and pepper to taste.
- Assemble the Casserole: Transfer the mixture into a greased 9×13-inch baking dish. If using breadcrumbs, sprinkle them evenly over the top. Then, sprinkle the remaining 1/2 cup of cheddar cheese over the casserole.
- Bake: Place the casserole in the preheated oven and bake for 25-30 minutes, or until the cheese is bubbly and golden brown on top.
- Serve: Remove from the oven and let it cool slightly before serving. Enjoy your Cheddar Broccoli Rice Casserole warm as a delightful family meal.
Extra Tips:
For a bit of variation, consider adding cooked chicken or bacon bits to the casserole for extra protein. You can also swap out the cream of mushroom soup for cream of chicken or cream of celery for a different flavor profile.
If you prefer a crisper topping, broil the casserole for a couple of minutes at the end of baking. Finally, feel free to experiment with different cheeses, such as a blend of cheddar and mozzarella, to find the taste that your family loves the most.
Loaded Nacho Supreme

Loaded Nacho Supreme is a delightful and indulgent dish that transforms a simple snack into a hearty meal, perfect for family dinners. This recipe layers crispy tortilla chips with a medley of toppings, creating a colorful and flavorful feast. Perfect for sharing, Loaded Nacho Supreme combines the richness of melted cheese, the zest of fresh salsa, and the heartiness of seasoned ground beef, all topped with a dollop of sour cream and fresh guacamole.
Whether you’re hosting a casual get-together or a cozy family night, this dish is sure to be a crowd-pleaser.
The beauty of Loaded Nacho Supreme lies in its versatility and ease of preparation. With a few simple ingredients and less than 30 minutes of your time, you can whip up a delicious and satisfying meal. The recipe allows for customization, so feel free to adjust the ingredients to your family’s taste preferences.
Whether you prefer it spicy, cheesy, or loaded with veggies, this dish can be tailored to suit any palate. Gather around the table and enjoy this fun, interactive dining experience with your loved ones.
Ingredients (Serving Size: 4-6 people)
- 1 bag (12 oz) of tortilla chips
- 1 pound ground beef
- 1 packet taco seasoning
- 1 cup of refried beans
- 2 cups shredded cheddar cheese
- 1 cup shredded Monterrey Jack cheese
- 1 cup salsa
- 1 cup sour cream
- 1 avocado (for guacamole)
- 1/4 cup chopped fresh cilantro
- 1/2 cup sliced black olives
- 1/2 cup diced tomatoes
- 1/4 cup sliced jalapeños
- 2 green onions, sliced
Cooking Instructions
- Preheat the Oven: Preheat your oven to 350°F (175°C) to prepare for baking the nachos.
- Cook the Ground Beef: In a large skillet over medium heat, cook the ground beef until browned. Drain excess fat, add the taco seasoning, and stir in 1/4 cup of water. Let it simmer for 5 minutes.
- Prepare the Nachos: On a large baking sheet, spread out the tortilla chips in an even layer. Spoon the refried beans evenly over the chips, followed by the seasoned beef.
- Add the Cheese: Sprinkle the shredded cheddar and Monterrey Jack cheese over the top of the beef and beans.
- Bake the Nachos: Place the baking sheet in the preheated oven and bake for 10-15 minutes, or until the cheese is fully melted and bubbly.
- Prepare Additional Toppings: While the nachos are baking, mash the avocado in a bowl with a pinch of salt and lime juice to make a simple guacamole.
- Assemble the Toppings: Once the nachos are done, remove them from the oven. Top with salsa, sour cream, and guacamole. Sprinkle with cilantro, black olives, diced tomatoes, jalapeños, and green onions.
- Serve: Serve the Loaded Nacho Supreme immediately while it’s hot and enjoy!
Extra Tips
For a vegetarian version, you can substitute the ground beef with a plant-based ground meat alternative or extra beans. Feel free to add your family’s favorite toppings, such as corn, bell peppers, or pickled red onions.
If you like extra heat, consider adding a few dashes of hot sauce or more jalapeños. Keep in mind that nachos are best enjoyed fresh, as the chips may become soggy if left out for too long.
Mozzarella-Stuffed Chicken Breasts
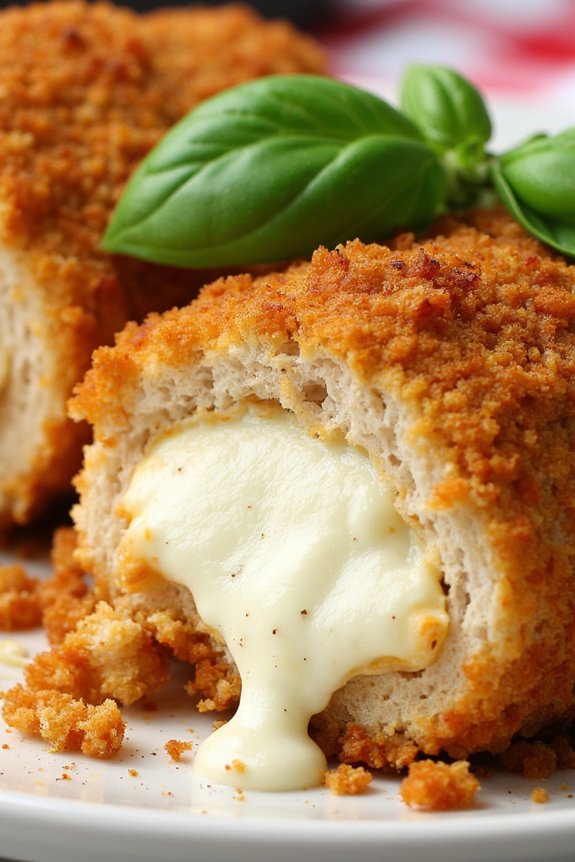
Mozzarella-Stuffed Chicken Breasts are a delightful dish that combines the juicy tenderness of chicken with the creamy richness of mozzarella cheese, all wrapped up in a crispy, flavorful crust. This dish is perfect for family dinners, offering a sophisticated taste that’s still approachable and easy to prepare. The combination of the seasoned chicken, gooey cheese, and golden crust will leave everyone at the table asking for seconds.
Whether you’re hosting a dinner party or just preparing a special meal for your loved ones, these stuffed chicken breasts are sure to impress.
The key to achieving the perfect Mozzarella-Stuffed Chicken Breasts lies in the balance of flavors and textures. The chicken needs to be pounded thin enough to wrap around the cheese, while the seasonings should enhance the natural flavors without overpowering them. With a few simple ingredients and some careful preparation, you can create a dish that’s both elegant and comforting.
This recipe serves 4-6 people, making it an ideal choice for a small gathering or a large family meal.
Ingredients:
- 4 large boneless, skinless chicken breasts
- 8 oz fresh mozzarella cheese, sliced
- 1 cup all-purpose flour
- 2 large eggs
- 1 cup breadcrumbs (preferably panko for extra crunch)
- 1/4 cup grated Parmesan cheese
- 1 teaspoon garlic powder
- 1 teaspoon onion powder
- 1 teaspoon dried Italian herbs
- Salt and pepper to taste
- 3 tablespoons olive oil
- Fresh basil leaves for garnish (optional)
Cooking Instructions:
1. Preheat Oven and Prepare Ingredients:
Preheat your oven to 375°F (190°C). While the oven heats, prepare your ingredients by slicing the mozzarella cheese and setting up your breading station with separate shallow bowls for flour, beaten eggs, and a mixture of breadcrumbs, Parmesan cheese, garlic powder, onion powder, Italian herbs, salt, and pepper.
2. Prepare Chicken:
Place each chicken breast between two sheets of plastic wrap or parchment paper. Use a meat mallet or rolling pin to gently pound the chicken to about 1/2 inch thickness. Be careful not to tear the meat.
3. Stuff Chicken:
Lay the pounded chicken breasts flat and place 2-3 slices of mozzarella in the center of each. Carefully roll the chicken around the cheese, tucking in the sides to enclose the filling completely. Secure with toothpicks if necessary.
4. Coat with Breading:
Dredge each stuffed chicken breast in flour, shaking off any excess. Dip it into the beaten eggs, then coat thoroughly with the breadcrumb mixture. Press the breadcrumbs gently to guarantee they adhere well.
5. Sear the Chicken:
Heat olive oil in a large oven-safe skillet over medium heat. Add the chicken breasts and cook for about 3-4 minutes on each side, or until they’re golden brown. This helps to seal in the juices and create a nice crust.
6. Bake:
Transfer the skillet to the preheated oven and bake for 20-25 minutes, or until the chicken is cooked through and the cheese is melted. The internal temperature should reach 165°F (75°C).
7. Serve:
Remove the chicken from the oven and let it rest for a few minutes before slicing. Garnish with fresh basil leaves if desired, and serve warm.
Extra Tips:
For the best results, make sure the chicken breasts are of even thickness before stuffing, as this guarantees even cooking. If you have time, allow the stuffed and breaded chicken to rest in the refrigerator for about 30 minutes before cooking, which helps the breading adhere better.
Additionally, using fresh mozzarella will give you a creamier melt, but if you prefer a more pronounced flavor, you can use a mix of mozzarella and provolone. Ultimately, remember to remove any toothpicks before serving to avoid any surprises at the dinner table!
Cheesy Baked Ziti
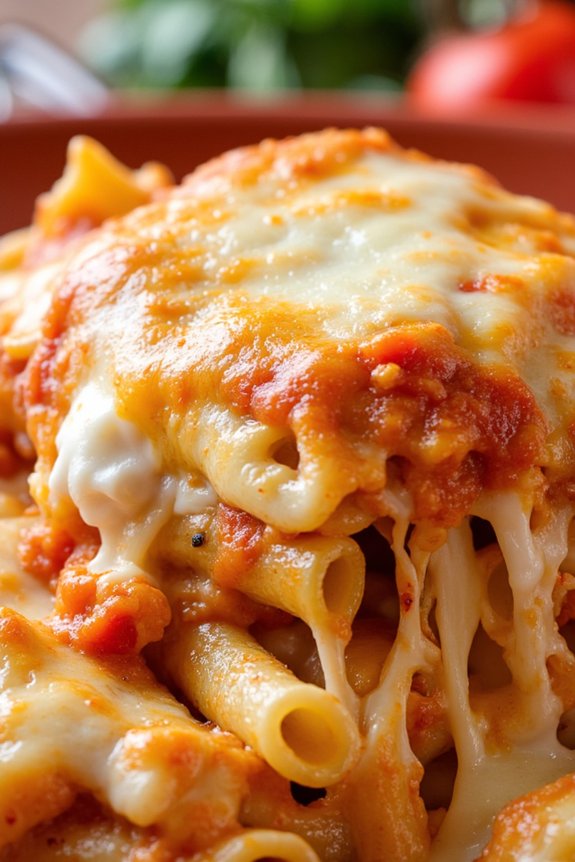
Cheesy Baked Ziti is a classic Italian-American dish that combines pasta, marinara sauce, and a medley of cheeses baked to perfection. This comforting casserole is ideal for family dinners, offering a hearty and satisfying meal that’s easy to prepare and certain to please even the pickiest eaters.
With its rich flavors and gooey cheese, Cheesy Baked Ziti is a dish you’ll find yourself making time and again. The beauty of Cheesy Baked Ziti lies in its simplicity. You don’t need a lot of ingredients or complicated techniques to make it. The key is to use high-quality cheeses and a flavorful marinara sauce to bring out the best in this dish.
Perfect for a weeknight dinner or a weekend feast, this recipe yields a delicious and filling meal for 4-6 people, making it great for sharing with family and friends.
Ingredients:
- 1 pound ziti pasta
- 2 cups marinara sauce
- 1 cup ricotta cheese
- 2 cups shredded mozzarella cheese
- 1 cup grated Parmesan cheese
- 1 tablespoon olive oil
- 2 cloves garlic, minced
- 1 teaspoon dried basil
- 1 teaspoon dried oregano
- Salt and pepper to taste
Cooking Instructions:
- Preheat the oven: Start by preheating your oven to 375°F (190°C) to guarantee it reaches the perfect temperature for baking.
- Cook the pasta: In a large pot of boiling salted water, cook the ziti pasta until it’s al dente, according to the package instructions. Once cooked, drain and set aside.
- Prepare the sauce: In a large skillet over medium heat, add the olive oil and minced garlic. Sauté the garlic until fragrant but not browned, about 1 minute. Add the marinara sauce, basil, oregano, salt, and pepper. Stir to combine and let simmer for 5 minutes.
- Mix the ricotta: In a mixing bowl, combine the ricotta cheese with half of the Parmesan cheese. Stir until smooth and creamy.
- Assemble the dish: In a large baking dish, spread a layer of the marinara sauce at the bottom. Add half of the cooked ziti, then spread the ricotta mixture over the pasta. Sprinkle half of the mozzarella cheese on top. Add another layer of ziti and cover with the remaining marinara sauce. Top with the remaining mozzarella and Parmesan cheese.
- Bake: Cover the baking dish with aluminum foil and bake in the preheated oven for 20 minutes. Remove the foil and bake for an additional 10-15 minutes, or until the cheese is bubbly and golden brown on top.
- Serve: Allow the Cheesy Baked Ziti to cool for a few minutes before serving. This allows the cheese to set slightly, making it easier to cut and serve.
Extra Tips: For an extra burst of flavor, consider adding cooked Italian sausage or ground beef to the marinara sauce. You can also experiment with different cheese blends, such as adding provolone or fontina for a unique twist.
If you prefer a bit of heat, sprinkle red pepper flakes into the sauce. Finally, for a crispy topping, consider adding breadcrumbs mixed with a little melted butter before baking.
Grilled Cheese and Tomato Soup Combo
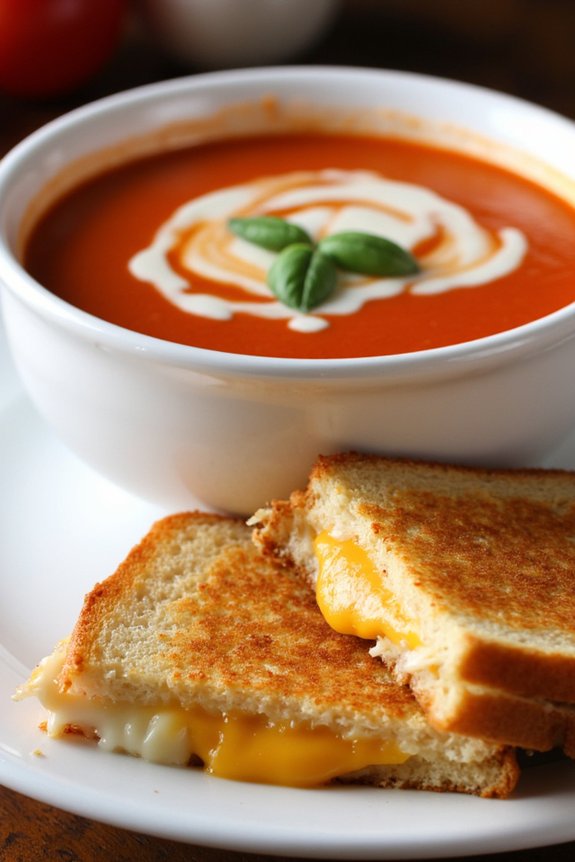
There’s something incredibly comforting about the classic combination of grilled cheese sandwiches and tomato soup. This timeless duo is perfect for a cozy family dinner that’s both satisfying and easy to prepare. With the crispy, golden-brown bread encasing oozy melted cheese paired with a warm, hearty tomato soup, this meal is sure to delight both kids and adults alike.
Whether you’re looking to reminisce about childhood favorites or simply need a quick yet delicious dinner option, this recipe will quickly become a staple in your home.
This Grilled Cheese and Tomato Soup Combo is designed to serve 4-6 people, making it ideal for a family meal. The recipe features a rich and creamy tomato soup made from fresh and canned tomatoes, perfectly seasoned to enhance its natural flavors. The grilled cheese sandwiches are crafted with a blend of cheeses, ensuring each bite is a gooey delight.
With a few simple ingredients and steps, you’ll have a delightful meal on the table in no time.
Ingredients:
For the Tomato Soup:
- 2 tablespoons olive oil
- 1 medium onion, chopped
- 2 cloves garlic, minced
- 1 can (28 ounces) crushed tomatoes
- 2 cups vegetable or chicken broth
- 1 cup heavy cream
- 1 teaspoon sugar
- Salt and pepper to taste
- 1 teaspoon dried basil
For the Grilled Cheese Sandwiches:
- 8 slices of bread (preferably sourdough or a hearty white bread)
- 4 tablespoons butter, softened
- 2 cups shredded cheddar cheese
- 1 cup shredded mozzarella cheese
Cooking Instructions:
- Prepare the Tomato Soup:
- Heat the olive oil in a large pot over medium heat. Add the chopped onion and minced garlic, sautéing until the onion becomes translucent and fragrant, about 5 minutes.
- Stir in the crushed tomatoes and broth. Bring the mixture to a simmer, allowing it to cook for about 15 minutes, stirring occasionally.
- Reduce the heat to low and stir in the heavy cream and sugar. Season the soup with salt, pepper, and dried basil. Allow it to cook for an additional 10 minutes, then use an immersion blender to puree the soup until smooth. Keep warm over low heat.
- Make the Grilled Cheese Sandwiches:
- Preheat a large skillet or griddle over medium heat.
- Butter one side of each slice of bread. Place four slices, buttered side down, on the skillet.
- Divide the shredded cheddar and mozzarella cheeses evenly onto the bread slices in the skillet, then top with the remaining bread slices, buttered side up.
- Cook the sandwiches until the bread is golden brown and the cheese has melted, about 3-4 minutes per side. Adjust the heat as necessary to prevent burning.
- Serve the Meal:
- Ladle the hot tomato soup into bowls and serve alongside the grilled cheese sandwiches. For added flair, you can garnish the soup with a drizzle of cream or a sprinkle of fresh basil.
Extra Tips:
For the best results, use a combination of cheeses in your grilled cheese sandwiches for a more complex flavor. Experiment with adding a slice of tomato or a sprinkle of herbs like oregano or thyme to your sandwiches for an added twist.
When making the soup, feel free to adjust the seasoning to your taste, and consider adding a pinch of red pepper flakes if you prefer a little heat. If you don’t have an immersion blender, you can carefully transfer the soup to a regular blender in batches. Always be cautious when blending hot liquids.
Enjoy your meal with a side salad or some crunchy pickles for a complete dining experience.
Taco Mac and Cheese Skillet
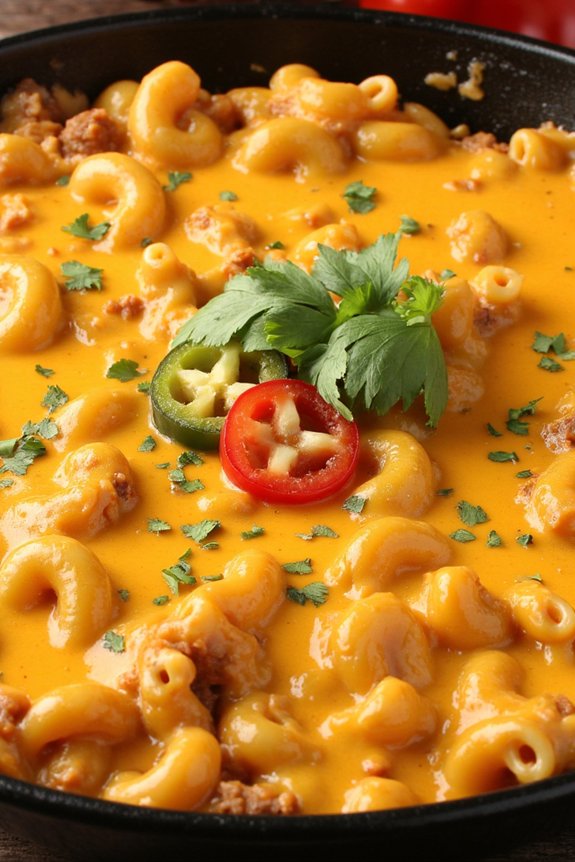
Taco Mac and Cheese Skillet is a delightful fusion of two beloved comfort foods, bringing together the savory richness of tacos and the creamy indulgence of mac and cheese. This dish is perfect for family dinners, offering a hearty and flavorful meal that everyone will enjoy. The combination of seasoned ground beef, pasta, and a cheesy sauce creates a satisfying one-pan dish that’s easy to prepare and guaranteed to please both kids and adults alike.
Ideal for busy weeknights, Taco Mac and Cheese Skillet isn’t only quick to make but also requires minimal cleanup, making it a great choice for home cooks looking for convenience without compromising on taste. This recipe, designed to serve 4-6 people, allows you to spend less time in the kitchen and more time with your family, sharing a delicious meal that brings warmth and joy to the dinner table.
Ingredients (Serves 4-6):
- 1 pound ground beef
- 1 packet taco seasoning
- 1 cup salsa
- 2 cups elbow macaroni
- 1 cup beef broth
- 1 cup water
- 2 cups shredded cheddar cheese
- 1/2 cup milk
- 1 medium onion, diced
- 1 tablespoon olive oil
- Salt and pepper to taste
- Optional toppings: chopped cilantro, diced tomatoes, sour cream, sliced jalapeños
Cooking Instructions:
- Prepare the Ingredients: Begin by gathering all the ingredients and verify the onion is diced finely. This will save time during the cooking process and help maintain a smooth workflow.
- Cook the Beef: In a large skillet, heat olive oil over medium heat. Add the diced onion and sauté until translucent, about 3-4 minutes. Add the ground beef and cook until browned, breaking it apart with a spoon. Drain excess fat if necessary.
- Season the Meat: Sprinkle the taco seasoning over the cooked beef and mix well. Stir in the salsa, guaranteeing everything is evenly coated with the seasoning and salsa.
- Combine Pasta and Liquids: Add the elbow macaroni to the skillet, followed by the beef broth and water. Stir to combine, verifying the pasta is submerged in the liquid. Bring the mixture to a boil.
- Simmer the Dish: Reduce the heat to low, cover the skillet, and let it simmer for about 10-12 minutes, or until the macaroni is cooked and most of the liquid is absorbed. Stir occasionally to prevent sticking.
- Add Cheese and Milk: Once the pasta is cooked, stir in the shredded cheddar cheese and milk. Mix until the cheese is fully melted and the sauce is creamy and smooth. Season with salt and pepper to taste.
- Serve: Remove the skillet from heat. If desired, top with optional toppings like chopped cilantro, diced tomatoes, sour cream, or sliced jalapeños for added flavor and texture.
Extra Tips: When cooking Taco Mac and Cheese Skillet, feel free to adjust the level of spiciness by choosing a mild, medium, or hot salsa based on your family’s preference. If you prefer a creamier texture, you can add more milk or cheese.
Additionally, this dish can be easily customized with other ingredients such as black beans or corn for added nutrition and flavor. For a vegetarian version, substitute the ground beef with a plant-based protein or additional vegetables. Enjoy experimenting with this versatile recipe to suit your family’s tastes!