

I remember the scent of rosemary wafting through my kitchen as I prepared a classic roast chicken for a family gathering. There’s something truly special about bringing loved ones together over a table filled with diverse dishes. From the zesty lemon garlic shrimp pasta to the rich, creamy baked ziti with sausage, each recipe has its own charm. Wondering what delicious surprises these dishes hold for your next get-together? Let’s explore them together.
Classic Roast Chicken With Herbs

There’s nothing quite like the comforting aroma of a classic roast chicken with herbs wafting through your home. This timeless dish is perfect for family dinners, offering a hearty and flavorful meal that everyone will love. The combination of juicy, tender chicken and a crispy, herb-infused skin makes for an irresistible entrée that’s both simple to prepare and impressive to serve.
Whether you’re gathering for a special occasion or just enjoying a cozy night in, this roast chicken will certainly be a crowd-pleaser.
To create this delicious dish, you’ll need a few fresh ingredients and a bit of patience. The key to a perfectly roasted chicken lies in the balance of seasoning and the proper cooking technique. By using a mix of fresh herbs such as rosemary, thyme, and parsley, the chicken is infused with a fragrant aroma and savory flavor. The result is a succulent and moist chicken, with herbs adding a delightful touch that elevates the overall taste.
Follow these instructions to serve a delightful roast chicken for 4-6 people.
Ingredients:
- 1 whole chicken (approximately 4-5 pounds)
- Salt and freshly ground black pepper
- 2 tablespoons olive oil
- 1 lemon, halved
- 4 garlic cloves, smashed
- A handful of fresh rosemary sprigs
- A handful of fresh thyme sprigs
- A handful of fresh parsley leaves
- 1 large onion, quartered
- 4 carrots, cut into chunks
- 4 potatoes, cut into quarters
- 1 cup chicken broth or water
Cooking Instructions:
- Preparation: Preheat your oven to 425°F (220°C). Remove the giblets from the chicken cavity and pat the chicken dry with paper towels. This guarantees a crispy skin.
- Seasoning the Chicken: Sprinkle the chicken generously with salt and pepper both inside and out. Rub the olive oil over the entire chicken.
- Stuffing the Chicken: Insert the lemon halves, smashed garlic cloves, and a few sprigs of rosemary and thyme into the cavity of the chicken. This will infuse the chicken with flavor as it cooks.
- Trussing the Chicken: Tie the legs together with kitchen twine to guarantee even cooking and a pleasing presentation. Tuck the wing tips under the body of the chicken.
- Arranging Vegetables: Place the onion quarters, carrot chunks, and potato quarters in a roasting pan. Lay additional rosemary, thyme, and parsley over the vegetables. Pour the chicken broth or water into the pan to keep the vegetables moist.
- Placing the Chicken in the Pan: Position the chicken breast-side up on top of the vegetables. This allows the juices to flavor the vegetables as the chicken roasts.
- Roasting: Place the roasting pan in the preheated oven. Roast the chicken for about 1.5 hours, or until the skin is golden brown and a thermometer inserted into the thickest part of the thigh reads 165°F (74°C).
- Resting: Remove the chicken from the oven and let it rest for 10-15 minutes before carving. This allows the juices to redistribute, guaranteeing moist meat.
- Serving: Carve the chicken and serve it alongside the roasted vegetables, which should be tender and flavorful from the chicken juices.
Extra Tips:
For an extra burst of flavor, consider basting the chicken every 30 minutes with the pan juices. This helps to achieve an evenly crispy skin while keeping the meat juicy.
If you prefer a more intense herb flavor, you can finely chop additional herbs and mix them with the olive oil to create a paste that can be rubbed under the skin.
Creamy Baked Ziti With Sausage
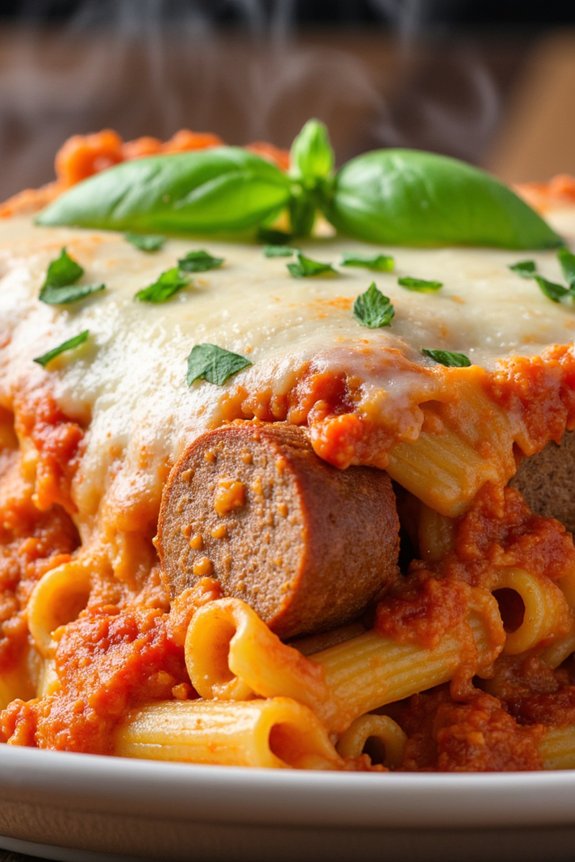
Creamy Baked Ziti With Sausage is a comforting and delicious dish that’s perfect for family dinners. The combination of al dente ziti pasta, savory Italian sausage, and a rich, creamy sauce makes this baked ziti recipe a standout. Not only is it easy to prepare, but it also delivers on flavor, making it a favorite for both kids and adults alike.
Whether you’re planning a cozy weeknight meal or hosting a gathering, this dish is certain to satisfy everyone’s palate. The preparation of this dish involves layering pasta, sausage, and sauce, then baking it to perfection with a generous topping of melted cheese.
The key to its creaminess lies in the blend of ricotta, mozzarella, and Parmesan cheeses, which meld together as they bake, creating a luscious texture. The addition of sausage adds a hearty element, making this baked ziti a complete meal that requires little else to accompany it.
You’ll find that this recipe serves 4-6 people, making it ideal for sharing at the dinner table.
Ingredients:
- 12 ounces ziti pasta
- 1 pound Italian sausage (casings removed)
- 1 tablespoon olive oil
- 3 cups marinara sauce
- 1 cup ricotta cheese
- 2 cups shredded mozzarella cheese
- 1/2 cup grated Parmesan cheese
- 1/4 cup chopped fresh basil
- 1 teaspoon Italian seasoning
- 1/2 teaspoon salt
- 1/4 teaspoon black pepper
Instructions:
- Preheat the Oven: Preheat your oven to 375°F (190°C). This guarantees that the oven is hot enough to cook the dish evenly and achieve a bubbly, golden top.
- Cook the Pasta: Fill a large pot with water and bring it to a boil. Add a pinch of salt and the ziti pasta. Cook the pasta according to package instructions until it’s al dente, then drain and set aside.
- Prepare the Sausage: In a large skillet, heat olive oil over medium heat. Add the Italian sausage and cook until browned, breaking it up with a spoon as it cooks. This should take about 5-7 minutes. Once cooked, remove from heat and drain any excess fat.
- Mix the Sauce and Sausage: In a large bowl, combine the marinara sauce, cooked sausage, ricotta cheese, Italian seasoning, salt, and pepper. Stir well to combine all ingredients thoroughly.
- Assemble the Dish: In a 9×13 inch baking dish, spread a layer of the sauce mixture on the bottom. Add half of the cooked ziti pasta, then layer with half of the remaining sauce. Sprinkle with 1 cup of mozzarella cheese. Repeat with the rest of the pasta, sauce, and mozzarella cheese.
- Add the Finishing Touches: Top with the grated Parmesan cheese and half of the chopped basil. Cover the dish with foil to prevent the cheese from burning.
- Bake: Place the baking dish in the preheated oven and bake for 25 minutes. Remove the foil and bake for an additional 10-15 minutes, or until the cheese is bubbly and golden brown.
- Serve: Remove the ziti from the oven and let it cool for a few minutes. Garnish with the remaining fresh basil before serving.
Extra Tips: For an added layer of flavor, consider using a mix of sweet and spicy Italian sausages. You can also make the dish ahead of time by assembling it in advance and storing it in the refrigerator for up to 24 hours before baking.
If you’re looking for a bit of a kick, sprinkle in some red pepper flakes along with the Italian seasoning. Finally, if you prefer a vegetarian version, simply omit the sausage and add sautéed vegetables like bell peppers and mushrooms to the sauce mixture.
Slow-Cooker Beef Stew
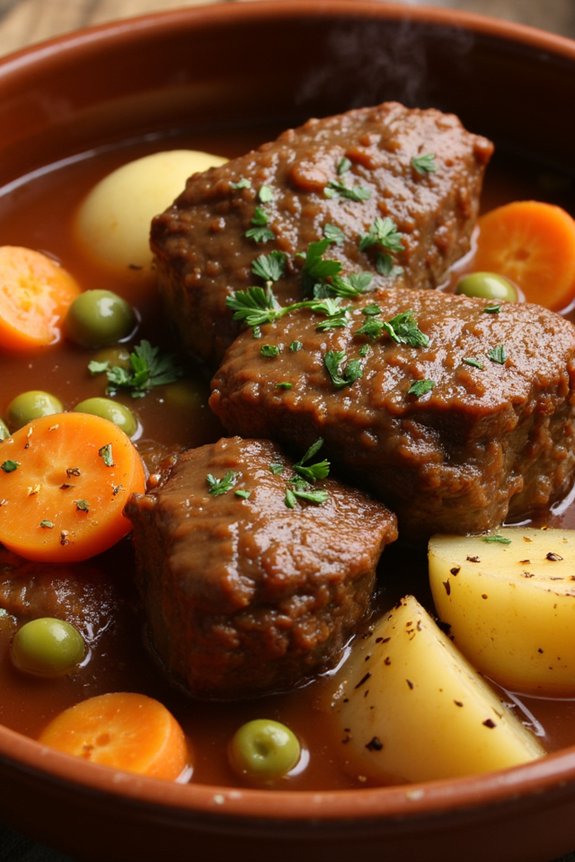
There’s something incredibly comforting about a warm bowl of beef stew, especially when it’s been simmering in a slow cooker all day.
Slow-Cooker Beef Stew is a classic family dinner recipe that’s perfect for those chilly evenings when you want a hearty and satisfying meal without too much fuss in the kitchen. This recipe allows you to prepare the ingredients in the morning, and by dinner time, you’ll have a rich and flavorful stew ready to serve. The slow-cooking process tenderizes the beef while allowing the flavors of the vegetables and broth to meld together beautifully.
This Slow-Cooker Beef Stew serves 4-6 people, making it ideal for a family meal or for having leftovers for the next day. It’s a versatile dish where you can adjust the vegetables to your family’s taste. Carrots, potatoes, and peas are traditional choices, but you can easily add other favorites like parsnips or mushrooms to the mix. With just a little bit of prep work, you can come home to a delicious and aromatic meal that everyone will enjoy.
Ingredients (Serving Size: 4-6 people):
- 2 pounds of beef chuck, cut into 1-inch cubes
- 3 tablespoons of all-purpose flour
- Salt and pepper to taste
- 2 tablespoons of olive oil
- 4 cups of beef broth
- 1 cup of red wine (optional)
- 3 cloves of garlic, minced
- 1 onion, chopped
- 4 carrots, sliced
- 3 potatoes, diced
- 2 tablespoons of tomato paste
- 1 tablespoon of Worcestershire sauce
- 1 teaspoon of dried thyme
- 1 teaspoon of dried rosemary
- 1 cup of frozen peas
- 2 tablespoons of chopped fresh parsley (for garnish)
Cooking Instructions:
- Prepare the Beef: In a large bowl, toss the beef cubes with flour, salt, and pepper until evenly coated. This will help to thicken the stew as it cooks.
- Brown the Beef: Heat olive oil in a large skillet over medium-high heat. Add the beef cubes in batches, browning them on all sides. Once browned, transfer the beef to the slow cooker.
- Prepare the Vegetables: In the same skillet, add the minced garlic and chopped onion. Sauté for 2-3 minutes until the onions are translucent and fragrant. Add these to the slow cooker along with the carrots and potatoes.
- Mix the Stew: Pour the beef broth and red wine into the slow cooker. Add the tomato paste, Worcestershire sauce, thyme, and rosemary. Stir everything to combine well.
- Slow Cook: Cover the slow cooker and set it to low heat. Cook for 7-8 hours, or until the beef is tender and the vegetables are cooked through. If you’re short on time, you can cook on high for 4-5 hours.
- Add Peas and Finish: About 30 minutes before serving, stir in the frozen peas. Allow them to heat through. Taste and adjust seasoning with more salt and pepper if needed.
- Garnish and Serve: Once the stew is ready, ladle it into bowls. Garnish with chopped fresh parsley before serving.
Extra Tips:
When making Slow-Cooker Beef Stew, selecting the right cut of beef is essential. Look for well-marbled beef chuck as it becomes very tender during slow cooking.
If you prefer a thicker stew, you can mix a tablespoon of cornstarch with a little cold water and stir it into the stew in the last 30 minutes of cooking.
This recipe is also perfect for personal customization; feel free to add or swap vegetables based on what you have on hand or what your family prefers. Enjoy the process of making this comforting dish, and feel free to make it your own!
Lemon Garlic Shrimp Pasta
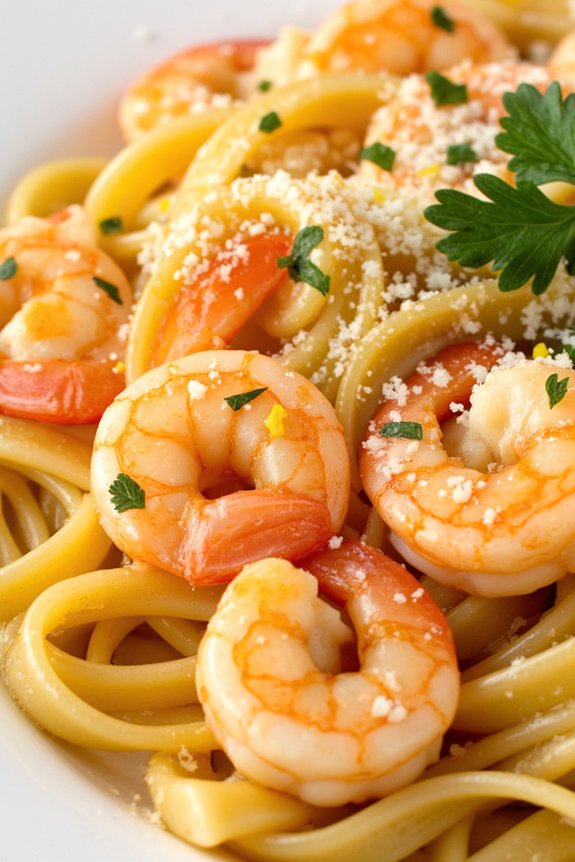
Lemon Garlic Shrimp Pasta is a delightful and invigorating dish that combines the zesty flavors of lemon with the aromatic punch of garlic, all complemented by succulent shrimp. This dish is perfect for a family dinner, as it’s both satisfying and easy to prepare. The pasta serves as a hearty base, while the shrimp adds a touch of elegance and protein to the meal.
The lemon and garlic sauce ties everything together with its bright and bold flavor profile, making it a dish that will impress your family and guests alike. Ideal for a serving size of 4-6 people, Lemon Garlic Shrimp Pasta isn’t only delicious but also quick to make, making it suitable for both weeknight dinners and special occasions.
This recipe calls for simple yet flavorful ingredients that you might already have in your pantry, ensuring that you can whip up this dish without much hassle. The combination of flavors is sure to delight everyone at the table, making it a go-to recipe for any family dinner.
Ingredients for 4-6 servings:
- 1 pound of large shrimp, peeled and deveined
- 12 ounces of pasta (spaghetti, fettuccine, or linguine)
- 4 tablespoons of olive oil, divided
- 4 cloves of garlic, minced
- 1 teaspoon of red pepper flakes (optional)
- 1 lemon, zest and juice
- 1/4 cup of white wine (optional)
- Salt and freshly ground black pepper, to taste
- 1/4 cup of fresh parsley, chopped
- 1/4 cup of grated Parmesan cheese
Instructions:
- Prepare the Pasta: Begin by cooking the pasta in a large pot of salted boiling water according to the package instructions until it’s al dente. Once cooked, reserve 1 cup of pasta water, then drain the pasta and set it aside.
- Cook the Shrimp: In a large skillet over medium heat, heat 2 tablespoons of olive oil. Add the shrimp to the skillet and season them with salt and pepper. Cook for about 2-3 minutes on each side, or until the shrimp are pink and opaque. Remove the shrimp from the skillet and set them aside.
- Make the Sauce: In the same skillet, add the remaining 2 tablespoons of olive oil. Add the minced garlic and red pepper flakes, sautéing for about 1 minute until the garlic is fragrant. Be careful not to burn the garlic.
- Add Lemon and Wine: Stir in the lemon zest, lemon juice, and white wine (if using). Let the mixture simmer for 2-3 minutes, allowing the flavors to meld and the alcohol to cook off.
- Combine Pasta and Shrimp: Return the cooked shrimp to the skillet, along with the drained pasta. Toss everything together to coat the pasta and shrimp with the lemon garlic sauce. If the sauce is too thick, add a bit of the reserved pasta water to loosen it up.
- Garnish and Serve: Finally, add the chopped parsley and grated Parmesan cheese, tossing the pasta to combine. Taste and adjust the seasoning with more salt and pepper if needed. Serve the Lemon Garlic Shrimp Pasta immediately, garnished with additional parsley and Parmesan if desired.
Extra Tips:
When cooking the shrimp, be careful not to overcook them, as they can become rubbery and lose their juiciness. If you prefer a creamier sauce, consider adding a splash of heavy cream after the lemon juice and wine have simmered.
Additionally, if you’re looking to add more vegetables to the dish, consider tossing in some spinach or cherry tomatoes when you add the shrimp back into the pan. These modifications can enhance both the flavor and nutritional value of the dish.
Enjoy your Lemon Garlic Shrimp Pasta with a side of crusty bread to soak up any remaining sauce!
Honey Glazed Ham
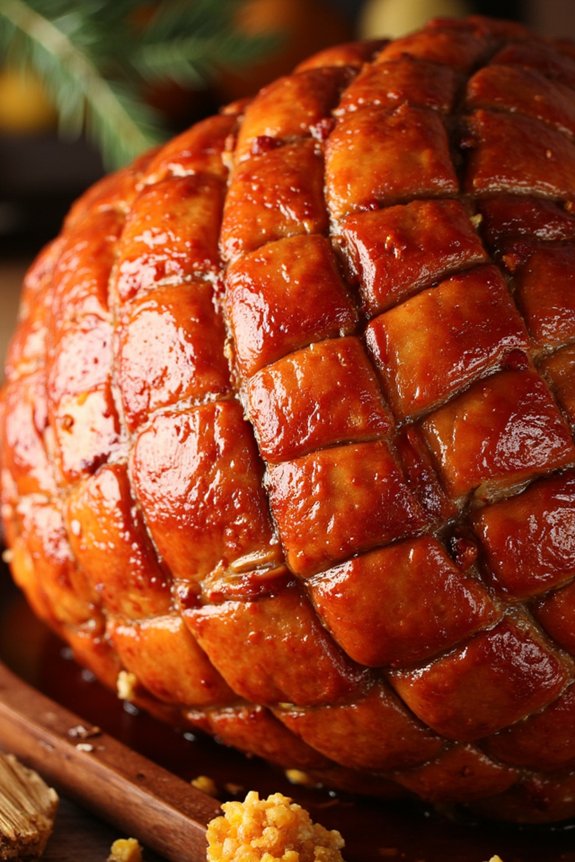
A honey glazed ham is a classic centerpiece for any family dinner, providing a sweet and savory profile that pleases a wide array of tastes. Perfect for holidays or any special gathering, the honey glaze enhances the natural flavor of the ham, creating a succulent and aromatic dish. This recipe is designed to serve 4-6 people, guaranteeing everyone at your table gets a generous helping of this delicious dish. The combination of honey, spices, and a hint of citrus creates a sticky, flavorful crust that complements the juicy meat inside.
To prepare a honey glazed ham, you’ll need a bone-in ham, as it retains moisture and flavor better than a boneless one. The glaze, made from honey, brown sugar, and a mix of spices, is applied in layers throughout the cooking process, allowing it to seep into the ham and create a beautifully caramelized crust. A basting brush is essential for applying the glaze evenly. This recipe is straightforward, but attention to detail will guarantee your honey glazed ham is the star of your dinner table.
Ingredients:
- 1 bone-in ham, about 5-7 pounds
- 1 cup honey
- 1/2 cup brown sugar
- 1/4 cup Dijon mustard
- 1/4 cup apple cider vinegar
- 2 tablespoons unsalted butter
- 2 teaspoons ground cinnamon
- 1 teaspoon ground cloves
- 1 teaspoon ground ginger
- 2 teaspoons orange zest
Cooking Instructions:
- Preheat the Oven: Start by preheating your oven to 325°F (165°C) to guarantee it’s hot enough to cook the ham evenly.
- Prepare the Ham: Remove the ham from its packaging and place it on a roasting rack in a large roasting pan. Score the surface of the ham in a diamond pattern, making shallow cuts about 1/4 inch deep. This helps the glaze penetrate the meat.
- Make the Glaze: In a saucepan over medium heat, combine the honey, brown sugar, Dijon mustard, apple cider vinegar, and butter. Stir until the sugar has dissolved and the mixture is smooth.
- Add the cinnamon, cloves, ginger, and orange zest, and mix well. Allow the glaze to simmer for about 5 minutes, then remove from heat.
- Apply the Glaze: Using a basting brush, apply a generous amount of glaze over the entire surface of the ham. Make sure to get the glaze into the scored cuts for maximum flavor.
- Bake the Ham: Place the ham in the preheated oven. Cook for approximately 15-20 minutes per pound, basting with additional glaze every 30 minutes. This helps to build layers of flavor and achieve a nice caramelized finish.
- Final Glazing and Resting: About 30 minutes before the ham is done, give it one last generous glaze. Once the internal temperature reaches 140°F (60°C), remove the ham from the oven. Let it rest for at least 15 minutes before carving to allow the juices to redistribute.
Extra Tips:
When preparing honey glazed ham, patience is key. The process of scoring, glazing, and basting may seem time-consuming, but it’s essential for achieving the perfect balance of flavors and a beautiful presentation.
If you prefer a spicier glaze, consider adding a pinch of cayenne pepper to the mixture. For a more citrusy note, increase the amount of orange zest or add a splash of orange juice to the glaze.
Remember that the leftover ham can be used in sandwiches, soups, or salads, making it a versatile dish that keeps on giving.
Vegetarian Stuffed Bell Peppers
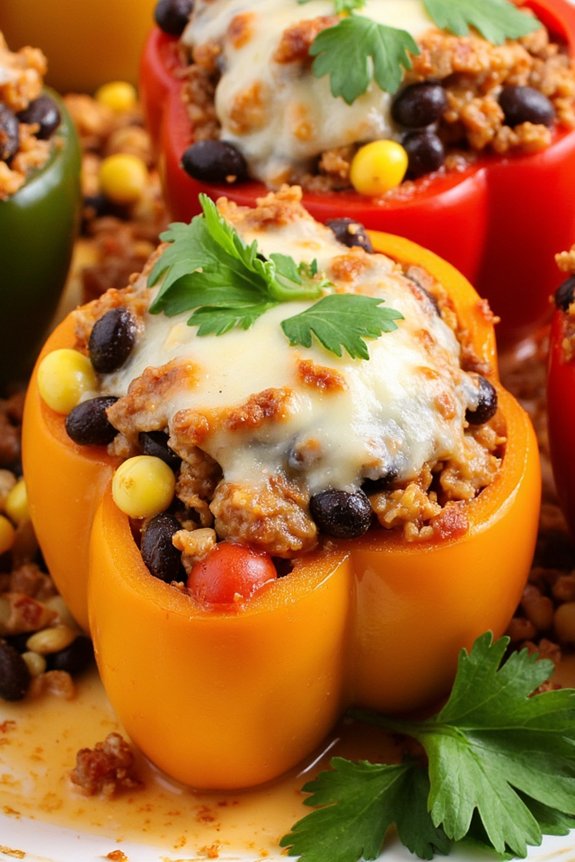
Vegetarian Stuffed Bell Peppers are a delightful and colorful addition to any family dinner. This dish isn’t only visually appealing but also packed with flavor and nutrition. The bell peppers serve as perfect edible bowls, filled with a hearty mixture of rice, beans, vegetables, and spices.
Whether you’re catering to vegetarians or simply looking for a meatless meal option, these stuffed peppers are sure to satisfy all palates at the table. The recipe is easy to prepare, making it an excellent choice for busy weeknights or lazy weekends.
This recipe features a delicious filling made from pantry staples and fresh produce, ensuring a balance of taste and texture. With the combination of protein-rich beans, aromatic herbs, and gooey cheese, these stuffed peppers are both comforting and nourishing.
The preparation process is straightforward, allowing you to create a wholesome meal that brings the whole family together. Suitable for serving 4-6 people, this dish is perfect for family gatherings or meal prepping for the week.
Ingredients (Serves 4-6):
- 6 large bell peppers (any color)
- 1 cup cooked rice
- 1 can (15 oz) black beans, drained and rinsed
- 1 cup corn (fresh, frozen, or canned)
- 1 small onion, diced
- 2 cloves garlic, minced
- 1 can (14.5 oz) diced tomatoes
- 1 tablespoon olive oil
- 1 teaspoon ground cumin
- 1 teaspoon smoked paprika
- 1 teaspoon dried oregano
- Salt and pepper to taste
- 1 cup shredded cheese (cheddar or mozzarella)
- Fresh cilantro or parsley for garnish (optional)
Cooking Instructions:
- Preheat and Prepare Peppers: Preheat your oven to 375°F (190°C). Cut the tops off the bell peppers and remove the seeds and membranes inside. Lightly brush the outside of the peppers with olive oil and place them in a baking dish.
- Cook the Filling: In a large skillet, heat the olive oil over medium heat. Add the diced onion and minced garlic, sautéing until the onion is translucent. Stir in the cumin, smoked paprika, and oregano, cooking for another minute until fragrant.
- Combine Ingredients: Add the black beans, corn, and diced tomatoes to the skillet. Stir to combine and let it cook for about 5 minutes. Mix in the cooked rice, salt, and pepper, ensuring everything is well combined and heated through.
- Stuff the Peppers: Spoon the rice mixture into each prepared bell pepper, packing it down gently. Top each stuffed pepper with shredded cheese.
- Bake the Peppers: Cover the baking dish with aluminum foil and bake in the preheated oven for 25 minutes. Remove the foil and bake for an additional 10 minutes, or until the cheese is bubbly and golden.
- Serve and Garnish: Once baked, remove the peppers from the oven and let them cool slightly. Garnish with fresh cilantro or parsley before serving.
Extra Tips:
For best results, choose bell peppers that can stand upright on their own to prevent the filling from spilling out. If you’re short on time, use pre-cooked rice or microwaveable rice packets.
Feel free to customize the filling by adding other vegetables like zucchini or mushrooms. For a spicy kick, consider adding chopped jalapeños or a sprinkle of red pepper flakes. If you prefer a vegan version, simply omit the cheese or use a plant-based cheese alternative.
Barbecue Pulled Pork Sliders

Barbecue Pulled Pork Sliders are a delicious and satisfying dish that brings a touch of smoky, tangy barbecue flavor to your family dinner table. Perfect for gatherings or a casual weeknight meal, these sliders are sure to impress with their tender, juicy pork and delectable sauce.
The combination of slow-cooked pork shoulder, rich barbecue sauce, and soft slider buns creates a mouthwatering experience that both adults and kids will love.
Cooking these sliders involves slow-cooking the pork until it’s fall-apart tender, then shredding it and mixing with your favorite barbecue sauce. The pulled pork is then piled high on soft slider buns and topped with crunchy coleslaw for added texture and flavor. This recipe is designed to serve 4-6 people, making it ideal for a family meal or a small gathering.
Ingredients:
- 3 pounds pork shoulder (also known as pork butt)
- 1 tablespoon olive oil
- 1 cup barbecue sauce
- 1 tablespoon brown sugar
- 1 teaspoon paprika
- 1 teaspoon garlic powder
- 1 teaspoon onion powder
- 1/2 teaspoon salt
- 1/2 teaspoon black pepper
- 1/4 teaspoon cayenne pepper (optional for heat)
- 12 slider buns
- 2 cups coleslaw mix
- 1/2 cup mayonnaise
- 1 tablespoon apple cider vinegar
- 1 teaspoon sugar
Cooking Instructions:
- Prepare the Pork: Start by rubbing the pork shoulder with olive oil. In a small bowl, mix together brown sugar, paprika, garlic powder, onion powder, salt, black pepper, and cayenne pepper. Rub this spice mixture all over the pork shoulder, ensuring even coverage.
- Slow Cook the Pork: Place the seasoned pork shoulder in a slow cooker. Add 1/2 cup of barbecue sauce to the slow cooker. Cover and cook on low for 8-10 hours, or on high for 4-5 hours, until the pork is tender and easily pulls apart with a fork.
- Prepare the Coleslaw: While the pork is cooking, make the coleslaw. In a large bowl, combine the coleslaw mix, mayonnaise, apple cider vinegar, and sugar. Mix well and refrigerate until ready to serve.
- Shred the Pork: Once the pork is cooked, transfer it to a large bowl and use two forks to shred the meat. Discard any large pieces of fat. Mix in the remaining 1/2 cup of barbecue sauce with the shredded pork.
- Assemble the Sliders: Slice the slider buns in half. Place a generous portion of pulled pork on the bottom half of each bun. Top with a spoonful of coleslaw, then place the other half of the bun on top.
- Serve: Serve the sliders immediately while warm. Enjoy with your favorite side dishes or as part of a buffet spread.
Extra Tips:
When making Barbecue Pulled Pork Sliders, it’s important to choose a good-quality pork shoulder as it impacts the flavor and tenderness of the final dish.
If you prefer a smokier flavor, consider adding a few drops of liquid smoke to the slow cooker. For a bit of extra crunch, you can toast the slider buns before assembling.
Also, feel free to experiment with different barbecue sauces to find the perfect balance of sweetness and tanginess for your taste.
Chicken Alfredo Casserole

Chicken Alfredo Casserole is a delightful and creamy dish perfect for a family dinner. This comforting meal combines tender chicken, al dente pasta, and a rich, cheesy Alfredo sauce, all baked to golden perfection. It’s a satisfying dish that brings the warmth of homemade cooking to your table, making it an ideal choice for both weeknight dinners and special occasions.
With its creamy texture and savory flavors, this casserole is sure to become a family favorite. This recipe serves 4-6 people, making it perfect for a small gathering or a hearty family meal. It’s a versatile dish that can be easily modified to include your favorite vegetables or additional seasonings. The combination of simple ingredients results in a luxurious and delicious meal that everyone will enjoy.
Follow the steps below to create this delicious Chicken Alfredo Casserole.
Ingredients:
- 2 cups cooked chicken, shredded or diced
- 8 ounces fettuccine pasta
- 2 cups Alfredo sauce
- 1 cup mozzarella cheese, shredded
- 1/2 cup Parmesan cheese, grated
- 1 cup broccoli florets (optional)
- 1 tablespoon olive oil
- Salt and pepper to taste
- 1 teaspoon garlic powder
- 1 teaspoon Italian seasoning
- 1/4 cup fresh parsley, chopped (optional, for garnish)
Instructions:
- Preheat the Oven: Preheat your oven to 350°F (175°C). This guarantees the casserole will be cooked evenly.
- Cook the Pasta: Boil a pot of water with a pinch of salt. Add the fettuccine pasta and cook according to package instructions until al dente. Drain and set aside.
- Prepare the Sauce: In a large saucepan over medium heat, add the olive oil. Once hot, add the cooked chicken pieces. Season with garlic powder, Italian seasoning, salt, and pepper. Stir for a minute until the chicken is well coated.
- Mix with Alfredo Sauce: Add the Alfredo sauce to the saucepan with the chicken. Stir to combine until the chicken is thoroughly coated with the sauce. If you’re including broccoli, add it to the mixture now.
- Combine Ingredients: In a large mixing bowl, combine the cooked pasta, chicken and Alfredo sauce mixture, and half of the mozzarella and Parmesan cheeses. Stir until well combined.
- Transfer to Baking Dish: Pour the mixture into a greased 9×13 inch baking dish. Spread it evenly. Sprinkle the remaining mozzarella and Parmesan cheeses over the top.
- Bake the Casserole: Place the dish in the preheated oven and bake for 25-30 minutes, or until the cheese on top is bubbly and golden brown.
- Garnish and Serve: Remove the casserole from the oven and let it cool for a few minutes. Garnish with fresh parsley if desired, and serve warm.
Extra Tips:
For an extra burst of flavor, consider adding a pinch of red pepper flakes to the sauce for a subtle kick. If you prefer a crispier top layer, you can broil the casserole for an additional 2-3 minutes after baking.
To make this dish a bit healthier, use whole wheat pasta and a light Alfredo sauce. Finally, this casserole can be prepared ahead of time and stored in the refrigerator for up to 24 hours before baking, making it a convenient option for busy days.
Grilled Salmon With Avocado Salsa
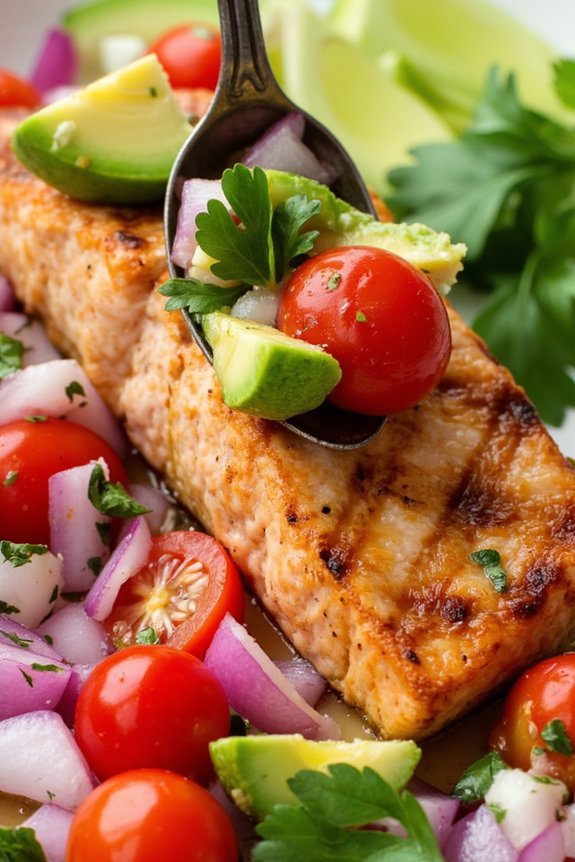
Grilled Salmon with Avocado Salsa is a delightful and nutritious dish perfect for family dinners. It’s a beautiful combination of juicy, flavorful salmon and invigorating avocado salsa, making it both satisfying and healthy. The dish isn’t only rich in omega-3 fatty acids but also packed with vitamins and minerals, thanks to the vibrant salsa. This recipe is ideal for those evenings when you want something delicious yet quick to prepare.
The avocado salsa adds a zesty and creamy contrast to the smoky grilled salmon, making it an exciting meal for everyone’s taste buds. With just a few fresh ingredients and simple preparation steps, you can create this restaurant-quality dish right in your own kitchen. Perfect for serving 4-6 people, this recipe will quickly become a favorite at your family table.
Ingredients for Grilled Salmon with Avocado Salsa (Serves 4-6):
- 4-6 salmon fillets (about 6 ounces each)
- 2 tablespoons olive oil
- Salt and pepper to taste
- 2 ripe avocados, diced
- 1 small red onion, finely chopped
- 1 cup cherry tomatoes, quartered
- 1 jalapeño, finely chopped (optional, for heat)
- 1/4 cup fresh cilantro, chopped
- Juice of 2 limes
- 1 tablespoon olive oil (for salsa)
Cooking Instructions:
- Prepare the Salmon: Begin by preheating your grill to medium-high heat. Pat the salmon fillets dry with paper towels and brush them lightly with olive oil. Season both sides with salt and pepper.
- Grill the Salmon: Place the salmon fillets on the hot grill, skin-side down if the skin is on. Grill for about 4-5 minutes per side or until the salmon is cooked to your desired level of doneness and has grill marks. Remove from the grill and let it rest.
- Make the Avocado Salsa: While the salmon is grilling, prepare the avocado salsa. In a medium bowl, combine the diced avocados, chopped red onion, quartered cherry tomatoes, jalapeño (if using), and chopped cilantro. Drizzle with lime juice and olive oil, then gently toss to combine. Season with salt and pepper to taste.
- Serve: Arrange the grilled salmon fillets on a serving platter or individual plates. Spoon a generous amount of avocado salsa over each fillet. Garnish with extra cilantro leaves if desired. Serve immediately while the salmon is warm and the salsa is invigorating.
Extra Tips:
Choosing the freshest ingredients is key to making this dish shine. Make sure the avocados are ripe but firm to hold their shape in the salsa. If you prefer a bit of heat, keep the seeds in the jalapeño, or remove them for a milder flavor.
When grilling salmon, avoid overcooking to ensure it remains moist and tender. Consider using a grill mat or basket to prevent the salmon from sticking to the grill grates. Enjoy this dish with a side of rice, quinoa, or a fresh green salad to complete the meal.
Spinach and Ricotta Lasagna

Spinach and Ricotta Lasagna is a delightful and hearty dish that perfectly combines the rich, savory flavors of ricotta cheese with the freshness of spinach. This classic Italian-inspired recipe is perfect for family dinners or gatherings, offering layers of creamy cheese, tender pasta, and a flavorful tomato sauce that satisfies and impresses.
The beauty of this dish lies in its balanced combination of ingredients, making it a wholesome meal that can be enjoyed by vegetarians and meat-lovers alike.
Preparing Spinach and Ricotta Lasagna is a rewarding experience that results in a dish that’s as pleasing to the eyes as it’s to the palate. The process involves layering sheets of lasagna with a luscious spinach and ricotta mixture, then topping it all with a homemade tomato sauce and melted mozzarella.
The dish bakes to golden perfection, resulting in a bubbling, cheesy masterpiece that everyone at the table will love. Ideal for a serving size of 4-6 people, this lasagna is sure to become a family favorite.
Ingredients (for 4-6 servings):
- 9 lasagna sheets
- 2 tablespoons olive oil
- 1 onion, finely chopped
- 2 cloves garlic, minced
- 400g fresh spinach, washed and chopped
- 500g ricotta cheese
- 1 egg
- 1/4 teaspoon nutmeg
- Salt and pepper to taste
- 800g canned crushed tomatoes
- 1 tablespoon dried oregano
- 1 tablespoon dried basil
- 200g mozzarella cheese, shredded
- 50g Parmesan cheese, grated
Cooking Instructions:
- Preheat and Prepare: Preheat your oven to 180°C (350°F). Grease a large baking dish with a bit of olive oil to prevent sticking.
- Cook the Spinach: In a large skillet, heat olive oil over medium heat. Add the chopped onion and garlic, sautéing until the onion is translucent. Add the fresh spinach and cook until wilted. Remove from heat and let it cool slightly.
- Make Ricotta Mixture: In a large bowl, combine the ricotta cheese, egg, nutmeg, salt, and pepper. Stir in the cooked spinach mixture until well combined.
- Prepare the Tomato Sauce: In a separate saucepan, pour in the canned crushed tomatoes. Add oregano, basil, salt, and pepper. Bring to a simmer and let it cook for about 15 minutes to thicken slightly.
- Assemble the Lasagna: Spread a thin layer of tomato sauce on the bottom of the baking dish. Lay down three sheets of lasagna. Spread half the ricotta-spinach mixture over the pasta. Top with a layer of tomato sauce. Repeat the layers, finishing with a layer of lasagna sheets topped with the remaining tomato sauce.
- Add Cheese: Sprinkle the shredded mozzarella and grated Parmesan evenly over the top layer.
- Bake: Cover the dish with aluminum foil and bake for 25 minutes. Remove the foil and bake for an additional 15 minutes, or until the cheese is bubbly and golden brown.
- Rest and Serve: Allow the lasagna to rest for about 10 minutes before slicing. This helps the layers set and makes serving easier.
Extra Tips:
For a more robust flavor, consider adding a pinch of red pepper flakes to the tomato sauce for a hint of heat. If you prefer a creamier texture, you can substitute part of the ricotta with mascarpone cheese.
When cooking spinach, make sure to drain excess liquid to prevent the lasagna from becoming watery. For a gluten-free version, use gluten-free lasagna noodles.
Finally, letting the lasagna rest before cutting allows the layers to firm up, ensuring neat slices and a beautifully presented dish.
Beef and Broccoli Stir-Fry
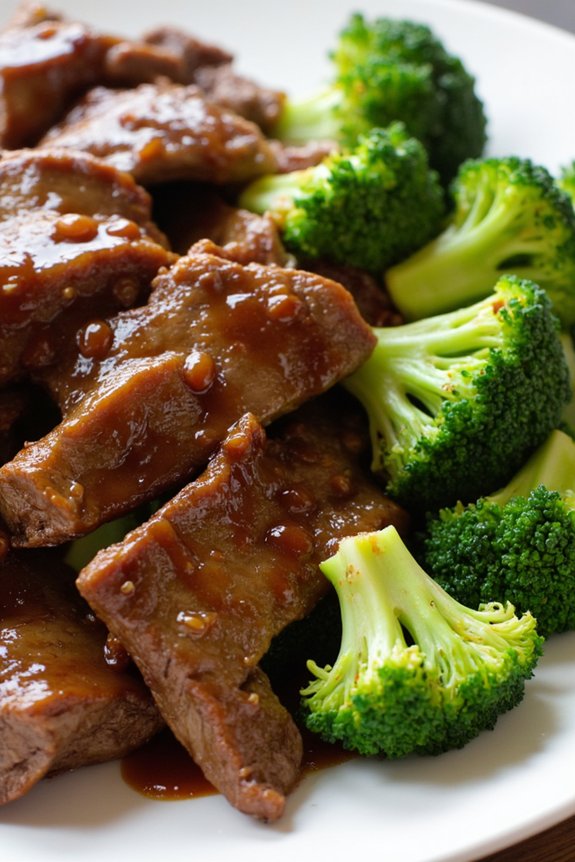
Beef and Broccoli Stir-Fry is a delicious and nutritious dish that’s perfect for a family dinner. This classic Asian-inspired meal combines tender slices of beef with crisp broccoli, all tossed in a savory sauce that’s packed with flavor.
It’s a quick and easy recipe that can be prepared in under 30 minutes, making it an ideal choice for busy weeknights. The balance of protein and vegetables guarantees a wholesome meal that’s both satisfying and healthy.
This recipe serves 4-6 people, making it perfect for a family gathering or for leftovers to enjoy the next day. The ingredients are simple and can be easily found at any grocery store.
The key to this dish is in the preparation and cooking technique, assuring that the beef remains tender and the broccoli retains its vibrant color and crunch. With a few straightforward steps, you can bring this delicious dish to your dinner table.
Ingredients:
- 1 1/2 pounds of flank steak, thinly sliced against the grain
- 1 pound of broccoli florets
- 3 tablespoons of vegetable oil, divided
- 4 cloves of garlic, minced
- 1 teaspoon of fresh ginger, grated
- 1/4 cup soy sauce
- 2 tablespoons oyster sauce
- 2 tablespoons cornstarch
- 1 tablespoon brown sugar
- 1/2 cup beef broth
- 1 tablespoon sesame oil
- 1/2 teaspoon black pepper
- Cooked white rice, for serving
Cooking Instructions:
- Prepare the Beef: In a medium bowl, combine the sliced flank steak with 1 tablespoon of cornstarch and 1 tablespoon of soy sauce. Mix well until the beef is evenly coated. Let it marinate for at least 10 minutes to tenderize the meat.
- Make the Sauce: In a separate bowl, whisk together the remaining soy sauce, oyster sauce, beef broth, brown sugar, sesame oil, 1 tablespoon of cornstarch, and black pepper. Set aside.
- Cook the Broccoli: Heat 1 tablespoon of vegetable oil in a large skillet or wok over medium-high heat. Add the broccoli florets and stir-fry for about 3-4 minutes until they’re bright green and tender-crisp. Remove the broccoli from the skillet and set aside.
- Stir-Fry the Beef: In the same skillet, add the remaining vegetable oil. When hot, add the minced garlic and grated ginger, stirring quickly to avoid burning. Add the marinated beef in a single layer and sear for 1-2 minutes on each side until browned. Avoid overcrowding the pan; you may need to do this in batches.
- Combine and Cook: Once the beef is browned, return the broccoli to the skillet. Pour the prepared sauce over the beef and broccoli. Stir to combine all the ingredients and cook for another 2-3 minutes until the sauce has thickened and everything is well-coated.
- Serve: Remove from heat and serve immediately over cooked white rice.
Extra Tips: For the best results, make sure that all ingredients are prepped and ready before you start cooking, as stir-frying is a quick process.
Use flank steak or a similar cut of beef that’s tender and ideal for quick cooking. Slicing the beef against the grain will help maintain tenderness. Adjust the seasoning and sauce to your taste, and feel free to add extra vegetables like bell peppers or snap peas for more variety.
To keep the broccoli vibrant and full of nutrients, don’t overcook it.
Baked Teriyaki Chicken Thighs
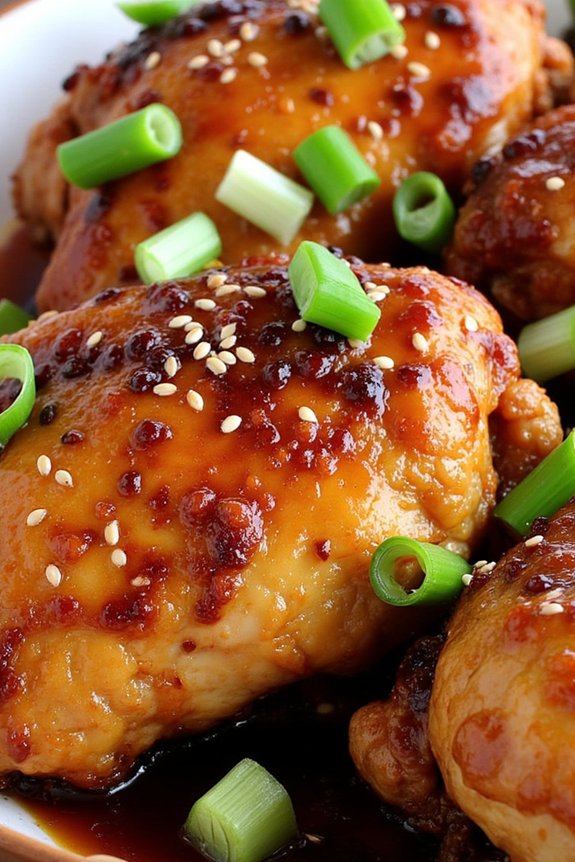
Baked Teriyaki Chicken Thighs are a delicious and easy-to-make dish that brings a taste of Asian cuisine to your family dinner table. This recipe combines tender, juicy chicken thighs with a sweet and savory homemade teriyaki sauce that’s both satisfying and flavorful.
Perfect for busy weeknights, these Baked Teriyaki Chicken Thighs are bound to become a family favorite. The balance of flavors, combined with the ease of preparation, makes this dish a go-to for any occasion.
This recipe serves 4-6 people, making it ideal for family dinners or small gatherings. The key to a successful Baked Teriyaki Chicken Thighs dish lies in the quality of the ingredients and the method of cooking. By marinating the chicken in the teriyaki sauce and then baking it to perfection, you guarantee that every bite is infused with rich flavors.
Serve it with steamed rice and a side of vegetables for a complete meal that everyone will love.
Ingredients:
- 8 bone-in, skin-on chicken thighs
- 1 cup soy sauce
- 1/2 cup brown sugar
- 1/4 cup honey
- 2 tablespoons rice vinegar
- 2 tablespoons sesame oil
- 2 cloves garlic, minced
- 1 tablespoon fresh ginger, grated
- 1 tablespoon cornstarch
- 2 tablespoons water
- Sesame seeds (for garnish)
- Chopped green onions (for garnish)
Cooking Instructions:
- Prepare the Marinade: In a medium bowl, combine soy sauce, brown sugar, honey, rice vinegar, sesame oil, minced garlic, and grated ginger. Mix well until the sugar is dissolved and all ingredients are fully incorporated.
- Marinate the Chicken: Place the chicken thighs in a large resealable plastic bag or a shallow dish. Pour the marinade over the chicken, ensuring each piece is well coated. Seal the bag or cover the dish with plastic wrap, and refrigerate for at least 1 hour, preferably overnight for maximum flavor absorption.
- Preheat the Oven: Preheat your oven to 400°F (200°C). Line a baking sheet with aluminum foil or parchment paper for easy cleanup.
- Bake the Chicken: Remove the chicken thighs from the marinade and place them skin-side up on the prepared baking sheet. Reserve the marinade. Bake in the preheated oven for 35-40 minutes, or until the chicken is fully cooked and the skin is crispy and golden brown.
- Make the Teriyaki Glaze: While the chicken is baking, pour the reserved marinade into a small saucepan. Bring it to a simmer over medium heat. In a small bowl, mix the cornstarch with water to create a slurry. Gradually whisk the slurry into the simmering marinade. Continue to cook until the sauce thickens to a glaze-like consistency.
- Glaze the Chicken: Once the chicken is fully cooked, remove it from the oven. Brush the thickened teriyaki glaze over each piece of chicken, ensuring an even coating. Return the chicken to the oven for an additional 5 minutes to allow the glaze to set.
- Garnish and Serve: Remove the chicken from the oven and let it rest for a few minutes before serving. Garnish with sesame seeds and chopped green onions for added flavor and presentation. Serve hot with steamed rice and vegetables.
Extra Tips:
For the best results, use bone-in, skin-on chicken thighs as they provide more flavor and moisture than boneless, skinless options. If you prefer a less sweet glaze, adjust the sugar and honey quantities to your taste.
Additionally, keeping some extra marinade aside before combining with raw chicken can serve as a dipping sauce after cooking. Always make certain the chicken is cooked to an internal temperature of 165°F (74°C) for safe consumption.
Homemade Margherita Pizza

Homemade Margherita Pizza is a classic Italian dish that brings simplicity and flavor to your family dinner table. This pizza is a delightful combination of fresh ingredients that highlight the vibrant flavors of tomatoes, mozzarella, and basil. Perfect for a family gathering, this recipe provides an opportunity to enjoy a homemade meal that’s both delicious and visually appealing.
With its thin crust and fresh toppings, this pizza is sure to become a favorite for both kids and adults. The beauty of a Margherita Pizza lies in its simplicity and the quality of its ingredients. Originating from Naples, this pizza pays homage to the colors of the Italian flag with its red tomatoes, white mozzarella, and green basil leaves.
Preparing this dish at home not only allows you to control the quality of the ingredients but also provides a fun cooking activity for the whole family. Whether you have a pizza stone or a simple baking sheet, this recipe guarantees a crispy crust and flavorful topping, making it an ideal choice for a family dinner.
Ingredients for 4-6 servings:
- 2 1/4 teaspoons active dry yeast
- 1 1/2 cups warm water (110°F – 115°F)
- 3 1/2 cups all-purpose flour
- 2 tablespoons olive oil
- 1 teaspoon salt
- 1 teaspoon sugar
- 1 1/2 cups canned crushed tomatoes
- 1 teaspoon dried oregano
- Salt and pepper to taste
- 8 ounces fresh mozzarella cheese, sliced
- Fresh basil leaves
- Olive oil for drizzling
Cooking Instructions:
- Prepare the Dough:
- In a small bowl, dissolve the active dry yeast in warm water. Let it sit for about 5 minutes until it becomes frothy.
- In a large bowl, combine the flour, salt, and sugar. Add the yeast mixture and olive oil, stirring until a dough begins to form.
- Knead the dough on a floured surface for about 6-8 minutes until it becomes smooth and elastic.
- Place the dough in a lightly oiled bowl, cover it with a damp cloth, and let it rise in a warm place for about 1-2 hours, or until it doubles in size.
- Prepare the Sauce:
- In a bowl, mix the crushed tomatoes with dried oregano, salt, and pepper. Adjust the seasoning to taste and set aside.
- Preheat the Oven:
- Preheat your oven to 475°F (245°C). If you have a pizza stone, place it in the oven to heat up as well.
- Assemble the Pizza:
- Once the dough has risen, punch it down and divide it into two equal parts for two pizzas.
- Roll out each dough portion on a floured surface to your desired thickness.
- Transfer the rolled-out dough onto a pizza peel or a baking sheet lined with parchment paper.
- Add Toppings:
- Spread the prepared tomato sauce evenly on the pizza dough, leaving a small border for the crust.
- Lay the fresh mozzarella slices over the sauce, ensuring even coverage.
- Bake the Pizza:
- Transfer the pizza to the preheated oven. If using a pizza stone, use a pizza peel to slide the pizza onto the stone.
- Bake for 10-12 minutes, or until the crust is golden brown and the cheese is bubbly and slightly browned.
- Finish and Serve:
- Remove the pizza from the oven and immediately top with fresh basil leaves.
- Drizzle a little olive oil over the top, slice, and serve hot.
Extra Tips:
For the perfect dough, confirm your water is at the correct temperature to activate the yeast; too hot, and it may kill the yeast, too cold, and it won’t activate properly.
If you have the time, allow the dough to rise slowly in the refrigerator overnight to develop more flavor. Fresh mozzarella is recommended for its creamy texture, but if unavailable, a good quality block mozzarella will suffice.
Finally, always add the basil after baking to keep its flavor and color vibrant.