

Family dinners are a treasured time, and making them enjoyable and hassle-free is always a win.
Trader Joe’s has a knack for offering products that elevate our favorite dishes in the simplest ways.
From creamy tomato basil pasta to savory BBQ pulled pork tacos, these recipes are sure to please.
Ready to transform your weeknight dinners with ease?
Let’s explore these delightful dishes together!
Creamy Tomato Basil Pasta With Burrata
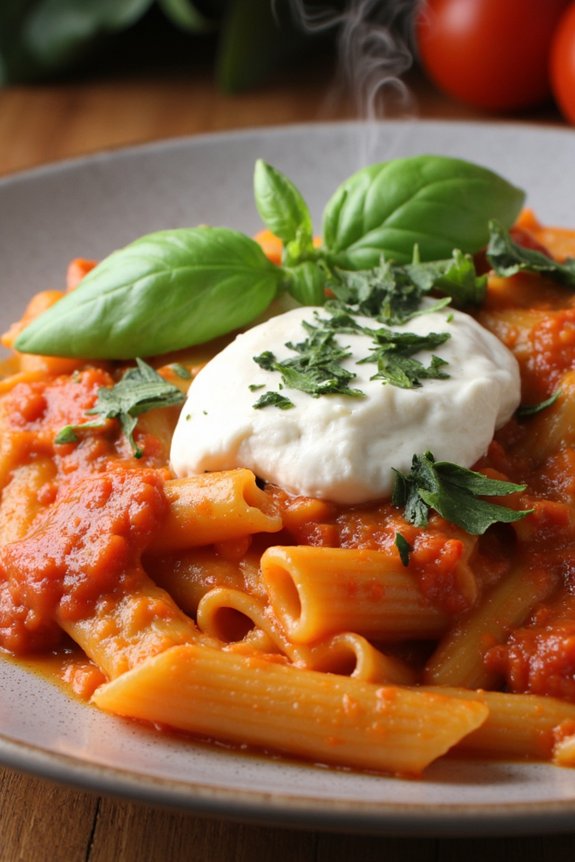
Creamy Tomato Basil Pasta With Burrata is a delightful dish that combines the rich flavors of creamy tomato sauce, fresh basil, and the luxurious texture of burrata cheese. Perfect for a family dinner, this pasta dish is both comforting and sophisticated, making it a great choice for any occasion.
The creamy sauce clings to each piece of pasta, while the burrata adds a creamy center that melts beautifully into the sauce, creating a harmonious blend of flavors. This recipe is designed to serve 4-6 people, guaranteeing everyone at the table gets a generous helping.
The combination of tomatoes and basil is a classic one that never fails to impress, and when paired with the creamy burrata, it creates a dish that’s both satisfying and flavorful. The pasta serves as the perfect vehicle to carry these flavors, making each bite a delicious experience.
Whether you’re hosting a dinner party or simply looking for a comforting meal to enjoy with your family, this Creamy Tomato Basil Pasta With Burrata is sure to be a hit.
Ingredients (Serves 4-6):
- 1 pound (450g) of pasta (such as penne or fusilli)
- 2 tablespoons olive oil
- 1 medium onion, finely chopped
- 3 cloves garlic, minced
- 1 (28-ounce) can of crushed tomatoes
- 1 cup heavy cream
- Salt and pepper to taste
- 1 teaspoon sugar
- 1/2 cup fresh basil leaves, chopped
- 8 ounces (225g) burrata cheese
- Grated Parmesan cheese, for serving
Instructions:
- Cook the Pasta: In a large pot, bring salted water to a boil. Add the pasta and cook according to package instructions until al dente. Drain and set aside.
- Prepare the Sauce Base: In a large skillet, heat the olive oil over medium heat. Add the chopped onion and cook until translucent, about 5-7 minutes. Stir in the minced garlic and cook for an additional 1-2 minutes until fragrant.
- Add the Tomatoes: Pour the crushed tomatoes into the skillet with the onions and garlic. Stir in the sugar, salt, and pepper. Let the sauce simmer for about 10 minutes, allowing the flavors to meld together.
- Incorporate the Cream: Reduce the heat to low and slowly stir in the heavy cream. Continue to simmer the sauce for another 5 minutes, stirring occasionally, until the sauce thickens slightly.
- Combine with Pasta: Add the cooked pasta to the skillet, tossing it gently in the sauce to make sure each piece is well coated. Add the chopped basil and combine.
- Add Burrata: Tear the burrata into smaller pieces and gently place them on top of the pasta. Allow it to sit for a minute, letting the heat from the pasta soften the burrata.
- Serve: Serve the pasta hot, with grated Parmesan cheese on the side for sprinkling.
Extra Tips:
When preparing this dish, it’s important to not overcook the pasta as it will continue to cook slightly when mixed with the hot sauce.
For an extra burst of flavor, you can add a splash of balsamic vinegar to the tomato sauce before adding the cream. Additionally, using fresh basil is key to achieving the best flavor; if fresh isn’t available, you can use dried basil, but the flavor will be slightly different.
Finally, for the best results with the burrata, make sure it’s at room temperature before adding it to the pasta, as this will help it melt more easily into the dish.
Sweet Potato Gnocchi With Sage Brown Butter
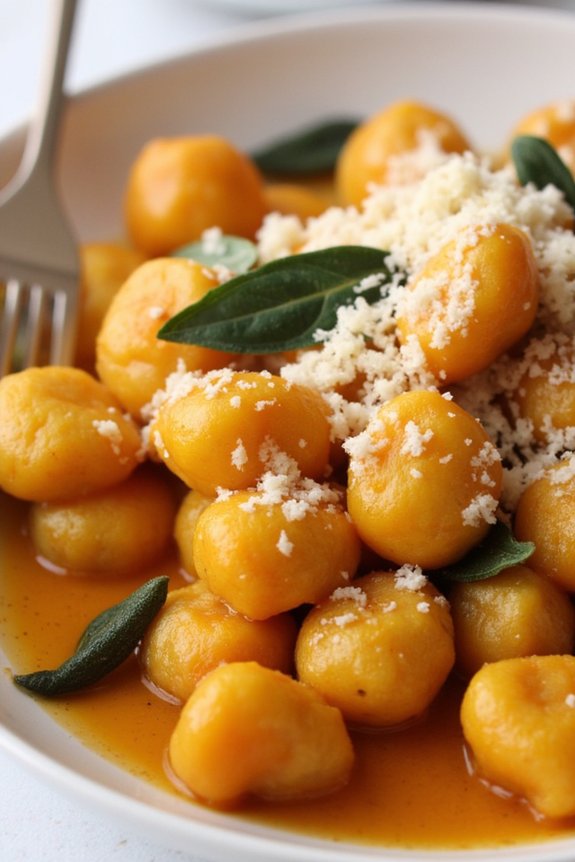
Sweet Potato Gnocchi With Sage Brown Butter is a delightful and comforting dish that brings together the earthy sweetness of sweet potatoes with the nutty richness of browned butter and the aromatic fragrance of fresh sage. This dish is perfect for a family dinner, providing a warm and satisfying meal that’s both elegant and rustic. The tender, pillowy gnocchi coated in a luscious sage-infused brown butter sauce is sure to impress family and friends alike.
The process of making sweet potato gnocchi from scratch can be a rewarding experience. It involves creating dough from roasted sweet potatoes, forming it into small dumplings, and then gently cooking them until they float to perfection. The final touch of browning butter with fresh sage leaves elevates the flavors, creating a sauce that’s both simple and luxurious. This recipe serves 4-6 people, making it ideal for family gatherings or cozy dinner parties.
Ingredients:
- 2 large sweet potatoes (about 2 pounds)
- 1 cup ricotta cheese
- 1 1/2 cups all-purpose flour, plus extra for dusting
- 1/2 cup grated Parmesan cheese
- 1 large egg, lightly beaten
- 1 teaspoon salt
- 1/2 teaspoon nutmeg
- 8 tablespoons (1 stick) unsalted butter
- 12 fresh sage leaves
- Salt and pepper to taste
- Grated Parmesan cheese, for serving
Instructions:
- Roast the Sweet Potatoes: Preheat your oven to 400°F (200°C). Pierce the sweet potatoes several times with a fork, place them on a baking sheet, and roast for about 45 minutes to 1 hour, or until they’re very tender when pierced with a knife. Allow them to cool slightly.
- Prepare the Gnocchi Dough: Once the sweet potatoes are cool enough to handle, peel them and mash the flesh in a large bowl until smooth. Add the ricotta, Parmesan cheese, egg, salt, and nutmeg, and mix until well combined. Gradually add the flour, mixing until a soft dough forms. Be careful not to overwork the dough, as this can make the gnocchi tough.
- Shape the Gnocchi: Lightly flour a clean work surface and divide the dough into four portions. Roll each portion into a long rope, about 1/2 inch in diameter. Cut each rope into 1-inch pieces to form the gnocchi. You can gently roll each piece over the back of a fork to create ridges, though this step is optional.
- Cook the Gnocchi: Bring a large pot of salted water to a boil. Add the gnocchi in batches, being careful not to overcrowd the pot. Cook the gnocchi until they float to the surface, about 2-3 minutes. Use a slotted spoon to remove them from the water and transfer to a plate.
- Make the Sage Brown Butter Sauce: In a large skillet, melt the butter over medium heat. Add the sage leaves and cook until the butter starts to brown and the sage becomes crispy, about 3-4 minutes. Be careful not to burn the butter. Add the cooked gnocchi to the skillet and gently toss to coat them in the browned butter.
- Serve: Transfer the gnocchi to serving plates, spooning any remaining sage brown butter over the top. Season with additional salt and pepper to taste, and garnish with grated Parmesan cheese.
Extra Tips:
When making gnocchi, it’s essential to have a light touch with the dough. Over-kneading or adding too much flour can result in dense and heavy gnocchi. The dough should be soft and slightly sticky; add just enough flour to make it manageable.
If you find the dough too sticky to work with, lightly dust your hands and work surface with flour. Additionally, confirm the sweet potatoes are completely cool before mixing them with the other ingredients, as residual heat can cause the dough to become too moist.
Finally, serve the gnocchi immediately after cooking to enjoy their tender, fluffy texture.
Chicken Shawarma Bowls With Garlic Sauce

Chicken Shawarma Bowls With Garlic Sauce are a delightful and flavorful addition to any family dinner menu. This Middle Eastern-inspired dish combines juicy, marinated chicken with a vibrant array of fresh vegetables, all served over a bed of fluffy rice or your choice of grains. The star of the dish is the creamy garlic sauce, which ties all the elements together with its rich and zesty flavor. Perfect for gatherings or a simple weeknight dinner, these bowls offer a balanced meal that’s both satisfying and nutritious.
The preparation of Chicken Shawarma Bowls is straightforward, making it an excellent option for home cooks of all skill levels. The chicken is marinated in a blend of spices and yogurt to ascertain it’s tender and flavorful. As the chicken cooks, you can prepare the garlic sauce and chop the vegetables, so everything is ready to assemble once the chicken is done. This recipe serves 4-6 people, making it ideal for families or small gatherings.
Ingredients:
- 1 1/2 pounds boneless, skinless chicken thighs
- 1 cup plain Greek yogurt
- 3 tablespoons olive oil
- 2 tablespoons lemon juice
- 4 cloves garlic, minced
- 2 teaspoons ground cumin
- 2 teaspoons ground paprika
- 1 teaspoon ground turmeric
- 1 teaspoon ground coriander
- 1 teaspoon salt
- 1/2 teaspoon black pepper
- 1/4 teaspoon cayenne pepper
- 2 cups cooked rice or quinoa
- 1 cucumber, diced
- 1 cup cherry tomatoes, halved
- 1/2 red onion, thinly sliced
- 1/4 cup chopped fresh parsley
- 1/4 cup tahini
- 2 tablespoons lemon juice (for sauce)
- 2 tablespoons water
- 3-4 cloves roasted garlic
- Salt and pepper to taste
Cooking Instructions:
- Marinate the Chicken: In a large bowl, combine Greek yogurt, olive oil, lemon juice, minced garlic, cumin, paprika, turmeric, coriander, salt, black pepper, and cayenne pepper. Mix well to form a marinade. Add the chicken thighs to the bowl, ensuring they’re fully coated in the marinade. Cover the bowl with plastic wrap and refrigerate for at least 1 hour, or overnight for best results.
- Prepare the Garlic Sauce: In a small bowl, whisk together tahini, lemon juice, water, and roasted garlic until smooth and creamy. Season with salt and pepper to taste. Adjust the consistency with more water if needed. Set aside.
- Cook the Chicken: Preheat your grill or skillet over medium-high heat. Remove the chicken from the marinade, shaking off any excess. Grill the chicken for about 5-7 minutes on each side, or until fully cooked and the internal temperature reaches 165°F (74°C). Remove from heat and let it rest for a few minutes before slicing.
- Assemble the Bowls: Divide the cooked rice or quinoa among serving bowls. Top each with sliced chicken, diced cucumber, cherry tomatoes, sliced red onion, and chopped parsley. Drizzle the garlic sauce generously over each bowl.
- Serve and Enjoy: Serve the Chicken Shawarma Bowls warm, allowing everyone to mix the ingredients as they please and enjoy the burst of flavors.
Extra Tips:
For an even more authentic flavor, consider adding a pinch of ground cinnamon or allspice to the marinade. If you prefer a spicier dish, increase the amount of cayenne pepper, or add a dash of hot sauce to the garlic sauce. For a smoky flavor, cook the chicken on an outdoor grill.
The garlic sauce can be made a day in advance and stored in the refrigerator, allowing the flavors to meld beautifully. Feel free to add other toppings such as pickled vegetables or feta cheese for additional taste and texture.
Mandarin Orange Chicken Stir-Fry
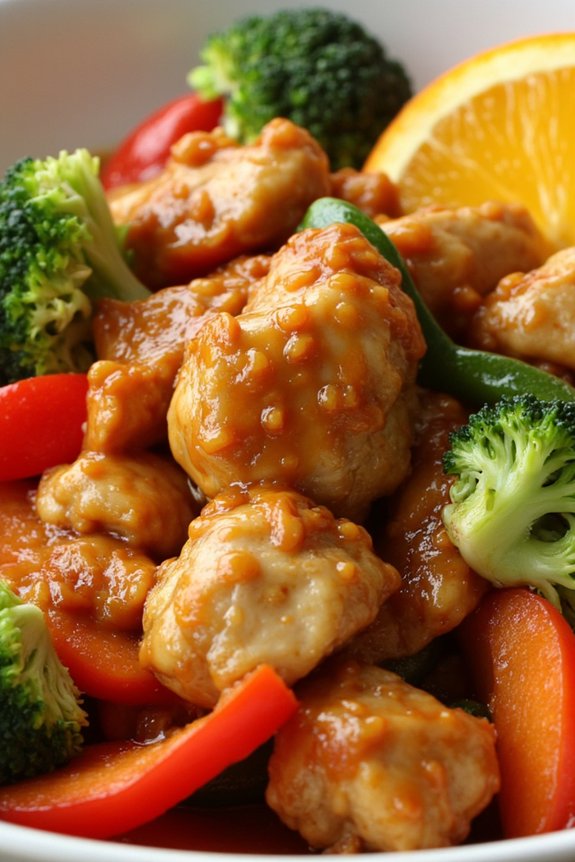
Mandarin Orange Chicken Stir-Fry is a delightful and vibrant dish that brings together the zesty sweetness of mandarin oranges with the savory goodness of chicken and vegetables. This recipe is perfect for a family dinner as it isn’t only quick to prepare but also pleases the palate with its invigorating flavors. The combination of fresh ingredients and simple cooking techniques makes it an ideal choice for a weekday meal that feels special.
In this dish, tender chunks of chicken are stir-fried with crisp bell peppers, broccoli, and carrots, all coated in a tangy mandarin orange sauce. The sauce, made from fresh mandarin orange juice, soy sauce, and a hint of ginger, infuses the stir-fry with a delightful citrus aroma. This recipe serves 4-6 people, making it a great option for a family gathering or a small dinner party.
Ingredients:
- 1.5 pounds boneless, skinless chicken breast, cut into bite-sized pieces
- 3 tablespoons vegetable oil, divided
- 1 cup fresh mandarin orange juice
- 2 tablespoons soy sauce
- 1 tablespoon honey
- 1 teaspoon freshly grated ginger
- 4 cloves garlic, minced
- 1 red bell pepper, sliced
- 1 cup broccoli florets
- 1 cup sliced carrots
- 1 tablespoon cornstarch
- 2 tablespoons water
- Salt and pepper to taste
- 2 mandarin oranges, peeled and segmented
- Cooked rice or noodles, for serving
Cooking Instructions:
- Prepare the Chicken: Season the chicken pieces with salt and pepper. Heat 1 tablespoon of vegetable oil in a large pan or wok over medium-high heat. Add the chicken in batches to avoid overcrowding and cook until golden brown and cooked through, about 5-6 minutes. Remove the chicken from the pan and set aside.
- Make the Sauce: In a small bowl, whisk together the mandarin orange juice, soy sauce, honey, and grated ginger. Set this sauce mixture aside.
- Stir-Fry the Vegetables: In the same pan, add the remaining 2 tablespoons of vegetable oil. Add the minced garlic and stir-fry for about 30 seconds until fragrant. Add the sliced bell pepper, broccoli florets, and sliced carrots. Stir-fry the vegetables for about 4-5 minutes until they’re tender-crisp.
- Combine Chicken and Sauce: Return the cooked chicken to the pan with the vegetables. Pour the prepared sauce over the chicken and vegetables. Stir to combine all the ingredients thoroughly.
- Thicken the Sauce: In a small bowl, mix the cornstarch with the water to make a slurry. Add the slurry to the stir-fry and cook for another 2-3 minutes, stirring frequently, until the sauce has thickened and coats the chicken and vegetables.
- Add Mandarin Segments: Gently fold in the mandarin orange segments and cook for an additional 1-2 minutes to warm them through without breaking them apart.
- Serve: Serve the Mandarin Orange Chicken Stir-Fry over cooked rice or noodles, garnished with extra mandarin segments if desired.
Extra Tips:
When making Mandarin Orange Chicken Stir-Fry, it’s important to keep the ingredients prepped and ready before you start cooking, as the stir-frying process is quite quick.
Verify that your chicken pieces are of uniform size to promote even cooking. If fresh mandarin oranges are unavailable, canned mandarin segments can be used as a substitute, although fresh will yield the best flavor.
Adjust the sweetness of the sauce to your taste by varying the amount of honey used. Additionally, feel free to experiment with other vegetables like snap peas or baby corn to customize the dish to your family’s preferences.
Cauliflower Gnocchi Alfredo With Spinach
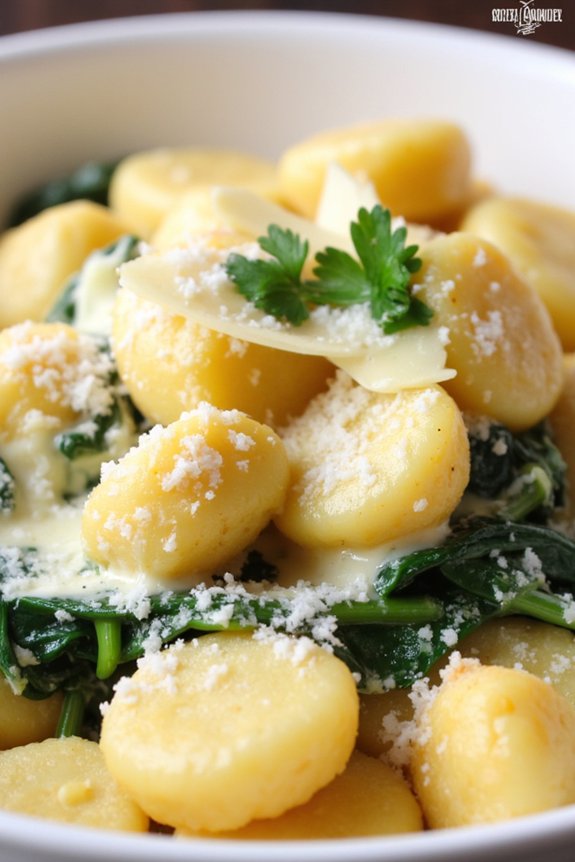
Cauliflower Gnocchi Alfredo With Spinach is a delightful twist on the classic Italian dish, offering a healthier and gluten-free option without compromising on taste. This recipe combines the creamy richness of Alfredo sauce with the nutritional benefits of cauliflower gnocchi and fresh spinach, making it a perfect family dinner that’s both satisfying and nourishing.
Whether you’re looking for a quick weeknight meal or a dish to impress your guests, this recipe is sure to become a favorite in your household.
The cauliflower gnocchi serves as a wonderful alternative to traditional potato gnocchi, absorbing the creamy Alfredo sauce beautifully while adding a subtle, earthy flavor to the dish. Paired with vibrant spinach, this meal isn’t only visually appealing but also packed with vitamins and minerals.
This recipe serves 4-6 people, making it ideal for family dinners or small gatherings. Let’s explore the ingredients and step-by-step instructions to create this delicious Cauliflower Gnocchi Alfredo With Spinach.
Ingredients
- 2 packages of cauliflower gnocchi (about 12 ounces each)
- 2 tablespoons olive oil
- 4 cloves garlic, minced
- 1 cup heavy cream
- 1 cup grated Parmesan cheese
- 2 cups fresh spinach leaves
- Salt and pepper, to taste
- 1/4 teaspoon nutmeg
- Fresh parsley, chopped (for garnish)
Cooking Instructions
- Prepare the Gnocchi: Begin by cooking the cauliflower gnocchi according to the package instructions. Typically, this involves boiling them in salted water for about 3-4 minutes until they float to the surface. Drain and set aside.
- Sauté the Garlic: In a large skillet, heat the olive oil over medium heat. Add the minced garlic and sauté for about 1 minute until fragrant, being careful not to burn it.
- Make the Alfredo Sauce: Pour the heavy cream into the skillet with the garlic, stirring to combine. Allow it to simmer gently for about 3-4 minutes until it begins to thicken slightly.
- Add Parmesan and Seasonings: Stir in the grated Parmesan cheese, salt, pepper, and nutmeg. Continue stirring until the cheese has melted and the sauce is smooth and creamy.
- Incorporate Spinach: Add the fresh spinach leaves to the sauce, stirring gently until they wilt, which should take about 2-3 minutes.
- Combine Gnocchi and Sauce: Add the cooked cauliflower gnocchi to the skillet, gently tossing them in the Alfredo sauce until well coated.
- Serve: Transfer the Cauliflower Gnocchi Alfredo With Spinach to a serving dish, garnish with freshly chopped parsley, and serve immediately.
Extra Tips
For the best results, confirm that the cauliflower gnocchi is thoroughly drained before adding it to the sauce to prevent the dish from becoming watery.
If you prefer a thicker sauce, you can reduce the cream slightly longer before adding the Parmesan. Additionally, consider adding grilled chicken or shrimp for extra protein.
Always adjust seasoning according to your taste preference, and remember that freshly grated Parmesan cheese will provide a richer flavor than pre-grated varieties.
BBQ Pulled Pork Tacos With Pineapple Salsa

BBQ Pulled Pork Tacos With Pineapple Salsa are a delightful fusion of savory and sweet flavors that are bound to elevate any family dinner. This dish combines tender, slow-cooked pulled pork with a vibrant pineapple salsa that adds a revitalizing twist to the classic taco. Perfect for serving a crowd, these tacos bring together the best of barbecue and tropical flavors, making them a hit for both adults and kids alike.
The key to these delicious tacos lies in the balance of flavors and textures. The pulled pork is seasoned with a smoky BBQ sauce, providing a rich, savory base. Meanwhile, the pineapple salsa offers a burst of brightness and sweetness, with juicy pineapple, zesty lime, and a hint of spice from jalapeños. Wrapped in soft tortillas, these tacos provide a satisfying meal that’s both hearty and invigorating. This recipe serves 4-6 people.
Ingredients:
- 3 pounds pork shoulder or pork butt
- 2 cups BBQ sauce
- 1 tablespoon smoked paprika
- 1 teaspoon garlic powder
- 1 teaspoon onion powder
- Salt and pepper to taste
- 8-12 small tortillas
- 1 cup pineapple, diced
- 1/4 cup red onion, finely chopped
- 1 jalapeño, seeded and minced
- 1/4 cup fresh cilantro, chopped
- Juice of 1 lime
- 1 avocado, sliced (optional)
Cooking Instructions:
- Prepare the Pork: Season the pork shoulder with smoked paprika, garlic powder, onion powder, salt, and pepper. Rub the spices evenly over the pork to guarantee full coverage.
- Cook the Pork: Place the seasoned pork in a slow cooker. Pour 1 cup of BBQ sauce over the pork, making sure it’s well coated. Set the slow cooker on low heat and cook for 8-10 hours, or until the pork is tender and easily shredded with a fork.
- Make the Pineapple Salsa: While the pork is cooking, prepare the pineapple salsa. In a medium bowl, combine diced pineapple, red onion, jalapeño, and cilantro. Squeeze the lime juice over the mixture and stir well. Refrigerate until ready to serve.
- Shred the Pork: Once cooked, remove the pork from the slow cooker and shred it using two forks. Return the shredded pork to the slow cooker, add the remaining cup of BBQ sauce, and stir to combine.
- Assemble the Tacos: Warm the tortillas in a dry skillet or microwave. For each taco, place a generous portion of pulled pork on a tortilla, top with a spoonful of pineapple salsa, and add avocado slices if desired.
- Serve: Arrange the tacos on a serving platter and garnish with additional cilantro if desired. Serve immediately, allowing everyone to enjoy the fresh flavors and tender pork.
Extra Tips:
For a smokier flavor, consider adding a dash of liquid smoke to the pork before cooking. If you prefer a bit more heat, leave the seeds in the jalapeño or add a pinch of cayenne pepper to the salsa.
To save time, the pork can also be cooked in an Instant Pot or pressure cooker on high for about 1 hour. Finally, experimenting with different BBQ sauces can customize the flavor to your preference, whether you like it sweeter or tangier.
Spinach and Artichoke Ravioli With Pesto
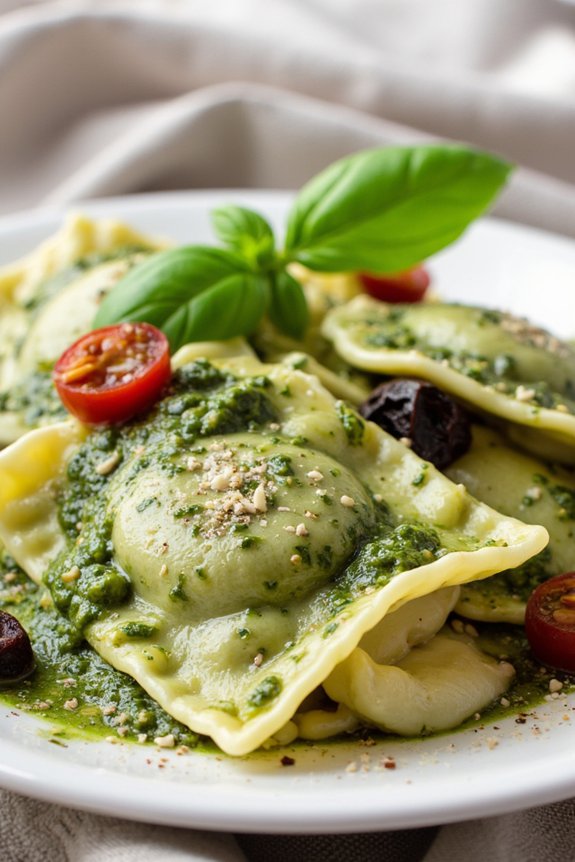
Spinach and Artichoke Ravioli With Pesto is a delightful combination of rich flavors and creamy textures that will elevate your family dinner to a gourmet experience. The dish beautifully marries the earthy spinach and tangy artichokes within tender pasta pockets, all brought together with a vibrant homemade pesto sauce.
This dish isn’t only visually appealing but also bursting with freshness and richness, making it a perfect centerpiece for a cozy family meal.
Whether you’re a fan of Italian cuisine or just looking for a new recipe to try, this Spinach and Artichoke Ravioli With Pesto is sure to impress. The recipe is straightforward, allowing even novice cooks to achieve delicious results. It serves 4-6 people, making it perfect for a family gathering or a dinner party with friends.
Ingredients for 4-6 servings:
- 1 package (about 20 ounces) of spinach and artichoke ravioli
- 2 cups fresh basil leaves
- 1/2 cup grated Parmesan cheese
- 1/2 cup pine nuts
- 2 cloves garlic
- 1/2 cup olive oil
- Salt and pepper to taste
- 1/4 cup heavy cream (optional)
- 1/4 cup sun-dried tomatoes, chopped (optional)
Cooking Instructions:
- Prepare the Pesto: In a food processor, combine the fresh basil leaves, Parmesan cheese, pine nuts, and garlic cloves. Pulse until the ingredients are finely chopped and well combined.
- Add Olive Oil: With the food processor running, slowly drizzle in the olive oil until the pesto reaches a smooth, creamy consistency. Season with salt and pepper to taste. If you prefer a creamier pesto, you can add the optional heavy cream at this stage and mix until well incorporated.
- Cook the Ravioli: Bring a large pot of salted water to a boil. Add the spinach and artichoke ravioli and cook according to the package instructions, usually about 4-5 minutes, until they float to the top and are tender.
- Combine and Serve: Drain the ravioli and return to the pot or a large mixing bowl. Add the pesto sauce to the ravioli and gently toss to coat evenly. If using, add the chopped sun-dried tomatoes for an extra burst of flavor.
- Garnish and Enjoy: Transfer the ravioli to a serving platter or individual plates. Garnish with additional Parmesan cheese and fresh basil leaves if desired. Serve immediately while hot.
Extra Tips:
For the best results, use fresh basil to guarantee your pesto is vibrant and aromatic. If pine nuts are unavailable, you can substitute them with walnuts or almonds for a slightly different flavor profile.
Always taste your pesto before serving to adjust the seasoning, as the saltiness of Parmesan can vary. For added texture and flavor, consider toasting the pine nuts lightly before adding them to the food processor.
Finally, serve the dish with a side of crusty bread or a simple green salad to complete the meal.
Beef and Broccoli With Jasmine Rice
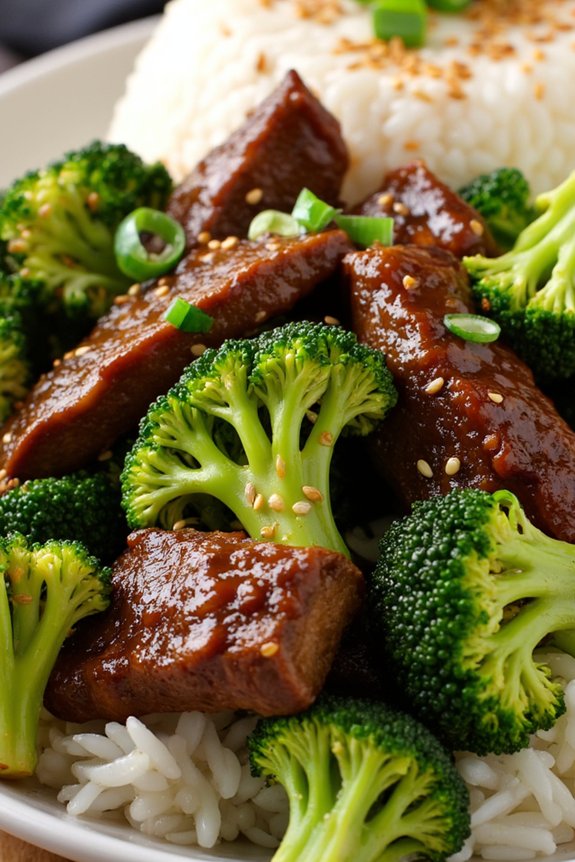
Beef and Broccoli With Jasmine Rice is a classic dish that combines tender beef slices with vibrant broccoli florets, all coated in a savory sauce and served over fragrant jasmine rice. This delightful meal is perfect for family dinners, offering a balance of protein, vegetables, and grains. The combination of soy sauce, garlic, and ginger in the sauce gives the dish its signature flavor, while the jasmine rice adds a subtle aromatic touch.
Whether you’re an experienced cook or a beginner, this recipe is straightforward and rewarding, guaranteeing a satisfying meal for everyone at the table. This dish isn’t only delicious but also quick to prepare, making it a great option for busy weeknights. The key is to have all your ingredients prepped and ready before you start cooking, allowing you to execute each step smoothly.
The beef is typically sliced thinly for quick cooking, while the broccoli is blanched to maintain its vibrant color and crisp texture. The jasmine rice, with its light floral notes, perfectly complements the savory flavors of the beef and broccoli. Let’s explore the ingredients you’ll need and the steps to create this family-favorite dish.
Ingredients (Serving Size: 4-6 people):
- 1 1/2 pounds flank steak, thinly sliced
- 1 pound broccoli florets
- 2 cups jasmine rice
- 3 cups water
- 1/4 cup soy sauce
- 1/4 cup oyster sauce
- 2 tablespoons cornstarch
- 3 tablespoons vegetable oil
- 4 cloves garlic, minced
- 1 tablespoon fresh ginger, grated
- 1 tablespoon sesame oil
- 1 tablespoon brown sugar
- Salt and pepper to taste
- Sliced green onions for garnish (optional)
- Sesame seeds for garnish (optional)
Cooking Instructions:
- Prepare the Jasmine Rice: Rinse the jasmine rice under cold water until the water runs clear. In a medium saucepan, combine 2 cups of jasmine rice with 3 cups of water. Bring to a boil, then reduce the heat to low, cover, and let it simmer for about 15 minutes or until the water is absorbed and the rice is tender. Remove from heat and let it sit, covered, for another 5 minutes before fluffing with a fork.
- Blanch the Broccoli: Bring a large pot of water to a boil. Add the broccoli florets and blanch for 2-3 minutes until they’re bright green and tender-crisp. Drain and immediately transfer the broccoli to a bowl of ice water to stop the cooking process. Once cool, drain and set aside.
- Marinate the Beef: In a large bowl, combine the sliced flank steak with 2 tablespoons of soy sauce, 1 tablespoon of cornstarch, and a pinch of salt and pepper. Mix well to coat the beef evenly and let it marinate for at least 10 minutes.
- Prepare the Sauce: In a small bowl, mix together the remaining soy sauce, oyster sauce, sesame oil, brown sugar, minced garlic, grated ginger, and 1 tablespoon of cornstarch. Stir until the sugar and cornstarch are dissolved, forming a smooth sauce.
- Cook the Beef: Heat 2 tablespoons of vegetable oil in a large skillet or wok over medium-high heat. Add the marinated beef in a single layer, cooking for 2-3 minutes on each side until browned and cooked through. Remove the beef from the skillet and set aside.
- Combine Everything Together: In the same skillet, add the remaining tablespoon of vegetable oil. Stir in the prepared sauce and bring it to a simmer. Add the blanched broccoli and cooked beef, tossing to coat everything evenly with the sauce. Cook for an additional 2-3 minutes until heated through.
- Serve: Arrange the cooked jasmine rice on a large serving platter or individual plates. Top with the beef and broccoli mixture. Garnish with sliced green onions and sesame seeds if desired.
Extra Tips:
For best results, verify that the beef is sliced very thinly against the grain; this makes it more tender and quick to cook. You can substitute the flank steak with other cuts like sirloin or ribeye if preferred.
To save time, the rice can be cooked ahead of time and reheated before serving. Adjust the sauce’s sweetness and saltiness according to your taste preferences by modifying the amount of brown sugar and soy sauce. Finally, feel free to add additional vegetables such as bell peppers or carrots for more color and nutrition.
Balsamic Glazed Brussels Sprouts and Chicken
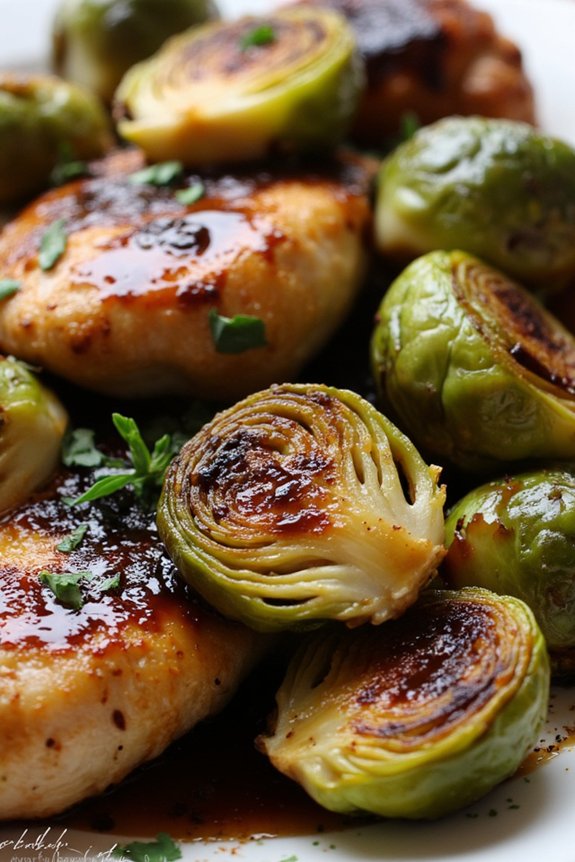
Balsamic Glazed Brussels Sprouts and Chicken is a delightful dish that brings together the earthy flavors of Brussels sprouts with the tender, juicy taste of chicken, all enveloped in a rich balsamic glaze. This dish is perfect for a cozy family dinner, offering a harmonious blend of sweet and savory flavors with a hint of tang from the balsamic vinegar.
The caramelized Brussels sprouts add a wonderful texture and depth to the dish, making it a crowd-pleaser for both adults and kids alike. This recipe isn’t only flavorful but also quite simple to prepare, making it ideal for a weeknight meal or a special weekend gathering.
The combination of ingredients guarantees that each bite is packed with flavor, and the cooking process allows for the natural sweetness of the Brussels sprouts to shine through. With minimal preparation and cooking time, you can have a delicious and nutritious meal on the table that will satisfy even the pickiest of eaters.
Prepare to delight your family with this scrumptious dish that’s sure to become a staple in your home.
Ingredients (serves 4-6):
- 1.5 pounds of chicken breast or thighs, cut into pieces
- 1 pound Brussels sprouts, trimmed and halved
- 3 tablespoons olive oil
- 1/2 cup balsamic vinegar
- 2 tablespoons honey
- 1 teaspoon garlic powder
- 1 teaspoon salt
- 1/2 teaspoon black pepper
- 1/4 teaspoon red pepper flakes (optional)
- Fresh thyme or parsley for garnish (optional)
Cooking Instructions:
- Preheat the Oven: Start by preheating your oven to 400°F (200°C). This will guarantee that the Brussels sprouts and chicken cook evenly and develop a nice caramelized texture.
- Prepare the Balsamic Glaze: In a small saucepan over medium heat, combine the balsamic vinegar and honey. Stir the mixture occasionally until it starts to thicken slightly, about 5-7 minutes. Remove from heat and set aside.
- Season the Chicken and Brussels Sprouts: In a large bowl, toss the chicken pieces and halved Brussels sprouts with olive oil, garlic powder, salt, black pepper, and red pepper flakes if using. Confirm that everything is evenly coated.
- Arrange on Baking Sheet: Place the seasoned chicken and Brussels sprouts on a baking sheet in a single layer. Make sure they aren’t overcrowded to guarantee even cooking.
- Roast in the Oven: Put the baking sheet into the preheated oven and roast for 20-25 minutes, or until the chicken is cooked through and the Brussels sprouts are tender and golden brown.
- Add the Glaze: Once cooked, remove the baking sheet from the oven and drizzle the balsamic glaze over the chicken and Brussels sprouts. Toss gently to coat everything evenly in the glaze.
- Serve: Transfer the dish to a serving platter and garnish with fresh thyme or parsley if desired. Serve immediately while hot.
For extra tips, make sure to allow the balsamic glaze to cool slightly before drizzling it over the chicken and Brussels sprouts, as this will help it adhere better to the ingredients.
Be cautious about overcrowding the baking sheet, as it can prevent proper caramelization. If you prefer a sweeter glaze, you can adjust the amount of honey to your taste. Additionally, for a more robust flavor, marinate the chicken in the seasoning for a few hours before cooking.
Enjoy your Balsamic Glazed Brussels Sprouts and Chicken with a side of mashed potatoes or rice for a complete meal.
Trader Joe’s Lobster Ravioli With Lemon Butter

Trader Joe’s Lobster Ravioli with Lemon Butter is a delectable dish that combines the richness of lobster with the zest of lemon butter to create a culinary masterpiece perfect for a family dinner. This dish isn’t only elegant but also easy to prepare, making it an ideal choice for those who wish to impress their loved ones with minimal fuss.
The lobster ravioli, available at Trader Joe’s, comes pre-prepared, allowing you to focus on crafting the perfect lemon butter sauce to complement the delicate flavors of the lobster.
The lemon butter sauce is the highlight of this recipe, providing a bright and tangy contrast to the rich, savory flavors of the ravioli. The combination of fresh lemon juice, butter, and a hint of garlic elevates the dish, making it a memorable addition to your dinner table. With a few simple ingredients and straightforward instructions, you’ll have a gourmet meal ready to serve in no time.
Ingredients for 4-6 servings:
- Two packages of Trader Joe’s Lobster Ravioli (9 oz each)
- 1/2 cup unsalted butter
- 1/4 cup freshly squeezed lemon juice
- Zest of one lemon
- 2 cloves garlic, minced
- Salt and pepper to taste
- Fresh parsley, chopped (for garnish)
- Grated Parmesan cheese (optional, for garnish)
Cooking Instructions:
1. Prepare the Ravioli:
Bring a large pot of salted water to a gentle boil. Add the lobster ravioli and cook according to package instructions, usually about 3-4 minutes, until they float to the top. Be careful not to overcook them. Once done, drain the ravioli and set aside.
2. Make the Lemon Butter Sauce:
In a large skillet over medium heat, melt the butter. Add the minced garlic and sauté for about 1 minute until fragrant, being careful not to let it brown.
3. Add Lemon Elements:
Stir in the lemon juice and lemon zest into the skillet. Let the sauce simmer gently for about 2-3 minutes, allowing the flavors to meld together. Season with salt and pepper to taste.
4. Combine Ravioli and Sauce:
Carefully add the cooked lobster ravioli to the skillet, gently tossing them in the lemon butter sauce to guarantee each piece is well-coated.
5. Serve:
Once the ravioli are evenly coated in the sauce, transfer them to a serving platter. Garnish with freshly chopped parsley and, if desired, sprinkle with grated Parmesan cheese for extra flavor.
Extra Tips:
When preparing Trader Joe’s Lobster Ravioli with Lemon Butter, keep an eye on the garlic as it can quickly turn from golden to burnt, which would alter the taste of the sauce.
It’s also vital to gently toss the ravioli in the sauce to prevent them from breaking apart. If you have any leftovers, store them in an airtight container in the fridge and consume within a day for the best taste and texture.
Vegan Jackfruit Tacos With Avocado Crema
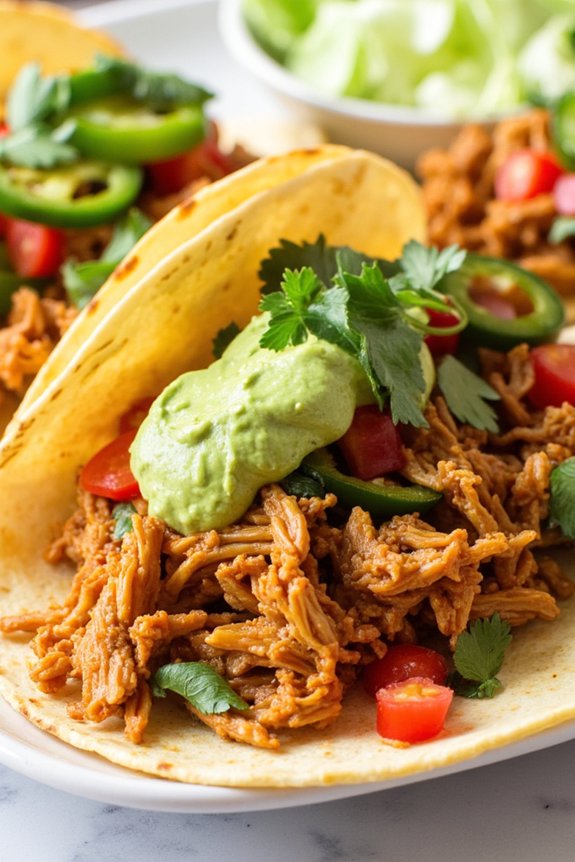
Vegan Jackfruit Tacos With Avocado Crema are a delicious and satisfying meal perfect for a family dinner. These tacos are packed with flavor and texture, featuring tender jackfruit that mimics the texture of pulled pork and is infused with a blend of spices, creating a savory and slightly smoky taste. The dish is elevated with a creamy avocado crema that adds a rejuvenating and tangy contrast to the spiced jackfruit filling.
Whether you’re a dedicated vegan or simply looking to try something new, these tacos are sure to become a favorite at your dinner table. The combination of jackfruit and avocado makes this dish not only nutritious but also incredibly enjoyable, even for those who might be skeptical about plant-based meals.
The jackfruit is cooked until it’s tender and well-seasoned, while the avocado crema adds a creamy richness that complements the tacos perfectly. This meal is easy to prepare and can be customized with your favorite toppings, making it ideal for family dinners where everyone can build their taco just the way they like it.
Now, let’s explore the ingredients and steps required to make this delightful dish for 4-6 people.
Ingredients:
- 2 cans (20 oz each) of young green jackfruit in brine or water, drained and rinsed
- 2 tablespoons olive oil
- 1 onion, finely chopped
- 3 cloves garlic, minced
- 1 tablespoon chili powder
- 1 teaspoon smoked paprika
- 1 teaspoon ground cumin
- 1 teaspoon ground coriander
- Salt and pepper to taste
- 1 cup vegetable broth
- 12 small corn tortillas
Avocado Crema:
- 2 ripe avocados
- 1/4 cup vegan sour cream
- 2 tablespoons lime juice
- Salt to taste
Optional toppings:
- Shredded lettuce
- Diced tomatoes
- Chopped cilantro
- Sliced jalapeños
- Lime wedges
Cooking Instructions:
- Prepare the Jackfruit: Begin by rinsing and draining the jackfruit thoroughly. Pat it dry with a paper towel and slice it into smaller pieces, removing any seeds or tough core portions.
- Cook the Aromatics: Heat the olive oil in a large skillet over medium heat. Add the chopped onion and garlic, and sauté until the onion becomes translucent, about 3-4 minutes.
- Season the Jackfruit: Add the sliced jackfruit to the skillet, followed by the chili powder, smoked paprika, cumin, coriander, salt, and pepper. Stir well to coat the jackfruit evenly with the spices.
- Simmer the Jackfruit: Pour in the vegetable broth and bring the mixture to a simmer. Cover the skillet and let it cook for about 20-25 minutes, stirring occasionally, until the jackfruit is tender and can be easily shredded with a fork.
- Shred the Jackfruit: Once the jackfruit is cooked and tender, use a fork to shred it into smaller pieces, resembling pulled meat. Continue to cook for an additional 5 minutes to allow the flavors to meld.
- Prepare the Avocado Crema: While the jackfruit is cooking, prepare the avocado crema. In a blender or food processor, combine the avocados, vegan sour cream, lime juice, and a pinch of salt. Blend until smooth and creamy.
- Assemble the Tacos: Warm the corn tortillas in a skillet or microwave. Spoon a generous amount of the jackfruit mixture onto each tortilla, top with a dollop of avocado crema, and add your desired toppings such as lettuce, tomatoes, cilantro, and jalapeños.
- Serve and Enjoy: Serve the tacos immediately with lime wedges on the side for extra zing.
Extra Tips:
For the best texture, make sure to cook the jackfruit until it’s very tender and easily shredded. If you prefer spicier tacos, feel free to add some cayenne pepper or extra jalapeños to the jackfruit mixture.
The avocado crema can be made in advance and stored in the refrigerator for up to a day; just make sure it’s covered tightly to prevent browning. If you’re serving these tacos to a larger group, consider doubling the recipe and setting up a taco bar with various toppings for a fun and interactive meal.