

Hey there, fellow food enthusiasts! If you’re looking to simplify your family dinners without sacrificing flavor, you’re in the right place. Slow cookers are my secret weapon for crafting meals that fill the home with irresistible aromas. From the classic comfort of Beef Pot Roast to the heartwarming Chicken and Dumplings, these recipes promise memorable moments around the table. Let’s get cozy and explore these slow cooker wonders together.
Classic Beef Pot Roast
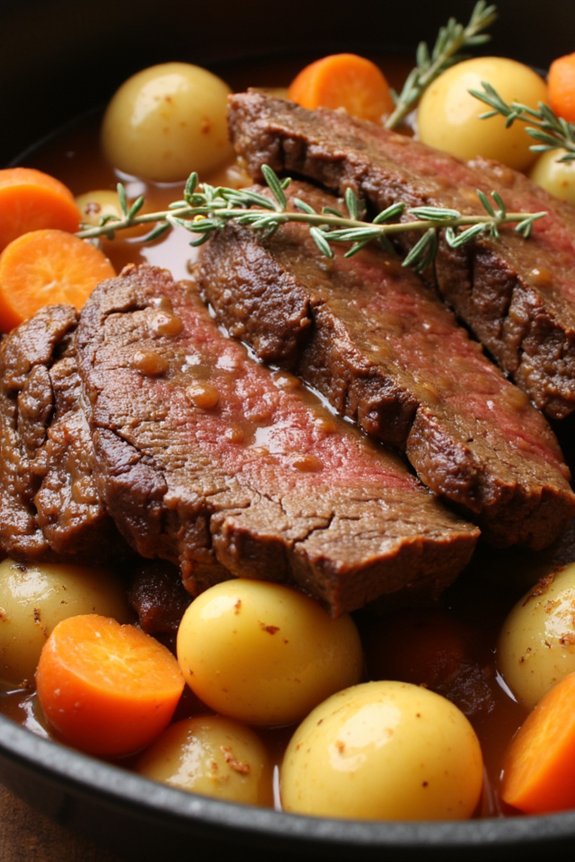
Nothing brings family together quite like a hearty classic beef pot roast. This timeless dish has been a staple in many households for generations, offering a warm and comforting meal that satisfies both the heart and the stomach. The tender beef, combined with root vegetables and rich gravy, creates a symphony of flavors that’s perfect for any family dinner.
Whether it’s a Sunday night special or a cozy mid-week meal, a beef pot roast is sure to be a hit at the dining table.
This recipe offers a straightforward approach to making a delicious beef pot roast, perfect for serving 4-6 people. With simple ingredients and easy-to-follow steps, you’ll be able to create a mouthwatering dish that will leave everyone asking for seconds.
The key to success is using a good quality cut of beef and allowing enough time for the flavors to meld together, resulting in a melt-in-your-mouth experience. Let’s dive right into the ingredients and instructions needed to prepare this classic dish.
Ingredients (Serves 4-6):
- 3 lbs chuck roast
- 2 tablespoons olive oil
- Salt and pepper, to taste
- 1 large onion, chopped
- 4 cloves garlic, minced
- 4 carrots, peeled and cut into chunks
- 4 potatoes, peeled and quartered
- 2 cups beef broth
- 1 cup red wine (optional)
- 2 tablespoons tomato paste
- 3 sprigs fresh thyme
- 2 bay leaves
- 1 tablespoon Worcestershire sauce
Cooking Instructions:
- Preheat the Oven: Begin by preheating your oven to 325°F (163°C) to guarantee it’s ready for slow-cooking the roast.
- Season the Meat: Pat the chuck roast dry with paper towels. Season it generously with salt and pepper on all sides to enhance the flavor.
- Sear the Roast: In a large Dutch oven, heat olive oil over medium-high heat. Once hot, add the roast and sear it on all sides until it’s deeply browned, about 3-4 minutes per side. This step locks in the juices and adds a rich, caramelized flavor.
- Sauté Vegetables: Remove the roast and set it aside. Lower the heat to medium and add the chopped onion and minced garlic to the pot. Sauté them for about 3 minutes until they’re soft and fragrant.
- Deglaze the Pot: Pour in the red wine (if using) and scrape up any brown bits from the bottom of the pot. This deglazing process adds depth to the flavor. Let it simmer for 2 minutes.
- Prepare the Roast: Return the roast to the pot. Add the carrots, potatoes, beef broth, tomato paste, thyme sprigs, bay leaves, and Worcestershire sauce. Stir to combine all ingredients well.
- Cook the Roast: Cover the Dutch oven with a lid and transfer it to the preheated oven. Let it cook for about 3-4 hours, or until the beef is fork-tender. Check occasionally to ascertain the liquid level remains sufficient, adding more broth if necessary.
- Rest and Serve: Once cooked, remove the pot roast from the oven and let it rest for 10 minutes. Discard the thyme sprigs and bay leaves. Slice the roast and serve it with the vegetables and gravy from the pot.
Extra Tips:
For an even more flavorful roast, consider marinating the beef overnight in the refrigerator with herbs and spices. Additionally, using a slow cooker is an excellent alternative to the oven method, offering convenience for busy days.
To thicken the gravy, you can create a slurry with cornstarch and cold water, adding it to the pot during the last 15 minutes of cooking. Don’t forget to taste and adjust the seasoning before serving to ascertain it’s to your preference.
Enjoy your classic beef pot roast with a side of crusty bread to soak up every last drop of the delicious gravy.
Slow Cooker Chicken and Dumplings

Slow Cooker Chicken and Dumplings is a comforting, hearty dish that’s perfect for family dinners. This recipe allows you to prepare a delicious meal with minimal effort, using a slow cooker to develop deep flavors over time. Tender chicken pieces are combined with a rich and creamy broth, complemented by fluffy dumplings that soak up all the savory goodness. This dish is a wonderful choice for busy days when you want to come home to a warm and satisfying meal.
The beauty of this recipe lies in its simplicity and the ability to customize it to your family’s taste. You can add your favorite vegetables or adjust the seasonings to create a dish that’s uniquely yours. The slow cooker does all the hard work, melding the flavors together while you go about your day. By the time dinner rolls around, you’ll have a delicious meal ready to serve, making it an ideal option for family gatherings or cozy nights at home.
Ingredients for 4-6 Servings****:
- 4 boneless, skinless chicken breasts
- 1 onion, chopped
- 3 cloves garlic, minced
- 4 cups chicken broth
- 1 cup frozen peas and carrots
- 1 teaspoon dried thyme
- 1/2 teaspoon black pepper
- 2 cups all-purpose flour
- 2 teaspoons baking powder
- 1 teaspoon salt
- 1/2 cup cold butter, cubed
- 1 cup milk
- 1 can (10.5 oz) condensed cream of chicken soup
Cooking Instructions:
- Prepare the Chicken and Broth: Begin by placing the chicken breasts at the bottom of your slow cooker. Add the chopped onion, minced garlic, chicken broth, frozen peas and carrots, dried thyme, and black pepper. Stir to combine all the ingredients thoroughly.
- Cook the Base: Cover the slow cooker and set it to cook on low for 6-7 hours, or on high for 3-4 hours. This slow cooking process will allow the chicken to become tender and infuse the broth with flavor.
- Shred the Chicken: Once the cooking time is complete, remove the chicken breasts from the slow cooker and use two forks to shred them into bite-sized pieces. Return the shredded chicken to the slow cooker.
- Prepare the Dumplings: In a mixing bowl, combine the flour, baking powder, and salt. Cut in the cold butter using a pastry cutter or fork until the mixture resembles coarse crumbs. Stir in the milk until just combined, forming a dough.
- Add the Cream of Chicken Soup: Stir the condensed cream of chicken soup into the slow cooker, mixing well with the broth and chicken.
- Form and Cook Dumplings: Drop spoonfuls of the dough onto the surface of the chicken mixture in the slow cooker. Space them evenly to allow for expansion. Cover and cook on high for an additional 30-45 minutes, or until the dumplings are cooked through and fluffy.
Extra Tips: To make the most out of your Slow Cooker Chicken and Dumplings, consider browning the chicken breasts in a skillet before adding them to the slow cooker for extra flavor. You can also add other vegetables like celery or mushrooms for added texture and taste. If the broth seems too thick after adding the cream of chicken soup, add a bit more chicken broth to reach your desired consistency. Finally, be sure not to lift the lid while the dumplings are cooking to guarantee they rise properly.
Hearty Vegetable Lentil Soup
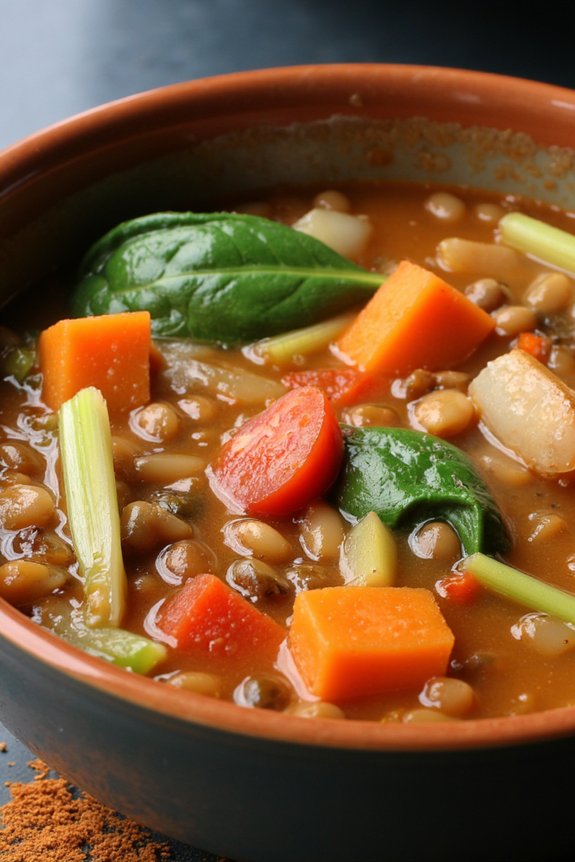
Hearty Vegetable Lentil Soup is a comforting and nutritious dish perfect for family dinners. This delicious soup combines a variety of fresh vegetables with protein-packed lentils, making it a satisfying and wholesome meal.
With its rich flavors and warming qualities, this soup is ideal for cooler evenings or whenever you need a nourishing boost. It’s easy to prepare and can be made in large batches, allowing you to enjoy leftovers for days to come.
This recipe serves 4-6 people and can easily be adjusted to accommodate a larger gathering. The combination of carrots, celery, tomatoes, and spinach creates a vibrant base, while the lentils add a hearty texture.
The addition of herbs and spices enhances the flavor profile, making every spoonful a delight. Whether you’re serving it as a main course or a starter, this Hearty Vegetable Lentil Soup is sure to become a family favorite.
Ingredients:
- 1 tablespoon olive oil
- 1 onion, diced
- 2 cloves garlic, minced
- 2 carrots, sliced
- 2 celery stalks, diced
- 1 teaspoon ground cumin
- 1 teaspoon dried thyme
- 1/2 teaspoon smoked paprika
- 1 cup dried lentils, rinsed
- 1 can (14 oz) diced tomatoes
- 6 cups vegetable broth
- 2 cups fresh spinach, chopped
- Salt and pepper to taste
- Optional: 1 tablespoon lemon juice
- Optional: Chopped parsley for garnish
Cooking Instructions:
- Prepare the Vegetables: Start by heating the olive oil in a large pot over medium heat. Add the diced onion and minced garlic, sautéing them until the onion becomes translucent and fragrant, about 3-4 minutes.
- Add the Vegetables and Spices: Stir in the sliced carrots and diced celery. Cook for another 5 minutes, allowing the vegetables to soften slightly. Add cumin, thyme, and smoked paprika, stirring to coat the vegetables with the spices.
- Incorporate the Lentils and Tomatoes: Add the rinsed lentils and diced tomatoes to the pot. Stir everything together, ensuring the lentils are evenly distributed.
- Simmer the Soup: Pour in the vegetable broth and bring the mixture to a boil. Once boiling, reduce the heat to low and let the soup simmer uncovered for about 25-30 minutes, or until the lentils are tender.
- Add the Spinach: Stir in the chopped spinach, allowing it to wilt into the soup. Season with salt and pepper to taste. If you prefer a bit of tanginess, add lemon juice at this stage.
- Finish and Serve: Once the spinach is wilted and the flavors have melded together, remove the soup from heat. Ladle the soup into bowls, garnishing with chopped parsley if desired. Serve hot.
Extra Tips:
When making Hearty Vegetable Lentil Soup, feel free to customize the vegetables based on what you have available or prefer. Zucchini, bell peppers, or potatoes can be great additions or substitutes.
If you like a thicker soup, blend a portion of it with an immersion blender for a creamier texture. Additionally, this soup freezes well, so consider making a double batch to enjoy later. Just store any leftovers in airtight containers for up to three months.
Savory Pulled Pork Sandwiches
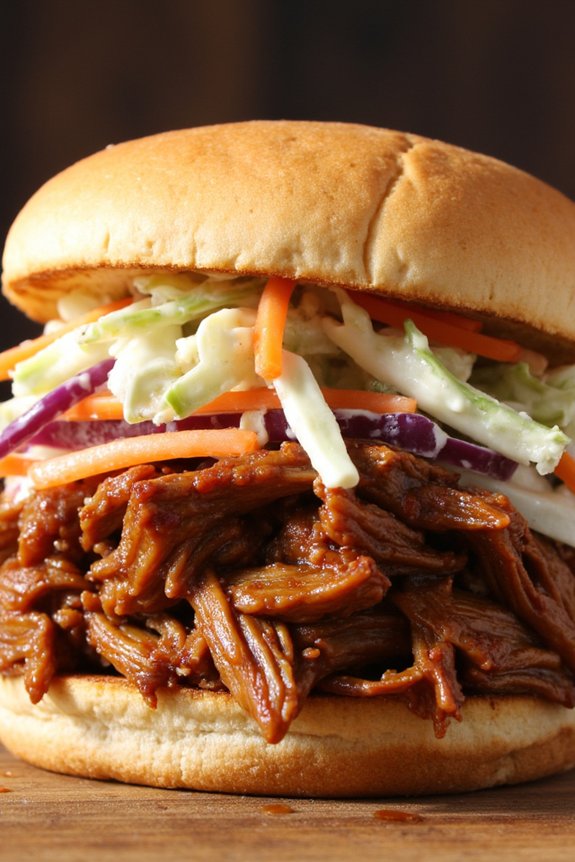
Savory Pulled Pork Sandwiches are a delightful and hearty meal perfect for family dinners or casual gatherings. The tender, slow-cooked pork is marinated with a blend of spices and sauces that enhance its natural flavors, creating a rich, savory filling. This dish is complemented by the slight crunch of coleslaw and the softness of freshly baked buns, offering a satisfying contrast of textures.
Pulled pork sandwiches are versatile and can be customized with different toppings and sauces to suit personal preferences, making them a crowd-pleaser at any table. Perfect for a serving size of 4-6 people, this recipe guarantees that everyone gets a generous helping of delicious pulled pork.
The preparation involves slow cooking the pork to achieve maximum tenderness and flavor infusion. Whether you’re hosting a dinner party or simply cooking for your family, these savory pulled pork sandwiches are sure to be a hit. With minimal effort and a few hours of cooking time, you can serve up a meal that’s both comforting and impressive.
Ingredients:
- 4-5 lbs pork shoulder or pork butt
- 1 tablespoon olive oil
- 1 large onion, chopped
- 4 cloves garlic, minced
- 1 cup barbecue sauce
- 1/2 cup apple cider vinegar
- 1/4 cup brown sugar
- 1 tablespoon Worcestershire sauce
- 1 tablespoon smoked paprika
- 2 teaspoons chili powder
- 2 teaspoons salt
- 1 teaspoon black pepper
- 1/2 teaspoon cayenne pepper
- 1/2 teaspoon dried thyme
- 4-6 hamburger buns
- 2 cups coleslaw
Instructions:
- Prepare the Pork: Begin by trimming any excess fat from the pork shoulder or butt. This will help to guarantee that the meat isn’t overly greasy once cooked.
- Brown the Meat: In a large skillet over medium-high heat, add olive oil. Once hot, add the pork and sear on all sides until browned. This should take about 5 minutes per side. Transfer the pork to a slow cooker.
- Sauté the Aromatics: In the same skillet, add the chopped onion and minced garlic. Sauté for about 2-3 minutes until the onion is translucent and fragrant.
- Combine Ingredients: Pour the sautéed onions and garlic over the pork in the slow cooker. Add barbecue sauce, apple cider vinegar, brown sugar, Worcestershire sauce, smoked paprika, chili powder, salt, black pepper, cayenne pepper, and dried thyme. Stir to coat the pork evenly with the mixture.
- Slow Cook the Pork: Cover the slow cooker and cook on low for 8-10 hours or on high for 4-6 hours. The pork should be tender and easily shredded with a fork.
- Shred the Pork: Once cooked, remove the pork from the slow cooker and place it on a large cutting board. Using two forks, shred the meat into bite-sized pieces. Return the shredded pork to the slow cooker and mix it with the juices.
- Assemble the Sandwiches: Toast the hamburger buns if desired. Place a generous portion of shredded pork onto each bun and top with coleslaw. Serve immediately.
Extra Tips:
For even more flavor, consider marinating the pork overnight in the spice mixture before cooking. This allows the flavors to penetrate the meat deeply.
If you prefer a spicier kick, increase the amount of cayenne pepper or add a dash of hot sauce to the barbecue mixture. Leftover pulled pork can be stored in the refrigerator for up to 3 days or frozen for later use. To reheat, simply warm it in a saucepan over low heat, adding a bit of extra barbecue sauce to keep it moist.
Creamy Tuscan Chicken

Creamy Tuscan Chicken is a delightful dish that combines succulent chicken breasts with a rich and creamy sauce infused with sun-dried tomatoes, spinach, and a blend of aromatic herbs. This recipe offers a comforting yet elegant meal that’s perfect for a family dinner.
The creamy sauce is balanced with a slight tang from the sun-dried tomatoes, creating a harmonious flavor profile that will satisfy everyone’s taste buds.
This dish isn’t only delicious but also simple to prepare, making it a great choice for a weeknight meal or a special occasion. The chicken is seared to perfection, and then simmered in the creamy sauce to absorb all the vibrant flavors.
Serve it over pasta, rice, or with crusty bread to soak up every last drop of the sauce. With its beautiful colors and enticing aroma, Creamy Tuscan Chicken is sure to be a hit at your dinner table.
Ingredients for 4-6 servings:
- 4 boneless, skinless chicken breasts
- Salt and pepper, to taste
- 2 tablespoons olive oil
- 1 teaspoon Italian seasoning
- 3 cloves garlic, minced
- 1 cup heavy cream
- 1/2 cup chicken broth
- 1/2 cup sun-dried tomatoes, chopped
- 1 cup fresh spinach leaves
- 1/2 cup grated Parmesan cheese
- 1 teaspoon red pepper flakes (optional)
- Fresh basil, for garnish
Cooking Instructions:
- Prepare the Chicken: Season the chicken breasts with salt, pepper, and Italian seasoning on both sides. This will guarantee that the chicken is flavorful throughout.
- Sear the Chicken: In a large skillet, heat the olive oil over medium-high heat. Add the chicken breasts and cook for about 5-7 minutes on each side until golden brown and cooked through. Remove the chicken from the skillet and set aside.
- Create the Sauce Base: In the same skillet, add the minced garlic and sauté for about 1 minute until fragrant. Be careful not to burn the garlic, as it can turn bitter.
- Add the Liquids: Pour in the heavy cream and chicken broth, stirring to combine with the garlic. Bring the mixture to a gentle simmer.
- Incorporate the Flavors: Add the sun-dried tomatoes, spinach, and grated Parmesan cheese to the skillet. Stir well until the cheese is melted and the spinach is wilted, creating a creamy sauce.
- Simmer the Chicken: Return the seared chicken breasts to the skillet, nestling them into the sauce. Let them simmer in the sauce for an additional 5-7 minutes, allowing the flavors to meld together.
- Finish and Serve: If desired, sprinkle red pepper flakes over the dish for a bit of heat. Garnish with fresh basil before serving. Serve hot over your choice of pasta, rice, or with bread.
Extra Tips:
When cooking Creamy Tuscan Chicken, make sure that the chicken breasts are of similar size so they cook evenly. If needed, pound thicker parts to achieve uniform thickness.
For a thicker sauce, allow it to simmer longer, reducing to your desired consistency. If you prefer a lighter version, you can substitute the heavy cream with half-and-half or a mixture of milk and Greek yogurt.
Feel free to add mushrooms for an earthy flavor or capers for an extra tangy kick. Adjust the seasonings according to your taste preference, and don’t forget to taste the sauce before serving to ascertain it’s perfectly balanced.
Flavorful Beef Stroganoff
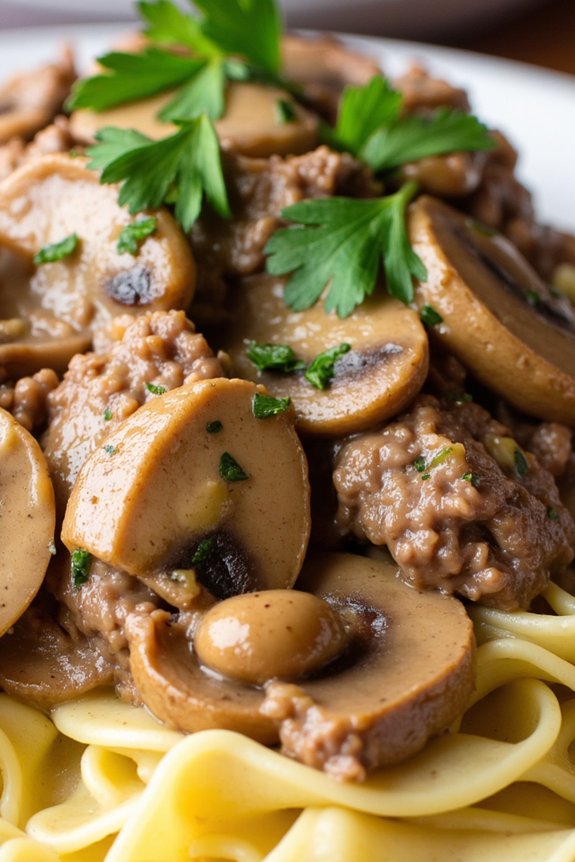
Beef Stroganoff is a classic comfort food that combines tender strips of beef with a creamy, savory sauce, usually served over egg noodles or rice. Originating from Russia, this dish has become a favorite in many households around the world due to its rich flavor and satisfying texture. Ideal for a family dinner, this recipe is designed to serve 4-6 people, making it perfect for gatherings or a cozy night in with loved ones.
The key to a successful Beef Stroganoff is using high-quality beef and allowing it to simmer gently in the sauce to absorb all the wonderful flavors. The sauce is a harmonious blend of sour cream, beef broth, and seasonings, enriched with mushrooms and onions for added depth. With a few simple steps, you can create this delectable dish that will have everyone asking for seconds.
Ingredients (Serves 4-6):
- 1 1/2 pounds beef sirloin, thinly sliced into strips
- Salt and pepper, to taste
- 2 tablespoons all-purpose flour
- 2 tablespoons olive oil
- 1 tablespoon butter
- 1 large onion, finely chopped
- 3 cloves garlic, minced
- 8 ounces mushrooms, sliced
- 1 cup beef broth
- 1 tablespoon Worcestershire sauce
- 1 teaspoon Dijon mustard
- 1 cup sour cream
- Fresh parsley, chopped (for garnish)
- Egg noodles or rice, cooked according to package instructions
Cooking Instructions:
- Prepare the Beef: Season the beef strips with salt and pepper. Lightly coat them with the flour, shaking off any excess. This will help thicken the sauce later.
- Sear the Beef: In a large skillet, heat the olive oil over medium-high heat. Add the beef strips in batches, cooking for about 2-3 minutes until browned on all sides. Remove the beef from the skillet and set aside.
- Cook the Vegetables: In the same skillet, reduce the heat to medium and melt the butter. Add the chopped onion and cook until translucent, about 5 minutes. Stir in the minced garlic and sliced mushrooms, cooking until the mushrooms are tender and have released their moisture, approximately 5-7 minutes.
- Create the Sauce: Pour in the beef broth, Worcestershire sauce, and Dijon mustard. Stir well, scraping any browned bits from the bottom of the skillet. Bring to a simmer.
- Combine the Ingredients: Return the seared beef to the skillet and mix well. Reduce the heat to low and gently stir in the sour cream until the sauce is smooth and creamy. Allow the dish to simmer for another 5 minutes to meld the flavors. Adjust seasoning with salt and pepper if needed.
- Serve: Remove from heat and garnish with fresh parsley. Serve over cooked egg noodles or rice, ensuring each portion has plenty of beef and sauce.
Extra Tips:
When preparing Beef Stroganoff, it’s important not to overcook the beef to maintain its tenderness. Quickly searing it on high heat helps lock in the juices.
Additionally, while sour cream is a classic ingredient, you can substitute it with Greek yogurt for a tangier and slightly healthier version. If you prefer a thicker sauce, allow the dish to simmer a bit longer after adding the sour cream, or add a slurry of cornstarch and water.
Finally, feel free to experiment with different types of mushrooms or add a splash of wine for an extra layer of flavor.
Zesty Chili Con Carne

Zesty Chili Con Carne is a hearty and flavorful dish perfect for family dinners. This warming meal combines the rich flavors of beef, tomatoes, and beans with a medley of spices to create a comforting and satisfying dish.
Whether served over rice, with a side of cornbread, or simply on its own, this chili will be a hit with everyone around the table. It’s a versatile recipe that can easily be adjusted to suit different tastes, whether you prefer it mild or with an extra kick of heat.
The recipe for Zesty Chili Con Carne is designed to serve 4-6 people, making it an ideal choice for family gatherings or casual get-togethers. The preparation is straightforward, with most of the cooking time allowing the flavors to meld together, resulting in a deeply satisfying and delicious meal.
With the right ingredients and a bit of patience, you can easily whip up this classic dish in your own kitchen.
Ingredients:
- 2 tablespoons olive oil
- 1 large onion, chopped
- 3 cloves garlic, minced
- 1 red bell pepper, diced
- 1 green bell pepper, diced
- 2 pounds ground beef
- 2 tablespoons chili powder
- 1 teaspoon cumin
- 1 teaspoon smoked paprika
- 1/2 teaspoon cayenne pepper
- 1 teaspoon salt
- 1/2 teaspoon black pepper
- 1 (14-ounce) can diced tomatoes
- 1 (6-ounce) can tomato paste
- 2 cups beef broth
- 1 (15-ounce) can kidney beans, drained and rinsed
- 1 (15-ounce) can black beans, drained and rinsed
- 1 tablespoon Worcestershire sauce
- 1 tablespoon brown sugar
- Juice of 1 lime
- Optional toppings: shredded cheese, sour cream, chopped cilantro, sliced jalapeños
Cooking Instructions:
- Prepare the Ingredients: Begin by chopping the onion, mincing the garlic, and dicing the red and green bell peppers. Drain and rinse the kidney beans and black beans, and set aside.
- Sauté the Vegetables: Heat the olive oil in a large pot over medium heat. Add the chopped onion and garlic, and sauté until the onion is translucent, about 5 minutes. Stir in the diced red and green bell peppers, cooking for an additional 3 minutes.
- Cook the Ground Beef: Increase the heat to medium-high and add the ground beef to the pot. Cook until the beef is browned, breaking it apart with a spoon, about 8-10 minutes. Drain any excess fat from the pot.
- Season the Meat: Stir in the chili powder, cumin, smoked paprika, cayenne pepper, salt, and black pepper, ensuring the beef is well coated with the spices.
- Add Tomatoes and Broth: Pour in the diced tomatoes, tomato paste, and beef broth. Stir to combine, bringing the mixture to a simmer.
- Combine Beans and Flavorings: Add the drained kidney beans and black beans to the pot, followed by the Worcestershire sauce, brown sugar, and lime juice. Stir everything together until well combined.
- Simmer the Chili: Reduce the heat to low, cover the pot, and let the chili simmer for at least 30 minutes, or up to 1 hour for a more developed flavor. Stir occasionally to prevent sticking.
- Serve and Garnish: Once the chili has thickened and the flavors have melded, taste and adjust seasoning if necessary. Serve hot, topped with optional garnishes like shredded cheese, sour cream, chopped cilantro, or sliced jalapeños.
Extra Tips:
For a deeper flavor, consider preparing the chili a day ahead. Allowing it to sit overnight in the fridge enhances the taste as the spices continue to develop.
If you prefer a spicier chili, feel free to increase the amount of cayenne pepper or add fresh chopped jalapeños during the cooking process. For a healthier version, you can substitute ground turkey or chicken for the beef.
Additionally, using a slow cooker is an excellent option for ease and convenience, allowing the chili to cook on low for 6-8 hours.
Tender Lamb Curry

Tender Lamb Curry is a delicious and aromatic dish perfect for family dinners. This recipe combines tender cuts of lamb with a rich blend of spices, creating a flavorful and satisfying meal. The slow-cooked lamb absorbs the fragrant curry spices, resulting in a dish that’s both hearty and comforting. This curry pairs beautifully with steamed rice or warm naan bread, making it a versatile option for any family gathering.
The key to a successful Tender Lamb Curry is using fresh ingredients and allowing sufficient time for the flavors to develop. The dish starts with marinating the lamb in yogurt and spices, ensuring the meat remains juicy and tender during cooking. This curry isn’t only a treat for the taste buds but also fills your kitchen with an inviting aroma that makes it hard to resist.
Here’s how you can prepare this delightful dish for a serving size of 4-6 people.
Ingredients:
- 900g (2 lbs) lamb shoulder, cut into cubes
- 1 cup plain yogurt
- 2 tablespoons vegetable oil
- 2 large onions, finely chopped
- 4 garlic cloves, minced
- 1 tablespoon fresh ginger, grated
- 2 teaspoons ground cumin
- 2 teaspoons ground coriander
- 1 teaspoon turmeric powder
- 1 teaspoon chili powder
- 1 teaspoon garam masala
- 2 cups canned tomatoes, crushed
- 1 cup coconut milk
- Salt, to taste
- Fresh cilantro leaves, for garnish
Instructions:
- Marinate the Lamb: In a large bowl, combine the lamb cubes with yogurt, 1 teaspoon of cumin, 1 teaspoon of coriander, turmeric, and a pinch of salt. Mix well, cover, and let it marinate in the refrigerator for at least 2 hours, or overnight for best results.
- Prepare the Base: Heat the vegetable oil in a large, heavy-bottomed pot over medium heat. Add the onions and sauté until they’re golden brown, about 10 minutes. Stir in the garlic and ginger, cooking for another 2 minutes until fragrant.
- Cook the Spices: Add the remaining cumin, coriander, chili powder, and garam masala to the pot. Cook the spices for 1-2 minutes, stirring constantly to prevent burning.
- Add the Lamb: Remove the lamb from the marinade, shaking off excess yogurt, and add it to the pot. Cook the lamb until it’s browned on all sides, about 5-7 minutes.
- Simmer the Curry: Pour in the crushed tomatoes and coconut milk, stirring to combine. Bring the mixture to a gentle simmer, cover the pot, and cook for 1.5 to 2 hours, or until the lamb is tender and the flavors have melded together. Stir occasionally and add a little water if the curry becomes too thick.
- Finalize the Dish: Taste and adjust the seasoning with salt as needed. Garnish with fresh cilantro leaves before serving.
Extra Tips: For an even deeper flavor, consider adding a few whole spices like cardamom pods and cinnamon sticks during the initial cooking of the onions. If you prefer a spicier curry, increase the amount of chili powder or add fresh chopped chilies.
This dish can also be prepared in advance and tastes even better the next day, making it ideal for busy family dinners. Pair it with basmati rice or naan bread to soak up the delicious curry sauce.
Garlic Herb Chicken Thighs

Garlic Herb Chicken Thighs are a mouthwatering addition to any family dinner, offering a succulent and flavorful experience. This dish combines the aromatic essence of garlic with a blend of fresh herbs to create a savory delight that’s bound to impress.
The chicken thighs are marinated to perfection, allowing the flavors to infuse deeply into the meat, resulting in a meal that’s tender, juicy, and bursting with taste. Ideal for gatherings, this recipe is both simple to prepare and sophisticated enough to be the star of the dinner table.
This recipe for Garlic Herb Chicken Thighs is designed to serve 4-6 people, making it an excellent choice for a family meal or a small gathering. The preparation involves marinating the chicken to guarantee every bite is packed with flavor, and cooking it to a delightful golden brown finish.
Paired with your favorite sides, this dish is sure to become a go-to recipe for those seeking a delicious and satisfying meal. With minimal ingredients and straightforward instructions, even beginner cooks can achieve a restaurant-quality dish at home.
Ingredients (Serves 4-6):
- 6 bone-in, skin-on chicken thighs
- 4 cloves garlic, minced
- 2 tablespoons fresh rosemary, chopped
- 2 tablespoons fresh thyme, chopped
- 1 tablespoon fresh parsley, chopped
- 1/4 cup olive oil
- 1 lemon, juiced
- Salt and pepper to taste
Cooking Instructions:
- Prepare the Marinade: In a mixing bowl, combine the minced garlic, rosemary, thyme, parsley, olive oil, and lemon juice. Season the mixture with salt and pepper. Stir well to ascertain all ingredients are thoroughly combined.
- Marinate the Chicken: Place the chicken thighs in a large resealable plastic bag or a shallow dish. Pour the marinade over the chicken, making sure each piece is well-coated. Seal the bag or cover the dish, and refrigerate for at least 1 hour, or up to overnight for more intense flavor.
- Preheat the Oven: Preheat your oven to 400°F (200°C). While the oven is heating, remove the chicken from the refrigerator and let it sit at room temperature for about 10 minutes.
- Sear the Chicken: Heat a large oven-safe skillet over medium-high heat. Place the chicken thighs skin-side down in the skillet. Sear the chicken for 4-5 minutes until the skin is golden brown and crispy. Flip the chicken and sear the other side for an additional 2 minutes.
- Bake the Chicken: Transfer the skillet to the preheated oven. Bake the chicken for 25-30 minutes, or until the internal temperature reaches 165°F (75°C) and the juices run clear.
- Rest and Serve: Remove the skillet from the oven and let the chicken rest for 5 minutes. This allows the juices to redistribute throughout the meat. Serve the chicken thighs hot, garnished with extra fresh herbs if desired.
Extra Tips:
When preparing Garlic Herb Chicken Thighs, it’s important to allow the chicken to marinate for as long as possible to maximize flavor. Overnight marination is ideal.
Additionally, confirm your skillet is oven-safe to avoid any mishaps when transferring it to the oven. If you want to achieve even crispier skin, be sure not to overcrowd the pan during the searing step.
Finally, always use a meat thermometer to check for doneness, as this guarantees the chicken is cooked safely and to perfection.
Cheesy Broccoli Rice Casserole

Cheesy Broccoli Rice Casserole is a comforting and delicious dish that makes for a perfect family dinner. It’s a creamy, cheesy, and hearty meal that combines the goodness of broccoli, the wholesomeness of rice, and the irresistible taste of melted cheese.
This casserole is an excellent way to incorporate more vegetables into your diet, and it’s sure to be a hit with both kids and adults. The combination of flavors and textures creates a satisfying meal that can stand alone or be served as a side dish to complement other entrees.
This recipe is designed to serve 4-6 people, making it an ideal choice for a family gathering or dinner with friends. The dish isn’t only simple to prepare, but it also uses ingredients that are likely already in your pantry or easily accessible at your local grocery store.
The preparation and cooking time is relatively short, allowing you to enjoy more time with your loved ones at the dinner table. Whether you’re a seasoned chef or a beginner in the kitchen, this Cheesy Broccoli Rice Casserole is easy to make and assured to please.
Ingredients:
- 1 cup uncooked long-grain white rice
- 2 cups broccoli florets
- 1 cup shredded cheddar cheese
- 1/2 cup grated Parmesan cheese
- 1 can (10.5 oz) cream of mushroom soup
- 1/2 cup milk
- 1/4 cup butter
- 1 small onion, chopped
- 1/2 teaspoon garlic powder
- Salt and pepper to taste
Cooking Instructions:
- Preheat the Oven: Begin by preheating your oven to 350°F (175°C). This will guarantee that your casserole cooks evenly once it’s assembled.
- Cook the Rice: In a medium saucepan, cook the rice according to package instructions. You can use either water or broth for added flavor. Once cooked, set it aside.
- Steam the Broccoli: While the rice is cooking, steam the broccoli florets until they’re tender yet still vibrant green. This typically takes about 5-7 minutes. Drain any excess water and set the broccoli aside.
- Sauté the Onions: In a large skillet, melt the butter over medium heat. Add the chopped onion and sauté until they’re soft and translucent, about 5 minutes.
- Combine Ingredients: In a large mixing bowl, combine the cooked rice, steamed broccoli, sautéed onions, cream of mushroom soup, milk, garlic powder, salt, and pepper. Mix until well combined.
- Add Cheeses: Stir in the shredded cheddar cheese and half of the grated Parmesan cheese into the rice mixture, ensuring the cheese is evenly distributed.
- Transfer to Baking Dish: Grease a 9×13 inch baking dish. Pour the rice and broccoli mixture into the dish and spread it out evenly.
- Top with Cheese: Sprinkle the remaining Parmesan cheese over the top of the casserole for a nice golden crust.
- Bake: Place the casserole in the preheated oven and bake for 25-30 minutes, or until the top is bubbly and golden brown.
- Serve: Once baked, remove the casserole from the oven and let it cool slightly before serving. Enjoy your Cheesy Broccoli Rice Casserole while it’s warm and gooey.
Extra Tips:
For an added layer of flavor, try using different types of cheese, such as Gruyère or mozzarella, in addition to or instead of cheddar.
If you prefer a bit of a kick, consider adding a pinch of red pepper flakes or a dash of hot sauce to the mixture. To make this dish even heartier, you can add cooked chicken or ham before baking.
Finally, if you want to prepare this dish in advance, assemble the casserole without baking and store it in the refrigerator for up to 24 hours before you’re ready to bake it.
Mediterranean Stuffed Peppers
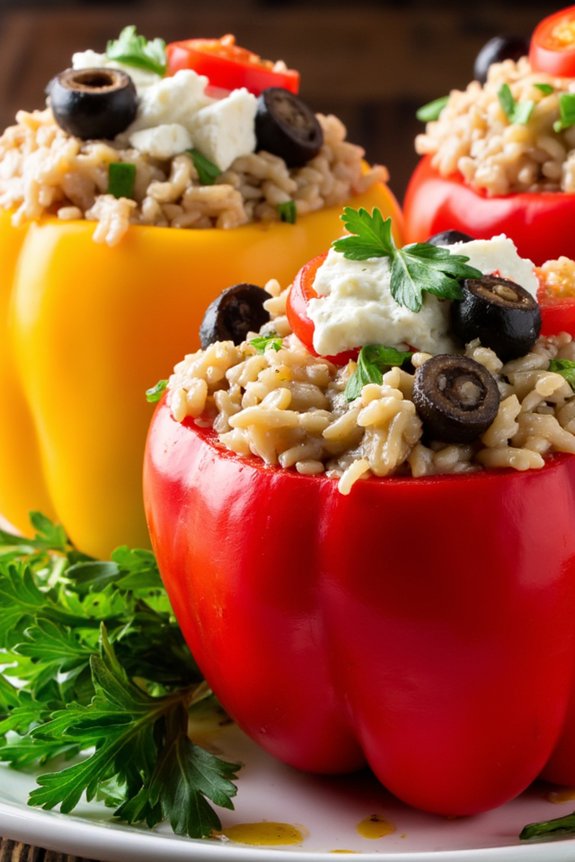
Mediterranean Stuffed Peppers are a delightful and nutritious dish that brings the vibrant flavors of the Mediterranean to your family dinner table. These peppers are filled with a flavorful mixture of rice, vegetables, and aromatic herbs, making them a wholesome and satisfying meal. The combination of ingredients not only provides a burst of taste but also a variety of textures that will please both adults and children alike.
Perfect for a serving size of 4-6 people, Mediterranean Stuffed Peppers are great for a family gathering or a simple weeknight dinner. They’re easy to prepare and can be made ahead of time, offering a convenient solution for busy evenings. The colorful presentation of the stuffed peppers adds a touch of elegance to your dining experience, making it a dish that’s both appealing to the eyes and the taste buds.
Ingredients (Serves 4-6):
- 4-6 medium-sized bell peppers
- 1 cup long-grain rice
- 2 tablespoons olive oil
- 1 medium onion, chopped
- 2 cloves garlic, minced
- 1 zucchini, diced
- 1 cup cherry tomatoes, halved
- 1/2 cup feta cheese, crumbled
- 1/4 cup black olives, sliced
- 2 tablespoons fresh parsley, chopped
- 1 teaspoon dried oregano
- 1/2 teaspoon salt
- 1/4 teaspoon black pepper
- 2 cups vegetable broth
- 1 tablespoon lemon juice
Cooking Instructions:
- Prepare the Peppers: Preheat your oven to 375°F (190°C). Cut the tops off the bell peppers and remove the seeds and membranes. Place the peppers upright in a baking dish.
- Cook the Rice: In a medium saucepan, bring the vegetable broth to a boil. Stir in the rice, reduce the heat to low, cover, and simmer for about 15 minutes until the rice is cooked. Remove from heat and set aside.
- Sauté the Vegetables: In a large skillet, heat the olive oil over medium heat. Add the chopped onion and minced garlic, and sauté until the onion is translucent. Add the diced zucchini and continue to cook for 3-4 minutes, until softened.
- Combine Ingredients: In a large bowl, combine the cooked rice, sautéed vegetables, cherry tomatoes, feta cheese, black olives, parsley, oregano, salt, and black pepper. Mix well to guarantee all ingredients are evenly distributed.
- Stuff the Peppers: Spoon the rice mixture into each bell pepper, packing it tightly. Place the filled peppers back into the baking dish.
- Bake the Peppers: Drizzle the lemon juice over the stuffed peppers and cover the dish with aluminum foil. Bake in the preheated oven for 30-35 minutes, until the peppers are tender.
- Serve: Once baked, remove the foil and allow the peppers to cool slightly before serving. Garnish with additional parsley if desired.
Extra Tips:
To enhance the flavor of your Mediterranean Stuffed Peppers, consider adding a pinch of crushed red pepper flakes to the rice mixture for a bit of heat. You can also experiment with different types of cheese, such as goat cheese or ricotta, to vary the taste.
If you prefer a meatier dish, ground lamb or beef can be added to the filling for additional protein. Finally, these stuffed peppers can be prepared a day ahead and kept in the refrigerator, making them an excellent option for meal prep. Simply reheat them in the oven before serving.
Sweet and Sour Meatballs

Sweet and Sour Meatballs are a delicious and satisfying dish that combines savory meatballs with a tangy and sweet sauce, making it a perfect choice for a family dinner. This dish is both comforting and flavorful, providing a balance of sweet and sour that appeals to both adults and children alike.
It’s versatile enough to be served as a main course alongside rice or noodles or as an appetizer at gatherings. The meatballs are made from a mixture of ground meat, breadcrumbs, and seasonings, then baked or fried until golden brown.
The sauce, which is the star of the dish, is a harmonious blend of vinegar, sugar, soy sauce, and ketchup, creating that signature sweet and sour taste. This dish is ideal for a serving size of 4-6 people, making it an excellent choice for family dinners or small parties.
Ingredients for Sweet and Sour Meatballs (serving size: 4-6 people):
- 1 ½ pounds ground beef or pork
- 1 cup breadcrumbs
- 1 large egg
- 2 cloves garlic, minced
- 1 teaspoon salt
- ½ teaspoon black pepper
- 1 tablespoon vegetable oil (for frying)
- 1 cup pineapple chunks
- 1 medium green bell pepper, chopped
For the sauce:
- 1 cup ketchup
- ½ cup rice vinegar or white vinegar
- ½ cup brown sugar
- 2 tablespoons soy sauce
- 1 tablespoon cornstarch
- ¼ cup water
Cooking Instructions:
- Prepare the Meatballs: In a large bowl, combine the ground meat, breadcrumbs, egg, minced garlic, salt, and pepper. Mix well until all ingredients are evenly incorporated. Form the mixture into small meatballs, about 1 inch in diameter.
- Cook the Meatballs: Heat the vegetable oil in a large skillet over medium heat. Add the meatballs in batches, making sure not to overcrowd the pan. Cook the meatballs until they’re browned on all sides and cooked through, about 8-10 minutes. Remove the meatballs from the skillet and set aside.
- Make the Sauce: In the same skillet, add the ketchup, rice vinegar, brown sugar, and soy sauce. Stir to combine and bring the mixture to a simmer over medium heat.
- Thicken the Sauce: In a small bowl, mix the cornstarch and water to create a slurry. Slowly add the slurry to the simmering sauce, stirring constantly until the sauce thickens.
- Combine Everything: Add the cooked meatballs, pineapple chunks, and chopped green bell pepper to the sauce. Stir gently to coat the meatballs and vegetables with the sauce. Simmer for an additional 5-7 minutes until the green bell pepper is tender but still crisp.
- Serve: Remove from heat and serve the sweet and sour meatballs over a bed of rice or noodles for a complete meal.
Extra Tips:
For the best texture, use fresh breadcrumbs rather than pre-packaged ones, as they provide a moister and more cohesive meatball. If you’re looking to add more vegetables, consider including chopped onions or red bell peppers for added color and flavor.
Adjust the sweetness and sourness of the sauce according to your taste by varying the amount of sugar and vinegar. If you want to save time, consider baking the meatballs in the oven at 400°F (200°C) for about 15-20 minutes as an alternative to frying.