

If you’re always on the hunt for something new to spice up your dinner routine, Andrew Zimmern’s family recipes are a must-try. Think about sharing a meal with delicious Korean fried chicken and aromatic Moroccan lamb tagine. Each recipe is a little adventure, bringing unique flavors to your table. It’s a lovely way to explore different cultures through food. Get ready to be inspired and tantalize your taste buds with these amazing dishes!
Spicy Korean Fried Chicken

Spicy Korean Fried Chicken is a delectable dish that combines the heat and sweetness of Korean spices with the satisfying crunch of perfectly fried chicken. This dish, often referred to as “Yangnyeom Chicken,” is a popular staple in Korean cuisine and is perfect for family dinners or gatherings. The chicken is first marinated to infuse it with flavor, then double-fried to achieve that irresistible crispiness. Finally, it’s tossed in a vibrant sauce that balances spicy, sweet, and tangy notes, making every bite a burst of flavor.
To make Spicy Korean Fried Chicken, you start with high-quality chicken pieces, usually wings or drumettes, which are marinated in a mixture that tenderizes the meat and adds depth of flavor. The marinated chicken is then coated in a light batter and fried twice to guarantee an ultra-crispy exterior. The sauce, which features ingredients like gochujang (Korean red chili paste) and honey, is prepared separately and later tossed with the fried chicken to create a glossy, flavorful coating. This recipe is designed for a serving size of 4-6 people, making it perfect for sharing with family and friends.
Ingredients:
- 2 pounds chicken wings or drumettes
- 1 teaspoon salt
- 1 teaspoon black pepper
- 2 tablespoons rice wine or sake
- 1 cup all-purpose flour
- 1 cup potato starch
- Oil for frying
- 1/4 cup gochujang (Korean red chili paste)
- 2 tablespoons soy sauce
- 1/4 cup honey
- 2 tablespoons brown sugar
- 2 tablespoons rice vinegar
- 1 tablespoon sesame oil
- 2 cloves garlic, minced
- 1 tablespoon ginger, minced
- Toasted sesame seeds (optional, for garnish)
- Sliced green onions (optional, for garnish)
Cooking Instructions:
- Marinate the Chicken:
- In a large bowl, combine the chicken wings with salt, black pepper, and rice wine. Mix well to guarantee each piece is evenly coated. Allow the chicken to marinate in the refrigerator for at least 30 minutes to 1 hour, which will enhance the flavors and tenderize the meat.
- Prepare the Coating:
- In a separate bowl, mix the all-purpose flour and potato starch. Once the chicken has marinated, dredge each piece in the flour-starch mixture, ensuring an even coat. Shake off any excess flour.
- Fry the Chicken:
- Heat a pot of oil to 350°F (175°C). Fry the chicken in batches to avoid overcrowding the pot. Fry each batch for about 8-10 minutes, or until the chicken is light golden brown. Remove the chicken and let it rest on a wire rack to drain excess oil.
- Double Fry for Extra Crispiness:
- Increase the oil temperature to 375°F (190°C). Fry the chicken a second time for an additional 5-7 minutes or until it’s a deep golden brown and extremely crispy. This step is essential for achieving the perfect texture.
- Make the Sauce:
- In a saucepan over medium heat, combine gochujang, soy sauce, honey, brown sugar, rice vinegar, sesame oil, garlic, and ginger. Stir well and bring to a gentle simmer. Cook for about 5 minutes until the sauce thickens slightly and the flavors meld together.
- Coat the Chicken:
- In a large mixing bowl, gently toss the double-fried chicken with the prepared sauce until each piece is thoroughly coated. Guarantee the sauce is distributed evenly for the best flavor.
- Serve:
- Transfer the Spicy Korean Fried Chicken to a serving platter. Sprinkle with toasted sesame seeds and sliced green onions for garnish, if desired. Serve immediately for the best taste and texture.
Extra Tips:
For the crispiest results, make sure to double fry the chicken. This second frying step is key to achieving that signature crunch.
Also, be cautious when heating the oil; maintain a steady temperature to prevent the chicken from absorbing too much oil or burning. Adjust the level of spice in the sauce by varying the amount of gochujang according to your preference. If you like it less spicy, reduce the gochujang and add more honey for sweetness.
Finally, serve the dish immediately after tossing the chicken in the sauce to enjoy the perfect balance of crispy texture and flavorful coating.
Moroccan Lamb Tagine
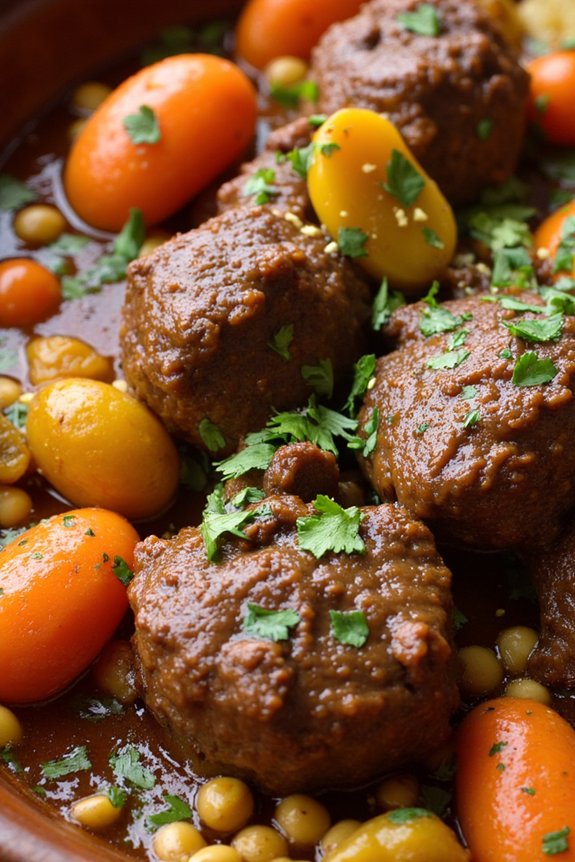
Moroccan Lamb Tagine is a fragrant and flavorful dish that brings the exotic tastes of North Africa to your kitchen. This slow-cooked stew is traditionally prepared in a tagine, a type of earthenware pot, which allows the lamb to become tender and infused with a medley of spices, dried fruits, and vegetables. The combination of lamb, spices like cumin and coriander, and sweet additions like apricots or raisins creates a deliciously complex dish that’s both savory and subtly sweet.
Perfect for a special family dinner, this dish offers a taste of Moroccan culture and culinary tradition.
Cooking Moroccan Lamb Tagine is a rewarding process that fills your home with enticing aromas and results in a hearty meal everyone will enjoy. While the cooking time is extensive, allowing the lamb to simmer gently guarantees that the meat becomes meltingly tender and that all the flavors meld beautifully.
Serve this dish over a bed of fluffy couscous or with warm, crusty bread to soak up the rich sauce.
Ingredients for 4-6 people:
- 2 pounds lamb shoulder, cut into 2-inch pieces
- 2 tablespoons olive oil
- 1 large onion, finely chopped
- 3 cloves garlic, minced
- 1 teaspoon ground cumin
- 1 teaspoon ground coriander
- 1 teaspoon ground cinnamon
- 1 teaspoon ground ginger
- 1/2 teaspoon ground turmeric
- 1/2 teaspoon cayenne pepper (optional)
- Salt and pepper to taste
- 1 (14 oz) can diced tomatoes
- 2 cups chicken or beef broth
- 1 cup dried apricots, halved
- 1/2 cup golden raisins
- 2 cups carrots, sliced
- 1 cup chickpeas, drained and rinsed
- 1/4 cup fresh cilantro, chopped
- 1/4 cup fresh parsley, chopped
- Zest of 1 lemon
Cooking Instructions:
- Brown the Lamb: In a large Dutch oven or tagine, heat the olive oil over medium-high heat. Add the lamb pieces and brown them on all sides, working in batches if necessary. Remove the lamb and set aside.
- Sauté Aromatics: In the same pot, reduce the heat to medium and add the chopped onion. Sauté until the onion is translucent, about 5 minutes. Add the minced garlic and continue to cook for another minute until fragrant.
- Add Spices: Stir in the ground cumin, coriander, cinnamon, ginger, turmeric, cayenne pepper (if using), salt, and pepper. Cook the spices with the onions and garlic for another 2 minutes to release their flavors.
- Simmer the Stew: Return the browned lamb to the pot. Add the diced tomatoes, broth, apricots, raisins, and carrots. Stir well to combine, and bring the mixture to a gentle simmer.
- Cook Slowly: Cover the pot and let the tagine cook on low heat for 2 to 2.5 hours, or until the lamb is incredibly tender. Stir occasionally, adding more broth if needed to maintain a stew-like consistency.
- Add Chickpeas and Herbs: In the last 20 minutes of cooking, stir in the chickpeas. Prior to serving, fold in the chopped cilantro, parsley, and lemon zest. Adjust seasoning with additional salt and pepper if necessary.
- Serve: Serve the Moroccan Lamb Tagine hot, over couscous or with crusty bread on the side to soak up the sauce.
Extra Tips:
For the best results, allow the tagine to cook low and slow, making certain the lamb becomes tender and the flavors meld perfectly. If you don’t have a tagine pot, a heavy-bottomed Dutch oven works just as well.
Feel free to adjust the level of spices to suit your taste, and experiment with adding other dried fruits such as dates or figs for a different sweet note. Preparing the tagine a day ahead can enhance the flavors even more, as the spices have more time to infuse the lamb.
Reheat gently before serving. Enjoy this comforting and aromatic dish with family and friends!
Thai Green Curry With Shrimp
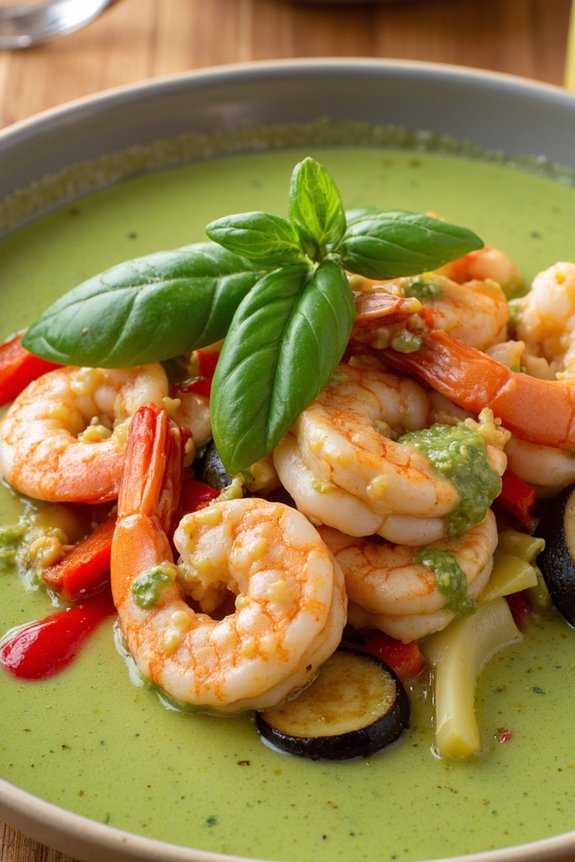
Thai Green Curry with Shrimp is a delightful dish that brings together the vibrant flavors of Thailand in a comforting, yet exotic meal. This dish features succulent shrimp simmered in a fragrant green curry sauce that’s bursting with the aromas of fresh herbs and spices. The creamy coconut milk balances the heat of the green curry paste, while the addition of vegetables like bell peppers and eggplant add texture and depth.
Perfect for a family dinner, this dish is both satisfying and easy to prepare, making it a go-to option for anyone looking to explore Thai cuisine at home. This recipe serves 4-6 people, making it ideal for a family gathering or a small dinner party. The key to an authentic Thai green curry is in the quality of the ingredients. Fresh shrimp, aromatic herbs, and a good quality green curry paste are essential.
The dish is traditionally served with steamed jasmine rice, which helps to soak up the delicious curry sauce. With a few simple steps, you can bring the taste of Thailand to your table and impress your family and friends with this flavorful dish.
Ingredients:
- 1 pound large shrimp, peeled and deveined
- 1 tablespoon vegetable oil
- 2 tablespoons green curry paste
- 1 can (14 oz) coconut milk
- 1 cup chicken broth
- 1 tablespoon fish sauce
- 1 tablespoon brown sugar
- 1 red bell pepper, sliced
- 1 cup baby eggplant, sliced
- 1 cup bamboo shoots
- 1/4 cup Thai basil leaves
- 1 lime, cut into wedges
- Steamed jasmine rice, for serving
Cooking Instructions:
- Prepare the Shrimp: Start by cleaning the shrimp. Peel and devein them, then rinse under cold water and pat dry with paper towels. Set aside.
- Heat the Oil: In a large skillet or wok, heat the vegetable oil over medium heat. Add the green curry paste and cook, stirring continuously, for about 1-2 minutes until fragrant.
- Add Coconut Milk and Broth: Pour in the coconut milk and chicken broth, stirring to combine with the curry paste. Bring the mixture to a simmer.
- Season the Curry: Add the fish sauce and brown sugar to the skillet, stirring well to guarantee the flavors are evenly distributed.
- Cook the Vegetables: Add the sliced red bell pepper, baby eggplant, and bamboo shoots to the skillet. Simmer for about 5-7 minutes until the vegetables are tender.
- Add the Shrimp: Stir in the shrimp and cook for about 3-4 minutes, or until they turn pink and opaque.
- Finish with Basil: Remove from heat and stir in the Thai basil leaves. Let them wilt slightly from the residual heat of the curry.
- Serve: Serve the green curry hot over steamed jasmine rice, garnished with lime wedges for a fresh, zesty kick.
Extra Tips:
To guarantee the best flavor, use fresh shrimp and high-quality green curry paste. You can adjust the spiciness by varying the amount of curry paste used. If you prefer a milder curry, start with a smaller amount and add more to taste.
Be careful not to overcook the shrimp, as they can become tough and rubbery if cooked for too long. The fresh lime wedges aren’t just for garnish; squeezing lime juice over the curry right before eating enhances the flavors and adds a revitalizing acidity that balances the richness of the coconut milk.
Enjoy this dish with a side of fresh cucumber salad for a complete Thai-inspired meal.
Ethiopian Lentil Stew
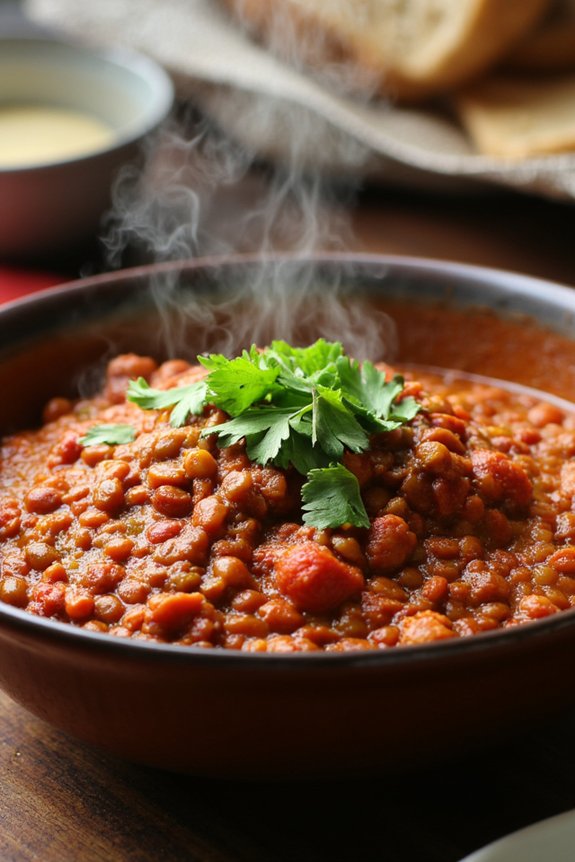
Ethiopian Lentil Stew, also known as Misir Wot, is a warm and hearty dish that’s perfect for bringing the family together. This dish is rich in flavor, thanks to a blend of spices that create a unique and aromatic experience. The main ingredients include lentils, which provide a great source of protein, and Berbere spice, a traditional Ethiopian spice mix that adds depth and heat to the stew. This dish is perfect for family dinners as it’s both nutritious and comforting.
In Andrew Zimmern’s family recipe, the lentils are simmered to perfection in a flavorful tomato base, enhanced with onions, garlic, and ginger. The Berbere spice mix is the star of the show, giving the stew its distinctive taste. This dish isn’t only easy to make but also allows for creativity in adjusting the spice levels according to your family’s preference. Whether you’re new to Ethiopian cuisine or a seasoned fan, this lentil stew is sure to become a family favorite.
Ingredients (serving size 4-6):
- 2 cups red lentils
- 1 large onion, finely chopped
- 3 garlic cloves, minced
- 1 tablespoon fresh ginger, grated
- 3 tablespoons Berbere spice mix
- 1 teaspoon ground cumin
- 1 teaspoon ground coriander
- 2 tablespoons tomato paste
- 4 cups vegetable broth
- 2 tablespoons olive oil
- Salt to taste
- Fresh cilantro, chopped (for garnish)
Instructions:
- Prepare the Ingredients: Begin by rinsing the red lentils under cold water until the water runs clear. Finely chop the onion, mince the garlic, and grate the ginger.
- Sauté the Aromatics: Heat the olive oil in a large pot over medium heat. Add the chopped onion and sauté until translucent, about 5 minutes. Stir in the minced garlic and grated ginger, cooking for an additional 2 minutes until fragrant.
- Add the Spices and Tomato Paste: Stir in the Berbere spice mix, ground cumin, and ground coriander. Cook for 1 minute to toast the spices and enhance their flavors. Add the tomato paste and mix well.
- Cook the Lentils: Add the rinsed red lentils to the pot, stirring to coat them in the spice mixture. Pour in the vegetable broth and bring the mixture to a boil. Reduce the heat to low, cover, and let it simmer for about 25-30 minutes, or until the lentils are tender and the stew has thickened. Stir occasionally to prevent sticking.
- Season and Serve: Taste the stew and add salt as needed. If the stew is too thick, you can add a little more broth or water to reach your desired consistency. Garnish with freshly chopped cilantro before serving.
Extra Tips:
When cooking Ethiopian Lentil Stew, it’s important to adjust the heat level to suit your family’s palate. The Berbere spice mix can vary in heat, so start with a smaller amount if you’re sensitive to spice, and gradually add more if desired.
Also, this stew can be prepared ahead of time as the flavors tend to deepen and improve after a day. If you’re short on time, consider using store-bought Berbere spice mix, but homemade will always give you a more authentic flavor.
Finally, serve this stew with traditional injera bread or over a bed of rice to complete the meal.
Mexican Mole Enchiladas

Mexican Mole Enchiladas is a rich and savory dish that combines the deep, complex flavors of mole sauce with the comforting texture of enchiladas. Originating from traditional Mexican cuisine, mole is a sauce made from a blend of spices, chocolate, and chili peppers, offering a perfect balance of sweetness and spice that complements the enchiladas beautifully. This dish is ideal for a family dinner, where you can enjoy the combination of soft tortillas filled with tender chicken, smothered in a luscious mole sauce, and topped with cheese.
Preparing Mexican Mole Enchiladas might seem intimidating due to the number of ingredients, but it’s a rewarding process that results in a truly authentic and delicious meal. With this recipe, you’ll create a serving size fit for 4-6 people, making it perfect for gatherings or a hearty family meal. The key to success is patience and attention to detail, ensuring that each element of the dish is prepared with care to bring out the rich flavors.
Ingredients for 4-6 servings:
- 12 corn tortillas
- 2 cups cooked and shredded chicken
- 2 tablespoons vegetable oil
- 1 cup of mole sauce (store-bought or homemade)
- 1 cup chicken broth
- 1 cup crumbled queso fresco or shredded cheese
- 1 small onion, finely chopped
- 2 cloves garlic, minced
- 1/2 teaspoon cumin
- Salt and pepper to taste
- Fresh cilantro, chopped (for garnish)
Cooking Instructions:
- Prepare the Mole Sauce: If you’re using store-bought mole, warm it up in a saucepan over low heat. If you’re making your own, start by blending your choice of dried chili peppers, chocolate, spices, and chicken broth until smooth. Simmer the mixture in a pan for 10-15 minutes, stirring occasionally until the sauce thickens.
- Cook the Filling: In a skillet, heat 1 tablespoon of vegetable oil over medium heat. Add the chopped onion and garlic, cooking until they become translucent. Stir in the shredded chicken, cumin, salt, and pepper. Mix well and cook for another 5 minutes, ensuring the chicken is evenly coated with the spices. Remove from heat and set aside.
- Warm the Tortillas: In a separate skillet, heat the remaining tablespoon of oil over medium heat. Briefly warm each tortilla on both sides until pliable, about 30 seconds per side. This will make them easier to roll without breaking.
- Assemble the Enchiladas: Preheat your oven to 350°F (175°C). Spread a thin layer of mole sauce on the bottom of a baking dish. Fill each tortilla with a generous spoonful of the chicken mixture, roll them tightly, and place them seam side down in the baking dish.
- Bake the Enchiladas: Pour the remaining mole sauce over the rolled tortillas, ensuring they’re well covered. Sprinkle the crumbled queso fresco or shredded cheese on top. Cover the dish with aluminum foil and bake for 20 minutes. Remove the foil and bake for an additional 10 minutes, or until the cheese is melted and bubbly.
- Garnish and Serve: Remove the enchiladas from the oven and let them cool for a few minutes. Garnish with fresh cilantro before serving. Enjoy your Mexican Mole Enchiladas with a side of rice or beans for a complete meal.
Extra Tips:
When cooking Mexican Mole Enchiladas, it’s important to taste the mole sauce as you cook it, adjusting the seasoning to your preference. If you find the sauce too thick, add a bit more chicken broth to achieve your desired consistency. For a spicier kick, consider adding a pinch of cayenne pepper or a sprinkle of sliced jalapeños.
Additionally, using fresh tortillas will greatly enhance the texture of the dish. If making homemade tortillas isn’t an option, choose the freshest store-bought ones available. Enjoy experimenting with different toppings, such as avocado slices or sour cream, to customize the dish to your liking.
Vietnamese Pho Ga
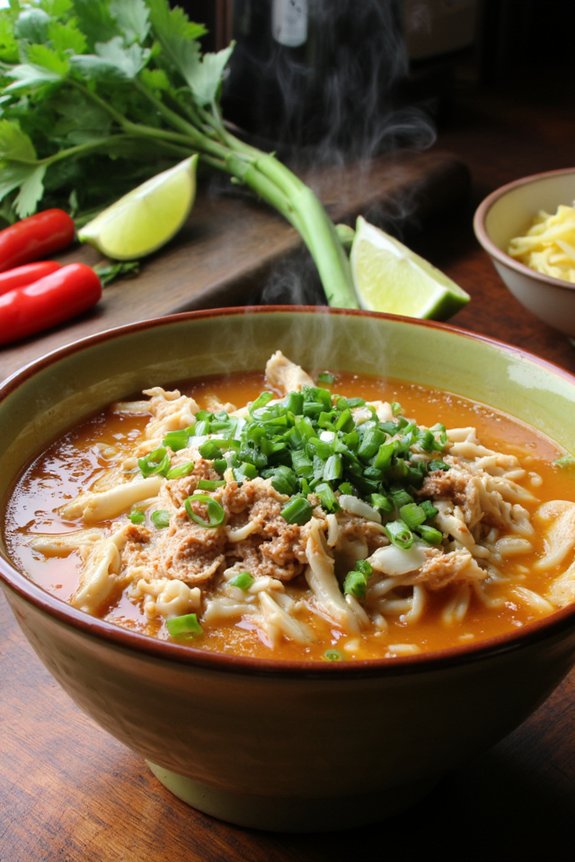
Vietnamese Pho Ga is a fragrant and comforting chicken noodle soup that celebrates the harmonious blend of aromatic spices and fresh herbs. Originating from Northern Vietnam, Pho Ga is a variation of the popular Pho Bo, substituting beef with chicken to create a lighter yet equally flavorful broth.
Andrew Zimmern’s family dinner recipe for Vietnamese Pho Ga captures the essence of traditional Vietnamese cooking, emphasizing the importance of patience in developing deep, rich flavors. The slow-simmered broth, infused with spices like star anise and cinnamon, forms the heart of this dish, while tender chicken and rice noodles add substance and texture.
Preparing this delightful dish requires attention to detail, from selecting high-quality chicken to properly balancing the spices and herbs. It’s a dish that encourages communal dining, as family and friends gather around the table to customize their bowls with fresh garnishes such as cilantro, Thai basil, and lime wedges. This recipe serves 4-6 people, making it perfect for a cozy dinner with loved ones.
Ingredients for 4-6 servings:
- 1 whole chicken (about 3-4 pounds)
- 2 onions, halved
- 1 large ginger root, sliced
- 2 cinnamon sticks
- 3 star anise
- 5 cloves
- 1 tablespoon coriander seeds
- 1 tablespoon fish sauce
- 1 tablespoon salt
- 1 tablespoon sugar
- 400g dried rice noodles
- 3 green onions, sliced
- Fresh cilantro leaves
- Fresh Thai basil leaves
- Bean sprouts
- Lime wedges
- Sliced chili peppers (optional)
Cooking Instructions:
- Prepare the Broth: Place the chicken in a large pot and cover with water. Bring to a boil over high heat, then reduce to a simmer. Skim off any foam that rises to the surface to keep the broth clear.
- Roast Aromatics: While the chicken is simmering, char the onion halves and ginger slices under a broiler or over an open flame until they’re blackened. This adds depth and smokiness to the broth.
- Simmer with Spices: Add the charred onions, ginger, cinnamon sticks, star anise, cloves, and coriander seeds to the pot. Simmer gently for about 1.5 to 2 hours, until the chicken is fully cooked and tender.
- Season the Broth: Remove the chicken and set aside to cool. Strain the broth to remove the solids, then add fish sauce, salt, and sugar to taste. Adjust seasoning as needed.
- Prepare the Noodles: Cook the rice noodles according to package instructions. Drain and rinse with cold water to prevent sticking.
- Shred the Chicken: Once the chicken is cool enough to handle, shred the meat into bite-sized pieces, discarding the skin and bones.
- Assemble the Bowls: Divide the cooked noodles among serving bowls. Top with shredded chicken and ladle hot broth over the top.
- Garnish and Serve: Serve with green onions, cilantro, Thai basil, bean sprouts, lime wedges, and sliced chili peppers on the side for diners to customize their bowls.
Extra Tips:
For the best flavor, use a good quality, free-range chicken, as it results in a richer broth.
Be patient with the simmering process; it’s vital for developing the complex flavors that make Pho Ga so special.
If you prefer a spicier broth, add a few slices of chili pepper to the pot while simmering.
Finally, prepare all garnishes ahead of time and arrange them on a platter, allowing each person to add their preferred toppings to their bowl. Enjoy!
Peruvian Lomo Saltado
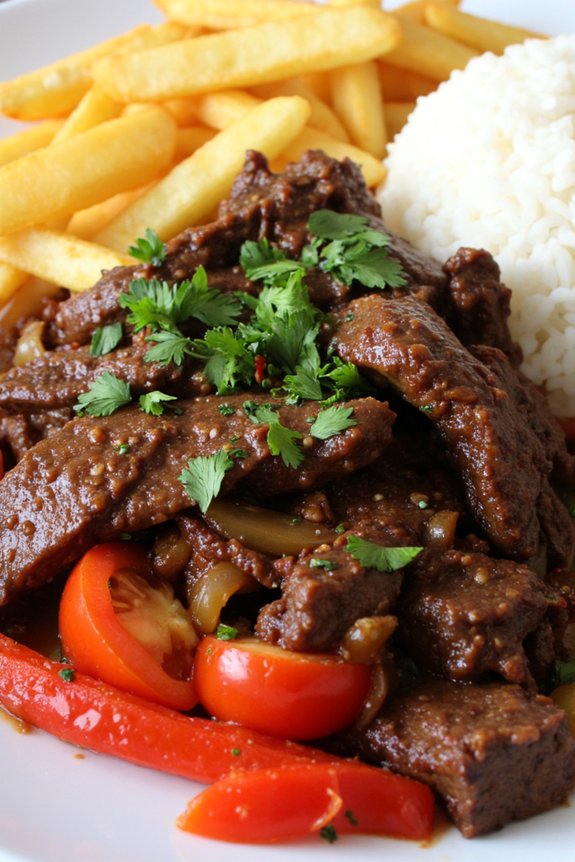
Lomo Saltado is a traditional Peruvian dish that perfectly blends the rich flavors of Latin America with a hint of Asian influence. This stir-fry dish features tender strips of beef, sautéed with onions, tomatoes, and a splash of soy sauce, creating a savory and aromatic meal that’s both satisfying and full of texture.
Traditionally served with both rice and French fries, Lomo Saltado is an excellent example of Peru’s fusion cuisine, making it a popular choice for family dinners or gatherings.
The beauty of Lomo Saltado lies in its simplicity and versatility. It encapsulates the vibrant culinary spirit of Peru with its colorful presentation and bold flavors. Whether you’re an experienced cook or a novice in the kitchen, preparing this dish will transport you to the bustling streets of Lima with every bite.
Serve it for 4-6 people and watch as it becomes a favorite at your family table.
Ingredients:
- 2 pounds beef sirloin, cut into strips
- 2 large red onions, sliced
- 2 large tomatoes, sliced into wedges
- 1 red bell pepper, sliced
- 3 tablespoons soy sauce
- 2 tablespoons white vinegar
- 1 tablespoon aji amarillo paste (optional for heat)
- 1 tablespoon minced garlic
- 1/4 cup fresh cilantro, chopped
- 1/4 cup vegetable oil
- Salt and pepper to taste
- Cooked white rice, for serving
- French fries, for serving
Instructions:
- Prepare the Ingredients: Begin by slicing the beef into thin strips, approximately 1/2 inch wide. Slice the onions, tomatoes, and red bell pepper. Set these aside in separate bowls.
- Marinate the Beef: In a large bowl, combine the beef strips with soy sauce, vinegar, aji amarillo paste (if using), minced garlic, salt, and pepper. Let the beef marinate for at least 15 minutes to absorb the flavors.
- Cook the Beef: Heat vegetable oil in a large skillet or wok over high heat. Once the oil is hot, add the marinated beef strips in batches to avoid overcrowding. Stir-fry each batch for about 2-3 minutes until the beef is browned but still tender. Remove the beef from the pan and set it aside.
- Sauté the Vegetables: In the same pan, add a little more oil if needed, and sauté the onions for about 2 minutes until they start to soften. Add the red bell pepper and cook for another minute. Finally, add the tomato wedges and cook until they begin to soften but still hold their shape.
- Combine and Finish the Dish: Return the beef to the pan with the sautéed vegetables. Add the chopped cilantro and toss everything together for about 1-2 minutes to combine the flavors. Adjust seasoning with additional soy sauce, salt, or pepper as needed.
- Serve: Serve the Lomo Saltado immediately with a side of cooked white rice and crispy French fries.
Extra Tips: When cooking Lomo Saltado, it’s crucial to use high heat to quickly sear the beef and vegetables, preserving their texture and flavor. Make sure not to overcrowd the pan during the stir-frying process to guarantee even cooking.
For an authentic touch, consider using Peruvian aji amarillo paste, which adds a unique heat and depth to the dish. Additionally, balance the ratio of vinegar and soy sauce to suit your taste preference while maintaining the dish’s characteristic tangy and savory profile.
Indian Butter Chicken
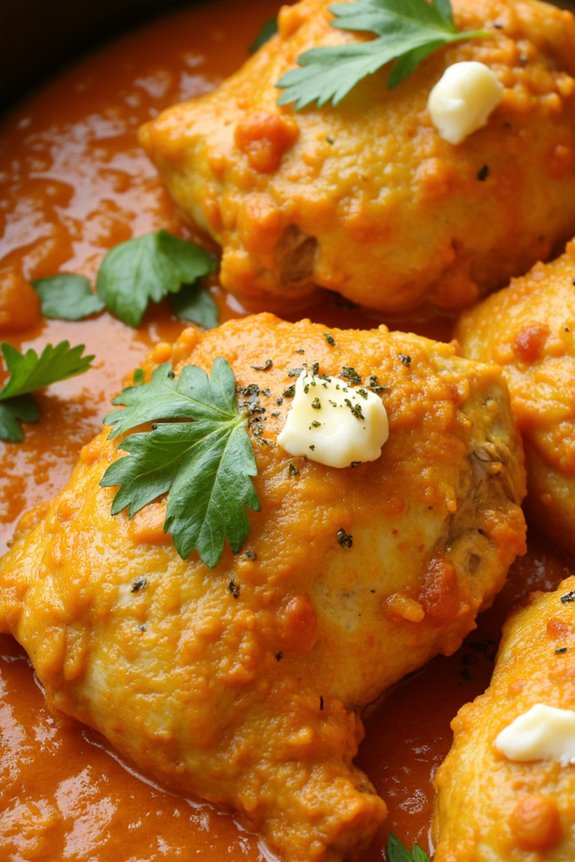
Indian Butter Chicken, a beloved dish that has gained worldwide popularity, offers a perfect blend of spices and creamy richness. This dish is known for its tender chicken pieces simmered in a fragrant, tomato-based sauce enriched with butter and cream.
The origins of Butter Chicken, or “Murgh Makhani,” trace back to Delhi, India, where it was created by the chefs of the iconic Moti Mahal restaurant in the 1950s. It’s an ideal dish for a family dinner that can be paired with naan or basmati rice for a complete meal.
This recipe for Indian Butter Chicken serves 4-6 people and is designed to bring the authentic flavors of this classic dish right to your home kitchen. With its aromatic spices and rich, creamy sauce, this recipe is sure to be a hit at your next family gathering.
Whether you’re a seasoned cook or trying Indian cuisine for the first time, this guide will walk you through creating a memorable meal.
Ingredients:
- 1.5 lbs (about 700g) boneless, skinless chicken thighs, cut into bite-sized pieces
- 1 cup plain yogurt
- 1 tablespoon lemon juice
- 2 teaspoons ground cumin
- 1 teaspoon ground coriander
- 1 teaspoon garam masala
- 1 teaspoon turmeric powder
- 1 teaspoon red chili powder
- 2 tablespoons butter
- 1 large onion, finely chopped
- 3 cloves garlic, minced
- 1 tablespoon ginger, minced
- 1 can (14 oz) tomato puree
- 1 cup heavy cream
- 2 tablespoons kasuri methi (dried fenugreek leaves)
- Salt, to taste
- Fresh cilantro leaves, for garnish
Cooking Instructions:
- Marinate the Chicken: In a large mixing bowl, combine the yogurt, lemon juice, ground cumin, ground coriander, garam masala, turmeric powder, red chili powder, and salt. Add the chicken pieces to the marinade, making sure each piece is well-coated. Cover and refrigerate for at least 1 hour, or overnight for deeper flavor.
- Cook the Chicken: Heat 1 tablespoon of butter in a large skillet over medium heat. Add the marinated chicken pieces and cook for about 5-7 minutes, stirring occasionally, until the chicken is browned and cooked through. Remove the chicken from the skillet and set aside.
- Prepare the Sauce: In the same skillet, add the remaining tablespoon of butter. Sauté the chopped onion until translucent, about 5 minutes. Add the minced garlic and ginger, and cook for another 2 minutes until fragrant.
- Add Tomato Puree: Pour in the tomato puree and stir well to combine with the onion mixture. Allow it to simmer for about 10 minutes, stirring occasionally, until the sauce thickens and the raw tomato smell dissipates.
- Incorporate Cream and Chicken: Lower the heat and stir in the heavy cream, mixing until the sauce is smooth and creamy. Add the cooked chicken pieces back into the skillet, along with any juices that have collected, and stir to coat the chicken in the sauce.
- Season and Finish: Sprinkle the kasuri methi over the chicken and sauce, stirring gently to combine. Let the dish simmer for an additional 5 minutes, allowing the flavors to meld. Taste and adjust seasoning with salt as needed.
- Garnish and Serve: Transfer the Butter Chicken to a serving dish, garnish with fresh cilantro leaves, and serve hot with naan or basmati rice.
Extra Tips: To achieve the best flavor, marinate the chicken overnight if time permits. This allows the spices to penetrate the meat thoroughly.
When cooking the sauce, make certain the tomato puree is well-cooked to avoid any raw taste; this is essential for the depth of flavor. If you prefer a spicier dish, adjust the red chili powder to taste.
Finally, using kasuri methi is optional, but it adds a distinct and authentic touch to the dish.
Spanish Paella With Seafood
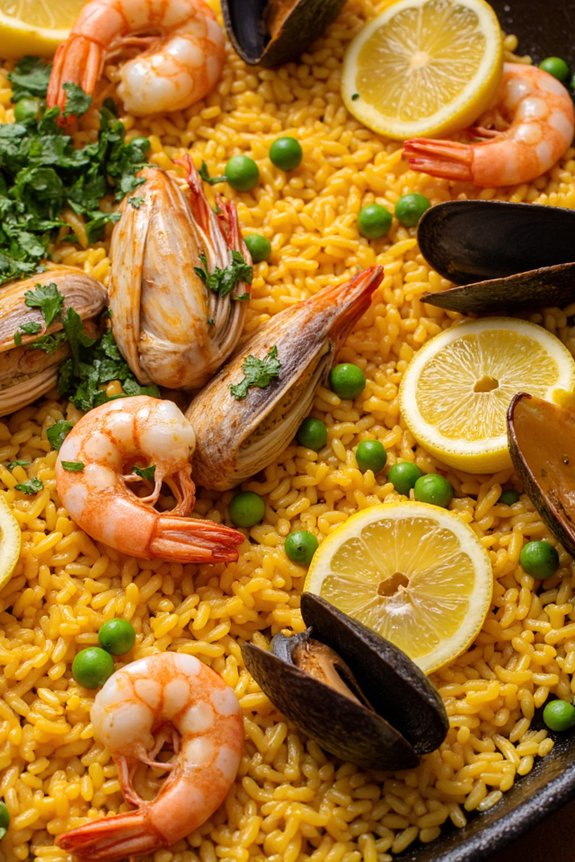
Spanish Paella is a quintessential dish that brings the flavors of the Mediterranean coast to your dining table. Originating from the Valencia region, this dish traditionally incorporates a variety of seafood, rice, and a symphony of spices. Andrew Zimmern’s Family Dinner Recipe for Spanish Paella with Seafood is a celebration of textures and tastes that promise to make any family meal special.
The combination of fresh seafood, aromatic saffron, and perfectly cooked rice creates a harmonious dish that’s both comforting and exotic. This recipe serves 4-6 people, perfect for a family gathering or a dinner party. The key to a good paella lies in the quality of the ingredients and the patience in cooking the rice to achieve the perfect texture. By following the steps carefully, you’ll be able to create an authentic Spanish Paella that captures the essence of a traditional Spanish meal.
Ingredients:
- 2 tablespoons olive oil
- 1 onion, finely chopped
- 2 cloves garlic, minced
- 1 red bell pepper, sliced
- 1 teaspoon smoked paprika
- 1/2 teaspoon saffron threads
- 1 cup Arborio rice or Bomba rice
- 3 1/2 cups seafood stock
- 1 pound mussels, cleaned and debearded
- 1 pound clams, cleaned
- 1/2 pound shrimp, peeled and deveined
- 1/2 pound calamari, cleaned and cut into rings
- 1 cup frozen peas
- Salt and pepper to taste
- Lemon wedges, for serving
- Fresh parsley, chopped, for garnish
Cooking Instructions:
- Prepare the Base: In a large paella pan or a wide, shallow skillet, heat the olive oil over medium heat. Add the chopped onion and cook until it becomes translucent. Stir in the minced garlic and sliced red bell pepper, cooking until the peppers are soft.
- Add Spices and Rice: Sprinkle the smoked paprika and saffron threads into the pan, stirring until fragrant. Add the Arborio or Bomba rice, stirring to coat the grains with the oil and spices evenly.
- Cook the Rice: Pour in the seafood stock, bring to a gentle simmer, and reduce the heat to low. Allow the rice to absorb the stock slowly, cooking for 15-20 minutes without stirring, which helps to form the socarrat or crust at the bottom.
- Add Seafood: Once the rice is nearly cooked and most of the liquid is absorbed, arrange the mussels, clams, shrimp, and calamari over the rice. Cover the pan with a lid or foil and continue to cook until the shellfish open and the shrimp turn pink, about 5-7 minutes.
- Finish the Dish: Stir in the frozen peas, seasoning the paella with salt and pepper to taste. Allow the peas to heat through, then remove the pan from heat.
- Garnish and Serve: Let the paella rest for a few minutes before serving. Garnish with chopped fresh parsley and serve with lemon wedges on the side for an extra burst of flavor.
Extra Tips:
When making Spanish Paella with seafood, patience is essential. Resist the urge to stir the rice while it cooks; this helps develop the socarrat, the desirable crispy layer at the bottom of the pan.
Confirm that your seafood is fresh, as it contributes considerably to the dish’s flavor. If saffron threads are unavailable, substitute with turmeric for color, though the flavor will differ slightly.
Finally, use a flat, wide pan for even cooking and heat distribution, which is vital for achieving the perfect paella texture.
Jamaican Jerk Pork

Jerk pork is traditionally cooked over an open flame, which imparts a smoky flavor that enhances the fruity and spicy notes of the marinade. However, it can also be adapted to an oven or stovetop method for convenience without losing its signature taste.
Served with rice and peas or a simple salad, this dish brings a taste of the Caribbean to your kitchen, making it a delightful centerpiece for any meal.
Ingredients (Serving size: 4-6 people)
- 3 pounds pork shoulder, trimmed and cut into large chunks
- 4 scallions, chopped
- 1 large onion, chopped
- 2 tablespoons fresh thyme leaves
- 2 teaspoons ground allspice
- 1 teaspoon ground nutmeg
- 1 teaspoon ground cinnamon
- 1/2 teaspoon ground cloves
- 1 tablespoon salt
- 1 teaspoon black pepper
- 1 tablespoon brown sugar
- 3 scotch bonnet peppers, seeded and chopped
- 2 tablespoons soy sauce
- 2 tablespoons vegetable oil
- 3 cloves garlic, minced
- 1/4 cup white vinegar
- Juice of 1 lime
Cooking Instructions
- Prepare the Marinade: In a blender or food processor, combine scallions, onion, thyme, allspice, nutmeg, cinnamon, cloves, salt, black pepper, brown sugar, scotch bonnet peppers, soy sauce, vegetable oil, garlic, vinegar, and lime juice. Blend until you have a smooth paste.
- Marinate the Pork: Place the pork chunks in a large resealable bag or a dish. Pour the marinade over the pork, ensuring each piece is well coated. Seal the bag or cover the dish and refrigerate for at least 4 hours, preferably overnight, to allow the flavors to develop fully.
- Preheat the Oven: When ready to cook, preheat your oven to 350°F (175°C).
- Cook the Pork: Remove the pork from the marinade and place it in a roasting pan. Reserve the marinade for basting. Roast the pork in the preheated oven for 1.5 to 2 hours, basting with the reserved marinade every 30 minutes, until the meat is tender and cooked through.
- Rest and Serve: Once cooked, remove the pork from the oven and let it rest for 10 minutes to allow the juices to redistribute. Slice the pork and serve with your choice of sides such as rice and peas or a fresh salad.
Extra Tips
For an authentic smoky flavor, consider using a charcoal grill instead of an oven. If you opt for grilling, cook the pork over indirect heat to prevent it from burning due to the sugar in the marinade.
Additionally, if you prefer a milder heat, substitute the scotch bonnet peppers with milder chili peppers or reduce the quantity. Remember to wear gloves when handling hot peppers to prevent skin irritation.
Adjust the seasoning to your taste, as the level of spice can vary depending on the peppers used.
Chinese Szechuan Beef Stir-Fry
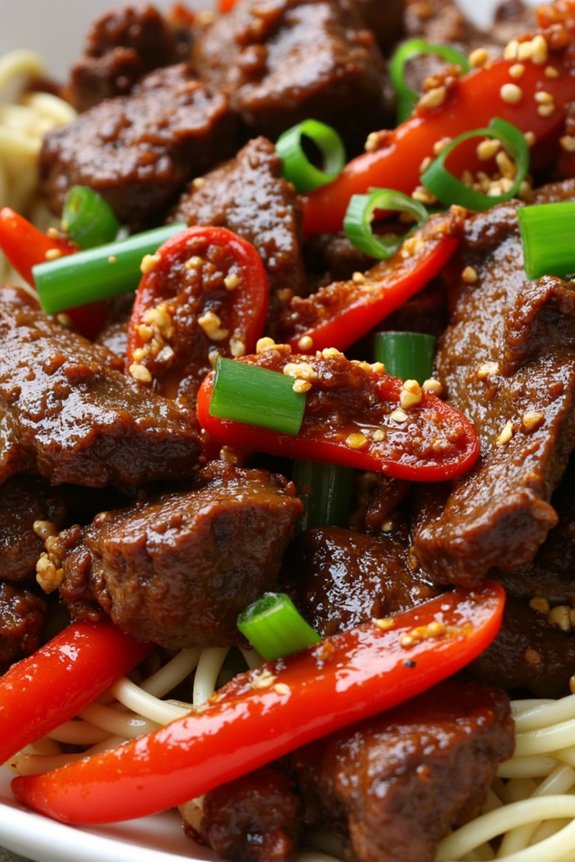
Andrew Zimmern’s Chinese Szechuan Beef Stir-Fry is a flavorful and spicy dish that brings the authentic taste of Szechuan cuisine to your dinner table. This recipe is perfect for those who enjoy a bit of heat and a lot of flavor in their meals. The combination of tender beef, crisp vegetables, and the signature Szechuan peppercorns creates a memorable dining experience that will have your family asking for seconds.
Easy to make and quick to prepare, this dish is ideal for a weeknight family dinner. The key to a successful Szechuan Beef Stir-Fry is in the preparation of the ingredients and the balance of flavors. The use of fresh ingredients like ginger, garlic, and scallions, along with the heat from dried red chilies and the numbing spice of Szechuan peppercorns, creates a symphony of taste that’s both spicy and savory.
This recipe serves 4-6 people, making it perfect for a family meal or a small gathering of friends.
Ingredients:
- 1.5 lbs flank steak, thinly sliced
- 2 tablespoons soy sauce
- 1 tablespoon cornstarch
- 2 tablespoons vegetable oil
- 2 teaspoons Szechuan peppercorns
- 8 dried red chilies
- 1 tablespoon minced garlic
- 1 tablespoon minced ginger
- 1 red bell pepper, sliced
- 1 green bell pepper, sliced
- 1 bunch scallions, chopped
- 2 tablespoons rice vinegar
- 2 tablespoons hoisin sauce
- 1 tablespoon sesame oil
Instructions:
- Marinate the Beef: In a large bowl, combine the thinly sliced flank steak with soy sauce and cornstarch. Mix well to coat the beef evenly. Let it marinate for at least 15 minutes to allow the flavors to penetrate the meat.
- Prepare the Stir-Fry Base: Heat the vegetable oil in a large wok or skillet over medium-high heat. Once hot, add the Szechuan peppercorns and dried red chilies. Stir-fry them for about 1-2 minutes until they become fragrant, making sure they don’t burn.
- Cook the Aromatics: Add the minced garlic and ginger to the wok. Stir-fry for an additional minute until they release their aroma and turn golden brown.
- Stir-Fry the Vegetables: Add the sliced red and green bell peppers to the wok. Stir-fry them for 3-4 minutes until they become tender-crisp.
- Cook the Beef: Increase the heat to high and add the marinated beef slices to the wok. Stir-fry the beef for about 5-7 minutes until it’s cooked through and all the pieces are browned.
- Combine and Season: Add the chopped scallions, rice vinegar, hoisin sauce, and sesame oil to the wok. Toss everything together to make sure the beef and vegetables are evenly coated with the sauce.
- Serve: Once everything is well combined and heated through, remove from heat. Transfer the stir-fry to a serving plate and enjoy hot with steamed rice or noodles.
Extra Tips:
When cooking Chinese Szechuan Beef Stir-Fry, it’s important to have all your ingredients prepped and ready before you start cooking, as the process moves quickly.
Slice the beef as thin as possible for quicker cooking and tenderness. Adjust the number of dried red chilies and Szechuan peppercorns according to your spice preference. If you prefer a milder dish, reduce the quantities; if you love heat, add more!
Always keep the heat high during stir-frying to make sure everything cooks evenly and maintains a nice texture.
Italian Braised Short Ribs
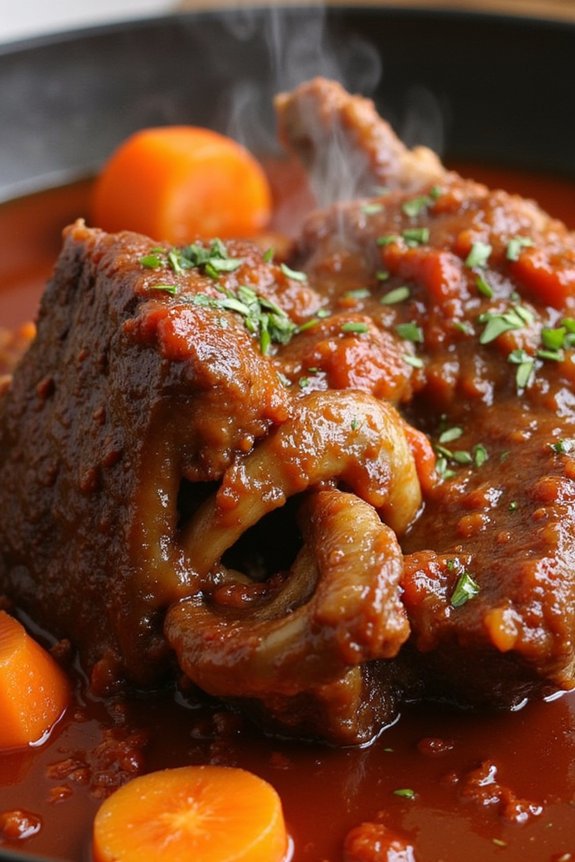
Indulge in the rich and robust flavors of Italian cuisine with these succulent braised short ribs. This dish combines the tender, melt-in-your-mouth texture of beef short ribs with a medley of Italian herbs and ingredients, creating a comforting meal that’s perfect for a family dinner.
The slow-cooked process allows the meat to absorb the full depth of flavors from the red wine, tomatoes, and aromatic vegetables, resulting in a dish that’s both hearty and satisfying.
Perfect for a serving size of 4-6 people, these Italian Braised Short Ribs require a bit of patience as they cook slowly, but the end result is well worth the wait. The recipe is designed to be straightforward, guaranteeing that even novice cooks can impress their family and friends with a gourmet-style meal.
Serve these ribs over creamy polenta or mashed potatoes to soak up the delicious sauce.
Ingredients (Serves 4-6):
- 4 pounds beef short ribs, bone-in
- Salt and freshly ground black pepper
- 2 tablespoons olive oil
- 1 onion, diced
- 2 carrots, diced
- 2 celery stalks, diced
- 4 cloves garlic, minced
- 2 tablespoons tomato paste
- 1 cup red wine (preferably Italian)
- 1 can (28 ounces) crushed tomatoes
- 2 cups beef broth
- 2 sprigs fresh rosemary
- 2 sprigs fresh thyme
- 1 bay leaf
Cooking Instructions:
- Preheat the Oven: Begin by preheating your oven to 325°F (165°C) to guarantee it’s ready for braising.
- Season the Ribs: Generously season the beef short ribs with salt and freshly ground black pepper on all sides.
- Sear the Ribs: In a large Dutch oven or heavy-bottomed pot, heat the olive oil over medium-high heat. Add the short ribs in batches, searing until they’re browned on all sides, about 8-10 minutes total. Remove the ribs and set them aside.
- Prepare the Vegetables: In the same pot, add the onion, carrots, and celery. Cook for about 5 minutes or until the vegetables are softened. Stir in the garlic and tomato paste, cooking for another minute until fragrant.
- Deglaze the Pot: Pour the red wine into the pot, scraping the bottom to release any browned bits. Allow the wine to simmer for 2-3 minutes.
- Combine Ingredients: Add the crushed tomatoes and beef broth to the pot, stirring to combine. Return the seared short ribs to the pot, nestling them into the sauce. Add the rosemary, thyme, and bay leaf.
- Braise in the Oven: Cover the pot with a lid and transfer it to the preheated oven. Braise for 2.5 to 3 hours, or until the meat is falling off the bone and tender.
- Final Touches: Remove the pot from the oven. Discard the rosemary, thyme, and bay leaf. If desired, skim any excess fat from the surface of the sauce.
Extra Tips:
For the best results, choose high-quality beef short ribs; the marbling will enhance the flavor and tenderness of the dish.
If you don’t have a Dutch oven, guarantee your pot is oven-safe and has a tight-fitting lid to retain moisture.
For a richer sauce, you can reduce it further on the stovetop after braising.
Be sure to taste and adjust seasoning before serving, as the flavors will concentrate during cooking.
Serve with a side of crusty bread or over a bed of creamy polenta to complement the savory sauce.