

Weeknight dinners used to be pure chaos, but these 14 organized, quick, and easy make-ahead meals have truly transformed our routine. From comforting beef stew to delightful chicken Alfredo bake, each dish delivers flavor without the hassle. Picture a kitchen where dinner is ready, and stress has no place. These meals can truly change your evenings for the better.
Hearty Beef and Vegetable Stew
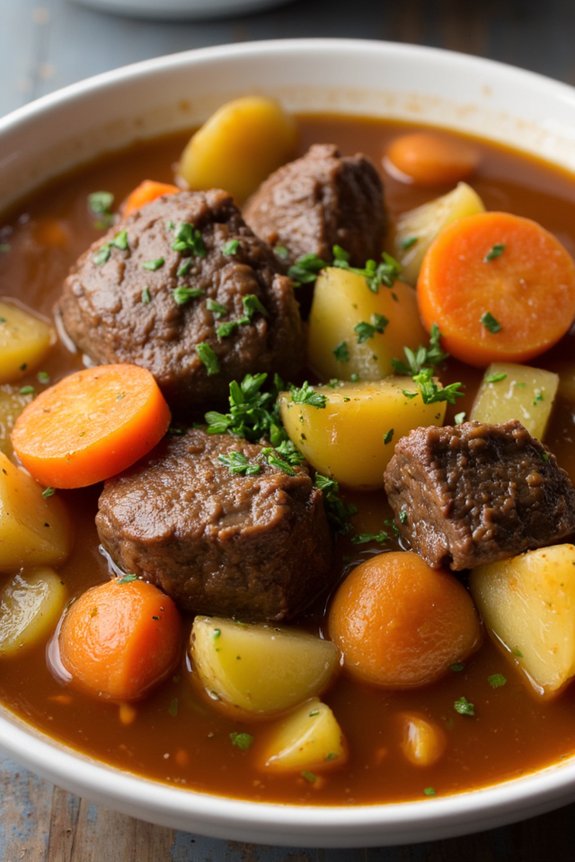
Hearty Beef and Vegetable Stew is the perfect make-ahead dinner that brings warmth and comfort to your family table. This classic dish is packed with chunks of tender beef, an assortment of vibrant vegetables, and a rich, savory broth that simmers together to create a satisfying meal.
The beauty of this stew lies in its ability to taste even better the next day, as the flavors meld and intensify, making it an ideal choice for busy weeknights or weekend gatherings.
Whether you’re feeding a family of four or six, this recipe provides enough servings to guarantee everyone leaves the table satisfied. With a bit of preparation, you can enjoy the convenience of having a hearty, home-cooked meal ready to go, reducing the stress of last-minute cooking.
Let’s plunge into the ingredients and step-by-step instructions to bring this delicious dish to life in your own kitchen.
Ingredients (Serves 4-6):
- 2 pounds beef chuck, cut into 1-inch cubes
- 3 tablespoons all-purpose flour
- 2 tablespoons olive oil
- 1 large onion, chopped
- 3 cloves garlic, minced
- 4 cups beef broth
- 1 cup red wine (optional)
- 2 tablespoons tomato paste
- 2 teaspoons Worcestershire sauce
- 1 teaspoon dried thyme
- 1 teaspoon dried rosemary
- 2 bay leaves
- 4 carrots, peeled and sliced
- 3 potatoes, peeled and cut into chunks
- 2 stalks celery, sliced
- Salt and pepper to taste
- Fresh parsley for garnish
Cooking Instructions:
- Prepare the Beef: In a medium-sized bowl, toss the beef cubes with the flour until evenly coated. This will help to thicken the stew as it cooks.
- Brown the Beef: Heat olive oil in a large Dutch oven or heavy-bottomed pot over medium-high heat. Add the beef in batches, making sure not to overcrowd the pan, and brown on all sides. Remove the beef from the pot and set aside.
- Sauté Vegetables: In the same pot, add the chopped onion and sauté for about 5 minutes or until translucent. Add the minced garlic and cook for an additional minute until fragrant.
- Deglaze the Pot: Pour in the red wine, if using, and scrape up any browned bits from the bottom of the pot. Let it simmer for about 2 minutes to reduce slightly.
- Add Liquids and Seasonings: Return the beef to the pot. Stir in the beef broth, tomato paste, Worcestershire sauce, thyme, rosemary, and bay leaves. Bring the mixture to a gentle boil.
- Simmer the Stew: Reduce the heat to low, cover, and let the stew simmer for about 1.5 to 2 hours, stirring occasionally, until the beef is tender.
- Add Vegetables: Add the carrots, potatoes, and celery to the pot. Season with salt and pepper to taste. Continue to simmer for another 30-40 minutes until the vegetables are tender.
- Finish and Serve: Remove the bay leaves, adjust seasoning if needed, and serve the stew hot, garnished with fresh parsley.
Extra Tips:
For an even richer flavor, consider making the stew a day ahead and refrigerating it overnight. This allows the flavors to develop further.
When you’re ready to serve, simply reheat over medium heat until warmed through. Feel free to customize the vegetables based on your preferences or what you have on hand; parsnips or peas make great additions.
If you want a thicker stew, mash some of the cooked potatoes into the broth before serving. Enjoy your hearty beef and vegetable stew with crusty bread or over a bed of fluffy mashed potatoes for a complete meal.
Creamy Chicken Alfredo Bake
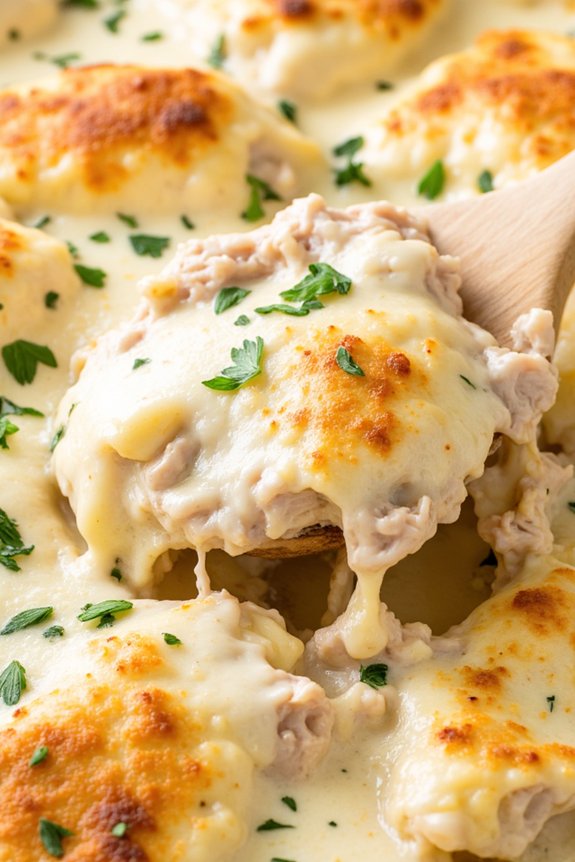
Creamy Chicken Alfredo Bake is a comforting and delicious make-ahead dinner that your whole family will love. This dish combines tender pieces of chicken, creamy Alfredo sauce, and perfectly cooked pasta, all baked together with a layer of melted cheese on top. It’s a perfect meal for busy weeknights or a hearty weekend dinner, and it’s sure to become a family favorite.
Preparing Creamy Chicken Alfredo Bake ahead of time not only saves you the stress of last-minute cooking but also allows the flavors to meld together, making it even more delectable. You can assemble the dish in advance and simply pop it in the oven when you’re ready to enjoy it. This dish serves 4-6 people, making it ideal for family gatherings or a cozy dinner with friends.
Ingredients:
- 1 pound boneless, skinless chicken breasts, cut into bite-sized pieces
- 12 ounces fettuccine or penne pasta
- 2 tablespoons olive oil
- 4 cloves garlic, minced
- 2 cups heavy cream
- 1 cup grated Parmesan cheese
- 1/2 teaspoon salt
- 1/4 teaspoon black pepper
- 1/4 teaspoon nutmeg
- 1 cup shredded mozzarella cheese
- 1/4 cup chopped fresh parsley (optional, for garnish)
Cooking Instructions:
- Preheat the Oven: Preheat your oven to 350°F (175°C).
- Cook the Pasta: In a large pot of boiling salted water, cook the pasta according to package instructions until al dente. Drain and set aside.
- Cook the Chicken: In a large skillet over medium heat, add olive oil. Once hot, add the chicken pieces. Cook for 5-7 minutes until golden brown and cooked through. Remove the chicken from the skillet and set aside.
- Prepare the Alfredo Sauce: In the same skillet, add minced garlic and sauté for about 1 minute until fragrant. Pour in the heavy cream, and bring it to a simmer. Reduce the heat to low, then stir in the Parmesan cheese, salt, black pepper, and nutmeg. Stir continuously until the cheese is melted and the sauce is smooth.
- Combine Ingredients: In a large mixing bowl, combine the cooked pasta, chicken, and Alfredo sauce. Mix until the pasta and chicken are well coated with the sauce.
- Assemble the Bake: Transfer the mixture to a greased 9×13 inch baking dish. Sprinkle the shredded mozzarella cheese evenly over the top.
- Bake: Place the baking dish in the preheated oven and bake for 20-25 minutes, or until the cheese is melted and bubbly.
- Garnish and Serve: Remove from the oven and let it cool for a few minutes. Garnish with chopped fresh parsley, if desired, before serving.
Extra Tips:
When making Creamy Chicken Alfredo Bake, you can customize the dish by adding vegetables like broccoli or spinach for an extra nutritional boost.
If you prefer a lighter version, substitute half of the heavy cream with milk. For added flavor, consider incorporating a pinch of red pepper flakes into the sauce for a slight kick.
To make this meal even more convenient, you can prepare and refrigerate the assembled dish up to a day in advance, then bake it just before serving. Enjoy your delicious and stress-free meal!
Vegetarian Stuffed Bell Peppers
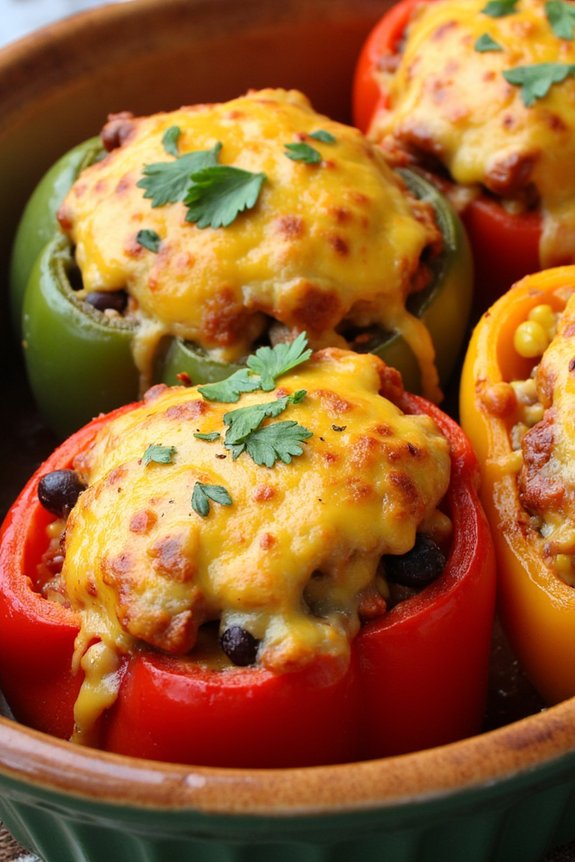
Vegetarian Stuffed Bell Peppers are a hearty and nutritious dish, perfect for family dinners and an excellent make-ahead option. This vibrant and colorful meal isn’t only a feast for the eyes but also packed with flavors and nutrients. Stuffed with a delicious mixture of rice, beans, vegetables, and spices, these bell peppers are a satisfying meatless option that even non-vegetarians will love.
Whether you’re planning a weekday dinner or a weekend family gathering, these stuffed peppers can be prepared in advance and baked just before serving, making them a convenient and time-saving choice. Ideal for a serving size of 4-6 people, this recipe can easily be doubled or halved depending on your needs.
The versatility of the stuffing allows you to customize it to your liking, incorporating your favorite vegetables or adding a bit of heat with some diced jalapeños. Additionally, these stuffed peppers are a fantastic way to use up any leftover rice or beans you might have. Not only are they delicious, but they also offer a well-rounded meal with plenty of protein and fiber, making them a wholesome choice for any family dinner.
Ingredients:
- 6 large bell peppers
- 1 cup cooked rice
- 1 can (15 oz) black beans, drained and rinsed
- 1 cup corn kernels (fresh, frozen, or canned)
- 1 cup diced tomatoes (fresh or canned)
- 1 small onion, diced
- 2 cloves garlic, minced
- 1 teaspoon ground cumin
- 1 teaspoon chili powder
- 1 cup shredded cheese (cheddar or Monterey Jack)
- 2 tablespoons olive oil
- Salt and pepper to taste
- Fresh cilantro for garnish (optional)
Cooking Instructions:
- Prepare the Bell Peppers: Preheat your oven to 375°F (190°C). Slice the tops off the bell peppers and remove the seeds and membranes. Lightly brush the outside of the peppers with olive oil and place them upright in a baking dish.
- Prepare the Filling: In a large skillet over medium heat, add 2 tablespoons of olive oil. Once hot, add the diced onion and garlic, sautéing until the onion becomes translucent, about 3-4 minutes.
- Combine Ingredients: Stir in the cooked rice, black beans, corn, diced tomatoes, cumin, chili powder, salt, and pepper. Cook for another 5 minutes, ensuring everything is well combined and heated through. Remove from heat and stir in half of the shredded cheese.
- Stuff the Peppers: Spoon the filling mixture into each bell pepper, packing it tightly. Top each pepper with the remaining shredded cheese.
- Bake the Peppers: Cover the baking dish with foil and bake in the preheated oven for 30 minutes. Remove the foil and bake for an additional 10-15 minutes, or until the peppers are tender and the cheese is bubbly and golden.
- Garnish and Serve: Remove the dish from the oven and let the peppers cool slightly before serving. Garnish with fresh cilantro if desired.
Extra Tips:
When preparing Vegetarian Stuffed Bell Peppers, feel free to experiment with different types of cheese or add a sprinkle of crushed red pepper for extra heat. If you prefer a softer texture for your peppers, consider parboiling them for a few minutes before stuffing.
This dish can be made ahead of time by preparing the peppers and filling, then storing them separately in the fridge. Simply stuff and bake when you’re ready to eat. Leftovers can be stored in an airtight container in the refrigerator for up to three days, making them a perfect option for meal prepping.
Classic Meat Lasagna
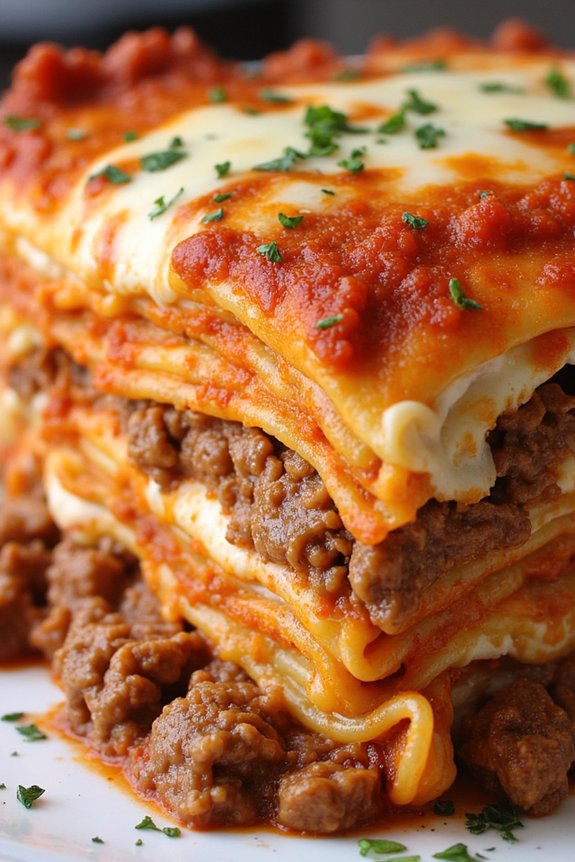
Indulge in the comforting taste of a Classic Meat Lasagna, a timeless dish that brings families together around the dinner table. This make-ahead recipe is perfect for busy weeknights, allowing you to prepare it in advance and savor a delicious home-cooked meal even on the busiest of days.
Layers of rich meat sauce, creamy ricotta, and gooey melted cheese come together between tender sheets of pasta, creating a symphony of flavors that everyone will love.
Preparing a Classic Meat Lasagna isn’t only a treat for your taste buds but also a practical solution for meal planning. You can assemble the lasagna a day ahead, refrigerate it, and simply bake it when you’re ready to serve. This not only saves time but also enhances the flavors as the ingredients meld together.
Whether you’re feeding a family of four or six, this recipe is designed to provide hearty servings that will satisfy even the hungriest appetites.
Ingredients (Serves 4-6):
- 9 lasagna noodles
- 1 pound ground beef
- 1 small onion, chopped
- 2 cloves garlic, minced
- 24 ounces marinara sauce
- 15 ounces ricotta cheese
- 1 egg
- 2 cups shredded mozzarella cheese
- 1/2 cup grated Parmesan cheese
- 1 tablespoon olive oil
- 2 teaspoons dried oregano
- 1 teaspoon dried basil
- Salt and pepper to taste
Cooking Instructions:
1. Prepare the Noodles: Cook the lasagna noodles according to the package instructions until al dente. Drain and set them aside on a clean towel to prevent sticking.
2. Cook the Meat Sauce: In a large skillet, heat olive oil over medium heat. Add the chopped onion and minced garlic. Sauté until the onion becomes translucent. Add the ground beef, cooking until browned and crumbled. Drain excess fat.
3. Season the Sauce: Stir in the marinara sauce, dried oregano, and dried basil. Let the mixture simmer for about 10 minutes, allowing the flavors to meld. Season with salt and pepper to taste.
4. Prepare the Ricotta Mixture: In a medium bowl, combine ricotta cheese and the egg. Mix until smooth and well incorporated.
5. Assemble the Lasagna: Preheat the oven to 375°F (190°C). In a 9×13 inch baking dish, spread a thin layer of the meat sauce at the bottom. Place three lasagna noodles over the sauce. Spread half of the ricotta mixture over the noodles, followed by a layer of meat sauce, and sprinkle with mozzarella cheese.
Repeat the layers, ending with noodles topped with the remaining meat sauce and both mozzarella and Parmesan cheeses.
6. Bake the Lasagna: Cover the dish with aluminum foil and bake for 25 minutes. Remove the foil and bake for an additional 15 minutes, or until the cheese is bubbly and golden brown.
7. Rest and Serve: Allow the lasagna to cool for at least 10 minutes before slicing. This resting time helps the layers set and makes serving easier.
Extra Tips:
For an even more flavorful lasagna, consider making the meat sauce a day ahead. This allows the herbs to infuse into the sauce, enhancing its taste.
If you wish to add vegetables, sautéed spinach or mushrooms can be layered with the ricotta mixture for added nutrition and texture. To freeze the lasagna, assemble it in a freezer-safe dish, cover tightly, and store for up to three months. When ready to bake, thaw overnight in the refrigerator and bake as directed.
Teriyaki Chicken Stir-Fry
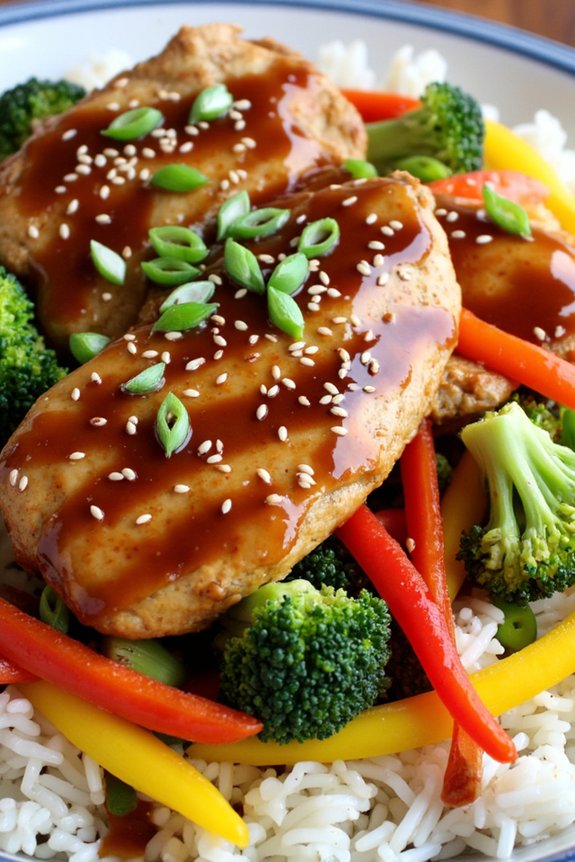
Teriyaki Chicken Stir-Fry is a delightful make-ahead dinner option that brings together the perfect balance of sweet and savory flavors. This dish features tender pieces of chicken coated in a rich teriyaki sauce, paired with a vibrant array of fresh vegetables.
It’s a versatile meal that can be prepped in advance, making it ideal for busy weeknights or when you need to serve a nutritious dinner without the stress of last-minute cooking. With just a bit of preparation, you can have this delicious and nutritious meal ready for your family in no time.
The beauty of this Teriyaki Chicken Stir-Fry lies in its adaptability. You can tailor the dish to your family’s tastes by incorporating your favorite vegetables and adjusting the sauce to your preferred level of sweetness or saltiness. It’s also a great way to use up any leftover vegetables you might’ve in your fridge.
The following recipe will serve 4-6 people, providing a wholesome meal that everyone will enjoy.
Ingredients:
- 1.5 lbs boneless, skinless chicken breasts
- 1/2 cup soy sauce
- 1/4 cup honey
- 1/4 cup rice vinegar
- 2 tablespoons sesame oil
- 1 tablespoon cornstarch
- 1 tablespoon water
- 1 tablespoon grated fresh ginger
- 2 cloves garlic, minced
- 1 red bell pepper, sliced
- 1 yellow bell pepper, sliced
- 1 cup broccoli florets
- 1 cup sugar snap peas
- 1 cup sliced carrots
- 1 tablespoon vegetable oil
- Cooked rice, for serving
- Sesame seeds, for garnish
- Chopped green onions, for garnish
Instructions:
- Prepare the Chicken: Start by slicing the chicken breasts into thin strips. This allows for even cooking and guarantees that the chicken will absorb the flavors of the teriyaki sauce.
- Make the Teriyaki Sauce: In a medium bowl, whisk together the soy sauce, honey, rice vinegar, sesame oil, grated ginger, and minced garlic. In a small bowl, mix the cornstarch with water to create a slurry, then add it to the sauce mixture. Stir thoroughly to combine.
- Cook the Chicken: Heat the vegetable oil in a large skillet or wok over medium-high heat. Add the chicken strips and cook until they’re browned and cooked through, about 5-7 minutes. Remove the chicken from the skillet and set aside.
- Cook the Vegetables: In the same skillet, add the broccoli, bell peppers, sugar snap peas, and carrots. Stir-fry the vegetables for about 3-4 minutes until they’re just tender but still crisp.
- Combine Chicken and Sauce: Return the cooked chicken to the skillet with the vegetables. Pour the teriyaki sauce over the chicken and vegetables. Stir well to coat everything evenly. Allow the mixture to cook for another 2-3 minutes until the sauce thickens and the chicken and vegetables are well coated.
- Serve: Serve the teriyaki chicken stir-fry over cooked rice. Garnish with sesame seeds and chopped green onions before serving.
Extra Tips: For added convenience, you can prep the vegetables and whisk the sauce ahead of time, storing them separately in the refrigerator until you’re ready to cook.
If you prefer a thicker sauce, simply increase the amount of cornstarch in the slurry. Additionally, feel free to experiment with different vegetables such as zucchini or mushrooms based on what’s in season or available.
This dish can easily be adapted to suit vegetarian diets by substituting tofu or tempeh for the chicken.
Slow Cooker Pulled Pork Sandwiches
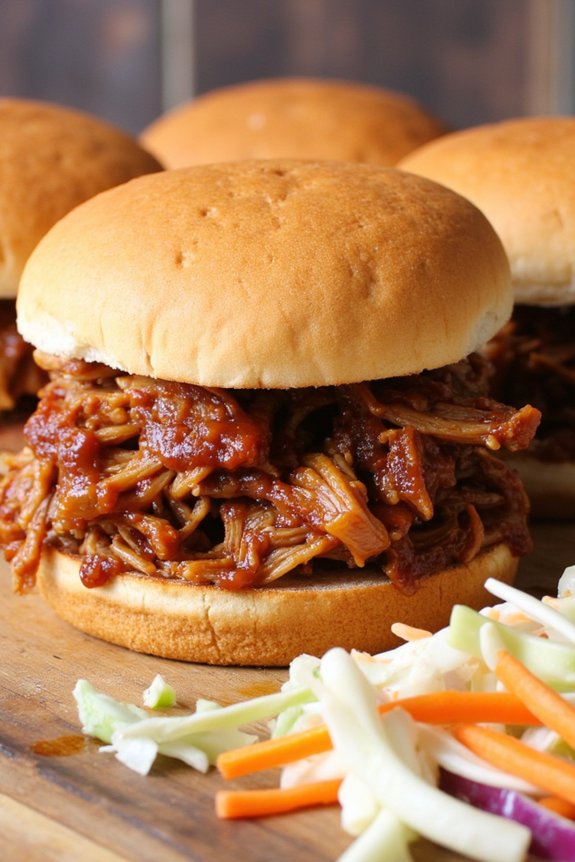
Slow Cooker Pulled Pork Sandwiches are a perfect make-ahead dinner for busy families looking for a delicious and hearty meal. This dish offers a savory, melt-in-your-mouth experience with minimal effort, thanks to the convenience of a slow cooker. The pork is cooked slowly over several hours, allowing it to become tender and flavorful, and it pairs perfectly with tangy barbecue sauce and fluffy sandwich buns. The result is a comforting and satisfying meal that can be prepared in advance, making it an ideal choice for weeknight dinners or casual gatherings.
These sandwiches aren’t only easy to prepare but also versatile, allowing you to adjust the flavors to suit your family’s preferences. Whether you prefer a spicy kick or a sweeter sauce, the recipe can be customized to meet your taste. With a serving size of 4-6 people, this dish is perfect for feeding a family or having leftovers for the next day. Plus, the leftovers can easily be stored and reheated, making it a convenient option for meal prep enthusiasts.
Ingredients (Serving Size: 4-6 people):
- 3-4 pounds pork shoulder or pork butt
- 1 large onion, sliced
- 3 cloves garlic, minced
- 1 cup barbecue sauce
- 1/2 cup chicken broth
- 1 tablespoon brown sugar
- 1 tablespoon smoked paprika
- 1 teaspoon ground cumin
- 1 teaspoon salt
- 1/2 teaspoon black pepper
- 1/4 teaspoon cayenne pepper (optional for heat)
- 6 sandwich buns
- Coleslaw (optional, for serving)
Cooking Instructions:
- Prepare the Pork: Start by trimming any excess fat from the pork shoulder or pork butt. Pat the meat dry with paper towels to guarantee better seasoning adherence.
- Season the Meat: In a small bowl, mix together the brown sugar, smoked paprika, ground cumin, salt, black pepper, and cayenne pepper. Rub this spice mixture all over the pork, confirming it’s evenly coated.
- Layer Ingredients in Slow Cooker: Place the sliced onion and minced garlic at the bottom of the slow cooker. This creates a flavorful base for the pork to cook on. Place the seasoned pork on top of the onions and garlic.
- Add Liquid Ingredients: Pour the barbecue sauce and chicken broth over the pork. This will help keep the meat moist and infuse it with flavor as it cooks.
- Cook the Pork: Cover the slow cooker with its lid and set it to cook on low for 8-10 hours, or on high for 4-5 hours. The pork should be tender and easily shredded with a fork when done.
- Shred the Pork: Once cooked, remove the pork from the slow cooker and place it on a large plate or cutting board. Use two forks to shred the meat into bite-sized pieces.
- Mix with Sauce: Return the shredded pork to the slow cooker and stir it into the remaining sauce until well combined. Let it cook for an additional 15-30 minutes on low to absorb the flavors.
- Assemble the Sandwiches: Toast the sandwich buns if desired, and then fill each bun with a generous amount of pulled pork. Top with coleslaw for added crunch and flavor, if using.
Extra Tips:
For the best results, choose a cut of pork with good marbling, like pork shoulder or pork butt, as this will yield tender, juicy meat. If you have time, let the seasoned pork sit in the refrigerator for a few hours or overnight before cooking to enhance the flavors.
Taste the sauce before serving and adjust seasoning or add more barbecue sauce if needed to suit your preference. Leftover pulled pork can be stored in an airtight container in the refrigerator for up to 3 days or frozen for longer storage. Reheat gently on the stove or in a microwave, adding a splash of chicken broth if it seems dry.
Spinach and Cheese Manicotti
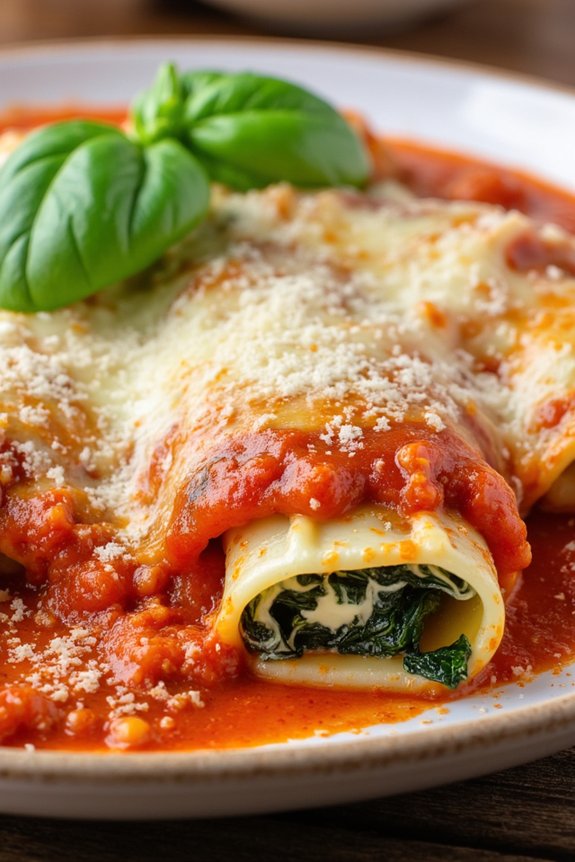
Spinach and Cheese Manicotti is a classic Italian-American dish that can be easily made ahead of time, making it perfect for busy families. This dish features tender pasta tubes filled with a creamy mixture of spinach and cheese, then baked in a rich tomato sauce until bubbly and golden.
It’s a hearty, comforting meal that appeals to both kids and adults alike. Preparing it in advance allows you to simply pop it in the oven when you’re ready to eat, freeing up time for other evening activities.
The beauty of Spinach and Cheese Manicotti is in its simplicity and versatility. You can customize the filling to suit your family’s preferences, adding more vegetables or different types of cheese if desired. This recipe provides a delicious and satisfying meal for 4-6 people, and its make-ahead nature means you can enjoy a home-cooked dinner without the last-minute stress.
Ingredients (Serves 4-6):
- 12 manicotti shells
- 2 cups ricotta cheese
- 1 cup shredded mozzarella cheese
- 1/2 cup grated Parmesan cheese
- 2 cups fresh spinach, chopped
- 1 egg
- 2 cloves garlic, minced
- 1 teaspoon dried Italian herbs
- 1/4 teaspoon salt
- 1/4 teaspoon black pepper
- 3 cups marinara sauce
- 1 tablespoon olive oil
Cooking Instructions:
- Prepare the Manicotti Shells: Begin by cooking the manicotti shells according to the package instructions until they’re al dente. Drain and lay them flat on a sheet of parchment paper to prevent sticking.
- Make the Filling: In a large mixing bowl, combine the ricotta cheese, mozzarella cheese, Parmesan cheese, chopped spinach, egg, minced garlic, Italian herbs, salt, and pepper. Mix until well combined.
- Stuff the Manicotti Shells: Carefully fill each manicotti shell with the cheese and spinach mixture using a small spoon or a piping bag. Confirm that each shell is evenly stuffed without breaking them.
- Prepare the Baking Dish: Preheat your oven to 375°F (190°C). Spread a thin layer of marinara sauce at the bottom of a large baking dish to prevent the manicotti from sticking.
- Assemble the Dish: Arrange the stuffed manicotti shells in the baking dish over the sauce. Pour the remaining marinara sauce over the top of the shells, ensuring they’re completely covered.
- Bake the Manicotti: Drizzle the olive oil over the sauce and cover the dish with aluminum foil. Bake in the preheated oven for 25 minutes. Remove the foil and bake for an additional 10 minutes, or until the sauce is bubbly and the top is lightly golden.
- Serve: Allow the manicotti to cool for a few minutes before serving. Garnish with extra Parmesan cheese and fresh basil if desired.
Extra Tips:
To make this dish even more flavorful, consider adding a pinch of nutmeg to the cheese mixture, as it complements the spinach beautifully.
When making the dish ahead, you can assemble the manicotti up to the baking step, cover it tightly, and store it in the refrigerator for up to 24 hours, or freeze it for up to a month. If baking from frozen, remember to extend the baking time by about 20 minutes.
This dish pairs well with a simple green salad and garlic bread for a complete meal.
Mexican Quinoa Casserole
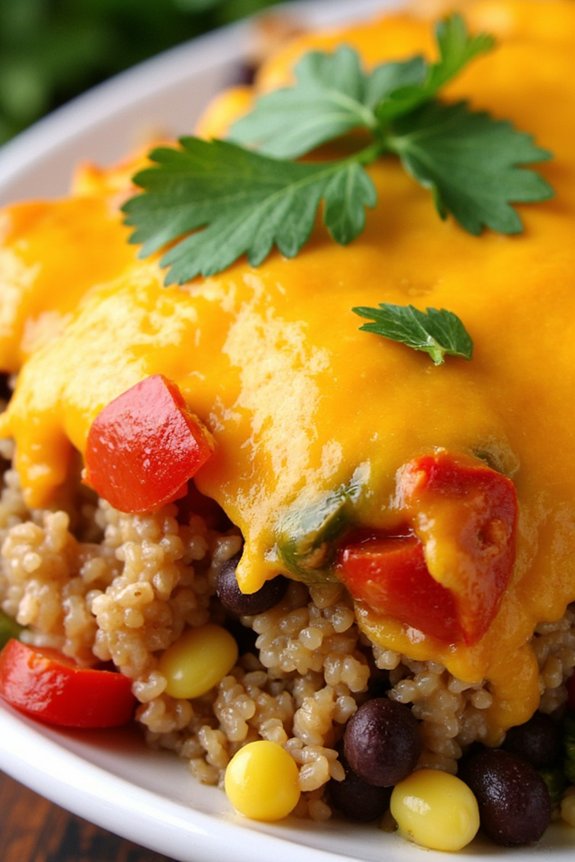
Mexican Quinoa Casserole is a delicious and nutritious make-ahead dinner option that’s perfect for the whole family. This recipe combines the vibrant flavors of Mexican cuisine with the wholesome goodness of quinoa, creating a satisfying dish that can be prepared in advance and enjoyed throughout the week. With just the right amount of spice and plenty of veggies, it’s a crowd-pleaser that even picky eaters will love.
This casserole isn’t only tasty but also incredibly versatile. It can be served as a main dish or as a side, and it pairs well with a variety of toppings like avocado, sour cream, or fresh cilantro. The best part about this recipe is that it can be assembled and stored in the fridge or freezer until you’re ready to bake it, making weeknight dinners a breeze.
Let’s explore the ingredients and steps needed to create this delightful Mexican Quinoa Casserole for 4-6 people.
Ingredients:
- 1 cup quinoa, rinsed
- 2 cups vegetable broth
- 1 tablespoon olive oil
- 1 small onion, diced
- 3 cloves garlic, minced
- 1 red bell pepper, chopped
- 1 yellow bell pepper, chopped
- 1 can (15 oz) black beans, drained and rinsed
- 1 can (15 oz) corn, drained
- 1 can (15 oz) diced tomatoes
- 1 tablespoon chili powder
- 1 teaspoon cumin
- 1 teaspoon smoked paprika
- Salt and pepper to taste
- 1 ½ cups shredded cheddar cheese
- Fresh cilantro, chopped (for garnish, optional)
Cooking Instructions:
- Cook the Quinoa: In a medium saucepan, combine the rinsed quinoa and vegetable broth. Bring to a boil over medium-high heat. Once boiling, reduce the heat to low, cover, and let it simmer for about 15 minutes or until the liquid is absorbed and the quinoa is fluffy. Set aside.
- Preheat Oven: Preheat your oven to 375°F (190°C).
- Sauté Vegetables: In a large skillet, heat the olive oil over medium heat. Add the diced onion and sauté for about 3 minutes until translucent. Add the minced garlic, chopped red and yellow bell peppers, and continue to sauté for another 5 minutes until the peppers are tender.
- Combine Ingredients: Add the cooked quinoa, black beans, corn, diced tomatoes, chili powder, cumin, smoked paprika, salt, and pepper to the skillet with the sautéed vegetables. Stir well to combine all ingredients evenly.
- Transfer to Baking Dish: Pour the quinoa mixture into a 9×13 inch baking dish, spreading it evenly. Sprinkle the shredded cheddar cheese over the top.
- Bake the Casserole: Place the casserole in the preheated oven and bake for 20-25 minutes, or until the cheese is melted and bubbly.
- Garnish and Serve: Remove the casserole from the oven and let it cool slightly. Garnish with fresh cilantro if desired before serving.
Extra Tips:
For a spicier kick, consider adding diced jalapeños or a dash of hot sauce to the quinoa mixture. If you prefer a creamier texture, mix in some sour cream or Greek yogurt before baking.
This casserole can be stored in an airtight container in the fridge for up to 4 days or frozen for up to 3 months. To reheat, simply cover the dish with foil and bake at 350°F (175°C) until heated through. Enjoy your meal with a side of tortilla chips for added crunch!
Thai Red Curry With Tofu
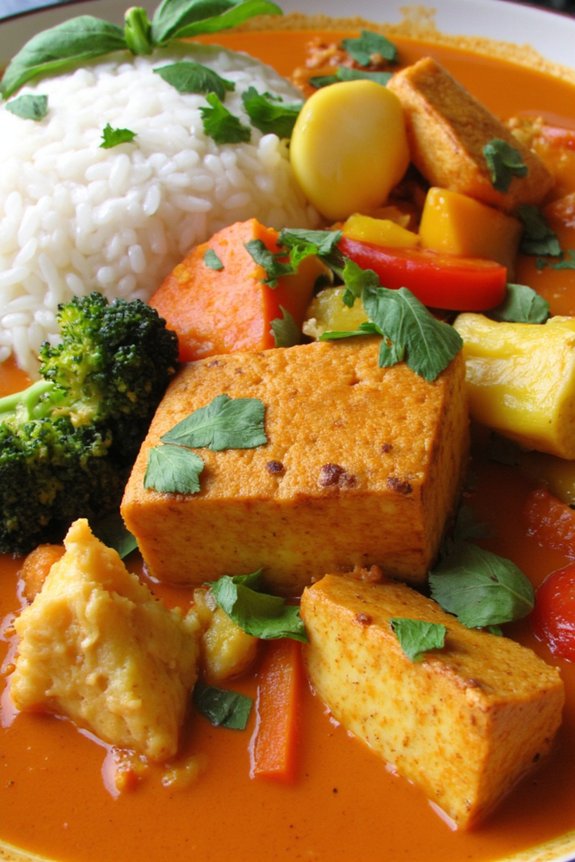
Thai Red Curry with Tofu is a delightful and aromatic dish perfect for make-ahead dinners. This recipe combines the rich and creamy flavors of coconut milk with the vibrant spices of red curry paste, delivering a taste that’s both exotic and comforting. By using tofu, this dish not only becomes a vegetarian-friendly option but also provides a substantial source of protein. Ideal for a family dinner, this curry can be prepared in advance and easily reheated, allowing the flavors to meld together beautifully over time.
The beauty of Thai Red Curry with Tofu lies in its balance of flavors and textures. The smoothness of the coconut milk is perfectly countered by the heat of the red curry paste, while the tofu and vegetables add a satisfying bite. This dish isn’t only delicious but also customizable — feel free to mix and match your favorite vegetables or adjust the spice level to suit your family’s preferences. Whether served over steamed rice or alongside noodles, this curry is sure to become a staple in your dinner rotation.
Ingredients for 4-6 Servings:
- 2 tablespoons vegetable oil
- 1 block (14 ounces) firm tofu, drained and cubed
- 1 tablespoon red curry paste
- 1 can (13.5 ounces) coconut milk
- 1 tablespoon soy sauce
- 1 tablespoon brown sugar
- 2 cups mixed vegetables (e.g., bell peppers, broccoli, carrots)
- 1 tablespoon lime juice
- 1/4 cup fresh basil leaves, chopped
- Salt, to taste
- Cooked jasmine rice, for serving
Cooking Instructions:
- Prepare the Tofu: Start by pressing the tofu to remove excess moisture. Cut the tofu into 1-inch cubes. Heat 1 tablespoon of vegetable oil in a large skillet over medium-high heat. Add the tofu cubes and cook until golden brown on all sides. Remove them from the skillet and set aside.
- Create the Curry Base: In the same skillet, add the remaining tablespoon of vegetable oil. Stir in the red curry paste and cook for 1-2 minutes, allowing the paste to become fragrant. Gradually add the coconut milk, stirring well to combine.
- Season the Curry: Add the soy sauce and brown sugar to the coconut milk mixture. Stir until the sugar is dissolved and the sauce is smooth.
- Cook the Vegetables: Add the mixed vegetables to the curry base. Stir well, cover the skillet, and let them simmer for about 5-7 minutes, or until the vegetables are tender yet crisp.
- Combine Tofu with Curry: Return the golden-browned tofu to the skillet. Stir to combine, making certain the tofu is evenly coated with the curry sauce. Let everything simmer together for another 2-3 minutes to allow the flavors to meld.
- Finish with Lime and Basil: Remove the skillet from the heat. Stir in the lime juice and chopped basil leaves. Taste and adjust the seasoning with salt if necessary.
- Serve and Enjoy: Serve the Thai Red Curry with Tofu over a bed of cooked jasmine rice. Garnish with additional fresh basil if desired.
Extra Tips:
When cooking Thai Red Curry with Tofu, it’s important to use firm or extra-firm tofu to make certain it holds its shape during cooking. For an even more flavorful experience, marinate the tofu in a little soy sauce and lime juice before frying.
If you prefer a spicier curry, consider adding a chopped Thai chili or a pinch of chili flakes. This dish can be stored in an airtight container in the refrigerator for up to 3 days, making it an excellent choice for meal prep and busy weeknights.
Baked Ziti With Italian Sausage
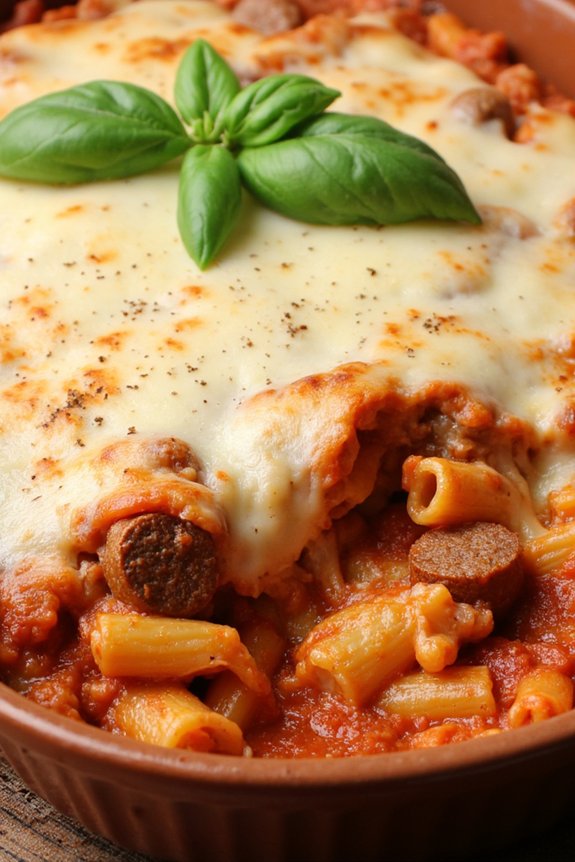
Baked Ziti With Italian Sausage is a hearty and delicious meal that’s perfect for a family dinner. This make-ahead dish isn’t only easy to prepare but also allows you to enjoy a stress-free evening with your loved ones. The combination of ziti pasta, flavorful Italian sausage, and gooey cheese creates a comforting dish that everyone will love.
Baked Ziti is also a versatile recipe, allowing you to add your favorite ingredients or make substitutions to suit your family’s preferences. Preparing Baked Ziti With Italian Sausage in advance means you can assemble the dish earlier in the day and simply pop it in the oven when it’s time to eat. This flexibility makes it an ideal choice for busy weeknights or when you have guests over.
The layers of pasta, sausage, and cheese meld together beautifully during baking, creating a dish that’s both satisfying and delicious. Below is a recipe for a serving size of 4-6 people.
Ingredients:
- 1 pound ziti pasta
- 1 tablespoon olive oil
- 1 pound Italian sausage (mild or spicy), casings removed
- 1 small onion, diced
- 3 cloves garlic, minced
- 1 teaspoon Italian seasoning
- 1/2 teaspoon red pepper flakes (optional)
- 2 cups marinara sauce
- 1 can (14.5 ounces) diced tomatoes, drained
- 1 cup ricotta cheese
- 1/2 cup grated Parmesan cheese
- 2 cups shredded mozzarella cheese
- Salt and pepper to taste
- Fresh basil leaves for garnish (optional)
Cooking Instructions:
- Cook the Pasta: Bring a large pot of salted water to a boil. Add the ziti pasta and cook until al dente, according to package instructions. Drain and set aside.
- Prepare the Sausage: In a large skillet, heat olive oil over medium heat. Add the Italian sausage and cook until browned, breaking it apart with a spoon. Remove excess fat if necessary.
- Sauté Aromatics: Add the diced onion and minced garlic to the skillet with the sausage. Cook until the onion is soft and translucent, about 5 minutes. Stir in the Italian seasoning and red pepper flakes if using.
- Make the Sauce: Pour in the marinara sauce and diced tomatoes. Stir to combine and let simmer for about 10 minutes. Season with salt and pepper to taste.
- Assemble the Dish: Preheat the oven to 375°F (190°C). In a large bowl, mix the cooked pasta with the sausage sauce. Add the ricotta cheese and half of the Parmesan cheese, stirring until well combined.
- Layer the Ingredients: Spread half of the pasta mixture in a 9×13-inch baking dish. Sprinkle with half of the mozzarella cheese. Add the remaining pasta mixture on top and finish with the remaining mozzarella and Parmesan cheese.
- Bake: Cover the dish with foil and bake for 20 minutes. Remove the foil and bake for an additional 10-15 minutes, or until the cheese is bubbly and golden brown.
- Serve: Let the baked ziti cool for a few minutes before serving. Garnish with fresh basil leaves if desired.
Extra Tips:
When preparing Baked Ziti With Italian Sausage, feel free to customize the dish by adding vegetables like spinach or bell peppers for extra nutrition. You can also prepare the dish up to the baking step and refrigerate it for up to 24 hours before baking. Just make sure it reaches an internal temperature of 165°F (74°C) before serving.
Additionally, using a high-quality marinara sauce can greatly enhance the flavor of the dish. Enjoy this comforting meal with a side salad or garlic bread for a complete dinner experience.
BBQ Chicken Pizza
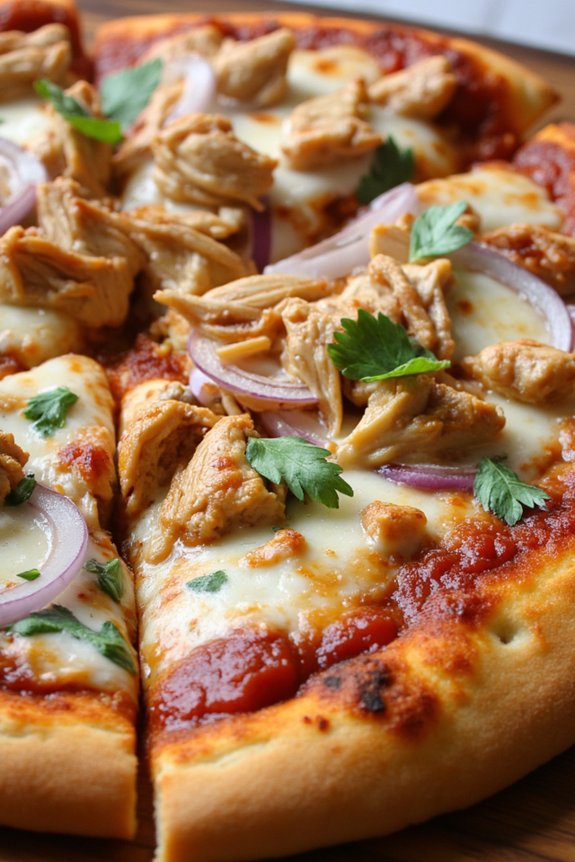
BBQ Chicken Pizza is a delightful twist on traditional pizza that combines the tangy flavors of barbecue sauce with the savory taste of roasted chicken. This make-ahead meal is perfect for busy families looking to enjoy a quick and satisfying dinner. By preparing some components in advance, you can easily assemble and bake this pizza in under 30 minutes, making it an ideal choice for weeknight dinners.
The combination of melted cheese, tender chicken, and a crispy crust will have everyone reaching for another slice. The beauty of BBQ Chicken Pizza lies in its simplicity and adaptability. You can customize this dish to suit your family’s taste preferences by adding different toppings or adjusting the level of spice in the barbecue sauce.
Whether you prefer a homemade crust or a store-bought one, the key lies in balancing the flavors and guaranteeing that the toppings are evenly distributed. This recipe yields enough for 4-6 people, making it a great option for family dinners or small gatherings.
Ingredients for 4-6 servings:
- 1 lb pizza dough
- 1 cup barbecue sauce
- 2 cups cooked chicken, shredded
- 1 1/2 cups mozzarella cheese, shredded
- 1/2 cup red onion, thinly sliced
- 1/4 cup fresh cilantro, chopped
- 1 tablespoon olive oil
- 1 teaspoon cornmeal (optional, for dusting)
- Salt and pepper to taste
Cooking Instructions:
- Preheat the Oven: Begin by preheating your oven to 450°F (230°C). If using a pizza stone, place it in the oven while preheating to guarantee it gets hot.
- Prepare the Dough: On a lightly floured surface, roll out the pizza dough to your desired thickness. For a crispier crust, aim for about 1/4 inch thick. If using, sprinkle a little cornmeal on a baking sheet or on the pizza stone to prevent sticking.
- Assemble the Pizza: Brush the dough with olive oil to create a base that helps the crust to crisp up. Spread the barbecue sauce evenly over the dough, leaving a small border around the edges.
- Add the Toppings: Distribute the shredded chicken evenly over the sauce, followed by the sliced red onions. Sprinkle the mozzarella cheese over the top, ensuring even coverage.
- Bake the Pizza: Transfer the pizza to the preheated oven. Bake for 12-15 minutes, or until the crust is golden brown and the cheese is bubbly and slightly browned.
- Finish with Cilantro: Once baked, remove the pizza from the oven and immediately sprinkle the chopped cilantro over the top. Allow the pizza to cool for a few moments before slicing.
- Serve: Cut the pizza into slices and serve hot. Enjoy the delightful combination of barbecue flavors with the gooey cheese and crispy crust.
Extra Tips:
To make your BBQ Chicken Pizza even more flavorful, consider marinating the chicken in barbecue sauce before cooking it. This will enhance the overall taste of the pizza.
If you like a bit of heat, you can add sliced jalapeños or a dash of hot sauce on top before baking. Additionally, if you’re short on time, consider using a rotisserie chicken for the topping.
For a healthier option, opt for a whole wheat pizza crust or a cauliflower crust that pairs well with the barbecue flavors.
Shepherd’s Pie With Mashed Potato Topping
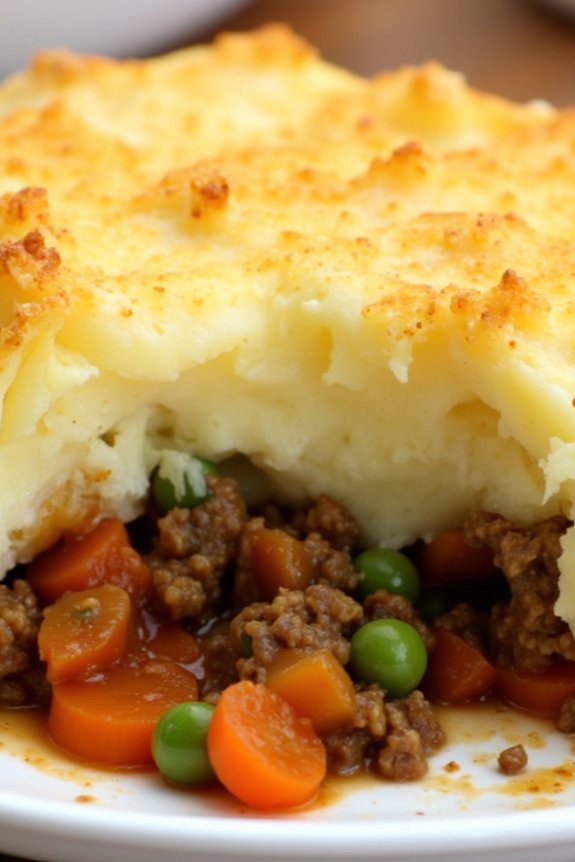
Shepherd’s Pie With Mashed Potato Topping is a classic comfort food that brings together the hearty flavors of seasoned meat and vegetables with the creamy richness of mashed potatoes. This dish is perfect for making ahead, allowing the flavors to meld beautifully and offering a convenient option for busy weeknight dinners.
The savory filling is typically made with ground lamb or beef, cooked with onions, carrots, and peas, and seasoned with herbs and spices, then topped with a layer of buttery mashed potatoes that turns golden brown in the oven.
This version of Shepherd’s Pie serves 4-6 people, making it an ideal meal for family gatherings or a satisfying dinner that can provide leftovers for the next day. Preparing this dish ahead of time means you can simply pop it in the oven when you need it, minimizing time spent in the kitchen and maximizing family time.
With a few simple ingredients and straightforward steps, you can create a delicious and comforting meal that everyone will love.
Ingredients:
- 1 tablespoon olive oil
- 1 large onion, chopped
- 2 cloves garlic, minced
- 1 pound ground lamb or beef
- 2 carrots, diced
- 1 cup frozen peas
- 2 tablespoons tomato paste
- 1 tablespoon Worcestershire sauce
- 1 teaspoon dried thyme
- 1 teaspoon dried rosemary
- Salt and pepper to taste
- 1 cup beef or vegetable broth
- 2 pounds potatoes, peeled and cubed
- 4 tablespoons butter
- 1/4 cup milk
- Salt and pepper to taste
Cooking Instructions:
- Prepare the Filling: Heat the olive oil in a large skillet over medium heat. Add the chopped onion and garlic, cooking until the onion is translucent. Add the ground lamb or beef, breaking it up with a spoon, and cook until browned.
- Add Vegetables and Seasoning: Stir in the diced carrots and frozen peas, cooking for about 5 minutes. Add the tomato paste, Worcestershire sauce, dried thyme, dried rosemary, salt, and pepper. Mix well to combine the flavors.
- Simmer the Mixture: Pour in the beef or vegetable broth, bringing the mixture to a simmer. Reduce the heat and let it cook for about 15 minutes, allowing the flavors to meld and the sauce to thicken slightly.
- Make the Mashed Potatoes: While the filling is simmering, place the cubed potatoes in a pot, cover with water, and bring to a boil. Cook until tender, about 15 minutes. Drain the potatoes and return them to the pot.
- Mash the Potatoes: Add butter, milk, salt, and pepper to the cooked potatoes. Mash until smooth and creamy, adjusting the seasoning as needed.
- Assemble the Pie: Preheat your oven to 400°F (200°C). Spoon the meat mixture into a baking dish and spread it evenly. Top with the mashed potatoes, smoothing them into an even layer.
- Bake the Pie: Place the dish in the preheated oven and bake for 25-30 minutes, or until the mashed potato topping is golden brown and the filling is bubbling.
Extra Tips:
When preparing Shepherd’s Pie With Mashed Potato Topping, consider making the mashed potatoes a bit firmer than usual to guarantee they hold their shape when baked.
If you’re short on time, the meat filling can be prepared a day in advance and stored in the refrigerator until you’re ready to assemble the pie.
For an extra crispy topping, you can sprinkle a bit of grated cheese over the mashed potatoes before baking. This dish also freezes well, making it a perfect option for meal prep. Just be sure to cover it tightly before storing it in the freezer.
Honey Garlic Shrimp Bowls
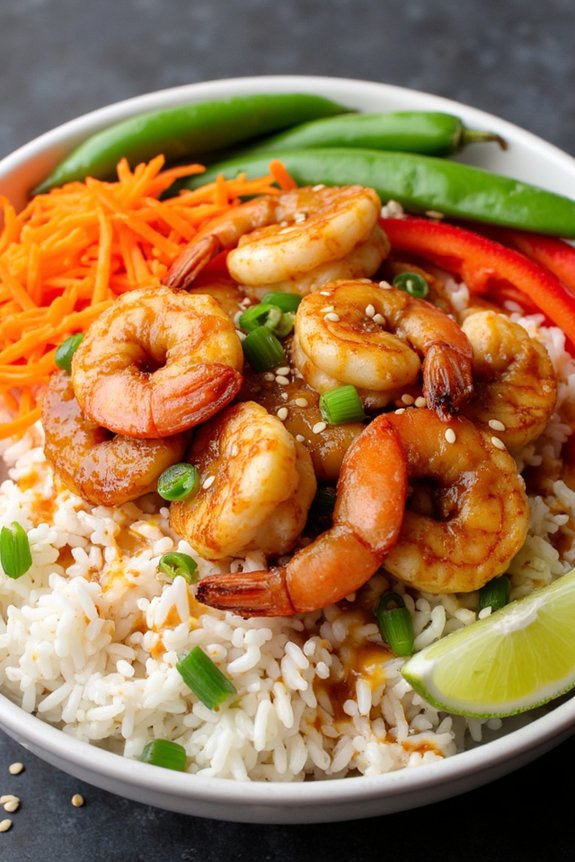
Honey Garlic Shrimp Bowls are a delicious and convenient option for family dinners, especially when you’re looking to prepare meals in advance. These bowls are packed with flavor, combining succulent shrimp with a sweet and savory honey garlic sauce, served over a bed of rice with fresh and colorful vegetables. Not only are they easy to prepare, but they also provide a healthy balance of protein, carbs, and vitamins, making them a nutritious choice for the whole family.
Preparing this dish ahead of time means you can enjoy a wholesome dinner without the stress of last-minute cooking, allowing you to spend more time with your loved ones.
The secret to these Honey Garlic Shrimp Bowls is in the sauce and the fresh ingredients. The honey garlic sauce is a perfect blend that brings out the natural sweetness of the shrimp while giving it a delightful savory kick. By preparing the components in advance, you can quickly assemble the bowls when it’s time to eat. This recipe serves 4-6 people, making it ideal for a family gathering or a weeknight dinner with some leftovers to enjoy the next day.
Ingredients:
- 2 pounds large shrimp, peeled and deveined
- 1/2 cup honey
- 1/4 cup soy sauce
- 1 tablespoon minced garlic
- 1 tablespoon olive oil
- 1 teaspoon sesame oil
- 1 teaspoon cornstarch
- 3 cups cooked rice (white or brown)
- 1 red bell pepper, sliced
- 1 cup snap peas
- 1 cup shredded carrots
- 1/4 cup green onions, chopped
- Salt and pepper to taste
- Sesame seeds for garnish
- Lime wedges for serving
Cooking Instructions:
- Prepare the Sauce: In a small bowl, whisk together the honey, soy sauce, minced garlic, sesame oil, and cornstarch. Verify the cornstarch is fully dissolved to avoid lumps. Set the sauce aside.
- Cook the Shrimp: Heat the olive oil in a large skillet over medium-high heat. Add the shrimp in a single layer, seasoning them with salt and pepper. Cook for about 2-3 minutes on each side, or until they turn pink and opaque. Remove the shrimp from the skillet and set aside.
- Cook the Vegetables: In the same skillet, add the red bell pepper, snap peas, and shredded carrots. Stir-fry the vegetables for about 3-4 minutes until they’re tender-crisp.
- Combine Sauce with Shrimp: Reduce the heat to medium and return the shrimp to the skillet with the vegetables. Pour the prepared sauce over the shrimp and vegetables. Gently stir to coat everything evenly. Cook for an additional 2-3 minutes, allowing the sauce to thicken and coat the shrimp and vegetables well.
- Assemble the Bowls: Divide the cooked rice among 4-6 serving bowls. Top each bowl with the honey garlic shrimp and vegetable mixture. Garnish with chopped green onions and sesame seeds.
- Serve: Serve immediately with lime wedges on the side for an extra burst of citrus flavor.
Extra Tips:
When preparing Honey Garlic Shrimp Bowls ahead of time, consider storing the components separately. Keep the cooked rice, shrimp with sauce, and vegetables in individual airtight containers in the refrigerator. This method prevents the rice from becoming soggy and maintains the texture of the shrimp and vegetables.
When ready to serve, reheat each component gently, then assemble the bowls just before serving. Additionally, feel free to customize the vegetables based on what you have available or prefer; broccoli, zucchini, or edamame are great alternatives.
Homemade Chicken Pot Pie

Homemade Chicken Pot Pie is the perfect make-ahead dinner for families looking to enjoy a comforting, hearty meal without the last-minute rush. This classic dish combines tender chicken, a medley of vegetables, and a creamy sauce, all encased in a flaky pastry crust. Not only does it provide a delicious and satisfying meal, but it can also be prepared in advance and stored until you’re ready to bake it, making it a convenient option for busy weeknights.
In this recipe, we’ll guide you through creating a delicious homemade Chicken Pot Pie that serves 4-6 people. By using fresh ingredients and a few key shortcuts, you can have this comforting dish ready to pop in the oven when you need it. Whether you’re feeding a crowd or just want to guarantee leftovers for the next day, this recipe is sure to become a family favorite.
Ingredients:
- 1 pound boneless, skinless chicken breasts
- 1 tablespoon olive oil
- Salt and pepper to taste
- 1 cup chopped carrots
- 1 cup frozen peas
- 1 cup chopped potatoes
- 1/2 cup chopped celery
- 1/3 cup unsalted butter
- 1/3 cup all-purpose flour
- 1/2 teaspoon onion powder
- 1/2 teaspoon garlic powder
- 1/4 teaspoon dried thyme
- 1 3/4 cups chicken broth
- 2/3 cup milk
- 2 unbaked pie crusts (store-bought or homemade)
- 1 egg, beaten
Instructions:
- Prepare the Chicken: Preheat your oven to 350°F (175°C). Season the chicken breasts with salt and pepper. In a large skillet over medium heat, add olive oil and cook the chicken until golden brown and cooked through, about 6-8 minutes per side. Remove from the skillet, let it cool slightly, then cut into bite-sized pieces.
- Cook the Vegetables: In the same skillet, add carrots, potatoes, and celery. Cook for about 5-7 minutes until the vegetables are slightly tender. Add the frozen peas and cook for another 2 minutes. Remove the vegetables from the skillet and set aside.
- Make the Sauce: In the skillet, melt the butter over medium heat. Stir in the flour, onion powder, garlic powder, and dried thyme until well combined, cooking for about 1 minute. Gradually whisk in the chicken broth and milk, cooking until the mixture thickens, about 4-5 minutes. Season with salt and pepper to taste.
- Combine Everything: Stir the cooked chicken and vegetables into the sauce, guaranteeing everything is evenly coated.
- Assemble the Pie: Roll out one pie crust and gently press it into a 9-inch pie dish. Pour the chicken and vegetable mixture into the crust. Roll out the second pie crust and place it over the filling. Crimp the edges to seal, and cut a few slits in the top to allow steam to escape.
- Bake the Pie: Brush the top crust with the beaten egg. Place the pie in the preheated oven and bake for 35-40 minutes, or until the crust is golden brown and the filling is bubbling. Allow the pie to rest for 10 minutes before serving.
Extra Tips:
For a flakier crust, guarantee that your pie dough is well chilled before rolling it out. If you prefer a richer flavor, you can substitute heavy cream for milk in the sauce.
Additionally, this dish can be made in advance and frozen unbaked; simply wrap it tightly in foil and plastic wrap. When ready to bake, remove the plastic wrap, and bake straight from the freezer, adding an extra 15-20 minutes to the baking time.