

As a busy mom who cherishes family meals, I’ve gathered 14 quick and easy weeknight dinner recipes that are perfect for those hectic evenings. From the zesty one-pan lemon garlic chicken to the cozy creamy Tuscan pasta, these dishes deliver deliciousness with minimal effort. My personal favorite is the speedy tuna noodle casserole, which is always a hit with the kids. Ready to simplify your weeknight cooking routine? Let’s make those evenings a little more relaxed with these family-friendly recipes.
One-Pan Lemon Garlic Chicken

One-Pan Lemon Garlic Chicken is a delightful and quick meal that brings bold flavors to your dinner table without the hassle of extensive clean-up. Perfect for a busy weeknight, this dish combines the zesty tang of lemon with the aromatic essence of garlic, creating a mouthwatering experience that’s both wholesome and satisfying.
The use of a single pan not only simplifies the cooking process but also allows the flavors to meld perfectly, resulting in a tender and juicy chicken dish with a savory sauce that begs to be mopped up with crusty bread.
This recipe is designed to serve 4-6 people, ensuring that the whole family can enjoy this delectable meal together. The beauty of this dish lies in its simplicity and efficiency, making it an ideal choice for home cooks of all skill levels. With just a handful of ingredients and minimal prep time, you can have a restaurant-quality meal on the table in under an hour.
Ingredients (serves 4-6):
- 6 boneless, skinless chicken thighs
- 2 tablespoons olive oil
- 1 teaspoon salt
- 1/2 teaspoon black pepper
- 1 teaspoon dried oregano
- 4 cloves garlic, minced
- 1 lemon, zested and juiced
- 1 cup chicken broth
- 2 tablespoons unsalted butter
- 2 tablespoons fresh parsley, chopped
Cooking Instructions:
- Prepare the Chicken: Pat the chicken thighs dry with paper towels. This will help them brown better during cooking. Season both sides of the chicken with salt, pepper, and dried oregano.
- Sear the Chicken: Heat the olive oil in a large skillet over medium-high heat. Once the oil is hot, add the chicken thighs in a single layer. Cook for 5-7 minutes on each side, or until they’re golden brown and cooked through. Remove the chicken from the skillet and set aside.
- Sauté the Garlic: In the same skillet, reduce the heat to medium and add the minced garlic. Sauté for about 30 seconds, or until fragrant, making sure not to let the garlic burn.
- Create the Sauce: Add the lemon zest and juice to the skillet, stirring to combine with the garlic. Pour in the chicken broth and bring the mixture to a simmer. Allow it to cook for 2-3 minutes, letting the flavors meld together.
- Combine and Finish: Return the chicken thighs to the skillet, nestling them into the sauce. Add the butter and allow it to melt, basting the chicken with the sauce. Let the chicken simmer in the sauce for another 5 minutes to absorb the flavors.
- Garnish and Serve: Once the chicken is fully cooked and the sauce has thickened slightly, remove from heat. Garnish with fresh parsley before serving.
Extra Tips: To enhance the flavor of the dish, consider marinating the chicken in lemon juice, olive oil, and garlic for a few hours or overnight before cooking.
If you prefer a thicker sauce, remove the chicken once cooked and allow the sauce to simmer for a few more minutes to reduce. Serve the chicken with steamed vegetables or a side salad for a complete meal. Additionally, if you like a bit of spice, adding a pinch of red pepper flakes to the sauce can provide a delightful kick.
Quick Beef Stir-Fry With Vegetables
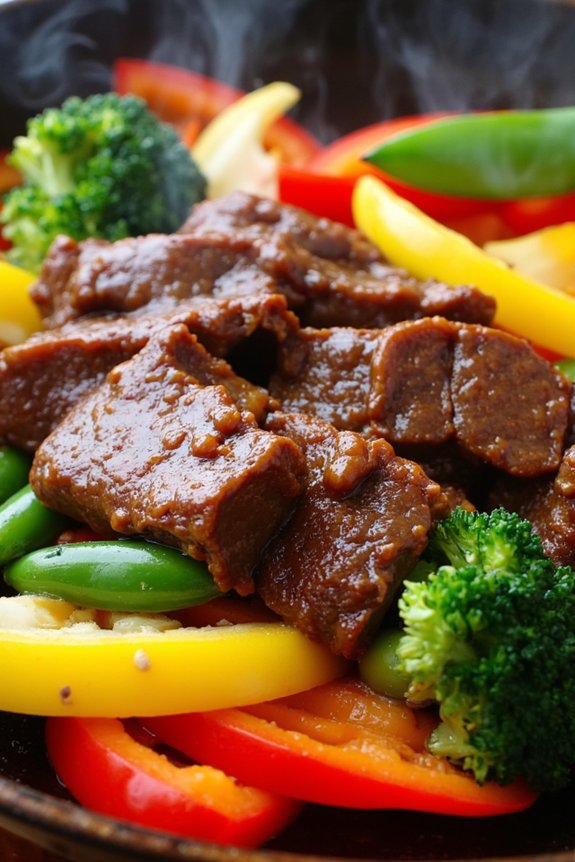
Weeknight dinners don’t have to be a hassle, and this Quick Beef Stir-Fry With Vegetables is proof. Perfectly suited for feeding a family of 4-6, this dish is a delightful blend of tender beef and colorful vegetables, all cooked in a savory sauce. It’s quick to prepare and even quicker to disappear from the plate, making it an ideal choice for those busy evenings when time is of the essence.
This stir-fry isn’t only easy to make but also highly versatile, allowing you to use whatever vegetables you have on hand. The beef is marinated briefly to enhance its flavor and tenderness, while the vegetables add a revitalizing crunch. Together, they create a harmonious dish that’s both nutritious and delicious. Serve it with steamed rice or noodles for a complete meal that’s guaranteed to satisfy everyone’s taste buds.
Ingredients (Serves 4-6):
- 1 pound beef sirloin, thinly sliced
- 2 tablespoons soy sauce
- 1 tablespoon cornstarch
- 2 tablespoons vegetable oil, divided
- 1 red bell pepper, sliced
- 1 yellow bell pepper, sliced
- 1 cup broccoli florets
- 1 cup sugar snap peas
- 3 cloves garlic, minced
- 1 tablespoon fresh ginger, grated
- 1/4 cup oyster sauce
- 1 tablespoon sesame oil
- Cooked rice or noodles, for serving
Cooking Instructions:
- Marinate the Beef: In a medium bowl, combine the thinly sliced beef, soy sauce, and cornstarch. Mix well to guarantee the beef is evenly coated. Let it marinate for 10-15 minutes while you prep the vegetables.
- Prepare the Vegetables: Slice the red and yellow bell peppers, and gather the broccoli florets and sugar snap peas. Mince the garlic and grate the ginger for the stir-fry.
- Cook the Beef: In a large wok or skillet, heat 1 tablespoon of vegetable oil over medium-high heat. Add the marinated beef in a single layer and stir-fry for about 3-4 minutes, or until the beef is browned and cooked through. Remove the beef from the wok and set it aside.
- Stir-Fry the Vegetables: In the same wok, add the remaining tablespoon of vegetable oil. Add the minced garlic and grated ginger, and stir-fry for 30 seconds until fragrant. Add the sliced bell peppers, broccoli, and sugar snap peas. Stir-fry the vegetables for about 4-5 minutes, or until they’re tender-crisp.
- Combine and Season: Return the cooked beef to the wok with the vegetables. Pour in the oyster sauce and sesame oil, and toss everything together to coat evenly. Stir-fry for another 1-2 minutes to heat through and combine the flavors.
- Serve: Transfer the beef stir-fry to a serving platter and serve immediately over cooked rice or noodles.
Extra Tips:
For the best results, slice the beef against the grain; this will make it more tender. If you prefer a spicier dish, feel free to add a pinch of red pepper flakes or a splash of chili oil during the cooking process. To save time, you can prep the vegetables and marinate the beef in advance, storing them in the refrigerator until you’re ready to cook.
Remember to keep the heat high while stir-frying to achieve that perfect sear and maintain the vibrant colors of the vegetables.
Creamy Tuscan Pasta
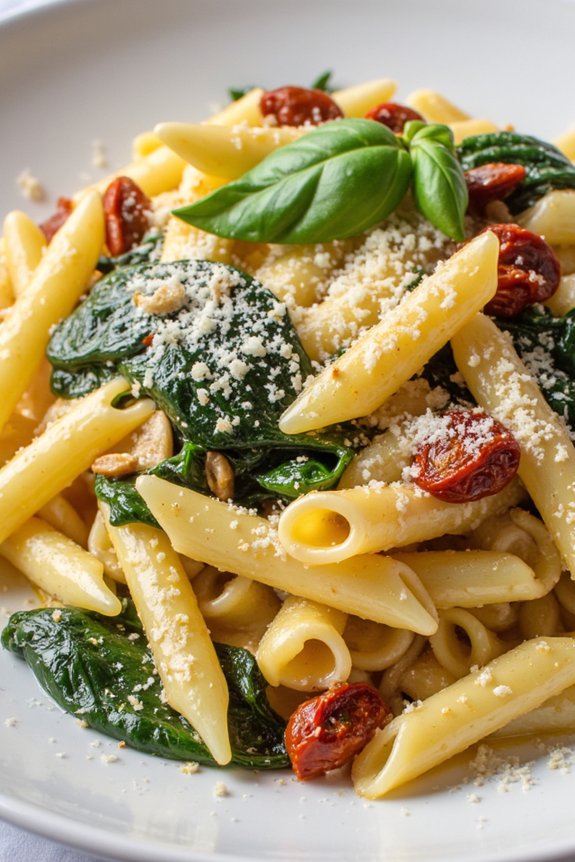
Creamy Tuscan Pasta is a delightful and satisfying dish that can be whipped up in no time, making it perfect for a busy weeknight dinner. This recipe combines the rich flavors of garlic, sun-dried tomatoes, and spinach with a luscious creamy sauce that clings to every bite of pasta. The dish isn’t only visually appealing with its mixture of vibrant green and red ingredients but also incredibly flavorful, offering a taste of Tuscan cuisine right in your kitchen.
The beauty of this Creamy Tuscan Pasta is in its simplicity and speed. You can have this dish ready in under 30 minutes, making it ideal for those nights when time is of the essence but you still crave a home-cooked meal. The creamy sauce is made from scratch yet doesn’t require any complex techniques, ensuring that even novice cooks can achieve a delicious result.
Whether you’re cooking for family or entertaining friends, this pasta dish is sure to impress and satisfy.
Ingredients (Serves 4-6):
- 12 ounces of pasta (penne, fettuccine, or your choice)
- 2 tablespoons olive oil
- 3 cloves garlic, minced
- 1 teaspoon red pepper flakes (optional)
- 1 cup heavy cream
- 1 cup chicken or vegetable broth
- 1/2 cup grated Parmesan cheese
- 1/2 cup sun-dried tomatoes, chopped
- 3 cups fresh spinach
- Salt and pepper to taste
- 2 tablespoons fresh basil, chopped (optional, for garnish)
Instructions:
- Cook the Pasta: Begin by bringing a large pot of salted water to a boil. Add the pasta and cook according to the package instructions until al dente. Drain the pasta and set aside.
- Prepare the Sauce: In a large skillet, heat olive oil over medium heat. Add the minced garlic and red pepper flakes (if using) and sauté for about 1 minute until fragrant. Be careful not to burn the garlic.
- Add the Cream: Pour in the heavy cream and chicken (or vegetable) broth. Stir well to combine and bring the mixture to a gentle simmer. Allow it to cook for about 5 minutes, stirring occasionally, until the sauce begins to thicken slightly.
- Incorporate Cheese and Tomatoes: Add the grated Parmesan cheese to the sauce, stirring until melted and smooth. Then, stir in the chopped sun-dried tomatoes, allowing them to heat through and infuse the sauce with their flavor.
- Include Spinach: Add the fresh spinach to the skillet. Stir occasionally until the spinach wilts into the sauce, which should take about 2-3 minutes.
- Combine with Pasta: Add the cooked pasta to the skillet and toss everything together, ensuring that the pasta is evenly coated with the creamy sauce. Season with salt and pepper to taste.
- Serve and Garnish: Serve the pasta hot, garnished with fresh basil if desired, for an added burst of flavor and color.
Extra Tips: To elevate the flavor of this Creamy Tuscan Pasta, consider adding cooked chicken or shrimp for added protein. Remember to slice the sun-dried tomatoes thinly for even distribution throughout the dish. If you prefer a thicker sauce, allow it to simmer a bit longer before adding the cheese.
Feel free to experiment with different types of pasta to suit your preferences or dietary needs, and for an even creamier sauce, you can add a bit more Parmesan cheese.
Easy Chicken Alfredo
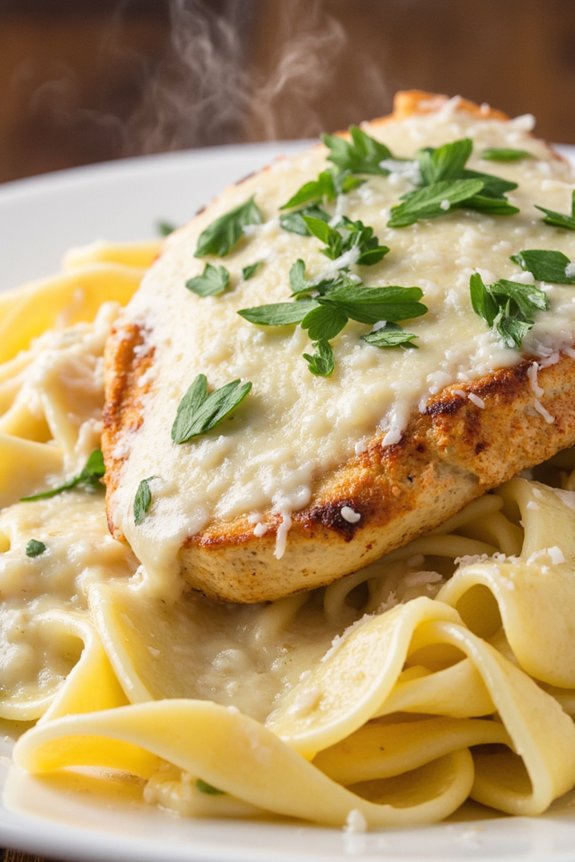
For those busy weeknights when time is of the essence but a delicious meal is still a must, Easy Chicken Alfredo is the perfect solution. This creamy and flavorful pasta dish combines tender chicken, rich Alfredo sauce, and perfectly cooked pasta, creating a comforting meal that the whole family will love. Ready in under 30 minutes, this recipe is a lifesaver when you need to whip up a satisfying dinner quickly.
The beauty of Easy Chicken Alfredo lies in its simplicity and the minimal ingredients required. With just a few pantry staples and some fresh chicken, you can have a restaurant-quality meal on the table without breaking a sweat. Whether you’re a seasoned cook or a novice, this recipe is straightforward and foolproof, ensuring a delicious outcome every time.
Ingredients (Serves 4-6):
- 1 pound boneless, skinless chicken breasts
- 1 tablespoon olive oil
- Salt and pepper to taste
- 12 ounces fettuccine pasta
- 1 cup heavy cream
- 1/2 cup chicken broth
- 1 cup grated Parmesan cheese
- 2 cloves garlic, minced
- 2 tablespoons unsalted butter
- Fresh parsley, chopped (optional, for garnish)
Cooking Instructions:
- Prepare the Chicken: Start by seasoning the chicken breasts with salt and pepper. Heat the olive oil in a large skillet over medium-high heat. Add the chicken breasts and cook for about 6-7 minutes on each side, or until they’re golden brown and cooked through. Remove the chicken from the skillet and let it rest for a few minutes before slicing it into thin strips.
- Cook the Pasta: While the chicken is cooking, bring a large pot of salted water to a boil. Add the fettuccine pasta and cook according to the package instructions until al dente. Reserve about 1 cup of pasta water, then drain the pasta and set aside.
- Make the Alfredo Sauce: In the same skillet used for the chicken, melt the butter over medium heat. Add the minced garlic and sauté for about 1 minute until fragrant. Pour in the heavy cream and chicken broth, stirring to combine. Bring the mixture to a gentle simmer and let it cook for 2-3 minutes, allowing it to thicken slightly.
- Combine Ingredients: Stir in the grated Parmesan cheese, letting it melt into the sauce. Add the sliced chicken and cooked pasta to the skillet, tossing everything together until the pasta is well coated with the sauce. If the sauce is too thick, gradually add some reserved pasta water until you reach your desired consistency.
- Serve: Remove the skillet from heat and garnish the Chicken Alfredo with freshly chopped parsley, if desired. Serve hot and enjoy your quick and easy weeknight dinner.
Extra Tips:
For an even richer flavor, consider using freshly grated Parmesan cheese as it melts more smoothly into the sauce than pre-grated varieties. If you prefer a lighter version, substitute half of the heavy cream with milk or half-and-half.
Additionally, you can add some steamed broccoli or peas for a pop of color and extra nutrition. Remember to taste the sauce before serving and adjust the seasoning as necessary for maximum flavor.
Veggie-Packed Fried Rice
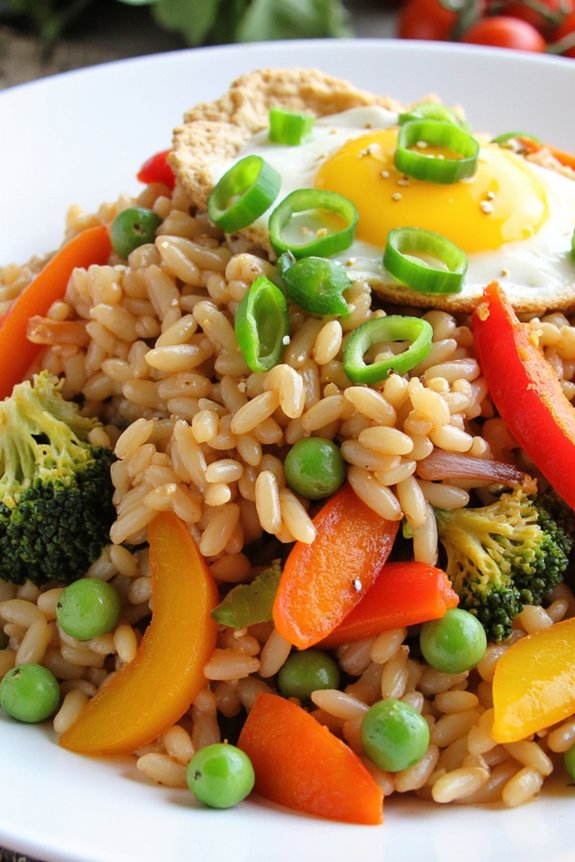
Veggie-Packed Fried Rice is the perfect solution for those busy weeknights when you need a quick and nutritious meal that satisfies the whole family. This colorful dish combines a variety of fresh vegetables with rice to create a tasty and balanced meal. Not only is it easy to prepare, but it’s also a great way to use up any leftover rice or vegetables you have on hand.
The combination of soy sauce, garlic, and ginger adds a delightful depth of flavor that makes this dish irresistible. This recipe makes enough Veggie-Packed Fried Rice to comfortably serve 4-6 people. It’s versatile enough to cater to different taste preferences, so feel free to adjust the ingredients as needed.
Whether you’re a seasoned cook or a kitchen newbie, you’ll find this recipe straightforward and rewarding. So, gather your ingredients and get ready to enjoy a delicious homemade dinner in no time!
Ingredients:
- 4 cups cooked rice (preferably day-old)
- 2 tablespoons vegetable oil
- 1 medium onion, diced
- 2 cloves garlic, minced
- 1 tablespoon fresh ginger, grated
- 2 carrots, diced
- 1 cup peas (fresh or frozen)
- 1 red bell pepper, diced
- 1 cup broccoli florets
- 3 eggs, lightly beaten
- 3 tablespoons soy sauce
- 1 tablespoon sesame oil
- 2 green onions, sliced
- Salt and pepper to taste
Instructions:
- Prepare the Ingredients: Before you start cooking, make sure all your vegetables are washed, diced, and ready to go. This will make the cooking process smoother since stir-frying requires quick and continuous action.
- Heat the Oil: In a large wok or skillet, heat the vegetable oil over medium-high heat. Confirm the oil is hot before adding the ingredients to prevent sticking.
- Sauté Aromatics: Add the diced onion, minced garlic, and grated ginger to the pan. Stir-fry for about 2 minutes, or until the onions become translucent and the garlic is fragrant.
- Cook the Vegetables: Add the diced carrots, peas, red bell pepper, and broccoli florets to the pan. Stir-fry for about 5-7 minutes, or until the vegetables are tender but still crisp.
- Scramble the Eggs: Push the vegetables to one side of the pan and pour the lightly beaten eggs into the empty space. Allow the eggs to set slightly, then scramble them gently until fully cooked.
- Combine Everything: Add the cooked rice to the pan, breaking up any clumps with a spatula. Combine the rice with the vegetable and egg mixture thoroughly.
- Season the Dish: Pour the soy sauce and sesame oil over the rice. Stir well to guarantee that the rice is evenly coated. Taste and adjust the seasoning with salt and pepper if needed.
- Finish with Green Onions: Once the rice is heated through and all ingredients are well-mixed, remove the pan from heat. Sprinkle the sliced green onions over the top and give a final stir before serving.
Extra Tips:
For the best results, use day-old rice as it tends to be drier, which helps it fry better without becoming mushy. If you don’t have leftover rice, cook fresh rice, spread it out on a baking sheet, and let it cool in the fridge for at least 30 minutes.
Feel free to get creative with your vegetable choices; add mushrooms, snap peas, or even some corn for variety. If you prefer a bit of heat, consider adding a dash of chili flakes or a teaspoon of sriracha during the seasoning stage.
Sheet Pan Sausage and Peppers

Sheet Pan Sausage and Peppers is a delightful and vibrant dish that combines the savory taste of sausages with the sweetness of roasted peppers and onions. This recipe is perfect for busy weeknights when you want to whip up something delicious without spending too much time in the kitchen.
With minimal prep and cleanup, you’ll have a hearty meal on the table in under an hour, perfect for feeding a family of 4-6 people.
The beauty of this dish lies in its simplicity and versatility. You can easily adapt it to suit your taste by using different types of sausages or adding your favorite vegetables. The roasting process caramelizes the vegetables and enhances their natural flavors, while the sausages become juicy and tender.
Serve it with crusty bread, over rice, or with a side of pasta for a complete and satisfying meal that everyone will love.
Ingredients for 4-6 servings:
- 1.5 pounds Italian sausage links (mild or spicy)
- 3 bell peppers (red, yellow, green), sliced
- 1 large red onion, sliced
- 3 tablespoons olive oil
- 1 teaspoon garlic powder
- 1 teaspoon dried oregano
- 1 teaspoon dried basil
- Salt and pepper to taste
- Fresh parsley, chopped (for garnish)
Cooking Instructions:
- Preheat the Oven: Set your oven to 400°F (200°C) and allow it to preheat while you prepare the ingredients.
- Prepare the Ingredients: Slice the bell peppers and red onion into strips. If the sausages are in casings, you can leave them whole or slice them into pieces, depending on your preference.
- Assemble on the Sheet Pan: Place the sliced peppers and onions on a large sheet pan. Add the sausages to the pan, arranging them around the vegetables.
- Season the Dish: Drizzle the olive oil over the vegetables and sausages. Sprinkle the garlic powder, dried oregano, dried basil, salt, and pepper evenly over the top.
- Mix and Coat: Use your hands or a spatula to toss the vegetables and sausages so they’re evenly coated with the oil and seasoning.
- Roast in the Oven: Place the sheet pan in the preheated oven and roast for 30-35 minutes. Halfway through cooking, toss the vegetables and sausages to guarantee even roasting.
- Check for Doneness: The dish is ready when the sausages are cooked through (internal temperature of 160°F/71°C) and the vegetables are tender and caramelized.
- Garnish and Serve: Remove the sheet pan from the oven and let it cool slightly. Garnish with chopped fresh parsley before serving.
Extra Tips:
For added flavor, consider adding a splash of balsamic vinegar or a squeeze of fresh lemon juice before serving. If you prefer a spicier dish, use hot Italian sausages or add a pinch of red pepper flakes to the seasoning mix.
You can also experiment by adding other vegetables like zucchini or mushrooms to the sheet pan. This dish isn’t only versatile but also reheats well, making it great for meal prep or leftover lunches.
20-Minute Shrimp Tacos
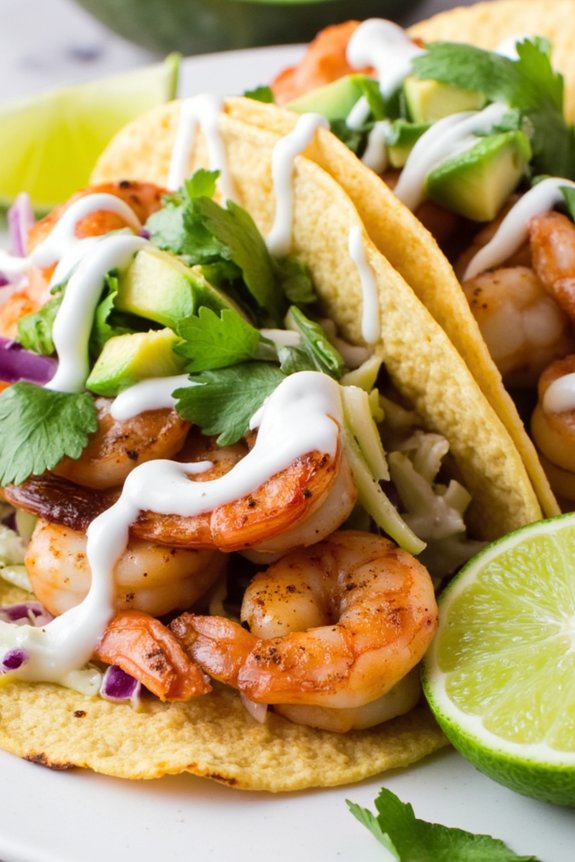
Searching for a quick and delicious dinner option that requires minimal effort and delivers maximum flavor? Seek no more than Minute Shrimp Tacos. Perfect for those hectic weeknights when time is of the essence, these tacos aren’t only speedy to prepare but also packed with fresh and vibrant flavors.
With succulent shrimp as the star ingredient, complemented by a zesty lime crema and crisp toppings, this dish will become a household favorite in no time. In just a few minutes, you can transform simple ingredients into a mouthwatering meal that pleases the whole family.
These shrimp tacos are versatile and can be easily customized to suit individual taste preferences. Plus, they’re healthy and light, making them ideal for any night of the week. Whether you’re a seasoned cook or a kitchen novice, Minute Shrimp Tacos promise a satisfying dining experience with minimal fuss.
Ingredients (Serves 4-6):
- 1 1/2 pounds large shrimp, peeled and deveined
- 2 tablespoons olive oil
- 1 teaspoon chili powder
- 1 teaspoon garlic powder
- 1/2 teaspoon ground cumin
- Salt and pepper to taste
- 12 small corn tortillas
- 1 cup shredded cabbage or slaw mix
- 1/4 cup chopped fresh cilantro
- 1 avocado, sliced
- 1 lime, cut into wedges
Lime Crema:
- 1/2 cup sour cream
- 1 tablespoon lime juice
- Zest of 1 lime
- Salt to taste
Instructions:
- Prepare the Shrimp: In a large bowl, combine the shrimp with olive oil, chili powder, garlic powder, ground cumin, salt, and pepper. Toss until the shrimp are evenly coated with the spices.
- Cook the Shrimp: Heat a large skillet over medium-high heat. Once hot, add the seasoned shrimp in a single layer. Cook for 2-3 minutes on each side, or until the shrimp are pink and opaque. Remove from the heat and set aside.
- Make the Lime Crema: In a small bowl, mix together the sour cream, lime juice, lime zest, and a pinch of salt. Stir until smooth and creamy. Adjust the seasoning if necessary.
- Warm the Tortillas: While the shrimp are cooking, warm the corn tortillas in a dry skillet over medium heat for about 30 seconds on each side or until pliable. Alternatively, wrap them in a damp paper towel and microwave for 30 seconds.
- Assemble the Tacos: To assemble the tacos, place a few shrimp on each tortilla. Top with shredded cabbage, a few slices of avocado, and a sprinkle of chopped cilantro. Drizzle with lime crema and serve with lime wedges on the side.
Extra Tips:
For the best flavor, consider marinating the shrimp for about 20 minutes before cooking to allow the spices to penetrate more deeply. If you prefer a bit of heat, add a pinch of cayenne pepper to the spice mix or serve the tacos with hot sauce on the side.
Feel free to experiment with additional toppings such as diced tomatoes, pickled onions, or crumbled queso fresco to enhance the tacos even further. Finally, make sure that your shrimp aren’t overcooked, as they can become rubbery; they should be just pink and firm to the touch. Enjoy your delicious Minute Shrimp Tacos!
Classic Tomato Basil Soup
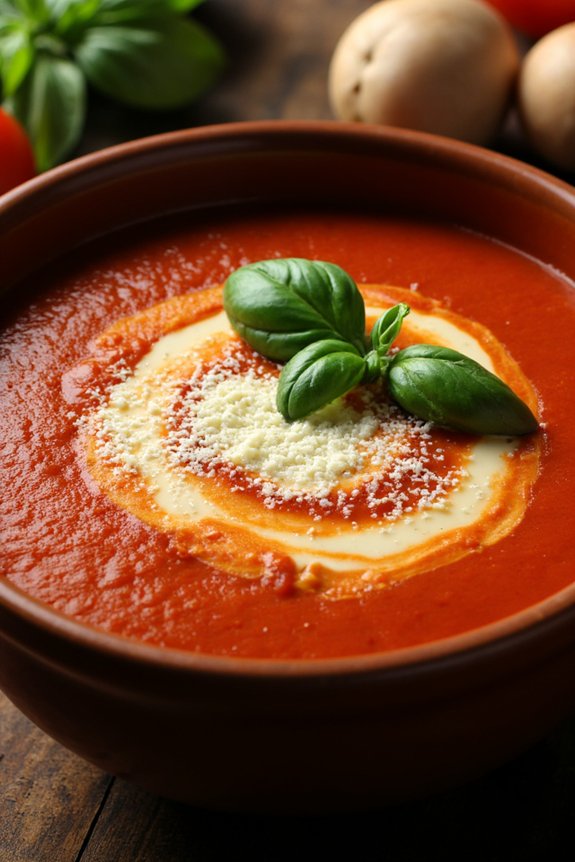
When you’re craving something warm and comforting on a busy weeknight, Classic Tomato Basil Soup is the perfect solution. This timeless recipe combines the rich flavors of ripe tomatoes with the aromatic essence of fresh basil, resulting in a velvety soup that’s both invigorating and satisfying. The best part is, it comes together quickly, making it ideal for those evenings when time is of the essence.
Whether you’re serving it as a starter or as the main course, this soup is sure to please everyone at the table. This version of the Classic Tomato Basil Soup is designed to serve 4-6 people, making it a great option for family dinners or small gatherings. The ingredients are simple and likely already in your pantry or fridge, which means you can whip this up without a trip to the grocery store.
Pair it with a crusty loaf of bread or a grilled cheese sandwich for a complete meal that hits the spot.
Ingredients:
- 2 tablespoons olive oil
- 1 medium onion, chopped
- 3 cloves garlic, minced
- 2 cans (28 ounces each) whole peeled tomatoes
- 1 cup vegetable broth
- 1 teaspoon sugar
- Salt and pepper to taste
- 1/4 cup fresh basil leaves, chopped
- 1/4 cup heavy cream (optional)
- Grated Parmesan cheese for serving (optional)
- Extra basil leaves for garnish (optional)
Cooking Instructions:
- Prepare the Base: Begin by heating the olive oil in a large pot over medium heat. Add the chopped onion and sauté for about 5 minutes until the onion is soft and translucent. Stir in the minced garlic and cook for an additional minute until fragrant.
- Add Tomatoes and Broth: Pour in the canned tomatoes, including their juice, and the vegetable broth. Use a spoon to break up the tomatoes into smaller pieces. Add the sugar, and season with salt and pepper to taste. Bring the mixture to a boil, then reduce the heat to low and let it simmer for about 20 minutes, allowing the flavors to meld together.
- Blend the Soup: Remove the pot from the heat and let it cool slightly. Using an immersion blender, blend the soup until smooth. If you don’t have an immersion blender, carefully transfer the soup in batches to a countertop blender and blend until smooth. Return the blended soup to the pot.
- Finish with Basil and Cream: Stir in the chopped fresh basil and, if desired, the heavy cream. Allow the soup to heat through on low heat for another 5 minutes. Taste and adjust seasoning with additional salt and pepper if needed.
- Serve and Garnish: Ladle the soup into bowls and garnish with grated Parmesan cheese and extra basil leaves if desired. Serve hot with your choice of bread or sandwich.
Extra Tips:
For an even deeper flavor, consider roasting the tomatoes in the oven before adding them to the soup. Simply toss them with a bit of olive oil, salt, and pepper, and roast at 400°F for about 30 minutes. This step enhances the sweetness and richness of the tomatoes.
Additionally, if you prefer a thicker soup, reduce the amount of vegetable broth or simmer the soup longer to allow more liquid to evaporate. This recipe is versatile and can be easily adapted to suit your taste preferences or dietary needs. Enjoy your comforting bowl of Classic Tomato Basil Soup!
Spinach and Mushroom Quesadillas

Spinach and Mushroom Quesadillas are a delightful and quick option for a satisfying weeknight dinner. These quesadillas are packed with the earthy flavors of mushrooms and the nutritional benefits of spinach, all enveloped in a crispy tortilla shell. Perfect for a family of four to six, this dish requires minimal prep time and can be ready to serve in under 30 minutes.
The combination of melted cheese, sautéed vegetables, and the slight kick from spices makes this recipe a favorite for both kids and adults alike. This dish not only provides a delicious meal, but it also offers a great way to sneak in some greens for those picky eaters. Spinach is a powerhouse of nutrients, while mushrooms add a savory depth that complements the cheesy goodness.
Whether it’s a busy weeknight or a casual gathering, these quesadillas are sure to impress without keeping you tied to the stove for too long.
Ingredients (Serves 4-6):
- 8 large flour tortillas
- 2 tablespoons olive oil
- 2 cups fresh spinach, roughly chopped
- 2 cups button or cremini mushrooms, sliced
- 1 small onion, diced
- 2 cloves garlic, minced
- 2 cups shredded cheese (cheddar, mozzarella, or a blend)
- 1 teaspoon ground cumin
- 1 teaspoon chili powder
- Salt and pepper to taste
- Sour cream and salsa for serving (optional)
Instructions:
- Prep the Ingredients: Start by washing the spinach leaves and slice the mushrooms. Dice the onion and mince the garlic to have everything ready for cooking.
- Sauté the Vegetables: In a large skillet, heat 1 tablespoon of olive oil over medium heat. Add the diced onion and cook until translucent, about 3 minutes. Stir in the garlic and cook for another minute.
- Add Mushrooms and Spinach: Add the sliced mushrooms to the skillet and cook until they begin to brown and soften, approximately 5 minutes. Then, add the spinach and cook until wilted, stirring occasionally. Season with cumin, chili powder, salt, and pepper.
- Assemble the Quesadillas: Lay out the tortillas on a flat surface. Sprinkle a generous amount of shredded cheese on one half of each tortilla. Spoon the spinach and mushroom mixture over the cheese. Fold the other half of the tortilla over the filling to create a half-moon shape.
- Cook the Quesadillas: Wipe the skillet clean and add the remaining olive oil. Heat over medium heat. Place the folded quesadillas in the skillet, cooking them in batches if necessary. Cook each side for about 3-4 minutes, or until the tortillas are golden brown and the cheese has melted.
- Serve: Remove the quesadillas from the skillet and let them cool slightly. Cut into wedges and serve with sour cream and salsa, if desired.
Extra Tips:
For extra flavor, consider adding a sprinkle of crumbled feta or goat cheese into the filling before cooking. To make the quesadillas crispier, use a cast-iron skillet and press down on the quesadillas with a spatula while cooking. If you prefer a spicier kick, add a pinch of red pepper flakes or a dash of hot sauce to the vegetable mixture.
Feel free to experiment with different types of mushrooms or even add some cooked chicken or beef for a heartier dish.
Quick Thai Red Curry
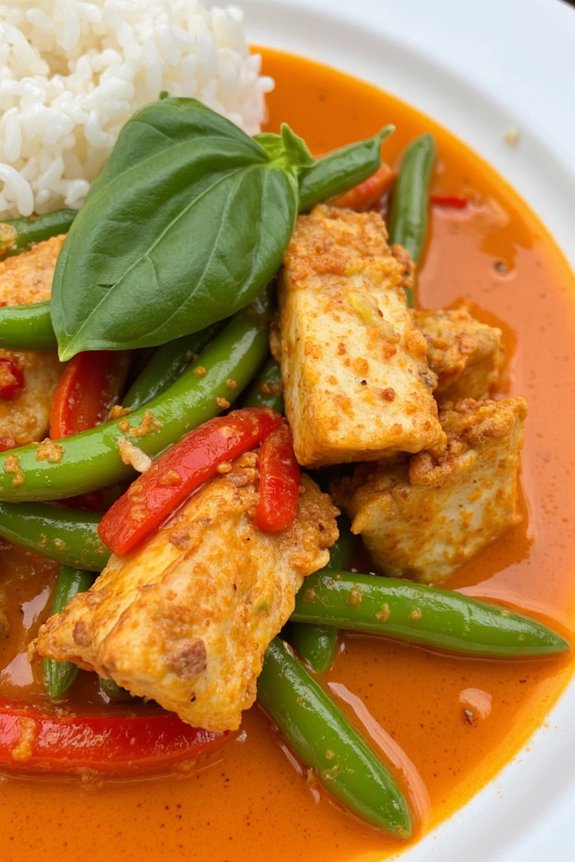
Quick Thai Red Curry is a delightful and aromatic dish that brings the vibrant flavors of Thailand right to your kitchen. This recipe is perfect for busy weeknights when you crave something exotic yet quick to prepare. With its rich, creamy coconut base and an infusion of red curry paste, this dish promises a harmonious blend of spicy, sweet, and savory notes.
It’s a versatile recipe, allowing you to customize it with your choice of protein and vegetables, making it not only delicious but also a balanced meal. This Quick Thai Red Curry is designed to serve 4-6 people, making it an ideal option for family dinners or small gatherings. The preparation time is minimal, yet the results are nothing short of impressive.
Whether you’re a seasoned cook or a beginner, this recipe is straightforward, requiring only a few steps to bring together a satisfying and flavorful meal. So gather your ingredients, and let’s plunge into creating this delightful dish.
Ingredients:
- 2 tablespoons vegetable oil
- 1 onion, thinly sliced
- 2 cloves garlic, minced
- 1 tablespoon fresh ginger, grated
- 3 tablespoons Thai red curry paste
- 1 can (14 oz) coconut milk
- 1 cup chicken or vegetable broth
- 1 tablespoon fish sauce
- 1 tablespoon brown sugar
- 1 red bell pepper, sliced
- 1 cup snap peas or green beans
- 1 pound chicken breast or tofu, cut into bite-sized pieces
- 1 lime, juiced
- Fresh basil or cilantro leaves, for garnish
- Cooked jasmine rice, for serving
Instructions:
1. Prepare the Aromatics: Begin by heating the vegetable oil in a large skillet or wok over medium heat. Add the sliced onion and sauté for about 3 minutes until it becomes translucent.
Stir in the minced garlic and grated ginger, cooking for an additional minute until fragrant.
2. Add the Curry Paste: Stir in the Thai red curry paste, mixing it well with the aromatics. Cook for 2 minutes, allowing the paste to become fragrant and slightly darken in color, releasing its oils.
3. Create the Curry Base: Pour in the coconut milk and chicken or vegetable broth. Stir to combine, making sure the curry paste is well incorporated into the liquid.
Add the fish sauce and brown sugar, mixing until the sugar is dissolved.
4. Simmer the Curry: Bring the mixture to a gentle simmer. Add the sliced red bell pepper and snap peas or green beans.
Let them cook for 5 minutes, maintaining a simmer, until the vegetables start to tenderize.
5. Cook the Protein: Add the chicken pieces or tofu into the curry, stirring to coat them evenly with the sauce.
Allow the curry to simmer for another 8-10 minutes, or until the chicken is fully cooked or the tofu is heated through.
6. Finish the Curry: Once the protein is cooked, stir in the lime juice. Taste and adjust seasoning with more fish sauce or sugar if needed.
Remove from heat.
7. Serve: Serve the curry hot, garnished with fresh basil or cilantro leaves.
Accompany it with a side of cooked jasmine rice for a complete meal.
Extra Tips:
For a richer flavor, you can add a teaspoon of lemongrass or kaffir lime leaves while simmering the curry.
Feel free to substitute or add additional vegetables such as zucchini or mushrooms to suit your taste. If you prefer a spicier curry, consider adding a sliced Thai chili or a dash of chili flakes.
Speedy Tuna Noodle Casserole

Looking for a quick and hearty meal to satisfy the whole family on a busy weeknight? This Speedy Tuna Noodle Casserole is the answer. It’s a comforting dish filled with tender noodles, flavorful tuna, and a creamy sauce, all baked to perfection. With minimal prep and a short cook time, you’ll have a delicious, home-cooked meal on the table in no time. Perfect for serving 4-6 people, this recipe guarantees that everyone leaves the dinner table happy and full.
This dish combines pantry staples with a few fresh ingredients to create a satisfying casserole that’s both flavorful and filling. The key to this recipe is using quality canned tuna and a variety of vegetables to add depth and nutrition. Plus, the crispy topping adds a delightful texture that pairs perfectly with the creamy interior.
Whether you’re a seasoned chef or a novice cook, this quick and easy casserole is sure to become a staple in your weeknight dinner rotation.
Ingredients (Serves 4-6):
- 12 oz egg noodles
- 2 cans (5 oz each) of tuna, drained
- 1 can (10.5 oz) of cream of mushroom soup
- 1 cup milk
- 1 cup frozen peas
- 1/2 cup shredded cheddar cheese
- 1/2 cup finely chopped onion
- 1/4 cup chopped fresh parsley
- 1 cup crushed potato chips
- Salt and pepper to taste
Cooking Instructions:
- Preheat Oven and Cook Noodles: Preheat your oven to 375°F (190°C). Bring a large pot of salted water to a boil and cook the egg noodles according to package instructions until al dente. Drain and set aside.
- Prepare the Sauce: In a large bowl, combine the cream of mushroom soup, milk, and shredded cheddar cheese. Stir until well combined and smooth.
- Mix Ingredients: Add the drained tuna, cooked noodles, frozen peas, chopped onion, and parsley to the bowl with the sauce. Season with salt and pepper to taste. Gently mix until all ingredients are evenly coated with the sauce.
- Assemble the Casserole: Pour the noodle mixture into a greased 9×13-inch baking dish. Spread it out evenly to guarantee even cooking.
- Add Topping: Sprinkle the crushed potato chips evenly over the top of the casserole. This will create a crispy, golden topping after baking.
- Bake the Casserole: Place the casserole in the preheated oven and bake for 20-25 minutes, or until the top is golden brown and the filling is bubbly.
- Serve: Remove from the oven and let it cool for a few minutes before serving. Garnish with additional fresh parsley if desired.
Extra Tips:
For added flavor, consider adding a tablespoon of Dijon mustard to the sauce mixture before combining with the noodles. If you prefer a bit more color and texture, substitute the potato chips with bread crumbs or even panko.
Additionally, feel free to experiment with different types of cheese or add in other vegetables like diced bell peppers or sliced mushrooms. This casserole is versatile and can easily be adapted to suit your family’s tastes.
Black Bean and Corn Salad
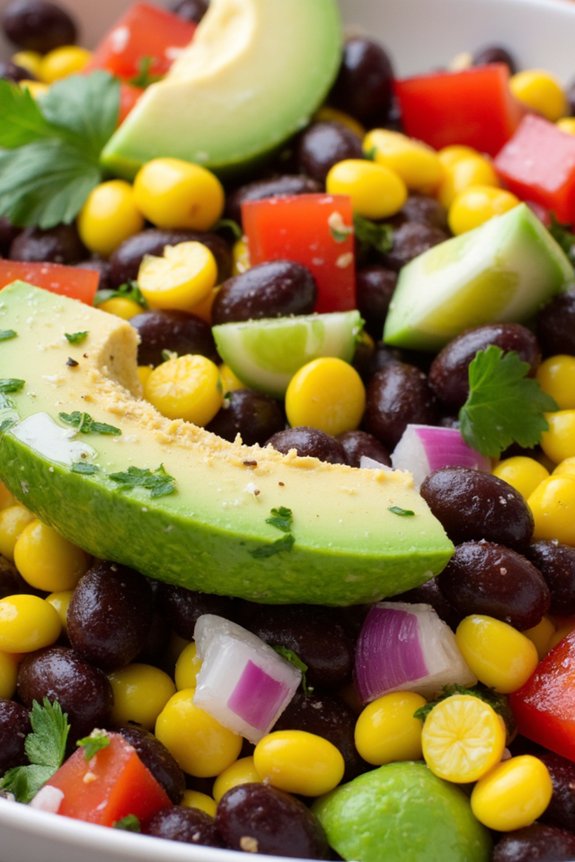
Are you looking for a quick and easy weeknight dinner that’s both nutritious and delicious? This Black Bean and Corn Salad is the perfect solution. It’s vibrant, full of flavor, and incredibly simple to prepare, making it an ideal choice for those busy evenings when you want something healthy on the table without all the fuss.
Packed with protein-rich black beans, sweet corn, and fresh vegetables, this salad can be served as a main dish or a hearty side. This revitalizing salad brings together the best of summer vegetables in a dish that can be enjoyed year-round. The combination of black beans and corn not only complements each other in taste but also provides a great source of fiber and essential nutrients.
The addition of lime juice and cilantro gives it a zesty kick, making it a rejuvenating choice for any meal. Whether you’re feeding a family of four or hosting a small gathering, this recipe serves 4-6 people and is sure to satisfy everyone at the table.
Ingredients:
- 2 cans (15 ounces each) black beans, drained and rinsed
- 1 can (15 ounces) corn kernels, drained
- 1 red bell pepper, diced
- 1 small red onion, finely chopped
- 1 avocado, diced
- 1/4 cup fresh cilantro, chopped
- 1/4 cup fresh lime juice
- 2 tablespoons olive oil
- 1 teaspoon ground cumin
- Salt and pepper to taste
Instructions:
- Prepare the Ingredients: Begin by draining and rinsing the black beans and corn kernels. Dice the red bell pepper and avocado, and finely chop the red onion and cilantro. Set these prepared ingredients aside.
- Mix the Salad Base: In a large mixing bowl, combine the black beans, corn, red bell pepper, and red onion. Stir gently to verify the ingredients are evenly distributed.
- Make the Dressing: In a small bowl, whisk together the lime juice, olive oil, ground cumin, salt, and pepper. Adjust the seasoning according to your taste preferences.
- Combine and Toss: Pour the dressing over the salad mixture. Gently toss the salad until all the ingredients are coated with the dressing. Be careful not to mash the avocado.
- Add Final Touches: Add the diced avocado and chopped cilantro to the salad. Give it a gentle toss to incorporate the final ingredients without breaking the avocado chunks.
- Chill and Serve: For the best flavor, cover the bowl and let the salad chill in the refrigerator for at least 30 minutes before serving. This allows the flavors to meld together beautifully.
Extra Tips: For a spicier version, consider adding a diced jalapeño or a sprinkle of red pepper flakes. If you’re serving this salad as a main dish, pair it with some grilled chicken or shrimp for added protein.
Feel free to experiment with the ingredients; cherry tomatoes or cucumbers can be great additions for extra crunch and freshness. Finally, for best results, make sure your avocado is ripe but not overripe to keep the salad looking and tasting its best. Enjoy your quick and easy Black Bean and Corn Salad!
Garlic Butter Salmon
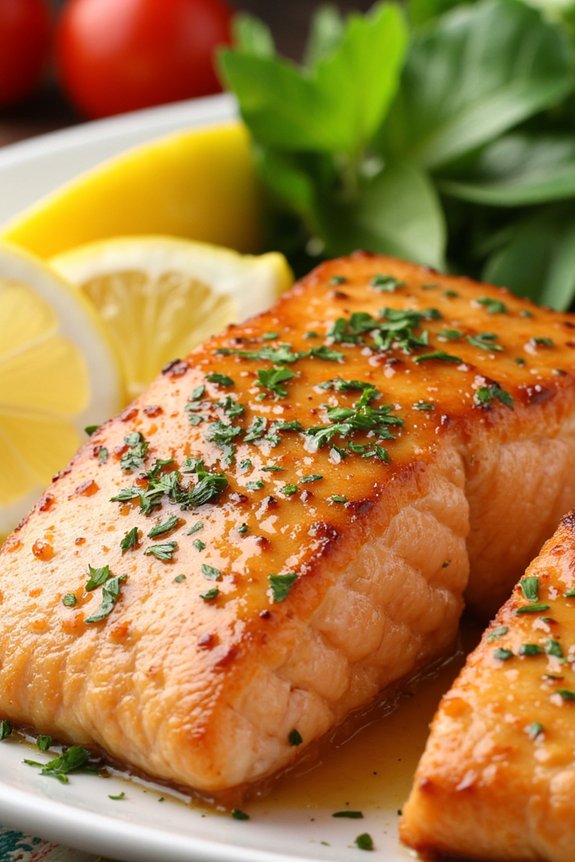
Garlic Butter Salmon is a delightful dish that combines the rich, savory flavors of garlic and butter with the natural, delicate taste of fresh salmon. This recipe is perfect for those busy weeknights when you want something quick yet delicious. With minimal ingredients and a straightforward cooking process, this dish can be whipped up in under 30 minutes, making it a favorite for families and culinary novices alike.
The combination of tender salmon fillets with a luscious garlic butter sauce is sure to please everyone at the table. This recipe is designed to serve 4-6 people, making it ideal for a family dinner or a small gathering with friends. The use of fresh ingredients guarantees a meal that isn’t only tasty but also nutritious.
Serve this Garlic Butter Salmon with a side of steamed vegetables or a crisp green salad for a well-rounded meal that will satisfy any appetite. Whether you’re an experienced chef or just starting your culinary journey, this recipe is a simple yet impressive way to enjoy seafood at home.
Ingredients:
- 4-6 salmon fillets (about 6 ounces each)
- 1/2 cup unsalted butter
- 4 cloves garlic, minced
- 1 tablespoon lemon juice
- Salt, to taste
- Black pepper, to taste
- 1 tablespoon fresh parsley, chopped
- Lemon wedges, for serving
Cooking Instructions:
- Prepare the Ingredients: Start by patting the salmon fillets dry with paper towels. This helps the skin crisp up during cooking. Season each fillet with salt and black pepper to taste. Set aside while you prepare the garlic butter sauce.
- Make the Garlic Butter: In a small saucepan over medium heat, melt the unsalted butter. Add the minced garlic and sauté for about 1-2 minutes until fragrant, being careful not to burn the garlic. Stir in the lemon juice and chopped parsley, then remove the sauce from heat.
- Cook the Salmon: Heat a large skillet over medium-high heat. Once hot, place the salmon fillets in the skillet, skin side down. Cook for about 4-5 minutes until the skin is crispy. Carefully flip the fillets and cook for an additional 3-4 minutes, or until the salmon is opaque and flakes easily with a fork.
- Finish with Garlic Butter: Reduce the heat to low and pour the prepared garlic butter sauce over the salmon fillets in the skillet. Use a spoon to baste the salmon with the sauce for an extra minute, allowing the flavors to meld.
- Serve: Transfer the salmon fillets to a serving platter and garnish with additional chopped parsley if desired. Serve immediately with lemon wedges on the side.
Extra Tips:
When cooking salmon, it’s important not to overcook it as it can become dry. Keep an eye on the fillets and remove them from the heat as soon as they’re fully cooked through.
If you prefer a bit of spice, consider adding a pinch of red pepper flakes to the garlic butter sauce for a subtle kick. For an even more flavorful dish, marinate the salmon in lemon juice and herbs for 30 minutes prior to cooking. Enjoy your Garlic Butter Salmon with a chilled glass of white wine or a light, invigorating beverage.
Zucchini and Corn Fritters

When you’re pressed for time on a busy weeknight but still want to serve a delicious homemade meal, zucchini and corn fritters are the perfect solution. These savory patties aren’t only quick to make but also packed with flavor and nutrition. The combination of fresh zucchini and sweet corn creates a delightful balance of taste and texture, while the golden, crispy exterior adds a satisfying crunch.
Whether you serve them as a main course, a side dish, or even an appetizer, these fritters are sure to be a hit with the whole family. In addition to being delicious, zucchini and corn fritters are incredibly versatile and can be customized to suit your taste preferences. You can easily add your favorite herbs or spices to the mix for a touch of personalized flavor.
Plus, they’re a great way to use up any extra zucchini you have on hand. Serve them with a dollop of sour cream, yogurt, or a squeeze of lemon for an extra burst of freshness. This recipe serves 4-6 people, making it ideal for family dinners or casual gatherings.
Ingredients:
- 2 medium zucchinis, grated
- 1 cup corn kernels (fresh, frozen, or canned)
- 1/2 cup all-purpose flour
- 1/4 cup grated Parmesan cheese
- 2 large eggs
- 2 green onions, finely chopped
- 2 cloves garlic, minced
- 1/4 teaspoon baking powder
- Salt and pepper, to taste
- Olive oil, for frying
Instructions:
- Prepare the Zucchini: Start by grating the zucchinis using a box grater. Once grated, place the zucchini in a clean kitchen towel or cheesecloth and squeeze out as much excess moisture as possible. This step is vital to guarantee the fritters hold their shape and aren’t soggy.
- Mix the Ingredients: In a large mixing bowl, combine the grated zucchini, corn kernels, flour, Parmesan cheese, eggs, green onions, garlic, baking powder, salt, and pepper. Stir well until all the ingredients are evenly incorporated, and you have a thick batter.
- Heat the Oil: In a large skillet, heat a generous amount of olive oil over medium heat. The oil should be hot enough for frying but not smoking.
- Form the Fritters: Using a spoon or small scoop, carefully drop spoonfuls of the batter into the skillet. Flatten each mound slightly with the back of the spoon to form round fritters.
- Fry the Fritters: Cook the fritters for about 3-4 minutes on each side, or until they’re golden brown and crispy. Be careful not to overcrowd the skillet, and work in batches if necessary.
- Drain and Serve: Once cooked, transfer the fritters to a plate lined with paper towels to drain any excess oil. Serve the fritters warm with your choice of dipping sauce or garnish.
Extra Tips:
To guarantee your zucchini and corn fritters are perfectly crispy, make sure to remove as much moisture as possible from the grated zucchini before mixing it with the other ingredients.
Additionally, you can customize the fritters by adding different herbs like parsley or cilantro, or even a pinch of chili flakes for a bit of heat. If you prefer a gluten-free option, substitute the all-purpose flour with almond flour or chickpea flour.
Finally, these fritters can be made ahead of time and reheated in the oven for a quick meal, making them an excellent option for meal prep.