

As a busy woman, I know firsthand how important it is to have quick, easy, and healthy dinner recipes at your fingertips. Picture this: coming home to a cozy meal like Hearty Vegetable and Lentil Soup or a simple Chicken and Broccoli Stir-Fry. These dishes are perfect for satisfying the whole family while keeping your grocery budget in check. Ready to transform your weeknight dinners into a nourishing and budget-friendly adventure? Let’s explore some delicious recipes together!
Hearty Vegetable and Lentil Soup
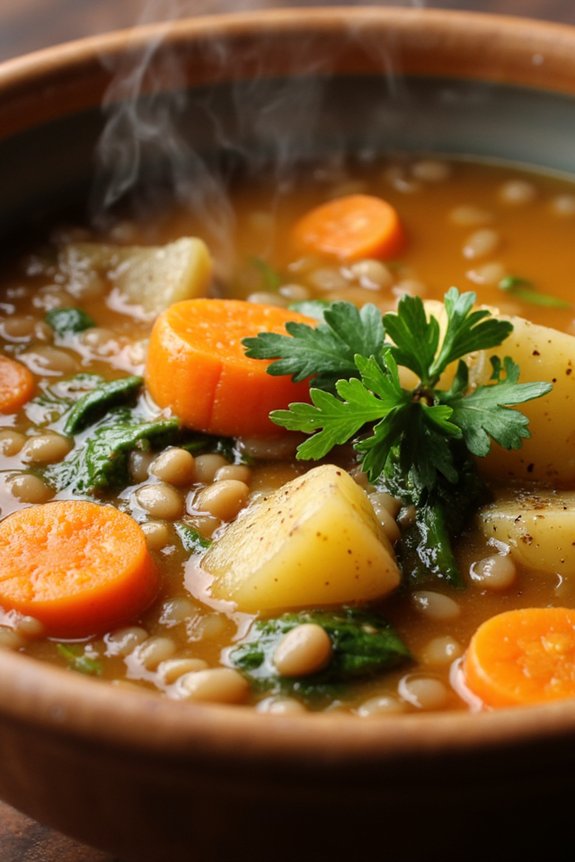
Hearty Vegetable and Lentil Soup is a comforting and nutritious dish that’s perfect for any season. This soup isn’t only delicious but also packed with a variety of vegetables and protein-rich lentils, making it a balanced meal that’s both satisfying and healthy.
Whether you’re a seasoned cook or a beginner in the kitchen, this recipe is straightforward and easy to follow, ensuring a perfect result every time. Lentils are a great source of fiber and protein, and when combined with fresh vegetables, this soup becomes a powerhouse of nutrients.
This recipe serves 4-6 people and is ideal for family dinners or meal prepping for the week. The ingredients are easily adaptable, allowing you to customize the soup based on what’s in season or what you have on hand.
The earthy flavors of lentils combined with the sweetness of carrots, the heartiness of potatoes, and the freshness of spinach create a delightful medley of tastes and textures. Plus, the addition of herbs and spices elevates the flavor profile, making this soup a favorite for anyone looking to enjoy a wholesome and delicious meal.
Ingredients:
- 2 tablespoons olive oil
- 1 large onion, diced
- 2 cloves garlic, minced
- 2 carrots, diced
- 2 celery stalks, diced
- 1 large potato, peeled and diced
- 1 cup dried lentils, rinsed
- 1 can (14.5 oz) diced tomatoes, with juice
- 6 cups vegetable broth
- 1 teaspoon dried thyme
- 1 teaspoon ground cumin
- Salt and pepper to taste
- 2 cups fresh spinach, roughly chopped
- Juice of 1 lemon
- Fresh parsley, chopped (for garnish)
Cooking Instructions:
- Prepare the Vegetables: Begin by heating the olive oil in a large pot over medium heat. Add the diced onion and sauté for about 5 minutes until it becomes translucent. Stir in the minced garlic and cook for an additional minute until fragrant.
- Add Vegetables: Add the diced carrots, celery, and potato to the pot. Cook for about 5-7 minutes, stirring occasionally, until the vegetables begin to soften.
- Incorporate Lentils and Tomatoes: Stir in the rinsed lentils and the can of diced tomatoes (including the juice). Mix well to combine all the ingredients evenly.
- Pour in Broth and Seasonings: Pour in the vegetable broth, ensuring that all the ingredients are submerged. Add the dried thyme, ground cumin, salt, and pepper. Stir well.
- Simmer the Soup: Bring the mixture to a boil, then reduce the heat to low. Cover the pot and let the soup simmer for about 25-30 minutes, or until the lentils and vegetables are tender.
- Finish with Spinach and Lemon: Once the lentils are cooked and the vegetables are tender, stir in the chopped spinach. Let it cook for another 2-3 minutes until the spinach wilts. Squeeze in the juice of one lemon and stir to combine.
- Serve and Garnish: Taste the soup and adjust seasoning if necessary. Ladle the soup into bowls, garnish with freshly chopped parsley, and serve hot.
Extra Tips:
For an even richer flavor, consider adding a bay leaf during the simmering process and remove it before serving. If you want a thicker soup, you can use an immersion blender to partially blend the soup for a creamier texture.
Feel free to experiment with other vegetables such as zucchini or bell peppers, or add a pinch of chili flakes for a bit of heat. This soup stores well in the fridge for up to four days and can also be frozen for up to three months, making it a convenient meal for those busy nights.
One-Pot Chicken and Rice
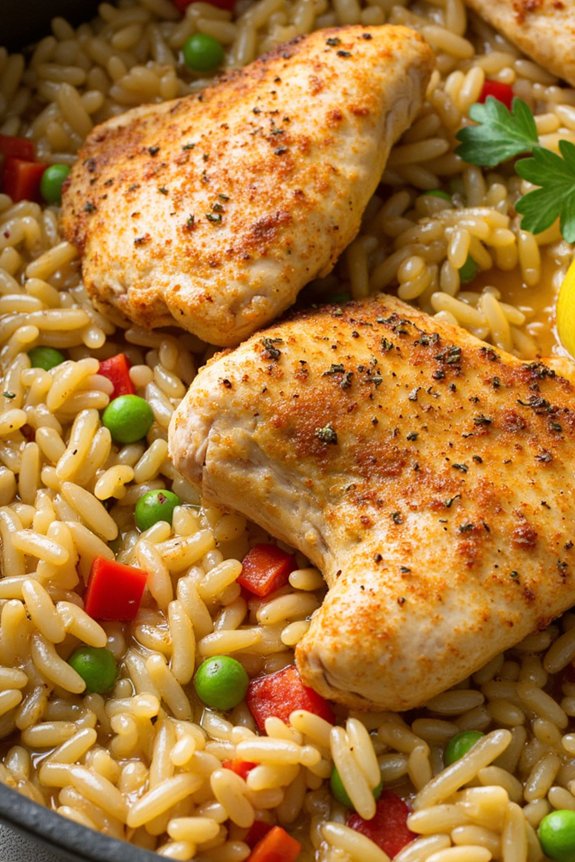
One-Pot Chicken and Rice is a delightful and nourishing meal that’s perfect for those busy weeknights when you need to whip up something delicious and satisfying without spending hours in the kitchen. This dish combines tender pieces of chicken with fluffy, flavorful rice and a medley of vegetables, all cooked together in a single pot. Not only does this method streamline the cooking process, but it also allows the flavors to meld beautifully, resulting in a comforting and hearty dish that the whole family will love.
The beauty of this One-Pot Chicken and Rice recipe lies in its simplicity and the use of wholesome ingredients that are likely already in your pantry. It’s a versatile dish that can be modified to suit your taste preferences or dietary needs, while still maintaining its essence. With this recipe, you’ll be able to create a delicious meal for 4-6 people with minimal cleanup, leaving you more time to enjoy your evening with family and friends.
Ingredients:
- 1 ½ pounds (approximately 700 grams) of boneless, skinless chicken thighs or breasts
- 1 tablespoon olive oil
- 1 medium onion, finely chopped
- 3 cloves garlic, minced
- 1 red bell pepper, diced
- 1 cup uncooked long-grain white rice
- 2 ½ cups chicken broth
- 1 teaspoon dried thyme
- 1 teaspoon paprika
- Salt and pepper to taste
- 1 cup frozen peas
- Juice of 1 lemon
- Fresh parsley, chopped (for garnish)
Instructions:
- Prepare the Chicken: Season the chicken pieces with salt, pepper, paprika, and thyme. This will enhance the flavor of the chicken and guarantee it’s well-seasoned throughout.
- Sauté Aromatics: Heat the olive oil in a large pot or Dutch oven over medium heat. Add the chopped onion and sauté for about 5 minutes until translucent. Add the garlic and red bell pepper, and cook for an additional 2-3 minutes, stirring occasionally to prevent burning.
- Brown the Chicken: Push the vegetables to the side of the pot and place the seasoned chicken pieces in the center. Cook for about 3-4 minutes on each side until the chicken is browned. It doesn’t need to be cooked through at this point, as it will finish cooking with the rice.
- Add Rice and Broth: Pour in the uncooked rice, stirring it around the pot to coat it in the oil and juices. Then add the chicken broth, stirring to combine everything well. Bring the mixture to a simmer.
- Cook the Rice: Cover the pot with a lid, reduce the heat to low, and let it cook for about 18-20 minutes. Check occasionally to guarantee the rice is absorbing the liquid and not sticking to the bottom.
- Add Peas and Lemon Juice: Once the rice is tender and the chicken is cooked through, stir in the frozen peas and lemon juice. Cook for an additional 2-3 minutes until the peas are heated through.
- Garnish and Serve: Remove from heat, sprinkle with chopped parsley, and serve hot. Enjoy your perfectly seasoned One-Pot Chicken and Rice with a squeeze of extra lemon juice if desired.
Extra Tips:
For a richer flavor, you can substitute a portion of the chicken broth with white wine. If you prefer a bit of heat, consider adding a pinch of cayenne pepper or red pepper flakes when seasoning the chicken.
If you have leftovers, store them in an airtight container in the refrigerator for up to 3 days. Reheat gently on the stovetop or in the microwave, adding a splash of water or broth to prevent the rice from drying out.
Quick and Easy Veggie Stir-Fry
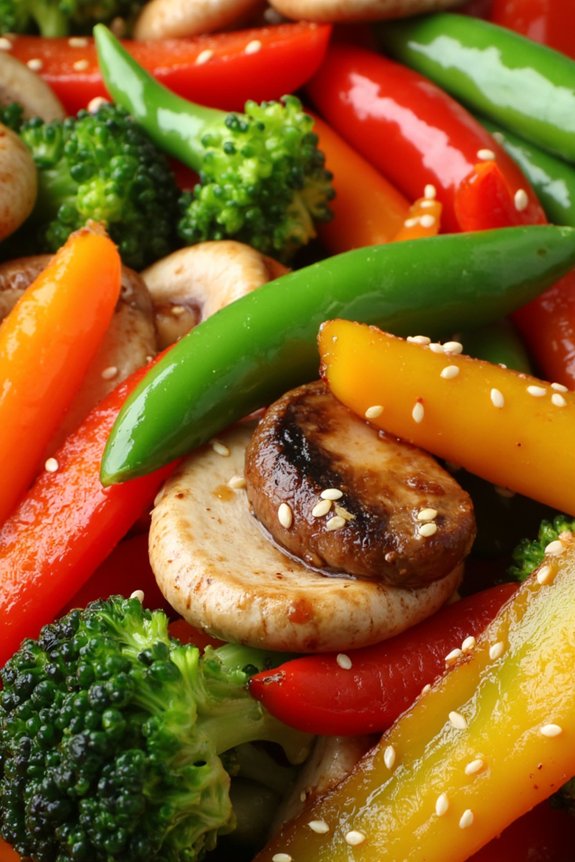
Veggie stir-fry is a vibrant, nutritious, and delicious meal that can be whipped up in no time. It’s perfect for those busy weeknights when you need something healthy and satisfying but don’t have hours to spend in the kitchen. This dish combines a medley of fresh vegetables with savory sauces and spices, resulting in a colorful plate that’s as appealing to the eyes as it’s to the palate.
Whether you’re a seasoned cook or a beginner, this quick and easy veggie stir-fry is a guaranteed way to enjoy a wholesome meal with minimal effort. Not only is this veggie stir-fry quick to prepare, but it also offers the flexibility to use whatever vegetables you have on hand. It’s an excellent way to incorporate more greens into your diet and reduce waste by utilizing leftover produce.
Pair it with a serving of rice or noodles for a complete meal, or enjoy it on its own for a lighter option. This recipe serves 4-6 people, making it ideal for family dinners or meal prepping for the week.
Ingredients:
- 2 tablespoons vegetable oil
- 1 medium onion, sliced
- 2 cloves garlic, minced
- 1 red bell pepper, sliced
- 1 yellow bell pepper, sliced
- 2 cups broccoli florets
- 1 cup snap peas
- 1 cup sliced carrots
- 1 cup sliced mushrooms
- 2 tablespoons soy sauce
- 1 tablespoon oyster sauce
- 1 tablespoon hoisin sauce
- 1 tablespoon sesame oil
- 1 teaspoon grated fresh ginger
- Salt and pepper to taste
- Sesame seeds for garnish
- Cooked rice or noodles (optional)
Cooking Instructions:
- Prepare the Vegetables: Start by washing all the vegetables thoroughly. Slice the onion, bell peppers, carrots, and mushrooms. Cut the broccoli into small florets and trim the snap peas. Mince the garlic and grate the ginger.
- Heat the Oil: In a large wok or skillet, heat the vegetable oil over medium-high heat until shimmering. This will create a perfect base to sear the vegetables quickly.
- Cook the Aromatics: Add the sliced onion to the hot oil and sauté for 1-2 minutes until translucent. Then, add the minced garlic and grated ginger, stirring constantly for about 30 seconds until fragrant.
- Add the Vegetables: Increase the heat to high and add the broccoli, bell peppers, snap peas, carrots, and mushrooms to the pan. Stir continuously for 5-7 minutes, or until the vegetables are tender-crisp. You want them to be cooked but still retain a bit of crunch.
- Season: Lower the heat to medium and pour in the soy sauce, oyster sauce, hoisin sauce, and sesame oil. Stir well to make sure all the vegetables are evenly coated. Add salt and pepper to taste.
- Finish the Dish: Continue cooking for another 2-3 minutes, allowing the flavors to meld together. Be careful not to overcook the vegetables; they should remain vibrant and slightly crisp.
- Serve: Transfer the stir-fry to a serving platter. Sprinkle with sesame seeds for garnish. Serve hot, either on its own or with cooked rice or noodles.
Extra Tips:
To enhance the flavor of your veggie stir-fry, consider adding a splash of rice vinegar or lime juice at the end for a bit of acidity. Feel free to customize this dish by incorporating your favorite vegetables or adding tofu for extra protein.
To save time during busy evenings, pre-chop your vegetables and store them in the refrigerator. Finally, make certain your wok or skillet is hot before adding the vegetables to achieve that perfect stir-fry texture.
Black Bean and Sweet Potato Tacos
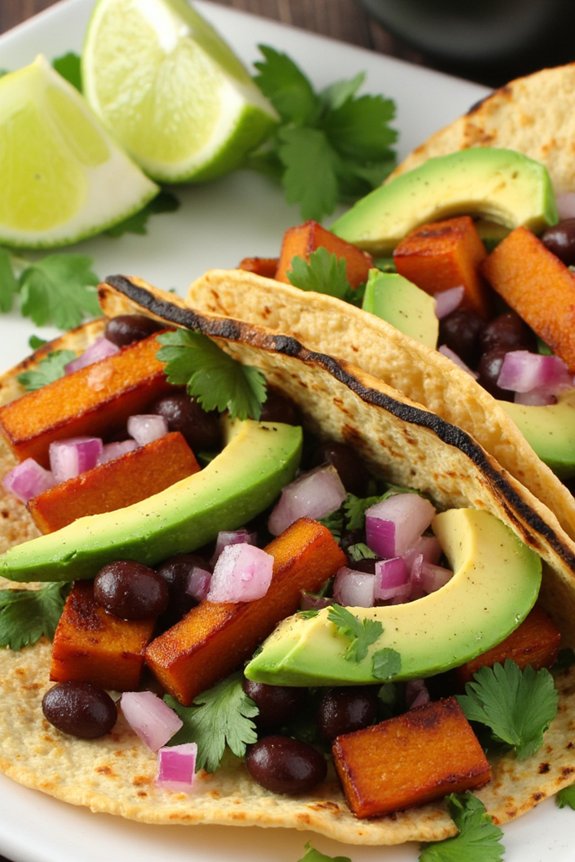
Black Bean and Sweet Potato Tacos are a delicious and nutritious option for a healthy dinner, combining the sweet and savory flavors of roasted sweet potatoes with the earthy taste of black beans. These tacos aren’t only pleasing to the palate but also packed with nutrients, making them a perfect choice for anyone looking to enjoy a wholesome meal.
Ideal for a family dinner or a casual get-together, these tacos are sure to impress both vegetarians and meat-lovers alike.
The simplicity of this dish lies in its fresh ingredients and straightforward preparation method. The black beans provide a rich source of protein and fiber, while sweet potatoes add a delightful sweetness and are loaded with vitamins. Serve these tacos with your choice of toppings, such as avocado, fresh cilantro, or a squeeze of lime, for an added burst of flavor. This recipe is designed to serve 4-6 people.
Ingredients:
- 3 medium sweet potatoes, peeled and diced
- 2 tablespoons olive oil
- 1 teaspoon ground cumin
- 1 teaspoon smoked paprika
- Salt and pepper to taste
- 2 (15-ounce) cans black beans, drained and rinsed
- 1 tablespoon lime juice
- 8-10 corn tortillas
- 1 avocado, sliced
- 1/4 cup fresh cilantro, chopped
- 1/4 cup red onion, diced
- Lime wedges for serving
Instructions:
- Preheat the Oven: Begin by preheating your oven to 400°F (200°C). This will guarantee that it’s hot enough to roast the sweet potatoes thoroughly.
- Prepare the Sweet Potatoes: In a large bowl, combine the diced sweet potatoes with olive oil, ground cumin, smoked paprika, salt, and pepper. Toss everything together until the sweet potato pieces are well coated with the spices and oil.
- Roast the Sweet Potatoes: Spread the seasoned sweet potatoes in a single layer on a baking sheet. Roast in the preheated oven for 25-30 minutes, or until they’re tender and slightly caramelized, stirring halfway through to guarantee even cooking.
- Prepare the Black Beans: While the sweet potatoes are roasting, place the drained and rinsed black beans in a small saucepan over medium heat. Add the lime juice and season with salt and pepper. Cook for about 5-7 minutes, or until the beans are heated through.
- Warm the Tortillas: As the beans cook, heat a non-stick skillet over medium heat. Warm each corn tortilla for about 30 seconds on each side until they’re pliable and slightly toasted.
- Assemble the Tacos: To assemble the tacos, place a generous spoonful of the roasted sweet potatoes and black beans onto each tortilla. Top with slices of avocado, chopped cilantro, and diced red onion.
- Serve: Serve the tacos immediately with lime wedges on the side for squeezing over the top just before eating.
Extra Tips: For an extra kick of flavor, consider adding a drizzle of your favorite hot sauce or a sprinkle of queso fresco over the finished tacos.
If you prefer a bit more texture, you can also add some shredded lettuce or cabbage for crunch. These tacos are highly customizable, so feel free to experiment with different toppings according to your taste preferences.
For those who enjoy a bit of heat, adding some sliced jalapenos can enhance the dish’s flavor profile.
Simple Spaghetti Aglio E Olio

Simple Spaghetti Aglio E Olio is a classic Italian dish known for its simplicity and rich flavor. Originating from Naples, this dish relies on basic ingredients to create something utterly delicious. It’s a perfect choice for a quick weeknight dinner or a sophisticated meal with friends.
The combination of garlic, olive oil, and red pepper flakes guarantees a delightful taste that will satisfy your craving for Italian cuisine without overwhelming your schedule. Most importantly, Simple Spaghetti Aglio E Olio is a healthy dinner option, as it focuses on using fresh ingredients and healthy fats.
The beauty of this dish lies in its minimalistic approach and the ease with which it can be prepared. With just a few ingredients and a short cooking time, you can have a hearty meal ready in no time.
It’s also a versatile recipe that allows for slight modifications if you wish to add personal touches, such as fresh herbs or a sprinkle of cheese. This dish is perfect for serving 4-6 people, making it a great choice for family dinners or small gatherings.
Ingredients for 4-6 people:
- 1 pound (450g) spaghetti
- 6 large garlic cloves, thinly sliced
- 1/2 cup (120ml) extra-virgin olive oil
- 1 teaspoon red pepper flakes
- Salt, to taste
- 1/2 cup (30g) fresh parsley, chopped
- 1 cup (250ml) reserved pasta water
- Optional: Grated Parmesan cheese for serving
Instructions:
- Cook the spaghetti: In a large pot, bring salted water to a boil. Add the spaghetti and cook according to package instructions until al dente. Reserve 1 cup of the pasta cooking water and then drain the spaghetti.
- Prepare the garlic and oil: While the pasta is cooking, heat the olive oil in a large skillet over medium heat. Add the thinly sliced garlic and red pepper flakes. Sauté gently, stirring frequently, until the garlic is golden brown and fragrant, about 2-3 minutes. Be careful not to burn the garlic.
- Combine pasta and sauce: Add the drained spaghetti to the skillet with the garlic and oil. Toss the pasta to coat it evenly in the oil and garlic. Add the reserved pasta water gradually, stirring continuously until the sauce emulsifies and coats the spaghetti. This should take about 2-3 minutes.
- Season and serve: Season the pasta with salt to taste. Stir in the fresh parsley. If desired, sprinkle with grated Parmesan cheese before serving. Serve immediately while hot.
Extra Tips: To maintain the best flavor, use high-quality extra-virgin olive oil, as it’s a key ingredient in this dish. Consider adding a squeeze of fresh lemon juice or a touch of lemon zest for a citrusy twist.
For a richer flavor, you can toast the garlic slightly longer, but be cautious not to burn it, as it can impart a bitter taste. If you want to add protein, consider incorporating grilled chicken or shrimp.
Budget-Friendly Chicken Fajitas
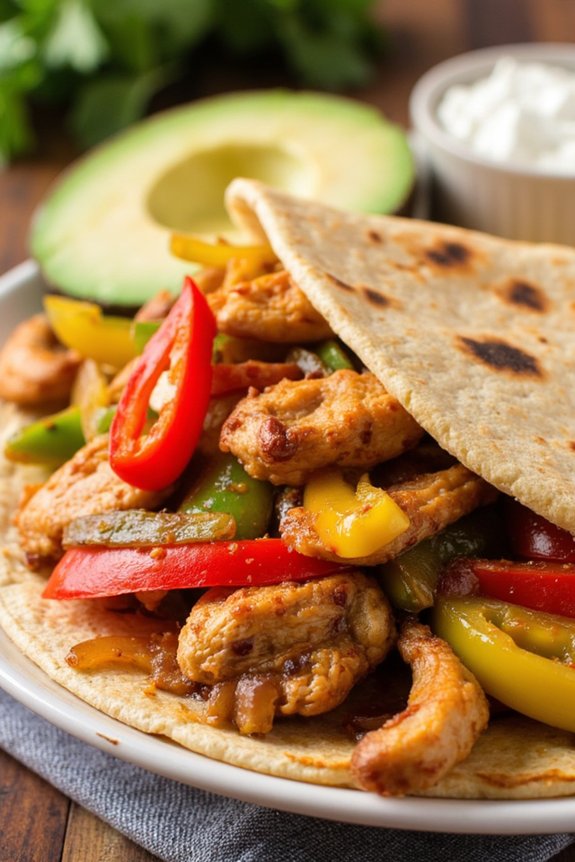
Indulge in the vibrant flavors of Budget-Friendly Chicken Fajitas, a delightful and economical meal option that can effortlessly transform a simple dinner into a festive occasion. This dish combines tender strips of chicken breast with a colorful array of bell peppers and onions, all seasoned to perfection with a homemade fajita spice mix.
Served on warm tortillas, these chicken fajitas can be customized with your favorite toppings, making them not only delicious but also a fun and interactive meal for family and friends. Perfect for feeding a crowd without breaking the bank, this recipe is designed for 4-6 people, ensuring everyone gets their fill.
The preparation is straightforward and can be completed in under 30 minutes, making it an ideal choice for busy weeknights. With a few pantry staples and fresh produce, you can create a tasty, nutritious dinner that everyone will love.
Ingredients (Serves 4-6):
- 1 1/2 pounds boneless, skinless chicken breast
- 2 tablespoons olive oil
- 1 red bell pepper
- 1 green bell pepper
- 1 yellow bell pepper
- 1 large onion
- 1 tablespoon chili powder
- 1 teaspoon ground cumin
- 1 teaspoon garlic powder
- 1 teaspoon paprika
- 1/2 teaspoon salt
- 1/2 teaspoon black pepper
- 1 tablespoon lime juice
- 8-12 small flour tortillas
- Optional toppings: shredded cheese, sour cream, salsa, avocado, cilantro
Cooking Instructions:
- Prepare the Chicken and Vegetables: Begin by slicing the chicken breasts into thin strips, about 1/2 inch wide. Wash and core the bell peppers, then slice them and the onion into thin strips. Set aside.
- Mix the Seasonings: In a small bowl, combine the chili powder, cumin, garlic powder, paprika, salt, and black pepper. Mix well to create the fajita seasoning.
- Season the Chicken: Place the sliced chicken in a large bowl and drizzle with 1 tablespoon of olive oil. Sprinkle the fajita seasoning over the chicken and toss until all pieces are well coated.
- Cook the Chicken: Heat the remaining tablespoon of olive oil in a large skillet over medium-high heat. Add the seasoned chicken strips and cook for 5-7 minutes, stirring occasionally, until they’re cooked through and have a slight golden brown color. Remove the chicken from the skillet and set aside.
- Sauté the Vegetables: In the same skillet, add the sliced bell peppers and onion. Cook for 5-6 minutes, stirring occasionally, until the vegetables are tender and slightly charred.
- Combine and Heat Through: Return the cooked chicken to the skillet with the vegetables. Add the lime juice and stir everything together. Cook for an additional 2-3 minutes until everything is heated through and well combined.
- Warm the Tortillas: While the chicken and vegetables are finishing, warm the tortillas. You can do this by wrapping them in foil and placing them in a warm oven for a few minutes or heating them individually in a dry skillet over medium heat.
- Assemble the Fajitas: Serve the chicken and vegetable mixture with warm tortillas and optional toppings such as shredded cheese, sour cream, salsa, avocado, and cilantro.
Extra Tips:
For an added depth of flavor, consider marinating the chicken in the olive oil and spice mixture for up to 30 minutes before cooking. This can be done while you prep the vegetables to save time.
To make the dish even more budget-friendly, you can substitute chicken thighs for chicken breasts. They’re often cheaper and provide a richer flavor due to their higher fat content.
Additionally, using seasonal vegetables or whatever is on sale can help keep costs down. Finally, don’t forget to taste and adjust the seasoning according to your preference before serving.
Quick Quinoa and Black Bean Salad
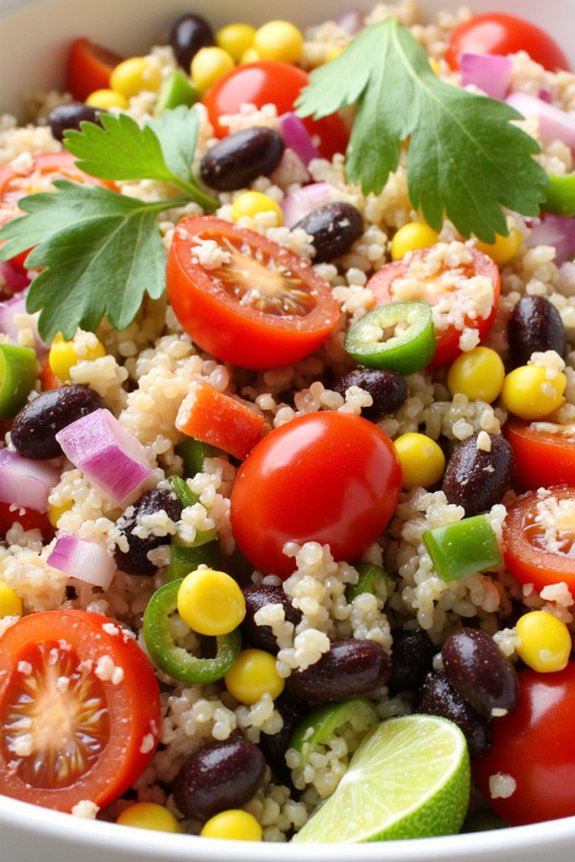
Quick Quinoa and Black Bean Salad is a vibrant and nutritious dish that’s perfect for a healthy dinner option. This salad isn’t only filling but also packed with protein and fiber, making it an excellent choice for those looking to maintain a balanced diet.
The combination of quinoa and black beans provides a hearty base, while fresh vegetables and a tangy lime dressing add a burst of flavor and freshness. This recipe is ideal for busy weeknights as it comes together quickly and can be made in advance.
The salad can be enjoyed on its own or as a side dish, and it’s perfect for meal prep, as it keeps well in the refrigerator for a few days. Whether you’re looking for a light dinner or a satisfying lunch, this Quick Quinoa and Black Bean Salad is sure to be a hit with everyone.
Ingredients (Serving Size: 4-6 people):
- 1 cup quinoa
- 2 cups water
- 1 can (15 oz) black beans, drained and rinsed
- 1 cup cherry tomatoes, halved
- 1 red bell pepper, diced
- 1 cup corn kernels (fresh, frozen, or canned)
- 1/4 cup red onion, finely chopped
- 1/4 cup fresh cilantro, chopped
- 1/4 cup lime juice
- 1/4 cup olive oil
- 1 teaspoon cumin
- Salt and pepper to taste
Cooking Instructions:
1. Prepare the Quinoa: Rinse the quinoa under cold water in a fine mesh strainer. In a medium saucepan, combine the quinoa and water. Bring to a boil over medium-high heat, then reduce the heat to low, cover, and simmer for about 15 minutes, or until the quinoa is tender and the water has been absorbed.
Remove from heat and let it sit covered for 5 minutes, then fluff with a fork.
2. Mix the Dressing: In a small bowl, whisk together the lime juice, olive oil, and cumin. Season with salt and pepper to taste. This will be your dressing for the salad.
3. Combine Ingredients: In a large mixing bowl, combine the cooked quinoa, black beans, cherry tomatoes, red bell pepper, corn, and red onion. Pour the dressing over the salad and toss well to combine all the ingredients evenly.
4. Add Fresh Herbs: Gently stir in the chopped cilantro. Taste the salad and adjust the seasoning with more salt, pepper, or lime juice if needed.
5. Chill and Serve: Cover the salad and refrigerate for at least 30 minutes to allow the flavors to meld. Serve chilled or at room temperature.
Extra Tips:
When preparing this Quick Quinoa and Black Bean Salad, it’s important to rinse the quinoa thoroughly before cooking to remove any bitterness.
You can also customize the salad by adding other vegetables such as avocado or cucumber, or by incorporating different herbs like parsley or mint for a unique twist. For a spicier kick, consider adding a diced jalapeño or a sprinkle of red pepper flakes.
This salad is versatile and can be tailored to suit your taste preferences.
Easy Baked Zucchini Parmesan

Easy Baked Zucchini Parmesan is a delightful and nutritious dish that brings together the tender texture of zucchini with the rich flavors of Parmesan cheese and marinara sauce. This dish isn’t only simple to prepare but also a brilliant way to incorporate more vegetables into your diet.
With its crispy, cheesy top and succulent zucchini layers, this recipe is bound to become a favorite at your dinner table, offering a healthier twist on the traditional parmesan dishes. Perfect for a family dinner or a casual gathering, Easy Baked Zucchini Parmesan is both satisfying and wholesome.
This dish combines the umami of Parmesan cheese with the tanginess of marinara sauce, all layered over fresh zucchini slices. Ideal for serving 4-6 people, this recipe is an illustration of how healthy eating can be both delicious and fulfilling, making it an excellent addition to your repertoire of healthy dinner recipes.
Ingredients for 4-6 people:
- 3 medium zucchinis
- 2 cups marinara sauce
- 2 cups shredded mozzarella cheese
- 1 cup grated Parmesan cheese
- 1 cup panko breadcrumbs
- 2 tablespoons olive oil
- 1 teaspoon garlic powder
- 1 teaspoon dried oregano
- Salt and pepper to taste
- Fresh basil leaves for garnish (optional)
Cooking Instructions:
1. Preheat the Oven: Begin by preheating your oven to 400°F (200°C). This guarantees that your dish will cook evenly and develop a perfect, golden crust.
2. Prepare the Zucchini: Slice the zucchinis into 1/4-inch thick rounds. Pat them dry with a paper towel to remove any excess moisture, which will help achieve a crispier texture.
3. Make the Breadcrumb Mixture: In a bowl, combine the panko breadcrumbs, grated Parmesan cheese, garlic powder, dried oregano, salt, and pepper. Mix well to distribute the seasonings evenly throughout the breadcrumbs.
4. Coat the Zucchini Slices: Brush both sides of each zucchini slice with olive oil, then dip them into the breadcrumb mixture, pressing gently to confirm the crumbs adhere well.
5. Layer the Ingredients: In a baking dish, spread a thin layer of marinara sauce on the bottom. Arrange a layer of zucchini slices over the sauce, then sprinkle with a portion of the mozzarella cheese.
Repeat the layers, finishing with a top layer of mozzarella and extra Parmesan cheese.
6. Bake: Place the baking dish in the preheated oven and bake for about 25-30 minutes, or until the cheese is bubbly and golden brown.
7. Garnish and Serve: Once baked, remove from the oven and let it cool slightly. Garnish with fresh basil leaves if desired. Serve hot, accompanied by a fresh salad or crusty bread.
Extra Tips:
For an added depth of flavor, consider roasting the zucchini slices for a few minutes before layering them in the dish. This can help intensify their natural sweetness and reduce excess moisture, resulting in a firmer texture.
Additionally, feel free to experiment with different types of cheese or add a sprinkle of red pepper flakes for a bit of heat. Remember to taste the marinara sauce before use and adjust its seasoning if necessary for the best-tasting result.
Creamy Tomato and Spinach Pasta
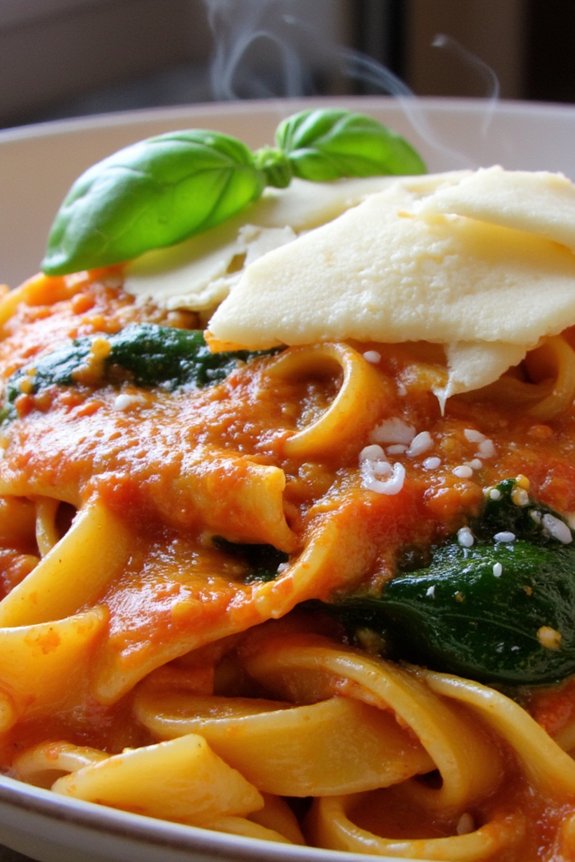
Creamy Tomato and Spinach Pasta is a delightful and nutritious dish that combines the rich flavors of ripe tomatoes with the freshness of spinach, all enveloped in a luscious, creamy sauce. This pasta dish isn’t just appetizing but also quick and easy to prepare, making it an ideal choice for a healthy dinner.
Whether you’re cooking for family or hosting friends, this meal is sure to impress with its vibrant colors and comforting taste.
The creamy texture is achieved without the need for heavy cream, making it a lighter option that doesn’t compromise on flavor. The use of fresh ingredients like spinach and tomatoes guarantees that you’re getting essential nutrients, while the pasta provides a satisfying base.
This recipe is perfect for vegetarians and can easily be adapted for vegans by using plant-based substitutes. Serve it with a side salad or some crusty bread for a complete meal.
Ingredients (Serves 4-6):
- 12 ounces pasta (penne or fusilli work well)
- 2 tablespoons olive oil
- 1 medium onion, finely chopped
- 3 cloves garlic, minced
- 1 can (14 ounces) crushed tomatoes
- 1/2 cup vegetable broth
- 1/2 cup heavy cream or plant-based cream alternative
- 2 cups fresh spinach, washed and roughly chopped
- Salt and pepper to taste
- 1/2 teaspoon red pepper flakes (optional)
- 1/4 cup grated Parmesan cheese or vegan cheese alternative
- Fresh basil leaves for garnish
Cooking Instructions:
- Cook the Pasta: Begin by cooking the pasta according to the package instructions in a large pot of salted boiling water. Once cooked to al dente, drain and set aside.
- Prepare the Sauce Base: In a large skillet, heat the olive oil over medium heat. Add the chopped onion and sauté until translucent, about 5 minutes. Then, add the minced garlic and continue to sauté for another minute until fragrant.
- Add Tomatoes and Broth: Pour in the crushed tomatoes and vegetable broth into the skillet with the onions and garlic. Stir to combine, bringing the mixture to a simmer. Allow it to cook for about 10 minutes, stirring occasionally, until the sauce has slightly thickened.
- Incorporate Creaminess: Lower the heat and stir in the heavy cream, mixing well until the sauce is smooth and creamy. Adjust the seasoning with salt, pepper, and red pepper flakes if using.
- Add Spinach: Gradually stir in the chopped spinach, allowing it to wilt into the sauce. This should take about 2-3 minutes.
- Combine with Pasta: Add the cooked pasta to the skillet and gently toss to coat the pasta evenly with the sauce. Continue to cook for another 2 minutes to guarantee everything is well combined.
- Finish and Serve: Remove from heat and sprinkle with grated Parmesan cheese. Garnish with fresh basil leaves before serving.
Extra Tips:
For the best results, use ripe, juicy tomatoes if you’re opting for fresh tomatoes instead of canned. You can add other vegetables like mushrooms or bell peppers for added texture and flavor.
If you prefer a thicker sauce, let it simmer for a few extra minutes before adding the cream. For a vegan version, substitute the heavy cream with coconut milk or a cashew cream alternative and use nutritional yeast in place of Parmesan cheese.
Healthy Turkey and Veggie Chili
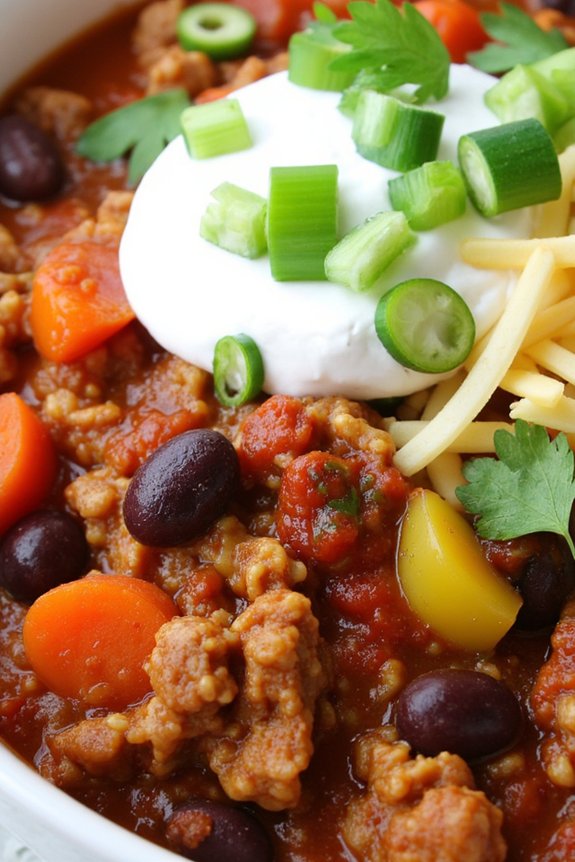
Healthy Turkey and Veggie Chili is a delicious and wholesome dish that combines lean ground turkey with a variety of fresh vegetables and aromatic spices. This chili is perfect for a cozy dinner, providing a satisfying and nutritious meal that’s both high in protein and packed with vitamins and minerals.
It’s a great option for those looking to maintain a balanced diet without sacrificing flavor. This recipe makes enough to serve 4-6 people, ensuring there’s plenty to go around. The combination of turkey and vegetables not only makes this chili hearty and filling, but it also adds a delightful array of textures and flavors.
Whether you’re preparing it for a family dinner or a casual gathering with friends, this dish is sure to be a hit.
Ingredients (serving size: 4-6 people):
- 1 tablespoon olive oil
- 1 pound ground turkey
- 1 large onion, diced
- 2 cloves garlic, minced
- 1 bell pepper, diced
- 2 carrots, diced
- 2 celery stalks, diced
- 1 zucchini, diced
- 1 can (15 ounces) black beans, drained and rinsed
- 1 can (15 ounces) kidney beans, drained and rinsed
- 1 can (28 ounces) crushed tomatoes
- 2 tablespoons tomato paste
- 2 cups chicken or vegetable broth
- 2 teaspoons chili powder
- 1 teaspoon ground cumin
- 1/2 teaspoon smoked paprika
- Salt and pepper to taste
- Optional toppings: chopped cilantro, sliced green onions, shredded cheese, sour cream
Cooking Instructions:
- Heat the Oil: In a large pot or Dutch oven, heat the olive oil over medium heat. This will prevent the turkey from sticking and help it cook evenly.
- Cook the Turkey: Add the ground turkey to the pot. Cook it for about 5-7 minutes, breaking it up with a wooden spoon, until it’s browned and cooked through.
- Saute the Vegetables: Add the diced onion and minced garlic to the pot, and cook for 2-3 minutes until the onion is translucent. Then, add the bell pepper, carrots, celery, and zucchini. Stir everything together and cook for another 5 minutes until the vegetables start to soften.
- Add Beans and Tomatoes: Stir in the black beans, kidney beans, crushed tomatoes, and tomato paste. This will form the base of your chili.
- Season and Simmer: Pour in the chicken or vegetable broth. Add the chili powder, ground cumin, smoked paprika, salt, and pepper. Stir well to combine all the ingredients. Bring the mixture to a simmer, then reduce the heat to low. Cover the pot and let it simmer for about 30 minutes, stirring occasionally, to allow all the flavors to meld together.
- Adjust Seasoning: Taste the chili and adjust the seasoning if necessary. You may want to add more salt, pepper, or chili powder depending on your preference.
- Serve: Once the chili is ready, serve it hot in bowls. Top with optional toppings like chopped cilantro, sliced green onions, shredded cheese, or a dollop of sour cream for added flavor and creaminess.
Extra Tips: For a thicker chili, you can simmer it uncovered for an additional 10-15 minutes to reduce the liquid. Feel free to customize the vegetables based on what you have on hand or what’s in season – ingredients like corn or sweet potatoes can be delicious additions.
If you prefer a spicier chili, consider adding a diced jalapeño or a pinch of cayenne pepper. This chili also freezes well, so consider making a double batch and storing leftovers for a quick meal on a busy day.
15-Minute Chickpea Curry
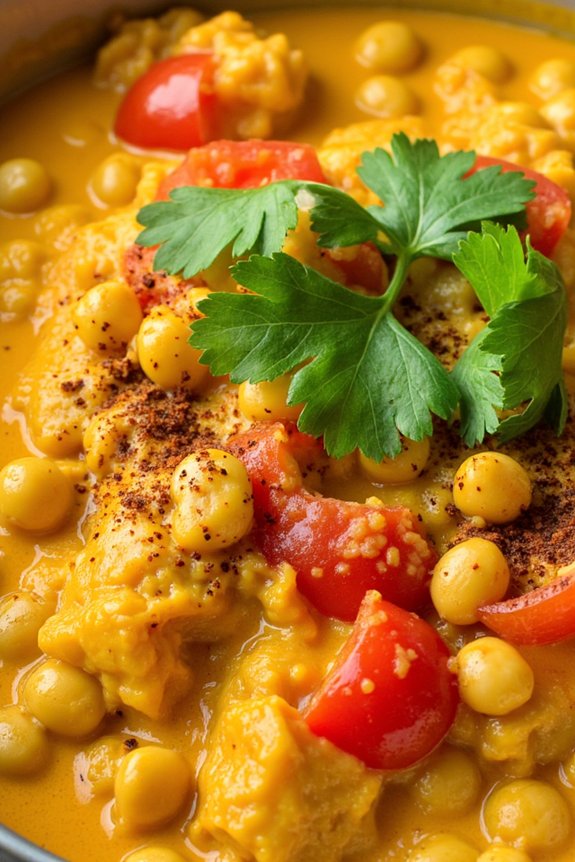
Minute Chickpea Curry is a delightful and easy-to-make dish that can be prepared in no time, making it perfect for those busy weeknights when you crave a healthy and satisfying meal. This curry isn’t only rich in flavor but also packed with nutrients, thanks to the protein-rich chickpeas and a medley of aromatic spices.
It’s a versatile meal that can be served on its own or paired with rice or naan for a complete dining experience. The dish is a wonderful blend of creamy coconut milk, tangy tomatoes, and earthy chickpeas, brought to life with the addition of spices like cumin, coriander, and turmeric.
The best part? It takes just minutes to prepare, allowing you to enjoy a delicious and wholesome dinner without spending hours in the kitchen. Whether you’re a seasoned cook or a beginner, this Minute Chickpea Curry is sure to become a staple in your healthy dinner repertoire.
Ingredients for 4-6 servings:
- 2 tablespoons olive oil
- 1 medium onion, diced
- 3 cloves garlic, minced
- 1 tablespoon ginger, minced
- 2 teaspoons ground cumin
- 2 teaspoons ground coriander
- 1 teaspoon ground turmeric
- 1/2 teaspoon cayenne pepper (optional)
- 2 cans (15 oz each) chickpeas, drained and rinsed
- 1 can (14 oz) diced tomatoes
- 1 can (14 oz) coconut milk
- Salt and pepper to taste
- Fresh cilantro, chopped, for garnish
- Cooked rice or naan for serving
Cooking Instructions:
- Sauté Aromatics: Heat the olive oil in a large pan over medium heat. Add the diced onion and cook until it becomes translucent, about 3-4 minutes. Stir in the minced garlic and ginger, cooking for another minute until fragrant.
- Add Spices: Sprinkle in the ground cumin, coriander, turmeric, and cayenne pepper (if using). Stir the mixture well to coat the onions, garlic, and ginger with the spices, allowing them to toast slightly for about 1 minute.
- Incorporate Chickpeas and Tomatoes: Add the drained chickpeas and can of diced tomatoes to the pan. Stir everything together, ensuring the chickpeas are well-coated with the spice mixture.
- Simmer with Coconut Milk: Pour in the coconut milk, stirring to combine all the ingredients. Bring the mixture to a gentle simmer and let it cook for about 10-15 minutes, allowing the flavors to meld together. Stir occasionally to prevent sticking.
- Season and Serve: Season the curry with salt and pepper to taste. Once the chickpeas are tender and the curry has thickened to your liking, remove it from the heat. Garnish with fresh cilantro before serving.
- Pair and Enjoy: Serve the Minute Chickpea Curry hot, alongside cooked rice or warm naan, to soak up the delicious sauce.
Extra Tips:
For a richer flavor, you can let the curry simmer longer, allowing the spices to deepen in taste. If you prefer a thicker curry, reduce the coconut milk slightly or let the curry simmer uncovered for a few more minutes to thicken.
Feel free to customize the heat level by adjusting the cayenne pepper or adding fresh chili peppers. This curry also keeps well in the fridge, making it a great option for meal prep or leftover lunches. Enjoy experimenting with different vegetables, like spinach or bell peppers, for added variety.
Vegetable and Cheese Stuffed Peppers
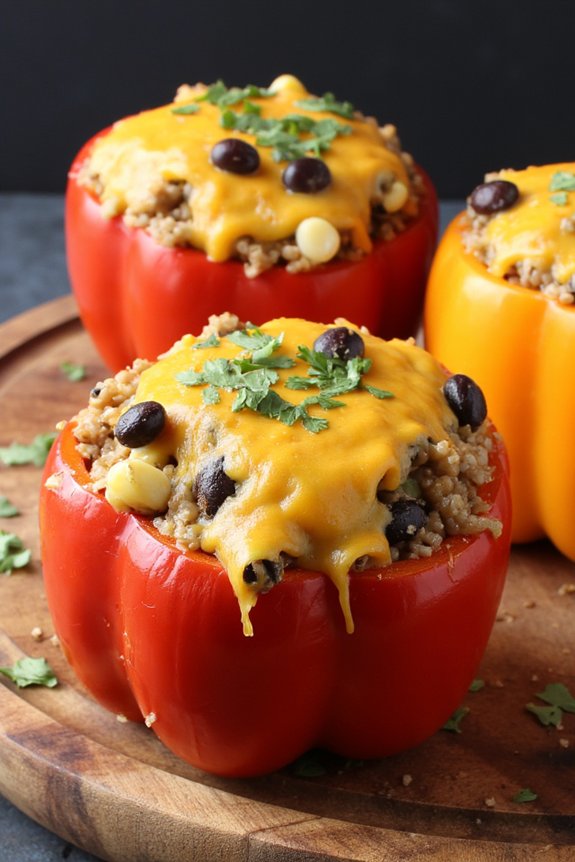
Vegetable and Cheese Stuffed Peppers is a delightful and nutritious dish that combines vibrant bell peppers with a delicious filling of vegetables and cheese. This recipe is perfect for those who are looking to enjoy a healthy yet hearty meal. The colorful bell peppers not only serve as an edible bowl but also add a sweet flavor that pairs beautifully with the savory filling.
Stuffed peppers are a versatile dish that can be easily adapted to include your favorite vegetables or cheese, making it a favorite among families and guests alike. This recipe is designed to serve 4-6 people, making it an excellent choice for a family dinner or a small gathering. The combination of fresh vegetables, protein-rich cheese, and aromatic herbs creates a well-balanced meal that’s both satisfying and nutritious.
Not only are these stuffed peppers easy to prepare, but they’re also a great way to incorporate more vegetables into your diet. Whether you’re a seasoned chef or a beginner in the kitchen, this recipe will guide you through the process of creating a delicious and healthy meal.
Ingredients:
- 6 medium-sized bell peppers (red, yellow, or green)
- 1 cup cooked quinoa or rice
- 1 cup canned black beans, drained and rinsed
- 1 cup corn kernels (fresh or frozen)
- 1 medium zucchini, diced
- 1 medium onion, chopped
- 2 cloves garlic, minced
- 1 teaspoon ground cumin
- 1 teaspoon chili powder
- 1/2 teaspoon salt
- 1/4 teaspoon black pepper
- 1 cup shredded cheddar cheese
- 1/4 cup chopped fresh cilantro
- 2 tablespoons olive oil
- Juice of 1 lime
Cooking Instructions:
- Prepare the Peppers: Preheat your oven to 375°F (190°C). Cut the tops off the bell peppers and remove the seeds and membranes inside. Lightly brush the outside of the peppers with olive oil and place them in a baking dish.
- Cook the Vegetables: In a large skillet, heat 2 tablespoons of olive oil over medium heat. Add the chopped onion and minced garlic, sautéing for about 2-3 minutes until the onion becomes translucent. Add the diced zucchini, corn, and black beans to the skillet, stirring occasionally, and cook for another 5 minutes.
- Season the Filling: Add the cooked quinoa or rice to the vegetable mixture in the skillet. Stir in the ground cumin, chili powder, salt, and black pepper, making certain that all ingredients are well combined. Cook for an additional 2 minutes.
- Stuff the Peppers: Remove the skillet from the heat and stir in the lime juice and half of the chopped cilantro. Carefully spoon the vegetable and quinoa mixture into each prepared bell pepper, filling them to the top.
- Bake the Peppers: Sprinkle shredded cheddar cheese over each stuffed pepper. Cover the baking dish with aluminum foil and bake in the preheated oven for 25 minutes. Remove the foil and bake for an additional 10 minutes, or until the cheese is melted and bubbly.
- Garnish and Serve: Once the peppers are cooked, remove them from the oven and let them cool slightly. Sprinkle the remaining cilantro over the top and serve the stuffed peppers warm.
Extra Tips:
When choosing your bell peppers, try to select ones that are similar in size to guarantee even cooking. You can also experiment with different types of cheese, such as mozzarella or feta, to add a unique twist to the dish.
If you prefer a spicier flavor, consider adding a pinch of cayenne pepper or crushed red pepper flakes to the filling. Leftover stuffed peppers can be stored in an airtight container in the refrigerator for up to three days and make for a delicious lunch the next day. Enjoy your Vegetable and Cheese Stuffed Peppers with a side salad or crusty bread for a complete meal.
Simple Chicken and Broccoli Stir-Fry
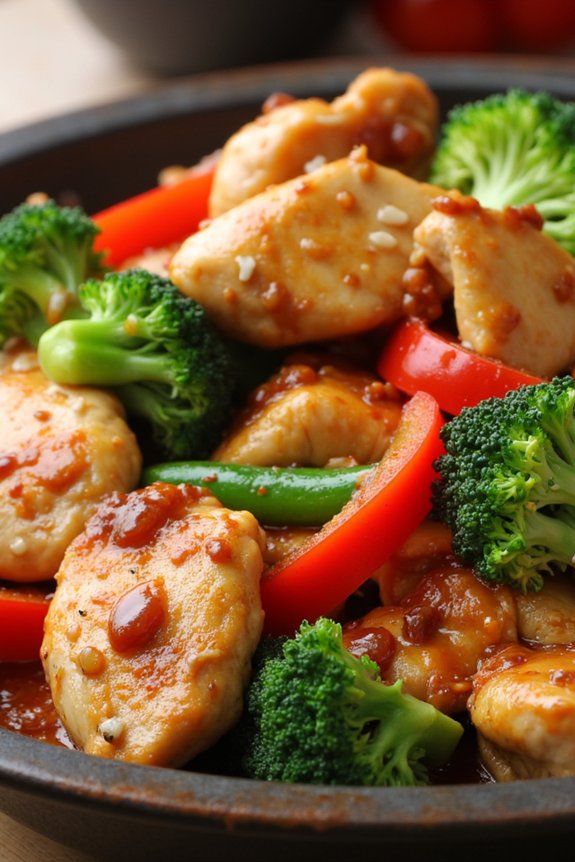
Simple Chicken and Broccoli Stir-Fry is a quick and nutritious meal that’s perfect for any night of the week. Packed with lean protein from chicken and the vitamin-rich goodness of broccoli, this dish not only satisfies your taste buds but also fuels your body with essential nutrients. The vibrant colors and delightful flavors make this stir-fry a family favorite, while the short preparation time guarantees it fits seamlessly into your busy schedule.
Whether you’re a novice in the kitchen or a seasoned cook, this recipe is easy to follow and promises a delicious outcome. This dish is ideal for serving 4-6 people, making it perfect for a family dinner or a small gathering. The simplicity of the ingredients allows the natural flavors to shine, while a savory sauce ties everything together beautifully.
The combination of tender chicken, crisp-tender broccoli, and a well-balanced sauce results in a meal that’s both wholesome and satisfying. Pair it with steamed rice or noodles for a complete meal that pleases both kids and adults alike. Let’s plunge into the ingredients and steps to create this delightful Simple Chicken and Broccoli Stir-Fry.
Ingredients (serves 4-6):
- 1.5 pounds boneless, skinless chicken breast, sliced into thin strips
- 1 tablespoon vegetable oil
- 4 cups broccoli florets
- 1 red bell pepper, thinly sliced
- 3 cloves garlic, minced
- 1 tablespoon fresh ginger, minced
- 1/4 cup low-sodium soy sauce
- 2 tablespoons oyster sauce
- 1 tablespoon cornstarch
- 1 tablespoon water
- 1 teaspoon sesame oil
- Salt and pepper to taste
- Cooked rice or noodles, for serving
Cooking Instructions:
- Prepare the Ingredients: Begin by slicing the chicken breast into thin strips, confirming they’re uniform for even cooking. Cut the broccoli into florets and slice the red bell pepper thinly. Mince the garlic and ginger, and set all ingredients aside.
- Make the Sauce: In a small bowl, combine the low-sodium soy sauce, oyster sauce, cornstarch, water, and sesame oil. Stir well until the cornstarch is completely dissolved. This will be your stir-fry sauce that adds flavor and helps thicken the dish.
- Cook the Chicken: Heat the vegetable oil in a large skillet or wok over medium-high heat. Add the chicken strips, season with a little salt and pepper, and cook for about 5-7 minutes until they’re golden brown and cooked through. Remove the chicken from the skillet and set aside.
- Stir-fry the Vegetables: In the same skillet, add a little more oil if needed, then add the minced garlic and ginger. Sauté for about 30 seconds until fragrant. Add the broccoli florets and red bell pepper, stirring frequently, and cook for about 3-4 minutes until the vegetables are crisp-tender.
- Combine and Finish: Return the cooked chicken to the skillet with the vegetables. Pour the prepared sauce over the mixture, stirring continuously until the sauce thickens and coats the chicken and vegetables evenly. This should take about 2-3 minutes.
- Serve: Remove from heat and serve the stir-fry hot over a bed of cooked rice or noodles, allowing the flavors to meld together. Enjoy your Simple Chicken and Broccoli Stir-Fry!
Extra Tips:
When cooking the chicken, confirm the skillet is hot before adding the meat to prevent it from sticking and to achieve a nice sear. For added flavor, consider marinating the chicken in a bit of the soy sauce and ginger for 15 minutes before cooking.
If you prefer a bit more heat, add a pinch of red pepper flakes or a drizzle of sriracha to the sauce. Finally, feel free to customize the vegetables based on what you have on hand or your personal preferences—snow peas or carrots make great additions!
Budget-Friendly Baked Potato Bar

A Budget-Friendly Baked Potato Bar is an exciting and economical way to enjoy a hearty meal with family or friends. This dish is all about creativity and customization, allowing everyone to top their baked potatoes with a variety of delicious and nutritious toppings.
It’s not only fun to prepare, but also a great way to use up leftover ingredients in your fridge, making it a sustainable and waste-reducing meal option. With the right toppings, baked potatoes become a well-rounded, healthy dinner that satisfies everyone’s taste buds.
To set up your own baked potato bar, you’ll start by baking large russet potatoes until they’re fluffy on the inside and crispy on the outside. While the potatoes are baking, you can prepare an assortment of toppings that cater to different dietary preferences and flavor profiles.
This recipe is designed to serve 4-6 people, and you can easily scale it up or down depending on your needs. It’s perfect for a relaxed dinner party or a casual family meal where everyone can participate in creating their perfect potato.
Ingredients (serves 4-6):
- 6 large russet potatoes
- Olive oil
- Salt and pepper
- 1 cup shredded cheddar cheese
- 1 cup sour cream
- 1 cup chopped cooked bacon
- 1 cup steamed broccoli florets
- 1/2 cup sliced green onions
- 1/2 cup diced tomatoes
- 1 can (15 oz) black beans, drained and rinsed
- 1/2 cup salsa
- 1/4 cup chopped fresh cilantro
Cooking Instructions:
- Prepare the Potatoes: Preheat your oven to 400°F (200°C). Scrub the russet potatoes under cold water to remove any dirt. Pat them dry with a paper towel. Use a fork to pierce each potato several times to allow steam to escape during baking.
- Season and Bake: Rub each potato with a little olive oil and sprinkle with salt and pepper. Place the potatoes directly on the oven rack or on a baking sheet. Bake in the preheated oven for 45-60 minutes, or until the skins are crispy and the insides are soft when pierced with a fork.
- Prepare the Toppings: While the potatoes are baking, prepare the toppings. Grate the cheddar cheese, chop the bacon, steam the broccoli, slice the green onions, and dice the tomatoes. Arrange these along with the sour cream, black beans, salsa, and cilantro in separate bowls for easy access.
- Assemble the Potato Bar: Once the potatoes are baked to perfection, remove them from the oven. Let them cool slightly before handling. To serve, slit each potato lengthwise and gently squeeze the ends to open them up.
- Serve and Enjoy: Set up the toppings on a counter or table, allowing each person to customize their potato with their favorite toppings. Encourage everyone to get creative with their combinations for a delightful dining experience.
Extra Tips:
For the best results, choose large russet potatoes as they bake evenly and have a fluffy interior perfect for holding toppings. If you prefer a quicker cooking time, you can microwave the potatoes for about 5-7 minutes before transferring them to the oven to achieve the crispy skin.
Feel free to include additional toppings such as sautéed mushrooms, avocado slices, or shredded chicken for more variety. Leftover toppings can be stored in the fridge for a few days and used in salads or wraps.
Quick and Easy Veggie Fried Rice
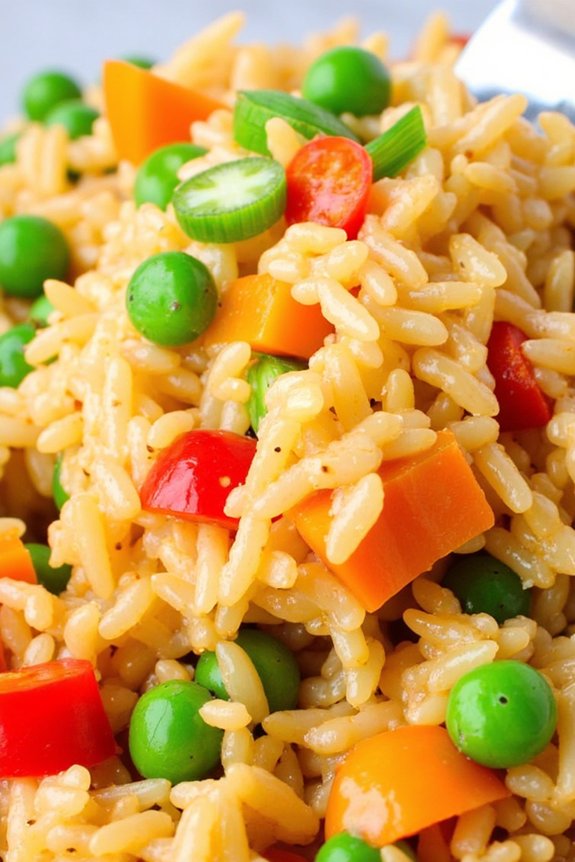
Veggie fried rice is a delightful and nutritious dish that’s perfect for busy weeknights or when you’re craving something delicious yet simple. This Quick and Easy Veggie Fried Rice recipe combines colorful vegetables with fragrant jasmine rice, seasoned perfectly to tantalize your taste buds.
It’s a versatile dish that works as a main course or a side, making it ideal for family dinners or casual gatherings. With just a few steps, you can whip up this wholesome meal in no time, allowing you to enjoy a healthy, home-cooked dinner without the fuss.
This recipe is ideal for serving 4-6 people, guaranteeing everyone at the table gets a satisfying portion. The combination of crunchy vegetables and savory rice, enhanced with soy sauce and sesame oil, offers a delightful texture and flavor combination.
Whether you’re a seasoned cook or a kitchen novice, this recipe is designed to be straightforward and stress-free, allowing you to focus on the joy of cooking and eating.
Ingredients:
- 3 cups cooked jasmine rice (preferably day-old)
- 2 tablespoons vegetable oil
- 1 medium onion, diced
- 2 cloves garlic, minced
- 1 cup frozen peas and carrots mix
- 1 red bell pepper, diced
- 2 eggs, lightly beaten
- 3 tablespoons soy sauce
- 1 tablespoon sesame oil
- 2 green onions, sliced
- Salt and pepper to taste
Cooking Instructions:
- Prepare the Rice: If not using leftover rice, cook 1.5 cups of jasmine rice according to package instructions and allow it to cool completely. Day-old rice is best for fried rice as it’s less sticky and absorbs the flavors better.
- Heat the Oil: In a large non-stick skillet or wok, heat the vegetable oil over medium-high heat. Confirm the oil is hot before adding other ingredients to prevent sticking.
- Cook the Aromatics: Add the diced onion and minced garlic to the skillet. Sauté for about 2-3 minutes or until the onion becomes translucent and fragrant.
- Add Vegetables: Stir in the frozen peas and carrots mix and diced red bell pepper. Cook for another 3-4 minutes, stirring occasionally until the vegetables are tender.
- Scramble the Eggs: Push the vegetables to one side of the skillet and pour the beaten eggs into the empty space. Stir the eggs continuously until they’re fully cooked and scrambled, then mix them with the vegetables.
- Add the Rice: Gradually add the cooked rice to the skillet, breaking up any clumps with a spatula. Stir well to combine all the ingredients evenly.
- Season the Rice: Pour in the soy sauce and sesame oil. Stir everything together, confirming the rice is evenly coated with the sauce. Taste and season with salt and pepper as needed.
- Finish and Serve: Add the sliced green onions to the skillet, giving it a final stir. Remove from heat and serve the veggie fried rice hot.
Extra Tips:
For an extra burst of flavor, consider adding a splash of rice vinegar or a pinch of red pepper flakes for some heat.
Using day-old rice helps prevent the dish from becoming mushy, but if you need to use fresh rice, try spreading it out on a baking sheet to cool and dry out slightly before cooking.
Feel free to customize the vegetable mix based on what you have on hand; broccoli, snap peas, or corn can be great additions. Enjoy your Quick and Easy Veggie Fried Rice as a standalone meal or pair it with your favorite protein for a complete dinner!