

As a lover of delicious yet budget-friendly meals, I’ve found that pantry staples are the unsung heroes of family dinners. Picture a cozy chickpea and tomato stew that warms the heart, or a quick and easy one-pot tuna pasta that’s both satisfying and simple. These recipes are like hidden gems, just waiting to be discovered. Ready to explore more treasures from your own pantry? Let’s get started!
Chickpea and Tomato Stew
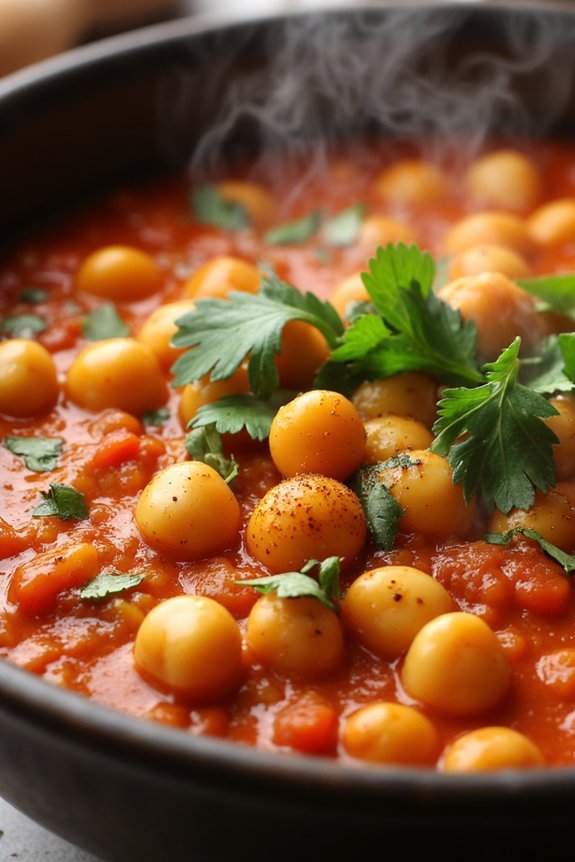
Chickpea and Tomato Stew is a delicious and hearty dish that makes good use of pantry staples, providing a nutritious and satisfying meal for the whole family. This stew is rich in flavor, thanks to the combination of chickpeas, tomatoes, and an array of spices. It’s perfect for a cozy dinner on a chilly evening or as a quick meal solution when you need something filling yet easy to prepare.
The beauty of this dish lies in its simplicity and the fact that it can be made entirely with ingredients you likely have on hand. This versatile stew isn’t only vegan but also packed with protein and fiber, making it an excellent option for those looking to maintain a balanced diet.
It’s also customizable; feel free to add any vegetables you have available or adjust the spices to suit your taste. The recipe serves 4-6 people, making it perfect for a family meal or for leftovers that can be enjoyed the next day. Pair it with crusty bread or rice for a complete meal.
Ingredients (Serves 4-6):
- 2 tablespoons olive oil
- 1 large onion, chopped
- 3 cloves garlic, minced
- 2 cans (15 oz each) chickpeas, drained and rinsed
- 1 can (28 oz) crushed tomatoes
- 2 teaspoons ground cumin
- 1 teaspoon smoked paprika
- 1/2 teaspoon cayenne pepper (optional)
- Salt and pepper to taste
- 2 cups vegetable broth
- 1 tablespoon lemon juice
- 1/4 cup fresh parsley, chopped
Cooking Instructions:
- Prepare the Ingredients: Begin by chopping the onion and mincing the garlic. Drain and rinse the canned chickpeas to remove any excess sodium.
- Sauté the Aromatics: In a large pot or Dutch oven, heat the olive oil over medium heat. Add the chopped onion and sauté for about 5 minutes, or until the onion is translucent. Add the minced garlic and continue to cook for another minute until fragrant.
- Add the Spices: Stir in the ground cumin, smoked paprika, and cayenne pepper. Cook for another minute to allow the spices to release their flavors.
- Combine the Main Ingredients: Add the drained chickpeas, crushed tomatoes, and vegetable broth to the pot. Stir well to combine all ingredients.
- Simmer the Stew: Bring the mixture to a gentle boil, then reduce the heat to low and let it simmer for about 20-25 minutes. This will allow the flavors to meld together and the stew to thicken slightly.
- Season and Finish: After simmering, add salt and pepper to taste. Stir in the lemon juice to add brightness to the stew. Let it cook for an additional 2-3 minutes.
- Serve: Garnish the stew with freshly chopped parsley before serving. Enjoy it hot with bread or rice.
Extra Tips:
For an even heartier stew, consider adding diced carrots or bell peppers along with the onions. If you prefer a thicker stew, you can mash some of the chickpeas with a fork to give it a creamier texture.
Adjust the spice level to your preference by increasing or omitting the cayenne pepper. This stew stores well in the refrigerator for up to three days, and the flavors only improve with time.
One-Pot Tuna Pasta
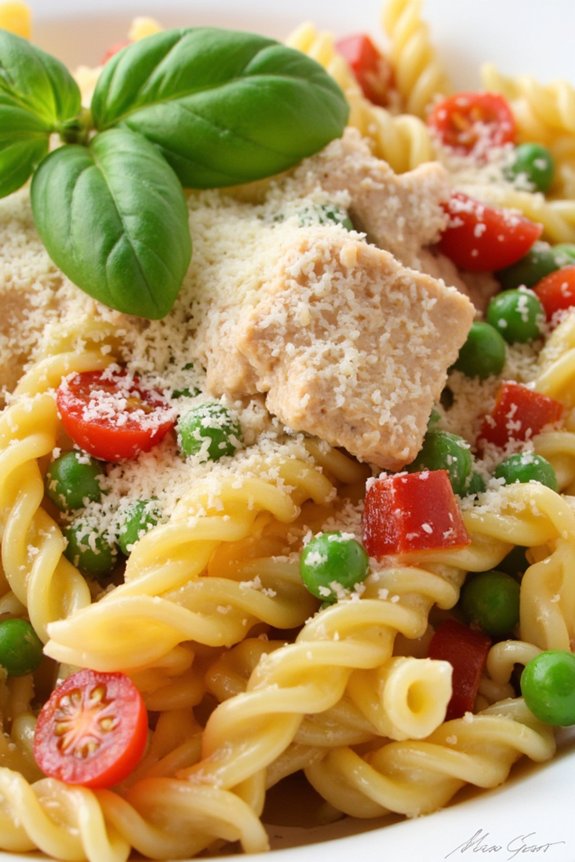
One-Pot Tuna Pasta is a delicious and simple dish that’s perfect for a quick weeknight meal. This recipe is ideal for those nights when you want a hearty and flavorful dinner without spending too much time in the kitchen. Using pantry staples, this recipe combines the convenience of canned tuna with the comfort of pasta, all cooked in one pot for minimal cleanup. The result is a creamy, savory dish that’s sure to satisfy everyone at the table.
The beauty of this One-Pot Tuna Pasta is its flexibility. You can easily adjust the ingredients to suit your taste or what you have on hand. The base of this dish is made with tender pasta and protein-rich tuna, enhanced with a creamy sauce made from a few simple ingredients. This recipe is designed to serve 4-6 people, making it perfect for family dinners or for leftovers that can be enjoyed the next day.
Ingredients (serves 4-6):
- 1 pound (450g) of pasta (penne, fusilli, or spaghetti)
- 2 tablespoons olive oil
- 3 cloves garlic, minced
- 1 medium onion, finely chopped
- 1 can (12 oz/340g) tuna in water, drained
- 1 can (14 oz/400g) diced tomatoes
- 1 cup heavy cream
- 1 cup frozen peas
- 1 teaspoon dried oregano
- Salt and pepper to taste
- 1 cup grated Parmesan cheese
- Fresh basil leaves for garnish (optional)
Cooking Instructions:
- Cook the Pasta: Begin by cooking the pasta in a large pot of boiling salted water until al dente, according to package instructions. Once done, drain and set aside, reserving about a cup of pasta water.
- Sauté Aromatics: In the same pot, heat the olive oil over medium heat. Add the minced garlic and chopped onion, sautéing for about 2-3 minutes until the onion becomes translucent and fragrant.
- Add Tuna and Tomatoes: Stir in the drained tuna and diced tomatoes. Cook for another 3-4 minutes, allowing the flavors to meld together.
- Create the Sauce: Pour in the heavy cream and add the frozen peas. Stir well to combine, then season with dried oregano, salt, and pepper.
- Combine Pasta and Sauce: Return the cooked pasta to the pot, stirring to coat the pasta evenly with the sauce. If the sauce is too thick, gradually add the reserved pasta water until desired consistency is reached.
- Finish with Cheese: Sprinkle in the grated Parmesan cheese, stirring until the cheese is melted and the sauce is creamy.
- Serve: Remove from heat and garnish with fresh basil leaves if desired. Serve immediately.
Extra Tips:
When making One-Pot Tuna Pasta, feel free to customize it with additional vegetables such as spinach or bell peppers for extra nutrition. If you prefer a lighter dish, you can substitute half-and-half for the heavy cream.
Additionally, using high-quality canned tuna will enhance the flavor of the dish. Remember to taste and adjust the seasoning as needed, since canned tuna and Parmesan cheese can vary in saltiness.
Enjoy your meal with a side salad or some crusty bread for a complete dining experience.
Lentil Soup With Vegetables
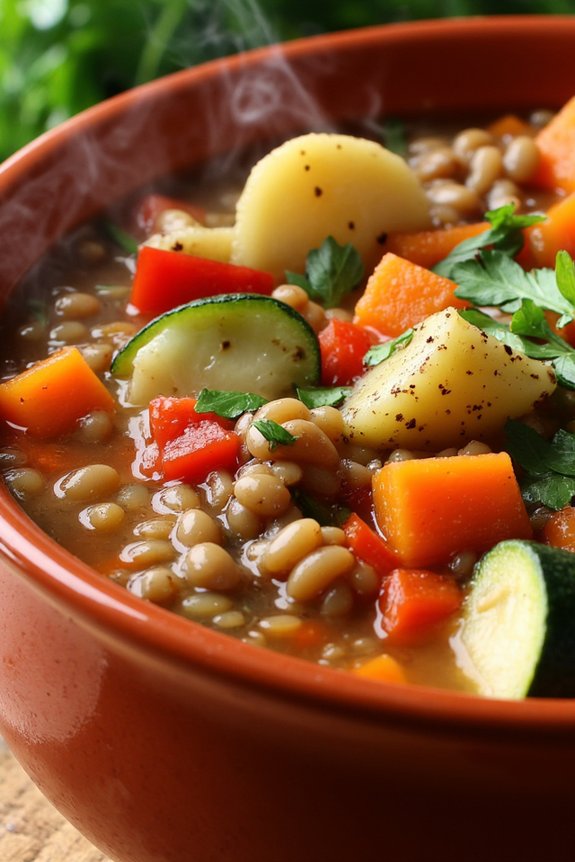
Lentil Soup With Vegetables is a hearty and nutritious dish that’s perfect for a cozy family dinner. Packed with protein-rich lentils and a variety of vegetables, this soup isn’t only filling but also incredibly healthy.
It’s a versatile recipe that can easily be adapted with whatever vegetables you have on hand, making it an ideal choice for a pantry staple meal. Whether you’re looking for a meatless Monday option or simply want to enjoy a bowl of comforting soup, this recipe is a great go-to.
This Lentil Soup With Vegetables is also incredibly easy to make, requiring minimal preparation and cooking time. The combination of lentils and vegetables simmered in a savory broth creates a deliciously fragrant and wholesome soup.
Plus, it’s budget-friendly and yields enough to serve 4-6 people, perfect for family gatherings or meal prep for the week. Let’s plunge into the recipe and discover how simple it’s to bring this delightful dish to your table.
Ingredients (Serving Size: 4-6 People)
- 1 cup dried lentils, rinsed and drained
- 2 tablespoons olive oil
- 1 large onion, chopped
- 2 cloves garlic, minced
- 3 carrots, diced
- 2 celery stalks, diced
- 1 red bell pepper, chopped
- 1 zucchini, chopped
- 1 can (14.5 oz) diced tomatoes
- 6 cups vegetable broth
- 1 teaspoon ground cumin
- 1 teaspoon dried thyme
- Salt and pepper to taste
- 2 tablespoons lemon juice
- Fresh parsley for garnish (optional)
Cooking Instructions
- Prepare the Vegetables: Begin by chopping all the vegetables. Dice the onion, carrots, celery, bell pepper, and zucchini into small, uniform pieces. Mince the garlic cloves.
- Sauté the Aromatics: In a large pot, heat the olive oil over medium heat. Add the chopped onions and minced garlic, sautéing until the onions become translucent and fragrant, about 5 minutes.
- Add the Vegetables: Add the diced carrots, celery, bell pepper, and zucchini to the pot. Stir well and cook for another 5 minutes until the vegetables start to soften.
- Incorporate the Lentils and Spices: Add the rinsed lentils to the pot, along with the ground cumin and dried thyme. Stir everything together to coat the lentils with the vegetables and spices.
- Pour in the Broth and Tomatoes: Add the vegetable broth and diced tomatoes (including the juice) to the pot. Stir well, bring to a boil, then reduce the heat to a simmer.
- Simmer the Soup: Cover the pot and let the soup simmer on low heat for about 30-40 minutes, or until the lentils are tender. Stir occasionally and add salt and pepper to taste.
- Finish with Lemon Juice: Once the lentils are cooked, stir in the lemon juice to brighten the flavors. Adjust seasoning if necessary.
- Serve and Garnish: Ladle the soup into bowls and garnish with freshly chopped parsley if desired. Serve hot.
Extra Tips
To confirm the lentils cook evenly, it’s important to rinse them thoroughly before adding them to the soup. This helps remove any debris and reduces the cooking time.
For added depth of flavor, consider including a bay leaf during the simmering process and removing it before serving. If you prefer a thicker soup, you can use an immersion blender to puree some of the soup before adding the lemon juice.
Adjust the vegetables to your preference or availability, and feel free to add greens like spinach or kale towards the end of cooking for an extra nutrient boost.
Black Bean and Corn Tacos
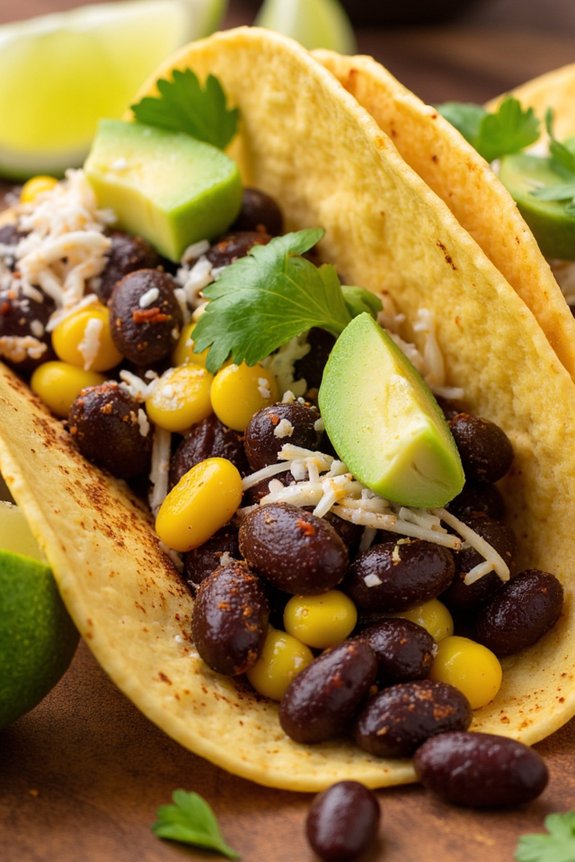
Black Bean and Corn Tacos are a delicious and nutritious option that can be whipped up in no time using pantry staples. This dish is perfect for a quick weeknight meal or a casual gathering with friends and family. The combination of black beans and corn provides a hearty and satisfying filling, while the addition of fresh toppings like avocado and cilantro adds a burst of flavor and color.
These tacos aren’t only easy to make but also versatile, allowing you to customize them to your taste preferences. With a serving size of 4-6 people, this recipe is ideal for a small group and can be doubled or halved as needed. The ingredients are mostly pantry staples, making it an economical choice that doesn’t require a trip to the grocery store.
The black beans and corn serve as the base, while spices like cumin and chili powder add depth and warmth. All these elements are nestled in soft or crispy taco shells, making each bite a delightful experience.
Ingredients:
- 2 cans (15 oz each) black beans, drained and rinsed
- 1 can (15 oz) corn kernels, drained
- 1 tablespoon olive oil
- 1 medium onion, diced
- 3 cloves garlic, minced
- 1 teaspoon ground cumin
- 1 teaspoon chili powder
- Salt and pepper to taste
- 8-12 taco shells (soft or crispy)
- 1 cup shredded cheese (cheddar or Mexican blend)
- 1 avocado, diced
- 1/4 cup cilantro, chopped
- Lime wedges for serving
Instructions:
- Prepare the Beans and Corn Mixture: Heat the olive oil in a large skillet over medium heat. Add the diced onion and sauté for 3-4 minutes until translucent. Stir in the minced garlic and cook for an additional minute until fragrant.
- Season and Cook: Add the drained black beans and corn to the skillet. Sprinkle in the cumin, chili powder, salt, and pepper. Stir well to combine and allow the mixture to cook for 5-7 minutes, stirring occasionally, until everything is heated through and the flavors meld together.
- Assemble the Tacos: Warm the taco shells according to package instructions. Spoon the black bean and corn mixture into each shell, filling them generously.
- Add Toppings: Top each taco with shredded cheese, diced avocado, and chopped cilantro. Squeeze a lime wedge over each taco just before serving to enhance the flavors.
- Serve and Enjoy: Arrange the tacos on a platter and serve immediately while they’re warm. Pair them with extra lime wedges on the side for additional zest.
Extra Tips: When making Black Bean and Corn Tacos, consider using fresh corn when in season for a sweeter, crunchier texture. If you prefer a spicier version, add some diced jalapeños or a pinch of cayenne pepper to the bean mixture.
For a creamier texture, you can also include a dollop of sour cream or Greek yogurt as a topping. These tacos are highly customizable, so feel free to experiment with your favorite toppings and adjust the seasonings to suit your palate.
Rice and Bean Burritos

Rice and Bean Burritos are a perfect pantry staple dinner that’s both hearty and delicious. This dish is incredibly versatile, allowing you to use whatever beans and rice you have on hand, and it can be easily customized with additional ingredients such as cheese, salsa, or vegetables.
Whether you’re looking for a quick weeknight meal or something to prepare ahead of time for busy days, these burritos are a nutritious option that will satisfy everyone at the table. The combination of rice and beans provides a complete protein, making this meal both filling and nourishing.
With its simple preparation and minimal ingredients, Rice and Bean Burritos are ideal for those who want to eat well without spending a lot of time in the kitchen. Plus, this recipe is budget-friendly and can be easily doubled or halved depending on your needs, making it a fantastic option for families of all sizes.
Ingredients for 4-6 servings:
- 2 cups cooked rice
- 1 can (15 oz) black beans, drained and rinsed
- 1 tablespoon olive oil
- 1 small onion, diced
- 2 cloves garlic, minced
- 1 teaspoon ground cumin
- 1 teaspoon chili powder
- Salt and pepper to taste
- 6 large flour tortillas
- 1 cup shredded cheddar cheese
- 1 cup salsa
- Optional: sour cream, sliced avocado, chopped cilantro for serving
Cooking Instructions:
1. Prepare the Rice and Beans: Begin by cooking the rice according to the package instructions if it’s not already prepared. In a large skillet, heat the olive oil over medium heat. Add the diced onion and cook until it starts to soften, about 3-4 minutes.
Add the minced garlic, ground cumin, and chili powder, and sauté for another minute until fragrant.
2. Mix Beans and Seasonings: Stir in the drained and rinsed black beans, and season the mixture with salt and pepper. Cook for another 5 minutes, stirring occasionally, until the beans are heated through and well mixed with the spices.
Add the cooked rice to the skillet and stir until everything is well combined. Remove from heat.
3. Assemble the Burritos: Lay a tortilla flat on a clean surface. Place about 1/2 cup of the rice and bean mixture in the center of the tortilla. Sprinkle with a small handful of shredded cheddar cheese and add a spoonful of salsa.
Fold in the sides of the tortilla and roll it up tightly to enclose the filling. Repeat with the remaining tortillas and filling.
4. Heat the Burritos: For a warm, crispy burrito, you can heat them briefly on a skillet or grill pan over medium heat for 1-2 minutes on each side until the tortillas are golden brown.
Alternatively, you can wrap them in foil and heat them in a 350°F (175°C) oven for 10 minutes.
5. Serve: Serve the burritos with additional salsa, sour cream, sliced avocado, and chopped cilantro on the side, if desired.
Extra Tips: To save time, you can use leftover rice or pre-cooked rice packets. Feel free to swap out the black beans for pinto or kidney beans if you prefer.
For those who like a bit of heat, consider adding chopped jalapeños or a dash of hot sauce to the filling. These burritos can also be frozen for up to a month; just wrap them individually in foil and store them in a freezer bag.
When you’re ready to eat, simply thaw and reheat them in the oven.
Spaghetti Aglio E Olio
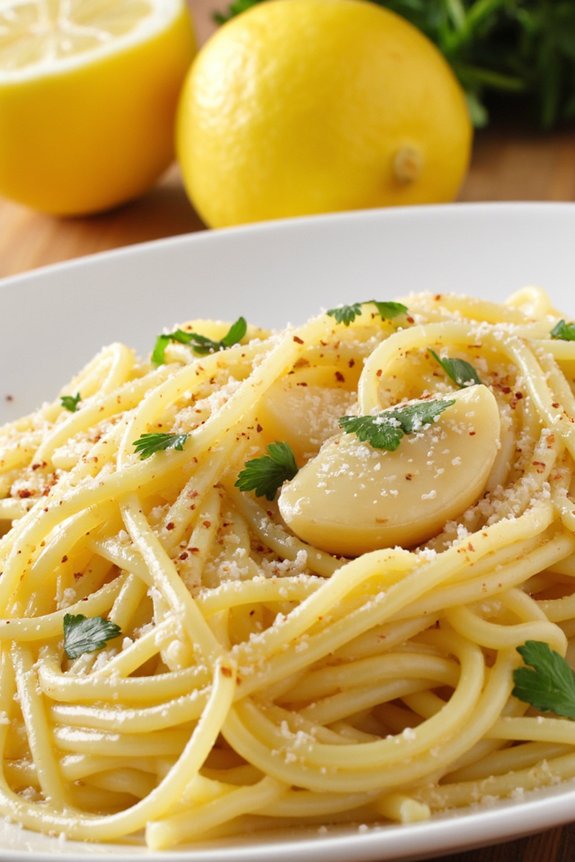
Spaghetti Aglio E Olio is a classic Italian dish that embodies simplicity and flavor with just a few basic ingredients. This pantry staple dinner is perfect for those nights when you’re short on time but still want a satisfying meal. The dish features spaghetti lightly coated in a fragrant mixture of garlic-infused olive oil and a hint of chili pepper heat, garnished with freshly chopped parsley for a fresh finish.
With its minimal ingredients and straightforward preparation, Spaghetti Aglio E Olio is a great option for both beginner cooks and seasoned chefs. Originating from Naples, this dish highlights the beauty of Italian cuisine, where quality ingredients shine through simplicity. It’s a great way to make use of pantry staples like pasta, olive oil, and garlic, turning them into a delicious meal that can be prepared in under 30 minutes.
Whether you’re cooking for yourself or a group, this recipe for 4-6 people guarantees everyone will enjoy a hearty and flavorful dinner. Let’s explore the ingredients and instructions to get started on this delightful dish.
Ingredients (serves 4-6):
- 1 pound (450g) spaghetti
- 1/2 cup (120ml) extra virgin olive oil
- 8 cloves garlic, thinly sliced
- 1 teaspoon red pepper flakes
- Salt, to taste
- 1/4 cup fresh parsley, chopped
- 1/2 cup grated Parmesan cheese (optional)
- Lemon wedges (optional)
Cooking Instructions:
- Boil the Pasta: Bring a large pot of salted water to a boil. Add the spaghetti and cook according to the package instructions until al dente. Reserve about 1 cup of pasta water and then drain the spaghetti.
- Prepare the Garlic Oil: While the spaghetti is cooking, heat the olive oil in a large pan over medium heat. Add the sliced garlic and sauté gently, stirring frequently, until the garlic is golden brown and fragrant. Be careful not to burn the garlic as it can turn bitter.
- Add the Spice: Once the garlic is ready, stir in the red pepper flakes and cook for another 30 seconds to release their flavor.
- Combine with Pasta: Add the cooked spaghetti to the pan with the garlic oil. Toss the pasta to coat it evenly with the oil and garlic. If the pasta seems dry, add some of the reserved pasta water, a little at a time, until the desired consistency is reached.
- Season and Garnish: Stir in the chopped parsley and season with salt to taste. If using, sprinkle the Parmesan cheese over the pasta and toss to combine. Serve hot, with lemon wedges on the side for those who enjoy a touch of acidity.
Extra Tips:
For the best results, use high-quality extra virgin olive oil as it’s the backbone of the dish’s flavor. Keep an eye on the garlic as it cooks; it should be golden and not too dark. Adjust the level of red pepper flakes according to your spice preference.
If you want a more robust flavor, consider adding a pinch of lemon zest to the pasta before serving. This dish is best enjoyed fresh, but if you have leftovers, store them in an airtight container in the fridge for up to 2 days. Reheat gently on the stovetop, adding a splash of water or olive oil to bring back the moisture.
Potato and Leek Soup

Potato and Leek Soup is a comforting and hearty dish that makes use of simple pantry staples to create something truly delectable. This classic soup is known for its creamy texture and subtle flavors, which come together beautifully in each spoonful. The combination of tender potatoes and the gentle onion-like flavor of leeks make it a warming and satisfying meal, perfect for any time of the year.
Whether you’re looking for a quick weeknight dinner or a cozy weekend meal, this soup is sure to please the whole family. This recipe is designed to serve 4-6 people, making it ideal for a family dinner or a small gathering. With just a few ingredients and straightforward steps, you’ll have a delicious homemade soup ready in no time.
The addition of cream at the end adds a luxurious touch, while the optional garnishes of chives and bacon provide extra layers of flavor and texture. With minimal prep work and cooking time, Potato and Leek Soup is a delightful and practical choice.
Ingredients:
- 2 tablespoons olive oil
- 2 leeks, white and light green parts only, sliced
- 4 medium potatoes, peeled and diced
- 1 onion, chopped
- 1 garlic clove, minced
- 4 cups chicken or vegetable broth
- 1 cup heavy cream
- Salt and pepper to taste
- Optional: chopped chives and crumbled bacon for garnish
Instructions:
- Prepare the Ingredients: Start by washing the leeks thoroughly to remove any dirt or grit. Slice the white and light green parts of the leeks. Peel and dice the potatoes, chop the onion, and mince the garlic.
- Sauté the Aromatics: In a large pot, heat the olive oil over medium heat. Add the chopped onion and garlic, sautéing until the onion becomes translucent, about 3-4 minutes. Then, add the sliced leeks and cook for an additional 5 minutes, stirring occasionally, until they’re soft.
- Cook the Vegetables: Add the diced potatoes to the pot, stirring to combine with the leeks and onions. Pour in the chicken or vegetable broth and bring the mixture to a boil. Once boiling, reduce the heat to low, cover, and let it simmer for about 20 minutes, or until the potatoes are tender.
- Blend the Soup: Remove the pot from heat and allow it to cool slightly. Using an immersion blender, puree the soup until smooth and creamy. Alternatively, you can transfer batches of the soup to a blender and blend until smooth. Be careful with the hot liquid.
- Add Cream and Season: Return the pot to low heat and stir in the heavy cream. Season with salt and pepper to taste. Allow the soup to warm through, but don’t let it boil.
- Serve: Ladle the soup into bowls and garnish with chopped chives and crumbled bacon if desired. Serve hot and enjoy!
Extra Tips:
When preparing leeks, be sure to wash them thoroughly, as they can often contain dirt between their layers. If you prefer a thicker soup, reduce the amount of broth slightly or add more potatoes. For a lighter version, substitute the heavy cream with milk or omit it altogether.
If you don’t have an immersion blender, just be cautious when transferring hot soup to a blender; blend in batches and cover the lid with a kitchen towel to prevent splattering.
Vegetable Fried Rice
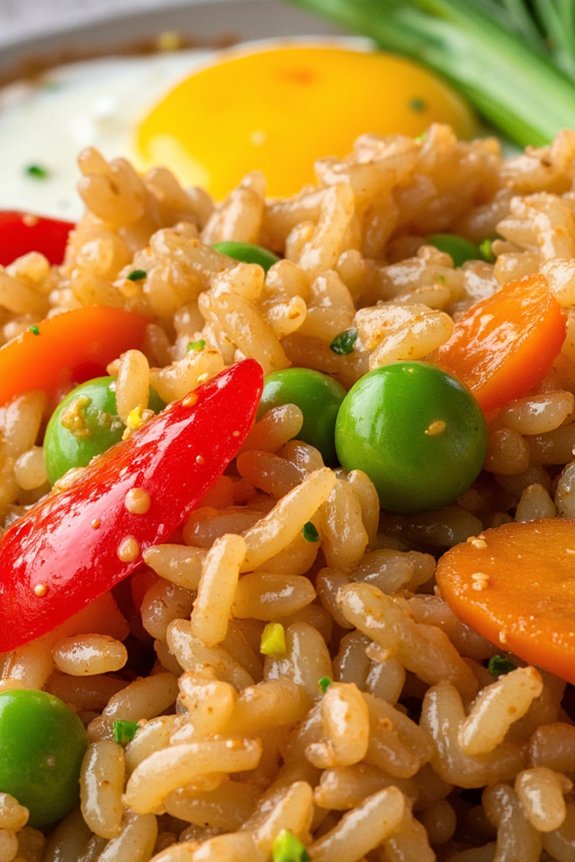
Vegetable Fried Rice is a quick and easy dish that makes use of pantry staples and leftover vegetables, making it a perfect weeknight meal. This dish isn’t only delicious but also versatile, as you can customize it with your favorite vegetables or whatever you have on hand. The combination of soy sauce, sesame oil, and fresh vegetables creates a flavorful and satisfying meal that can be served as a main dish or as a side.
The key to making great Vegetable Fried Rice is to use day-old rice, as it has less moisture and provides a better texture when fried. Freshly cooked rice can result in a mushy dish, so it’s worth planning ahead if possible. This recipe serves 4-6 people and can be easily doubled or adjusted to fit your family’s needs.
Ingredients for 4-6 servings:
- 4 cups cooked day-old white rice
- 2 tablespoons vegetable oil
- 1 onion, diced
- 2 cloves garlic, minced
- 1 cup frozen peas and carrots mix
- 1 red bell pepper, diced
- 2 eggs, lightly beaten
- 3 tablespoons soy sauce
- 1 tablespoon sesame oil
- 2 green onions, sliced
- Salt and pepper to taste
Cooking Instructions:
- Prepare Ingredients: Begin by confirming that all your ingredients are prepped and ready to go. Dice the onion and bell pepper, mince the garlic, and slice the green onions.
- Heat the Oil: In a large skillet or wok, heat the vegetable oil over medium-high heat. Add the diced onion and sauté for about 2-3 minutes until it becomes translucent.
- Add Vegetables: Stir in the minced garlic, frozen peas, and carrots mix, and diced red bell pepper. Cook for another 4-5 minutes, stirring frequently, until the vegetables are tender.
- Cook the Eggs: Push the vegetables to one side of the skillet. Pour the lightly beaten eggs into the empty side of the skillet. Scramble the eggs until fully cooked, then mix them with the vegetables.
- Add Rice: Add the day-old cooked rice to the skillet. Break up any clumps and stir well to combine with the vegetables and eggs.
- Flavor the Rice: Pour the soy sauce and sesame oil over the rice mixture. Stir well to make sure the rice is evenly coated with the sauce. Season with salt and pepper to taste.
- Finish and Serve: Stir in the sliced green onions and cook for an additional 1-2 minutes. Serve immediately, garnished with additional green onions if desired.
Extra Tips:
For the best results, use a large skillet or wok to make sure there’s plenty of room for the rice to fry evenly. If you don’t have day-old rice, you can spread freshly cooked rice on a baking sheet and place it in the refrigerator for 30 minutes to cool and dry out.
Feel free to experiment with other vegetables like broccoli, corn, or mushrooms, and adjust the soy sauce and sesame oil to your taste preference.
Peanut Butter Noodles

Peanut Butter Noodles is a delicious and simple dish that brings together the creamy richness of peanut butter with the savory umami flavors of soy sauce, all tossed with noodles and a touch of heat. This pantry staple dinner is perfect for those nights when you want something quick, satisfying, and full of flavor.
With just a few ingredients that you likely already have on hand, you can create a comforting meal that will please both adults and children alike. This recipe is versatile, allowing you to customize it with your favorite vegetables or proteins. You can keep it vegetarian or add some cooked chicken, shrimp, or tofu for extra heartiness.
The key to a great Peanut Butter Noodles dish is balancing the flavors—sweet, salty, tangy, and spicy—to create a harmonious bowl of comfort. Serve this dish warm or cold, making it suitable for any season or occasion.
Ingredients (Serves 4-6):
- 12 ounces of noodles (spaghetti, udon, or rice noodles)
- 1/2 cup creamy peanut butter
- 1/4 cup soy sauce
- 1 tablespoon rice vinegar
- 1 tablespoon honey or maple syrup
- 1 tablespoon sesame oil
- 1 teaspoon sriracha or chili paste (adjust to taste)
- 2 cloves garlic, minced
- 1/4 cup hot water
- 2 green onions, sliced
- 1/4 cup chopped peanuts
- Optional: 1 cup shredded carrots, bell peppers, or sliced cucumbers
Cooking Instructions:
- Cook the Noodles: Begin by cooking the noodles according to the package instructions. Once cooked, drain and rinse them under cold water to stop the cooking process and prevent sticking. Set aside.
- Prepare the Sauce: In a large bowl, whisk together the peanut butter, soy sauce, rice vinegar, honey, sesame oil, sriracha, and minced garlic. Gradually add the hot water while whisking to achieve a smooth, creamy consistency.
- Combine Noodles and Sauce: Add the cooked noodles to the bowl with the peanut sauce. Toss well to guarantee the noodles are evenly coated with the sauce.
- Add Vegetables (Optional): If you’re using vegetables, add them to the noodles and toss again to combine. This step is optional but adds a nice crunch and freshness to the dish.
- Garnish and Serve: Transfer the noodles to a serving platter or individual bowls. Garnish with sliced green onions and chopped peanuts. Serve immediately, either warm or chilled.
Extra Tips:
For an extra kick, increase the amount of sriracha or chili paste in the sauce. If you prefer a lighter sauce, add more hot water until you reach your desired consistency.
This dish can be stored in the refrigerator for up to three days and makes for a great leftover lunch or dinner. Experiment with different vegetables or proteins to keep the dish interesting and tailored to your preferences.
White Bean and Spinach Quesadillas

White Bean and Spinach Quesadillas are a delightful and nutritious twist on traditional quesadillas, offering a blend of creamy white beans, fresh spinach, and melted cheese all enveloped in a crispy tortilla. This dish is perfect for a quick weeknight dinner or a casual get-together, as it brings together pantry staples and fresh ingredients to create a satisfying meal. The combination of savory beans and vibrant spinach not only provides a hearty filling but also adds a boost of fiber and vitamins to your diet.
These quesadillas are incredibly versatile, allowing you to customize them to your taste or to accommodate any dietary preferences. Whether you’re serving them as an appetizer, a main dish, or even a snack, they’re sure to be a hit with family and friends. Plus, they’re quick and easy to prepare, making them a go-to option when you’re short on time but still want something delicious and homemade.
Ingredients (Serves 4-6):
- 2 cups canned white beans, drained and rinsed
- 2 cups fresh spinach, roughly chopped
- 1 1/2 cups shredded cheese (such as Monterey Jack or cheddar)
- 1/2 cup chopped onions
- 1 tsp minced garlic
- 1 tsp ground cumin
- 1/2 tsp chili powder
- Salt and pepper to taste
- 8 large flour tortillas
- 2 tbsp olive oil or butter
Instructions:
- Prepare the Filling: In a large skillet over medium heat, add 1 tablespoon of olive oil or butter. Once hot, add the chopped onions and minced garlic. Sauté until the onions are translucent and fragrant, about 3-4 minutes.
- Add Beans and Spices: Stir in the drained white beans, ground cumin, chili powder, salt, and pepper. Cook for another 3-4 minutes, mashing the beans slightly with the back of a spoon to create a thick, chunky mixture.
- Incorporate Spinach: Add the chopped spinach to the skillet, stirring well until the spinach wilts and is fully combined with the bean mixture. Remove the skillet from heat and set aside.
- Assemble the Quesadillas: Lay out the flour tortillas on a flat surface. On one half of each tortilla, spread a generous amount of the bean and spinach mixture. Top with shredded cheese, then fold the other half of the tortilla over the filling to form a semicircle.
- Cook the Quesadillas: Heat a clean skillet or griddle over medium heat and add a small amount of olive oil or butter. Place the assembled quesadillas in the skillet, cooking each side for about 3-4 minutes until the tortillas are golden brown and the cheese is melted.
- Serve: Remove from heat and let them cool slightly before cutting into wedges. Serve with salsa, sour cream, or guacamole as desired.
Extra Tips: For an added kick, consider incorporating a pinch of crushed red pepper flakes or a splash of hot sauce into the bean mixture. If you prefer a creamier texture, blend half of the white beans before adding to the skillet. Additionally, you can substitute whole wheat tortillas for a healthier option or experiment with different cheeses like pepper jack for extra flavor. Remember to adjust the seasoning according to your taste, especially if you’re using different types of cheese.
Pasta E Fagioli

Pasta E Fagioli is a traditional Italian soup that combines the hearty goodness of pasta with the nutritional benefits of beans, creating a wholesome and comforting meal perfect for any day of the week. This dish translates to “pasta and beans” in Italian and is known for its rich, savory broth infused with aromatic herbs and spices.
It’s a versatile recipe that can be adapted to suit various tastes and dietary needs, making it a staple in many households. Whether you’re looking for a quick weeknight dinner or a satisfying lunch, Pasta E Fagioli is a delightful choice.
This comforting soup isn’t only delicious but also easy to prepare using pantry staples, making it an ideal recipe for those days when you’re looking to whip up something without a trip to the grocery store. The key to a great Pasta E Fagioli lies in its simplicity and the quality of ingredients.
By using canned beans and tomatoes, along with some dried pasta, you can create a nourishing meal that’s both economical and filling. Follow this recipe for a serving size of 4-6 people and enjoy a bowl of warmth and goodness.
Ingredients for Pasta E Fagioli (serving size: 4-6 people):
- 2 tablespoons olive oil
- 1 medium onion, diced
- 2 cloves garlic, minced
- 2 carrots, peeled and diced
- 2 celery stalks, diced
- 1 teaspoon dried oregano
- 1 teaspoon dried thyme
- 1/2 teaspoon red pepper flakes (optional)
- 1 can (14 oz) diced tomatoes
- 4 cups vegetable or chicken broth
- 1 can (15 oz) cannellini beans, drained and rinsed
- 1 can (15 oz) kidney beans, drained and rinsed
- 1 cup ditalini pasta
- Salt and pepper to taste
- Grated Parmesan cheese for serving
- Fresh basil or parsley for garnish (optional)
Cooking Instructions:
- Prepare the Vegetables: Start by heating the olive oil in a large pot over medium heat. Add the diced onion, minced garlic, diced carrots, and diced celery. Sauté these vegetables for about 5 minutes until they begin to soften and the onions turn translucent.
- Add Aromatics: Stir in the dried oregano, dried thyme, and red pepper flakes (if using). Cook for another minute until the spices release their aroma, enhancing the flavors of the vegetables.
- Incorporate Tomatoes and Broth: Pour in the diced tomatoes with their juice and the broth. Stir everything together, bringing the mixture to a simmer. Allow it to cook for about 10 minutes so the flavors meld together.
- Add Beans: Add the drained and rinsed cannellini and kidney beans to the pot. Stir to combine, and let the soup simmer for another 5 minutes, allowing the beans to heat through.
- Cook the Pasta: Stir in the ditalini pasta. Let the soup simmer for about 10 minutes, or until the pasta is cooked al dente. Stir occasionally to prevent the pasta from sticking to the pot.
- Season and Serve: Taste the soup and season with salt and pepper as needed. Serve hot, garnished with grated Parmesan cheese and fresh basil or parsley, if desired.
Extra Tips:
When preparing Pasta E Fagioli, you can customize the soup by adding other vegetables like zucchini or spinach for extra nutrition. If you prefer a thicker consistency, mash a portion of the beans before adding them to the soup.
For a gluten-free version, substitute regular pasta with a gluten-free alternative. Remember, the soup thickens as it sits, so if you plan on having leftovers, you may need to add a bit more broth or water when reheating. Enjoy this classic Italian comfort food with a side of crusty bread for a complete meal.
Creamy Tomato Risotto
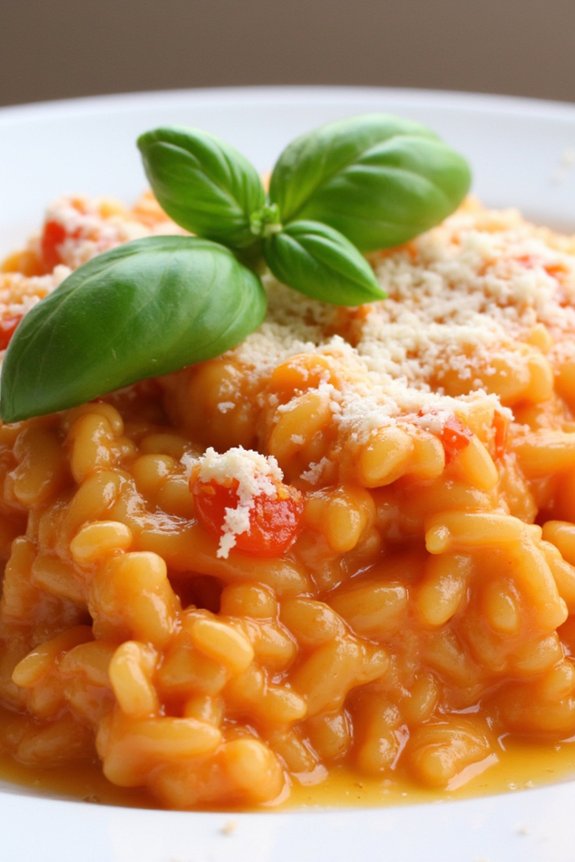
Creamy Tomato Risotto is a comforting and elegant dish perfect for any occasion, combining the rich flavors of ripe tomatoes with the creamy consistency of risotto. This dish isn’t only delicious but also uses pantry staples and requires minimal effort to create a restaurant-quality meal at home.
The slow-cooked Arborio rice absorbs the tangy tomato broth, releasing its starches to create a creamy texture. Finished with a touch of parmesan and fresh basil, this risotto is both hearty and satisfying, making it an ideal choice for a family dinner or a special gathering.
Risotto is a versatile dish that allows for creativity, and this Creamy Tomato Risotto is no exception. It’s an excellent way to incorporate pantry staples like canned tomatoes and rice into a gourmet meal.
With the right technique and a little patience, you’ll achieve a velvety texture that rivals any dish from your favorite Italian restaurant. This recipe serves 4-6 people, making it perfect for a family meal or a dinner party.
Ingredients (Serves 4-6):
- 1 1/2 cups Arborio rice
- 4 cups vegetable or chicken broth
- 1 cup canned crushed tomatoes
- 1/2 cup dry white wine
- 1 medium onion, finely chopped
- 2 cloves garlic, minced
- 1/2 cup grated Parmesan cheese
- 2 tablespoons olive oil
- 2 tablespoons unsalted butter
- Salt and pepper to taste
- Fresh basil leaves, for garnish
Cooking Instructions:
- Prepare the Broth: In a medium saucepan, bring the vegetable or chicken broth to a gentle simmer. Keep it warm over low heat throughout the cooking process.
- Sauté Aromatics: In a large pan or skillet, heat the olive oil over medium heat. Add the chopped onion and cook until translucent, about 5 minutes. Stir in the minced garlic and cook for an additional 1 minute until fragrant.
- Toast the Rice: Add the Arborio rice to the pan with the onions and garlic. Stir continuously for 2-3 minutes until the rice is lightly toasted and coated with oil.
- Deglaze with Wine: Pour in the dry white wine and stir until it’s mostly absorbed by the rice, about 2 minutes.
- Incorporate Tomatoes: Stir in the crushed tomatoes, ensuring all the rice is coated and the mixture is evenly distributed.
- Cook the Risotto: Begin adding the warm broth to the rice mixture, one ladleful at a time. Stir frequently and allow each addition of broth to be absorbed before adding the next. Continue this process until the rice is creamy and tender, approximately 18-20 minutes.
- Finish with Parmesan and Butter: Once the rice is cooked to your liking, remove the pan from the heat. Stir in the butter and grated Parmesan cheese, mixing until fully incorporated and the risotto is creamy. Season with salt and pepper to taste.
- Serve: Divide the risotto among serving plates and garnish with fresh basil leaves. Serve immediately.
Extra Tips:
To achieve the perfect creamy consistency, it’s essential to add the broth gradually and stir continuously, encouraging the rice to release its starches.
If you prefer a richer flavor, you can substitute half of the broth with tomato juice. Additionally, try experimenting with different types of cheeses, such as pecorino or fontina, for a unique twist.
Chickpea Curry With Rice
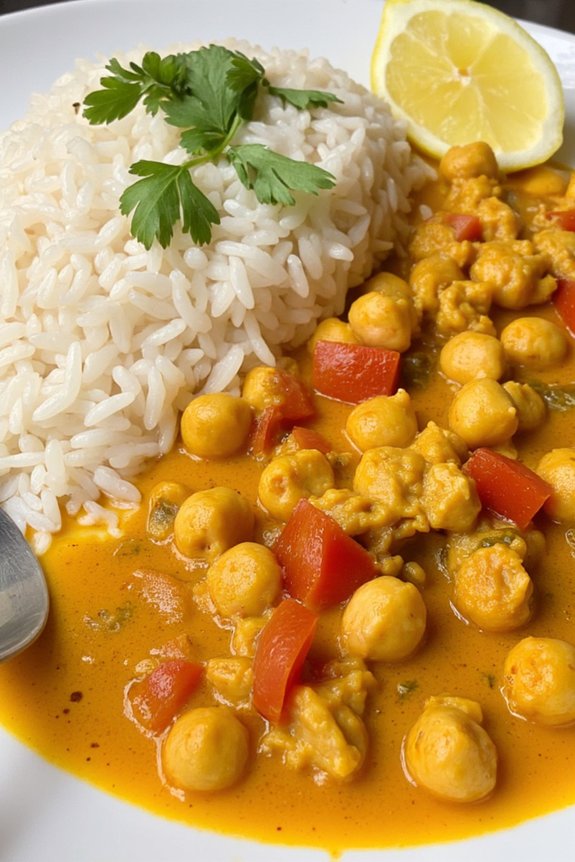
Chickpea Curry With Rice is a delightful and satisfying dish that combines the rich flavors of a hearty curry with the comforting texture of fluffy rice. This dish is perfect for those nights when you need to whip up something nourishing yet simple using pantry staples.
Chickpeas, with their firm texture and nutty flavor, form the heart of this curry, offering both protein and fiber. Coupled with aromatic spices and creamy coconut milk, this curry is a harmonious blend of taste and nutrition, making it ideal for family dinners or meal prepping.
What makes Chickpea Curry With Rice particularly appealing is its versatility. Whether you’re a seasoned cook or a beginner, this recipe is straightforward and forgiving, allowing you to adjust spices and ingredients according to your preference.
Additionally, the dish is entirely plant-based, making it an excellent choice for vegetarians and vegans. Served over a bed of rice, it becomes a complete meal that can satisfy even the most voracious appetites. The recipe below serves 4-6 people, ensuring there’s enough to go around or to save for later.
Ingredients:
- 2 cups basmati rice
- 2 tablespoons vegetable oil
- 1 large onion, finely chopped
- 3 cloves garlic, minced
- 1 tablespoon fresh ginger, minced
- 2 teaspoons ground cumin
- 2 teaspoons ground coriander
- 1 teaspoon ground turmeric
- 1 teaspoon garam masala
- 1/2 teaspoon red chili powder (adjust to taste)
- 2 cans (15 oz each) chickpeas, drained and rinsed
- 1 can (14 oz) coconut milk
- 1 can (14 oz) diced tomatoes
- Salt to taste
- Fresh cilantro, chopped (for garnish)
- Lemon wedges (for serving)
Cooking Instructions:
- Prepare the Rice: Rinse the basmati rice under cold water until the water runs clear. In a medium saucepan, bring 4 cups of water to a boil. Add the rice and a pinch of salt. Cover and reduce the heat to low. Cook for about 15-18 minutes until the rice is tender and water is absorbed. Fluff with a fork and set aside.
- Sauté Aromatics: In a large pan, heat the vegetable oil over medium heat. Add the chopped onion and sauté until translucent, about 5 minutes. Stir in the minced garlic and ginger, and cook for another 2 minutes until fragrant.
- Add Spices: Sprinkle the cumin, coriander, turmeric, garam masala, and red chili powder into the pan. Stir well to coat the onion mixture in spices, cooking for an additional 1-2 minutes to release their flavors.
- Simmer the Curry: Add the chickpeas, coconut milk, and diced tomatoes to the pan. Stir everything together and bring the mixture to a simmer. Season with salt to taste. Allow the curry to simmer gently for 15-20 minutes, stirring occasionally, until the sauce thickens and the chickpeas are heated through.
- Serve: Spoon the cooked rice onto plates or bowls. Ladle the chickpea curry over the rice. Garnish with fresh cilantro and serve with lemon wedges on the side for an extra burst of flavor.
Extra Tips: For a more robust flavor, consider toasting the spices in a dry pan before adding them to the onion mixture. This can enhance the depth of the curry.
If you prefer a thicker curry, you can mash some of the chickpeas against the side of the pan during cooking. Adjust the level of spiciness by varying the amount of red chili powder or adding a fresh chili if desired.
Finally, this dish can be easily customized with additional vegetables, such as spinach or bell peppers, to increase its nutritional value.
Mushroom and Barley Pilaf
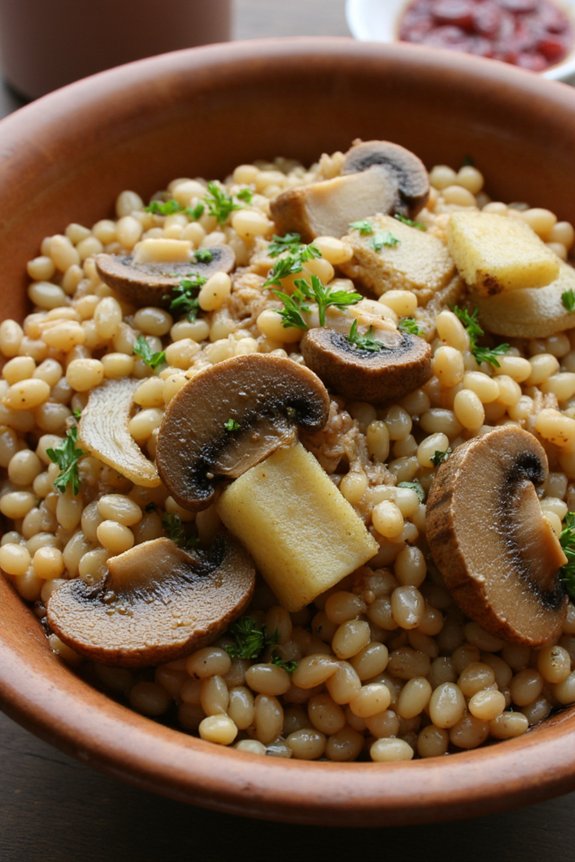
Mushroom and Barley Pilaf is a hearty and nutritious dish that can be whipped up using simple pantry staples. This recipe combines the earthy flavors of mushrooms with the nutty taste of barley, creating a wholesome meal that’s perfect for any day of the week.
Whether you’re looking for a side dish or a main course, this pilaf is sure to satisfy. The combination of flavors and textures makes it not only delicious but also comforting, ideal for a cozy family dinner.
Barley is a versatile grain that adds a chewy texture and a subtle nutty flavor to the dish, while mushrooms bring in their unique umami taste. This recipe is straightforward and can be adjusted to suit your taste preferences.
It’s also a great way to use up any extra vegetables you have on hand, making it a flexible addition to your meal rotation. With minimal effort, you can create a comforting dish that your whole family will love.
Ingredients (Serves 4-6):
- 1 cup pearl barley
- 2 tablespoons olive oil
- 1 medium onion, chopped
- 2 cloves garlic, minced
- 8 ounces mushrooms, sliced
- 3 cups vegetable or chicken broth
- 1 teaspoon dried thyme
- Salt and pepper to taste
- 2 tablespoons fresh parsley, chopped (optional for garnish)
Cooking Instructions:
- Prepare the Barley: Rinse the pearl barley under cold water to remove any dust or debris. Set aside.
- Sauté Aromatics: In a large skillet or saucepan, heat the olive oil over medium heat. Add the chopped onion and cook until it becomes translucent, about 5 minutes. Stir in the minced garlic and cook for another minute until fragrant.
- Cook Mushrooms: Add the sliced mushrooms to the pan. Cook them with the onions and garlic, stirring occasionally, until the mushrooms are golden brown and have released their moisture, about 5-7 minutes.
- Add Barley and Broth: Stir in the rinsed barley, ensuring it’s well mixed with the mushrooms and onions. Pour in the vegetable or chicken broth and add the dried thyme. Season with salt and pepper to taste.
- Simmer the Pilaf: Bring the mixture to a boil, then reduce the heat to low. Cover the pan and let it simmer for about 40-45 minutes, or until the barley is tender and has absorbed most of the liquid. Stir occasionally to prevent sticking.
- Garnish and Serve: Once cooked, remove the pilaf from heat and let it sit, covered, for about 5 minutes. This resting period allows the flavors to meld. Garnish with chopped fresh parsley before serving, if desired.
Extra Tips:
For an added layer of flavor, consider using a mix of different mushrooms such as shiitake or cremini along with the standard button mushrooms.
If you prefer a creamier texture, you can stir in a tablespoon of butter or a splash of cream at the end. For a bit of a crunch, toasted nuts like almonds or pine nuts can be sprinkled on top before serving.
Split Pea Soup
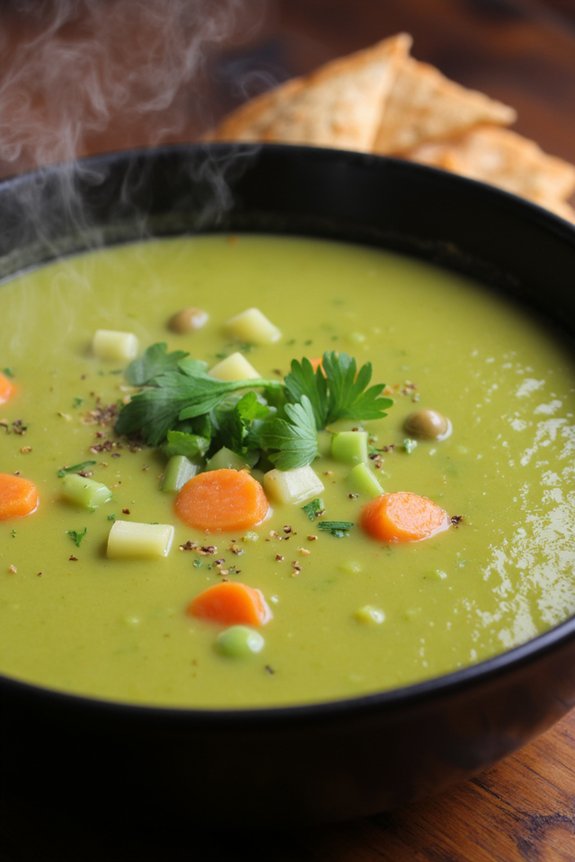
Split pea soup is a hearty and nutritious dish that has been a favorite comfort food for generations. It’s a perfect pantry staple dinner recipe, especially during the colder months when you crave something warm and filling. Made with dried split peas, vegetables, and seasonings, this soup isn’t only delicious but also economical and easy to prepare.
Plus, it’s a great way to enjoy a protein-rich meal without any meat, though adding ham or bacon can enhance the flavor even further.
This classic soup begins with the basic ingredients that you likely already have in your kitchen. The split peas are simmered until tender, creating a thick and creamy base. Onions, carrots, and celery provide a flavorful backdrop, while herbs and spices add depth.
Whether you prefer it vegetarian or with a smoky meat addition, split pea soup is versatile enough to suit any palate. Best of all, it makes a substantial batch, perfect for feeding a family or storing leftovers for later.
Ingredients (Serves 4-6):
- 1 pound dried split peas
- 1 tablespoon olive oil
- 1 large onion, chopped
- 3 carrots, diced
- 3 stalks celery, diced
- 2 cloves garlic, minced
- 8 cups chicken or vegetable broth
- 1 bay leaf
- 1 teaspoon dried thyme
- Salt and pepper to taste
- Optional: 1 ham hock or 4 slices of bacon, chopped
- Optional garnish: Fresh parsley, chopped
Cooking Instructions:
- Prepare the Ingredients: Rinse the split peas under cold water until the water runs clear. Set them aside. Chop the onion, carrots, and celery, and mince the garlic.
- Sauté the Vegetables: In a large pot, heat the olive oil over medium heat. Add the chopped onion, carrots, and celery. Sauté for about 5 minutes, or until the vegetables are softened. Add the minced garlic and cook for another minute until fragrant.
- Cook the Soup Base: Pour in the chicken or vegetable broth and add the rinsed split peas. Stir in the bay leaf and dried thyme. If using, add the ham hock or chopped bacon at this point. Bring the mixture to a boil.
- Simmer the Soup: Once boiling, reduce the heat to low and cover the pot. Allow the soup to simmer for about 1 to 1.5 hours, or until the split peas are tender and the soup has thickened, stirring occasionally.
- Season and Serve: Remove the bay leaf and, if used, the ham hock. Season the soup with salt and pepper to taste. If you prefer a smoother texture, you can use an immersion blender to puree the soup to your desired consistency. Serve hot, garnished with fresh parsley if desired.
Extra Tips:
To enhance the flavor of your split pea soup, consider adding a smoked ham hock or bacon during cooking. This will lend a delightful smoky taste to the broth.
If you prefer a vegetarian version, verify your broth is vegetable-based and consider adding smoked paprika to emulate that smoky flavor. Additionally, if the soup becomes too thick upon standing, simply add a bit more broth or water to reach your preferred consistency.
This soup stores well, so it’s perfect for making ahead and reheating. Enjoy it with crusty bread for a complete meal.