

Cooking for a big family can be a delightful challenge, especially when you’re aiming to keep meals tasty and budget-friendly. I’ve put together 13 mild, quick, and easy dinner recipes that are perfect for feeding ten people without breaking the bank. From comforting Cheesy Chicken and Rice Casserole to hearty Beef and Bean Chili, these dishes are all about simplicity and flavor. Each recipe promises to fill everyone’s plate with deliciousness and ease your dinnertime routine. Let’s explore these wonderful meal ideas that make family dinners enjoyable and stress-free!
Cheesy Chicken and Rice Casserole
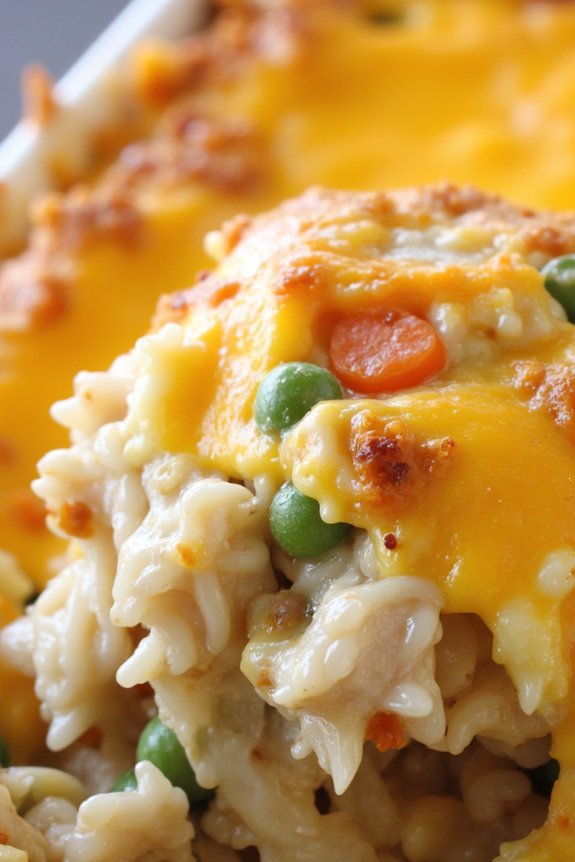
Cheesy Chicken and Rice Casserole is a comforting, family-friendly meal that’s perfect for those busy weeknights when you want something quick, easy, and satisfying. This one-dish wonder combines tender chicken, creamy cheese, and fluffy rice into a delightful casserole that’s certain to please both kids and adults alike.
With minimal prep and simple ingredients, it’s the ideal recipe for when you want to whip up something delicious without spending too much time in the kitchen. Not only is this casserole budget-friendly, but it also uses pantry staples that you likely already have on hand.
The combination of flavors and textures creates a harmonious dish that’s hearty and filling. Whether you’re serving it as a main course or as part of a larger spread, this Cheesy Chicken and Rice Casserole is certain to become a staple in your dinner rotation.
Ingredients (serves 4-6):
- 2 cups cooked chicken, shredded
- 1 cup uncooked white rice
- 2 cups chicken broth
- 1 can (10.5 oz) cream of chicken soup
- 1 cup shredded cheddar cheese
- 1/2 cup milk
- 1 small onion, chopped
- 1/2 cup frozen peas
- 1/2 cup chopped carrots
- Salt and pepper to taste
- 1 tablespoon olive oil
- 1 teaspoon garlic powder
- 1 teaspoon dried thyme
Cooking Instructions:
- Preheat the Oven: Begin by preheating your oven to 350°F (175°C). This will guarantee that your casserole cooks evenly.
- Prepare the Rice: In a large saucepan, bring the chicken broth to a boil. Add the uncooked rice, reduce heat to low, cover, and simmer for about 15 minutes until the rice is tender and the liquid is absorbed.
- Cook the Vegetables: While the rice is cooking, heat olive oil in a skillet over medium heat. Add the chopped onion, carrots, and peas. Sauté for about 5 minutes until the onions become translucent and the carrots begin to soften.
- Combine Ingredients: In a large bowl, mix the cooked rice, sautéed vegetables, shredded chicken, cream of chicken soup, milk, garlic powder, dried thyme, salt, and pepper. Stir until everything is well combined.
- Assemble the Casserole: Transfer the mixture into a greased 9×13 inch baking dish. Spread it out evenly.
- Add Cheese: Sprinkle the shredded cheddar cheese over the top of the casserole, guaranteeing even coverage.
- Bake: Place the baking dish in the preheated oven and bake for 25-30 minutes, or until the cheese is melted and bubbly.
- Serve: Once cooked, remove from the oven and let it cool for a few minutes before serving. Enjoy your Cheesy Chicken and Rice Casserole hot.
Extra Tips:
For added flavor, consider topping the casserole with some crushed crackers or breadcrumbs before baking for a crispy topping. If you prefer a bit more spice, add a pinch of cayenne pepper or some chopped green chilies to the mix.
You can also customize the vegetables based on what you have at home, such as adding bell peppers or broccoli. Make sure to taste and adjust the seasoning as needed, especially with salt and pepper, to suit your family’s preferences.
One-Pot Spaghetti With Garlic Bread
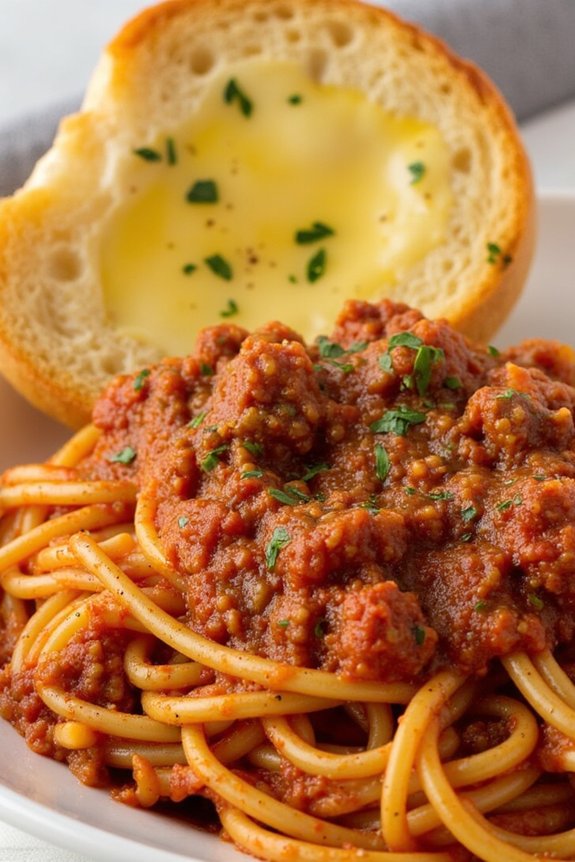
One-Pot Spaghetti With Garlic Bread is a delightful and budget-friendly meal that combines the convenience of a single pot with the classic flavors of Italian cuisine. This dish is perfect for busy families who want a quick and satisfying dinner without the hassle of multiple dishes to clean up afterward. The spaghetti is cooked together with a savory tomato sauce and seasoned ground beef, absorbing all the rich flavors, while the homemade garlic bread complements the meal with its buttery and garlicky goodness.
This recipe is designed to serve 4-6 people, making it ideal for family dinners or small gatherings. The ingredients are simple and affordable, often already found in your pantry or easily accessible at your local grocery store. By using a single pot for the spaghetti and making garlic bread in the oven simultaneously, you can streamline the cooking process and enjoy more time at the dinner table with your loved ones.
Ingredients:
- 1 lb ground beef
- 1 small onion, finely chopped
- 3 cloves garlic, minced
- 1 can (28 oz) crushed tomatoes
- 3 cups chicken broth
- 12 oz spaghetti
- 1 teaspoon Italian seasoning
- Salt and pepper, to taste
- 1 loaf of French bread
- 1/2 cup unsalted butter, softened
- 1 tablespoon garlic powder
- 2 tablespoons chopped fresh parsley
Cooking Instructions:
- Prepare the Garlic Bread: Preheat your oven to 375°F (190°C). Cut the French bread loaf in half lengthwise. In a small bowl, mix the softened butter, garlic powder, and chopped parsley. Spread the mixture evenly over the cut sides of the bread. Place the bread on a baking sheet, cut side up, and set aside.
- Cook the Beef and Onion: In a large pot or Dutch oven, heat a tablespoon of oil over medium heat. Add the chopped onion and minced garlic, sautéing until the onion becomes translucent. Add the ground beef and cook until browned, breaking it apart with a spoon as it cooks. Drain any excess fat.
- Combine Ingredients: Add the crushed tomatoes, chicken broth, Italian seasoning, salt, and pepper to the pot. Stir to combine and bring the mixture to a simmer.
- Cook the Spaghetti: Break the spaghetti in half and add it to the pot, submerging it in the sauce. Cover and let it cook for about 10-12 minutes, stirring occasionally, until the pasta is tender and has absorbed most of the sauce.
- Bake the Garlic Bread: While the spaghetti is cooking, place the prepared garlic bread in the preheated oven. Bake for 10-12 minutes, or until the edges are golden and crispy. Remove from the oven and slice before serving.
- Serve the Dish: Once the spaghetti is cooked, adjust the seasoning as needed. Serve the spaghetti hot, alongside slices of the garlic bread.
Extra Tips:
When cooking the spaghetti, make certain you stir it occasionally to prevent it from sticking to the bottom of the pot and to allow even cooking. If the sauce becomes too thick before the pasta is fully cooked, you can add a splash of water or broth.
For a more flavorful garlic bread, consider using a mix of Parmesan and mozzarella cheese on top before baking. This dish can be easily customized with additional vegetables like bell peppers or mushrooms for added nutrition and flavor.
Budget-Friendly Beef and Bean Chili

Looking for a hearty and satisfying meal that won’t break the bank? Budget-Friendly Beef and Bean Chili is your go-to dish. This recipe combines the rich flavors of ground beef with the comforting texture of beans, all simmered together in a savory tomato base. Perfect for feeding a family of 4-6, this chili isn’t only easy on your wallet but also simple to prepare, making it an ideal choice for a weeknight dinner or a weekend gathering.
With minimal prep work and a short cooking time, you can have a delicious meal ready in no time. The combination of spices and ingredients creates a robust flavor while keeping the dish nutritious and filling. You can even customize it by adding your favorite toppings like shredded cheese, sour cream, or fresh herbs. Let’s plunge into this easy-to-follow recipe and bring a taste of comfort to your dining table.
Ingredients (serves 4-6):
- 1 pound ground beef
- 1 medium onion, chopped
- 3 cloves garlic, minced
- 1 (15-ounce) can kidney beans, drained and rinsed
- 1 (15-ounce) can black beans, drained and rinsed
- 1 (14.5-ounce) can diced tomatoes
- 1 (6-ounce) can tomato paste
- 2 cups beef broth
- 2 tablespoons chili powder
- 1 teaspoon cumin
- 1 teaspoon paprika
- 1/2 teaspoon salt
- 1/4 teaspoon black pepper
- 1 tablespoon olive oil
Cooking Instructions:
- Prepare the Ingredients: Begin by chopping the onion and mincing the garlic. Drain and rinse the kidney beans and black beans.
- Cook the Beef: In a large pot, heat the olive oil over medium heat. Add the ground beef and cook until browned, breaking it apart with a spoon as it cooks. This should take about 5-7 minutes.
- Sauté the Aromatics: Add the chopped onion and minced garlic to the pot with the beef. Cook for an additional 3-4 minutes, stirring occasionally, until the onion becomes translucent and fragrant.
- Add the Tomatoes and Beans: Stir in the diced tomatoes, tomato paste, kidney beans, and black beans. Mix well to combine all the ingredients.
- Incorporate the Spices: Sprinkle the chili powder, cumin, paprika, salt, and black pepper over the mixture. Stir to guarantee the spices are evenly distributed.
- Simmer the Chili: Pour in the beef broth, stir, and bring the mixture to a simmer. Reduce the heat to low, cover, and let it cook for 20-25 minutes, stirring occasionally.
- Adjust Seasoning and Serve: Before serving, taste and adjust the seasoning if necessary. Serve hot, with optional toppings like shredded cheese, sour cream, or chopped cilantro.
Extra Tips:
To make this dish even more budget-friendly, consider using canned tomatoes and beans that are on sale or store-brand products. You can also substitute ground turkey or chicken if you prefer a lighter option.
If you have leftovers, this chili stores well in the refrigerator for up to 3 days or can be frozen for future meals. For added heat, include a pinch of cayenne pepper or a chopped jalapeño pepper. Enjoy this versatile and economical meal any day of the week!
Easy Vegetable Stir-Fry With Tofu

Easy Vegetable Stir-Fry With Tofu is a perfect option for a quick, nutritious, and budget-friendly family dinner. This dish is packed with colorful vegetables and protein-rich tofu, making it a healthy choice for everyone at the table.
The beauty of this stir-fry lies not only in its vibrant appearance but also in its versatility. You can easily swap out vegetables based on what you have available or prefer, making it a great way to use up leftover produce.
The combination of fresh vegetables, savory tofu, and a simple yet flavorful sauce creates a delightful harmony of taste and texture. The dish isn’t only easy to prepare but also adaptable for various dietary preferences, including vegetarian and vegan diets.
Whether you’re a seasoned home cook or a beginner in the kitchen, this Easy Vegetable Stir-Fry With Tofu is sure to become a favorite in your dinner rotation.
Ingredients (Serves 4-6):
- 1 block (14 oz) firm tofu
- 2 tablespoons vegetable oil
- 1 red bell pepper, sliced
- 1 yellow bell pepper, sliced
- 1 cup broccoli florets
- 1 cup snow peas
- 2 carrots, thinly sliced
- 3 green onions, chopped
- 3 cloves garlic, minced
- 1 tablespoon fresh ginger, minced
- 1/4 cup soy sauce
- 2 tablespoons hoisin sauce
- 1 tablespoon sesame oil
- 1 tablespoon cornstarch mixed with 2 tablespoons water
- Cooked rice or noodles, for serving
- Sesame seeds, for garnish
- Fresh cilantro, for garnish
Cooking Instructions:
- Prepare the Tofu: Start by draining the tofu and pressing it to remove excess moisture. Once pressed, cut the tofu into 1-inch cubes. This step is essential for achieving a crisp texture when stir-frying.
- Cook the Tofu: Heat 1 tablespoon of vegetable oil in a large non-stick skillet or wok over medium-high heat. Add the tofu cubes in a single layer. Cook for about 5-7 minutes, turning occasionally, until all sides are golden brown. Remove the tofu from the pan and set aside.
- Stir-Fry the Vegetables: In the same skillet, add the remaining tablespoon of vegetable oil. Add the garlic and ginger, and sauté for 30 seconds until fragrant. Then, add the red and yellow bell peppers, broccoli, snow peas, and carrots. Stir-fry the vegetables for about 5 minutes, or until they’re tender-crisp.
- Combine Tofu and Vegetables: Return the cooked tofu to the skillet with the vegetables. Add the soy sauce, hoisin sauce, and sesame oil, stirring well to combine everything evenly.
- Thicken the Sauce: Pour in the cornstarch mixture to thicken the sauce. Stir continuously until the sauce coats the tofu and vegetables and reaches the desired consistency, about 2 minutes.
- Finish and Serve: Remove the skillet from heat. Sprinkle with chopped green onions, sesame seeds, and fresh cilantro. Serve the stir-fry hot over a bed of cooked rice or noodles.
Extra Tips:
For an extra-crispy tofu, consider dusting the tofu cubes with cornstarch before frying. This will give them a lovely golden crust.
Feel free to adjust the sauce ingredients according to your taste preference, adding more soy sauce for saltiness or a touch of honey for sweetness. If you’re looking to add some heat, a dash of chili flakes or a splash of sriracha can elevate the dish’s flavor profile.
Quick and Mild Taco Night

Taco night is a beloved family tradition that brings everyone together around the dinner table. This Quick and Mild Taco Night recipe guarantees a delicious and satisfying meal that’s both easy on the budget and simple to prepare. Perfect for family-friendly dining, this dish features mild flavors that cater to all taste preferences, making it a hit even with the pickiest eaters.
With a preparation time of under 30 minutes, it’s a go-to meal for busy weeknights when you want to serve something tasty without spending hours in the kitchen. This recipe serves 4-6 people, making it ideal for a family gathering or a small get-together.
The focus is on traditional taco elements, such as seasoned ground beef, fresh toppings, and soft or crispy taco shells. By using common pantry staples and fresh produce, you can create a delightful taco night experience that everyone will enjoy. Customize the toppings to your family’s liking and let each person build their own perfect taco.
Ingredients:
- 1 pound ground beef
- 1 packet mild taco seasoning
- 2/3 cup water
- 12 taco shells (soft or hard)
- 1 cup shredded lettuce
- 1 cup diced tomatoes
- 1 cup shredded cheddar cheese
- 1/2 cup sour cream
- 1/4 cup chopped fresh cilantro (optional)
- 1 lime, cut into wedges
Cooking Instructions:
- Cook the Ground Beef: In a large skillet over medium heat, add the ground beef. Cook and crumble the meat until it’s browned and fully cooked, about 7-10 minutes. Drain any excess fat from the skillet.
- Season the Meat: Return the skillet to the stove and sprinkle the mild taco seasoning over the cooked beef. Pour in 2/3 cup of water and stir to incorporate the seasoning. Allow the mixture to simmer for 5 minutes, stirring occasionally, until the sauce has thickened and the flavors are well combined.
- Prepare the Toppings: While the beef is simmering, prepare your toppings. Wash and shred the lettuce, dice the tomatoes, and grate the cheddar cheese. Arrange these toppings, along with the sour cream and cilantro, in small bowls for easy access.
- Warm the Taco Shells: Preheat your oven to 350°F (175°C). Arrange the taco shells on a baking sheet and warm them in the oven for about 5 minutes, or until heated through. This step can also be done in a microwave if preferred.
- Assemble the Tacos: Once everything is ready, set up a taco assembly line. Start by filling each taco shell with a generous portion of the seasoned beef. Top with shredded lettuce, diced tomatoes, and cheddar cheese. Add a dollop of sour cream and a sprinkle of cilantro if desired. Serve with lime wedges on the side for an extra burst of freshness.
Extra Tips:
For a healthier twist, consider using ground turkey or chicken in place of beef. Additionally, you can add some black beans or corn to bulk up the filling and provide extra texture and flavor.
If you prefer a little more heat, keep a bottle of hot sauce handy for those who like their tacos with a kick. Ultimately, involve the whole family in the preparation by letting each person customize their own taco with their favorite toppings, making it a fun and interactive meal.
Simple Baked Ziti With Marinara Sauce
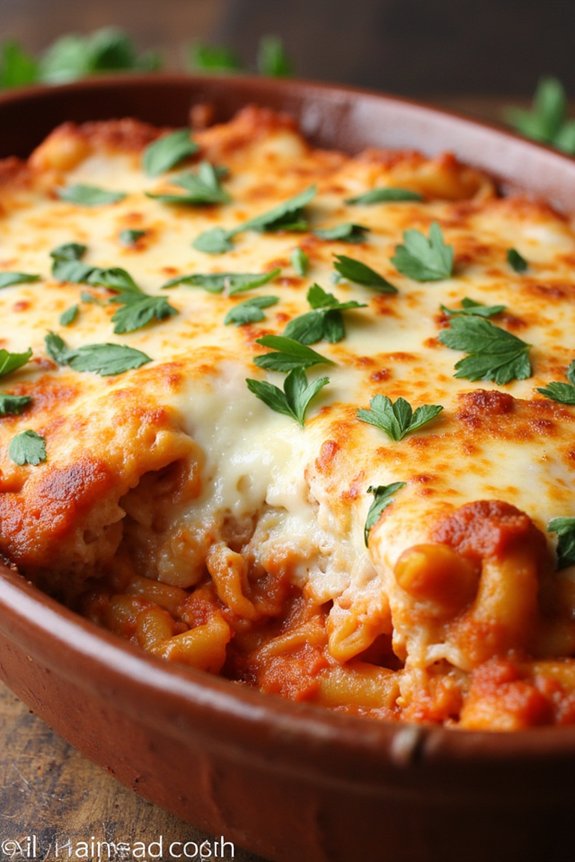
Simple Baked Ziti With Marinara Sauce is a classic Italian-American dish that brings comfort and satisfaction to any family dinner table. This hearty meal is both affordable and easy to prepare, making it perfect for busy weeknights when you want to enjoy a home-cooked meal without spending hours in the kitchen. The combination of pasta, marinara sauce, and melted cheese creates a delectable dish that’s sure to be a hit with both kids and adults alike.
Baked ziti isn’t only delicious but also versatile, allowing you to customize it with your favorite ingredients. Whether you prefer adding extra vegetables, different types of cheese, or even some protein, this dish can be easily adjusted to suit your family’s tastes. This recipe serves 4-6 people and is perfect for leftovers, which can be enjoyed the next day for lunch or dinner.
Ingredients:
- 1 pound ziti pasta
- 1 tablespoon olive oil
- 1 medium onion, chopped
- 3 cloves garlic, minced
- 1 teaspoon dried oregano
- 1 teaspoon dried basil
- 1/2 teaspoon red pepper flakes (optional)
- 1 jar (24 ounces) marinara sauce
- 1 cup ricotta cheese
- 2 cups shredded mozzarella cheese, divided
- 1/2 cup grated Parmesan cheese
- Salt and pepper, to taste
- Fresh parsley, chopped (for garnish)
Cooking Instructions:
- Preheat and Prepare: Preheat your oven to 375°F (190°C). Lightly grease a 9×13-inch baking dish and set aside.
- Cook the Pasta: Bring a large pot of salted water to a boil. Add the ziti pasta and cook until al dente, following package instructions. Drain the pasta and set aside.
- Make the Sauce: In a large skillet, heat olive oil over medium heat. Add the chopped onion and sauté until soft and translucent, about 5 minutes. Add the minced garlic, dried oregano, dried basil, and red pepper flakes (if using), and sauté for an additional minute.
- Combine with Marinara: Pour the marinara sauce into the skillet with the onion and garlic mixture. Stir to combine and let it simmer for about 5 minutes. Season with salt and pepper to taste.
- Mix Pasta and Sauce: In a large mixing bowl, combine the cooked pasta with the marinara sauce mixture. Add ricotta cheese and 1 cup of shredded mozzarella cheese, stirring until well combined.
- Assemble the Dish: Spread half of the pasta mixture into the prepared baking dish. Sprinkle with half of the remaining mozzarella cheese and half of the Parmesan cheese. Layer the rest of the pasta mixture on top and finish with the remaining mozzarella and Parmesan cheese.
- Bake: Cover the baking dish with aluminum foil and bake in the preheated oven for 20 minutes. Remove the foil and bake for an additional 10-15 minutes, or until the cheese is bubbly and golden brown.
- Garnish and Serve: Remove from the oven and let it cool for a few minutes. Garnish with fresh parsley before serving.
Extra Tips:
For a richer flavor, consider adding cooked ground beef, sausage, or even some sautéed mushrooms to the sauce. If you’re looking to add more vegetables, spinach, bell peppers, or zucchini make excellent additions.
To guarantee the pasta doesn’t become mushy, be careful not to overcook it before baking. This dish can be prepared a day in advance; simply assemble it, cover, and refrigerate it until you’re ready to bake.
Enjoy your Simple Baked Ziti With Marinara Sauce as a standalone meal or pair it with a fresh salad and garlic bread for a complete Italian feast.
Family-Sized Chicken Quesadillas

Family-Sized Chicken Quesadillas are a delicious and budget-friendly dinner option that your entire family will love. These quesadillas are packed with flavorful chicken, gooey melted cheese, and a mix of vegetables, all encased in a crispy tortilla. They’re perfect for a quick and satisfying meal that’s sure to please both adults and kids.
Plus, they’re versatile enough that you can easily customize them with your family’s favorite ingredients.
Preparing these quesadillas is simple, making it an ideal recipe for busy weeknights. Using common pantry staples, this dish comes together quickly with minimal effort. The combination of spices and fresh ingredients adds a delightful burst of flavor, while the chicken provides a hearty protein component.
Whether served on their own or with a side of salsa, guacamole, or sour cream, these Family-Sized Chicken Quesadillas are sure to become a regular part of your dinner rotation.
Ingredients (Serves 4-6):
- 2 tablespoons olive oil
- 1 pound boneless, skinless chicken breasts, diced
- 1 teaspoon chili powder
- 1 teaspoon cumin
- 1/2 teaspoon salt
- 1/4 teaspoon black pepper
- 1 red bell pepper, thinly sliced
- 1 green bell pepper, thinly sliced
- 1 small red onion, thinly sliced
- 2 cups shredded cheddar cheese
- 8 large flour tortillas
- Cooking spray
Cooking Instructions:
- Prepare the Chicken: Heat 1 tablespoon of olive oil in a large skillet over medium-high heat. Add the diced chicken, chili powder, cumin, salt, and black pepper. Cook for 6-8 minutes, stirring occasionally, until the chicken is cooked through and lightly browned. Remove the chicken from the skillet and set aside.
- Cook the Vegetables: In the same skillet, add the remaining tablespoon of olive oil. Add the sliced red and green bell peppers and the red onion. Sauté for about 5 minutes, or until the vegetables are tender. Remove from heat and set aside.
- Assemble the Quesadillas: Lay out four tortillas on a flat surface. Sprinkle half of the cheese evenly over each tortilla. Distribute the cooked chicken and sautéed vegetables evenly over the cheese, then top with the remaining cheese. Place another tortilla on top of each, pressing down gently to secure.
- Cook the Quesadillas: Spray a large skillet or griddle with cooking spray and heat over medium heat. Carefully place one assembled quesadilla in the skillet. Cook for 2-3 minutes on each side, or until the tortillas are golden brown and the cheese has melted. Repeat with the remaining quesadillas.
- Serve: Slice each quesadilla into wedges and serve immediately with your choice of salsa, guacamole, or sour cream.
Extra Tips:
For extra flavor, marinate the chicken in the spices for 30 minutes before cooking. You can also add other ingredients like black beans, corn, or jalapeños for additional texture and taste.
If you prefer a spicier version, consider adding a few dashes of hot sauce to the chicken while cooking. To save time, use pre-cooked rotisserie chicken instead of raw chicken breasts.
Creamy Chicken and Broccoli Pasta
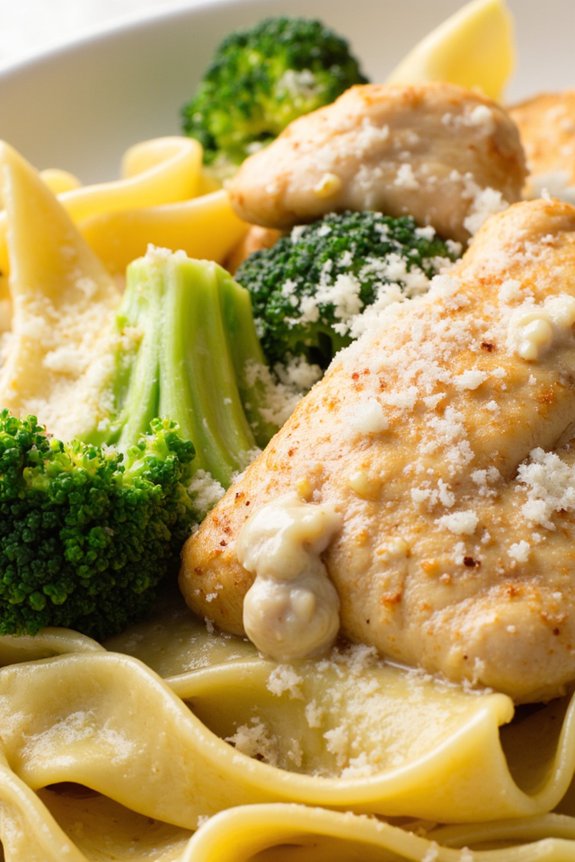
Cooking this dish is straightforward and doesn’t require any advanced culinary skills. Whether you’re a seasoned cook or a beginner, you’ll find this recipe simple to follow. The creamy sauce is made using basic ingredients that are likely already in your pantry or refrigerator.
By using chicken breasts and broccoli, you’re keeping the dish both healthy and fulfilling. The end result is a comforting pasta dish that will have everyone at the table asking for seconds.
Ingredients (Serves 4-6):
- 2 tablespoons olive oil
- 1 pound boneless, skinless chicken breasts, cut into bite-sized pieces
- Salt and pepper to taste
- 3 cups broccoli florets
- 12 ounces pasta (penne or fettuccine recommended)
- 3 tablespoons butter
- 3 cloves garlic, minced
- 2 tablespoons all-purpose flour
- 2 cups milk
- 1 cup heavy cream
- 1 cup grated Parmesan cheese
- 1 teaspoon Italian seasoning
Cooking Instructions:
- Prepare the Ingredients:
- Begin by cutting the chicken breasts into bite-sized pieces. Season them with salt and pepper.
- Cut the broccoli into florets and set aside.
- Cook the Pasta:
- In a large pot of boiling salted water, cook the pasta according to the package instructions until al dente. Drain and set aside.
- Cook the Chicken:
- In a large skillet over medium-high heat, heat the olive oil. Add the chicken pieces and cook until golden brown and cooked through, about 5-7 minutes. Remove the chicken from the skillet and set aside.
- Cook the Broccoli:
- In the same skillet, add the broccoli florets. Cook for about 3-4 minutes until they’re bright green and slightly tender. Remove from the skillet and set aside with the chicken.
- Make the Creamy Sauce:
- Lower the heat to medium and add the butter to the skillet. Once melted, add the minced garlic and cook for about 1 minute until fragrant.
- Stir in the flour and cook for another minute, stirring constantly. Gradually whisk in the milk and heavy cream, ensuring there are no lumps.
- Bring the mixture to a simmer and cook until slightly thickened, about 3-4 minutes.
- Combine Ingredients:
- Add the Parmesan cheese and Italian seasoning to the sauce, stirring until the cheese is melted and well combined.
- Return the chicken and broccoli to the skillet, stirring to coat them in the sauce.
- Add the cooked pasta to the skillet and toss everything together until well combined. Adjust seasoning with salt and pepper as needed.
Extra Tips:
To make the dish even healthier, you can substitute whole wheat pasta for regular pasta. If you prefer a bit of spice, consider adding a pinch of red pepper flakes to the sauce.
Freshly grated Parmesan cheese will give the sauce a richer flavor compared to pre-grated options. If you find the sauce too thick, add a splash of the pasta cooking water to reach the desired consistency.
Finally, make sure not to overcook the broccoli, as it should remain vibrant and slightly crisp to maintain its nutrients and texture.
Homemade Sloppy Joes

Homemade Sloppy Joes are a classic, budget-friendly meal that’s both hearty and satisfying. This dish is perfect for family dinners, combining the savory taste of seasoned ground beef with a slightly sweet and tangy sauce, all served on a soft bun.
It’s a meal that’s quick to prepare, making it ideal for busy weeknights when you want something delicious without spending too much time in the kitchen. Additionally, Sloppy Joes are versatile; you can easily add your favorite vegetables or adjust the seasoning to suit your family’s taste preferences.
This recipe serves 4-6 people and is a great way to enjoy a homemade meal without breaking the bank. Using simple ingredients that you likely already have in your pantry, you can whip up this delightful dish in no time.
The combination of flavors in Homemade Sloppy Joes makes it an all-time favorite for both kids and adults, ensuring that everyone at the dinner table leaves satisfied.
Ingredients
- 1 1/2 pounds ground beef
- 1 medium onion, chopped
- 1 bell pepper, diced
- 1 cup tomato sauce
- 1/4 cup ketchup
- 2 tablespoons brown sugar
- 1 tablespoon Worcestershire sauce
- 1 tablespoon apple cider vinegar
- 1 teaspoon garlic powder
- 1 teaspoon mustard powder
- Salt and pepper to taste
- 4-6 hamburger buns
Cooking Instructions
- Cook the Ground Beef: In a large skillet over medium heat, add the ground beef. Cook and crumble it with a spatula until it’s browned and cooked through, about 6-8 minutes. Drain any excess fat from the skillet.
- Sauté the Vegetables: Add the chopped onion and diced bell pepper to the skillet with the cooked beef. Cook for another 5 minutes, stirring occasionally, until the vegetables are softened and fragrant.
- Prepare the Sauce: In a small bowl, mix together the tomato sauce, ketchup, brown sugar, Worcestershire sauce, apple cider vinegar, garlic powder, mustard powder, salt, and pepper. Stir until well combined.
- Combine and Simmer: Pour the sauce mixture over the beef and vegetables in the skillet. Stir everything together until the beef is well coated with the sauce. Reduce the heat to low and let it simmer for about 10-15 minutes, allowing the flavors to meld.
- Serve: Toast the hamburger buns, if desired, and spoon a generous amount of the sloppy joe mixture onto the bottom half of each bun. Top with the remaining bun halves and serve immediately.
Extra Tips
For an extra nutritious twist, consider adding some finely chopped carrots or zucchini to the mix when you sauté the onions and bell peppers. This not only boosts the nutritional content but also adds extra texture to the dish.
If you prefer a spicier version, a pinch of chili powder or a splash of hot sauce can be added to the sauce mixture. Additionally, if you’re serving this to kids and are concerned about mess, try serving the sloppy joe mixture over rice or pasta instead of buns for a neater dining experience.
Hearty Vegetable Soup With Bread Rolls
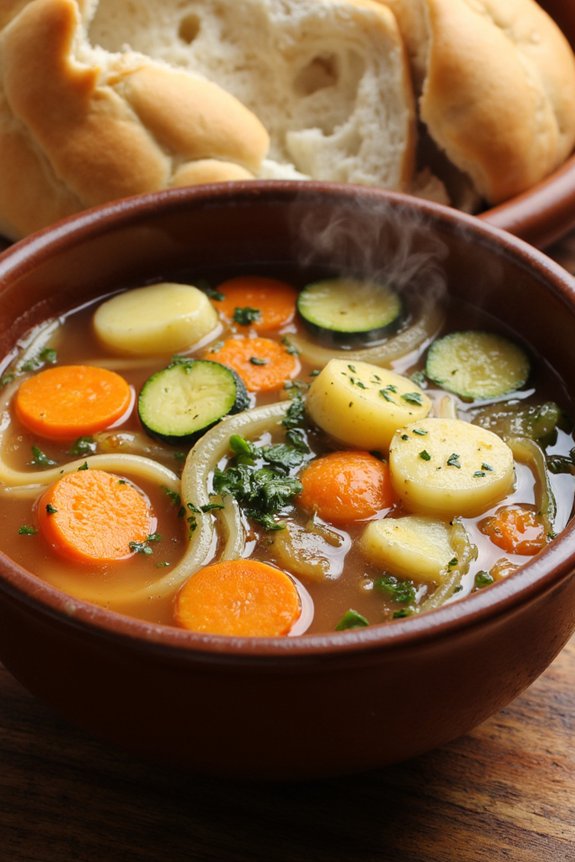
Hearty Vegetable Soup With Bread Rolls is a delightful and nutritious meal that’s perfect for families looking to enjoy a cozy dinner together without breaking the bank. This dish combines a variety of fresh vegetables simmered in a rich broth, resulting in a flavorful soup that’s both satisfying and hearty.
Paired with warm, fluffy bread rolls, this meal is sure to be a hit with both adults and children alike. Not only is this soup easy on the wallet, but it also allows you to incorporate an abundance of vitamins and minerals into your family’s diet.
Ideal for chilly nights or anytime you crave a comforting meal, this Hearty Vegetable Soup With Bread Rolls is as simple to prepare as it’s delicious. With a few basic ingredients and a bit of time on the stove, you can create a nourishing dinner that will warm your family’s hearts and stomachs.
Plus, the bread rolls can be made from scratch or purchased from your local bakery, making this dish adaptable to your schedule and cooking preferences.
Ingredients (Serves 4-6):
- 2 tablespoons olive oil
- 1 large onion, chopped
- 2 cloves garlic, minced
- 3 carrots, sliced
- 2 stalks celery, sliced
- 2 potatoes, peeled and diced
- 1 zucchini, diced
- 1 can (14.5 oz) diced tomatoes
- 6 cups vegetable broth
- 1 teaspoon dried thyme
- 1 teaspoon dried basil
- Salt and pepper to taste
- 1 cup frozen green beans
- 1 cup frozen corn
- 1 loaf of bread rolls or 6 individual rolls
Cooking Instructions:
- Prepare the Vegetables: Begin by washing and chopping all the vegetables. This includes chopping the onion, mincing the garlic, slicing the carrots and celery, and dicing the potatoes and zucchini.
- Sauté the Aromatics: In a large pot, heat the olive oil over medium heat. Add the chopped onion and garlic, and sauté until the onion becomes translucent, about 5 minutes.
- Add the Vegetables: Add the carrots, celery, potatoes, and zucchini to the pot. Stir well to combine with the onion and garlic, and cook for another 5 minutes.
- Incorporate the Broth and Tomatoes: Pour the vegetable broth and diced tomatoes into the pot. Stir in the dried thyme and basil, and season with salt and pepper to taste.
- Simmer the Soup: Bring the mixture to a boil, then reduce the heat to low. Cover the pot and let the soup simmer for about 30 minutes, or until the vegetables are tender.
- Add Frozen Vegetables: Stir in the frozen green beans and corn. Continue to simmer for an additional 10 minutes.
- Prepare the Bread Rolls: While the soup is simmering, preheat your oven according to the package instructions for the bread rolls. Bake the rolls until golden brown and heated through.
- Serve: Once the soup is ready, ladle it into bowls and serve hot alongside the freshly baked bread rolls.
Extra Tips:
For an even heartier soup, you can add a can of drained beans such as cannellini or chickpeas to increase the protein content. If you prefer a spicier kick, consider adding a pinch of red pepper flakes during the sautéing process.
To keep the bread rolls warm longer, cover them with a clean kitchen towel after baking. Finally, this soup can be easily adapted with whatever vegetables are in season or on sale, making it a versatile option for any time of the year.
Classic Meatloaf With Mashed Potatoes
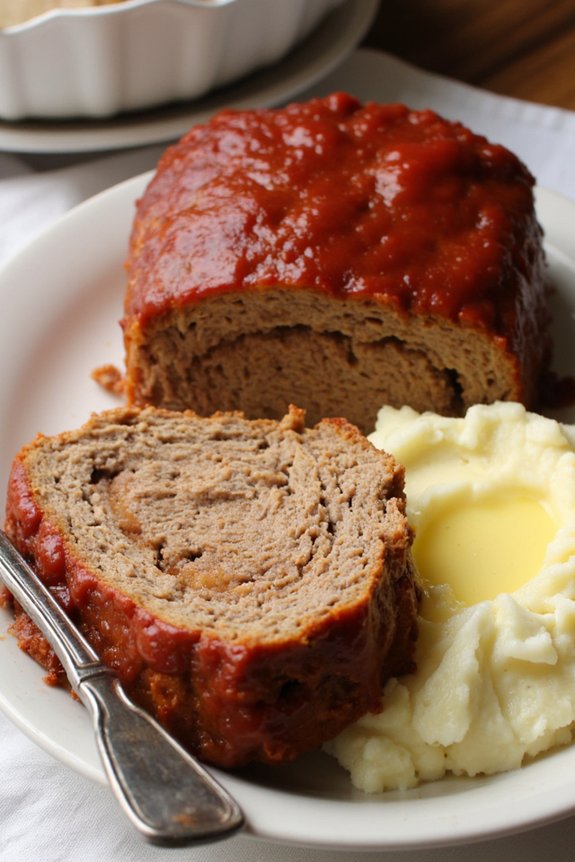
Classic Meatloaf With Mashed Potatoes is a comforting and budget-friendly dinner option that your whole family will love. This hearty dish combines ground meat, breadcrumbs, and a blend of savory spices to create a flavorful meatloaf, perfectly complemented by creamy, buttery mashed potatoes.
Whether you’re looking for a cozy weeknight dinner or a meal to satisfy a crowd, this recipe is sure to become a family favorite. The meatloaf is baked to perfection, allowing the flavors to meld together while maintaining a moist and tender texture.
Paired with fluffy mashed potatoes, this dish offers a satisfying combination of textures and flavors. Not only is it delicious, but it’s also easy to prepare, making it an ideal choice for busy weeknights. Let’s explore the recipe for Classic Meatloaf With Mashed Potatoes, designed to serve 4-6 people.
Ingredients:
*For the Meatloaf:*
- 2 pounds ground beef
- 1 cup breadcrumbs
- 1/2 cup milk
- 1/2 cup onion, finely chopped
- 2 cloves garlic, minced
- 2 large eggs
- 1 tablespoon Worcestershire sauce
- 1 teaspoon salt
- 1/2 teaspoon black pepper
- 1/2 cup ketchup
For the Mashed Potatoes:
- 2 pounds potatoes, peeled and cubed
- 1/4 cup butter
- 1/2 cup milk
- Salt and pepper to taste
Instructions:
- Preheat the Oven: Begin by preheating your oven to 350°F (175°C). This guarantees that the oven is ready for baking once the meatloaf is prepared.
- Prepare the Meatloaf Mixture: In a large bowl, combine the ground beef, breadcrumbs, milk, chopped onion, minced garlic, eggs, Worcestershire sauce, salt, and black pepper. Mix everything together until well combined, but avoid overmixing to guarantee the meatloaf remains tender.
- Shape the Meatloaf: Transfer the meat mixture to a loaf pan or shape it into a loaf on a baking sheet lined with parchment paper. Spread the ketchup evenly over the top of the loaf for added flavor and moisture.
- Bake the Meatloaf: Place the meatloaf in the preheated oven and bake for 1 hour, or until the internal temperature reaches 160°F (70°C). Once cooked, let it rest for about 10 minutes before slicing.
- Cook the Potatoes: While the meatloaf is baking, place the cubed potatoes in a large pot and cover with water. Bring to a boil over high heat, then reduce to a simmer and cook until the potatoes are tender, about 15-20 minutes.
- Mash the Potatoes: Drain the cooked potatoes and return them to the pot. Add the butter and milk, then mash until you reach the desired consistency. Season with salt and pepper to taste.
- Serve: Slice the meatloaf and serve alongside a generous portion of mashed potatoes. Enjoy your Classic Meatloaf With Mashed Potatoes with a side of green vegetables for a complete meal.
Extra Tips:
For an extra flavorful meatloaf, consider adding a mix of ground pork or turkey to the beef. You can also enhance the mashed potatoes by incorporating roasted garlic or a sprinkle of cheese.
If you prefer a smoother texture for your mashed potatoes, use a potato ricer or hand mixer. Additionally, any leftover meatloaf makes excellent sandwiches for the next day, offering a convenient and tasty lunch option.
Mild Curry Chicken and Rice
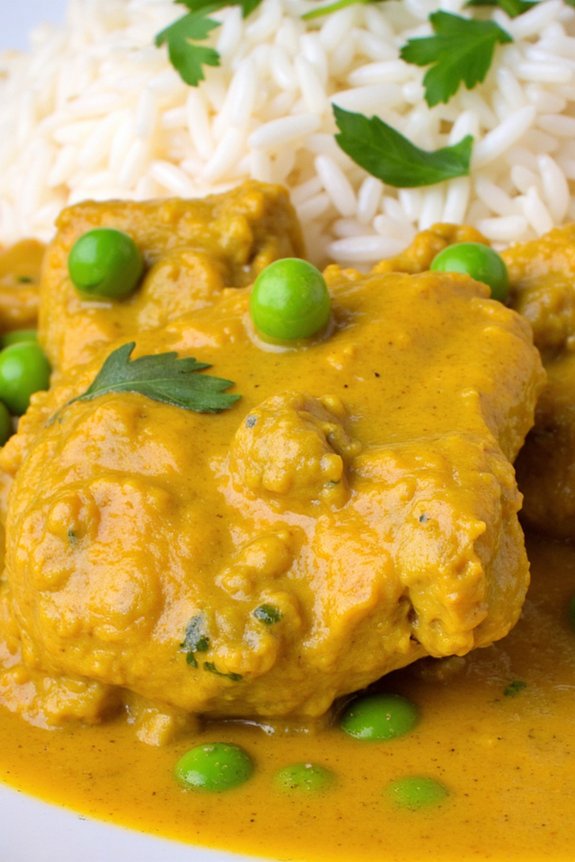
Mild Curry Chicken and Rice is a delightful dish that combines tender chicken pieces with aromatic spices and fluffy rice. This recipe is perfect for families who love a bit of flavor but prefer a milder curry without the intense heat.
It’s a comforting and satisfying meal that’s both easy on the wallet and simple to prepare. With the blend of spices and the creaminess from coconut milk, this dish is sure to become a family favorite.
Ideal for serving 4-6 people, this recipe can easily be adapted to suit your taste preferences. Whether you want to add more vegetables or adjust the spice levels, Mild Curry Chicken and Rice is a versatile dish that can be tailored to your family’s liking.
The following ingredients and instructions will guide you in creating a delicious and wholesome meal that everyone will enjoy.
Ingredients:
- 1.5 lbs chicken breast, cut into bite-sized pieces
- 2 tablespoons vegetable oil
- 1 large onion, diced
- 2 cloves garlic, minced
- 1 tablespoon ginger, grated
- 2 tablespoons mild curry powder
- 1 teaspoon ground cumin
- 1 teaspoon ground coriander
- 1 can (14 oz) coconut milk
- 1 cup chicken broth
- 1 tablespoon tomato paste
- Salt and pepper to taste
- 1 cup basmati rice
- 2 cups water
- Fresh cilantro, chopped (for garnish)
- Optional: 1 cup peas or diced carrots
Cooking Instructions:
- Prepare the Rice: Start by rinsing the basmati rice under cold water until the water runs clear. This helps to remove excess starch and prevents the rice from becoming sticky.
- Cook the Rice: In a medium saucepan, bring 2 cups of water to a boil. Add the rinsed rice, reduce the heat to low, cover, and simmer for about 15 minutes or until the rice is tender and all the water is absorbed. Remove from heat and let it sit covered for an additional 5 minutes, then fluff with a fork.
- Sauté the Aromatics: In a large skillet or pot, heat the vegetable oil over medium heat. Add the diced onion and sauté until translucent, about 5 minutes. Stir in the minced garlic and grated ginger, cooking for another minute until fragrant.
- Cook the Chicken: Add the chicken pieces to the skillet and cook until they’re browned on all sides, about 5-7 minutes.
- Add the Spices: Sprinkle the mild curry powder, ground cumin, and ground coriander over the chicken. Stir well to coat the chicken evenly with the spices.
- Simmer the Curry: Pour in the coconut milk, chicken broth, and tomato paste, stirring to combine. Bring the mixture to a gentle simmer and cook for about 15 minutes, allowing the flavors to meld and the chicken to cook through. Season with salt and pepper to taste.
- Add Optional Vegetables: If using peas or diced carrots, stir them into the curry during the last 5 minutes of cooking to heat through.
- Serve: Serve the curry chicken over the cooked rice, garnished with freshly chopped cilantro.
Extra Tips:
For a richer flavor, consider marinating the chicken in the spices for 30 minutes to an hour before cooking.
If you prefer more heat, you can add a pinch of cayenne pepper or a chopped chili to the dish. Additionally, if you’re looking to make this dish even more budget-friendly, feel free to substitute chicken thighs for the breast, as they’re often cheaper and add extra flavor to the curry.
Oven-Baked Fish and Chips
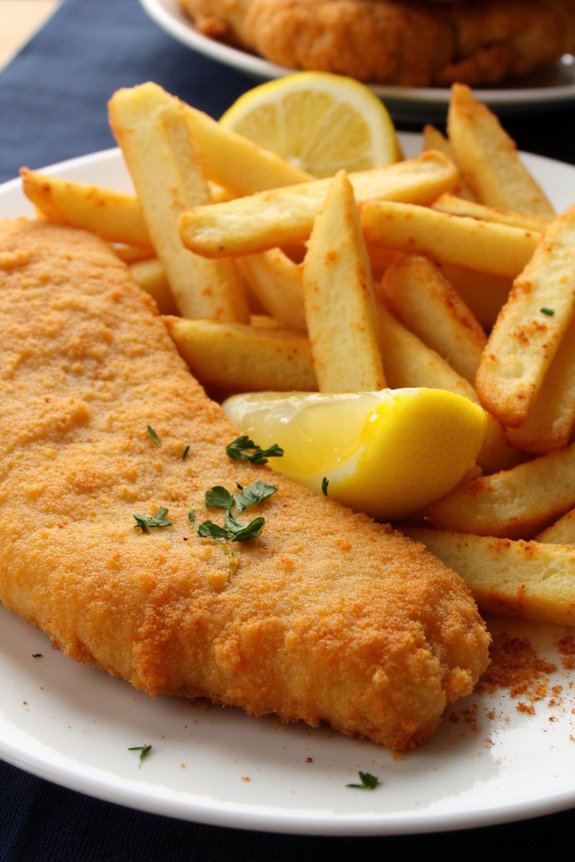
Fish and chips is a classic dish that many enjoy, but it can often be seen as a treat rather than a regular dinner option due to the high cost of eating out. By making oven-baked fish and chips at home, you can enjoy this delicious meal more often while keeping it budget-friendly. This homemade version isn’t only cost-effective but also healthier since it avoids the deep-frying process, reducing the amount of oil used considerably.
Plus, the crispy texture of oven-baked fish and the perfectly seasoned chips will make this a family favorite in no time. This recipe for oven-baked fish and chips is designed to serve 4-6 people, making it an ideal choice for a family dinner. The dish combines tender fillets of white fish with golden, oven-baked potato chips seasoned to perfection.
It’s an easy meal to prepare, taking around 45 minutes from start to finish, which makes it perfect for busy weeknights. With just a few simple ingredients, you can create a meal that’s both satisfying and delicious, bringing the taste of the seaside right to your kitchen.
Ingredients (Serves 4-6):
- 4-6 white fish fillets (such as cod or haddock)
- 4 large potatoes
- 1 cup all-purpose flour
- 2 eggs
- 1 cup breadcrumbs
- 1 teaspoon paprika
- 1 teaspoon garlic powder
- Salt and pepper, to taste
- 3 tablespoons olive oil
- Lemon wedges, for serving
- Fresh parsley, chopped (optional, for garnish)
Cooking Instructions:
- Preheat the Oven: Begin by preheating your oven to 425°F (220°C). This high temperature will help guarantee that both the fish and chips come out crispy and golden brown.
- Prepare the Potatoes: Wash and peel the potatoes, then cut them into thick chips or wedges. Place them in a large bowl of cold water and let them soak for about 10 minutes. This helps to remove some of the starch, resulting in crisper chips.
- Season the Chips: Drain the potatoes and pat them dry with a clean kitchen towel. In a large bowl, toss the potato chips with 2 tablespoons of olive oil, paprika, garlic powder, salt, and pepper until they’re well coated.
- Bake the Chips: Spread the seasoned potato chips evenly on a baking sheet lined with parchment paper. Make sure they’re in a single layer to guarantee even cooking. Bake in the preheated oven for 25-30 minutes, turning halfway through, until they’re golden brown and crispy.
- Prepare the Fish: While the chips are baking, pat the fish fillets dry with paper towels. Season them with salt and pepper. Set up a breading station with three shallow dishes: one with flour, one with beaten eggs, and one with breadcrumbs.
- Bread the Fish: Dredge each fish fillet first in the flour, then dip it into the egg, and finally coat it with breadcrumbs, ensuring each fillet is evenly covered.
- Bake the Fish: Place the breaded fish fillets on a separate baking sheet lined with parchment paper and drizzle with the remaining 1 tablespoon of olive oil. Once the chips are halfway done, add the fish to the oven and bake for about 15-20 minutes until the fish is cooked through and the coating is crispy.
- Serve: Remove both the fish and chips from the oven. Serve immediately with lemon wedges on the side and a sprinkle of fresh parsley if desired.
Extra Tips:
For an extra crunch, try using panko breadcrumbs instead of regular breadcrumbs, as they provide a lighter and crispier coating. If you prefer a bit of spice, add a pinch of cayenne pepper to the breadcrumb mixture.
Confirm the fish fillets are of uniform thickness to promote even cooking. Additionally, you can make this dish gluten-free by using gluten-free flour and breadcrumbs. Finally, pairing this meal with a homemade tartar sauce or a side of mushy peas can elevate the dish further, giving you a true fish and chips experience.