

As a food enthusiast who loves keeping dinner exciting and varied, I understand the challenge of finding balanced meals that don’t center around chicken. It’s a chance to get creative in the kitchen and try something new. From the comforting warmth of a lentil stew to the zestiness of shrimp tacos, there’s so much to explore. Each recipe brings its own delightful twist. I’m excited to share how these meals have added a flavorful spark to my family’s dinners.
Savory Lentil and Vegetable Stew
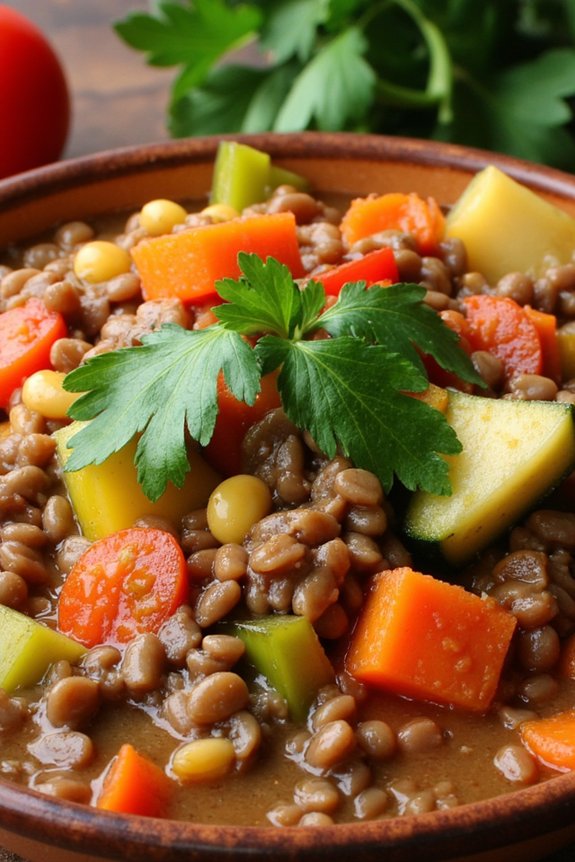
Savory Lentil and Vegetable Stew is a hearty and nutritious dish that’s perfect for a balanced family dinner. This stew brings together the earthy flavors of lentils with a medley of fresh vegetables, creating a wholesome meal that’s both satisfying and nourishing. Packed with plant-based protein and fiber, it’s an ideal choice for those looking to incorporate more vegetarian meals into their diet.
Whether you’re cooking for a large family or just want to have leftovers for the next day, this stew is versatile and easy to prepare. This recipe is designed to serve 4-6 people, making it an excellent option for a family meal or a gathering with friends.
The combination of lentils, vegetables, and herbs offers a rich and comforting taste that both adults and children will enjoy. The slow simmering process allows the flavors to meld together, resulting in a stew that’s bursting with taste and aroma. Serve it with a slice of crusty bread or over a bed of rice for a complete meal.
Ingredients:
- 1 cup of green or brown lentils
- 2 tablespoons olive oil
- 1 large onion, diced
- 2 cloves garlic, minced
- 2 carrots, peeled and sliced
- 2 celery stalks, sliced
- 1 bell pepper, diced
- 1 zucchini, sliced
- 1 can (14.5 ounces) of diced tomatoes
- 4 cups of vegetable broth
- 1 teaspoon dried thyme
- 1 teaspoon dried basil
- 1 bay leaf
- Salt and pepper to taste
- Fresh parsley for garnish
Cooking Instructions:
- Prepare the Lentils: Rinse the lentils under cold water in a fine mesh sieve. Make sure to remove any debris or stones. Set them aside to drain.
- Sauté the Aromatics: In a large pot or Dutch oven, heat the olive oil over medium heat. Add the diced onion and sauté for about 5 minutes until it becomes translucent. Stir in the minced garlic and cook for another 1 minute until fragrant.
- Add Vegetables: Add the sliced carrots, celery, bell pepper, and zucchini to the pot. Stir well and cook for about 5 minutes, allowing the vegetables to soften slightly.
- Combine with Tomatoes and Broth: Pour in the diced tomatoes and vegetable broth. Stir well to combine all ingredients.
- Season the Stew: Add the rinsed lentils, dried thyme, dried basil, and bay leaf to the pot. Stir everything together and bring the mixture to a boil.
- Simmer the Stew: Once boiling, reduce the heat to low, cover the pot, and let the stew simmer for 35-40 minutes. Stir occasionally, and check the lentils for doneness. They should be tender but not mushy.
- Final Seasoning: Remove the bay leaf, and season the stew with salt and pepper to taste. Adjust the seasoning based on your preference.
- Serve: Ladle the stew into bowls and garnish with fresh parsley. Serve hot with bread or over rice if desired.
Extra Tips:
For a richer flavor, consider adding a splash of red wine or a tablespoon of tomato paste during the simmering process. If you prefer a thicker stew, you can mash some of the lentils against the side of the pot before serving.
Feel free to experiment with additional vegetables such as potatoes, spinach, or kale for added nutrients. Remember to store any leftovers in an airtight container in the refrigerator for up to three days. Reheat gently on the stove, adding a bit of broth or water if needed to achieve the desired consistency.
Grilled Salmon With Lemon-Dill Sauce

Grilled Salmon With Lemon-Dill Sauce is a delightful and nutritious dish perfect for a balanced family dinner. The rich flavor of the salmon is complemented by the tangy and fresh lemon-dill sauce, making this meal both satisfying and healthy. Ideal for a family of 4-6, this recipe guarantees everyone gets a generous serving of flavorful fish seasoned to perfection.
The dish isn’t only easy to prepare but also quick to cook, making it a great choice for busy weeknights or a special weekend dinner. Salmon is an excellent source of omega-3 fatty acids and high-quality protein, while the lemon-dill sauce adds a revitalizing twist that enhances the natural taste of the fish.
Grilling the salmon allows it to develop a delightful char while maintaining its moisture and tenderness. This recipe pairs well with a side of roasted vegetables or a fresh green salad, making it a complete meal that the whole family will love.
Ingredients (Serves 4-6):
- 4-6 salmon fillets (about 6 oz each)
- Salt and freshly ground black pepper, to taste
- 2 tablespoons olive oil
- 1 lemon, thinly sliced
- Fresh dill sprigs, for garnish
For the Lemon-Dill Sauce:
- 1/2 cup plain Greek yogurt
- 1 tablespoon mayonnaise
- 2 tablespoons fresh lemon juice
- 2 teaspoons lemon zest
- 2 tablespoons fresh dill, chopped
- 1 garlic clove, minced
- Salt and freshly ground black pepper, to taste
Cooking Instructions:
- Prepare the Grill: Preheat the grill to medium-high heat. If using a charcoal grill, wait until the coals are covered with gray ash. Clean the grill grates thoroughly and lightly oil them to prevent sticking.
- Season the Salmon: Pat the salmon fillets dry with paper towels. Brush each fillet with olive oil and season with salt and freshly ground black pepper. Place a slice of lemon on top of each fillet.
- Grill the Salmon: Place the salmon fillets on the grill, skin-side down. Cover and grill for about 6-8 minutes per side, or until the salmon is opaque and flakes easily with a fork. Be careful not to overcook to keep the salmon moist.
- Make the Lemon-Dill Sauce: While the salmon is grilling, combine Greek yogurt, mayonnaise, lemon juice, lemon zest, chopped dill, and minced garlic in a bowl. Mix well and season with salt and pepper to taste.
- Serve: Once the salmon is cooked, remove it from the grill and let it rest for a minute. Serve the salmon fillets with a generous dollop of lemon-dill sauce on the side. Garnish with fresh dill sprigs for extra flavor and presentation.
Extra Tips:
When grilling salmon, it’s important to keep an eye on the cooking time to guarantee the fish stays moist and tender. If you’re using a gas grill, preheat it with the lid closed to ensure even cooking.
For added flavor, you can also add a cedar plank to the grilling process, which will infuse the salmon with a subtle smoky aroma. This dish pairs well with a crisp white wine or a light, invigorating sparkling water. Enjoy your Grilled Salmon With Lemon-Dill Sauce with roasted vegetables or a fresh salad for a well-rounded, healthy meal.
Beef and Broccoli Stir-Fry
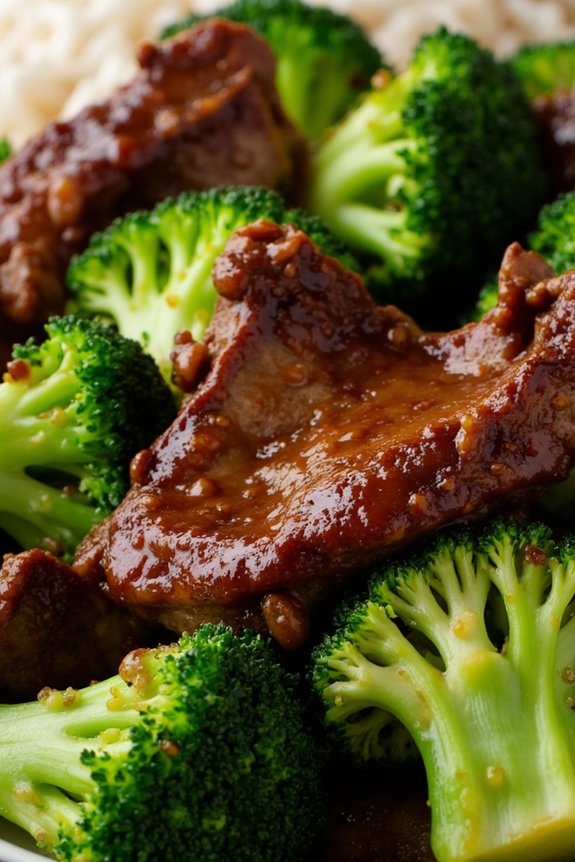
To guarantee the best results, choose a cut of beef that’s tender and cooks quickly, such as flank steak or sirloin. The secret to a great stir-fry is high heat and fast cooking, which helps to lock in the flavors while keeping the vegetables vibrant and the meat juicy.
Pair this stir-fry with steamed rice or noodles to create a complete meal that’s sure to please everyone at the table.
Ingredients for 4-6 servings:
- 1 pound of flank steak or sirloin, thinly sliced against the grain
- 4 cups of broccoli florets
- 3 tablespoons of soy sauce
- 2 tablespoons of oyster sauce
- 1 tablespoon of cornstarch
- 1 tablespoon of sesame oil
- 2 tablespoons of vegetable oil
- 3 cloves of garlic, minced
- 1-inch piece of ginger, minced
- 1/4 cup of beef broth
- Cooked rice or noodles, for serving
Cooking Instructions:
- Marinate the Beef: In a bowl, combine the sliced beef with 1 tablespoon of soy sauce and the cornstarch. Mix well to coat the beef evenly and set aside for at least 10 minutes to allow the flavors to meld.
- Prepare the Sauce: In a small bowl, whisk together the remaining soy sauce, oyster sauce, and beef broth. This will be the stir-fry sauce.
- Cook the Broccoli: Heat 1 tablespoon of vegetable oil in a large skillet or wok over medium-high heat. Add the broccoli florets and stir-fry for about 3-4 minutes until they’re bright green and tender-crisp. Remove the broccoli from the pan and set aside.
- Sauté the Aromatics: In the same pan, add the remaining vegetable oil. Add the minced garlic and ginger, stirring for about 30 seconds until fragrant.
- Cook the Beef: Increase the heat to high and add the marinated beef to the skillet. Stir-fry for about 3-4 minutes until the beef is browned and cooked through.
- Combine Ingredients: Return the broccoli to the pan with the beef. Pour the prepared sauce over everything and stir well to combine. Cook for an additional 2 minutes, confirming that everything is well-coated in the sauce.
- Finish with Sesame Oil: Drizzle the sesame oil over the stir-fry and give it one last toss to incorporate the flavors.
- Serve: Transfer the beef and broccoli stir-fry to a serving dish and enjoy with steamed rice or noodles.
Extra Tips:
For the best texture, make sure to cut the beef thinly against the grain; this helps to keep it tender.
When stir-frying, it’s essential to keep the heat high and to move quickly to avoid overcooking the ingredients. If you prefer a bit more sauce, you can double the sauce ingredients.
Also, feel free to add other vegetables like bell peppers or snow peas to customize the dish to your family’s liking.
Remember to have all your ingredients prepped and ready to go before you start cooking, as stir-frying is a fast process.
Creamy Mushroom Risotto
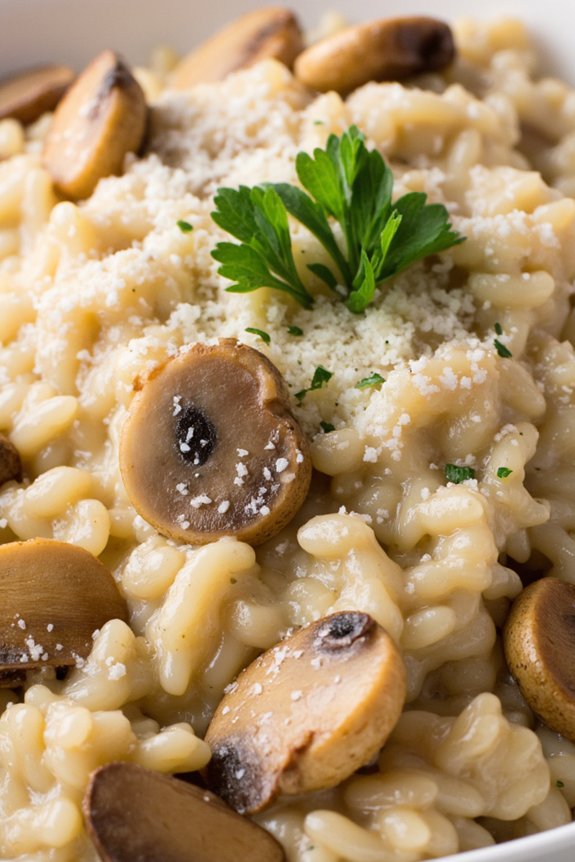
Creamy Mushroom Risotto is a comforting and rich dish perfect for a balanced family dinner. This classic Italian recipe combines creamy Arborio rice with earthy mushrooms, resulting in a dish that’s both satisfying and indulgent. The slow cooking process allows the rice to absorb the flavors of the broth and mushrooms, creating a luscious consistency that pairs beautifully with a sprinkling of Parmesan cheese.
This recipe isn’t only delicious but also provides a wonderful opportunity to gather and enjoy a meal with family, making it a staple for cozy nights at home.
Mushrooms, the star of this dish, bring an umami depth that complements the creamy texture of the risotto. The addition of white wine and fresh herbs enhances the complexity of flavors, while the consistent stirring guarantees a smooth and velvety finish. This recipe is designed to serve 4-6 people, making it ideal for a family meal or small gathering.
With a balance of carbohydrates, healthy fats, and proteins, this Creamy Mushroom Risotto is a wholesome choice that doesn’t compromise on taste.
Ingredients for 4-6 Servings:
- 2 cups Arborio rice
- 1 pound (about 450g) mixed mushrooms (such as cremini, shiitake, or button), sliced
- 1 small onion, finely chopped
- 3 cloves garlic, minced
- 1/2 cup dry white wine
- 6 cups vegetable or chicken broth
- 1/2 cup grated Parmesan cheese
- 2 tablespoons olive oil
- 3 tablespoons butter
- Salt and pepper to taste
- Fresh parsley, chopped (for garnish)
Cooking Instructions:
- Prepare the Broth: In a saucepan, warm the vegetable or chicken broth over low heat. It’s important to keep the broth warm so it can be easily absorbed by the rice during cooking.
- Cook the Mushrooms: In a large pan, heat 1 tablespoon of olive oil and 1 tablespoon of butter over medium heat. Add the sliced mushrooms and cook until they’re golden brown and any liquid they release has evaporated. Remove the mushrooms from the pan and set aside.
- Sauté the Aromatics: In the same pan, add the remaining olive oil and butter. Sauté the chopped onion over medium heat until translucent. Add the minced garlic and cook for another minute until fragrant.
- Toast the Rice: Add the Arborio rice to the pan with the onions and garlic. Stir continuously for about 2 minutes until the rice is well coated and slightly toasted.
- Deglaze with Wine: Pour in the white wine and stir until it’s mostly absorbed by the rice. This step adds depth and richness to the risotto.
- Begin Adding Broth: Add a ladleful of warm broth to the rice, stirring constantly until the liquid is mostly absorbed. Continue adding broth, one ladleful at a time, stirring frequently and waiting until the liquid is absorbed before adding more. This process should take about 18-20 minutes.
- Add Mushrooms and Cheese: Once the rice is creamy and cooked to al dente, stir in the cooked mushrooms and grated Parmesan cheese. Season with salt and pepper to taste.
- Finish and Serve: Remove from heat and let the risotto sit for a minute. Garnish with fresh parsley before serving.
Extra Tips:
For the best results, use a good quality Arborio rice as it provides the creamy texture risotto is known for. It’s essential to stir the risotto frequently; this helps release the starches from the rice, resulting in a creamy consistency.
If you prefer a more intense mushroom flavor, consider using a mushroom broth instead of vegetable or chicken broth. Finally, always taste and adjust seasoning towards the end of cooking, as the saltiness of the broth and Parmesan can vary.
Enjoy your Creamy Mushroom Risotto with a glass of the same white wine used in the recipe for a delightful dining experience.
Spicy Shrimp Tacos With Avocado Crema

Spicy Shrimp Tacos With Avocado Crema are a delightful and balanced meal that’s perfect for a family dinner. These tacos combine succulent, spicy shrimp with a creamy, invigorating avocado sauce, all wrapped up in warm tortillas. The contrast of flavors and textures makes this dish an exciting experience for your taste buds. It’s not only flavorful but also packed with nutrients, offering a great source of protein from the shrimp and healthy fats from the avocado. This dish is ideal for a fun family meal that brings everyone together over a delicious plate of tacos.
Preparing the Spicy Shrimp Tacos With Avocado Crema is a straightforward process that doesn’t require much time, making it an excellent choice for busy weeknights. The shrimp are seasoned with just the right amount of spice to give them a kick without overwhelming the palate. Meanwhile, the avocado crema adds a smooth, cooling element that complements the heat perfectly.
Serve these tacos with a side of fresh lime wedges and your choice of toppings such as shredded cabbage or sliced jalapeños to enhance the dining experience.
Ingredients (Serves 4-6):
- 1 1/2 pounds large shrimp, peeled and deveined
- 2 tablespoons olive oil
- 1 tablespoon chili powder
- 1 teaspoon paprika
- 1 teaspoon garlic powder
- 1/2 teaspoon onion powder
- 1/2 teaspoon cumin
- Salt and pepper to taste
- 8-12 small corn or flour tortillas
- 2 ripe avocados
- 1/4 cup sour cream
- 2 tablespoons lime juice
- 1/4 cup fresh cilantro leaves, chopped
- Optional toppings: shredded cabbage, sliced jalapeños, lime wedges
Cooking Instructions:
- Prepare the Shrimp: In a large bowl, combine the shrimp with olive oil, chili powder, paprika, garlic powder, onion powder, cumin, salt, and pepper. Mix until the shrimp are evenly coated with the spices.
- Cook the Shrimp: Heat a large skillet over medium-high heat. Once hot, add the shrimp in a single layer. Cook for 2-3 minutes on each side, or until the shrimp are pink and opaque. Remove from heat and set aside.
- Make the Avocado Crema: In a blender or food processor, combine the avocados, sour cream, lime juice, and cilantro. Blend until smooth and creamy. Adjust seasoning with salt and pepper to taste.
- Warm the Tortillas: In a dry skillet over medium heat, warm the tortillas one at a time until they’re pliable and slightly charred, about 30 seconds per side.
- Assemble the Tacos: Spread a generous spoonful of avocado crema on each tortilla. Top with a few shrimp and add your choice of optional toppings like shredded cabbage or sliced jalapeños. Serve with lime wedges on the side.
Extra Tips:
When preparing the shrimp, be careful not to overcook them, as they can become rubbery. They should be cooked just until they turn pink and opaque.
For an extra burst of flavor, consider marinating the shrimp for 15-30 minutes before cooking. If you prefer more heat, feel free to add a pinch of cayenne pepper to the shrimp seasoning.
The avocado crema can be made ahead of time and stored in the fridge, covered with plastic wrap directly on the surface to prevent browning.
Eggplant Parmesan With Fresh Basil

Eggplant Parmesan With Fresh Basil is a classic Italian dish that combines layers of breaded and fried eggplant slices with rich marinara sauce, creamy mozzarella, and the aromatic touch of fresh basil. This hearty and satisfying meal is perfect for family dinners, offering a delicious balance of flavors and textures.
The eggplant slices are first coated in breadcrumbs, then baked until golden and crispy before being layered with the sauce and cheese, creating a delightful combination that will have everyone coming back for seconds.
This recipe serves 4-6 people, making it ideal for a family gathering or a cozy night in. The use of fresh basil not only adds a vibrant flavor but also a beautiful garnish that elevates the presentation of the dish.
Whether you’re a seasoned cook or a beginner looking to try something new, Eggplant Parmesan With Fresh Basil is a rewarding dish that will quickly become a favorite at your dinner table.
Ingredients:
- 2 medium-sized eggplants
- 1 cup all-purpose flour
- 4 large eggs
- 2 cups breadcrumbs
- 1 teaspoon salt
- 1 teaspoon black pepper
- 1 teaspoon dried oregano
- 2 cups marinara sauce
- 2 cups shredded mozzarella cheese
- 1 cup grated Parmesan cheese
- 1/4 cup olive oil
- 1/2 cup fresh basil leaves
- Cooking spray
Cooking Instructions:
- Prepare the Eggplant: Preheat your oven to 375°F (190°C). Slice the eggplants into 1/4-inch thick rounds. Sprinkle salt on both sides of the eggplant slices and let them sit for about 30 minutes to draw out excess moisture. Rinse and pat them dry with a paper towel.
- Bread the Eggplant: Set up a breading station with three shallow bowls. Place flour in the first bowl. In the second bowl, beat the eggs. In the third bowl, combine breadcrumbs, salt, pepper, and oregano. Dip each eggplant slice in flour, then egg, and finally coat with breadcrumb mixture.
- Bake the Eggplant: Arrange the breaded eggplant slices on a baking sheet lined with parchment paper. Lightly spray them with cooking spray or drizzle with a bit of olive oil. Bake in the preheated oven for about 25 minutes, flipping halfway through, until golden and crispy.
- Assemble the Dish: In a large baking dish, spread a thin layer of marinara sauce. Arrange a layer of baked eggplant slices over the sauce. Top with more marinara sauce, then sprinkle with mozzarella and Parmesan cheese. Repeat the layers until all ingredients are used, finishing with a layer of cheese on top.
- Bake the Parmesan: Cover the baking dish with foil and bake in the oven for 25 minutes. Remove the foil and bake for an additional 10-15 minutes, or until the cheese is bubbly and golden brown.
- Garnish and Serve: Remove from the oven and let it cool for a few minutes. Garnish with fresh basil leaves before serving.
Extra Tips:
To guarantee your Eggplant Parmesan With Fresh Basil has the perfect texture, make sure your eggplant slices are completely dried after salting. This step is vital in preventing the dish from becoming soggy.
If you prefer a less breaded version, you can skip the flouring step and just dip the slices in eggs and breadcrumbs. For a more robust flavor, consider using a homemade marinara sauce or adding a hint of garlic to the breadcrumb mixture.
Enjoy this dish with a side of garlic bread or a fresh green salad for a complete and balanced meal.
Moroccan Lamb Tagine With Couscous
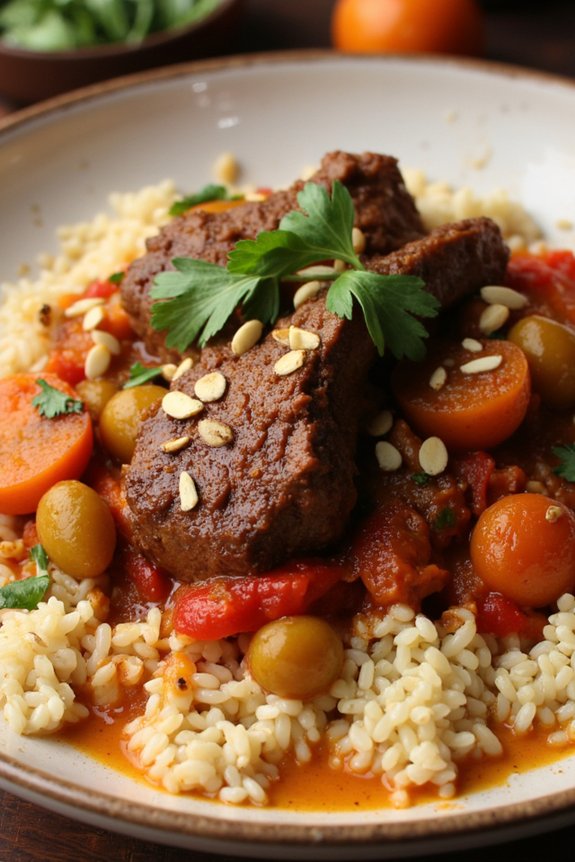
Moroccan Lamb Tagine with Couscous is a savory and aromatic dish that perfectly embodies the rich flavors of North African cuisine. This dish centers around tender lamb stewed with a blend of spices, dried fruits, and vegetables, creating a symphony of flavors that will delight your palate.
Served atop fluffy couscous, it’s a wholesome and satisfying meal perfect for family gatherings or any special occasion. This recipe not only brings heartwarming flavors to the table but also provides a balanced meal rich in protein, fiber, and nutrients.
The lamb tagine is cooked slowly, allowing the spices to meld beautifully with the meat and vegetables, resulting in a tender, melt-in-the-mouth experience. Coupled with the light and airy texture of couscous, this dish is sure to become a family favorite.
Now, let’s plunge into the ingredients and step-by-step instructions to create this delightful meal for 4-6 people.
Ingredients:
- 2 pounds lamb shoulder, cut into 2-inch cubes
- 2 tablespoons olive oil
- 1 large onion, finely chopped
- 3 cloves garlic, minced
- 1 teaspoon ground cumin
- 1 teaspoon ground coriander
- 1 teaspoon ground cinnamon
- 1 teaspoon ground ginger
- 1/2 teaspoon cayenne pepper
- 1 can (14 oz) diced tomatoes
- 2 cups chicken or beef broth
- 1 cup dried apricots, halved
- 1/2 cup raisins
- 2 carrots, sliced
- 1 red bell pepper, chopped
- Salt and pepper to taste
- 2 cups couscous
- 2 1/2 cups water
- 1/4 cup fresh cilantro, chopped
- 1/4 cup slivered almonds, toasted
Instructions:
- Prepare the Lamb: Heat the olive oil in a large, heavy-bottomed pot or Dutch oven over medium-high heat. Add the lamb cubes in batches and brown them on all sides. Remove the lamb from the pot and set aside.
- Sauté the Aromatics: In the same pot, add the chopped onion and sauté until soft and translucent, about 5 minutes. Stir in the minced garlic and cook for an additional minute until fragrant.
- Spice it Up: Reduce the heat to medium and add the ground cumin, coriander, cinnamon, ginger, and cayenne pepper to the onion mixture. Stir well to coat the onions and garlic with the spices.
- Simmer the Tagine: Return the browned lamb to the pot. Add the diced tomatoes, chicken or beef broth, apricots, raisins, carrots, and red bell pepper. Stir together, making sure everything is well mixed. Season with salt and pepper to taste. Bring the mixture to a simmer, then reduce the heat to low, cover, and let it cook for 1.5 to 2 hours, or until the lamb is tender.
- Prepare the Couscous: About 15 minutes before the tagine is ready, bring 2 1/2 cups of water to a boil in a separate saucepan. Remove from heat, add the couscous, cover, and let it sit for 5 minutes. Fluff the couscous with a fork before serving.
- Serve the Dish: Once the tagine is done, stir in the chopped cilantro and adjust the seasoning if needed. Serve the lamb tagine over a bed of couscous and sprinkle with toasted slivered almonds.
Extra Tips: When cooking Moroccan Lamb Tagine, patience is key. Allowing the lamb to cook slowly guarantees it becomes incredibly tender and soaks up all the delicious spices and flavors.
If you have a tagine pot, use it for an authentic cooking experience, but a Dutch oven works perfectly fine. Feel free to adjust the spice levels to your liking, and add other traditional ingredients like olives or preserved lemons for an extra burst of flavor.
Quinoa and Black Bean Stuffed Peppers

Quinoa and Black Bean Stuffed Peppers are a delightful, nutritious option for a balanced family dinner. This dish combines the hearty textures of quinoa and black beans with the vibrant flavors of bell peppers, creating a meal that isn’t only satisfying but also visually appealing. The peppers serve as edible bowls, making them both a fun and practical choice for serving.
This recipe is perfect for those seeking a vegetarian option that’s rich in protein and fiber, providing a complete meal that will please the whole family. This recipe serves 4-6 people and is both easy to prepare and packed with nutrients. The combination of spices and fresh ingredients guarantees a flavorful experience with each bite.
The dish can be easily modified to suit individual tastes by adjusting the level of spice or adding other vegetables. Additionally, the stuffed peppers can be prepared ahead of time, making it an excellent choice for busy weeknights or when entertaining guests.
Ingredients:
- 6 large bell peppers (any color)
- 1 cup quinoa
- 2 cups vegetable broth
- 1 can (15 oz) black beans, drained and rinsed
- 1 cup corn kernels (fresh or frozen)
- 1 small onion, chopped
- 2 cloves garlic, minced
- 1 teaspoon cumin
- 1 teaspoon chili powder
- 1/2 teaspoon smoked paprika
- Salt and pepper to taste
- 1 cup shredded cheese (cheddar or Mexican blend)
- 2 tablespoons olive oil
- Fresh cilantro, chopped (for garnish)
- Lime wedges (for serving)
Cooking Instructions:
- Prepare the Quinoa: Rinse the quinoa under cold water. In a medium saucepan, combine the quinoa and vegetable broth. Bring to a boil, then reduce heat to low, cover, and simmer for 15 minutes, or until all the liquid is absorbed. Fluff with a fork and set aside.
- Preheat the Oven: Preheat your oven to 375°F (190°C).
- Prepare the Peppers: Cut the tops off the bell peppers and remove the seeds and membranes. Lightly brush the outside of the peppers with olive oil and place them upright in a baking dish.
- Cook the Filling: In a large skillet, heat 2 tablespoons of olive oil over medium heat. Add the chopped onion and garlic, and sauté until the onion is translucent. Stir in the cooked quinoa, black beans, corn, cumin, chili powder, smoked paprika, salt, and pepper. Cook for about 5 minutes until everything is well combined and heated through.
- Stuff the Peppers: Spoon the quinoa and black bean mixture into each pepper, packing it tightly. Top each stuffed pepper with shredded cheese.
- Bake the Peppers: Cover the baking dish with foil and bake in the preheated oven for 30 minutes. Remove the foil and bake for an additional 10-15 minutes, or until the peppers are tender and the cheese is bubbly and golden.
- Garnish and Serve: Remove from the oven and let cool slightly. Garnish with fresh cilantro and serve with lime wedges on the side.
Extra Tips:
For added flavor, consider roasting the peppers for a few minutes before stuffing them to enhance their sweetness. You can also add a dash of hot sauce or a pinch of cayenne pepper to the filling if you prefer a spicier dish.
If you want to make this recipe vegan, simply omit the cheese or use a plant-based alternative. Additionally, leftovers can be stored in an airtight container in the refrigerator for up to three days, making it a great option for meal prepping.
Classic Beef Stroganoff
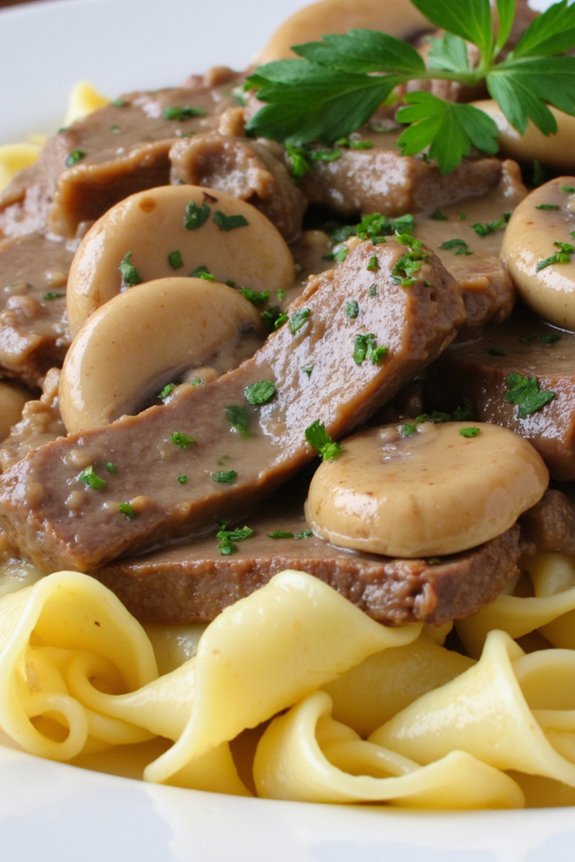
Classic Beef Stroganoff is a hearty dish that combines tender strips of beef with a creamy, flavorful sauce, served over egg noodles or rice. This traditional Russian recipe has become a family favorite across the globe for its rich taste and comforting nature.
Perfect for a balanced family dinner, this dish is both satisfying and relatively simple to prepare, making it ideal for a weeknight meal or a special weekend gathering.
This recipe serves 4-6 people and captures the essence of classic beef stroganoff with its savory blend of ingredients. The use of sour cream and beef broth creates a luscious sauce that complements the tender beef, while mushrooms add an earthy depth to the overall flavor.
Whether you’re a seasoned chef or a kitchen novice, this recipe offers a straightforward approach to creating a memorable meal for your loved ones.
Ingredients:
- 1 1/2 pounds beef sirloin, cut into thin strips
- Salt and pepper to taste
- 2 tablespoons all-purpose flour
- 2 tablespoons olive oil
- 1 medium onion, finely chopped
- 2 cloves garlic, minced
- 8 ounces mushrooms, sliced
- 1 cup beef broth
- 1 tablespoon Worcestershire sauce
- 1 teaspoon Dijon mustard
- 1 cup sour cream
- 12 ounces egg noodles or rice
- 2 tablespoons fresh parsley, chopped (for garnish)
Cooking Instructions:
- Prepare the Beef: Season the beef strips with salt and pepper. Dust them lightly with flour, shaking off any excess. This will help to create a nice crust on the beef when it’s cooked.
- Brown the Beef: In a large skillet, heat the olive oil over medium-high heat. Add the beef strips in batches to avoid overcrowding the pan. Cook until browned on all sides, about 3-4 minutes per batch. Remove the beef from the skillet and set aside.
- Cook the Vegetables: In the same skillet, add the chopped onion and cook until translucent, about 3 minutes. Add the minced garlic and sliced mushrooms, cooking until the mushrooms are browned and tender, about 5 minutes.
- Create the Sauce: Pour the beef broth into the skillet, scraping up any browned bits from the bottom of the pan. Stir in the Worcestershire sauce and Dijon mustard, bringing the mixture to a simmer.
- Combine Ingredients: Return the browned beef to the skillet, stirring to coat with the sauce. Reduce the heat to low and let it simmer for about 10 minutes, allowing the flavors to meld.
- Finish with Sour Cream: Remove the skillet from heat and stir in the sour cream until well combined. Make sure the sauce is smooth and creamy, adjusting the seasoning with additional salt and pepper if necessary.
- Cook the Noodles/Rice: While the beef mixture is simmering, cook the egg noodles or rice according to the package instructions. Drain and set aside.
- Serve: Serve the beef stroganoff over the cooked noodles or rice, garnishing with chopped fresh parsley for a pop of color and added flavor.
Extra Tips:
For a more tender beef, consider using a cut like tenderloin or ribeye. When cooking the beef, make sure not to overcook it, as it will continue to cook slightly when added back into the sauce.
If you prefer a thicker sauce, let it simmer a little longer to reduce before adding the sour cream. Additionally, feel free to experiment with different types of mushrooms or add a splash of wine to the sauce for extra depth.
Pesto Pasta With Cherry Tomatoes and Spinach
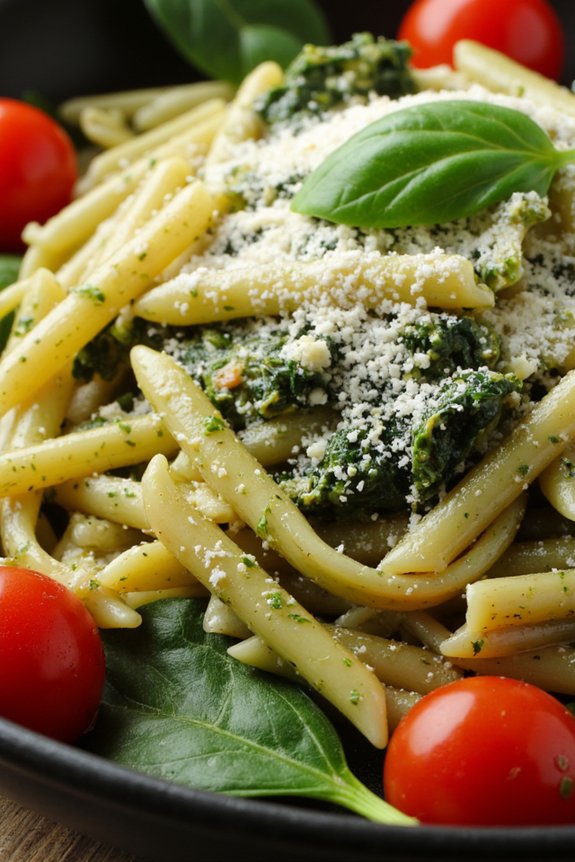
Pesto Pasta With Cherry Tomatoes and Spinach is a delightful and nutritious meal that’s perfect for a balanced family dinner. This dish combines the rich, aromatic flavors of homemade or store-bought pesto with the sweetness of cherry tomatoes and the earthiness of fresh spinach. Not only is this recipe quick and easy to prepare, but it also delivers a vibrant and colorful plate that will please both the eyes and the palate.
This pasta dish is perfect for those busy weeknights when you want to serve something wholesome without spending too much time in the kitchen. The beauty of Pesto Pasta With Cherry Tomatoes and Spinach lies in its simplicity and flexibility. You can choose your favorite type of pasta, whether it’s traditional spaghetti, penne, or even a gluten-free option.
The cherry tomatoes burst with flavor as they cook, complementing the creamy pesto and tender spinach. This recipe is designed to serve 4-6 people, making it ideal for a family meal or for entertaining guests. Whether you’re a seasoned chef or a beginner in the kitchen, this dish is straightforward yet impressive, offering a perfect harmony of flavors and textures.
Ingredients (Serving Size: 4-6 people):
- 400 grams of pasta (spaghetti, penne, or your choice)
- 2 cups cherry tomatoes, halved
- 3 cups fresh spinach leaves
- 1 cup pesto sauce (homemade or store-bought)
- 1/4 cup grated Parmesan cheese
- 2 tablespoons olive oil
- 2 cloves garlic, minced
- Salt and pepper to taste
Cooking Instructions:
- Cook the Pasta: Begin by bringing a large pot of salted water to a boil. Add the pasta and cook according to the package instructions until al dente. Once cooked, drain the pasta and reserve about 1/2 cup of the pasta cooking water. Set aside.
- Sauté the Garlic: In a large skillet or pan, heat the olive oil over medium heat. Add the minced garlic and sauté for about 1 minute until fragrant, being careful not to burn it.
- Cook the Cherry Tomatoes: Add the halved cherry tomatoes to the skillet. Sauté them for about 3-4 minutes until they start to soften and release their juices.
- Add the Spinach: Stir in the fresh spinach leaves, cooking them for an additional 2-3 minutes until they’re wilted.
- Combine with Pesto: Lower the heat and add the cooked pasta to the skillet. Pour in the pesto sauce, and toss everything together until the pasta is well coated. If the sauce is too thick, add a little of the reserved pasta water to reach your desired consistency.
- Season and Serve: Add salt and pepper to taste, and mix in the grated Parmesan cheese. Stir well to combine all the ingredients. Serve the pasta hot, garnished with additional Parmesan if desired.
Extra Tips:
When preparing Pesto Pasta With Cherry Tomatoes and Spinach, consider making your own pesto for an extra burst of fresh flavor. You can customize the pesto by adding nuts like pine nuts or walnuts, and experimenting with different herbs.
If you prefer a creamier texture, you can add a splash of heavy cream or a dollop of ricotta cheese to the sauce. Additionally, make sure not to overcook the pasta, as it continues to cook slightly when combined with the pesto and other ingredients.
This dish is versatile, so feel free to add cooked chicken or shrimp for extra protein, or swap in other vegetables you have on hand.
Teriyaki Tofu and Vegetable Skewers
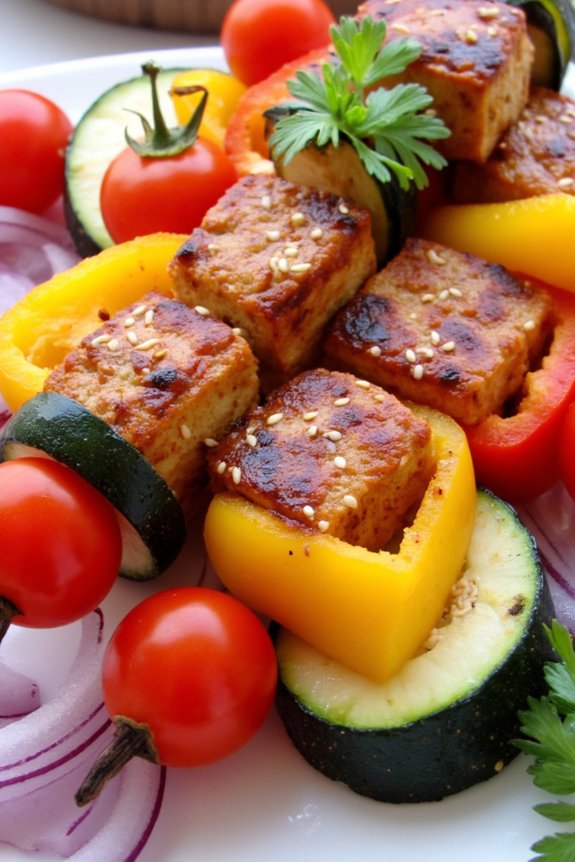
Teriyaki Tofu and Vegetable Skewers are a delicious and healthy option for a balanced family dinner. This dish is perfect for those who are looking to incorporate more plant-based meals into their diet without sacrificing flavor. The combination of marinated tofu with colorful vegetables on skewers makes it a visually appealing and tasty dish that’s sure to please both adults and children alike.
The teriyaki marinade, made from a blend of soy sauce, ginger, garlic, and a touch of sweetness, infuses the tofu and vegetables with a savory and slightly sweet flavor that’s sure to be a hit at the dinner table.
This recipe isn’t only nutritious but also fun to make. Involving the whole family in the preparation process can be a great way to encourage healthy eating habits, especially for picky eaters. It also provides an opportunity to teach children about the importance of including a variety of vegetables in their diet.
The skewers can be grilled outdoors for a smoky flavor or cooked in an oven or stovetop grill pan for convenience. Either way, the result is a satisfying meal that’s easy to prepare and full of flavor.
Ingredients (Serves 4-6):
- 1 block (14 oz) firm tofu
- 1 red bell pepper
- 1 yellow bell pepper
- 1 zucchini
- 1 red onion
- 1 cup cherry tomatoes
- 1 cup teriyaki sauce
- 2 tablespoons olive oil
- 1 tablespoon sesame seeds
- Skewers (wooden or metal)
Cooking Instructions:
- Prepare the Tofu: Begin by pressing the tofu to remove excess moisture. Place the block of tofu between paper towels and set a heavy object on top for about 15 minutes. Once pressed, cut the tofu into 1-inch cubes.
- Marinate the Tofu: Place the tofu cubes in a shallow dish or a resealable plastic bag. Pour the teriyaki sauce over the tofu, ensuring all pieces are well-coated. Marinate for at least 30 minutes, or overnight for a deeper flavor.
- Prepare the Vegetables: While the tofu is marinating, wash all the vegetables. Cut the bell peppers and zucchini into 1-inch pieces. Slice the red onion into thick wedges. Leave the cherry tomatoes whole.
- Assemble the Skewers: Alternate threading the marinated tofu cubes, bell pepper pieces, zucchini slices, red onion wedges, and cherry tomatoes onto the skewers. Leave a little space between each piece to allow for even cooking.
- Cook the Skewers: Preheat a grill to medium-high heat or an oven to 400°F (200°C) if using an oven. Brush the skewers lightly with olive oil to prevent sticking. Grill the skewers for about 10-15 minutes, turning occasionally, until the tofu is golden brown and the vegetables are tender. If using an oven, place the skewers on a baking sheet and roast for 15-20 minutes.
- Garnish and Serve: Once cooked, sprinkle the skewers with sesame seeds for added texture and flavor. Serve immediately, either on their own or over a bed of rice or quinoa.
Extra Tips:
For best results, use firm tofu as it holds up well on skewers. If using wooden skewers, soak them in water for at least 30 minutes before threading the ingredients to prevent them from burning.
Feel free to customize the vegetable selection based on personal preference or seasonal availability. To make the dish gluten-free, use a gluten-free teriyaki sauce. This dish can also be prepared ahead of time by marinating the tofu and chopping the vegetables in advance, making it a quick and convenient option for a weeknight dinner.
Baked Cod With Garlic and Herb Crust
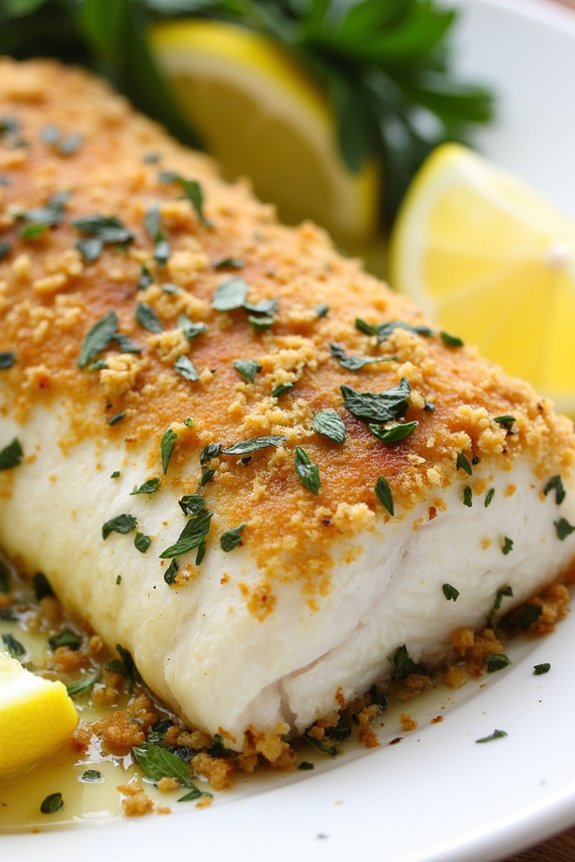
Baked Cod With Garlic and Herb Crust is a delightful and healthy option for a balanced family dinner. This dish combines the mild, flaky texture of cod with a flavorful crust made from fresh herbs and garlic, creating a meal that’s both nutritious and satisfying.
Perfect for a weeknight dinner or a special occasion, this recipe is simple to prepare and certain to impress. The combination of fresh ingredients enhances the natural flavors of the cod, making it a dish that even those who aren’t typically fish enthusiasts will enjoy.
This recipe is designed to serve 4-6 people, making it ideal for a family meal. The preparation is straightforward and requires minimal ingredients, allowing you to focus on the quality and freshness of the produce and fish.
The garlic and herb crust adds a vibrant contrast to the soft and tender cod, while baking it guarantees a moist and flaky texture. Whether you’re a seasoned cook or trying your hand at fish for the first time, this recipe is easy to follow and yields delicious results every time.
Ingredients:
- 4-6 cod fillets (about 1.5-2 pounds total)
- 1 cup fresh breadcrumbs
- 1/4 cup fresh parsley, chopped
- 1/4 cup fresh dill, chopped
- 3 cloves garlic, minced
- Zest of 1 lemon
- 1/4 cup grated Parmesan cheese
- 3 tablespoons olive oil
- Salt and pepper to taste
- Lemon wedges, for serving
Instructions:
- Preheat the Oven: Preheat your oven to 400°F (200°C). Line a baking sheet with parchment paper or lightly grease it with olive oil.
- Prepare the Crust Mixture: In a medium-sized bowl, combine the breadcrumbs, parsley, dill, minced garlic, lemon zest, Parmesan cheese, and olive oil. Mix well until all ingredients are evenly combined and the mixture is slightly moist.
- Season the Cod Fillets: Pat the cod fillets dry using paper towels. Season both sides with salt and pepper to taste. Place the fillets on the prepared baking sheet.
- Apply the Herb Crust: Evenly distribute the herb and breadcrumb mixture over the top of each cod fillet, pressing down gently to make sure the crust adheres well.
- Bake the Cod: Place the baking sheet in the preheated oven and bake for 12-15 minutes, or until the cod is opaque and flakes easily with a fork. The crust should be golden brown and crispy.
- Serve: Remove from the oven and allow to cool slightly before serving. Serve the baked cod hot with lemon wedges on the side for squeezing over the top.
Extra Tips:
For the best results, use fresh cod fillets that have a firm texture and a mild aroma. If fresh herbs aren’t available, dried herbs can be used, though the flavor will be more intense, so adjust the quantity accordingly.
When making the herb crust, make sure the breadcrumb mixture isn’t too dry; a little extra olive oil can help achieve the right consistency. Baking times may vary slightly depending on the thickness of the fillets, so keep an eye on the fish to avoid overcooking.
Serve this dish with a side of steamed vegetables or a fresh salad for a complete and balanced meal.
Sweet Potato and Black Bean Enchiladas

Sweet Potato and Black Bean Enchiladas are a delicious and nutritious option for a balanced family dinner. This dish is packed with flavor and nutrients, combining the sweetness of roasted sweet potatoes with the hearty texture of black beans, all wrapped in soft corn tortillas and smothered with rich enchilada sauce.
It’s a perfect vegetarian meal that satisfies the whole family and can easily be adapted to suit various dietary preferences. These enchiladas aren’t only wholesome but also easy to prepare, making them an ideal choice for busy weeknights.
The combination of sweet potatoes and black beans provides a good source of fiber and plant-based protein, while the enchilada sauce adds a delightful kick of spice. This recipe serves 4-6 people and is sure to become a family favorite.
Ingredients:
- 2 large sweet potatoes, peeled and diced
- 1 tablespoon olive oil
- Salt and pepper, to taste
- 1 teaspoon ground cumin
- 1 teaspoon smoked paprika
- 1/2 teaspoon chili powder
- 1 can (15 oz) black beans, drained and rinsed
- 1 cup corn kernels (fresh, frozen, or canned)
- 8-10 corn tortillas
- 2 cups enchilada sauce
- 1 cup shredded cheese (cheddar or Mexican blend)
- 1/4 cup chopped fresh cilantro
- 1 lime, cut into wedges
Cooking Instructions:
- Preheat the Oven: Preheat your oven to 400°F (200°C).
- Roast the Sweet Potatoes: On a baking sheet, toss the diced sweet potatoes with olive oil, salt, pepper, cumin, smoked paprika, and chili powder. Spread them out in an even layer and roast for 20-25 minutes, or until tender and slightly caramelized.
- Prepare the Filling: In a large mixing bowl, combine the roasted sweet potatoes, black beans, and corn. Toss gently to mix the ingredients evenly.
- Warm the Tortillas: Wrap the corn tortillas in a damp paper towel and microwave them for about 30 seconds to make them pliable and prevent cracking.
- Assemble the Enchiladas: Spread a thin layer of enchilada sauce at the bottom of a 9×13 inch baking dish. Place a generous spoonful of the sweet potato and black bean mixture onto each tortilla, roll them up, and place them seam-side down in the baking dish.
- Add Sauce and Cheese: Pour the remaining enchilada sauce over the rolled tortillas, ensuring they’re evenly coated. Sprinkle the shredded cheese on top.
- Bake the Enchiladas: Cover the baking dish with foil and bake in the preheated oven for 15 minutes. Remove the foil and bake for an additional 10 minutes, or until the cheese is melted and bubbly.
- Garnish and Serve: Remove the enchiladas from the oven and let them cool for a few minutes. Garnish with chopped cilantro and serve with lime wedges on the side.
Extra Tips:
For an extra burst of flavor, consider adding a can of diced green chiles to the filling mixture. If you prefer a spicier dish, use a spicy enchilada sauce or add a dash of hot sauce to the filling.
To make the dish vegan, simply omit the cheese or use a plant-based cheese alternative. You can also prepare the sweet potato and black bean filling ahead of time to streamline the cooking process on busy nights.
Thai Red Curry With Mixed Vegetables
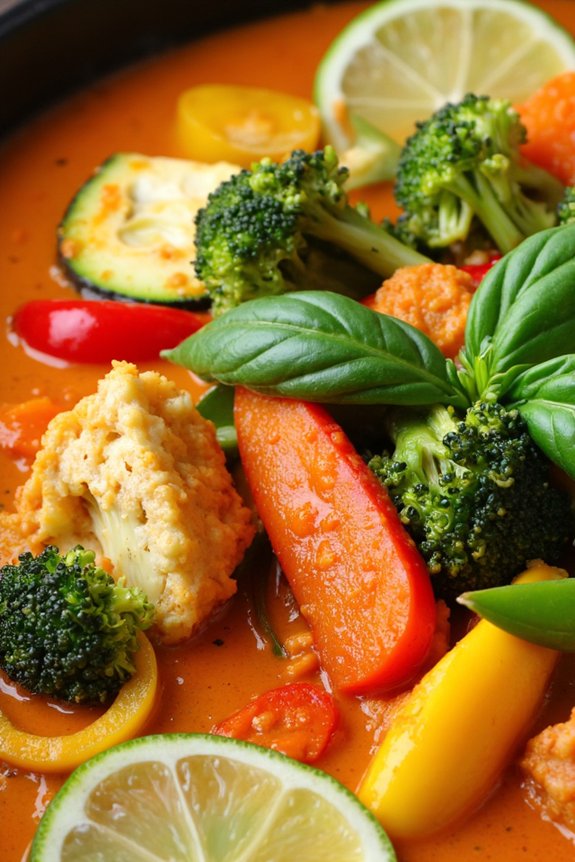
Thai Red Curry With Mixed Vegetables is a delightful and aromatic dish that brings together the rich flavors of Thai cuisine in an easy, family-friendly meal. This dish is perfect for a balanced family dinner as it combines a variety of vegetables in a creamy coconut milk base, infused with the warmth of red curry paste. The vibrant colors and enticing aromas make this curry a feast for both the eyes and the taste buds, offering a satisfying and nutritionally balanced option for those looking to incorporate more plant-based meals into their diet.
This recipe is designed to serve 4-6 people, making it an excellent choice for a family dinner or a gathering with friends. The Thai Red Curry can be enjoyed on its own or served over jasmine rice for a more filling meal. The blend of spices and the freshness of the vegetables provide a wholesome meal that’s both comforting and invigorating.
Whether you’re a seasoned cook or a novice in the kitchen, this recipe is straightforward and rewarding, sure to impress your loved ones with its authentic taste.
Ingredients:
- 2 tablespoons vegetable oil
- 1 onion, thinly sliced
- 2 cloves garlic, minced
- 1 tablespoon ginger, minced
- 3 tablespoons Thai red curry paste
- 1 can (400 ml) coconut milk
- 1 cup vegetable broth
- 1 tablespoon soy sauce
- 1 tablespoon fish sauce (optional)
- 1 tablespoon brown sugar
- 1 red bell pepper, sliced
- 1 yellow bell pepper, sliced
- 1 cup broccoli florets
- 1 cup sliced carrots
- 1 cup sugar snap peas
- 1 zucchini, sliced
- Fresh basil leaves for garnish
- Lime wedges for serving
Cooking Instructions:
- Prepare the Base: Heat the vegetable oil in a large pan over medium heat. Add the sliced onion and sauté until it becomes translucent, about 3-4 minutes. Stir in the minced garlic and ginger, and cook for an additional minute until fragrant.
- Add the Curry Paste: Add the Thai red curry paste to the pan, stirring continuously for about 2 minutes to allow the flavors to develop and the paste to slightly darken.
- Create the Curry Sauce: Pour in the coconut milk and vegetable broth, stirring to combine with the curry paste. Add the soy sauce, fish sauce (if using), and brown sugar. Bring the mixture to a gentle simmer, making sure everything is well incorporated.
- Cook the Vegetables: Add the sliced red and yellow bell peppers, broccoli, carrots, sugar snap peas, and zucchini to the curry sauce. Stir to guarantee the vegetables are coated in the sauce. Cover and let simmer for about 10-15 minutes, or until the vegetables are tender but still crisp.
- Finalize the Dish: Taste and adjust the seasoning if necessary, adding more soy sauce or sugar to balance the flavors as desired. Remove from heat and stir in fresh basil leaves.
- Serve: Serve the curry hot, garnished with additional fresh basil leaves and lime wedges on the side for squeezing over the top. Pair with jasmine rice for a complete meal.
Extra Tips:
When making Thai Red Curry With Mixed Vegetables, feel free to adjust the level of spiciness by varying the amount of red curry paste used. For a spicier curry, add an extra tablespoon of curry paste or even a sliced chili. If you prefer a milder flavor, reduce the curry paste slightly.
Additionally, this recipe is highly adaptable; you can substitute or add any seasonal vegetables you have on hand, such as eggplant or mushrooms, to customize the dish to your liking. Remember to taste and adjust the seasoning as you go to ascertain a deliciously balanced flavor profile.