

When it comes to family dinners, Mexican cuisine offers vibrant and bold flavors that everyone will love. Think of the sizzle of a steak fajita skillet or the creamy goodness of cheesy chicken enchiladas on your dining table. These 14 quick and easy recipes are perfect for those busy nights when you need something delicious yet simple. Let’s explore these culinary delights and see which ones will become your family’s new favorites.
Cheesy Chicken Enchiladas

Cheesy Chicken Enchiladas are a classic Mexican dish that combines tender shredded chicken, rich spices, and melted cheese all wrapped up in soft tortillas and baked to perfection. This recipe is perfect for a family dinner or a gathering with friends, as it serves 4-6 people. The combination of creamy cheese and flavorful chicken filling makes it a favorite among both kids and adults.
With its simple ingredients and straightforward preparation, you can easily bring the taste of Mexico to your dining table.
The key to delicious Cheesy Chicken Enchiladas is in the balance of flavors and textures. The enchiladas are filled with a seasoned chicken mixture that’s enriched with a blend of cheeses, then topped with enchilada sauce and more cheese before being baked until bubbly and golden.
This recipe not only satisfies the craving for a hearty and comforting meal but also allows for customization with additional toppings like sour cream, guacamole, or fresh cilantro for an extra burst of flavor.
Ingredients (serves 4-6):
- 2 cups cooked and shredded chicken breast
- 1 teaspoon chili powder
- 1 teaspoon cumin
- 1/2 teaspoon garlic powder
- 1/2 teaspoon onion powder
- Salt and pepper to taste
- 2 cups shredded Mexican blend cheese
- 1 cup enchilada sauce
- 8 flour tortillas (8-inch size)
- 1/4 cup chopped green onions
- 1/4 cup chopped fresh cilantro
- Cooking spray
Cooking Instructions:
- Preheat the Oven: Preheat your oven to 350°F (175°C). Lightly grease a 9×13-inch baking dish with cooking spray and set aside.
- Prepare the Chicken Filling: In a large bowl, combine the shredded chicken, chili powder, cumin, garlic powder, onion powder, salt, and pepper. Mix thoroughly to guarantee the chicken is well seasoned. Add 1 cup of the shredded Mexican blend cheese to the chicken mixture and stir until evenly distributed.
- Assemble the Enchiladas: Lay a tortilla flat on a clean surface. Spoon about 1/4 cup of the chicken mixture onto the center of the tortilla. Roll the tortilla tightly around the filling and place it seam side down in the prepared baking dish. Repeat with the remaining tortillas and chicken mixture.
- Add Sauce and Cheese: Pour the enchilada sauce evenly over the rolled tortillas in the baking dish. Sprinkle the remaining 1 cup of shredded cheese over the top of the enchiladas.
- Bake the Enchiladas: Cover the baking dish with aluminum foil and bake in the preheated oven for 20 minutes. After 20 minutes, remove the foil and continue baking for an additional 10 minutes, or until the cheese is melted and bubbly.
- Garnish and Serve: Remove the enchiladas from the oven and let them cool for a few minutes. Garnish with chopped green onions and fresh cilantro before serving. Enjoy your Cheesy Chicken Enchiladas warm with your favorite toppings.
Extra Tips:
For a spicier kick, you can add chopped jalapeños or a dash of hot sauce to the chicken filling. If you prefer corn tortillas, lightly toast them in a skillet before rolling to prevent them from cracking.
To save time, you can use store-bought rotisserie chicken. Feel free to experiment with different cheeses, like Monterey Jack or pepper jack, to customize the flavor to your liking.
Enchiladas can be made ahead of time and refrigerated until ready to bake, making them a convenient option for meal planning.
Beef Tacos With Fresh Salsa
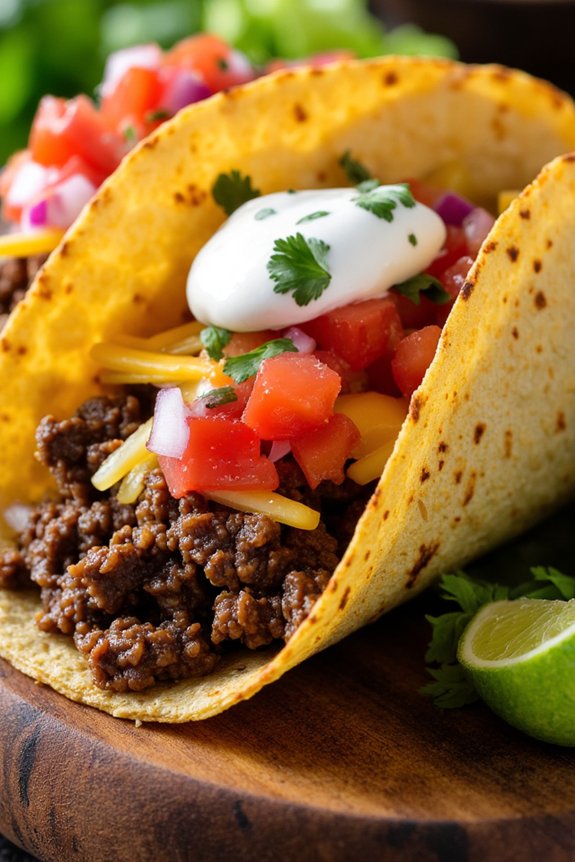
Beef Tacos with Crisp Salsa is a delightful Mexican dish that’s both flavorful and easy to prepare. This recipe combines seasoned ground beef with a vibrant homemade salsa, all neatly packed into soft or crunchy taco shells. The freshness of the salsa complements the savory beef perfectly, creating a balance of textures and flavors that’s sure to please your taste buds.
Whether you’re hosting a casual dinner with friends or preparing a family meal, these tacos are versatile enough to suit any occasion. The key to this recipe is the crisp salsa, which adds a burst of flavor and an invigorating contrast to the rich beef. Made with ripe tomatoes, crisp onions, and zesty lime juice, the salsa can be adjusted to your personal taste preferences.
You can also add other toppings like shredded cheese, lettuce, and sour cream to elevate the dish even further. The following recipe provides enough ingredients to serve 4-6 people, making it perfect for a small gathering or a family meal.
Ingredients for Beef Tacos With Crisp Salsa (Serves 4-6):
- 1 lb ground beef
- 1 packet taco seasoning mix
- 12 taco shells (soft or hard)
- 2 cups shredded lettuce
- 1 cup shredded cheddar cheese
- 1/2 cup sour cream
For Crisp Salsa:
- 4 ripe tomatoes, diced
- 1 small red onion, finely chopped
- 1 jalapeño pepper, seeded and finely chopped
- 1/4 cup fresh cilantro, chopped
- 1 lime, juiced
- Salt and pepper to taste
Cooking Instructions:
- Prepare the Salsa: In a medium-sized bowl, combine the diced tomatoes, chopped red onion, jalapeño, and cilantro. Squeeze the lime juice over the mixture and season with salt and pepper to taste. Stir well and let the salsa sit for at least 15 minutes to allow the flavors to meld together.
- Cook the Beef: In a large skillet, cook the ground beef over medium heat until it’s browned and fully cooked, breaking it up with a spatula as it cooks. Drain excess fat. Add the taco seasoning mix and a cup of water to the beef. Stir to combine and let it simmer for about 5 minutes, allowing the flavors to blend.
- Prepare the Taco Shells: If using hard taco shells, preheat the oven to 350°F (175°C) and bake the shells for about 5 minutes until they’re warm and crispy. If using soft tortillas, you can warm them in a dry skillet for about 30 seconds on each side or wrap them in foil and warm them in the oven for about 5 minutes.
- Assemble the Tacos: Fill each taco shell with a portion of the seasoned beef, followed by a generous spoonful of crisp salsa. Top with shredded lettuce, cheddar cheese, and a dollop of sour cream.
Extra Tips:
For an added layer of flavor, consider adding a teaspoon of cumin or smoked paprika to the beef while cooking. If you prefer a spicier salsa, include the seeds of the jalapeño or add a dash of hot sauce.
This dish pairs well with sides like Mexican rice or refried beans, making it a complete meal. To save time, prepare the salsa in advance and store it in the refrigerator until ready to use. Enjoy your delicious homemade Beef Tacos with Crisp Salsa!
Quick and Easy Chicken Fajitas
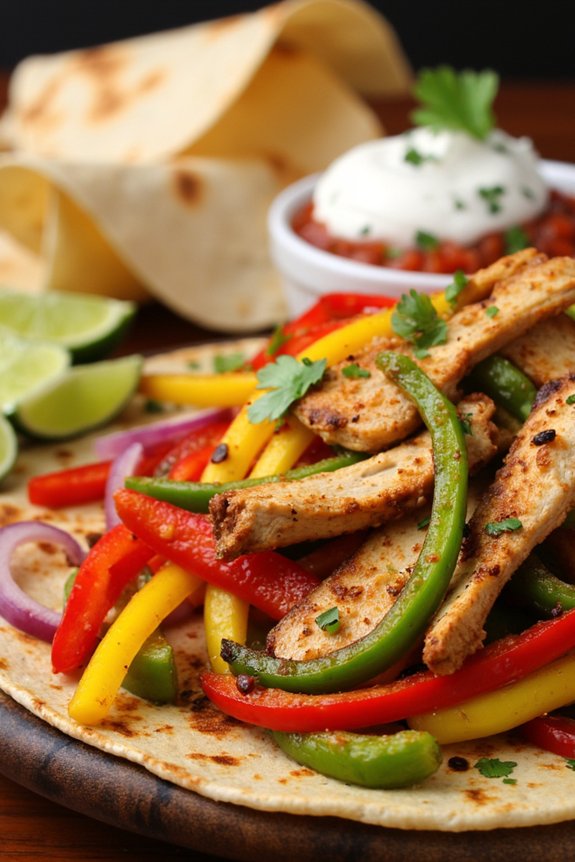
Chicken fajitas are a classic Mexican dish that are loved for their vibrant flavors and ease of preparation. Perfect for busy weeknights, these fajitas are a quick and satisfying meal that brings together tender chicken strips, sautéed bell peppers, and onions all wrapped in warm tortillas. The dish isn’t only delicious but also colorful, making it an appealing choice for family dinners or casual gatherings. With just a few simple ingredients, you can have this delightful meal ready in under 30 minutes.
The beauty of chicken fajitas lies in their versatility. You can easily customize the dish to suit your taste preferences by adding your favorite toppings such as guacamole, sour cream, or salsa. Whether you prefer your fajitas mild or spicy, this recipe can be adjusted to cater to your heat level. Serve these fajitas with a side of rice or beans to make it a complete meal. This recipe serves 4-6 people, making it ideal for feeding a small group or guaranteeing leftovers for the next day.
Ingredients:
- 1 1/2 pounds boneless, skinless chicken breasts
- 1 tablespoon olive oil
- 3 bell peppers (red, green, and yellow)
- 1 large onion
- 3 cloves garlic
- 2 teaspoons ground cumin
- 2 teaspoons chili powder
- 1 teaspoon smoked paprika
- 1 teaspoon salt
- 1/2 teaspoon black pepper
- Juice of 1 lime
- 8-12 flour tortillas
- Optional toppings: shredded cheese, sour cream, guacamole, salsa, chopped cilantro
Cooking Instructions:
- Prepare the Chicken: Slice the chicken breasts into thin strips. In a mixing bowl, combine the chicken strips with olive oil, cumin, chili powder, smoked paprika, salt, and black pepper. Mix well to confirm the chicken is evenly coated with the spices. Let it marinate for at least 10 minutes while you prepare the vegetables.
- Slice the Vegetables: Cut the bell peppers and onion into thin strips. Mince the garlic cloves. Set aside.
- Cook the Chicken: Heat a large skillet over medium-high heat. Add the marinated chicken strips to the skillet and cook for about 5-7 minutes, stirring occasionally, until the chicken is cooked through and golden brown. Remove the chicken from the skillet and set aside.
- Sauté the Vegetables: In the same skillet, add a little additional olive oil if needed. Add the sliced onions and bell peppers. Cook for about 5-6 minutes until the vegetables are tender-crisp. Add the minced garlic and cook for another minute.
- Combine and Finish: Return the cooked chicken to the skillet with the vegetables. Squeeze the juice of one lime over the mixture and toss everything together to combine. Cook for an additional 2 minutes to heat everything through.
- Warm the Tortillas: While the chicken and vegetables are cooking, warm the flour tortillas in a dry skillet or microwave until they’re soft and pliable.
- Assemble the Fajitas: Serve the chicken and vegetable mixture on warm tortillas. Add optional toppings such as shredded cheese, sour cream, guacamole, or salsa as desired. Garnish with chopped cilantro.
Extra Tips:
For a different flavor profile, try adding a splash of hot sauce to the chicken marinade for a spicier kick. If you prefer a smokier taste, consider grilling the chicken and vegetables instead of cooking them on the stovetop.
To keep the tortillas warm, wrap them in a clean kitchen towel or foil while assembling the fajitas. For a healthier alternative, swap flour tortillas for whole wheat or corn tortillas. Additionally, if you have leftovers, store the chicken and vegetable mixture in an airtight container in the refrigerator for up to three days.
Vegetarian Black Bean Quesadillas
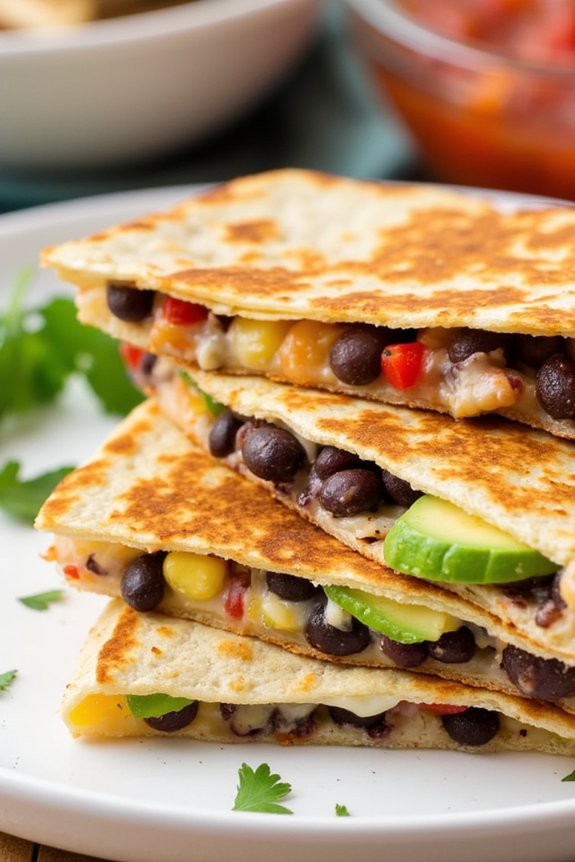
Vegetarian Black Bean Quesadillas are a delightful and satisfying meal that combines the rich flavors of black beans, fresh vegetables, and melty cheese, all encased in a crispy tortilla. Perfect for a quick weeknight dinner or a casual gathering with friends, these quesadillas aren’t only easy to prepare but also packed with nutrients, making them a healthy choice for vegetarians and meat lovers alike.
The combination of smoky spices, creamy avocado, and tangy salsa guarantees every bite is bursting with flavor. These quesadillas can be customized with your favorite toppings and fillings, allowing you to tailor them to your taste preferences. Whether you prefer a little kick of heat or a milder flavor profile, you can easily adjust the ingredients to suit your palate.
Served alongside a fresh salad or a bowl of guacamole, Vegetarian Black Bean Quesadillas make for a complete and delicious meal that everyone will enjoy.
Ingredients for 4-6 servings:
- 2 tablespoons olive oil
- 1 small onion, finely chopped
- 2 cloves garlic, minced
- 1 red bell pepper, diced
- 1 yellow bell pepper, diced
- 1 teaspoon ground cumin
- 1 teaspoon smoked paprika
- 1 can (15 ounces) black beans, drained and rinsed
- 1 cup corn kernels (fresh, canned, or frozen)
- Salt and pepper to taste
- 8 flour tortillas (8-inch)
- 2 cups shredded cheese (cheddar, Monterey Jack, or a blend)
- 2 avocados, sliced
- 1 cup salsa
- 1/4 cup chopped fresh cilantro
Cooking Instructions:
- Prepare the Filling: Heat the olive oil in a large skillet over medium heat. Add the chopped onion and sauté for about 3 minutes until it becomes translucent. Stir in the minced garlic and cook for another minute until fragrant.
- Cook the Vegetables: Add the diced red and yellow bell peppers to the skillet. Cook for about 5 minutes, stirring occasionally, until the peppers soften. Sprinkle the cumin and smoked paprika over the vegetables, stirring to combine and coat them evenly with the spices.
- Add Black Beans and Corn: Stir in the black beans and corn kernels. Cook for another 3-4 minutes, allowing the flavors to meld together. Season the mixture with salt and pepper to taste. Remove the skillet from the heat and set aside.
- Assemble the Quesadillas: Place one tortilla on a flat surface. Sprinkle about 1/4 cup of shredded cheese over half of the tortilla. Spoon a generous amount of the black bean and vegetable mixture over the cheese. Add a few slices of avocado and a tablespoon of salsa. Fold the tortilla in half to enclose the filling. Repeat with the remaining tortillas.
- Cook the Quesadillas: Heat a non-stick skillet or griddle over medium heat. Place the quesadillas in the skillet, two at a time, and cook for 3-4 minutes on each side until the tortillas are golden brown and the cheese is melted. Use a spatula to press down gently on the quesadillas as they cook.
- Serve: Once cooked, transfer the quesadillas to a cutting board and let them cool slightly. Cut each quesadilla into wedges and garnish with chopped fresh cilantro. Serve with additional salsa on the side.
Extra Tips:
For an extra crispy texture, you can brush a little olive oil or melted butter on the outside of the tortillas before cooking. If you prefer spicier quesadillas, consider adding chopped jalapeños or a sprinkle of cayenne pepper to the filling.
For a gluten-free option, use corn tortillas instead of flour tortillas. Finally, if you have leftover filling, it can be stored in an airtight container in the refrigerator for up to 3 days and used for more quesadillas or as a topping for salads.
Spicy Shrimp Tacos With Lime Crema
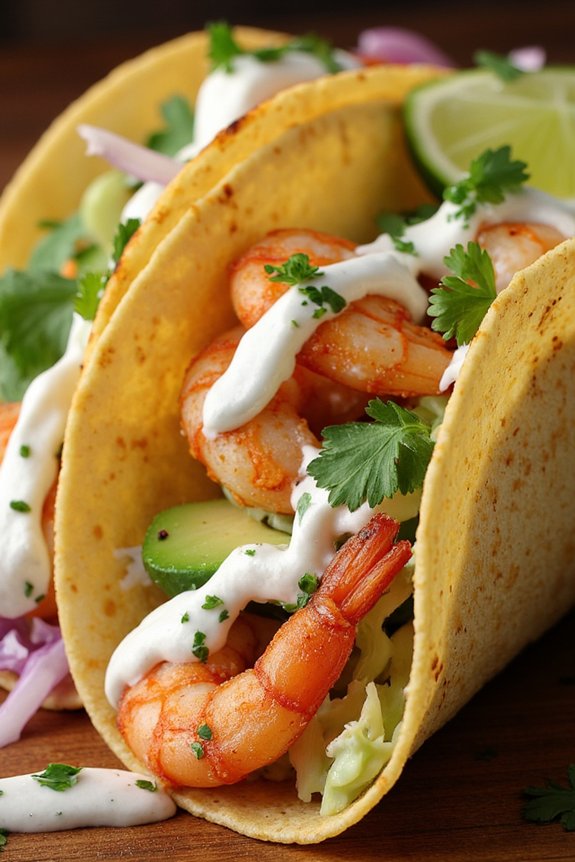
Spicy Shrimp Tacos With Lime Crema is a vibrant and flavorful dish perfect for those who love a bit of heat in their meals. This recipe combines succulent shrimp seasoned with a blend of spices, nestled in warm corn tortillas, and topped with a revitalizing lime crema. The balance of spicy, tangy, and creamy elements makes these tacos a hit for any dinner gathering or casual weeknight meal.
The dish isn’t only delicious but also quick and easy to prepare, making it a great option for busy cooks who want to serve something impressive yet uncomplicated. The lime crema, a smooth blend of sour cream, lime juice, and zest, adds a zesty creaminess that complements the spicy shrimp beautifully.
Serve these tacos with toppings like shredded cabbage, avocado slices, and a sprinkle of fresh cilantro for added freshness and texture. This recipe serves 4-6 people, making it an ideal choice for family dinners or small parties. With the perfect combination of ingredients and flavors, these Spicy Shrimp Tacos With Lime Crema are sure to become a favorite in your recipe collection.
Ingredients (Serves 4-6):
- 1 1/2 pounds large shrimp, peeled and deveined
- 1 tablespoon olive oil
- 1 teaspoon chili powder
- 1/2 teaspoon paprika
- 1/2 teaspoon ground cumin
- 1/4 teaspoon cayenne pepper
- Salt and pepper to taste
- 8-12 corn tortillas
- 1 cup sour cream
- 1 lime, zested and juiced
- 2 cups shredded cabbage
- 1 avocado, sliced
- Fresh cilantro, chopped
Instructions:
- Prepare the Shrimp: In a large bowl, combine the shrimp with olive oil, chili powder, paprika, cumin, cayenne pepper, salt, and pepper. Mix well to guarantee the shrimp are evenly coated with the spices. Let the shrimp marinate for about 10 minutes to absorb the flavors.
- Make the Lime Crema: In a small bowl, mix the sour cream with lime juice and zest. Stir until smooth and well combined. Adjust the seasoning with a pinch of salt if needed. Set aside in the refrigerator until ready to use.
- Cook the Shrimp: Heat a large skillet over medium-high heat. Add the marinated shrimp to the skillet and cook for about 2-3 minutes on each side, or until the shrimp are cooked through and slightly charred. Remove from heat and set aside.
- Warm the Tortillas: In a separate dry skillet, heat the corn tortillas over medium heat for about 30 seconds on each side, until they’re warm and pliable. Keep them warm by wrapping them in a clean kitchen towel.
- Assemble the Tacos: To assemble the tacos, place a few shrimp on each warm tortilla. Top with shredded cabbage, avocado slices, and a drizzle of lime crema. Garnish with chopped cilantro for an extra burst of flavor.
- Serve: Serve the tacos immediately while the shrimp are still hot and the tortillas are warm. Offer extra lime wedges on the side for those who enjoy an additional squeeze of lime juice.
Extra Tips:
For an even spicier kick, consider adding sliced jalapeños or a dash of hot sauce to the tacos. If you prefer a milder version, reduce the amount of cayenne pepper in the shrimp marinade.
To make the dish more nutritious, you can add more vegetables such as diced tomatoes or red onions. Also, if you want to save time, you can prepare the lime crema in advance and store it in the fridge for up to a day. This dish pairs well with a light, fresh salad or a side of Mexican rice.
One-Pot Mexican Rice With Ground Beef
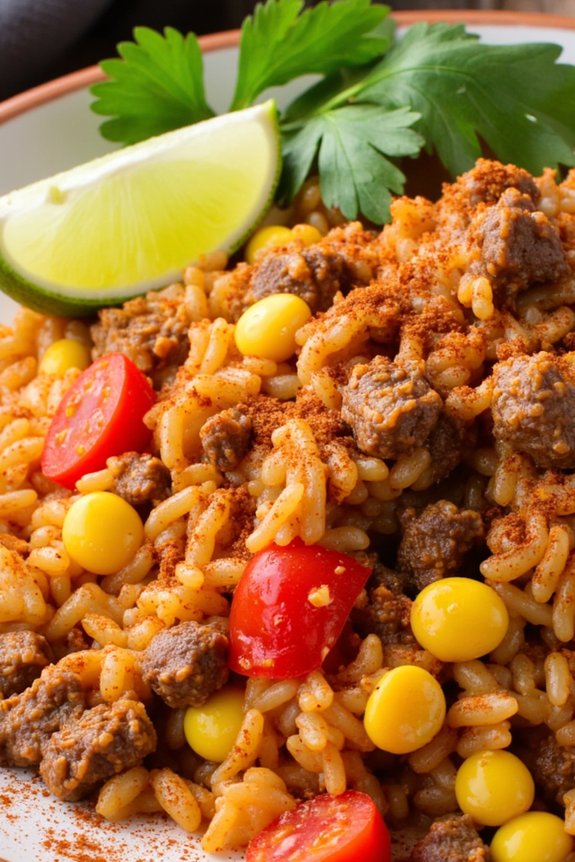
One-Pot Mexican Rice With Ground Beef is a delicious and convenient meal that brings the vibrant flavors of Mexico right to your kitchen. Perfect for a family dinner or when entertaining guests, this dish combines seasoned ground beef, fluffy rice, and a medley of vegetables, all cooked together in one pot for easy preparation and clean-up.
The blend of spices creates an aromatic and flavorful dish that’s both hearty and satisfying, making it a favorite for those who enjoy a little spice in their meals. This recipe is ideal for busy weeknights when you want to serve something nutritious and tasty without spending hours in the kitchen.
The ingredients are simple and easy to find, and the cooking process is straightforward, making it accessible even to beginner cooks. Whether you’re familiar with Mexican cuisine or trying it for the first time, this One-Pot Mexican Rice With Ground Beef will surely become a staple in your home.
Ingredients (Serves 4-6):
- 1 pound ground beef
- 1 cup long-grain white rice
- 1 medium onion, diced
- 1 red bell pepper, diced
- 2 cloves garlic, minced
- 1 can (14.5 oz) diced tomatoes
- 1 cup beef broth
- 1 cup water
- 1 tablespoon olive oil
- 1 teaspoon ground cumin
- 1 teaspoon chili powder
- 1 teaspoon paprika
- Salt and pepper to taste
- 1 cup frozen corn
- 1/2 cup chopped fresh cilantro (optional, for garnish)
- 1 lime, cut into wedges (optional, for serving)
Cooking Instructions:
- Prepare the Ingredients: Begin by dicing the onion and red bell pepper, and mincing the garlic. Set these aside. Rinse the rice under cold water until the water runs clear to remove excess starch.
- Brown the Beef: In a large pot or Dutch oven, heat the olive oil over medium heat. Add the ground beef and season with salt and pepper. Cook until the beef is browned, breaking it apart with a spoon as it cooks, about 5-7 minutes. Once browned, remove the beef from the pot and set aside.
- Sauté Vegetables: In the same pot, add the diced onion and red bell pepper. Sauté for 3-4 minutes until they start to soften. Add the minced garlic and cook for another minute until fragrant.
- Cook the Rice: Add the rinsed rice to the pot with the vegetables and stir for 1-2 minutes to lightly toast the rice. This step enhances the flavor and helps the rice absorb the spices better.
- Combine Ingredients: Return the browned ground beef to the pot. Add the diced tomatoes, beef broth, water, ground cumin, chili powder, paprika, and a little more salt and pepper to taste. Stir well to combine all ingredients.
- Simmer the Dish: Bring the mixture to a boil, then reduce the heat to low. Cover the pot with a lid and let it simmer for about 18-20 minutes, or until the rice is tender and has absorbed most of the liquid. Stir occasionally to prevent sticking.
- Add Corn: Once the rice is cooked, stir in the frozen corn. Cover the pot again and let it sit for another 5 minutes, allowing the corn to heat through.
- Serve: Once the dish is done, fluff the rice with a fork. Garnish with chopped fresh cilantro if desired, and serve with lime wedges on the side for a fresh burst of flavor.
Extra Tips:
When preparing One-Pot Mexican Rice With Ground Beef, it’s crucial to keep an eye on the liquid levels as the rice cooks. If the rice appears too dry before it’s fully cooked, you can add a little more water or beef broth.
Additionally, feel free to adjust the spice levels according to your taste preference. If you like it spicier, consider adding a pinch of cayenne pepper or a few chopped jalapeños. Using fresh lime juice at the end enhances the flavors, making the dish even more delightful. Enjoy your meal!
Classic Chiles Rellenos

Classic Chiles Rellenos are a beloved Mexican dish combining roasted poblano peppers stuffed with cheese or meat, then battered and fried to perfection. This dish is known for its rich, savory flavor and satisfying texture, making it a popular choice for both everyday meals and special occasions.
Traditionally served with a flavorful tomato sauce, Chiles Rellenos are a reflection of the creativity and boldness of Mexican cuisine, offering a delightful balance of heat, creaminess, and freshness. The dish traces its roots to Puebla, Mexico, and has since become a staple in many Mexican households.
It’s versatile enough to accommodate various fillings, though cheese remains a classic choice. Whether enjoyed as a standalone meal or accompanied by rice and beans, Classic Chiles Rellenos are sure to delight the palate and bring a taste of Mexico to your dining table. Below is a recipe that serves 4-6 people, guaranteeing everyone at your table gets a chance to savor this traditional favorite.
Ingredients (Serves 4-6)
- 6 large poblano peppers
- 8 ounces of Monterrey Jack cheese or queso fresco, cut into strips
- 4 large eggs, separated
- 1 cup all-purpose flour
- 1 teaspoon salt
- 1/2 teaspoon black pepper
- Vegetable oil, for frying
- 2 cups tomato sauce (homemade or store-bought)
- 1/2 teaspoon cumin
- 1/2 teaspoon garlic powder
Cooking Instructions
- Roast the Poblanos: Preheat your oven’s broiler. Place the poblano peppers on a baking sheet and broil them for about 5-7 minutes on each side, until the skin is blackened and blistered. Remove from the oven, place in a bowl, and cover with plastic wrap to steam for 10 minutes. This will make peeling the skins easier.
- Peel and Prepare the Peppers: Once the peppers have steamed, gently peel off the skins. Use a small knife to make a slit down the side of each pepper and carefully remove the seeds, keeping the peppers intact.
- Stuff the Peppers: Stuff each pepper with cheese strips, making sure that they’re filled but not overstuffed. Close the slit and secure with a toothpick if necessary.
- Prepare the Batter: In a medium bowl, beat the egg whites until stiff peaks form. In a separate bowl, whisk the egg yolks and gently fold them into the beaten egg whites. Season with salt and pepper.
- Coat the Peppers: Roll each stuffed pepper in flour, shaking off any excess. Dip them into the egg batter, making sure they’re well-coated.
- Fry the Peppers: Heat about 1 inch of vegetable oil in a large skillet over medium-high heat. Carefully place the coated peppers into the hot oil and fry until golden brown on all sides, about 3-4 minutes per side. Remove and drain on paper towels.
- Prepare the Sauce: In a saucepan, heat the tomato sauce over medium heat. Stir in the cumin and garlic powder, and let it simmer for about 10 minutes.
- Serve: Pour a generous amount of tomato sauce onto a serving platter and place the fried chiles rellenos on top. Serve with additional sauce on the side.
Extra Tips
When making Chiles Rellenos, it’s important to verify the peppers are roasted well enough to easily peel the skins, which can otherwise impart a bitter taste.
For a smoother batter, make sure your egg whites are beaten to stiff peaks before folding in the yolks. If you’re looking for an extra kick, consider adding finely chopped jalapeños or spices to the cheese filling.
Finally, for those who prefer a lighter version, the peppers can be baked instead of fried, though this will result in a less traditional texture.
Easy Chicken Tortilla Soup
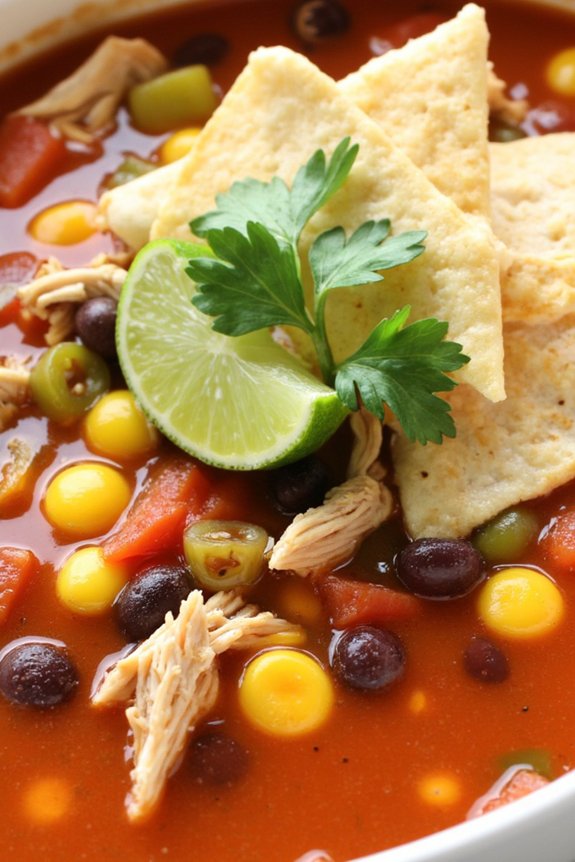
If you’re in the mood for a comforting and flavorful Mexican-inspired dish, Easy Chicken Tortilla Soup is a perfect choice. This hearty soup is a delightful combination of tender chicken, savory broth, and vibrant vegetables, all brought together with the unique addition of crispy tortilla strips.
It’s a meal that warms you from the inside out, making it an excellent option for a cozy dinner with family or friends. The recipe is straightforward and doesn’t require much time, making it ideal for busy weeknights or when you’re looking for a quick yet satisfying meal.
This recipe serves 4-6 people, making it great for a small gathering or to enjoy leftovers the next day. The ingredients are simple and easily accessible, allowing you to create this delicious soup without any hassle.
Plus, it’s adaptable, so you can customize it to suit your taste preferences or dietary needs. Whether you prefer it mild or spicy, with extra veggies or topped with cheese, this soup can be tailored to your liking.
Ingredients:
- 2 tablespoons olive oil
- 1 medium onion, diced
- 2 cloves garlic, minced
- 1 red bell pepper, diced
- 1 green bell pepper, diced
- 1 teaspoon ground cumin
- 1 teaspoon chili powder
- 6 cups chicken broth
- 1 can (14.5 ounces) diced tomatoes
- 1 can (15 ounces) black beans, drained and rinsed
- 2 cups cooked chicken, shredded
- 1 cup corn kernels (fresh, frozen, or canned)
- Salt and pepper to taste
- 1/4 cup fresh cilantro, chopped
- Juice of 1 lime
- 6 corn tortillas, cut into strips
- Vegetable oil for frying
Cooking Instructions:
- Prepare the Vegetables: Begin by heating the olive oil in a large pot over medium heat. Add the diced onion, minced garlic, red bell pepper, and green bell pepper. Sauté for 5-7 minutes until the vegetables are soft and the onions are translucent.
- Season the Vegetables: Stir in the ground cumin and chili powder, cooking for another minute to allow the spices to become fragrant.
- Add Liquids and Cook: Pour in the chicken broth and diced tomatoes. Bring the mixture to a boil, then reduce the heat to a simmer.
- Incorporate the Main Ingredients: Add the black beans, shredded chicken, and corn kernels. Let the soup simmer for 15-20 minutes, allowing the flavors to meld together. Season with salt and pepper to taste.
- Finish with Fresh Ingredients: Stir in the chopped cilantro and lime juice just before serving to add a burst of freshness to the soup.
- Prepare the Tortilla Strips: While the soup is simmering, heat vegetable oil in a skillet over medium heat. Fry the tortilla strips until they’re golden and crispy. Remove them from the oil and drain on paper towels.
- Serve: Ladle the soup into bowls and top each serving with crispy tortilla strips. Optionally, you can add toppings such as avocado, cheese, or sour cream.
Extra Tips:
When cooking Easy Chicken Tortilla Soup, feel free to adjust the spice level by adding more chili powder or incorporating fresh jalapeños.
For a thicker soup, you can blend a portion of the soup and then mix it back in. To save time, use rotisserie chicken or leftover cooked chicken.
If you’re looking for a vegetarian option, substitute the chicken with additional beans or vegetables and use vegetable broth. This soup also pairs well with a side of warm cornbread or a fresh green salad. Enjoy your meal!
Pork Carnitas Tacos
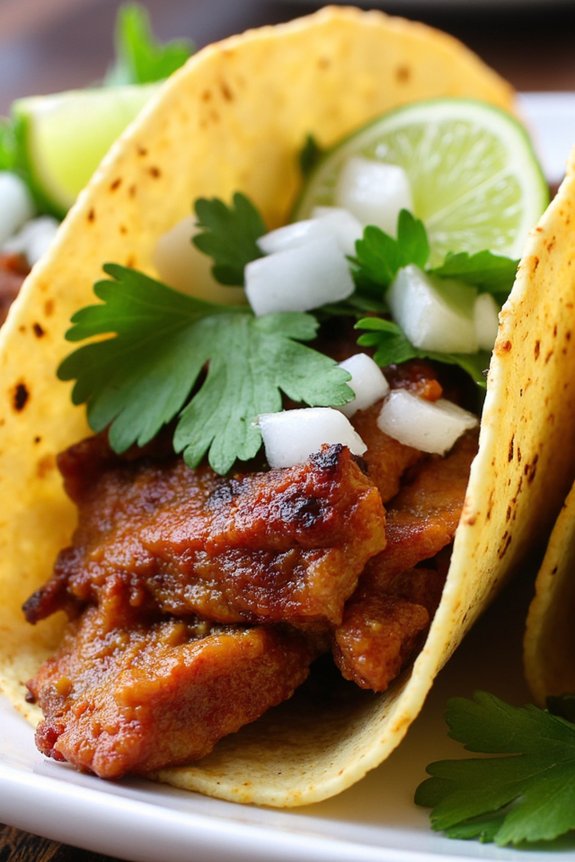
Pork Carnitas Tacos are a classic Mexican dish that brings a burst of flavor and a bit of adventure to your dinner table. The dish consists of tender, crispy pork wrapped in warm tortillas and topped with fresh garnishes. The secret to perfect carnitas lies in slow-cooking the pork until it’s succulent and flavorful, then finishing it off with a quick broil for that ideal crispiness. Served with a variety of toppings like onions, cilantro, and lime, these tacos are bound to become a family favorite.
Creating the perfect Pork Carnitas Tacos involves a blend of spices and a slow-cooking method that allows the pork to soak up all the delicious flavors. Once cooked, the pork is shredded and broiled to achieve a crispy texture that contrasts beautifully with the soft tortillas. These tacos are perfect for family dinners or gatherings, offering a vibrant taste of Mexican cuisine that’s both satisfying and easy to prepare.
Ingredients for 4-6 servings:
- 3 pounds pork shoulder or pork butt
- 1 tablespoon salt
- 1 teaspoon black pepper
- 1 tablespoon ground cumin
- 1 tablespoon dried oregano
- 1 tablespoon garlic powder
- 2 teaspoons onion powder
- 1 cup orange juice
- 1/2 cup lime juice
- 1/2 cup chicken broth
- 1 large onion, quartered
- 4 cloves garlic, minced
- 16 corn tortillas
- 1 cup chopped fresh cilantro
- 1 cup diced onions
- Lime wedges, for serving
Cooking Instructions:
- Prepare the Pork: Start by cutting the pork shoulder into large chunks, about 3-4 inches each. This will help the meat cook evenly and absorb flavors more efficiently.
- Season the Meat: In a large bowl, combine salt, black pepper, cumin, oregano, garlic powder, and onion powder. Rub this spice mix all over the pork chunks, making sure they’re well coated.
- Slow Cook the Pork: Place the seasoned pork into a slow cooker. Add the orange juice, lime juice, chicken broth, quartered onion, and minced garlic. Cover and cook on low for 8-10 hours, or until the pork is tender and easily shredded.
- Shred the Pork: Once the pork is cooked, remove it from the slow cooker and shred it using two forks. Discard any large pieces of fat.
- Crisp the Pork: Preheat your oven broiler. Spread the shredded pork on a baking sheet and place it under the broiler for about 5-10 minutes, or until the edges are crispy. Keep a close eye to avoid burning.
- Warm the Tortillas: Heat the corn tortillas on a skillet or directly over a gas flame until they’re warm and pliable.
- Assemble the Tacos: Fill each tortilla with a generous portion of crispy pork. Top with chopped cilantro, diced onions, and a squeeze of lime juice.
- Serve: Serve the tacos immediately, accompanied by lime wedges for an extra burst of flavor.
Extra Tips:
For the best flavor, prepare the pork a day in advance and let it sit in the refrigerator overnight. This allows the spices to penetrate the meat more deeply.
If you prefer a spicier taco, consider adding sliced jalapeños or a splash of hot sauce as a topping.
When crisping the pork under the broiler, keep an eye on it and stir occasionally to guarantee even crisping.
For a gluten-free option, make sure to use corn tortillas rather than flour.
Simple Guacamole and Chips
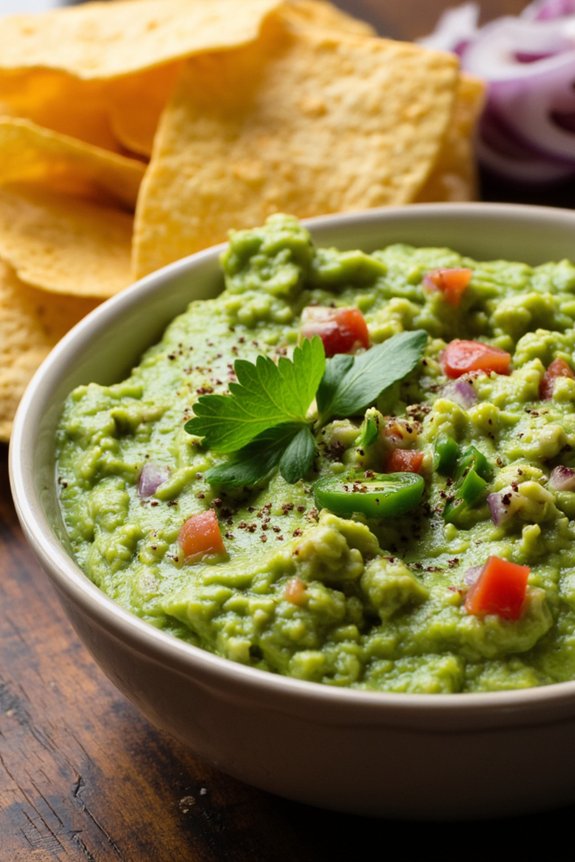
Guacamole is a classic Mexican dish that has become a favorite around the world. Its creamy texture and rich flavor make it the perfect accompaniment to a variety of dishes, but it’s most commonly enjoyed with a side of crispy tortilla chips.
This simple guacamole recipe is easy to prepare and uses fresh ingredients to guarantee a delicious and authentic taste. Perfect for a casual gathering or as a starter for a Mexican-themed dinner, this guacamole is sure to be a hit with your guests.
The secret to a great guacamole lies in the quality of the avocados and the balance of flavors. Ripe avocados provide a creamy base, while lime juice adds a rejuvenating zing. The addition of cilantro and jalapeño gives it a traditional kick, while onion and tomatoes add texture and depth.
Whether you prefer your guacamole smooth or chunky, this recipe can be adjusted to suit your taste. Serve it with a big bowl of tortilla chips and watch it disappear in no time.
Ingredients for 4-6 servings:
- 4 ripe avocados
- 1 lime, juiced
- 1 teaspoon salt
- 1/2 cup diced onion
- 3 tablespoons chopped fresh cilantro
- 2 roma tomatoes, diced
- 1 teaspoon minced garlic
- 1 pinch ground cayenne pepper (optional)
- 1 jalapeño, seeded and finely chopped
- Tortilla chips for serving
Cooking Instructions:
- Prepare the Avocados: Begin by cutting the avocados in half and removing the pits. Scoop the flesh into a large mixing bowl. Use a fork or a potato masher to mash the avocados to your desired consistency—smooth or chunky.
- Add Lime and Salt: Immediately add the lime juice and salt to the mashed avocados. This won’t only flavor the guacamole but also help prevent the avocados from browning.
- Mix in Vegetables: Stir in the diced onion, chopped cilantro, tomatoes, and minced garlic. Make sure everything is evenly distributed for a consistent flavor throughout.
- Spice it Up: Add the finely chopped jalapeño and a pinch of cayenne pepper if you like some heat. Mix well to guarantee the spices are incorporated.
- Taste and Adjust: Taste the guacamole and adjust the seasoning if necessary. You might want to add more lime juice, salt, or cilantro based on your preference.
- Serve: Transfer the guacamole to a serving bowl. Serve immediately with a side of tortilla chips.
Extra Tips:
When selecting avocados, gently squeeze them to guarantee they’re ripe; they should yield slightly under pressure but not feel mushy.
To keep your guacamole fresh for longer, press a piece of plastic wrap directly onto the surface of the guacamole before refrigerating to minimize oxidation.
If you prefer a spicier guacamole, feel free to leave the seeds in the jalapeño or add an extra one. Enjoy your Simple Guacamole and Chips as a delightful appetizer or snack!
Mexican Street Corn Salad
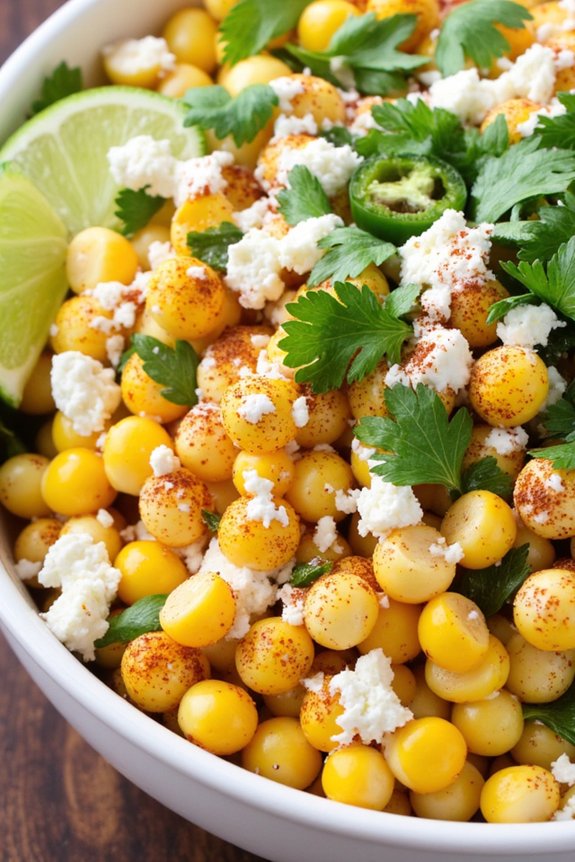
Mexican Street Corn Salad is a delightful twist on the classic Mexican street food known as elote. This vibrant and flavorful salad captures all the deliciousness of traditional elote but in a convenient, easy-to-eat form. Perfect for a potluck, barbecue, or a simple family dinner, this dish combines the smoky sweetness of charred corn with the zing of fresh lime, creamy mayonnaise, and crumbly cotija cheese, resulting in a side dish that’s sure to be a crowd-pleaser.
In addition to its mouthwatering flavor profile, Mexican Street Corn Salad is also incredibly versatile. You can customize it with your favorite toppings or adjust the spice level to suit your taste. Whether you serve it alongside grilled meats or enjoy it as a standalone dish, this salad is packed with delicious ingredients that celebrate the essence of Mexican cuisine. Gather your ingredients and get ready to bring a taste of Mexico to your table.
Ingredients for 4-6 servings:
- 6 ears of corn, husked
- 1/4 cup mayonnaise
- 1/4 cup sour cream
- 1/2 cup cotija cheese, crumbled
- 1/4 cup fresh cilantro, chopped
- 1/2 teaspoon chili powder
- 1/2 teaspoon smoked paprika
- 1 tablespoon lime juice
- 1/2 teaspoon salt
- 1/4 teaspoon black pepper
- 1 jalapeño, seeded and finely chopped (optional)
- Lime wedges for serving
Cooking Instructions:
- Prepare the Corn: Preheat your grill to medium-high heat. Place the corn directly on the grill grates and cook, turning occasionally, until the corn is charred and cooked through, about 10-12 minutes. If you don’t have a grill, you can also use a broiler. Once cooked, remove the corn from the grill and let it cool slightly.
- Cut the Corn Kernels: Once the corn is cool enough to handle, use a sharp knife to carefully cut the kernels off the cob. Hold the cob vertically and slice downward to remove the kernels. Transfer the kernels to a large mixing bowl.
- Make the Dressing: In a separate small bowl, combine the mayonnaise, sour cream, lime juice, chili powder, smoked paprika, salt, and black pepper. Mix until the dressing is smooth and well combined.
- Assemble the Salad: Add the cotija cheese, chopped cilantro, and finely chopped jalapeño (if using) to the bowl with the corn kernels. Pour the prepared dressing over the salad ingredients and toss everything together until the corn is evenly coated with the dressing.
- Chill and Serve: For best flavor, cover the salad and refrigerate for at least 30 minutes to allow the flavors to meld. Before serving, give the salad a final toss and garnish with additional cotija cheese and cilantro if desired. Serve with lime wedges on the side for an extra burst of fresh lime juice.
Extra Tips:
When making Mexican Street Corn Salad, feel free to adjust the ingredients to suit your preferences. For a spicier kick, add more jalapeño or sprinkle some cayenne pepper into the dressing.
If cotija cheese isn’t available, feta cheese is a great alternative. Additionally, grilling the corn is key to achieving that authentic smoky flavor, but if time or equipment is limited, canned or frozen corn can be used in a pinch. Just be sure to drain and dry them well before using.
Enjoy this salad as a revitalizing side dish or even as a topping for tacos or nachos!
Instant Pot Chicken Pozole

Pozole is a traditional Mexican stew that’s both comforting and flavorful, made with hominy, meat, and a deliciously spiced broth. This Instant Pot Chicken Pozole is a quicker version of the classic dish, allowing you to enjoy all the rich flavors without spending hours at the stove. The pressure cooker helps to infuse the chicken and hominy with the vibrant spices, creating an inviting meal perfect for both weeknights and special occasions.
This recipe yields a hearty serving for 4-6 people. It’s perfect for a family dinner or a small gathering, where everyone can enjoy a bowl of this warm and satisfying stew. By using an Instant Pot, you save time while still achieving the depth of flavor that pozole is known for. Serve it with your choice of traditional garnishes, such as radishes, cabbage, and lime, to add freshness and texture to each bowl.
Ingredients:
- 2 lbs boneless, skinless chicken thighs
- 1 tablespoon vegetable oil
- 1 medium onion, finely chopped
- 4 cloves garlic, minced
- 1 teaspoon ground cumin
- 1 teaspoon dried oregano
- 1 teaspoon smoked paprika
- 1/2 teaspoon chili powder
- 6 cups chicken broth
- 2 (15 oz) cans hominy, drained and rinsed
- 2 bay leaves
- Salt and pepper, to taste
- 2 limes, cut into wedges
- Optional garnishes: shredded cabbage, sliced radishes, chopped cilantro, avocado slices, tortilla chips
Cooking Instructions:
- Prepare the Chicken: Begin by seasoning the chicken thighs with salt and pepper. Set the Instant Pot to the sauté setting and add the vegetable oil. Once hot, sear the chicken thighs on both sides until they’re browned, about 3-4 minutes per side. Remove the chicken from the pot and set aside.
- Sauté the Aromatics: In the same pot, add the chopped onion and garlic. Sauté for 2-3 minutes until the onion becomes translucent and fragrant. Stir in the cumin, oregano, smoked paprika, and chili powder, cooking for an additional minute to toast the spices.
- Combine Ingredients: Pour in the chicken broth to deglaze the pot, scraping up any browned bits from the bottom. Return the seared chicken to the pot along with the drained hominy and bay leaves.
- Pressure Cook: Secure the lid on the Instant Pot and set it to the pressure cook setting on high for 15 minutes. Once the cooking time is complete, allow the pressure to release naturally for 10 minutes before performing a quick release to remove any remaining pressure.
- Shred the Chicken: Carefully open the lid and remove the chicken thighs. Shred them using two forks and return the shredded chicken to the pot. Stir everything together, and taste to adjust the seasoning with additional salt and pepper if needed.
- Serve: Ladle the pozole into bowls and serve with lime wedges and your choice of traditional garnishes.
Extra Tips:
For an even richer flavor, consider roasting or toasting the spices before adding them to the pot. This can enhance their aromas and add depth to the dish.
Additionally, if you prefer a spicier pozole, you can add diced jalapeños or a sprinkle of cayenne pepper to the sautéed onions and garlic. Always taste the pozole before serving and adjust the spice level and seasoning according to your preference.
Enjoy experimenting with different garnishes to find your perfect combination!
Sizzling Steak Fajita Skillet
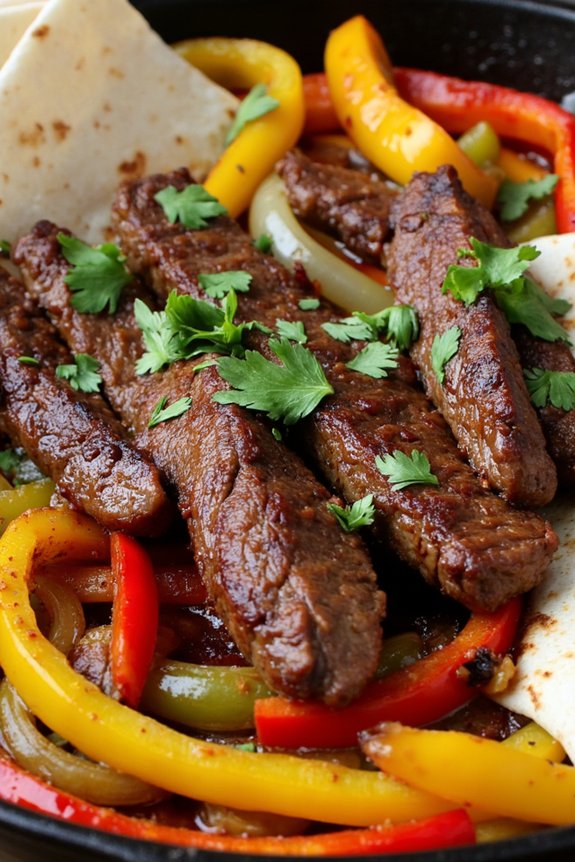
Sizzling Steak Fajita Skillet is a vibrant and flavorful dish that embodies the spirit of Mexican cuisine. The sizzling sound and aroma of the well-seasoned steak and vegetables are enough to draw everyone to the table. This recipe combines juicy marinated steak with a colorful array of bell peppers and onions, all cooked to perfection in a cast-iron skillet. The dish is typically served with warm tortillas, allowing you to create your own fajitas right at the table. It’s a fun and interactive way to enjoy a delicious meal with family or friends.
What makes this dish truly special is the use of traditional Mexican spices and marinades that infuse the meat with rich, bold flavors. The steak is marinated to enhance its tenderness and taste, while the vegetables are sautéed until they achieve a perfect balance of softness and crispness.
Whether you’re hosting a dinner party or simply want to enjoy a hearty meal, this Sizzling Steak Fajita Skillet is sure to impress. It’s not only a feast for the taste buds but also a visually appealing dish that’s vibrant and full of life.
Ingredients (Serves 4-6)
- 2 pounds of flank steak or skirt steak
- 3 bell peppers (red, yellow, and green), sliced
- 1 large onion, sliced
- 3 tablespoons olive oil
- 3 tablespoons lime juice
- 3 cloves garlic, minced
- 2 teaspoons chili powder
- 1 teaspoon cumin
- 1 teaspoon paprika
- 1/2 teaspoon salt
- 1/2 teaspoon black pepper
- 1/4 cup cilantro, chopped
- Tortillas
- Optional toppings: sour cream, guacamole, shredded cheese, salsa
Cooking Instructions
- Marinate the Steak: In a large bowl, combine olive oil, lime juice, minced garlic, chili powder, cumin, paprika, salt, and black pepper. Mix well to create the marinade. Add the steak, making sure it’s well-coated with the marinade. Cover and refrigerate for at least 30 minutes, or up to 4 hours for best flavor.
- Prepare Vegetables: While the steak is marinating, slice bell peppers and onion into strips. Set aside.
- Cook the Steak: Heat a cast-iron skillet over medium-high heat. Once hot, add the marinated steak to the skillet. Sear the steak for about 3-4 minutes on each side, or until it reaches your desired level of doneness. Remove the steak from the skillet and let it rest for a few minutes before slicing.
- Sauté Vegetables: In the same skillet, add the sliced bell peppers and onion. Sauté for about 5-7 minutes until they’re slightly tender but still crisp. The vegetables will pick up the flavors from the steak residue left in the skillet, enhancing their taste.
- Combine and Serve: Slice the steak into thin strips and return it to the skillet with the sautéed vegetables. Stir to combine and heat through for an additional 2-3 minutes. Sprinkle chopped cilantro over the top for a fresh finish. Serve immediately with warm tortillas and your choice of toppings.
Extra Tips
For the best results, allow the steak to marinate for the full 4 hours if possible, as this will greatly enhance its flavor and tenderness. A cast-iron skillet is ideal for this recipe because it retains heat well and provides a nice sear on the steak.
When slicing the steak, cut against the grain to ensure it remains tender and easy to chew. Finally, have your tortillas and toppings ready before you start cooking, so you can enjoy the fajitas hot off the skillet.
Quick Beef Enchilada Casserole

Quick Beef Enchilada Casserole is a delightful fusion of flavors that brings the vibrant taste of Mexico right to your dining table. This dish is perfect for those busy weeknights when you’re craving something hearty yet don’t want to spend hours in the kitchen.
It’s a layered casserole that combines seasoned ground beef, zesty enchilada sauce, and gooey melted cheese, all nestled between soft corn tortillas. The result is a comforting meal that’s bound to please both kids and adults alike.
The great thing about this casserole is its simplicity and versatility. You can prepare it ahead of time, making it an excellent option for meal prep or family gatherings. Just pop it in the oven when you’re ready to eat, and in no time, you’ll have a mouthwatering meal that’s ready to serve.
Plus, it’s a one-dish wonder, meaning less cleanup for you. Serve it with a fresh salad or some Mexican-style rice to complete your meal.
Ingredients for 4-6 servings:
- 1 pound ground beef
- 1 medium onion, chopped
- 2 cloves garlic, minced
- 1 teaspoon ground cumin
- 1 teaspoon chili powder
- Salt and pepper to taste
- 1 (10-ounce) can red enchilada sauce
- 1 (4-ounce) can chopped green chilies
- 2 cups shredded cheddar cheese
- 10-12 small corn tortillas
- 1/4 cup chopped fresh cilantro (optional)
- Sliced black olives for garnish (optional)
- Sour cream for serving (optional)
Cooking Instructions:
1. Preheat the Oven: Set your oven to 375°F (190°C) to make sure it’s ready for baking the casserole.
2. Cook the Beef Mixture: In a large skillet over medium heat, add the ground beef and chopped onion. Cook until the beef is browned and the onion is soft, about 5-7 minutes. Drain any excess fat.
3. Season the Beef: Stir in the minced garlic, ground cumin, chili powder, salt, and pepper. Cook for another 1-2 minutes until the garlic is fragrant.
4. Add Chilies and Enchilada Sauce: Mix in the chopped green chilies and half of the enchilada sauce. Stir well to combine and let it simmer for about 3 minutes.
5. Layer the Casserole: In a 9×13-inch baking dish, spread a thin layer of the remaining enchilada sauce on the bottom. Place a layer of corn tortillas over the sauce, followed by half of the beef mixture and a layer of cheese.
Repeat the layers, finishing with a layer of tortillas topped with the remaining enchilada sauce and cheese.
6. Bake: Cover the dish with aluminum foil and bake in the preheated oven for 20 minutes. Remove the foil and bake for an additional 10 minutes or until the cheese is bubbly and golden brown.
7. Garnish and Serve: Let the casserole cool for a few minutes before sprinkling with chopped cilantro and sliced black olives. Serve with a dollop of sour cream if desired.
Extra Tips:
For an extra kick, consider adding a diced jalapeño to the beef mixture when cooking. If you prefer a vegetarian version, substitute the ground beef with black beans or a meat substitute of your choice.
Feel free to experiment with different types of cheese, such as Monterey Jack or a Mexican cheese blend, to tailor the dish to your taste preferences. Additionally, make certain to use fresh corn tortillas, as they hold up better in the casserole compared to flour tortillas.
Enjoy your Quick Beef Enchilada Casserole with your favorite hot sauce for an added burst of flavor.