

As someone who loves sharing easy and healthy meals with my family, I’ve found some fantastic recipes that are quick, nutritious, and delightful. Think lemon herb grilled chicken sizzling on the grill, paired with fluffy quinoa, or a colorful veggie stir-fry with crispy tofu. These dishes are not only nutritious but also visually appealing. Hungry for more ideas to make family dinners satisfying and wholesome? Let’s explore these vibrant meals together!
Lemon Herb Grilled Chicken With Quinoa
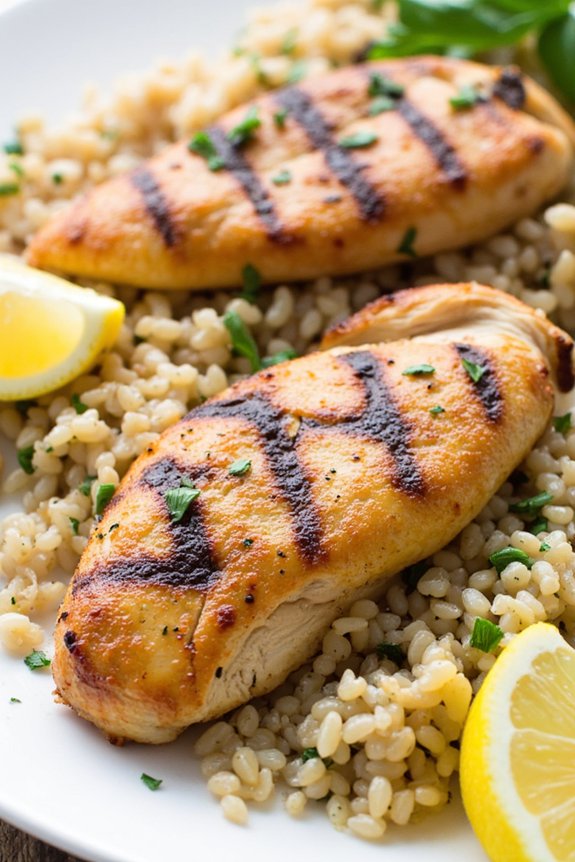
Lemon Herb Grilled Chicken With Quinoa is a delightful and healthy dinner option perfect for those looking to enjoy a flavorful meal without compromising on nutrition. This dish features juicy, marinated chicken breasts grilled to perfection, paired with wholesome quinoa that’s both light and satisfying. The infusion of lemon and herbs adds a revitalizing zest that complements the nutty taste of quinoa, creating a harmonious balance of flavors.
Whether you’re hosting a dinner party or preparing a weeknight meal for the family, this recipe is sure to please everyone at the table.
Quinoa, often referred to as a superfood, serves as the perfect base for this dish. It’s packed with protein, fiber, and essential nutrients, making it an excellent choice for a health-conscious meal. The lemon herb marinade, made with fresh lemon juice, olive oil, garlic, and a medley of aromatic herbs, infuses the chicken with vibrant flavors, guaranteeing each bite is tender and delectable.
This recipe is easy to prepare and can be cooked on an outdoor grill or a stovetop grill pan, making it versatile and accessible for any kitchen setup.
Ingredients (Serves 4-6):
- 4 boneless, skinless chicken breasts
- 1 cup quinoa
- 2 cups water or chicken broth
- 1/4 cup fresh lemon juice
- 1/4 cup olive oil
- 3 cloves garlic, minced
- 1 tablespoon fresh thyme leaves
- 1 tablespoon fresh rosemary, chopped
- 1 tablespoon fresh parsley, chopped
- Salt and pepper to taste
- Lemon wedges for garnish
Cooking Instructions:
- Prepare the Marinade: In a mixing bowl, whisk together the lemon juice, olive oil, minced garlic, thyme, rosemary, parsley, salt, and pepper. Confirm the ingredients are well combined to form a uniform marinade.
- Marinate the Chicken: Place the chicken breasts in a shallow dish or resealable plastic bag. Pour the marinade over the chicken, making sure each piece is well coated. Cover the dish or seal the bag and refrigerate for at least 30 minutes, or up to 4 hours for more intense flavor.
- Cook the Quinoa: While the chicken is marinating, rinse the quinoa under cold water to remove any bitterness. In a medium saucepan, bring 2 cups of water or chicken broth to a boil. Add the rinsed quinoa, reduce the heat to low, cover, and simmer for about 15 minutes or until the liquid is absorbed and the quinoa is fluffy.
- Preheat the Grill: Preheat your grill or grill pan over medium-high heat. Lightly oil the grates or pan to prevent sticking.
- Grill the Chicken: Remove the chicken from the marinade and place it on the preheated grill. Cook for about 6-7 minutes on each side or until the internal temperature reaches 165°F (75°C) and the chicken is golden brown with grill marks.
- Serve: Fluff the cooked quinoa with a fork and transfer it to a serving platter. Slice the grilled chicken and arrange it over the quinoa. Garnish with lemon wedges and additional fresh herbs, if desired.
Extra Tips: To enhance the flavor, consider adding a sprinkle of lemon zest to the marinade. If you prefer a spicier kick, include a pinch of red pepper flakes in the marinade. For a complete meal, serve this dish with a side of steamed vegetables or a fresh green salad.
Remember to let the chicken rest for a few minutes after grilling to allow the juices to redistribute, guaranteeing each bite is tender and juicy.
Veggie-Packed Stir-Fry With Tofu
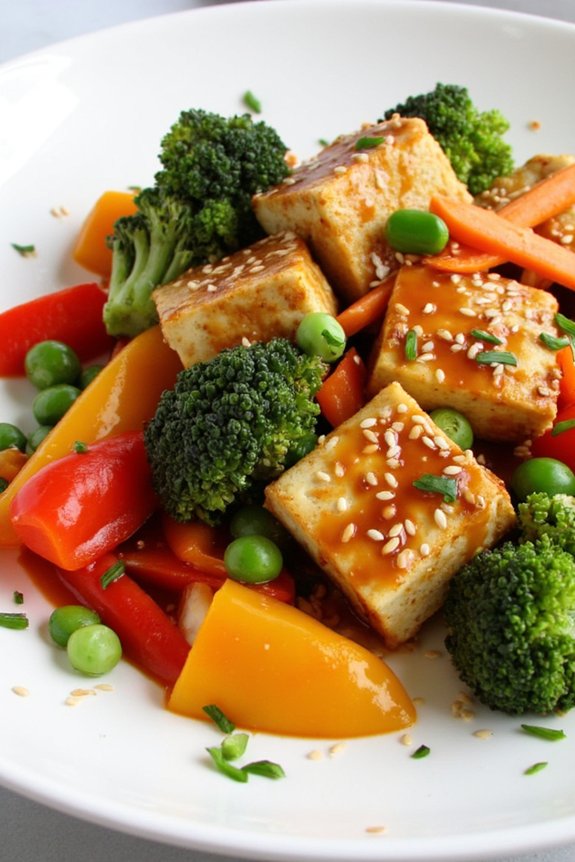
Looking for a delicious and healthy dinner option that’s quick to prepare and packed with nutrients? This Veggie-Packed Stir-Fry With Tofu is perfect for you! It’s a vibrant and colorful dish that combines fresh vegetables and protein-rich tofu, all stir-fried to perfection in a savory sauce. Not only is this dish vegetarian and vegan-friendly, but it also makes for a satisfying meal that can be enjoyed by everyone.
Whether you’re a seasoned cook or a beginner in the kitchen, this recipe is straightforward and easy to follow, guaranteeing a delightful dining experience.
The beauty of this stir-fry lies in its versatility. You can use a variety of vegetables based on your preference or whatever you have on hand, making it an excellent way to clear out your fridge. The tofu is cooked until golden brown, adding a delightful texture that complements the crisp vegetables.
This recipe makes enough to serve 4-6 people, making it ideal for family dinners or meal prepping for the week. Enjoy this nourishing meal that isn’t only good for your body but also incredibly satisfying to your taste buds.
Ingredients (Serves 4-6):
- 1 block (14 oz) firm tofu, pressed and cubed
- 2 tablespoons vegetable oil, divided
- 1 red bell pepper, sliced
- 1 yellow bell pepper, sliced
- 1 cup broccoli florets
- 1 cup snap peas
- 1 cup carrots, julienned
- 3 cloves garlic, minced
- 1 tablespoon fresh ginger, minced
- 1/4 cup soy sauce
- 2 tablespoons hoisin sauce
- 1 tablespoon sesame oil
- 1 tablespoon cornstarch mixed with 2 tablespoons water (optional, for thickening)
- 1/4 cup green onions, chopped
- Sesame seeds for garnish
- Cooked rice or quinoa, for serving
Cooking Instructions:
- Prepare the Tofu: Start by pressing the tofu to remove excess moisture. Once pressed, cut it into 1-inch cubes. This will help the tofu become crispy when cooked.
- Cook the Tofu: Heat 1 tablespoon of vegetable oil in a large skillet or wok over medium-high heat. Add the tofu cubes and cook until they’re golden brown and crispy on all sides, about 8-10 minutes. Remove the tofu from the skillet and set aside.
- Stir-Fry the Vegetables: In the same skillet, add the remaining tablespoon of oil. Add the minced garlic and ginger, and sauté for about 30 seconds until fragrant. Then add the sliced bell peppers, broccoli, snap peas, and carrots. Stir-fry the vegetables for about 5-7 minutes, or until they’re tender-crisp.
- Combine Tofu and Sauce: Return the cooked tofu to the skillet with the vegetables. Pour in the soy sauce, hoisin sauce, and sesame oil. Stir everything together until the tofu and vegetables are well coated. If you prefer a thicker sauce, add the cornstarch slurry and stir until the sauce thickens.
- Finish and Serve: Once everything is well combined and heated through, remove from heat. Garnish with chopped green onions and sesame seeds. Serve hot over cooked rice or quinoa.
Extra Tips:
For the best results, verify the tofu is well-pressed to remove as much moisture as possible before cooking. This helps achieve a crispy texture.
Feel free to mix and match vegetables to your liking or based on seasonal availability. If you want to add a bit of heat, consider adding a dash of red pepper flakes or a splash of sriracha.
Finally, this dish can be easily adapted for meal prep; simply store in airtight containers for up to 3 days in the refrigerator. Enjoy your nutritious and delicious Veggie-Packed Stir-Fry With Tofu!
One-Pot Spaghetti With Spinach and Tomatoes
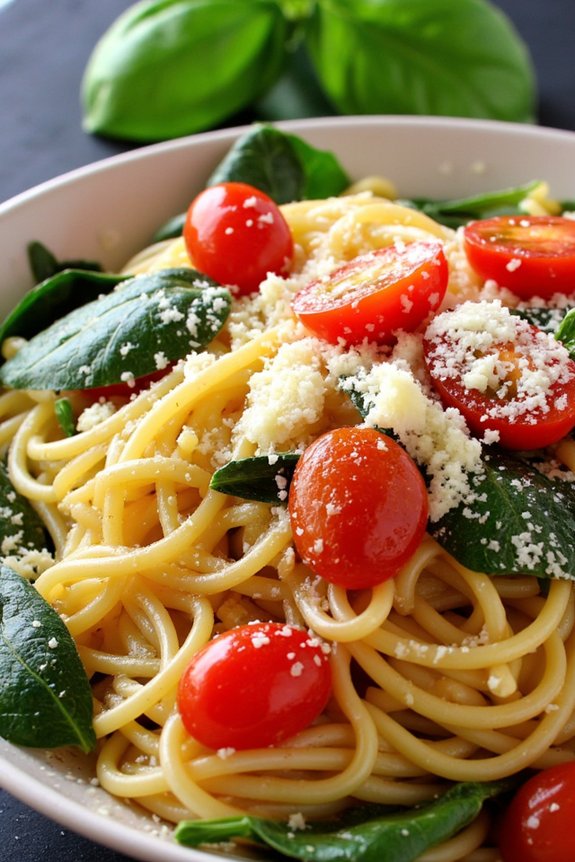
One-Pot Spaghetti With Spinach and Tomatoes is a delightful, healthy dinner option that’s perfect for busy weeknights. This dish brings together the rich flavors of ripe tomatoes, fresh spinach, and whole grain spaghetti, all cooked in one pot for easy preparation and minimal cleanup. The combination of fresh ingredients guarantees that every bite is packed with nutrients and flavor, making it a wholesome meal that everyone in the family will love.
The simplicity of this recipe doesn’t compromise its taste, as the natural flavors of the spinach and tomatoes shine through, complemented by aromatic garlic and a hint of basil. This recipe is particularly great for those who enjoy a quick yet satisfying dinner without the hassle of multiple pots and pans.
The one-pot method allows the spaghetti to absorb the flavors of the sauce as it cooks, resulting in a richer, more cohesive dish. It’s also a versatile recipe that can be easily adapted to suit personal preferences by adding protein like grilled chicken or shrimp, or even more vegetables. Not only is it an economical choice, but it also encourages the use of fresh, seasonal produce, making it a sustainable and healthy option.
Ingredients (Serves 4-6):
- 12 ounces whole grain spaghetti
- 2 tablespoons olive oil
- 3 cloves garlic, minced
- 1 onion, finely chopped
- 2 cups cherry tomatoes, halved
- 5 cups fresh spinach leaves
- 4 cups vegetable broth
- 1 teaspoon dried basil
- Salt and pepper to taste
- 1/2 cup grated Parmesan cheese
- Fresh basil leaves for garnish (optional)
Cooking Instructions:
- Prepare the Base: In a large pot or Dutch oven, heat the olive oil over medium heat. Add the minced garlic and chopped onion, sautéing until the onion becomes translucent and fragrant, about 3-4 minutes.
- Add Tomatoes and Spices: Stir in the cherry tomatoes and dried basil. Cook for another 2-3 minutes until the tomatoes begin to soften.
- Combine Pasta and Broth: Add the whole grain spaghetti and pour in the vegetable broth. Confirm the pasta is fully submerged. Increase the heat to high and bring the mixture to a boil.
- Cook the Pasta: Once boiling, reduce the heat to medium-low. Let the pasta cook for about 10-12 minutes, stirring occasionally to prevent sticking, until the pasta is tender and the broth is mostly absorbed.
- Incorporate Spinach: Add the fresh spinach to the pot, stirring it into the pasta until it wilts, about 2 minutes. Season the dish with salt and pepper to taste.
- Finish and Serve: Remove the pot from heat and stir in the grated Parmesan cheese until melted and well combined. Serve the spaghetti hot, garnished with fresh basil leaves if desired.
Extra Tips:
When cooking One-Pot Spaghetti With Spinach and Tomatoes, be sure to use a large enough pot to accommodate all the ingredients comfortably. This prevents the pasta from clumping together.
If you prefer a thicker sauce, allow the dish to rest for a few minutes after cooking; the residual heat will continue to thicken the sauce. Additionally, feel free to experiment by adding your favorite herbs or a splash of lemon juice for added brightness. For a dairy-free version, you can substitute nutritional yeast for the Parmesan cheese.
Quick and Easy Black Bean Tacos
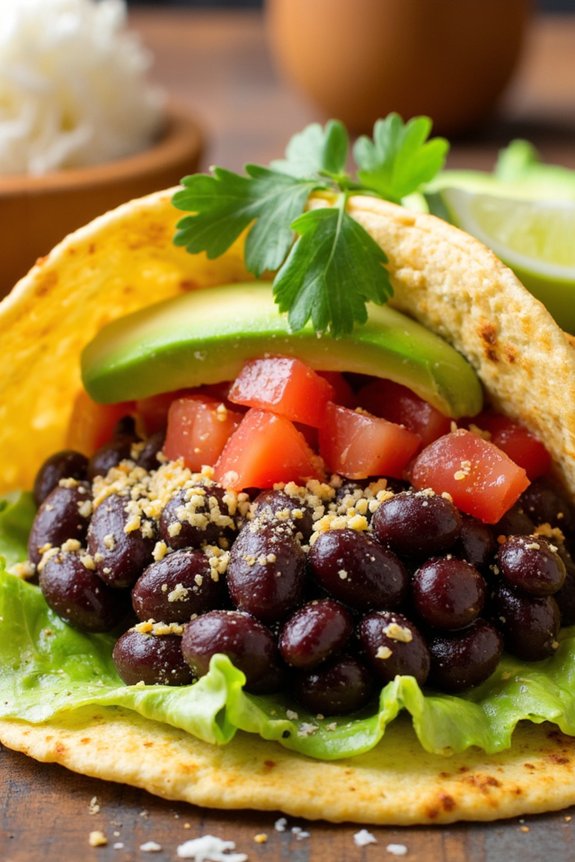
Black bean tacos are a delicious, nutritious, and incredibly easy meal to whip up on a busy weeknight. Packed with fiber and protein, black beans are a healthy alternative to meat that won’t leave you feeling heavy. This recipe isn’t only quick to prepare but also versatile, allowing you to customize it with your favorite toppings. In under 30 minutes, you can have a satisfying meal that the whole family will love.
Perfect for serving 4-6 people, these black bean tacos are an excellent way to enjoy a vegetarian meal without compromising on flavor. The ingredients used in this recipe are simple and readily available, making it a great option for those who want to incorporate more plant-based meals into their diet. With just a few steps, you’ll have a meal that’s both delicious and satisfying.
Ingredients:
- 2 cans (15 oz each) black beans, drained and rinsed
- 1 tablespoon olive oil
- 1 small onion, diced
- 2 cloves garlic, minced
- 1 teaspoon ground cumin
- 1 teaspoon chili powder
- Salt and pepper to taste
- 8-12 small corn tortillas
- 1 cup shredded lettuce
- 1 cup diced tomatoes
- 1 cup shredded cheese (cheddar or Mexican blend)
- 1 avocado, sliced
- Fresh cilantro for garnish
- Lime wedges for serving
Instructions:
- Prepare the Beans: In a large skillet, heat the olive oil over medium heat. Add the diced onion and sauté until translucent, about 3-4 minutes. Stir in the minced garlic and cook for an additional 1 minute until fragrant.
- Season the Beans: Add the drained and rinsed black beans to the skillet. Sprinkle with ground cumin, chili powder, salt, and pepper. Stir well to combine the ingredients. Cook for 5-7 minutes, allowing the beans to heat through and the flavors to meld together.
- Warm the Tortillas: While the beans are cooking, warm the corn tortillas. You can do this by placing them directly over a gas flame for a few seconds on each side, or by heating them in a dry skillet over medium heat until pliable.
- Assemble the Tacos: Once the beans are ready and the tortillas are warmed, it’s time to assemble the tacos. Place a spoonful of the black bean mixture onto each tortilla. Top with shredded lettuce, diced tomatoes, shredded cheese, and avocado slices.
- Garnish and Serve: Garnish each taco with fresh cilantro and a squeeze of lime juice. Serve immediately while the tortillas are still warm.
Extra Tips:
To enhance the flavor of your tacos, consider adding a dollop of sour cream or a drizzle of hot sauce for an extra kick. If you prefer a spicier version, you can add a chopped jalapeño or a pinch of cayenne pepper when sautéing the onions.
For a gluten-free option, verify your corn tortillas are certified gluten-free. Customize your tacos with additional toppings like pickled red onions or a splash of salsa for added flavor. Enjoy these black bean tacos as a main dish or pair them with a side of Mexican rice or a fresh salad for a complete meal.
Zesty Lemon Garlic Shrimp With Asparagus
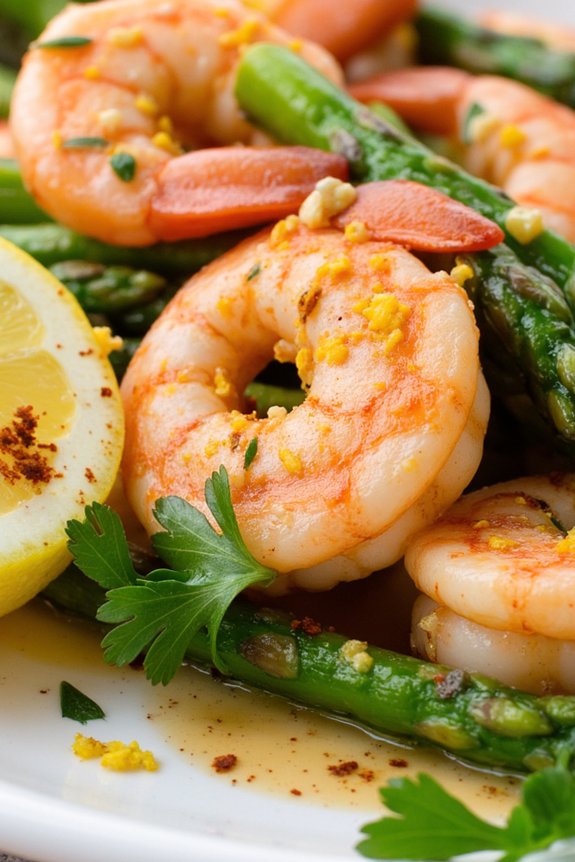
Zesty Lemon Garlic Shrimp With Asparagus is a delightful and healthy dinner option that combines the vibrant flavors of lemon and garlic with succulent shrimp and tender asparagus. This dish is perfect for those who are looking for a quick yet impressive meal that’s both nutritious and satisfying.
The citrusy lemon zest and aromatic garlic perfectly complement the sweetness of the shrimp, while the asparagus adds a revitalizing crunch to each bite. This dish can be prepared in under 30 minutes, making it an ideal choice for busy weeknights or a last-minute dinner party.
It’s not only delicious but also packed with essential nutrients, including protein, vitamins, and minerals. Whether you’re a seafood lover or just looking to incorporate more greens into your diet, Zesty Lemon Garlic Shrimp With Asparagus is sure to become a favorite in your recipe collection.
Serving Size: 4-6 people
Ingredients:
- 1 1/2 pounds large shrimp, peeled and deveined
- 1 pound asparagus, trimmed and cut into 2-inch pieces
- 3 tablespoons olive oil
- 4 cloves garlic, minced
- Zest and juice of 1 lemon
- Salt and pepper to taste
- 1/4 teaspoon red pepper flakes (optional)
- 2 tablespoons fresh parsley, chopped
Cooking Instructions:
- Prepare the Ingredients: Begin by cleaning and prepping your shrimp. Rinse them under cold water, then pat them dry with a paper towel. Trim the asparagus by snapping off the woody ends and cut them into 2-inch pieces.
- Heat the Oil: In a large skillet, heat 3 tablespoons of olive oil over medium-high heat. Verify the oil is hot but not smoking.
- Cook the Shrimp: Add the shrimp to the skillet in a single layer. Season with salt, pepper, and red pepper flakes, if using. Cook for about 2-3 minutes on one side until they start to turn pink.
- Add Garlic and Lemon: Flip the shrimp and add the minced garlic. Cook for another minute until the garlic is fragrant. Add the lemon zest and juice, stirring to coat the shrimp evenly.
- Cook the Asparagus: Push the shrimp to one side of the skillet and add the asparagus. Season with a pinch of salt and pepper. Sauté for 3-4 minutes until the asparagus is tender-crisp.
- Combine and Serve: Mix the shrimp and asparagus together in the skillet. Cook for an additional 1-2 minutes, verifying everything is well coated in the lemon-garlic sauce. Remove from heat, sprinkle with fresh parsley, and serve immediately.
Extra Tips:
For the best flavor, use fresh, high-quality shrimp and make sure they’re thoroughly dried before cooking to achieve a nice sear. If you prefer a bit of heat, don’t skip the red pepper flakes.
When zesting the lemon, be careful to only remove the yellow part of the peel, as the white pith can be bitter. This dish pairs beautifully with a side of quinoa or whole-grain pasta for a complete meal.
If you have leftovers, store them in an airtight container in the refrigerator for up to two days. Reheat gently to maintain the texture of the shrimp and asparagus.
Baked Salmon With Avocado Salsa
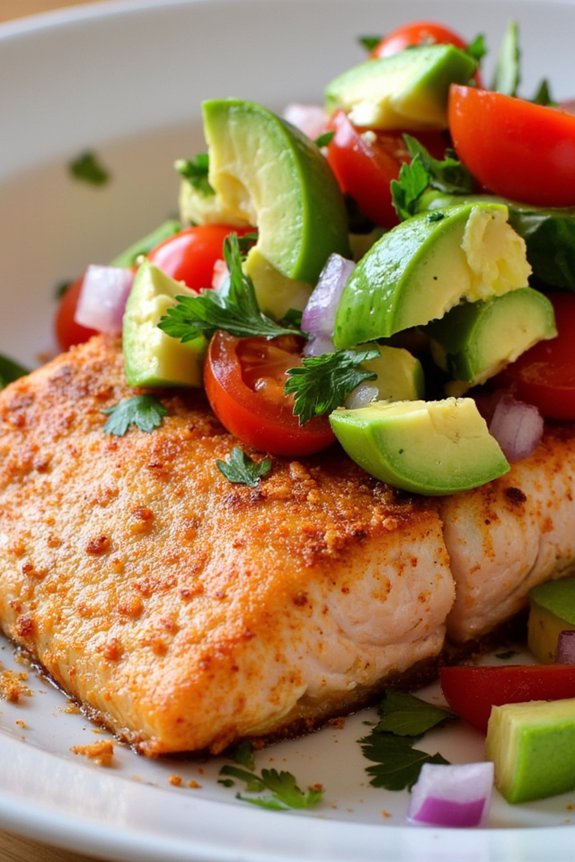
Baked Salmon With Avocado Salsa is a delightful and nutritious meal that marries the rich, buttery taste of salmon with the fresh and zesty flavors of avocado salsa. This dish isn’t only packed with essential nutrients but also offers a burst of flavors in every bite.
Perfect for a weeknight dinner or a special occasion, the combination of oven-baked salmon and a revitalizing avocado salsa makes it a crowd-pleaser. It’s easy to prepare, making it an ideal choice for both novice cooks and seasoned chefs.
The baked salmon is tender and flaky, seasoned to perfection, while the avocado salsa adds a creamy and tangy contrast, enhancing the overall flavor profile of the dish. This recipe is designed to serve 4-6 people, guaranteeing that everyone at the table can enjoy a generous portion of this healthy and delicious meal.
Whether you’re looking to impress your guests or simply want to prepare a wholesome dinner for your family, Baked Salmon With Avocado Salsa is sure to be a hit.
Ingredients for 4-6 Servings:
- 4-6 salmon fillets (about 6 ounces each)
- 2 tablespoons olive oil
- 1 teaspoon salt
- 1 teaspoon black pepper
- 1 teaspoon garlic powder
- 1 teaspoon paprika
- Juice of 1 lemon
- 2 ripe avocados, diced
- 1 small red onion, finely chopped
- 1-2 jalapeños, seeded and finely chopped
- 1 cup cherry tomatoes, quartered
- Juice of 2 limes
- 1/4 cup fresh cilantro, chopped
- Salt and pepper to taste
Cooking Instructions:
- Preheat the Oven: Start by preheating your oven to 400°F (200°C). This guarantees that the salmon cooks evenly and becomes perfectly flaky.
- Prepare the Salmon: Place the salmon fillets on a baking sheet lined with parchment paper or aluminum foil. Drizzle olive oil over the fillets and season them with salt, black pepper, garlic powder, and paprika. Squeeze the juice of one lemon over the seasoned fillets to add a zesty flavor.
- Bake the Salmon: Transfer the baking sheet to the preheated oven. Bake the salmon for 12-15 minutes, or until the fillets are cooked through and easily flake with a fork. Remove the salmon from the oven and let it rest for a few minutes.
- Prepare the Avocado Salsa: While the salmon is baking, prepare the avocado salsa. In a medium-sized bowl, combine the diced avocados, chopped red onion, finely chopped jalapeños, quartered cherry tomatoes, and chopped cilantro. Squeeze the lime juice over the mixture and season with salt and pepper to taste. Gently toss the ingredients until they’re well combined.
- Serve: Once the salmon has rested, place each fillet on a serving plate. Generously spoon the avocado salsa over the top of the salmon. Serve immediately and enjoy the vibrant flavors.
Extra Tips:
For the best results, choose salmon fillets with the skin on, as this helps keep the fish moist during baking. If you prefer a milder salsa, remove the seeds from the jalapeños before chopping them.
To prevent the avocado from browning, add the lime juice to the salsa just before serving. This dish pairs well with a side of quinoa or a fresh green salad for a complete meal.
Hearty Lentil Soup With Fresh Vegetables
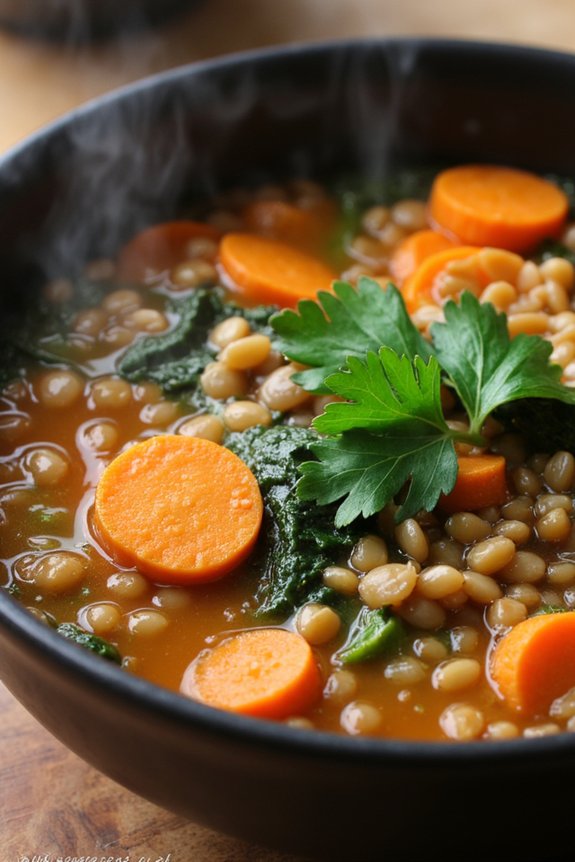
Hearty Lentil Soup With Fresh Vegetables is a nourishing and comforting dish perfect for a cozy dinner. This soup is packed with protein-rich lentils and vibrant vegetables, making it not only delicious but also incredibly healthy. The blend of spices and herbs adds depth to the soup, while the vegetables provide a satisfying texture and flavor.
Whether you’re serving it as a main course or a hearty appetizer, this soup is sure to warm you up on a chilly evening. This recipe is simple and straightforward, making it ideal for both beginner and experienced cooks. It requires minimal preparation and utilizes ingredients that are commonly found in most kitchens.
The lentils cook fairly quickly, and the vegetables add a fresh taste that complements the earthy lentils. This dish is also versatile, allowing for variations based on the vegetables you have on hand. Serve it with crusty bread or a side salad for a complete meal that everyone will love.
Ingredients (Serving Size: 4-6 people):
- 1 tablespoon olive oil
- 1 large onion, chopped
- 2 cloves garlic, minced
- 3 carrots, sliced
- 2 celery stalks, sliced
- 1 teaspoon ground cumin
- 1 teaspoon smoked paprika
- 1/2 teaspoon dried thyme
- 1 bay leaf
- 1 1/2 cups dried lentils, rinsed and drained
- 8 cups vegetable broth
- 1 can (14.5 oz) diced tomatoes
- 2 cups chopped spinach or kale
- Salt and pepper to taste
- Fresh parsley, chopped (for garnish)
Cooking Instructions:
- Prepare the Ingredients: Begin by chopping the onion, mincing the garlic, and slicing the carrots and celery. Rinse and drain the lentils to remove any debris.
- Sauté Aromatics: In a large pot, heat the olive oil over medium heat. Add the chopped onion and sauté for about 5 minutes until translucent. Add the minced garlic and sauté for an additional minute until fragrant.
- Add Vegetables and Spices: Stir in the sliced carrots and celery, cooking for another 3-4 minutes. Add the ground cumin, smoked paprika, dried thyme, and bay leaf, stirring to coat the vegetables with the spices.
- Simmer the Soup: Add the rinsed lentils, vegetable broth, and diced tomatoes to the pot. Bring the mixture to a boil, then reduce the heat to a simmer. Cover and let it cook for 25-30 minutes, or until the lentils are tender.
- Incorporate Greens: Once the lentils are cooked, stir in the chopped spinach or kale. Allow it to cook for an additional 5 minutes until the greens are wilted and tender.
- Season and Serve: Taste the soup and season with salt and pepper as needed. Remove the bay leaf before serving. Ladle the soup into bowls and garnish with fresh parsley. Serve hot with crusty bread or a side salad.
Extra Tips: To enhance the flavor of this Hearty Lentil Soup With Fresh Vegetables, consider making it a day ahead. The flavors meld beautifully overnight, resulting in an even tastier soup.
You can also customize the vegetables based on what’s in season or your personal preference. For added protein, consider adding cooked chicken or sausage. If you prefer a thicker soup, use a hand blender to partially purée the soup for a creamier texture.
Finally, always remember to adjust the seasoning to your taste right before serving.
Teriyaki Chicken and Broccoli Rice Bowl
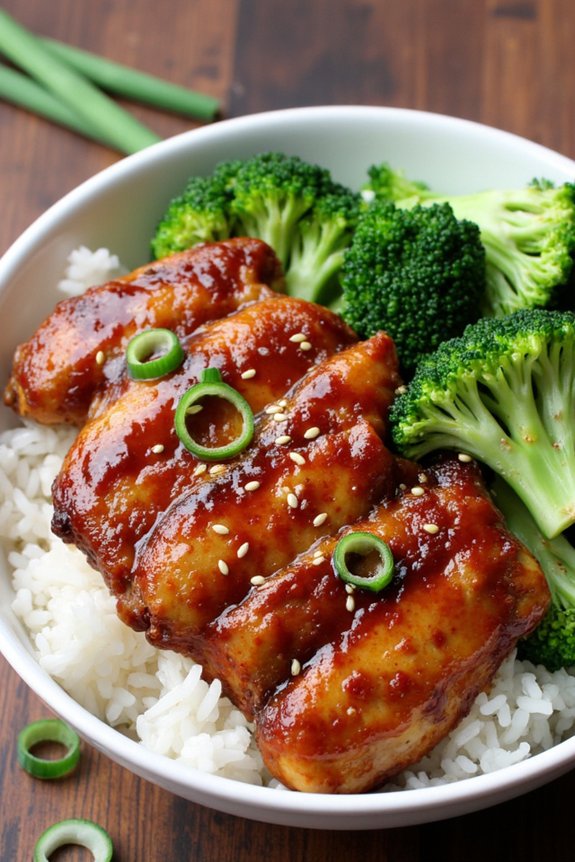
Teriyaki Chicken and Broccoli Rice Bowl is a delightful and healthy meal that combines savory teriyaki-glazed chicken with nutrient-rich broccoli and fluffy rice. This dish is perfect for a family dinner, offering a balance of protein, vegetables, and carbohydrates. The teriyaki sauce, with its sweet and salty notes, enhances the flavors of the chicken and vegetables, making it a favorite for both adults and children.
Whether you’re looking for a quick weeknight meal or a dish to impress your guests, this recipe delivers both taste and nutrition. The preparation of this dish involves marinating chicken in a homemade teriyaki sauce, which allows the flavors to permeate the meat, guaranteeing every bite is bursting with flavor.
The broccoli is lightly steamed to maintain its vibrant color and crunch, complementing the tender chicken and the fluffy rice. The combination of these ingredients not only satisfies the palate but also provides a wholesome and balanced meal that fits well into a healthy lifestyle.
Let’s explore the ingredients and steps needed to create this delicious Teriyaki Chicken and Broccoli Rice Bowl for 4-6 people.
Ingredients:
- 2 pounds boneless, skinless chicken thighs or breasts
- 4 cups broccoli florets
- 2 cups jasmine or basmati rice
- 1 cup soy sauce
- 1/2 cup honey or brown sugar
- 1/4 cup rice vinegar
- 2 tablespoons sesame oil
- 1 tablespoon minced garlic
- 1 tablespoon grated ginger
- 2 tablespoons cornstarch
- 1/4 cup water
- Sesame seeds for garnish
- Sliced green onions for garnish
Cooking Instructions:
- Prepare the Marinade: In a medium bowl, combine the soy sauce, honey or brown sugar, rice vinegar, sesame oil, minced garlic, and grated ginger. Mix well until all the ingredients are thoroughly combined.
- Marinate the Chicken: Place the chicken thighs or breasts in a large resealable plastic bag or shallow dish. Pour half of the prepared marinade over the chicken, guaranteeing each piece is well coated. Seal the bag or cover the dish and refrigerate for at least 30 minutes, or up to 2 hours for more intense flavor.
- Cook the Rice: While the chicken is marinating, rinse the rice under cold water until the water runs clear. Cook the rice according to the package instructions, then set aside, keeping it warm.
- Steam the Broccoli: Bring a pot of water to a boil and place a steamer basket over it. Add the broccoli florets to the basket and cover. Steam for about 5-7 minutes, or until the broccoli is tender-crisp. Remove from heat and set aside.
- Cook the Chicken: Heat a large skillet or grill pan over medium-high heat. Remove the chicken from the marinade and discard the used marinade. Cook the chicken for about 6-8 minutes on each side, or until the chicken is cooked through and has a nice char. Remove from the pan and let it rest for a few minutes before slicing.
- Make the Teriyaki Sauce: In a small saucepan, combine the remaining marinade. In a separate bowl, mix the cornstarch with water until smooth, then add to the saucepan. Bring the mixture to a simmer over medium heat, stirring constantly, until the sauce thickens.
- Assemble the Bowl: Divide the cooked rice among serving bowls. Top with sliced chicken and steamed broccoli. Drizzle with the thickened teriyaki sauce. Garnish with sesame seeds and sliced green onions.
Extra Tips: When cooking the chicken, guarantee the pan is hot before adding the chicken to achieve a nice sear and lock in the juices. If you prefer a spicier kick, you can add a dash of red pepper flakes to the marinade or teriyaki sauce.
For added flavor and texture, consider adding sliced bell peppers or snap peas to the broccoli. Always taste the teriyaki sauce before serving and adjust the sweetness or saltiness to your preference by adding more honey or soy sauce, respectively.
Mediterranean Chickpea Salad With Feta
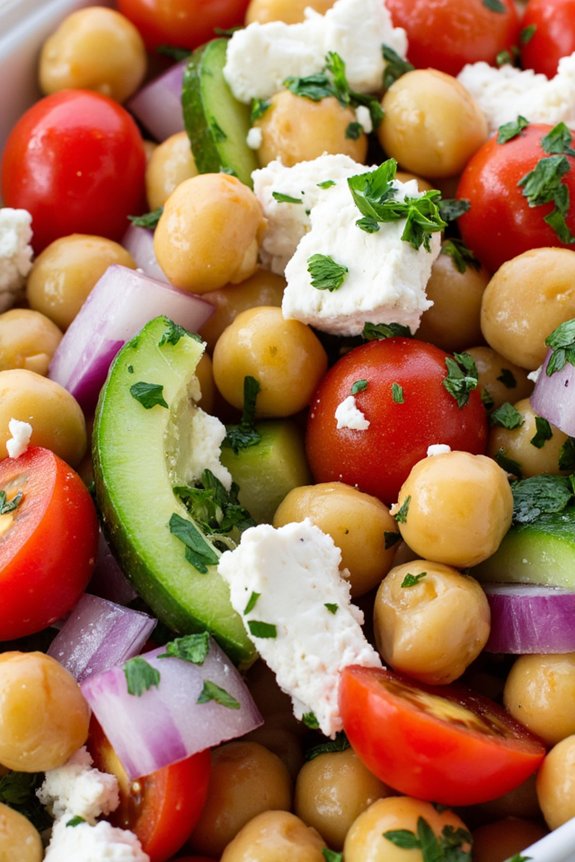
Mediterranean Chickpea Salad With Feta is a vibrant and revitalizing dish that captures the essence of the Mediterranean diet. This salad isn’t only delicious but also packed with nutrients, making it an excellent choice for a healthy dinner. The combination of creamy feta cheese, hearty chickpeas, and a variety of fresh vegetables creates a satisfying meal that can be enjoyed on its own or as a side dish.
The flavors are enhanced with a simple yet flavorful dressing, making this dish a favorite for those looking to enjoy a nutritious and tasty meal. Ideal for a serving size of 4-6 people, this Mediterranean Chickpea Salad With Feta is perfect for family dinners or gatherings with friends.
The ingredients are readily available and the preparation is straightforward, making it an easy-to-make dish even for those with a busy schedule. The salad can be served immediately or prepared ahead of time, allowing the flavors to meld together for an even tastier experience. Whether you’re a seasoned cook or a beginner in the kitchen, this recipe is sure to be a hit.
Ingredients:
- 2 cans (15 oz each) chickpeas, drained and rinsed
- 1 cup cherry tomatoes, halved
- 1 cucumber, diced
- 1/2 red onion, finely chopped
- 1 red bell pepper, diced
- 3/4 cup crumbled feta cheese
- 1/4 cup chopped fresh parsley
- 1/4 cup chopped fresh mint
- 1/3 cup extra-virgin olive oil
- 3 tablespoons fresh lemon juice
- 1 tablespoon red wine vinegar
- 1 teaspoon dried oregano
- Salt and freshly ground black pepper, to taste
Instructions:
- Prepare the Vegetables: Begin by washing all the vegetables thoroughly under cold water. Halve the cherry tomatoes, dice the cucumber, red bell pepper, and finely chop the red onion. Place all the chopped vegetables in a large mixing bowl.
- Rinse the Chickpeas: Drain the canned chickpeas in a colander and rinse them under cold running water. Allow them to drain completely before adding them to the bowl of vegetables.
- Add the Herbs and Feta: Chop the fresh parsley and mint. Add them along with the crumbled feta cheese to the bowl of vegetables and chickpeas. Gently mix to distribute the ingredients evenly.
- Make the Dressing: In a small bowl, whisk together the extra-virgin olive oil, fresh lemon juice, red wine vinegar, and dried oregano. Season the dressing with salt and freshly ground black pepper according to your taste.
- Combine and Toss: Pour the dressing over the salad ingredients in the large mixing bowl. Gently toss the salad using two large spoons or salad tongs until everything is well combined and coated with the dressing.
- Serve or Chill: Serve the salad immediately, or for a more enhanced flavor, cover and refrigerate for at least 30 minutes to allow the flavors to meld.
Extra Tips: When preparing the Mediterranean Chickpea Salad With Feta, consider using a high-quality feta cheese as it greatly influences the flavor of the dish. If possible, opt for fresh herbs rather than dried, as they provide a vibrant taste.
To make the salad more substantial, you can add grilled chicken or shrimp. Additionally, if you prefer a creamier texture, try mashing some of the chickpeas slightly before mixing them into the salad. Remember to taste and adjust the seasoning before serving to ascertain the perfect balance of flavors.
Speedy Veggie and Cheese Quesadillas

Speedy Veggie and Cheese Quesadillas are the perfect solution for a quick and healthy dinner that doesn’t sacrifice flavor. This delightful dish combines the vibrant colors of fresh vegetables with the creamy richness of melted cheese, all enveloped in a crispy tortilla. It’s an excellent way to enjoy a nutritious meal, and it’s so simple to prepare that it can easily become a weekly staple for your family.
Whether you’re looking for a vegetarian option or just want to incorporate more veggies into your diet, these quesadillas are sure to be a hit.
The beauty of this recipe lies in its versatility and ease. You can mix and match your favorite vegetables, or use whatever you have on hand, making it a great choice for using up leftovers. The preparation time is minimal, and the entire meal can be ready in under 30 minutes, perfect for those busy weeknights.
Plus, with the option to customize the fillings, everyone in the family can enjoy their quesadilla just the way they like it.
Ingredients (for 4-6 servings):
- 8 large flour tortillas
- 2 cups shredded cheddar cheese (or cheese of your choice)
- 1 red bell pepper, diced
- 1 green bell pepper, diced
- 1 small red onion, thinly sliced
- 1 cup mushrooms, sliced
- 1 zucchini, sliced
- 2 tablespoons olive oil
- 1 teaspoon ground cumin
- 1 teaspoon chili powder
- Salt and pepper to taste
- Optional toppings: sour cream, salsa, guacamole
Cooking Instructions:
1. Prepare the Vegetables: Start by washing and chopping all your vegetables. Dice the bell peppers, slice the onion, mushrooms, and zucchini.
2. Cook the Vegetables: Heat 1 tablespoon of olive oil in a large skillet over medium heat. Add the sliced onions and cook for about 2 minutes until they start to soften.
Add the bell peppers, mushrooms, and zucchini. Sprinkle with cumin, chili powder, salt, and pepper. Stir and cook for another 5-7 minutes until the vegetables are tender.
3. Assemble the Quesadillas: Lay out the tortillas on a clean surface. Evenly distribute the cooked vegetables over one half of each tortilla. Sprinkle a generous amount of shredded cheese over the veggies.
4. Cook the Quesadillas: In a clean skillet, heat the remaining tablespoon of olive oil over medium heat. Place a tortilla in the skillet, vegetable side up, and fold the other half over the filling to form a half-moon shape.
Press down gently with a spatula to flatten. Cook for about 2-3 minutes on each side until the tortilla is golden brown and the cheese has melted.
5. Serve: Remove the quesadillas from the skillet and let them cool for a minute. Cut each into wedges and Serve with optional toppings like sour cream, salsa, or guacamole.
Extra Tips:
For an extra crispy quesadilla, make sure not to overfill them. This guarantees they fold easily and cook evenly. Adjust the heat as necessary to prevent burning the tortillas before the cheese melts.
If you want to add some protein, consider including black beans or cooked chicken in the filling. Additionally, using a mixture of cheeses can enhance flavor complexity. If you prefer a spicier quesadilla, add some sliced jalapeños or a dash of hot sauce to the vegetable mix.