

As a busy mom, I know how challenging it can be to find dinner ideas that are quick, healthy, and delicious. Our families deserve meals that bring everyone together at the table. Think vibrant stir-fries, hearty one-pot meals, and zesty pasta dishes. These 15 recipes make weeknight cooking simple and full of flavor. Ready to make dinnertime a breeze?
One-Pot Lemon Garlic Shrimp Pasta

One-Pot Lemon Garlic Shrimp Pasta is a delightful and easy-to-make dish that brings a burst of flavor to your dinner table without the hassle of using multiple pots and pans. The combination of succulent shrimp, zesty lemon, and aromatic garlic creates a harmonious blend that’s both invigorating and satisfying. Perfect for a quick weeknight meal, this pasta dish is sure to become a family favorite with its simplicity and delicious taste.
Cooking everything in one pot not only simplifies the preparation process but also enhances the flavors, as the pasta absorbs the savory juices from the shrimp and the fragrant garlic. This method also makes cleanup a breeze, allowing you to enjoy your meal without worrying about a sink full of dirty dishes. Whether serving it for a casual dinner or a special occasion, this One-Pot Lemon Garlic Shrimp Pasta is sure to impress with its vibrant flavors and ease of preparation.
Ingredients (Serves 4-6 people):
- 12 oz (340 g) fettuccine or spaghetti
- 1 lb (450 g) large shrimp, peeled and deveined
- 4 cloves garlic, minced
- 1 lemon, zested and juiced
- 1/4 cup (60 ml) olive oil
- 1/2 cup (120 ml) chicken or vegetable broth
- 1/2 cup (120 ml) heavy cream
- 1/4 cup (30 g) grated Parmesan cheese
- 2 tbsp (30 g) unsalted butter
- Salt and pepper to taste
- 2 tbsp (8 g) fresh parsley, chopped
Instructions:
- Prepare the Pasta: In a large pot, bring water to a boil. Add a generous pinch of salt and cook the pasta according to the package instructions until al dente. Reserve 1 cup of pasta water, then drain and set aside.
- Cook the Shrimp: In the same pot, heat olive oil over medium heat. Add the shrimp, season with salt and pepper, and cook for 2-3 minutes on each side, or until pink and opaque. Remove the shrimp from the pot and set aside.
- Sauté Garlic: In the same pot, add butter and minced garlic. Sauté for 1-2 minutes until the garlic becomes fragrant, being careful not to let it burn.
- Add Liquid Ingredients: Pour in the chicken or vegetable broth, heavy cream, and lemon juice. Stir to combine and bring the mixture to a simmer.
- Combine Ingredients: Return the cooked pasta and shrimp to the pot. Add the lemon zest and Parmesan cheese. Toss everything together until the pasta is evenly coated with the sauce. If the sauce is too thick, gradually add reserved pasta water until desired consistency is reached.
- Season and Garnish: Adjust seasoning with additional salt and pepper if needed. Sprinkle chopped parsley over the pasta for a fresh burst of flavor.
- Serve: Serve the pasta hot, garnished with extra Parmesan cheese and lemon slices if desired.
Extra Tips:
- For added flavor, you can deglaze the pot with a splash of white wine before adding the broth.
- When cooking the shrimp, make sure not to overcrowd the pot, as this can cause them to steam rather than sear, resulting in a less flavorful dish.
- If you prefer a spicier kick, consider adding a pinch of red pepper flakes during the garlic sauté step.
- Using fresh lemon juice is essential for the vibrant citrus flavor in this recipe, so avoid using bottled lemon juice if possible.
Easy Sheet Pan Chicken Fajitas

Easy Sheet Pan Chicken Fajitas are the perfect solution for a quick and delicious weeknight dinner. This recipe is ideal for those who want to enjoy a flavorful meal without spending too much time in the kitchen. By using a single sheet pan, you minimize cleanup, while the high heat of the oven guarantees that the chicken and vegetables are roasted to perfection, bringing out their natural flavors. The combination of colorful bell peppers, onions, and tender chicken seasoned with traditional fajita spices makes this dish a family favorite.
The beauty of this recipe lies in its simplicity and versatility. You can easily adjust the spice level to suit your taste, and it’s a great opportunity to use up any vegetables you have on hand. Serve these chicken fajitas with warm tortillas, a side of guacamole, salsa, and sour cream for a complete meal. Whether you’re feeding a family or hosting a casual dinner with friends, these Easy Sheet Pan Chicken Fajitas are sure to impress.
Ingredients (Serves 4-6)
- 1.5 pounds boneless, skinless chicken breasts
- 3 bell peppers (any color), sliced
- 1 large onion, sliced
- 3 tablespoons olive oil
- 1 tablespoon chili powder
- 1 teaspoon garlic powder
- 1 teaspoon onion powder
- 1 teaspoon smoked paprika
- 1 teaspoon ground cumin
- 1 teaspoon salt
- 1/2 teaspoon black pepper
- Juice of 1 lime
- Fresh cilantro, chopped (for garnish)
- Tortillas (flour or corn)
Instructions
- Preheat the Oven: Begin by preheating your oven to 425°F (220°C). This high temperature is essential for roasting the chicken and vegetables quickly and evenly.
- Prepare the Chicken and Vegetables: Slice the chicken breasts into thin strips and place them in a large mixing bowl. Add the sliced bell peppers and onion to the bowl with the chicken.
- Season the Ingredients: Drizzle the olive oil over the chicken and vegetables. Sprinkle the chili powder, garlic powder, onion powder, smoked paprika, ground cumin, salt, and black pepper over the mixture. Toss everything together until the chicken and vegetables are evenly coated with the oil and seasonings.
- Arrange on a Sheet Pan: Spread the seasoned chicken and vegetable mixture evenly onto a large sheet pan. Make sure the ingredients are in a single layer to facilitate even cooking.
- Bake in the Oven: Place the sheet pan in the preheated oven and bake for 20-25 minutes, or until the chicken is cooked through and the vegetables are tender and slightly caramelized. Stir halfway through cooking to promote even roasting.
- Finish with Lime and Garnish: Once cooked, remove the sheet pan from the oven and squeeze the juice of one lime over the chicken and vegetables. Toss to combine and then sprinkle with fresh cilantro.
- Serve: Serve the chicken fajitas with warm tortillas. Offer additional toppings such as guacamole, salsa, and sour cream on the side for a complete meal.
Extra Tips
When preparing Easy Sheet Pan Chicken Fajitas, it’s important to cut the chicken and vegetables to a uniform size to guarantee they cook evenly. If you prefer a spicier fajita, consider adding a pinch of cayenne pepper or a sliced jalapeño to the seasoning mix.
For a smokier flavor, you can use chipotle chili powder instead of regular chili powder. Finally, make sure not to overcrowd the sheet pan; if necessary, use two pans to prevent steaming and guarantee everything roasts properly.
Quick Vegetable Stir-Fry With Tofu
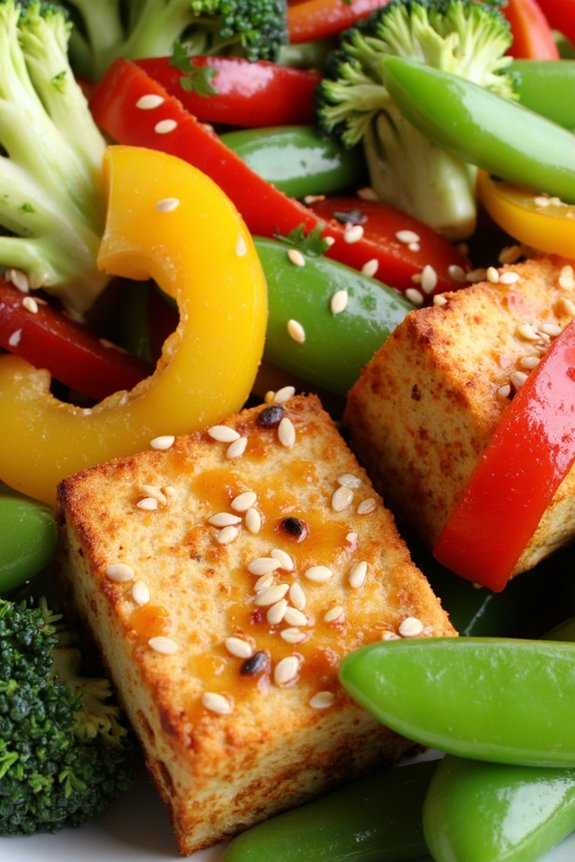
Looking for a delicious, nutritious, and quick meal to whip up on a busy evening? This Quick Vegetable Stir-Fry With Tofu is the perfect solution for a hearty dinner that can be prepared in under 30 minutes. Packed with vibrant vegetables and protein-rich tofu, this dish is both satisfying and healthy.
The beauty of this stir-fry lies in its versatility—feel free to swap in your favorite veggies or adjust the seasoning to suit your taste. Whether you’re a seasoned cook or a beginner in the kitchen, this recipe is straightforward and certain to become a staple in your dinner rotation.
The flavors of the dish are enhanced by a simple yet flavorful sauce that ties everything together beautifully. The key is to cook the tofu until it’s golden and slightly crispy, which adds a delightful texture and guarantees it absorbs the savory sauce. Pair this stir-fry with steamed rice or noodles for a complete meal that will please everyone at the table.
With minimal preparation and cooking time, this Quick Vegetable Stir-Fry With Tofu is the epitome of a quick and easy dinner recipe.
Ingredients for 4-6 Servings:
- 1 block (14 ounces) firm tofu, drained and cubed
- 2 tablespoons vegetable oil
- 2 cups broccoli florets
- 1 red bell pepper, sliced
- 1 yellow bell pepper, sliced
- 1 cup snap peas
- 2 carrots, thinly sliced
- 3 cloves garlic, minced
- 2 tablespoons soy sauce
- 2 tablespoons oyster sauce (or a vegetarian alternative)
- 1 tablespoon sesame oil
- 1 tablespoon cornstarch
- 1/4 cup water
- 1 teaspoon grated fresh ginger
- Salt and pepper to taste
- Cooked rice or noodles, for serving
- Sesame seeds and chopped scallions, for garnish
Cooking Instructions:
- Prepare the Tofu: Pat the tofu dry with paper towels to remove excess moisture. Cut it into 1-inch cubes and set aside.
- Make the Sauce: In a small bowl, combine soy sauce, oyster sauce, sesame oil, cornstarch, and water. Stir until smooth and set aside for later.
- Cook the Tofu: Heat a large skillet or wok over medium-high heat. Add 1 tablespoon of vegetable oil. Once the oil is hot, add the tofu cubes. Cook, turning occasionally, until the tofu is golden brown and crispy on all sides, about 8-10 minutes. Remove the tofu from the pan and set aside.
- Stir-Fry the Vegetables: In the same pan, add the remaining tablespoon of oil. Add garlic and ginger, sauté for about 30 seconds until fragrant. Then, add broccoli, bell peppers, snap peas, and carrots. Stir-fry for about 5 minutes until the vegetables are tender-crisp.
- Combine Tofu and Sauce: Return the cooked tofu to the pan with the vegetables. Pour the prepared sauce over the mixture. Stir well to coat everything evenly. Cook for another 2-3 minutes until the sauce thickens and everything is heated through.
- Season and Serve: Taste and adjust the seasoning with salt and pepper as needed. Serve the stir-fry hot over cooked rice or noodles. Garnish with sesame seeds and chopped scallions for an extra touch of flavor.
Extra Tips:
When preparing this Quick Vegetable Stir-Fry With Tofu, make sure your tofu is well-drained for the best texture—press it between paper towels if needed.
To save time, you can purchase pre-cut vegetables or use frozen ones. If you prefer a spicier dish, consider adding a dash of red pepper flakes or a sliced chili pepper to the stir-fry.
For a gluten-free version, use tamari instead of soy sauce. Remember that the key to a successful stir-fry is cooking over high heat and moving quickly, so have all your ingredients prepped and ready before you start cooking. Enjoy your meal!
20-Minute Turkey Taco Skillet

Minute Turkey Taco Skillet is the perfect solution for those nights when you need to get dinner on the table fast. This dish combines the savory flavors of ground turkey, spices, and fresh vegetables, all cooked together in one skillet for ultimate convenience.
With minimal prep and cook time, this recipe guarantees that you can serve a delicious, healthy meal without spending hours in the kitchen. Whether you’re feeding a family or meal prepping for the week, this turkey taco skillet is sure to become a favorite in your household.
This recipe isn’t only quick and easy but also versatile. You can customize it with your favorite toppings such as cheese, sour cream, avocado, or fresh cilantro, making it a hit for picky eaters or those with specific dietary preferences.
The combination of lean turkey and fresh ingredients makes it a nutritious choice, while the bold taco seasonings guarantee it’s bursting with flavor. Ready in under 30 minutes, this Minute Turkey Taco Skillet is a stress-free way to enjoy a satisfying meal.
Ingredients (serving size: 4-6 people):
- 1 tablespoon olive oil
- 1 pound ground turkey
- 1 small onion, diced
- 2 cloves garlic, minced
- 1 red bell pepper, diced
- 1 green bell pepper, diced
- 1 packet taco seasoning mix
- 1 can (14.5 ounces) diced tomatoes, undrained
- 1 cup corn kernels (fresh, frozen, or canned)
- Salt and pepper to taste
- 1 cup shredded cheddar cheese
- Optional toppings: sour cream, sliced avocado, chopped cilantro, lime wedges
Cooking Instructions:
- Heat the Skillet: Begin by heating the olive oil in a large skillet over medium-high heat. Once the oil is hot, add the diced onion and cook for about 2 minutes until it becomes translucent.
- Cook the Turkey: Add the ground turkey to the skillet. Break it up with a spatula and cook it until it’s no longer pink, approximately 5-7 minutes.
- Add Vegetables and Seasoning: Stir in the minced garlic, diced red and green bell peppers, and taco seasoning mix. Cook for another 3 minutes, guaranteeing the vegetables start to soften and the spices are well mixed with the turkey.
- Incorporate Tomatoes and Corn: Pour in the can of diced tomatoes (including the juice) and add the corn kernels. Stir everything together and bring the mixture to a simmer.
- Simmer and Season: Allow the skillet to simmer for about 5 minutes, stirring occasionally. Taste and adjust with salt and pepper if needed.
- Melt the Cheese: Sprinkle the shredded cheddar cheese evenly over the top of the mixture. Cover the skillet and let it cook for an additional 2 minutes, or until the cheese is melted and bubbly.
- Serve: Remove the skillet from heat and serve immediately. Garnish with optional toppings such as sour cream, avocado slices, chopped cilantro, or a squeeze of lime juice, according to preference.
Extra Tips:
To make this dish even quicker, you can pre-chop your vegetables or use pre-packaged diced onions and peppers.
If you prefer, substitute ground turkey with ground chicken or beef, keeping in mind the cooking time may vary slightly. For a spicier version, add a pinch of cayenne pepper or a chopped jalapeño to the mix.
Leftovers can be stored in an airtight container in the refrigerator for up to three days, making it an excellent choice for meal prep. Serve with tortilla chips, over rice, or in taco shells for variety.
Simple Baked Salmon With Dill and Lemon

Simple Baked Salmon With Dill and Lemon is a delicious and healthy dinner option that can be prepared in no time. This dish combines the rich flavors of fresh salmon with the zesty tang of lemon and the aromatic herbiness of dill. It’s perfect for a quick weeknight meal or a special occasion without the fuss.
The preparation is straightforward, and the result is a beautifully flaky salmon that melts in your mouth. This recipe caters to 4-6 people and requires minimal ingredients, making it both budget-friendly and time-efficient. The combination of fresh ingredients not only enhances the salmon’s natural flavor but also provides a delightful presentation.
With just a few simple steps, you can serve a restaurant-quality dish that’s sure to impress your family or guests.
Ingredients for 4-6 servings:
- 4-6 salmon fillets (about 6 ounces each)
- 2 lemons, thinly sliced
- 3 tablespoons olive oil
- 3 tablespoons fresh dill, chopped
- 4 cloves garlic, minced
- Salt, to taste
- Pepper, to taste
Cooking Instructions:
- Preheat the Oven: Preheat your oven to 400°F (200°C). This guarantees that the salmon cooks evenly and achieves a nice, flaky texture.
- Prepare the Baking Dish: Lightly grease a baking dish with some olive oil to prevent the salmon from sticking. Arrange the salmon fillets in the dish, leaving space between each piece.
- Season the Salmon: Drizzle olive oil over each salmon fillet. Sprinkle with salt, pepper, and minced garlic to taste. The olive oil helps keep the salmon moist while the garlic adds a rich flavor.
- Add Lemon and Dill: Place lemon slices on top of each fillet, then sprinkle the chopped dill over the salmon. The lemon slices will infuse the fish with a fresh citrus aroma and the dill adds a layer of herbal complexity.
- Bake the Salmon: Place the baking dish in the preheated oven and bake for 15-20 minutes, or until the salmon is cooked through and flakes easily with a fork. The cooking time may vary depending on the thickness of the fillets.
- Serve: Once cooked, remove the salmon from the oven and let it rest for a couple of minutes. This allows the juices to redistribute, enhancing the flavor. Serve with your choice of side dishes, like roasted vegetables or a fresh salad.
Extra Tips:
When choosing salmon fillets, look for ones that are uniform in thickness to guarantee even cooking. You can also experiment with adding a hint of white wine or a splash of soy sauce for an extra flavor dimension.
If you don’t have fresh dill, dried dill can be used, though fresh dill often provides a more vibrant taste. For a crispy skin, try broiling the salmon for the last few minutes of cooking, but watch closely to avoid burning. Enjoy your meal with a chilled glass of white wine for a perfect pairing!
Healthy Chicken Caesar Wraps
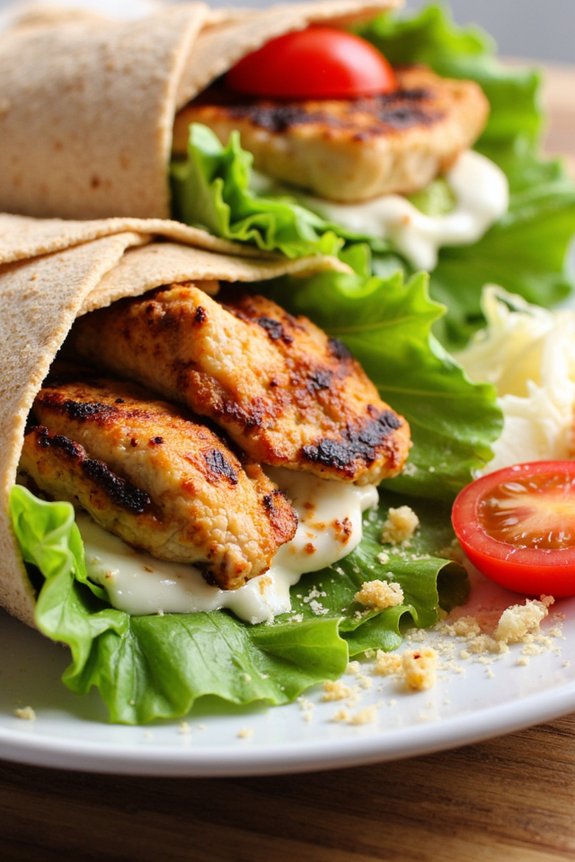
Healthy Chicken Caesar Wraps are a delightful and nutritious option for a quick and easy dinner. This dish combines the classic flavors of a Caesar salad with the convenience of a wrap, making it a perfect choice for busy weeknights. Loaded with lean protein from grilled chicken, fresh greens, and a creamy yet light Caesar dressing, these wraps offer a balanced meal that’s both satisfying and healthy.
The use of whole wheat tortillas and a homemade dressing guarantees that you aren’t only enjoying a delicious meal but also one that’s mindful of your dietary needs.
These wraps are versatile and can be customized with various toppings and ingredients to suit your taste preferences. Whether you’re preparing a meal for your family or looking for something to pack for lunch the next day, Healthy Chicken Caesar Wraps are sure to become a staple in your meal rotation.
With minimal cooking time and simple ingredients, you can have these flavorful wraps ready in no time, making them an ideal choice for anyone seeking a nutritious and quick meal solution.
Ingredients for 4-6 servings:
- 1 1/2 lbs boneless, skinless chicken breasts
- 1 tablespoon olive oil
- Salt and pepper to taste
- 1 teaspoon garlic powder
- 6 whole wheat tortillas
- 1 cup Caesar dressing (store-bought or homemade)
- 6 cups romaine lettuce, chopped
- 1/2 cup grated Parmesan cheese
- 1 cup cherry tomatoes, halved
- 1/2 cup croutons (optional)
- Lemon wedges for serving (optional)
Cooking Instructions:
- Prepare the Chicken: Begin by preheating your grill or stovetop grill pan over medium-high heat. While it’s heating, rub the chicken breasts with olive oil, and season both sides with salt, pepper, and garlic powder.
- Cook the Chicken: Place the seasoned chicken breasts onto the heated grill. Cook for about 6-7 minutes on each side, or until the chicken is thoroughly cooked and no longer pink in the center. Once done, remove from heat and allow to rest for a few minutes before slicing into thin strips.
- Assemble the Wraps: Lay out the whole wheat tortillas on a clean surface. Spread a generous tablespoon of Caesar dressing over each tortilla, leaving about an inch border around the edges.
- Add the Fillings: Evenly distribute the chopped romaine lettuce, sliced chicken, cherry tomatoes, and Parmesan cheese onto each tortilla. If desired, add croutons for extra crunch.
- Wrap It Up: To wrap, fold in the sides of the tortilla and then roll it up tightly from the bottom. Slice each wrap in half to serve.
- Serve: Arrange the wraps on a serving platter, and if desired, serve with lemon wedges for an added zest.
Extra Tips:
For a healthier homemade Caesar dressing, consider blending Greek yogurt with lemon juice, Dijon mustard, minced garlic, and anchovy paste for a lighter alternative.
If you prefer a vegetarian version, substitute the chicken with grilled tofu or chickpeas. Confirm the chicken is rested before slicing to retain its juices, making it more flavorful and moist in the wraps.
For added freshness, you can include sliced cucumbers or bell peppers. Keep leftover wraps in the refrigerator for up to two days, tightly wrapped in plastic wrap or stored in an airtight container.
Quick and Easy Veggie Omelette

The Quick and Easy Veggie Omelette is a delightful dish that’s perfect for breakfast, brunch, or even a light dinner. Packed with colorful vegetables, this omelette isn’t only nutritious but also bursting with flavor and can be whipped up in no time.
Whether you’re a seasoned cook or a beginner in the kitchen, this recipe is straightforward and designed to cater to the needs of a family-sized serving, making it ideal for 4-6 people.
What makes this omelette recipe stand out is its versatility. You can incorporate your favorite vegetables, making it a great way to use up any leftover produce. The addition of cheese provides a creamy texture and rich taste, balancing the freshness of the vegetables. Follow this simple recipe, and you’ll have a delicious meal ready in less than 30 minutes.
Ingredients (serves 4-6 people):
- 12 large eggs
- 1 cup milk
- 1 red bell pepper, diced
- 1 green bell pepper, diced
- 1 cup mushrooms, sliced
- 1 small red onion, finely chopped
- 1 cup spinach leaves, roughly chopped
- 1 cup shredded cheddar cheese
- Salt and pepper to taste
- 3 tablespoons olive oil or butter
Instructions:
- Prepare the Vegetables: Begin by washing and chopping all the vegetables. Dice the red and green bell peppers, slice the mushrooms, chop the red onion finely, and roughly chop the spinach leaves.
- Beat the Eggs: In a large mixing bowl, crack the eggs and add the milk. Whisk them together until fully combined. Season with salt and pepper according to your taste.
- Sauté the Vegetables: Heat 2 tablespoons of olive oil or butter in a large non-stick skillet over medium heat. Add the chopped onions, bell peppers, and mushrooms. Cook for about 5 minutes, stirring occasionally, until the vegetables are soft.
- Add the spinach and cook for an additional 2 minutes until wilted.
- Cook the Omelette: Pour the beaten eggs over the cooked vegetables in the skillet, guaranteeing an even distribution. Reduce the heat to low and cover the skillet. Allow the omelette to cook for about 8-10 minutes, or until the eggs are mostly set.
- Add the Cheese: Once the omelette is almost fully cooked, sprinkle the shredded cheddar cheese over the top. Cover again and cook for another 2 minutes, or until the cheese has melted and the eggs are fully set.
- Serve the Omelette: Carefully slide the omelette onto a large serving plate. Cut into wedges and serve warm. Enjoy your Quick and Easy Veggie Omelette with a side of toast or a fresh salad.
Extra Tips:
For a fluffier omelette, you can separate the egg whites from the yolks and whip the whites until they form soft peaks before gently folding them into the yolk mixture.
Additionally, feel free to experiment with different types of cheese or add herbs like chives or parsley for extra flavor. If you prefer a spicier omelette, consider adding a dash of hot sauce or some chopped jalapeños to the vegetable mix.
Cooking the omelette on low heat guarantees even cooking without burning the bottom, so be patient for the best results.
Speedy Beef and Broccoli Stir-Fry

Speedy Beef and Broccoli Stir-Fry is a delightful dish that combines tender slices of beef with crisp broccoli florets in a savory sauce, making it a perfect choice for a quick and satisfying dinner. This recipe is a great option for busy weeknights when you want something nutritious and delicious on the table in no time.
With minimal prep work and a short cooking time, you can enjoy this classic takeout favorite right from the comfort of your own kitchen. The key to this dish is slicing the beef thinly and cooking it over high heat to achieve a perfect sear, while the broccoli retains its crunchiness. The sauce, a combination of soy sauce, ginger, and garlic, coats the beef and broccoli beautifully, resulting in a harmonious blend of flavors.
This recipe serves 4-6 people, making it ideal for family dinners or small gatherings.
Ingredients
- 1 pound beef sirloin, thinly sliced
- 4 cups broccoli florets
- 3 tablespoons vegetable oil, divided
- 3 cloves garlic, minced
- 1 tablespoon fresh ginger, grated
- 1/3 cup soy sauce
- 2 tablespoons oyster sauce
- 1 tablespoon cornstarch
- 1 tablespoon water
- 1/4 teaspoon red pepper flakes (optional)
- Cooked rice, for serving
Instructions
- Prepare the Ingredients: Begin by slicing the beef sirloin into thin strips, making sure to cut against the grain for tenderness. Cut the broccoli into bite-sized florets. Mince the garlic and grate the ginger.
- Make the Sauce: In a small bowl, combine soy sauce, oyster sauce, and red pepper flakes, if using. In another small bowl, mix cornstarch with water to create a slurry, then add to the sauce mixture. Stir well to combine.
- Cook the Beef: Heat 1 tablespoon of vegetable oil in a large skillet or wok over high heat. Add the beef slices to the pan in a single layer and cook for 2-3 minutes, stirring occasionally, until the beef is browned and just cooked through. Remove the beef from the pan and set aside.
- Cook the Broccoli: In the same skillet, add another tablespoon of vegetable oil. Add the broccoli florets and stir-fry for about 3-4 minutes until they’re vibrant green and tender-crisp. If necessary, add a splash of water to the pan to help steam the broccoli.
- Combine Ingredients: Push the broccoli to the sides of the skillet and add the remaining tablespoon of oil to the center. Add the minced garlic and grated ginger, stirring constantly for about 30 seconds until fragrant. Return the cooked beef to the pan and pour the sauce over the mixture.
- Thicken the Sauce: Stir everything together, allowing the sauce to come to a simmer and thicken, which should take about 1-2 minutes. Confirm the beef and broccoli are well-coated with the sauce.
- Serve: Remove from heat and serve the Speedy Beef and Broccoli Stir-Fry over cooked rice.
Extra Tips
For the best results, confirm the beef is very cold or slightly frozen when slicing; this makes it easier to cut thinly.
Be sure to have all your ingredients prepped and ready to go before you start cooking, as the process moves quickly. If you prefer a bit more heat, feel free to increase the amount of red pepper flakes. Additionally, you can add other vegetables like bell peppers or snow peas for variety. Enjoy your homemade takeout experience!
15-Minute Caprese Chicken

Minute Caprese Chicken is a delightful and quick-to-prepare dish that combines the classic flavors of a Caprese salad with the heartiness of a chicken entrée. Perfect for busy weeknights, this dish requires minimal ingredients and time, yet delivers a punch of flavor that’s bound to impress. The combination of fresh basil, ripe tomatoes, creamy mozzarella, and balsamic reduction beautifully complements the juicy, perfectly cooked chicken breasts, making it a family favorite.
The beauty of Minute Caprese Chicken lies in its simplicity and versatility. Whether you’re cooking for a small family dinner or entertaining guests, this recipe is sure to be a hit. The vibrant colors and fresh ingredients not only make it visually appealing but also guarantee a healthy and satisfying meal. Plus, it’s easy to pair with a side of pasta, rice, or a fresh green salad, making it a well-rounded dining option.
Ingredients (Serves 4-6):
- 4 boneless, skinless chicken breasts
- Salt and pepper to taste
- 2 tablespoons olive oil
- 3-4 large tomatoes, sliced
- 8 ounces fresh mozzarella, sliced
- Fresh basil leaves
- Balsamic reduction or glaze
Instructions:
- Prepare the Chicken: Pat the chicken breasts dry with paper towels and season both sides generously with salt and pepper.
- Cook the Chicken: In a large skillet, heat the olive oil over medium-high heat. Once the oil is hot, add the chicken breasts to the skillet. Cook for about 5-6 minutes on each side, or until the chicken is golden brown and cooked through. The internal temperature should reach 165°F (75°C). Remove the chicken from the skillet and let it rest.
- Assemble the Caprese Topping: While the chicken is resting, prepare the Caprese topping. Layer slices of tomato and mozzarella on top of each chicken breast. If desired, you can return the chicken to the skillet and cover it to allow the mozzarella to melt slightly, about 2 minutes.
- Final Touch: Once the mozzarella is slightly melted, remove the chicken from the skillet. Top each chicken breast with fresh basil leaves. Drizzle a generous amount of balsamic reduction or glaze over the top.
- Serve: Arrange the Caprese chicken on a serving platter or individual plates. Serve immediately while the chicken is still warm and the cheese is melty.
Extra Tips:
To guarantee the chicken stays juicy, avoid overcooking it. Use a meat thermometer to check the internal temperature for perfect doneness. If you prefer a more robust flavor, consider marinating the chicken in olive oil, garlic, and herbs before cooking.
Additionally, for a homemade touch, you can create your own balsamic reduction by simmering balsamic vinegar on low heat until it thickens. This dish pairs beautifully with a light, crisp white wine or a sparkling water infused with lemon and basil for a revitalizing dining experience.
Easy Spinach and Ricotta Stuffed Shells

Looking for a comforting, yet simple dinner recipe that will impress your family or guests? Try making Easy Spinach and Ricotta Stuffed Shells. This Italian-inspired dish combines tender pasta shells filled with a creamy mixture of ricotta cheese, fresh spinach, and a hint of nutmeg. Topped with marinara sauce and melted mozzarella cheese, these stuffed shells are baked to perfection, creating a meal that’s both hearty and delicious.
Perfect for a busy weeknight or a weekend gathering, this recipe requires minimal effort and delivers maximum flavor. Spinach and Ricotta Stuffed Shells aren’t only delicious but also versatile. You can easily customize this recipe to suit your taste preferences or dietary needs by adding other ingredients such as mushrooms or substituting the ricotta with a dairy-free alternative.
Serve these shells with a simple green salad and some crusty bread, and you have a complete meal that’s sure to satisfy. Plus, this dish can be prepared in advance and baked when you’re ready to eat, making it a convenient option for meal planning.
Ingredients (Serves 4-6):
- 20 jumbo pasta shells
- 2 cups ricotta cheese
- 1 cup shredded mozzarella cheese
- 1/2 cup grated Parmesan cheese
- 1 large egg
- 2 cups fresh spinach, chopped
- 1/4 teaspoon ground nutmeg
- Salt and pepper to taste
- 3 cups marinara sauce
- 1 tablespoon olive oil
- Fresh basil leaves for garnish (optional)
Instructions:
- Preheat and Prepare: Preheat your oven to 375°F (190°C). Lightly grease a 9×13-inch baking dish with olive oil to prevent sticking.
- Cook the Pasta Shells: In a large pot of boiling salted water, cook the pasta shells according to the package instructions until al dente. Drain and set aside to cool slightly.
- Make the Filling: In a large mixing bowl, combine the ricotta cheese, 1/2 cup of mozzarella cheese, Parmesan cheese, egg, chopped spinach, ground nutmeg, salt, and pepper. Mix until all the ingredients are well incorporated.
- Stuff the Shells: Carefully fill each cooked pasta shell with the ricotta and spinach mixture using a spoon, ensuring not to overfill them to prevent tearing.
- Assemble the Dish: Spread 1 cup of marinara sauce evenly over the bottom of the prepared baking dish. Arrange the stuffed shells on top of the sauce in a single layer. Pour the remaining marinara sauce over the shells, ensuring they’re well-covered.
- Add Cheese and Bake: Sprinkle the remaining 1/2 cup of mozzarella cheese over the top of the shells. Cover the dish with aluminum foil and bake in the preheated oven for 25 minutes. Remove the foil and bake for an additional 10 minutes, or until the cheese is melted and bubbly.
- Serve: Once baked, remove the dish from the oven and let it cool for 5 minutes. Garnish with fresh basil leaves before serving, if desired.
Extra Tips:
To make this dish even more flavorful, consider adding a pinch of crushed red pepper flakes to the marinara sauce for a bit of heat. If you have leftovers, these stuffed shells reheat well in the oven or microwave, making them perfect for a next-day meal.
For a healthier twist, substitute whole wheat pasta shells and use part-skim ricotta cheese. Finally, if you prefer a meatier version, cooked ground beef or sausage can be added to the filling or the sauce. Enjoy this delicious and easy meal with your family and friends!
Black Bean and Corn Quesadillas

Black Bean and Corn Quesadillas are a delicious and satisfying meal option that can be whipped up in no time. Perfect for a quick dinner, these quesadillas are packed with protein and fiber from the black beans and corn, and the gooey cheese adds just the right amount of indulgence.
Whether you’re serving them as a main course or a hearty snack, these quesadillas are bound to be a crowd-pleaser. Plus, they can easily be adapted to suit your taste preferences by adding your favorite toppings or spices.
These quesadillas aren’t only quick to make, but they’re also an excellent way to use up leftover ingredients you might’ve in your pantry or fridge. The combination of black beans and corn provides a satisfying texture, while the melted cheese binds everything together in a deliciously crispy tortilla.
Serve them with a side of salsa, sour cream, or guacamole for an extra burst of flavor. This recipe is designed to serve 4-6 people, making it perfect for a family dinner or small gathering with friends.
Ingredients (serves 4-6):
- 1 tablespoon olive oil
- 1 small onion, chopped
- 2 cloves garlic, minced
- 1 can (15 oz) black beans, drained and rinsed
- 1 cup corn kernels (fresh, frozen, or canned)
- 1 teaspoon ground cumin
- 1 teaspoon chili powder
- Salt and pepper to taste
- 2 cups shredded cheese (cheddar, Monterey Jack, or a mix)
- 8 large flour tortillas
- Optional: 1/4 cup chopped fresh cilantro
- Optional toppings: salsa, sour cream, guacamole
Instructions:
1. Prepare the Filling: Heat the olive oil in a large skillet over medium heat. Add the chopped onion and garlic, stirring frequently, until the onion becomes translucent (about 3-4 minutes).
2. Add Beans and Corn: Stir in the black beans and corn, and cook for another 2-3 minutes. Add the ground cumin, chili powder, salt, and pepper, mixing well to confirm the spices are evenly distributed. If using cilantro, stir it in at this point.
3. Assemble the Quesadillas: Lay one tortilla flat and sprinkle 1/4 cup of shredded cheese over half of it. Add about 1/2 cup of the bean and corn mixture on top of the cheese, then sprinkle another 1/4 cup of cheese over the filling. Fold the tortilla in half, pressing gently to seal.
Repeat this process with the remaining tortillas and filling.
4. Cook the Quesadillas: Heat a large non-stick skillet or griddle over medium heat. Place the folded quesadillas in the skillet, cooking for 3-4 minutes on each side, or until the tortillas are golden brown and the cheese is melted. You may need to cook them in batches, depending on the size of your skillet.
5. Serve: Once cooked, transfer the quesadillas to a cutting board and let them cool for a minute before slicing. Serve warm with your choice of salsa, sour cream, or guacamole.
Extra Tips: For an extra crispy quesadilla, lightly brush the outside of the tortillas with a little olive oil before cooking. If you prefer a spicier filling, consider adding chopped jalapeños or a dash of hot sauce to the bean mixture.
Additionally, if you have leftover chicken or beef, feel free to add it to the filling for a heartier meal. Enjoy experimenting with different cheese varieties and additional toppings to find your perfect combination!
Instant Pot Chicken and Rice
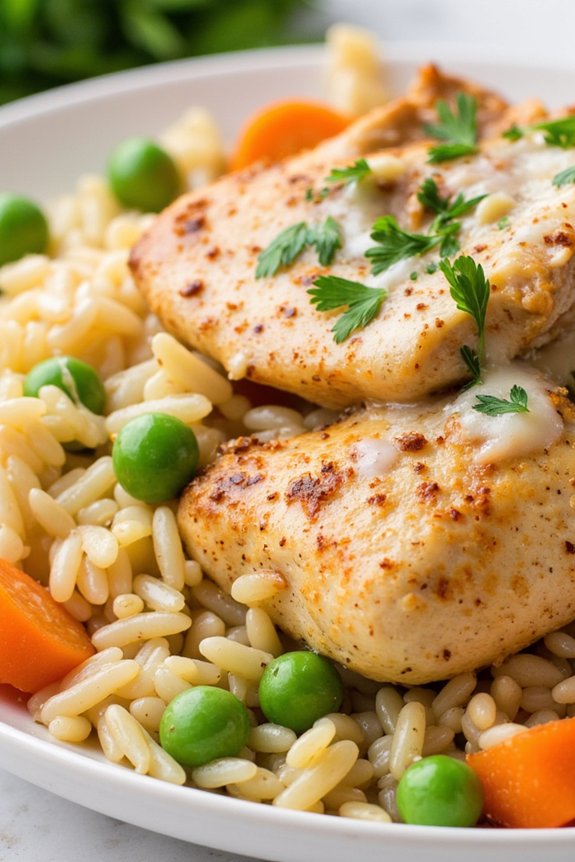
Looking for a quick and satisfying dinner solution? This Instant Pot Chicken and Rice recipe is perfect for busy weeknights when you need to get dinner on the table fast. The Instant Pot not only speeds up the cooking process but also guarantees that the chicken is tender and the rice is perfectly cooked.
This dish is a comforting blend of juicy chicken, fluffy rice, and a mix of aromatic spices, all cooked together in one pot for an easy cleanup.
The beauty of this recipe is its simplicity and versatility; it can be easily adapted to include your favorite vegetables or spices. The combination of chicken and rice is a classic that never fails to please, and with the Instant Pot, this dish is ready in under 30 minutes from start to finish.
This makes it a go-to recipe that will surely become a family favorite.
Ingredients (Serves 4-6 people):
- 1 tablespoon olive oil
- 1 medium onion, chopped
- 2 cloves garlic, minced
- 1 pound boneless chicken thighs or breasts, cut into 1-inch pieces
- 1 cup long-grain white rice
- 1 1/2 cups chicken broth
- 1 cup frozen peas and carrots mix
- 1 teaspoon salt
- 1/2 teaspoon black pepper
- 1/2 teaspoon paprika
- 1/2 teaspoon dried thyme
- 1/2 teaspoon dried oregano
- 1/4 cup grated Parmesan cheese (optional)
- Fresh parsley, chopped (for garnish)
Cooking Instructions:
- Prepare the Instant Pot: Begin by setting your Instant Pot to the sauté function. Once hot, add the olive oil and chopped onion. Sauté the onion for about 2-3 minutes until it becomes translucent.
- Add the minced garlic and continue to sauté for another 30 seconds until fragrant.
- Cook the Chicken: Add the chicken pieces to the pot, seasoning with salt, pepper, paprika, thyme, and oregano. Stir well to coat the chicken with the spices.
- Sauté the chicken for 3-4 minutes until it’s lightly browned on the outside.
- Add Rice and Broth: Cancel the sauté function. Add the rice to the pot, stirring to combine with the chicken and onion mixture.
- Pour in the chicken broth, guaranteeing all the rice is submerged. Scrape the bottom of the pot to deglaze and release any browned bits, which will add flavor to the dish.
- Pressure Cook: Close the lid of the Instant Pot and set the valve to the sealing position. Select the manual or pressure cook button and cook on high pressure for 8 minutes.
- Release Pressure: Once the cooking time is complete, allow the pressure to naturally release for 10 minutes, then carefully perform a quick release for any remaining pressure.
- Add Vegetables: Open the lid and stir in the frozen peas and carrots. The residual heat will cook the vegetables perfectly without turning them mushy.
- If desired, stir in the Parmesan cheese for extra flavor.
- Serve: Garnish with freshly chopped parsley before serving. Enjoy this hearty and delicious meal!
Extra Tips:
To prevent the “burn” warning on your Instant Pot, make sure to scrape the bottom of the pot after adding the broth to deglaze any stuck bits.
You can also customize this recipe by adding other vegetables like bell peppers or mushrooms. For an extra burst of flavor, consider adding a splash of lemon juice or a pinch of cayenne pepper.
Leftovers can be stored in an airtight container in the refrigerator for up to 3 days, making it a great option for meal prep.
Fast and Flavorful Thai Peanut Noodles

Fast and Flavorful Thai Peanut Noodles are the perfect solution for a quick and satisfying dinner. This dish combines the rich and creamy taste of peanut sauce with the spicy and aromatic flavors of Thai cuisine, resulting in a meal that’s both delicious and easy to prepare.
Whether you’re looking for a meatless option or want to include protein like chicken or tofu, this recipe is versatile and can be adjusted to your preferences. Ready in under 30 minutes, these noodles are perfect for busy weeknights or when you want to impress guests with minimal effort.
The key to a successful Thai Peanut Noodles dish is in the sauce. Using a combination of peanut butter, soy sauce, lime juice, and a hint of chili paste, you’ll create a savory and slightly spicy sauce that coats the noodles perfectly.
Fresh vegetables like bell peppers and carrots add crunch and color, while garnishes like cilantro and crushed peanuts offer an additional layer of flavor. Serve this meal as a satisfying main dish for 4-6 people, and you’ll have everyone asking for seconds.
Ingredients:
- 12 oz rice noodles
- 1 cup creamy peanut butter
- 1/4 cup soy sauce
- 2 tablespoons lime juice
- 2 tablespoons brown sugar
- 1 tablespoon chili paste (adjust to taste)
- 3 cloves garlic, minced
- 1 tablespoon ginger, grated
- 1 tablespoon sesame oil
- 1 red bell pepper, thinly sliced
- 1 cup shredded carrots
- 1/2 cup chopped green onions
- 1/4 cup chopped cilantro
- 1/4 cup crushed peanuts
- Optional: 1 lb chicken breast or tofu, cubed
Instructions:
- Prepare the Noodles:
- Cook the rice noodles according to the package instructions. Once cooked, drain them and rinse under cold water to prevent sticking. Set aside.
- Make the Peanut Sauce:
- In a medium bowl, whisk together the peanut butter, soy sauce, lime juice, brown sugar, chili paste, minced garlic, and grated ginger until smooth. Adjust the seasoning to taste, adding more chili paste if you prefer more heat.
- Cook the Protein (Optional):
- If using chicken or tofu, heat the sesame oil in a large skillet over medium heat. Add the cubed chicken or tofu and cook until browned and cooked through, about 7-10 minutes. Remove from the skillet and set aside.
- Sauté the Vegetables:
- In the same skillet, add the red bell pepper and shredded carrots. Sauté for 3-4 minutes until the vegetables are slightly tender yet still crisp.
- Combine Everything:
- Add the cooked noodles and protein (if using) to the skillet with the vegetables. Pour the peanut sauce over the noodles and toss everything together until well combined and heated through.
- Serve:
- Divide the noodles among serving plates. Garnish with chopped green onions, cilantro, and crushed peanuts for added flavor and texture.
Extra Tips:
For an even quicker preparation, consider using pre-cut vegetables and pre-cooked protein options available at most grocery stores.
If you’re making this dish ahead of time, keep the sauce separate and combine it with the noodles right before serving to maintain the best texture.
Feel free to adjust the level of spiciness by adding more or less chili paste to suit your taste. This dish also pairs well with a side of steamed broccoli or snap peas for added nutrition.
Zucchini Noodles With Pesto and Cherry Tomatoes
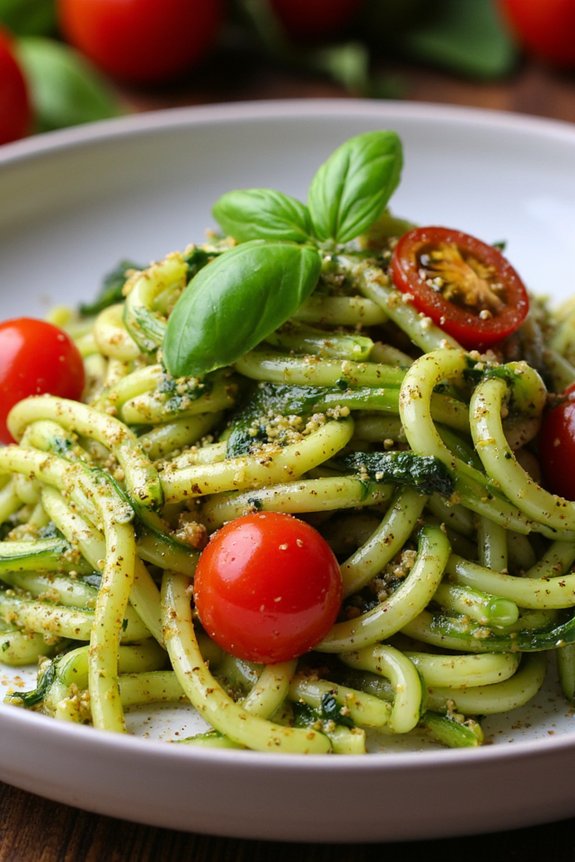
Zucchini Noodles With Pesto and Cherry Tomatoes is a delicious and healthy alternative to traditional pasta dishes, perfect for a quick and easy dinner. This dish combines the fresh, vibrant flavors of zucchini noodles, also known as “zoodles,” with a rich, homemade pesto sauce and juicy cherry tomatoes.
It’s a light yet satisfying meal that can be ready in just under 30 minutes, making it ideal for busy weeknights or when you want to serve something nutritious without spending too much time in the kitchen.
Zucchini noodles are a fantastic low-carb substitute for pasta, and when paired with the fragrant basil pesto, they create a mouthwatering base for the sweet and tangy cherry tomatoes. This dish is vegetarian-friendly and can easily be adapted to suit a vegan diet by substituting the cheese in the pesto with nutritional yeast.
Whether you’re looking to cut down on carbs, incorporate more vegetables into your diet, or simply enjoy a fresh and flavorful meal, this Zucchini Noodles With Pesto and Cherry Tomatoes recipe is sure to become a favorite.
Ingredients (Serves 4-6):
- 4 medium zucchinis
- 2 cups cherry tomatoes, halved
- 1/2 cup homemade or store-bought basil pesto
- 2 tablespoons olive oil
- 1/4 cup grated Parmesan cheese (optional)
- Salt and pepper to taste
- Fresh basil leaves for garnish
Cooking Instructions:
1. Prepare the Zucchini Noodles: Begin by washing the zucchinis thoroughly. Use a spiralizer to create the zucchini noodles, also known as zoodles. If you don’t have a spiralizer, you can also use a julienne peeler or a regular vegetable peeler to create thin strips.
2. Cook the Zoodles: Heat 1 tablespoon of olive oil in a large skillet over medium heat. Add the zucchini noodles and sauté for about 3-5 minutes until they’re slightly softened but still have a bit of crunch. Be careful not to overcook them, as they can become mushy.
Once done, remove the zoodles from the skillet and set aside.
3. Sauté the Cherry Tomatoes: In the same skillet, add the remaining tablespoon of olive oil. Add the cherry tomatoes and cook for about 3 minutes, stirring occasionally, until they start to soften and release their juices.
4. Combine Ingredients: Lower the heat to medium-low and return the zucchini noodles to the skillet. Add the pesto and toss everything gently to combine. Cook for an additional 2 minutes to heat through.
5. Season and Serve: Season with salt and pepper to taste. If desired, sprinkle grated Parmesan cheese over the top. Garnish with fresh basil leaves before serving.
Extra Tips:
When making Zucchini Noodles With Pesto and Cherry Tomatoes, it’s important to choose firm and fresh zucchinis for the best texture. Avoid overcooking the zoodles, as they should retain some crunch for a satisfying bite.
If you prefer a vegan version, simply replace Parmesan cheese with nutritional yeast for that cheesy flavor. Feel free to experiment by adding other vegetables such as bell peppers or mushrooms to enhance the dish further.
Finally, this dish is best served immediately to maintain the vibrant colors and flavors.
Quick Chickpea Curry With Coconut Milk

Quick Chickpea Curry with Coconut Milk is a delightful, flavorful dish that combines the rich creaminess of coconut milk with the hearty texture of chickpeas. This recipe is perfect for a weeknight dinner when you want something nutritious yet quick to prepare.
With the aromatic blend of spices, this curry offers a comforting and satisfying meal that can be enjoyed by the whole family. Not only is it a vegan-friendly dish, but it’s also packed with protein and fiber, making it a wholesome choice for any meal.
Whether you’re a seasoned cook or a beginner in the kitchen, this Quick Chickpea Curry with Coconut Milk is an excellent dish to try. The recipe is straightforward and doesn’t require any complex techniques.
With just a few staple pantry ingredients, you can whip up this curry in no time. Serve it over steamed rice or with warm naan bread for a complete meal. The balance of flavors in this dish is sure to impress your taste buds and leave you wanting more.
Ingredients (serves 4-6):
- 2 tablespoons vegetable oil
- 1 large onion, finely chopped
- 3 garlic cloves, minced
- 1 tablespoon fresh ginger, grated
- 2 teaspoons ground cumin
- 2 teaspoons ground coriander
- 1 teaspoon turmeric
- 1 teaspoon garam masala
- 1/2 teaspoon cayenne pepper (optional)
- 2 cans (15 oz each) chickpeas, drained and rinsed
- 1 can (14 oz) coconut milk
- 1 can (14.5 oz) diced tomatoes
- Salt to taste
- Fresh cilantro, chopped (for garnish)
Cooking Instructions:
- Heat the Oil: In a large skillet or pot, heat the vegetable oil over medium heat. Add the chopped onion and sauté for about 5 minutes or until the onions become soft and translucent.
- Add Aromatics: Stir in the minced garlic and grated ginger. Cook for an additional 1-2 minutes until fragrant, being careful not to let the garlic burn.
- Incorporate Spices: Add the ground cumin, ground coriander, turmeric, garam masala, and cayenne pepper (if using) to the onion mixture. Stir continuously for 1 minute to toast the spices, which will enhance their flavors.
- Mix in Chickpeas: Add the drained and rinsed chickpeas to the pan. Stir well to coat the chickpeas with the spice mixture.
- Add Liquids: Pour in the coconut milk and diced tomatoes, stirring to combine all the ingredients. Bring the mixture to a gentle simmer.
- Simmer the Curry: Reduce the heat to low and let the curry simmer for about 15-20 minutes, allowing the flavors to meld together. Stir occasionally and season with salt to taste.
- Garnish and Serve: Once the curry has thickened to your desired consistency, remove it from the heat. Garnish with freshly chopped cilantro before serving.
Extra Tips:
For a more robust flavor, consider making the curry a day ahead to allow the spices to develop further. Adjust the level of heat by adding more or less cayenne pepper according to your preference.
If you prefer a thicker curry, mash some of the chickpeas against the side of the pot with a spoon. For added texture, you can also toss in some fresh spinach or peas during the last few minutes of cooking. Serve the curry with a side of rice, naan bread, or even quinoa for a complete meal.