

Spring has arrived, bringing with it the perfect opportunity to update our dinner menus with fresh, seasonal ingredients. Picture Lemon Herb Grilled Chicken alongside tender asparagus or the vibrant flavors of Citrus Glazed Salmon with a colorful quinoa salad. In this list of 12 fresh family dinner recipes, you’ll find a delightful mix of comforting and light dishes that capture the essence of the season. Each recipe is designed to please all tastes and make your spring meals truly special. Let’s explore these mouthwatering meals together.
Lemon Herb Grilled Chicken With Asparagus
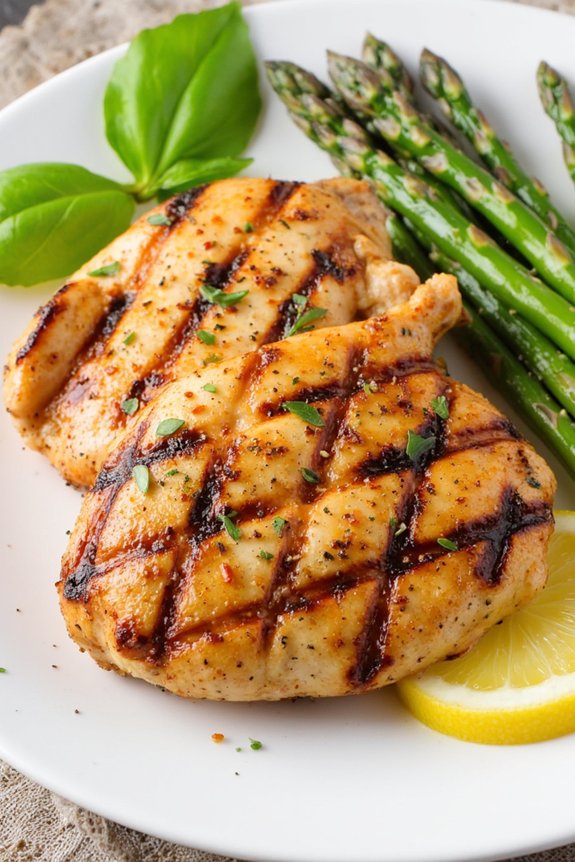
Lemon Herb Grilled Chicken With Asparagus is a perfect springtime dish that combines the zesty freshness of lemon with aromatic herbs and tender, juicy chicken. This delightful recipe not only brings a burst of flavors to your dinner table but also incorporates nutritious asparagus, making it a well-rounded meal. Ideal for family dinners, this dish is light yet satisfying, perfect for those warmer spring evenings when you want something both healthy and delicious.
Using simple, fresh ingredients, this recipe is easy to prepare and requires minimal effort, making it suitable for cooks of all levels. The key to this dish is allowing the chicken to marinate in a lemon-herb mixture, which infuses the meat with flavors while guaranteeing it stays moist during grilling.
The asparagus, lightly seasoned and grilled alongside the chicken, complements the dish beautifully, adding a crisp texture and vibrant color to your plate.
Ingredients (Serving Size: 4-6 people):
- 4-6 boneless, skinless chicken breasts
- 1 bunch of asparagus, trimmed
- 1/4 cup olive oil
- 3 tablespoons lemon juice
- Zest of 1 lemon
- 3 cloves garlic, minced
- 1 tablespoon fresh thyme, chopped
- 1 tablespoon fresh rosemary, chopped
- Salt and pepper to taste
- Lemon wedges, for serving
Cooking Instructions:
- Prepare the Marinade: In a small bowl, whisk together the olive oil, lemon juice, lemon zest, minced garlic, thyme, rosemary, salt, and pepper. This will serve as your flavorful marinade.
- Marinate the Chicken: Place the chicken breasts in a shallow dish or a large resealable plastic bag. Pour the marinade over the chicken, guaranteeing all pieces are well-coated. Cover or seal, then refrigerate for at least 30 minutes to 1 hour. This allows the chicken to absorb the flavors.
- Preheat the Grill: Preheat your grill to medium-high heat. If using a charcoal grill, guarantee the coals are hot and evenly spread out.
- Grill the Chicken: Remove the chicken from the marinade and place it on the hot grill. Cook for 6-7 minutes on each side or until the internal temperature reaches 165°F (75°C). The marinade will give the chicken a nice char and impart a juicy, flavorful bite.
- Grill the Asparagus: While the chicken is cooking, lightly coat the asparagus with olive oil and season with salt and pepper. Place them on the grill perpendicular to the grates to avoid them falling through. Grill for about 3-4 minutes, turning occasionally, until they’re tender and have grill marks.
- Serve: Once cooked, remove the chicken and asparagus from the grill. Let the chicken rest for a few minutes before serving. Serve with lemon wedges on the side for an extra zesty kick.
Extra Tips: For best results, make sure to pat the chicken dry before marinating to help the marinade stick better. If possible, use fresh herbs as they provide a more robust flavor compared to dried ones.
Additionally, if you prefer, you can use a grill pan on the stove if an outdoor grill isn’t available. Always remember to let the chicken rest after grilling, as this helps the juices redistribute throughout the meat, guaranteeing every bite is tender and flavorful.
Spring Vegetable Risotto
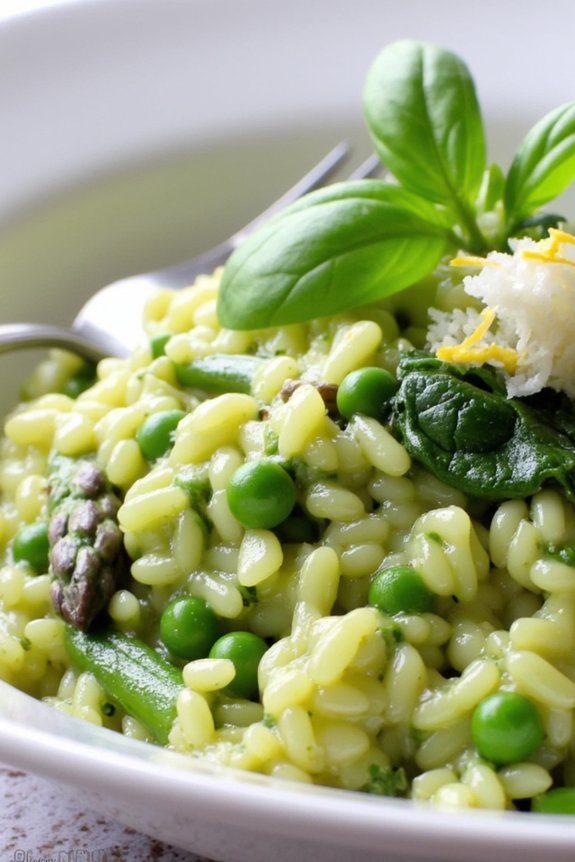
Spring Vegetable Risotto is a delightful dish that showcases the best produce of the season. This creamy risotto is infused with the fresh flavors of spring vegetables like asparagus, peas, and spinach, making it a perfect meal for a family dinner. The dish isn’t only delicious but also visually appealing, with its vibrant green hues and rich, creamy texture. With the right balance of flavors and a touch of Parmesan cheese, this risotto is bound to be a hit at your dinner table.
Preparing Spring Vegetable Risotto requires a bit of attention and patience, but the end result is well worth the effort. The key to a perfect risotto is to cook it slowly, allowing the rice to absorb the flavors of the broth gradually. As you stir the risotto, the starch from the rice is released, creating the creamy consistency that this dish is known for. The addition of fresh vegetables not only adds color and flavor but also provides a healthy dose of nutrients.
Ingredients (Serves 4-6)
- 1 1/2 cups Arborio rice
- 1 bunch of asparagus, trimmed and cut into 1-inch pieces
- 1 cup fresh or frozen peas
- 2 cups fresh baby spinach
- 1 small onion, finely chopped
- 2 cloves garlic, minced
- 4-5 cups vegetable broth
- 1/2 cup dry white wine
- 1/2 cup grated Parmesan cheese
- 2 tablespoons olive oil
- 2 tablespoons unsalted butter
- Salt and pepper to taste
- Zest of 1 lemon
- Fresh basil leaves for garnish (optional)
Cooking Instructions
- Prepare the Broth: In a medium saucepan, heat the vegetable broth over medium heat until it’s warm. Keep it on low heat to maintain its temperature while you prepare the risotto.
- Sauté the Vegetables: In a large pan, heat the olive oil and butter over medium heat. Add the chopped onion and garlic, and sauté until the onion becomes translucent, about 3-4 minutes.
- Cook the Asparagus: Add the asparagus pieces to the pan and cook for another 3 minutes until they start to soften. Stir occasionally to guarantee even cooking.
- Toast the Rice: Add the Arborio rice to the pan and stir well, making certain that each grain is coated with the oil and butter. Cook for about 2 minutes until the rice is lightly toasted.
- Deglaze with Wine: Pour in the dry white wine and stir continuously until the wine is absorbed by the rice.
- Begin Adding Broth: Add one ladleful of warm vegetable broth to the rice. Stir frequently until the broth is nearly absorbed by the rice. Continue adding the broth one ladleful at a time, stirring constantly, and allowing each addition to be absorbed before adding more. This process will take about 18-20 minutes.
- Incorporate Vegetables: About 5 minutes before the risotto is done, stir in the peas and spinach. Continue to cook, adding more broth as needed, until the rice is creamy and al dente.
- Finish with Cheese and Seasoning: Remove the pan from the heat and stir in the grated Parmesan cheese and lemon zest. Season with salt and pepper to taste.
- Serve the Risotto: Serve the Spring Vegetable Risotto hot, garnished with fresh basil leaves if desired.
Extra Tips
When making risotto, it’s important to use Arborio rice as its high starch content is essential for achieving the creamy texture. Keep the broth warm to guarantee the rice cooks evenly, and be patient with the process of adding broth gradually. Stirring frequently is key, as it helps release the starch from the rice, resulting in a luscious, creamy risotto.
Adjust the seasoning based on your taste preferences, and feel free to experiment with other spring vegetables like fava beans or zucchini for a unique twist.
Citrus Glazed Salmon With Quinoa Salad
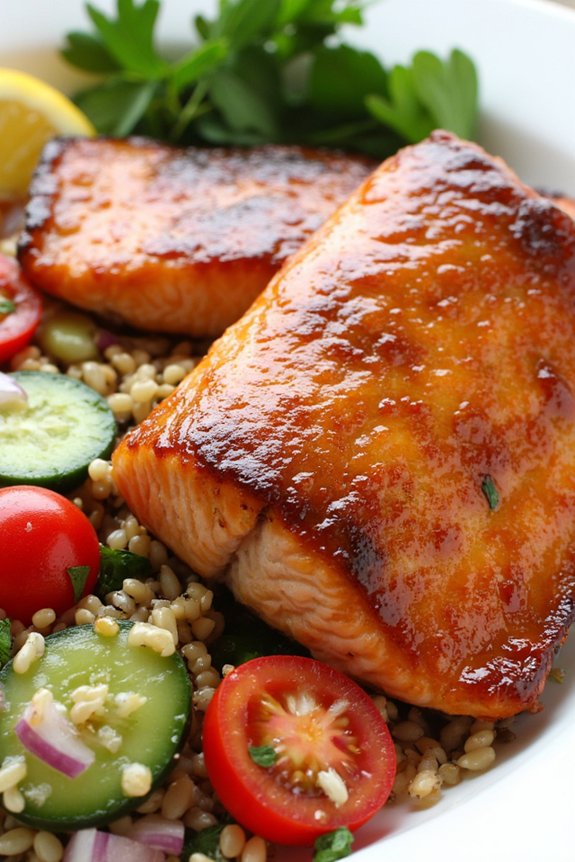
Citrus Glazed Salmon with Quinoa Salad is a vibrant, flavorful dish perfect for welcoming the invigorating vibes of spring. This recipe combines the rich, buttery taste of salmon with a tangy citrus glaze, creating a delightful contrast that pairs beautifully with the nutty, fluffy texture of quinoa salad.
The salad is loaded with fresh vegetables and herbs, adding a burst of color and crunch to each bite. This meal isn’t only delicious but also packed with nutrients, making it an ideal choice for a healthy family dinner.
The citrus glaze is a simple yet effective way to enhance the natural flavors of the salmon. Made with a blend of fresh citrus juices, honey, and soy sauce, it caramelizes beautifully when baked, creating a glossy, flavorful crust on the fish.
Paired with the quinoa salad, which is tossed with a light vinaigrette and fresh seasonal vegetables, this dish is sure to become a family favorite. The combination of textures and flavors creates a balanced, satisfying meal that can be prepared in under an hour, making it perfect for busy weeknights or a relaxed weekend gathering.
Ingredients (Serves 4-6):
- 4-6 salmon fillets
- 1 cup quinoa
- 2 cups water or vegetable broth
- 1/4 cup fresh orange juice
- 1/4 cup fresh lemon juice
- 3 tablespoons soy sauce
- 2 tablespoons honey
- 2 tablespoons olive oil
- 1 cup cherry tomatoes, halved
- 1 cucumber, diced
- 1/2 red onion, finely chopped
- 1/4 cup fresh parsley, chopped
- Salt and pepper to taste
Cooking Instructions:
- Prepare the Quinoa: Rinse the quinoa under cold water. In a medium saucepan, bring 2 cups of water or vegetable broth to a boil. Add the quinoa, reduce the heat to low, cover, and let simmer for about 15 minutes, or until the liquid is absorbed and the quinoa is fluffy. Remove from heat and set aside to cool.
- Make the Citrus Glaze: In a small bowl, mix together the orange juice, lemon juice, soy sauce, and honey. Stir until the honey is fully dissolved. This will be used to glaze the salmon.
- Prepare the Salmon: Preheat your oven to 400°F (200°C). Place the salmon fillets on a baking sheet lined with parchment paper. Brush the fillets generously with the citrus glaze, ensuring each piece is well-coated. Season lightly with salt and pepper.
- Bake the Salmon: Place the salmon in the preheated oven and bake for 12-15 minutes, or until the salmon is cooked through and flakes easily with a fork. The glaze should be caramelized and slightly sticky.
- Assemble the Quinoa Salad: In a large bowl, combine the cooled quinoa, cherry tomatoes, cucumber, red onion, and parsley. Drizzle with olive oil and season with salt and pepper to taste. Toss until well combined.
- Serve: Serve the citrus glazed salmon hot, alongside generous servings of the quinoa salad. Garnish with additional parsley if desired.
Extra Tips:
When cooking salmon, it’s important not to overcook it as this can lead to a dry, less flavorful result. Keep an eye on the salmon during the last few minutes of baking; it should be just cooked through and still moist.
For added flavor, consider marinating the salmon in the glaze for 30 minutes before baking. If you prefer a bit of spice, you can add a pinch of red pepper flakes to the glaze. Feel free to customize the quinoa salad with other seasonal vegetables or herbs you have on hand.
Pea and Mint Soup With Crusty Bread
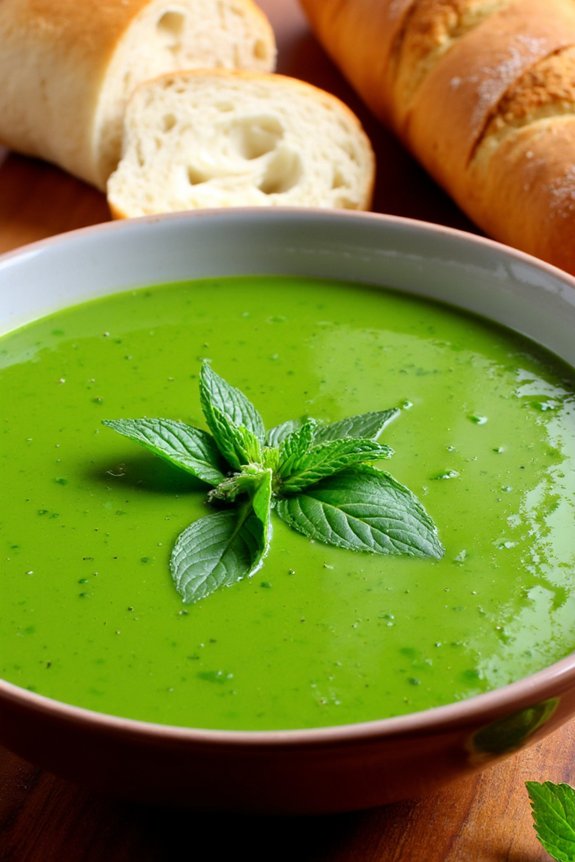
Pea and mint soup with crusty bread is a delightful and invigorating dish perfect for spring. This vibrant soup combines the sweetness of fresh peas with the cool, aromatic notes of mint, creating a light yet satisfying meal.
Paired with crusty bread, it’s a perfect choice for a family dinner that celebrates the season’s fresh produce. The vibrant green color of the soup makes it as visually appealing as it’s delicious, and it can be served as a starter or as a main course with the accompanying bread.
This dish isn’t only bursting with flavor but also easy to prepare, making it an ideal choice for busy weeknight dinners or leisurely weekend meals. The recipe is designed to serve 4-6 people, ensuring there’s enough to go around at the table.
Whether you’re a seasoned cook or a beginner in the kitchen, this recipe is straightforward and rewarding. The combination of peas and mint is classic and sure to be a hit with both adults and kids alike.
Ingredients (serves 4-6):
- 2 tablespoons olive oil
- 1 medium onion, chopped
- 2 cloves garlic, minced
- 4 cups vegetable broth
- 4 cups fresh or frozen peas
- 1 cup fresh mint leaves
- Salt and pepper to taste
- 1 cup heavy cream (optional)
- 1 loaf crusty bread
Cooking Instructions:
- Prepare the Ingredients: Begin by gathering all your ingredients. Chop the onion and mince the garlic. If using fresh peas, shell them; if using frozen, measure them out.
- Sauté the Aromatics: In a large pot, heat the olive oil over medium heat. Add the chopped onion and garlic, and sauté for about 5 minutes until the onion becomes translucent and the garlic is fragrant.
- Cook the Peas: Add the vegetable broth to the pot and bring it to a boil. Once boiling, add the peas. Reduce the heat to a simmer and cook for about 10 minutes, or until the peas are tender.
- Blend the Soup: Remove the pot from heat. Using an immersion blender, blend the soup until smooth. Alternatively, you can transfer the soup to a blender in batches, but be careful with the hot liquid.
- Add Mint and Season: Stir in the fresh mint leaves, and season the soup with salt and pepper to taste. If desired, stir in the heavy cream for a richer texture and flavor.
- Serve: Slice the crusty bread and serve it alongside bowls of the pea and mint soup. Enjoy your meal while it’s warm.
Extra Tips:
To enhance the flavor of your pea and mint soup, consider adding a squeeze of lemon juice just before serving for a touch of brightness.
If you prefer a thicker soup, reduce the amount of broth slightly or add a peeled and diced potato to the simmering peas. For a dairy-free version, skip the cream or substitute it with a plant-based alternative.
Finally, for a touch of indulgence, top the soup with a dollop of crème fraîche or a sprinkle of Parmesan cheese.
Spinach and Ricotta Stuffed Shells
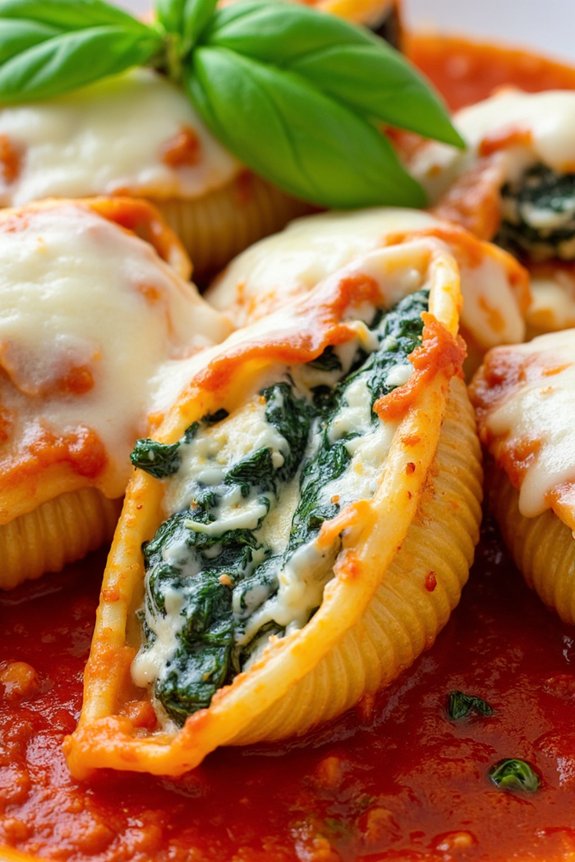
Spinach and Ricotta Stuffed Shells is a delightful and comforting dish perfect for a spring family dinner. The combination of creamy ricotta cheese, fresh spinach, and tender pasta shells creates a satisfying meal that’s both hearty and light. This vegetarian dish isn’t only easy to prepare but also makes for a visually appealing centerpiece on the dining table with its vibrant green and red hues from the spinach and marinara sauce.
Ideal for serving a group of 4-6 people, this recipe allows you to enjoy a delicious homemade meal that will surely impress your family and friends. The key to success with this dish is using fresh ingredients and taking time to layer the flavors carefully. Let’s plunge into the ingredients and steps needed to create this delectable springtime meal.
Ingredients:
- 20-24 jumbo pasta shells
- 1 tablespoon olive oil
- 2 cloves garlic, minced
- 10 ounces fresh spinach, roughly chopped
- 15 ounces ricotta cheese
- 1 cup grated mozzarella cheese
- 1/2 cup grated Parmesan cheese
- 1 large egg
- 1 teaspoon salt
- 1/2 teaspoon black pepper
- 1/2 teaspoon nutmeg
- 2 cups marinara sauce
- Fresh basil leaves (optional, for garnish)
Instructions:
- Preheat and Prepare: Preheat your oven to 375°F (190°C). Cook the jumbo pasta shells in a large pot of salted boiling water until al dente, according to the package instructions. Drain the shells and set them aside to cool slightly.
- Sauté Spinach: In a large skillet, heat the olive oil over medium heat. Add the minced garlic and sauté for about 1 minute until fragrant. Add the chopped spinach and cook until wilted, about 3-4 minutes. Remove from heat and let it cool slightly.
- Mix Filling: In a large mixing bowl, combine the ricotta cheese, 1/2 cup of mozzarella cheese, Parmesan cheese, egg, salt, pepper, and nutmeg. Add the cooled spinach and garlic mixture to the bowl and stir until well combined.
- Stuff Shells: Spread 1 cup of marinara sauce evenly on the bottom of a 9×13-inch baking dish. Fill each pasta shell with about 2 tablespoons of the ricotta and spinach mixture, and place them in the baking dish.
- Assemble: Pour the remaining marinara sauce over the stuffed shells, making sure they’re well coated. Sprinkle the remaining 1/2 cup of mozzarella cheese on top.
- Bake: Cover the baking dish with aluminum foil and bake in the preheated oven for 25 minutes. Remove the foil and continue baking for an additional 10 minutes, or until the cheese is melted and bubbly.
- Serve: Remove from the oven and let it cool for a few minutes. Garnish with fresh basil leaves if desired, and serve warm.
Extra Tips:
For the best results, use fresh spinach and ricotta cheese to guarantee a rich and creamy filling. If you prefer a bit of a kick, consider adding a pinch of red pepper flakes to the spinach mixture.
Additionally, if you have time, allow the stuffed shells to sit for a few minutes after baking before serving. This resting period helps the flavors meld together beautifully and makes serving easier.
Feel free to prepare the dish ahead of time and refrigerate it until you’re ready to bake, making it a convenient option for busy weeknights.
Zesty Shrimp Tacos With Mango Salsa
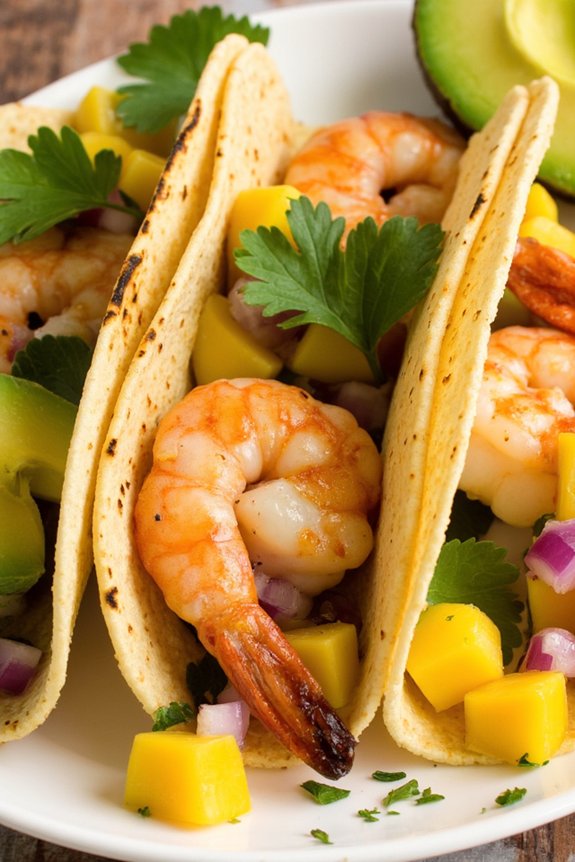
Zesty Shrimp Tacos With Mango Salsa are a perfect way to welcome the flavors of spring into your family dinner table. These tacos are a delightful blend of spicy, sweet, and tangy, offering a burst of revival with every bite. The shrimp is seasoned with a zesty blend of spices and cooked to perfection, providing a savory foundation for the vibrant and juicy mango salsa.
This dish isn’t only delicious but also quick to prepare, making it ideal for busy weeknights or casual weekend gatherings. The combination of tender shrimp and colorful mango salsa creates a stunning presentation that will impress both family and friends.
The mango salsa, made with ripe mango, red onion, fresh cilantro, and a hint of lime, complements the spicy shrimp beautifully. Serve these tacos with warm corn tortillas, and garnish with creamy avocado slices for an extra layer of flavor and texture.
Whether you’re a seafood lover or simply searching for a revitalizing spring recipe, these Zesty Shrimp Tacos With Mango Salsa are sure to become a family favorite.
Ingredients (serves 4-6):
- 1 ½ pounds large shrimp, peeled and deveined
- 1 tablespoon olive oil
- 1 teaspoon chili powder
- 1 teaspoon paprika
- ½ teaspoon cumin
- ½ teaspoon garlic powder
- Salt and pepper to taste
- 8-12 corn tortillas
- 2 ripe mangoes, diced
- ½ red onion, finely chopped
- 1 jalapeño, seeded and diced
- ¼ cup fresh cilantro, chopped
- Juice of 2 limes
- 1 avocado, sliced
Cooking Instructions:
- Prepare the Shrimp: In a large bowl, combine the shrimp with olive oil, chili powder, paprika, cumin, garlic powder, salt, and pepper. Toss until the shrimp are evenly coated with the seasoning.
- Cook the Shrimp: Heat a large skillet over medium-high heat. Add the seasoned shrimp and cook for 2-3 minutes on each side until they’re pink and opaque. Remove from heat and set aside.
- Make the Mango Salsa: In a separate bowl, combine the diced mango, red onion, jalapeño, cilantro, and lime juice. Mix well and season with salt to taste. Let the salsa sit for a few minutes to allow the flavors to meld.
- Warm the Tortillas: Heat the corn tortillas in a dry skillet over medium heat for about 30 seconds on each side, until they’re warm and pliable.
- Assemble the Tacos: Place a portion of the cooked shrimp onto each warmed tortilla. Top with a generous spoonful of mango salsa and garnish with avocado slices.
- Serve and Enjoy: Serve the tacos immediately while the shrimp is still warm, and enjoy the delightful combination of flavors.
Extra Tips:
When preparing the shrimp, make sure they’re patted dry before adding the seasoning; this guarantees that the spices adhere well and the shrimp gets a nice sear in the pan.
If you prefer a milder salsa, you can reduce or omit the jalapeño. For an extra touch of creaminess, consider adding a dollop of sour cream or a sprinkle of cotija cheese on top of the tacos.
To save time, the mango salsa can be made in advance and stored in the refrigerator until you’re ready to serve the tacos.
Herb Crusted Pork Tenderloin With Roasted Vegetables
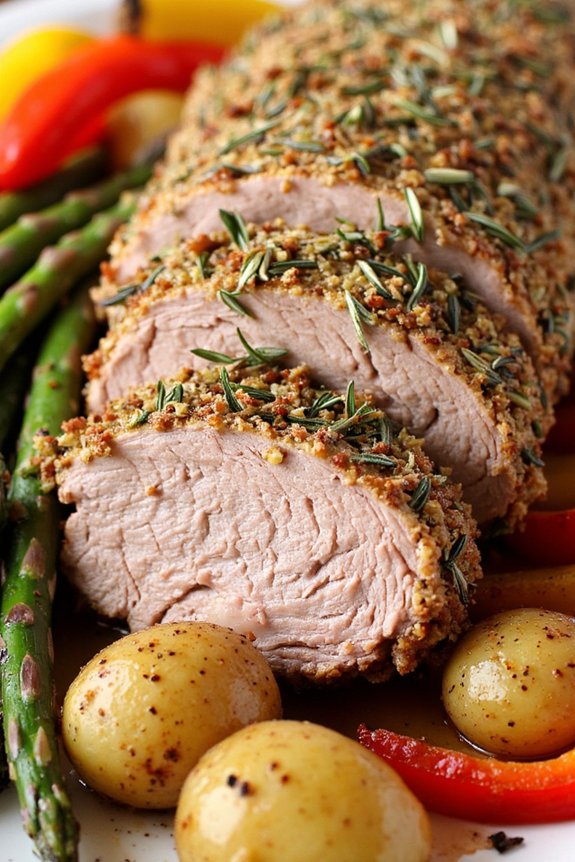
Herb Crusted Pork Tenderloin with Roasted Vegetables is a delightful dish perfect for a spring family dinner. This dish combines tender, juicy pork coated with a fragrant herb crust, paired with a medley of perfectly roasted seasonal vegetables. The freshness of the herbs enhances the natural flavors of the pork, while the roasting process brings out the sweetness in the vegetables, creating a harmonious balance of flavors that’s as pleasing to the palate as it’s to the eye.
Ideal for serving 4-6 people, this recipe makes for a satisfying and impressive meal without requiring hours in the kitchen. The recipe encourages the use of fresh, springtime produce, making it not only flavorful but also a celebration of the season’s bounty. Whether you’re hosting a family gathering or simply looking to try something new for dinner, this dish is sure to be a hit.
Ingredients:
- 2 pork tenderloins (about 1.5 lbs total)
- 2 tablespoons olive oil
- 4 cloves garlic, minced
- 1 tablespoon fresh rosemary, chopped
- 1 tablespoon fresh thyme, chopped
- 1 tablespoon Dijon mustard
- Salt and pepper to taste
- 1 pound baby potatoes, halved
- 1 pound asparagus, trimmed
- 1 red bell pepper, sliced
- 1 yellow bell pepper, sliced
- 2 tablespoons olive oil (for vegetables)
- Salt and pepper to taste (for vegetables)
Instructions:
- Preheat your oven to 425°F (220°C). This high temperature will guarantee the pork and vegetables cook evenly and develop a nice, crispy exterior.
- Prepare the herb crust by mixing minced garlic, chopped rosemary, thyme, Dijon mustard, olive oil, salt, and pepper in a small bowl. Stir until well combined.
- Coat the pork tenderloins with the herb mixture. Use your hands to press the mixture onto the pork, making sure it’s evenly coated on all sides.
- Place the pork tenderloins on a large baking sheet lined with parchment paper or foil for easy cleanup.
- Prepare the vegetables by tossing baby potatoes, asparagus, and bell peppers in olive oil, salt, and pepper. Spread them out on the same baking sheet around the pork to allow the flavors to meld as they roast together.
- Roast in the oven for 25-30 minutes, or until the internal temperature of the pork reaches 145°F (63°C) and the vegetables are tender and golden brown. Be sure to stir the vegetables halfway through to guarantee even roasting.
- Remove from the oven and let the pork rest for about 5 minutes before slicing. This allows the juices to redistribute, resulting in a juicier and more flavorful tenderloin.
- Serve the sliced pork with the roasted vegetables on a platter for a family-style presentation, or plate individually for a more formal setting.
Extra Tips:
When cooking Herb Crusted Pork Tenderloin with Roasted Vegetables, it’s important to let the pork rest before slicing. Resting helps to lock in the juices, making the meat more succulent.
Additionally, try to cut the vegetables uniformly to guarantee they roast evenly. If you prefer a little heat, add a pinch of red pepper flakes to the vegetable mixture for an extra kick.
Finally, using a meat thermometer is the best way to confirm your pork is cooked perfectly without overcooking.
Fresh Spring Roll Bowls With Peanut Sauce
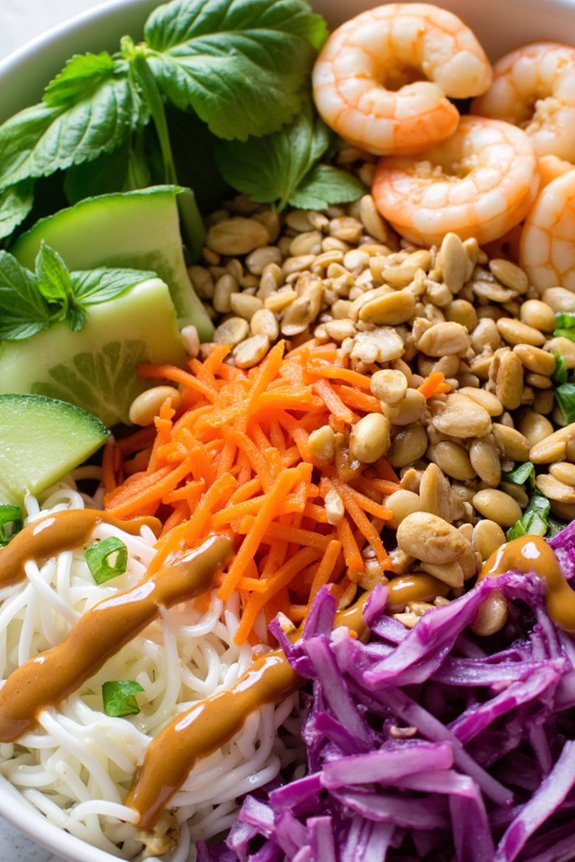
Fresh Spring Roll Bowls With Peanut Sauce are the perfect way to celebrate the vibrant flavors of spring with a light, fresh, and satisfying meal. These bowls combine all the delicious ingredients typically found in fresh Vietnamese spring rolls but deconstructed into a convenient bowl form. The combination of crunchy vegetables, fresh herbs, and tender rice noodles, all topped with a luscious peanut sauce, creates a delightful balance of flavors and textures.
This dish isn’t only appealing to the eyes with its array of colorful ingredients but also to the palate with its mix of savory, sweet, and slightly spicy flavors. It’s a versatile dish that can be served as a light lunch or a hearty dinner, and it’s easily customizable to suit different dietary preferences. Whether you’re entertaining guests or looking for a quick weeknight meal, Fresh Spring Roll Bowls With Peanut Sauce are sure to please.
Ingredients (serving size: 4-6 people):
- 8 ounces rice vermicelli noodles
- 1 cup shredded carrots
- 1 cup thinly sliced cucumber
- 1 cup shredded red cabbage
- 1 cup bean sprouts
- 1/2 cup fresh mint leaves
- 1/2 cup fresh cilantro leaves
- 1/2 cup fresh basil leaves
- 1/4 cup roasted peanuts, chopped
- 1 tablespoon sesame seeds
- 1 pound cooked shrimp or chicken, sliced (optional for protein)
- 1/4 cup soy sauce
- 3 tablespoons creamy peanut butter
- 2 tablespoons lime juice
- 2 tablespoons hoisin sauce
- 1 tablespoon honey
- 2 teaspoons sesame oil
- 1 garlic clove, minced
- 1 teaspoon sriracha (optional for heat)
- Salt and pepper to taste
Cooking Instructions:
- Prepare the noodles: Cook the rice vermicelli noodles according to the package instructions. Once done, drain and rinse them under cold water to stop the cooking process. Set aside.
- Chop and prep vegetables: While the noodles are cooking, shred the carrots and cabbage, and slice the cucumber thinly. Rinse the bean sprouts and pat them dry with a paper towel.
- Mix the peanut sauce: In a medium bowl, whisk together the soy sauce, peanut butter, lime juice, hoisin sauce, honey, sesame oil, minced garlic, and sriracha. Adjust the seasoning with salt and pepper, and add more sriracha if extra heat is desired.
- Assemble the bowls: Divide the cooked noodles evenly among 4-6 bowls. Arrange the shredded carrots, sliced cucumber, shredded cabbage, and bean sprouts around the noodles. If using, add the sliced shrimp or chicken on top.
- Garnish: Sprinkle the chopped roasted peanuts and sesame seeds over the bowls. Distribute the fresh mint, cilantro, and basil leaves evenly across each bowl for an aromatic finish.
- Serve with sauce: Drizzle the prepared peanut sauce over each bowl just before serving. Alternatively, serve the sauce on the side for guests to add according to their preference.
Extra Tips:
For a completely vegetarian or vegan option, simply omit the shrimp or chicken and add tofu or extra vegetables like bell peppers or avocado. Make sure to use a creamy peanut butter for the sauce to achieve a smooth consistency. You can prepare the sauce ahead of time and store it in the refrigerator for up to a week, making it even more convenient for meal prep.
If you’re making these bowls for a crowd, consider setting up a DIY spring roll bowl bar so guests can customize their bowls to their liking.
Honey Mustard Glazed Chicken Thighs With Snap Peas
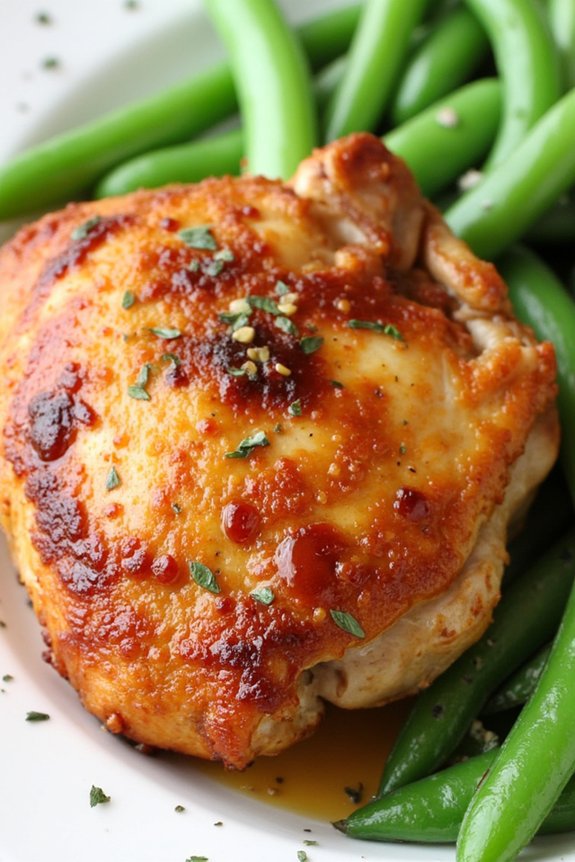
Honey Mustard Glazed Chicken Thighs With Snap Peas is a delightful spring-inspired dish that brings together the sweet and tangy flavors of honey mustard with the tender juiciness of chicken thighs.
This dish is perfect for a family dinner, showcasing the bright green snap peas that add a fresh crunch and a pop of color to your meal. The glaze caramelizes beautifully on the chicken, creating a mouthwatering experience that’s guaranteed to please both adults and children alike.
Served warm, this dish isn’t only visually appealing but also packed with nutrients, thanks to the protein-rich chicken and vitamin-loaded snap peas. The combination of bold flavors and simple ingredients makes it an ideal choice for a quick yet satisfying weeknight dinner.
Whether you’re gathering around the table or enjoying a relaxed meal in the backyard, Honey Mustard Glazed Chicken Thighs With Snap Peas offers a taste of spring in every bite.
Ingredients for 4-6 servings:
- 8 bone-in, skin-on chicken thighs
- Salt and black pepper, to taste
- 1/3 cup honey
- 1/3 cup Dijon mustard
- 2 tablespoons olive oil
- 1 tablespoon apple cider vinegar
- 2 cloves garlic, minced
- 1 pound snap peas, trimmed
- 1 tablespoon fresh thyme leaves
- Lemon wedges, for serving
Cooking Instructions:
- Prepare the Oven and Chicken: Preheat your oven to 400°F (200°C). Pat the chicken thighs dry with paper towels and season them generously with salt and black pepper on both sides.
- Make the Honey Mustard Glaze: In a medium bowl, whisk together the honey, Dijon mustard, olive oil, apple cider vinegar, and minced garlic until well combined. This mixture will serve as the glaze that will coat the chicken thighs.
- Glaze the Chicken: Place the chicken thighs in a large mixing bowl and pour about half of the honey mustard glaze over them. Toss the chicken in the bowl to make sure each piece is evenly coated with the glaze.
- Arrange and Bake: Arrange the glazed chicken thighs skin-side up on a baking sheet lined with parchment paper or aluminum foil. Bake in the preheated oven for 25-30 minutes, or until the chicken is cooked through and the skin is golden and crispy.
- Prepare the Snap Peas: While the chicken is baking, bring a large pot of salted water to a boil. Add the snap peas and blanch them for 2-3 minutes until they’re bright green and tender-crisp. Drain and set aside.
- Combine and Serve: Once the chicken is done, remove it from the oven and drizzle with the remaining honey mustard glaze. Garnish with fresh thyme leaves. Serve the chicken thighs with the blanched snap peas and lemon wedges on the side.
Extra Tips:
When cooking the chicken thighs, make certain they’re arranged in a single layer on the baking sheet to promote even cooking and to achieve a crispy skin.
If you prefer a spicier version, consider adding a pinch of red pepper flakes to the honey mustard glaze for an extra kick.
For additional flavor, you can also roast the snap peas in the oven alongside the chicken for the last 10 minutes of baking.
To make the dish even more nutritious, consider adding other spring vegetables like asparagus or carrots into the mix. Enjoy your spring-inspired family dinner!
Artichoke and Sun-Dried Tomato Pasta
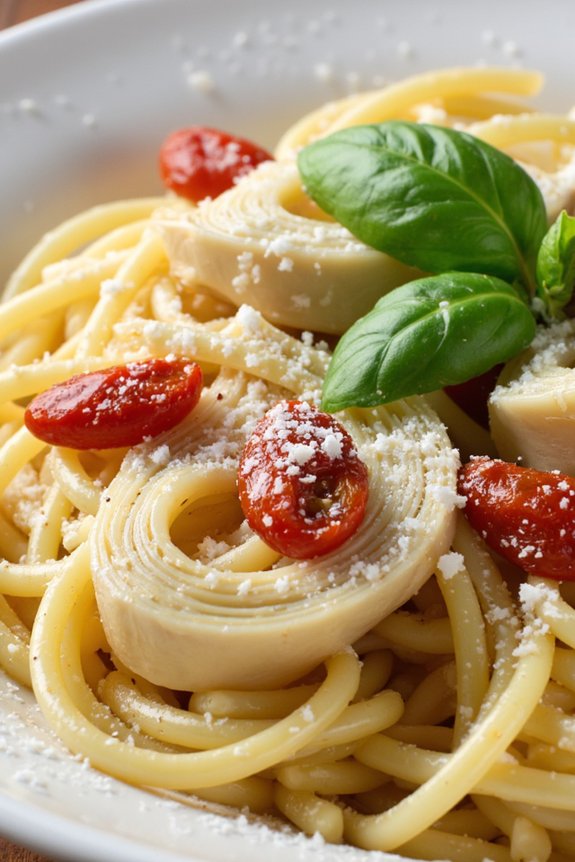
Artichoke and Sun-Dried Tomato Pasta is a delightful spring dish that’s both vibrant and flavorful, perfect for a family dinner. This recipe combines the nutty, rich flavor of artichokes with the tangy sweetness of sun-dried tomatoes, creating a beautifully balanced pasta dish. The addition of fresh herbs and a hint of garlic enhances the natural flavors of the ingredients, making it a rejuvenating meal that captures the essence of the season.
This pasta dish isn’t only about taste but also about texture. The creaminess of the sauce, combined with the slight chewiness of the sun-dried tomatoes and the tender artichokes, makes every bite a pleasurable experience. Ideal for serving 4-6 people, this recipe is sure to be a hit at your family dinner table, enticing everyone with its aromatic and colorful presentation.
Ingredients (Serves 4-6):
- 12 oz (340g) pasta (penne or fettuccine)
- 1 cup sun-dried tomatoes, packed in oil, drained and sliced
- 1 can (14 oz) artichoke hearts, drained and quartered
- 3 cloves garlic, minced
- 1/4 cup olive oil
- 1/2 cup white wine (optional)
- 1/2 cup grated Parmesan cheese
- 1/4 cup fresh basil leaves, chopped
- Salt and pepper to taste
- 1/4 teaspoon red pepper flakes (optional)
- Lemon wedges for serving
Instructions:
- Cook the Pasta: Bring a large pot of salted water to a boil. Add the pasta and cook according to the package instructions until al dente. Reserve 1 cup of pasta water, then drain the pasta and set aside.
- Prepare the Sauce Base: In a large skillet, heat the olive oil over medium heat. Add the minced garlic and sauté for about 1 minute until fragrant but not browned.
- Add the Vegetables: Stir in the sun-dried tomatoes and artichoke hearts into the skillet. Cook for about 3-4 minutes, allowing the flavors to meld together.
- Deglaze the Pan: Pour in the white wine (if using) and bring to a simmer. Let it cook for 2-3 minutes until the wine has reduced slightly.
- Combine with Pasta: Add the cooked pasta to the skillet, tossing to coat it well with the sauce. Gradually add reserved pasta water as needed to reach the desired consistency.
- Finish with Cheese and Herbs: Remove the skillet from heat and stir in the Parmesan cheese and fresh basil. Season with salt, pepper, and red pepper flakes if desired.
- Serve: Divide the pasta among serving plates, garnish with additional Parmesan and basil if desired, and serve with lemon wedges on the side.
Extra Tips:
For a creamier sauce, consider adding a splash of heavy cream or a dollop of ricotta cheese towards the end of cooking. If you prefer a more robust flavor, experiment with adding a spoonful of capers or olives to the sauce.
Remember that the quality of the ingredients, particularly the sun-dried tomatoes and artichokes, will greatly impact the taste of the dish, so choose the best you can find. Finally, if you’re short on time, pre-cooked artichokes can be a convenient substitute.
Grilled Lamb Chops With Mint Chimichurri
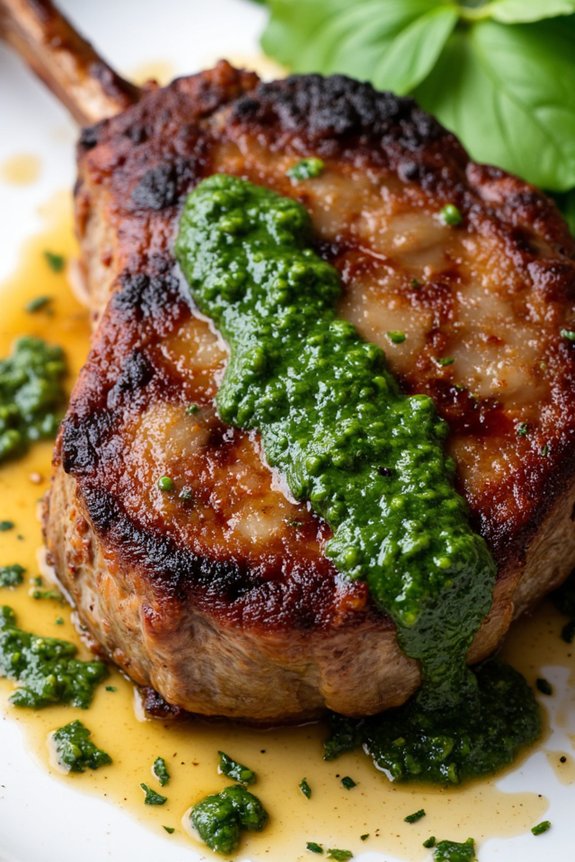
Grilled Lamb Chops With Mint Chimichurri is a delightful dish that combines the rich, savory flavors of lamb with the fresh and vibrant notes of mint chimichurri. As spring ushers in warmer weather, it’s the perfect time to fire up the grill and enjoy a family meal that celebrates the season’s bounty.
The succulent lamb chops are perfectly complemented by the herbaceous, tangy, and slightly spicy mint chimichurri, making this dish a hit at any dinner gathering.
The key to this dish lies in its balance of flavors and textures. Grilling the lamb chops imparts a smoky depth that pairs beautifully with the bright and zesty chimichurri.
Mint, parsley, and cilantro are blended with garlic, vinegar, and a hint of spice to create a sauce that enhances the natural flavor of the lamb without overpowering it. This dish isn’t only a feast for the palate but also a feast for the eyes, with its vivid green chimichurri contrasting against the golden-brown lamb chops.
Ingredients (Serves 4-6)
- 8 lamb chops (about 1-inch thick)
- 2 tablespoons olive oil
- Salt and pepper to taste
- 1 cup fresh mint leaves
- 1 cup fresh parsley leaves
- 1/2 cup fresh cilantro leaves
- 3 cloves garlic
- 1/2 teaspoon red pepper flakes
- 1/4 cup red wine vinegar
- 1/2 cup olive oil
- Salt and pepper to taste
Cooking Instructions
1. Prepare the Lamb Chops: Begin by patting the lamb chops dry with paper towels. This will help them sear properly on the grill. Rub each chop with olive oil and season generously with salt and pepper on both sides.
Let them sit at room temperature for about 20 minutes before grilling.
2. Make the Mint Chimichurri: In a food processor, combine mint, parsley, cilantro, garlic, and red pepper flakes. Pulse until the herbs are finely chopped.
Add the red wine vinegar and 1/2 cup of olive oil, then pulse again until everything is well combined. Season with salt and pepper to taste. Set aside.
3. Preheat the Grill: Heat your grill to medium-high. Clean and oil the grates to prevent sticking.
4. Grill the Lamb Chops: Place the lamb chops on the grill. Cook for about 4-5 minutes per side for medium-rare, or adjust the time to your desired level of doneness.
Use a meat thermometer to verify the internal temperature reaches 145°F for medium-rare.
5. Rest the Lamb Chops: Once cooked, remove the lamb chops from the grill and let them rest on a platter for about 5 minutes.
This allows the juices to redistribute throughout the meat, guaranteeing tenderness.
6. Serve: Arrange the lamb chops on a serving platter and generously spoon the mint chimichurri over the top.
Serve immediately for best flavor and texture.
Extra Tips
For the best results, choose lamb chops that are uniform in thickness to promote even cooking. If possible, purchase lamb that’s fresh and locally sourced for maximum flavor.
The mint chimichurri can be made a few hours in advance to allow the flavors to meld, enhancing its taste. Additionally, if you prefer a milder sauce, reduce the amount of red pepper flakes or omit them entirely.
Finally, remember to preheat your grill properly to achieve a nice sear on the lamb chops, which adds to the overall taste and presentation of the dish.
Spring Pesto Pizza With Arugula and Goat Cheese
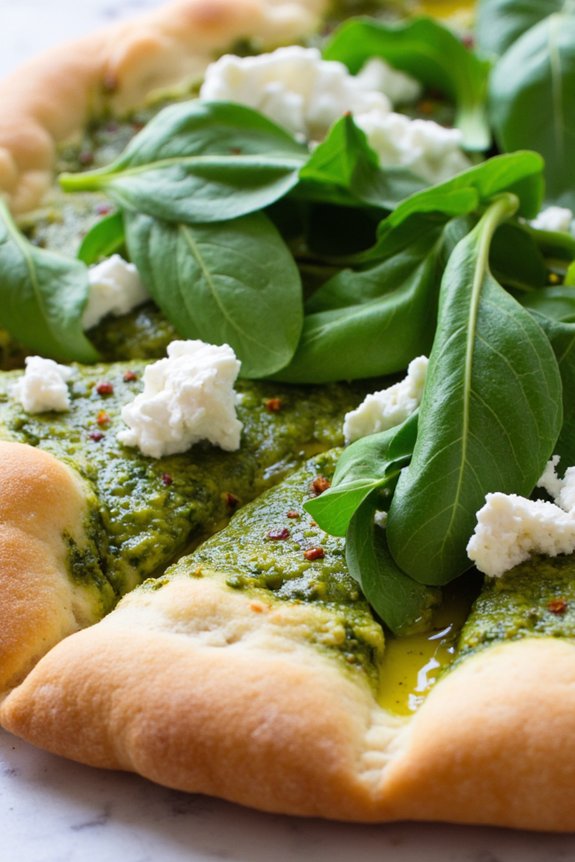
Spring is the perfect time to enjoy fresh, vibrant flavors, and one dish that embodies the season is Spring Pesto Pizza with Arugula and Goat Cheese. This pizza combines the peppery taste of arugula with creamy goat cheese and a homemade basil pesto, all atop a crisp, golden crust.
It’s a delightful and invigorating meal that’s easy to prepare and sure to please the whole family. Whether you’re enjoying it as a light dinner or a weekend lunch, this pizza is a celebration of spring’s bounty.
To make this pizza, you’ll start by preparing a simple yet delicious basil pesto, which serves as the base sauce. The pesto is made by blending fresh basil leaves, garlic, pine nuts, Parmesan cheese, and olive oil until smooth.
This vibrant green sauce is spread over the rolled-out pizza dough, providing a flavorful foundation. The pizza is then topped with a generous sprinkle of crumbled goat cheese and fresh arugula, which adds a wonderful texture and flavor contrast.
Once baked, the pizza is drizzled with a bit of extra virgin olive oil and a sprinkle of crushed red pepper flakes for a touch of heat.
Ingredients (Serves 4-6):
- 1 pre-made pizza dough or homemade dough
- 1 cup fresh basil leaves
- 2 cloves garlic
- 1/4 cup pine nuts
- 1/4 cup grated Parmesan cheese
- 1/3 cup olive oil
- Salt and pepper, to taste
- 4 oz goat cheese, crumbled
- 2 cups fresh arugula
- 1 tablespoon extra virgin olive oil
- Crushed red pepper flakes, to taste
Instructions:
1. Preheat the Oven: Preheat your oven to 475°F (245°C) and place a pizza stone or baking sheet inside to heat.
2. Make the Pesto: In a food processor, combine the basil leaves, garlic, pine nuts, and Parmesan cheese. Pulse until the ingredients are finely chopped.
With the processor running, slowly add the olive oil until the mixture is smooth. Season with salt and pepper to taste.
3. Prepare the Pizza Dough: On a lightly floured surface, roll out the pizza dough into a 12-inch circle. Carefully transfer it to a piece of parchment paper for easy transfer to the oven.
4. Assemble the Pizza: Spread the prepared pesto evenly over the pizza dough, leaving a small border around the edges. Sprinkle the crumbled goat cheese on top of the pesto.
5. Bake the Pizza: Carefully transfer the pizza, along with the parchment paper, onto the preheated pizza stone or baking sheet. Bake for 10-12 minutes, or until the crust is golden brown and the cheese is bubbly.
6. Add Finishing Touches: Remove the pizza from the oven and scatter the fresh arugula over the top. Drizzle with extra virgin olive oil and sprinkle with crushed red pepper flakes.
7. Serve: Slice the pizza and serve immediately, enjoying the fresh flavors and crispy crust.
Extra Tips:
When making the pesto, feel free to substitute walnuts or almonds if pine nuts aren’t available.
If you’re using a store-bought pizza dough, make sure to let it come to room temperature before rolling it out to prevent it from shrinking.
For an extra crispy crust, bake the pizza on a preheated pizza stone. If you prefer a less spicy pizza, you can omit the crushed red pepper flakes or adjust to taste.
Enjoy this delightful Spring Pesto Pizza with a side salad or a light white wine for a complete, invigorating meal.