

As a mom, I know the dinner table can feel like a toddler tornado at times. It’s all about striking the right balance between delicious and nutritious, isn’t it? Whipping up meals like Cheesy Chicken and Broccoli Casserole or Veggie-Packed Mac and Cheese, I’ve found ways to make dinnertime delightful for everyone. But there’s a little trick to keeping those tiny taste buds happy and eager for more. Can you guess what it is?
Cheesy Chicken and Broccoli Casserole

Cheesy Chicken and Broccoli Casserole is a comforting and nutritious meal that’s perfect for family dinners, especially when you have toddlers at the table. This dish combines tender chicken pieces with vibrant broccoli florets, all enveloped in a rich, cheesy sauce that’s certain to please even the pickiest eaters.
The casserole is easy to prepare and can be on the table in under an hour, making it a practical choice for busy weeknights. This recipe is designed to serve 4-6 people, guaranteeing there’s plenty to go around. The creamy texture and savory flavors will appeal to the whole family, while the inclusion of broccoli adds a boost of vitamins and minerals.
With its melty cheese topping and hearty ingredients, this casserole is a complete meal on its own, though you can always serve it with a side of crusty bread or a simple salad to round things out.
Ingredients:
- 2 cups cooked chicken breast, diced
- 3 cups broccoli florets
- 2 cups cooked rice
- 1 can (10.5 oz) cream of chicken soup
- 1 cup milk
- 2 cups shredded cheddar cheese
- 1 teaspoon garlic powder
- 1/2 teaspoon onion powder
- Salt and pepper, to taste
- 1 tablespoon butter
- 1/2 cup breadcrumbs
Cooking Instructions:
- Preheat the Oven: Preheat your oven to 375°F (190°C) to confirm it’s ready for the casserole.
- Prepare the Broccoli: In a large pot of boiling water, blanch the broccoli florets for about 2-3 minutes until they’re just tender but still bright green. Drain them and set aside.
- Make the Sauce: In a medium saucepan, combine the cream of chicken soup and milk over medium heat. Stir in the garlic powder, onion powder, salt, and pepper. Let the mixture come to a gentle simmer, stirring frequently.
- Assemble the Casserole: In a large bowl, mix the cooked chicken, blanched broccoli, cooked rice, and half of the shredded cheddar cheese. Pour the sauce over the mixture and stir to combine everything evenly.
- Transfer to Baking Dish: Grease a 9×13 inch baking dish with butter. Transfer the chicken and broccoli mixture into the dish, spreading it out evenly.
- Add Toppings: Sprinkle the remaining cheddar cheese over the top, followed by the breadcrumbs for a crunchy topping.
- Bake: Place the casserole in the preheated oven and bake for 20-25 minutes, or until the cheese is melted and bubbly, and the breadcrumbs are golden brown.
- Serve: Remove from the oven and let it cool for a few minutes before serving. Enjoy the cheesy goodness with your family!
Extra Tips:
For an added boost of flavor, consider using a sharp cheddar cheese or mixing in a bit of Parmesan. If you want to save time, rotisserie chicken can be a quick alternative to cooking chicken breast.
When blanching the broccoli, be sure not to overcook it, as it will continue to cook in the oven. Feel free to add other veggies your toddlers enjoy, such as peas or carrots, to make the casserole even more nutritious.
Mini Meatball Sliders

Mini Meatball Sliders are a delightful and nutritious option for family dinners, especially when catering to toddlers. These bite-sized treats aren’t only fun to eat but also packed with flavors that appeal to young taste buds. They’re the perfect way to introduce your little ones to new textures and ingredients while keeping mealtime exciting and enjoyable.
Plus, these sliders are easy to handle, making them a great choice for small hands. When preparing Mini Meatball Sliders, you can get creative with the ingredients, adding vegetables or using different types of meat to suit your family’s preferences. This dish can be prepared in advance and assembled quickly, making it a convenient option for busy weeknights.
Serve these sliders with a side of steamed vegetables or a simple salad to create a balanced meal that the whole family will love.
Ingredients (Serves 4-6)
- 1 pound ground beef or turkey
- 1/4 cup breadcrumbs
- 1/4 cup grated Parmesan cheese
- 1 large egg
- 1 small onion, finely chopped
- 2 cloves garlic, minced
- 1 teaspoon dried oregano
- Salt and pepper to taste
- 12 small slider buns
- 1 cup marinara sauce
- 1 cup shredded mozzarella cheese
- Olive oil for cooking
Cooking Instructions
- Prepare the Meatball Mixture: In a large mixing bowl, combine the ground beef or turkey, breadcrumbs, Parmesan cheese, egg, chopped onion, minced garlic, oregano, salt, and pepper. Mix everything together until well combined. Be careful not to over-mix, as this can make the meatballs tough.
- Shape the Meatballs: Using your hands, form the mixture into small meatballs, about the size of a golf ball. You should be able to make around 12 meatballs. Place them on a plate or tray ready for cooking.
- Cook the Meatballs: Heat a tablespoon of olive oil in a large skillet over medium heat. Once the oil is hot, add the meatballs, making sure not to overcrowd the pan. Cook the meatballs for about 7-10 minutes, turning occasionally until they’re browned on all sides and cooked through.
- Prepare the Sliders: Preheat your oven to 350°F (175°C). Place the bottom halves of the slider buns on a baking sheet. Add a spoonful of marinara sauce to each bun, followed by a cooked meatball and a sprinkle of mozzarella cheese.
- Bake the Sliders: Place the sliders in the preheated oven for about 5 minutes, or until the cheese has melted and the buns are slightly toasted. Remove from the oven and top with the remaining bun halves.
- Serve: Arrange the sliders on a serving platter and enjoy while warm. Pair them with your favorite sides for a complete meal.
Extra Tips
When forming the meatballs, try to make them all a uniform size to guarantee even cooking. You can also prepare the meatballs ahead of time and store them in the refrigerator until you’re ready to cook.
If you want to sneak in some extra veggies, consider adding finely grated zucchini or carrots to the meatball mixture. For a crispier bun, you can lightly toast the buns before assembling the sliders.
Finally, if your toddlers prefer a milder taste, you can use a sweeter marinara sauce or adjust the seasoning in the meatballs to their liking.
Veggie-Packed Mac and Cheese

Veggie-Packed Mac and Cheese is a delightful twist on the classic comfort food, designed specifically to please both toddlers and the entire family. This recipe cleverly incorporates a variety of vegetables into the creamy, cheesy sauce, making it a nutritious option that doesn’t compromise on taste. The hidden veggies guarantee your little ones get their daily dose of nutrients without even realizing it, while the cheesy goodness keeps them coming back for more.
Perfect for a family dinner, this dish is both satisfying and wholesome. This version of mac and cheese isn’t only rich in flavor but also easy to prepare, making it ideal for busy weeknights. By blending vegetables into the cheese sauce, you create a smooth and creamy texture that coats the pasta beautifully. This recipe is designed to serve 4-6 people, assuring there’s enough to go around.
Whether you serve it as a main dish or a side, Veggie-Packed Mac and Cheese is sure to become a family favorite.
Ingredients:
- 12 ounces elbow macaroni
- 1 cup broccoli florets, chopped
- 1 cup cauliflower florets, chopped
- 1 cup carrots, finely diced
- 2 tablespoons unsalted butter
- 2 tablespoons all-purpose flour
- 2 cups whole milk
- 1 1/2 cups shredded cheddar cheese
- 1/2 cup shredded mozzarella cheese
- 1/2 teaspoon garlic powder
- 1/2 teaspoon onion powder
- Salt and pepper to taste
Cooking Instructions:
- Cook the Pasta: Begin by cooking the elbow macaroni according to the package instructions until al dente. Drain and set aside.
- Steam the Vegetables: In a steamer or a pot with a steamer basket, steam the broccoli, cauliflower, and carrots until they’re tender, about 5-7 minutes. Once done, blend the vegetables into a smooth puree using a food processor or blender.
- Prepare the Cheese Sauce: In a large saucepan, melt the butter over medium heat. Stir in the flour and cook for about 1 minute until the mixture is bubbly and slightly golden.
- Add Milk and Puree: Gradually whisk in the milk, stirring constantly to avoid lumps. Add the pureed vegetables into the sauce, mixing well to combine.
- Melt the Cheese: Reduce the heat to low and add the cheddar and mozzarella cheeses, stirring until completely melted and the sauce is smooth. Add garlic powder, onion powder, salt, and pepper, adjusting the seasoning to taste.
- Combine Pasta and Sauce: Add the cooked macaroni to the cheese sauce, stirring until the pasta is thoroughly coated with the sauce.
- Serve: Remove from heat and serve warm, garnished with additional cheese or steamed vegetables if desired.
Extra Tips:
For an extra creamy texture, you can substitute half of the milk with heavy cream. If your toddler is particularly picky, try blending the vegetables very finely so they’re completely hidden in the sauce.
You can also experiment with different types of cheese to adjust the flavor according to your family’s preference. If you’re looking to add a bit more protein, consider mixing in some cooked chicken or turkey.
Finally, for a crispy topping, sprinkle some breadcrumbs on top and bake in the oven until golden brown.
Sweet and Sour Chicken Nuggets

Sweet and Sour Chicken Nuggets are a delightful twist on a classic favorite, perfect for family dinners with toddlers. These nuggets are crispy on the outside and tender on the inside, coated in a tangy sweet and sour sauce that’s sure to please even the pickiest of eaters. The recipe is designed to be easy to prepare and cook, making it an ideal choice for busy parents who want to serve a nutritious and flavorful meal.
By using simple ingredients, you can create a dish that’s both delicious and appealing to kids. This recipe serves 4-6 people, guaranteeing there’s enough to go around for the whole family. The chicken nuggets are made from scratch using freshly cut chicken breast pieces, which are then breaded and baked to golden perfection.
The sweet and sour sauce is made separately, allowing you to adjust the flavor to your family’s liking. With a little preparation and a few easy steps, you can create a wholesome meal that everyone will enjoy.
Ingredients:
- 1.5 pounds of chicken breast, cut into bite-sized pieces
- 1 cup all-purpose flour
- 2 large eggs
- 1 cup breadcrumbs
- 1 teaspoon garlic powder
- 1 teaspoon onion powder
- Salt and pepper to taste
- 1/2 cup ketchup
- 1/4 cup apple cider vinegar
- 1/4 cup brown sugar
- 1 tablespoon soy sauce
- 1 tablespoon cornstarch
- 1/2 cup pineapple juice
- 2 tablespoons vegetable oil
Cooking Instructions:
- Preheat and Prepare: Preheat your oven to 400°F (200°C). Line a baking sheet with parchment paper to prevent sticking and facilitate easy cleanup.
- Prepare the Chicken: Season the chicken pieces with salt, pepper, garlic powder, and onion powder. Set up a breading station with three bowls: one with flour, one with beaten eggs, and one with breadcrumbs.
- Bread the Chicken: Dip each chicken piece first in the flour, then in the eggs, and finally in the breadcrumbs, guaranteeing each piece is evenly coated.
- Bake the Nuggets: Place the breaded chicken pieces on the prepared baking sheet. Drizzle with a little vegetable oil to help them crisp up. Bake for 15-20 minutes, or until the nuggets are golden brown and cooked through.
- Make the Sauce: While the chicken is baking, combine the ketchup, apple cider vinegar, brown sugar, soy sauce, and pineapple juice in a saucepan over medium heat. Whisk together until smooth.
- Thicken the Sauce: In a small bowl, mix the cornstarch with a tablespoon of water to create a slurry. Add the slurry to the sauce, stirring constantly until it thickens.
- Coat the Nuggets: Once the chicken nuggets are cooked, remove them from the oven. Toss them in the sweet and sour sauce until they’re fully coated.
- Serve and Enjoy: Serve the Sweet and Sour Chicken Nuggets warm. They pair well with a side of steamed vegetables or rice.
Extra Tips:
To make the Sweet and Sour Chicken Nuggets even more toddler-friendly, consider cutting the chicken pieces into smaller, uniform sizes for easy handling.
You can also adjust the sweetness or tanginess of the sauce by adding more brown sugar or vinegar to suit your child’s taste preferences. For a healthier option, you can use whole wheat breadcrumbs and reduce the sugar content in the sauce.
Finally, these nuggets can be made ahead and frozen, making them a quick meal solution on busy nights.
Hidden Veggie Spaghetti

Hidden Veggie Spaghetti is a fantastic way to guarantee toddlers are getting their daily dose of vegetables without any fuss. This recipe cleverly incorporates a variety of vegetables into a delicious tomato-based sauce, making it both nutritious and appealing to young palates. The sauce is pureed until smooth, disguising the vegetables and blending them seamlessly into the dish. Serve this spaghetti and watch your little ones enjoy every bite, oblivious to the veggie goodness they’re consuming.
This recipe is ideal for family dinners and is designed to serve 4-6 people. It’s a great way to introduce toddlers to the flavors of a traditional spaghetti dish while sneaking in those essential vitamins and minerals. The recipe can be adjusted to include your family’s favorite vegetables, and it’s easy to prepare, making it perfect for busy weeknights. Plus, it’s a hit with adults too, making it a versatile addition to your family’s meal rotation.
Ingredients:
- 12 oz whole wheat spaghetti
- 2 tablespoons olive oil
- 1 medium onion, finely chopped
- 2 cloves garlic, minced
- 1 medium zucchini, grated
- 1 carrot, grated
- 1 red bell pepper, finely chopped
- 1 cup baby spinach, chopped
- 2 cups tomato puree
- 1 teaspoon dried oregano
- 1 teaspoon dried basil
- Salt and pepper to taste
- 1/4 cup grated Parmesan cheese (optional)
Instructions:
- Cook the Spaghetti: Bring a large pot of salted water to a boil. Add the whole wheat spaghetti and cook according to the package instructions until al dente. Drain and set aside.
- Prepare the Vegetables: In a large skillet or saucepan, heat the olive oil over medium heat. Add the chopped onion and sauté until translucent, about 3-4 minutes. Add the minced garlic and cook for another minute until fragrant.
- Add Grated Vegetables: Stir in the grated zucchini, carrot, and red bell pepper. Cook for about 5 minutes, or until the vegetables are softened.
- Add Tomato and Spinach: Pour in the tomato puree and add the chopped baby spinach. Stir well to combine all the ingredients.
- Season the Sauce: Sprinkle in the dried oregano and basil, and season with salt and pepper to taste. Let the sauce simmer for about 10 minutes, allowing the flavors to meld and the vegetables to cook through.
- Blend the Sauce: If a smoother sauce is preferred, use an immersion blender to puree the sauce directly in the pan until smooth. Alternatively, transfer the sauce to a blender, puree, and return it to the pan.
- Combine and Serve: Add the cooked spaghetti to the sauce and toss to coat the noodles evenly. Serve hot, garnished with Parmesan cheese if desired.
Extra Tips:
When preparing Hidden Veggie Spaghetti, feel free to customize the vegetables to suit your family’s preferences or what you have on hand. For picky eaters, guarantee the sauce is well-blended to hide any vegetable chunks.
This recipe can also be made in advance and stored in the refrigerator for up to three days, making it a convenient option for meal prepping. Additionally, you can freeze portions for a quick toddler meal on busy days. Enjoy this nutritious and tasty meal with your family!
Baked Zucchini Fritters

Baked Zucchini Fritters are a delightful and nutritious option for a family dinner that toddlers will enjoy. These fritters are crispy on the outside and tender on the inside, making them perfect for little hands to hold and munch on. Zucchini is a great vegetable to incorporate into your child’s diet, as it’s packed with vitamins and minerals essential for growth. The baked method of preparation keeps these fritters healthy without sacrificing flavor, guaranteeing your toddlers get a wholesome meal.
This recipe for Baked Zucchini Fritters is designed to serve 4-6 people, making it ideal for a family meal. The fritters can be served as a main course or a side dish, depending on your preferences. With the addition of a few simple ingredients, these fritters can be made quickly and easily, allowing you to spend more time with your family and less time in the kitchen.
Ingredients:
- 4 medium zucchinis, grated
- 2 large eggs
- 1 cup breadcrumbs
- 1/2 cup grated Parmesan cheese
- 1/4 cup chopped fresh parsley
- 2 cloves garlic, minced
- 1 teaspoon salt
- 1/2 teaspoon black pepper
- 1 tablespoon olive oil (for greasing the baking sheet)
Instructions:
- Preheat the Oven: Start by preheating your oven to 400°F (200°C). Line a baking sheet with parchment paper or lightly grease it with olive oil to prevent the fritters from sticking.
- Prepare the Zucchini: Grate the zucchinis using a box grater or food processor. Place the grated zucchini in a clean kitchen towel, then squeeze out as much excess moisture as possible. This step is vital to guarantee the fritters hold together well.
- Mix the Ingredients: In a large mixing bowl, combine the grated zucchini, eggs, breadcrumbs, Parmesan cheese, parsley, garlic, salt, and pepper. Mix thoroughly until all ingredients are well incorporated and the mixture is slightly sticky.
- Shape the Fritters: Using your hands, form small patties from the zucchini mixture, about 2-3 inches in diameter. Place them evenly spaced on the prepared baking sheet.
- Bake the Fritters: Place the baking sheet in the preheated oven and bake the fritters for 20-25 minutes, or until they’re golden brown and crispy on the outside. Flip the fritters halfway through the baking time to guarantee even cooking on both sides.
- Serve: Remove the fritters from the oven and let them cool slightly before serving. They can be served plain or with a dipping sauce like yogurt or marinara for extra flavor.
Extra Tips:
When making Baked Zucchini Fritters, it’s vital to remove as much water as possible from the grated zucchini to guarantee the fritters hold their shape and don’t become soggy. If you find the mixture too wet, add a bit more breadcrumbs to help bind it together.
You can also customize the flavor by adding herbs or spices like oregano or cumin, depending on your toddler’s taste preferences. These fritters can be made ahead of time and stored in the fridge for up to three days, making them a convenient option for busy weeknights.
Creamy Tomato Basil Soup With Grilled Cheese Bites

Creamy Tomato Basil Soup With Grilled Cheese Bites is a delightful and comforting meal perfect for toddlers and the entire family. This dish combines the rich flavors of ripe tomatoes with the fragrant aroma of fresh basil, resulting in a creamy soup that’s both nutritious and delicious.
The grilled cheese bites add a fun and interactive element to the meal, making it more appealing to young children. This recipe is perfect for introducing toddlers to new flavors in a familiar format, ensuring they enjoy every bite.
The creamy texture of the soup is achieved by blending the tomatoes with a touch of cream, while the basil adds a fresh, herbaceous note that enhances the overall flavor profile. The grilled cheese bites are made with soft bread and mild cheese, cut into small, manageable pieces for little hands.
This dish not only satisfies the taste buds but also provides essential nutrients for growing toddlers. It’s a versatile recipe that can be easily adapted to suit dietary preferences and can be made ahead of time for convenience.
Ingredients (Serves 4-6):
- 2 tablespoons olive oil
- 1 medium onion, chopped
- 2 cloves garlic, minced
- 2 cans (14.5 ounces each) of diced tomatoes
- 1 cup vegetable or chicken broth
- 1 cup heavy cream
- 1/4 cup fresh basil leaves, chopped
- Salt and pepper to taste
- 8 slices of bread
- 1 cup shredded cheese (cheddar or mozzarella)
- Butter for grilling
Cooking Instructions:
- Prepare the Soup Base: In a large pot, heat the olive oil over medium heat. Add the chopped onion and garlic, sautéing until the onion becomes translucent and fragrant, about 5 minutes.
- Simmer the Tomatoes: Add the diced tomatoes and broth to the pot. Stir well, bring the mixture to a boil, then reduce the heat to low. Let it simmer for about 20 minutes to allow the flavors to meld together.
- Blend the Soup: Remove the pot from the heat and carefully blend the soup using an immersion blender until it’s smooth and creamy. If you prefer a chunkier soup, blend it for a shorter time.
- Add Cream and Basil: Return the pot to low heat, stir in the heavy cream and chopped basil. Season with salt and pepper to taste. Let the soup warm through for about 5 minutes, stirring occasionally.
- Prepare Grilled Cheese Bites: Butter one side of each slice of bread. Place the cheese between two slices of bread, buttered sides out. Heat a skillet over medium heat and grill the sandwiches until golden brown on both sides and the cheese has melted. Remove from heat and cut into bite-sized pieces.
- Serve: Ladle the creamy tomato basil soup into bowls and serve with the grilled cheese bites on the side or placed on top of the soup for dipping.
Extra Tips:
For an even creamier soup, you can add a bit more heavy cream or substitute with coconut milk for a dairy-free version. If you prefer a slightly thicker soup, let it simmer for a few more minutes before adding the cream.
When making the grilled cheese bites, using a variety of cheeses like gouda or Swiss can add more depth to the flavor. Finally, you can prepare the soup in advance and store it in the refrigerator for up to three days, making it a convenient option for busy weeknights.
Rainbow Veggie Quesadillas
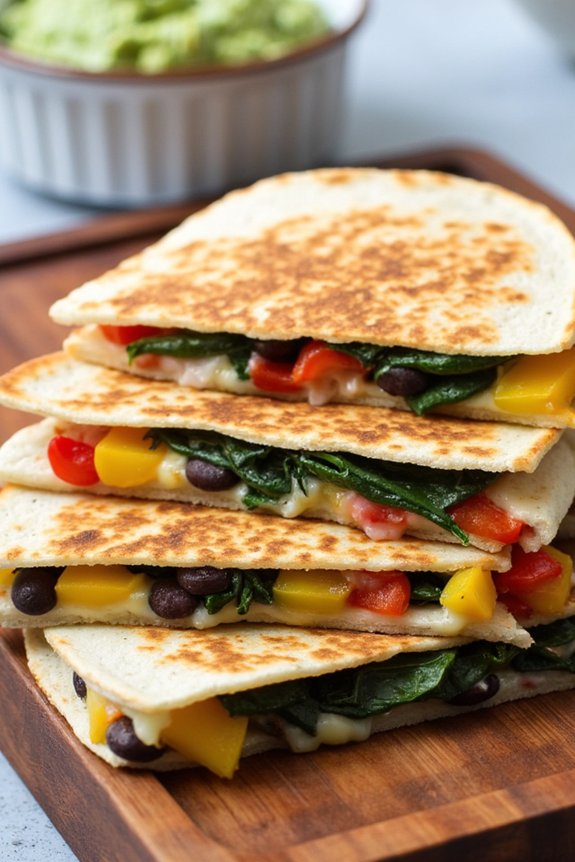
Rainbow Veggie Quesadillas are a vibrant and nutritious dinner option that will delight both toddlers and adults alike. These quesadillas aren’t only visually appealing with their array of colorful vegetables but also packed with essential nutrients. Perfectly suited for little hands, they offer a fun way to introduce toddlers to a variety of veggies in a single meal. This recipe combines the wholesomeness of fresh produce with the cheesy goodness that kids love, making it a hit at family dinner tables.
The beauty of Rainbow Veggie Quesadillas lies in their versatility. You can customize the vegetables according to your toddler’s preferences or what you have on hand, guaranteeing every bite is full of flavor. These quesadillas are easy to prepare, making them an ideal choice for busy weeknights when you want to serve something healthy without spending too much time in the kitchen. With this recipe, you’ll be able to create a colorful, delicious meal that your entire family will enjoy.
Ingredients for 4-6 servings:
- 8 large flour tortillas
- 2 cups shredded cheese (cheddar, mozzarella, or a blend)
- 1 red bell pepper, diced
- 1 yellow bell pepper, diced
- 1 cup baby spinach, chopped
- 1 cup corn kernels (fresh, canned, or frozen)
- 1 cup black beans, rinsed and drained
- 1 zucchini, diced
- 2 tablespoons olive oil
- Salt and pepper to taste
- Optional: sour cream, salsa, or guacamole for serving
Cooking Instructions:
1. Prepare the Vegetables:
Begin by washing all the vegetables thoroughly. Dice the red and yellow bell peppers, chop the baby spinach, and dice the zucchini into small, toddler-friendly pieces. If you’re using fresh corn, cut the kernels off the cob.
2. Cook the Vegetables:
In a large skillet over medium heat, add olive oil. Once it’s hot, add the diced zucchini, bell peppers, and corn. Sauté the vegetables for about 5-7 minutes until they become tender.
3. Add Spinach and Black Beans:
Stir in the chopped spinach and black beans to the skillet with the other vegetables. Season with salt and pepper to taste, and cook for an additional 2-3 minutes until the spinach is wilted and the beans are warmed through.
4. Assemble the Quesadillas:
Lay out the tortillas on a flat surface. Sprinkle a generous amount of shredded cheese over one half of each tortilla. Spoon the cooked vegetable mixture evenly over the cheese, then fold the other half of the tortilla over to enclose the filling.
5. Cook the Quesadillas:
Wipe the skillet clean and return it to medium heat. Place one or two folded quesadillas in the skillet at a time, cooking for 2-3 minutes on each side until the tortillas are golden brown and the cheese has melted. Repeat with the remaining quesadillas.
6. Serve:
Cut each quesadilla into wedges and serve warm. Optionally, accompany them with sour cream, salsa, or guacamole for dipping.
Extra Tips:
When preparing Rainbow Veggie Quesadillas, feel free to adjust the selection of vegetables based on seasonal availability or what your child prefers. For added protein, consider adding cooked chicken or tofu into the veggie mix.
If you’re catering to a sensitive palate, verify the vegetables are diced finely to blend seamlessly with the melted cheese, making them less noticeable. This dish can also be made ahead of time; simply prepare and assemble the quesadillas, then refrigerate them until you’re ready to cook.
One-Pot Chicken Alfredo
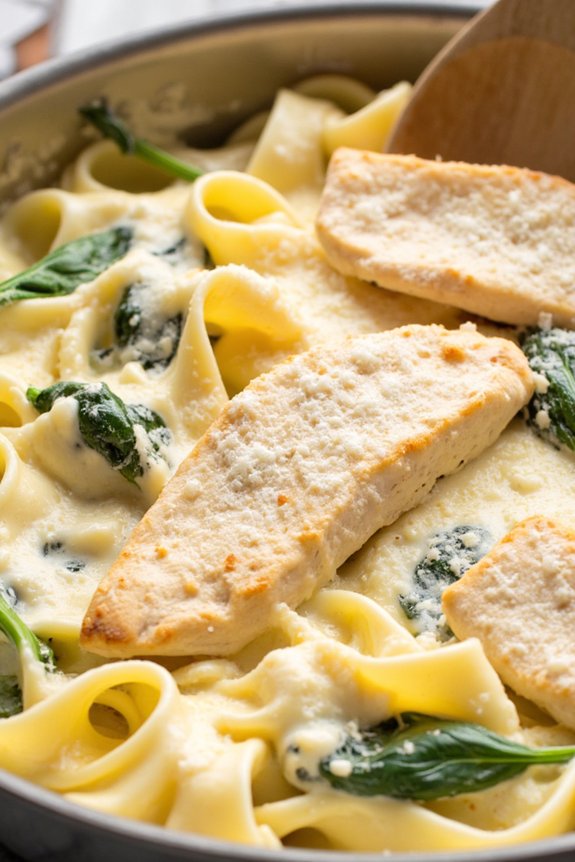
One-Pot Chicken Alfredo is a delightful and creamy dish that can easily become a family favorite, especially for those with toddlers. This recipe is perfect for busy parents who want to prepare a nutritious meal without spending too much time in the kitchen. The one-pot method not only saves time but also minimizes cleanup, making it an ideal choice for weeknight dinners.
The combination of tender chicken, rich Alfredo sauce, and perfectly cooked pasta creates a delicious meal that’s hard to resist. This dish is subtly flavored to cater to the delicate palates of toddlers, yet it’s still rich and satisfying enough for adults. The creamy texture and mild taste make it appealing to little ones, while the inclusion of chicken provides essential protein for growing bodies.
Additionally, by incorporating vegetables like spinach or peas, you can boost the nutritional value, guaranteeing that your toddlers get a well-rounded meal. This recipe serves 4-6 people, making it perfect for a family dinner with room for leftovers.
Ingredients:
- 1 pound boneless, skinless chicken breasts, sliced into thin strips
- 1 tablespoon olive oil
- 4 cups chicken broth
- 1 cup heavy cream
- 12 ounces fettuccine pasta
- 1 cup grated Parmesan cheese
- 2 cups baby spinach (optional)
- Salt and pepper to taste
- 2 cloves garlic, minced
- 1 tablespoon butter
Cooking Instructions:
- Prepare the Chicken: Heat the olive oil in a large pot over medium-high heat. Add the chicken strips and season with salt and pepper. Cook the chicken until it’s browned and cooked through, about 5-7 minutes. Remove the chicken from the pot and set aside.
- Saute the Garlic: In the same pot, add the butter and minced garlic. Sauté the garlic for about 1 minute, or until fragrant, but not browned.
- Add Liquids and Pasta: Pour in the chicken broth and heavy cream, stirring to combine. Bring the mixture to a boil.
- Cook the Pasta: Add the fettuccine pasta to the pot. Reduce the heat to medium-low and cover the pot, letting it simmer. Stir occasionally to prevent sticking, cooking until the pasta is al dente, about 10-12 minutes.
- Add Chicken and Cheese: Once the pasta is cooked, return the chicken to the pot. Stir in the Parmesan cheese until melted and the sauce is creamy. If using, add the baby spinach and stir until it’s wilted.
- Season and Serve: Taste the dish and adjust the seasoning with more salt and pepper if needed. Serve hot, garnished with extra Parmesan cheese if desired.
Extra Tips:
When cooking One-Pot Chicken Alfredo, consider using a non-stick pot to facilitate easy cleanup and prevent the pasta from sticking to the bottom. If you find the sauce too thick, you can add a splash more chicken broth or cream to reach your desired consistency.
For added nutrition, feel free to incorporate other vegetables such as peas or broccoli. Keep in mind that the pasta will continue to absorb liquid as it sits, so it’s best to serve the dish immediately for the creamiest texture.
Chicken and Veggie Skewers
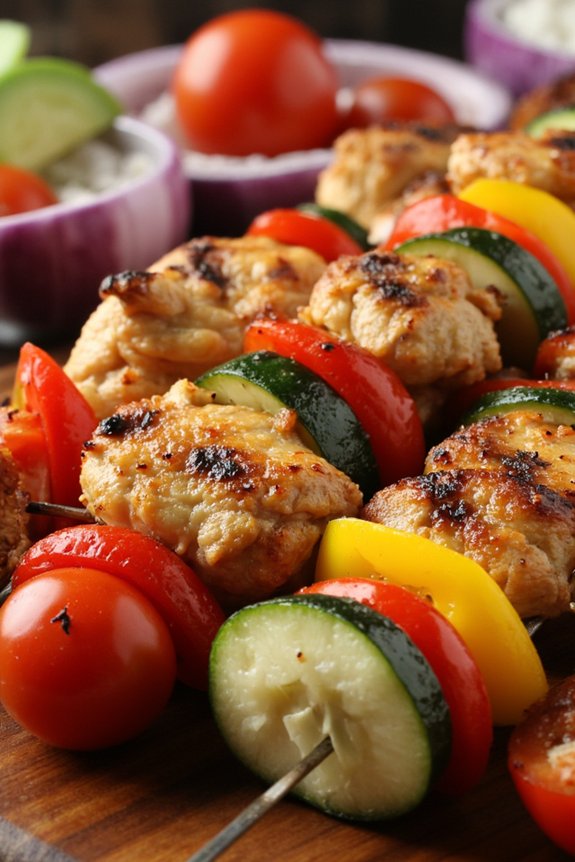
Introducing a delightful and nutritious meal that’s perfect for little ones: Chicken and Veggie Skewers. These colorful skewers aren’t only visually appealing but also packed with essential nutrients that toddlers need for their growth and development.
This dish is simple to prepare and can be a fun way to involve your child in the cooking process by allowing them to help assemble the skewers. It’s a great opportunity to introduce them to a variety of vegetables and lean protein in a single meal.
Chicken and Veggie Skewers are perfect for family dinners as they can be customized to include your toddler’s favorite vegetables. They’re easy to hold and eat, making them ideal for small hands. Plus, by preparing these skewers at home, you can control the ingredients, guaranteeing your child gets a wholesome and healthy meal.
This recipe serves 4-6 people, making it perfect for a family gathering or a meal prep for a few days.
Ingredients:
- 2 boneless, skinless chicken breasts
- 1 red bell pepper
- 1 yellow bell pepper
- 1 zucchini
- 1 red onion
- 1 cup cherry tomatoes
- 2 tablespoons olive oil
- 1 teaspoon garlic powder
- 1 teaspoon onion powder
- Salt and pepper to taste
- Wooden or metal skewers
Instructions:
- Preparation: Start by soaking the wooden skewers in water for about 30 minutes to prevent them from burning during cooking. If you’re using metal skewers, you can skip this step.
- Cut the Chicken: Rinse the chicken breasts under cold water and pat them dry with a paper towel. Cut them into bite-sized pieces, approximately 1 inch in size, guaranteeing they’re uniform for even cooking.
- Prepare the Vegetables: Wash all the vegetables thoroughly. Cut the bell peppers and zucchini into similar-sized pieces as the chicken. Peel and cut the red onion into chunks. Leave the cherry tomatoes whole.
- Marinate: In a large bowl, combine the olive oil, garlic powder, onion powder, salt, and pepper. Add the chicken pieces and toss to coat them evenly. Let them marinate for at least 20 minutes to absorb the flavors.
- Assemble the Skewers: Begin assembling the skewers by alternating between chicken and vegetables. You can start with a piece of chicken, followed by a chunk of red bell pepper, zucchini, red onion, and a cherry tomato. Repeat this pattern until the skewer is filled, leaving some space at each end for handling.
- Cook the Skewers: Preheat your grill or grill pan over medium heat. Place the skewers on the grill and cook for about 10-12 minutes, turning occasionally, until the chicken is cooked through and the vegetables are tender. Guarantee the internal temperature of the chicken reaches 165°F (75°C).
- Serve: Remove the skewers from the grill and let them cool slightly before serving to your toddler. You can serve them as is or with a side of dipping sauce like hummus or yogurt-based dip for added flavor.
Extra Tips:
When preparing Chicken and Veggie Skewers for toddlers, guarantee that the vegetables and chicken pieces are cut into small, manageable sizes to prevent choking hazards.
If your toddler is new to eating skewers, remove the pieces from the skewer and serve them on a plate for easier handling. You can also experiment with different vegetables or add a sprinkle of cheese on top for extra taste.
Adjust the seasoning according to your toddler’s preference and avoid adding too much salt.
Loaded Baked Potato Boats

Loaded Baked Potato Boats are a fun and nutritious meal option for toddlers and the whole family. These delightful potato boats are filled with a hearty and creamy mixture that’s both satisfying and easy for little hands to eat. By using a variety of colorful and wholesome ingredients, you can guarantee that this dish isn’t only delicious but also packed with essential nutrients that are perfect for growing children. Not to mention, it’s a great way to sneak in some vegetables without any fuss.
The beauty of Loaded Baked Potato Boats is that they’re incredibly versatile. You can easily customize them based on your family’s preferences, making them an ideal choice for picky eaters. Whether you choose to add a dollop of sour cream, some crispy bacon bits, or a sprinkle of cheddar cheese, each bite offers a delightful combination of flavors and textures. This recipe serves 4-6 people, making it perfect for family dinners or gatherings.
Ingredients (Serving size: 4-6 people)
- 6 large russet potatoes
- 1 cup sour cream
- 1 cup shredded cheddar cheese
- 4 slices cooked bacon, crumbled
- 1 cup steamed broccoli florets, chopped
- 2 tablespoons unsalted butter
- Salt and pepper to taste
- Fresh chives, chopped (optional)
Cooking Instructions
- Preheat the Oven: Begin by preheating your oven to 400°F (200°C). This will guarantee a warm environment for baking the potatoes.
- Bake the Potatoes: Wash the russet potatoes thoroughly and pat them dry. Pierce each potato a few times with a fork to allow steam to escape during baking. Place the potatoes directly on the oven rack and bake for about 45-60 minutes, or until they’re tender when pierced with a fork.
- Prepare the Filling: While the potatoes are baking, cook the bacon until crisp and crumble it into small pieces. Steam the broccoli until tender and chop it finely. Set these aside.
- Scoop Out the Potatoes: Once the potatoes are baked and cool enough to handle, cut each one in half lengthwise. Carefully scoop out the insides, leaving about 1/4-inch of potato on the skin to maintain the shape of the boat. Place the scooped potato flesh in a mixing bowl.
- Mix the Filling: To the bowl with the potato flesh, add sour cream, butter, half of the shredded cheddar cheese, crumbled bacon, and chopped broccoli. Season with salt and pepper to taste. Mix everything until well combined and smooth.
- Fill the Potato Boats: Spoon the filling mixture back into the potato skins. Sprinkle the remaining cheese over the top of each filled potato.
- Bake Again: Place the filled potato boats on a baking sheet and return them to the oven. Bake for an additional 10-15 minutes, or until the cheese is melted and bubbly.
- Garnish and Serve: Remove from the oven and let them cool slightly before serving. Garnish with fresh chives if desired.
Extra Tips
When making Loaded Baked Potato Boats, you can easily adapt the recipe to suit dietary preferences or restrictions. For a vegetarian version, simply omit the bacon and add more vegetables such as bell peppers or mushrooms.
To save time, bake the potatoes in advance and store them in the refrigerator until you’re ready to assemble and bake the boats. Additionally, encourage your toddlers to help with mixing the filling or topping the boats with cheese, as involving them in the cooking process can make them more excited to try new foods.
Spinach and Ricotta Stuffed Shells
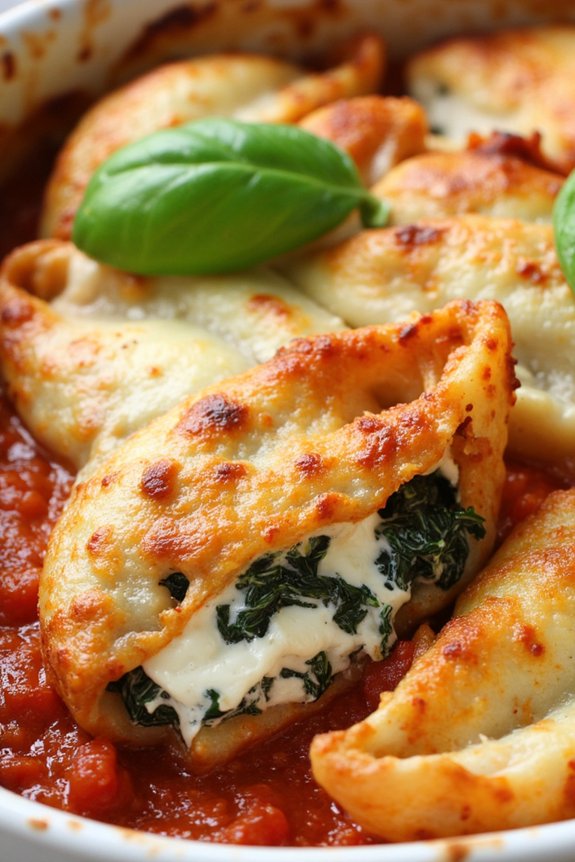
Spinach and Ricotta Stuffed Shells are a delicious and nutritious meal that even the pickiest toddlers will enjoy. This dish combines the creamy richness of ricotta cheese with the healthy benefits of spinach, all nestled inside tender pasta shells. It’s a wonderful way to introduce little ones to the flavors of Italian cuisine while guaranteeing they receive a balanced meal. Perfect for a family dinner, this recipe is both satisfying and simple to prepare.
The filling is made from a blend of ricotta cheese, spinach, and a hint of Parmesan, offering a delightful texture that contrasts beautifully with the al dente pasta shells. Topped with a flavorful marinara sauce and more cheese, the dish is baked to perfection, resulting in a bubbly, golden crust. Not only is this recipe toddler-friendly, but it also caters to adults looking for a hearty vegetarian option. It’s a versatile dish that can be prepared in advance, making it an ideal choice for busy evenings.
Ingredients (Serves 4-6):
- 20 large pasta shells
- 1 tablespoon olive oil
- 2 cups ricotta cheese
- 1 cup cooked spinach, finely chopped
- 1 egg
- 1/2 cup grated Parmesan cheese
- 1 teaspoon garlic powder
- Salt and pepper to taste
- 2 cups marinara sauce
- 1 cup shredded mozzarella cheese
- Fresh basil leaves for garnish (optional)
Cooking Instructions:
- Preheat the Oven: Start by preheating your oven to 375°F (190°C). This will guarantee it’s ready for baking once the shells are prepared.
- Cook the Pasta Shells: Bring a large pot of salted water to a boil. Add the pasta shells and cook for about 8-10 minutes, or until they’re al dente. Drain the shells and toss them with olive oil to prevent sticking.
- Prepare the Filling: In a large bowl, combine the ricotta cheese, cooked spinach, egg, Parmesan cheese, garlic powder, salt, and pepper. Mix until all ingredients are thoroughly combined.
- Stuff the Shells: Using a spoon, fill each pasta shell with the ricotta and spinach mixture. Place the stuffed shells in a single layer in a greased baking dish.
- Add the Sauce and Cheese: Pour the marinara sauce evenly over the stuffed shells. Sprinkle the shredded mozzarella cheese on top.
- Bake the Dish: Cover the baking dish with aluminum foil and bake in the preheated oven for 25 minutes. Remove the foil and bake for an additional 10 minutes, or until the cheese is melted and bubbly.
- Garnish and Serve: Once baked, remove the dish from the oven and let it cool for a few minutes. Garnish with fresh basil leaves if desired, and serve warm.
Extra Tips:
When preparing Spinach and Ricotta Stuffed Shells, it’s important to cook the pasta shells just until al dente, as they’ll continue to cook slightly in the oven. You can prepare the filling and stuff the shells ahead of time, storing them in the refrigerator for up to a day to save time on busy evenings.
If you’re looking to add a bit of variety, try incorporating other vegetables like finely chopped mushrooms or zucchini into the filling. Additionally, using fresh spinach instead of frozen can enhance the flavor and texture of the dish.
Fish Stick Tacos With Avocado Sauce

Fish Stick Tacos with Avocado Sauce is a delightful and nutritious meal perfect for family dinners, especially when catering to toddlers. The crispy fish sticks paired with a creamy avocado sauce make for a fun and flavorful dining experience that children will love. Not only is this recipe simple to prepare, but it also introduces young ones to the taste of fish in a familiar and exciting way.
Making certain that the meal is both delicious and balanced, this dish incorporates fresh ingredients and vibrant flavors that even picky eaters will enjoy. This dish is designed to serve 4-6 people, making it an ideal choice for small family gatherings or meals with friends. The combination of textures and flavors from the crispy fish, soft tortillas, and creamy avocado sauce makes each bite a delight.
Additionally, this recipe offers flexibility regarding toppings and accompaniments, allowing you to cater to your family’s preferences. Below, you’ll find the list of ingredients needed to bring this meal to life, followed by step-by-step instructions to guide you through the cooking process.
Ingredients for Fish Stick Tacos with Avocado Sauce (Serves 4-6):
- 12-18 frozen or homemade fish sticks
- 8-12 small corn or flour tortillas
- 2 ripe avocados
- 1 lime
- 1/4 cup plain Greek yogurt
- 1 tablespoon olive oil
- 1 teaspoon garlic powder
- 1/2 teaspoon salt
- 1/4 teaspoon black pepper
- 1 cup shredded lettuce
- 1/2 cup chopped tomatoes
- 1/4 cup chopped cilantro (optional)
- Sliced radishes (optional)
Cooking Instructions:
- Prepare the Fish Sticks: Preheat your oven according to the package instructions for the fish sticks, or to 400°F (200°C) if homemade. Arrange the fish sticks on a baking sheet and cook them in the oven for the time specified, typically around 15-20 minutes, until they’re golden brown and crispy. Turn them halfway through cooking for even browning.
- Make the Avocado Sauce: While the fish sticks are baking, cut the avocados in half, remove the pits, and scoop the flesh into a blender or food processor. Add the juice of one lime, Greek yogurt, olive oil, garlic powder, salt, and black pepper. Blend until smooth and creamy. Taste and adjust seasoning if necessary.
- Prepare the Toppings: While the fish sticks continue to cook, prepare your taco toppings. Shred the lettuce, chop the tomatoes, and if using, slice the radishes and chop the cilantro. Set these aside for taco assembly.
- Warm the Tortillas: In a dry skillet over medium heat, warm each tortilla for about 30 seconds per side until they’re pliable and slightly browned. Wrap them in a clean kitchen towel to keep them warm.
- Assemble the Tacos: Once the fish sticks are cooked, it’s time to assemble the tacos. Place a couple of fish sticks on each tortilla, top with a generous spoonful of avocado sauce, and add lettuce, tomatoes, cilantro, and radishes as desired.
- Serve and Enjoy: Serve the tacos immediately while the fish sticks are still warm. These tacos pair well with a side of rice or beans for a more complete meal.
Extra Tips:
When making Fish Stick Tacos with Avocado Sauce, make certain that the avocados are ripe for the best flavor and texture in the sauce. If your avocados are slightly underripe, you can add a touch more lime juice and a bit of water for a smoother consistency.
For a spicier kick, consider adding a pinch of cayenne pepper or a small jalapeño to the avocado sauce. Additionally, to save time, you can prepare the avocado sauce and toppings in advance, storing them in the refrigerator until you’re ready to assemble the tacos.
This dish is versatile, so feel free to mix and match toppings based on your family’s preferences, making it a fun and engaging meal for toddlers and adults alike.
Melty Mozzarella Stuffed Meatballs

Melty Mozzarella Stuffed Meatballs are a delightful twist on the classic meatball recipe, perfect for family dinners with toddlers. These meatballs aren’t only packed with flavor but also feature a gooey mozzarella surprise in the center that’s certain to captivate young taste buds. The dish pairs beautifully with a side of pasta or a fresh salad, making it a versatile option for any family meal.
Creating these meatballs is a fun and interactive process that can be a great way to get your toddlers involved in the kitchen. They can help by rolling the meat mixture into balls or sneaking a peek at the melting cheese as it oozes out. Not only will this dish become a household favorite, but it will also encourage your little ones to explore new flavors and textures, all while enjoying a nutritious meal.
Ingredients for 4-6 servings:
- 1 pound ground beef
- 1/2 cup breadcrumbs
- 1/4 cup grated Parmesan cheese
- 1 large egg
- 2 cloves garlic, minced
- 1 teaspoon dried oregano
- 1 teaspoon dried basil
- 1/2 teaspoon salt
- 1/4 teaspoon black pepper
- 1 cup mozzarella cheese, cut into small cubes
- 2 cups marinara sauce
- 1 tablespoon olive oil
- Fresh parsley, chopped (optional, for garnish)
Cooking Instructions:
- Prepare the Meat Mixture: In a large mixing bowl, combine the ground beef, breadcrumbs, Parmesan cheese, egg, minced garlic, oregano, basil, salt, and pepper. Use your hands or a spatula to mix the ingredients until they’re well combined and the mixture is uniform.
- Form the Meatballs: Take a small amount of the meat mixture and flatten it in your palm. Place a cube of mozzarella cheese in the center and carefully fold the meat around it, making sure the cheese is completely enclosed. Roll the meatball gently between your palms to form a smooth, round shape. Repeat this process until all the meat mixture is used up.
- Cook the Meatballs: Heat the olive oil in a large skillet over medium heat. Once hot, add the meatballs in a single layer, making sure not to overcrowd the pan. Cook the meatballs for about 5-7 minutes, turning occasionally, until they’re browned on all sides.
- Simmer in Marinara Sauce: Pour the marinara sauce over the meatballs in the skillet. Reduce the heat to low, cover the skillet, and let the meatballs simmer for about 15-20 minutes. This allows the flavors to meld together and guarantees the meatballs are cooked through.
- Serve: Once cooked, transfer the meatballs and sauce to a serving dish. Garnish with chopped fresh parsley if desired. Serve warm alongside pasta, rice, or a fresh salad.
Extra Tips:
To guarantee the mozzarella stays inside the meatballs, make sure you completely seal the meat mixture around the cheese and roll them tightly.
If you prefer, you can make the meatballs a day in advance and store them in the refrigerator, allowing the flavors to develop even more.
When cooking with toddlers, always supervise their involvement in the kitchen and assign age-appropriate tasks such as mixing ingredients or forming meatballs.
This dish can also be adapted by using other types of cheese, like cheddar or gouda, to suit your family’s preferences.
Butternut Squash and Apple Risotto
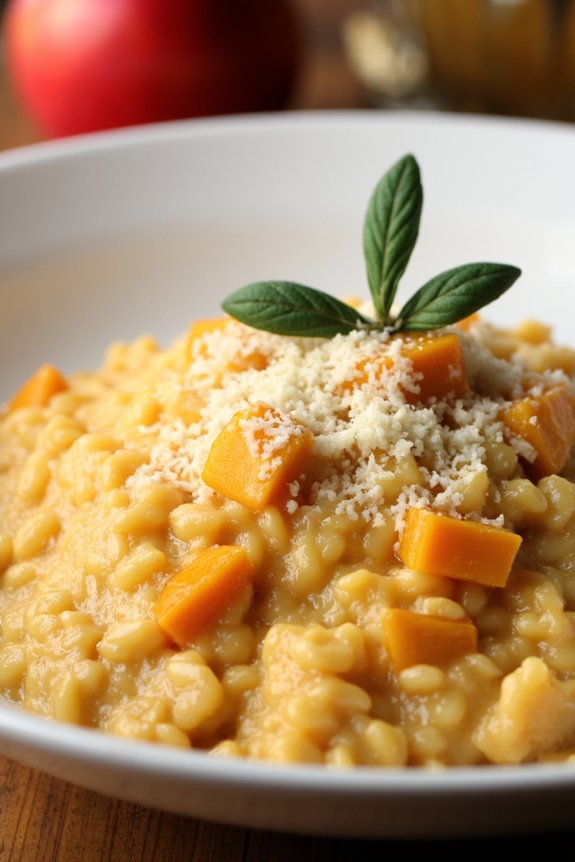
Butternut Squash and Apple Risotto is a delightful dish that combines the natural sweetness of butternut squash and apples with the creamy texture of risotto, making it perfect for toddlers and the whole family. This recipe is a great way to introduce young palates to new flavors while guaranteeing they receive the nutrition they need.
The dish isn’t only delicious but also visually appealing, with its vibrant orange hue and enticing aroma. This recipe serves 4-6 people, making it an ideal choice for a family dinner. The combination of butternut squash and apple provides a perfect balance of flavors, and the creamy risotto texture is gentle enough for toddlers to enjoy.
With simple ingredients and straightforward preparation, this dish is sure to become a family favorite.
Ingredients:
- 1 medium butternut squash, peeled and diced
- 2 apples, peeled, cored, and diced
- 2 tablespoons olive oil
- 1 small onion, finely chopped
- 2 cloves garlic, minced
- 1 1/2 cups Arborio rice
- 1/2 cup white wine (optional)
- 4 cups vegetable broth
- 1/2 cup grated Parmesan cheese
- 2 tablespoons unsalted butter
- Salt and pepper to taste
- Fresh sage leaves for garnish (optional)
Instructions:
- Prepare the Butternut Squash and Apples: Preheat your oven to 400°F (200°C). Place the diced butternut squash and apples on a baking sheet. Drizzle with 1 tablespoon of olive oil, and season with a pinch of salt and pepper. Roast in the oven for 20-25 minutes, or until the squash is tender and the apples are slightly caramelized.
- Sauté the Aromatics: In a large pan, heat the remaining tablespoon of olive oil over medium heat. Add the chopped onion and cook until translucent, about 5 minutes. Stir in the minced garlic and cook for another minute until fragrant.
- Cook the Rice: Add the Arborio rice to the pan, stirring to coat it in the oil and onions. Cook for 2-3 minutes until the rice is slightly toasted. Pour in the white wine (if using) and stir until it’s absorbed by the rice.
- Add the Broth Gradually: Begin adding the vegetable broth, one cup at a time, stirring frequently and allowing each cup to be absorbed before adding the next. This process should take about 20 minutes, and the rice should be creamy and tender.
- Incorporate Roasted Squash and Apples: Once the rice is cooked, gently fold in the roasted butternut squash and apples. Stir in the grated Parmesan cheese and butter until melted and well combined. Season with salt and pepper to taste.
- Serve the Risotto: Serve the risotto warm, garnished with fresh sage leaves if desired. The dish is ready to enjoy!
Extra Tips: When making risotto, it’s important to keep the broth warm while you gradually add it to the rice. This helps the rice cook evenly and absorb the liquid more efficiently.
If you prefer a slightly sweeter risotto, you can choose sweeter apple varieties like Fuji or Gala. Additionally, if you’re serving this to very young toddlers, consider mashing the roasted squash and apples slightly before mixing them in to guarantee easy digestion.