

Hey lovely readers! If you’re a seafood enthusiast like me, you’re going to adore these 11 vibrant and healthy pescatarian dinner ideas. Picture zesty lemon garlic shrimp skewers sizzling away or the enticing aroma of creamy coconut curry mussels wafting through your kitchen. Each dish is a delicious treat, from Mediterranean grilled salmon paired with quinoa salad to spicy tuna poke bowls. Ready to elevate your dinner table with these flavor-packed creations?
Zesty Lemon Garlic Shrimp Skewers
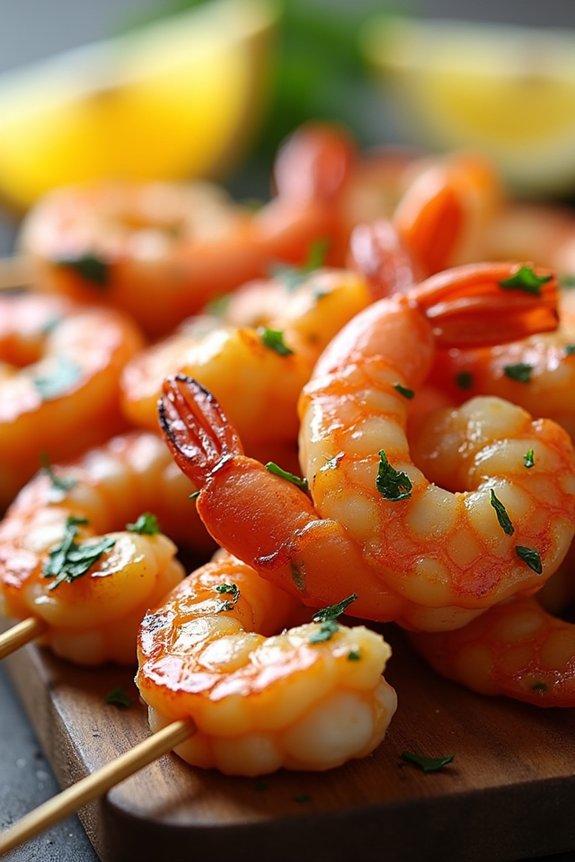
Zesty Lemon Garlic Shrimp Skewers are a delightful option for pescatarians looking for a flavorful and easy-to-prepare meal. Perfect for a family dinner, these skewers combine the invigorating tang of lemon with the savory aroma of garlic, complemented by the natural sweetness of shrimp.
When grilled to perfection, they offer a burst of flavors that will leave your taste buds craving for more. This dish, suitable for 4 to 6 people, isn’t only quick to prepare but also a healthy choice, providing essential nutrients like protein and omega-3 fatty acids.
The key to this dish lies in the marinade, which infuses the shrimp with vibrant flavors. By allowing the shrimp to soak in this mixture, you guarantee that each bite is infused with the rich taste of garlic and the zestiness of lemon.
When skewered and grilled, the shrimp develop a beautiful char that enhances their taste and texture. Whether you’re planning a family dinner or a casual gathering, these shrimp skewers are sure to be a hit with everyone, including those who mightn’t typically enjoy seafood.
Ingredients for 4-6 servings:
- 2 lbs large shrimp, peeled and deveined
- 4 cloves garlic, minced
- 1/4 cup olive oil
- 1/4 cup fresh lemon juice
- 1 tablespoon lemon zest
- 2 tablespoons fresh parsley, chopped
- 1 teaspoon salt
- 1/2 teaspoon black pepper
- Skewers (if wooden, soak in water for 30 minutes prior to using)
Cooking Instructions:
- Prepare the Marinade: In a large bowl, combine the minced garlic, olive oil, fresh lemon juice, lemon zest, chopped parsley, salt, and black pepper. Mix well to guarantee all ingredients are thoroughly combined.
- Marinate the Shrimp: Add the peeled and deveined shrimp to the marinade, tossing them gently to guarantee they’re well-coated. Cover the bowl with plastic wrap and refrigerate for at least 30 minutes, allowing the flavors to meld.
- Preheat the Grill: While the shrimp are marinating, preheat your grill to medium-high heat. If you’re using wooden skewers, ensure they’re soaked in water to prevent burning.
- Assemble the Skewers: Thread the marinated shrimp onto the skewers, piercing through both ends of each shrimp to secure them in place. Leave a small space between each shrimp to guarantee even cooking.
- Grill the Skewers: Place the shrimp skewers on the preheated grill. Cook for approximately 2-3 minutes on each side, or until the shrimp are pink and opaque with a slight char on the outside. Be careful not to overcook, as shrimp can become tough.
- Serve: Remove the skewers from the grill and transfer them to a serving platter. Garnish with additional chopped parsley and serve immediately with lemon wedges on the side for extra zest.
Extra Tips:
For the best results, always use fresh lemon juice and zest, as they provide a brighter flavor compared to bottled juice. Guarantee your grill is well-oiled to prevent the shrimp from sticking, and maintain a close watch while grilling to avoid overcooking.
If you’re looking to add a bit more heat, consider incorporating a pinch of red pepper flakes into the marinade. These skewers pair well with a light salad or grilled vegetables, making for a well-rounded and nutritious meal.
Mediterranean Grilled Salmon With Quinoa Salad
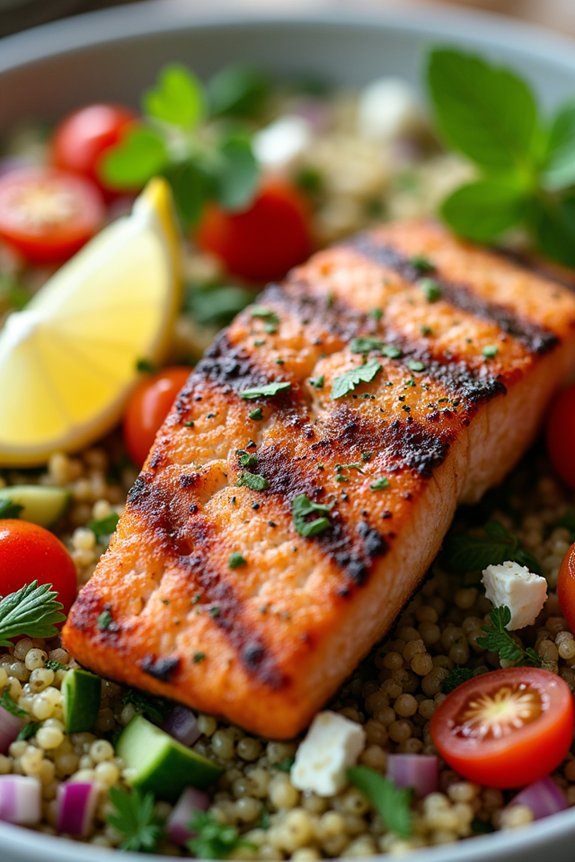
Mediterranean Grilled Salmon with Quinoa Salad is a perfect dish for families looking to enjoy a healthy and flavorful meal together. This dish harmoniously combines the rich, fatty flavors of grilled salmon with the fresh, vibrant taste of a quinoa salad infused with Mediterranean ingredients. Not only is it delicious, but it also provides a nutritious meal packed with protein, omega-3 fatty acids, and a variety of vitamins and minerals from the fresh vegetables and herbs.
Preparing this dish is a great way to introduce your family to the delightful flavors of the Mediterranean. The salmon is marinated in a simple yet zesty blend of lemon, garlic, and olive oil, then grilled to perfection. The quinoa salad is a revitalizing mix of crunchy cucumbers, juicy tomatoes, tangy feta cheese, and aromatic herbs, all tossed in a light lemon vinaigrette. Together, these elements create a meal that’s satisfying and wholesome.
Ingredients (serves 4-6):
- 4-6 salmon fillets (about 6 ounces each)
- 1 cup quinoa
- 2 cups water
- 1 cucumber, diced
- 1 pint cherry tomatoes, halved
- 1/2 red onion, finely chopped
- 1/2 cup feta cheese, crumbled
- 1/4 cup fresh parsley, chopped
- 1/4 cup fresh mint, chopped
- 1/4 cup olive oil
- 2 lemons
- 3 garlic cloves, minced
- Salt and pepper to taste
Cooking Instructions:
- Prepare Salmon Marinade: In a small bowl, whisk together 2 tablespoons of olive oil, the juice of one lemon, minced garlic, salt, and pepper. Place the salmon fillets in a shallow dish and pour the marinade over them. Verify each fillet is well coated. Cover and refrigerate for at least 30 minutes.
- Cook Quinoa: Rinse the quinoa under cold water. In a medium saucepan, combine quinoa and 2 cups of water. Bring to a boil over medium-high heat. Reduce heat to low, cover, and let it simmer for about 15 minutes or until all the water is absorbed and the quinoa is fluffy. Set aside to cool.
- Prepare Quinoa Salad: In a large bowl, combine the cooled quinoa, diced cucumber, halved cherry tomatoes, chopped red onion, crumbled feta cheese, parsley, and mint. In a small bowl, whisk together the juice of the remaining lemon and 2 tablespoons of olive oil. Pour the dressing over the salad, season with salt and pepper, and toss to combine.
- Grill the Salmon: Preheat your grill to medium-high heat. Remove the salmon from the marinade and place the fillets on the grill. Cook for 4-5 minutes on each side, or until the fish flakes easily with a fork and has a nice char.
- Assemble and Serve: Divide the quinoa salad among plates and place a grilled salmon fillet on top of each serving. Garnish with extra parsley or lemon wedges if desired.
Extra Tips:
When grilling salmon, make sure your grill is well-oiled to prevent the fish from sticking. If you don’t have a grill, you can also cook the salmon in a hot skillet or bake it in the oven.
For added flavor, consider adding olives or artichoke hearts to the quinoa salad. Additionally, let the quinoa salad sit for about 10-15 minutes before serving to allow the flavors to meld together.
Spicy Tuna Poke Bowls

Spicy Tuna Poke Bowls are a vibrant and healthy option that brings the fresh flavors of the sea to your dining table. Perfect for families looking to explore pescatarian meals, this dish combines succulent tuna with a medley of vegetables and a spicy kick, all served over a bed of rice.
Originating from Hawaii, poke bowls have become popular worldwide due to their versatility and ease of preparation. This version ramps up the flavor with a spicy sauce that perfectly complements the freshness of the fish.
This dish isn’t only delicious but also packed with nutrients, making it an excellent choice for a wholesome family dinner. The combination of raw fish, fresh vegetables, and a zesty sauce offers a satisfying meal that requires minimal cooking.
This recipe serves 4-6 people, guaranteeing everyone gets a generous portion of the spicy, flavorful poke. Prepare to enjoy a taste of the tropics with this easy-to-make and delightful meal.
Ingredients (Serves 4-6):
- 1 pound sushi-grade tuna, diced
- 2 cups cooked sushi rice
- 1 cup cucumber, diced
- 1 cup edamame, cooked and shelled
- 1 avocado, sliced
- 2 tablespoons soy sauce
- 1 tablespoon sesame oil
- 1 tablespoon sriracha
- 1 tablespoon rice vinegar
- 1 tablespoon honey
- 1 teaspoon grated ginger
- 2 teaspoons sesame seeds
- 2 green onions, sliced
- Seaweed salad (optional)
- Pickled ginger (optional)
Instructions:
- Prepare the Rice: Begin by cooking the sushi rice according to the package instructions. Once cooked, let it cool to room temperature. This will be the base of your poke bowl.
- Make the Spicy Sauce: In a small bowl, combine the soy sauce, sesame oil, sriracha, rice vinegar, honey, and grated ginger. Mix well until the honey is fully dissolved and the ingredients are combined into a smooth sauce.
- Marinate the Tuna: In a medium-sized bowl, add the diced tuna and pour half of the spicy sauce over it. Gently mix to coat the tuna evenly. Let it marinate for about 10-15 minutes in the refrigerator to allow the flavors to meld.
- Prepare the Vegetables: While the tuna is marinating, dice the cucumber, cook and shell the edamame if not done already, and slice the avocado. Arrange these ingredients separately for easy assembly.
- Assemble the Poke Bowls: Divide the cooled sushi rice among 4-6 bowls. Top each bowl with a generous portion of marinated tuna, diced cucumber, edamame, and avocado slices. Drizzle the remaining spicy sauce over each assembled bowl.
- Garnish and Serve: Sprinkle sesame seeds and sliced green onions over the top of the bowls. Add seaweed salad or pickled ginger as optional toppings for extra flavor and texture. Serve immediately and enjoy!
Extra Tips:
When selecting tuna for your Spicy Tuna Poke Bowls, it’s essential to choose sushi-grade fish to guarantee safety and quality, as this dish involves raw consumption.
For added flavor, consider incorporating other toppings such as sliced radishes or mango for a sweet contrast. Adjust the level of spice in the sauce to suit your family’s taste preferences, and feel free to experiment with different vegetables to keep the dish fresh and exciting each time you make it.
Creamy Coconut Curry Mussels
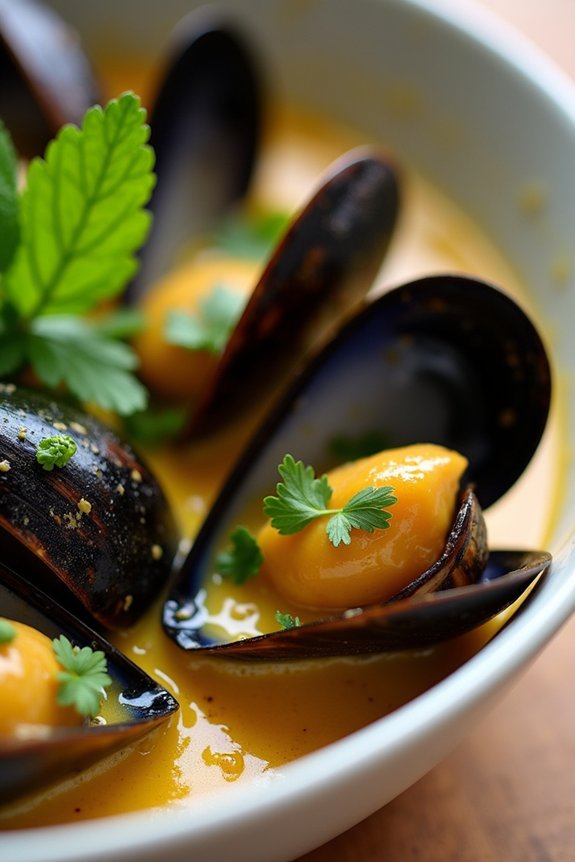
Immerse yourself in the world of coastal flavors with this delightful dish of Creamy Coconut Curry Mussels. Perfect for pescatarian families looking to add a unique twist to their dinner repertoire, this recipe combines the rich and creamy essence of coconut milk with the fiery zing of curry.
Mussels, known for their tender and succulent meat, soak up the aromatic broth, creating a symphony of flavors that will transport your taste buds to a tropical paradise. Whether you’re a seasoned cook or a beginner, this dish offers an easy yet impressive way to enjoy seafood.
Ideal for a family meal, this recipe serves 4-6 people and is designed to be both nourishing and satisfying. The beauty of this dish lies in its simplicity and the quality of ingredients, making it a great choice for both weeknight dinners and special occasions.
The gentle heat from the curry, the sweetness from the coconut milk, and the briny taste of mussels create a balanced and delicious dish that will leave everyone asking for more.
Ingredients:
- 4 pounds fresh mussels, cleaned and debearded
- 2 tablespoons vegetable oil
- 1 onion, finely chopped
- 3 cloves garlic, minced
- 1 tablespoon ginger, minced
- 1 tablespoon red curry paste
- 1 can (14 oz) coconut milk
- 1 cup chicken or vegetable broth
- 1 tablespoon fish sauce
- 1 tablespoon brown sugar
- Juice of 1 lime
- Fresh cilantro, chopped, for garnish
- Salt and pepper to taste
- Cooked jasmine rice or crusty bread, for serving
Cooking Instructions:
- Prepare the Mussels: Begin by thoroughly rinsing the mussels in cold water. Remove the beards and discard any mussels that are open and don’t close when tapped.
- Sauté Aromatics: In a large pot or Dutch oven, heat the vegetable oil over medium heat. Add the chopped onion and sauté until translucent, about 5 minutes. Stir in the garlic and ginger and cook for another minute until fragrant.
- Build the Curry Base: Add the red curry paste to the pot, stirring well to combine with the onion mixture. Cook for 2 minutes, allowing the paste to release its flavors.
- Add Liquids: Pour in the coconut milk and chicken or vegetable broth, stirring to combine. Bring the mixture to a gentle simmer.
- Season the Curry: Add fish sauce, brown sugar, and lime juice to the pot. Stir and season with salt and pepper to taste. Allow the curry to simmer for about 5 minutes.
- Cook the Mussels: Increase the heat to medium-high and add the cleaned mussels to the pot. Cover and cook for 5-7 minutes or until the mussels open. Discard any mussels that remain closed after cooking.
- Garnish and Serve: Once the mussels are cooked, remove from heat and garnish with chopped fresh cilantro. Serve immediately with cooked jasmine rice or crusty bread to soak up the delicious broth.
Extra Tips:
When selecting mussels, verify they’re fresh by checking that they’re tightly closed. If they’re slightly open, they should close when tapped. If not, discard them.
For a spicier dish, increase the amount of red curry paste or add a sliced chili pepper during the sautéing stage. Make certain not to overcook the mussels, as they can become tough and chewy. Enjoy your Creamy Coconut Curry Mussels immediately for the best flavor and texture.
Herb-Crusted Baked Cod
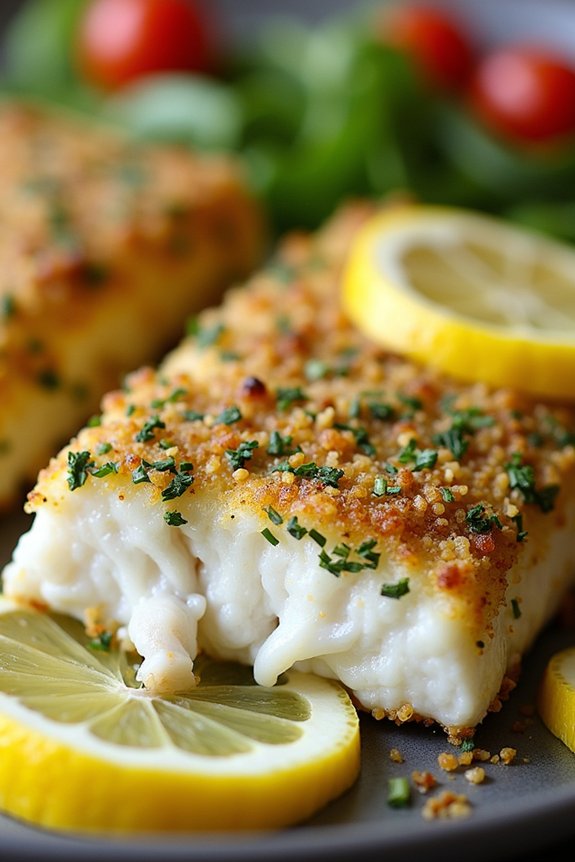
If you’re looking for a delicious and healthy pescatarian dinner idea that’s sure to please the entire family, Herb-Crusted Baked Cod is a fantastic choice. This dish combines the mild, flaky texture of fresh cod fillets with a flavorful herb crust that adds a delightful crunch. It’s a simple yet elegant meal that can be prepared in under an hour, making it perfect for busy weeknights or a special family dinner. Not only is this dish rich in protein and omega-3 fatty acids, but it also bursts with the fresh flavors of herbs and lemon, creating a meal that’s both nutritious and satisfying.
The beauty of this recipe lies in its simplicity and versatility. By using fresh herbs and a few pantry staples, you can create a gourmet dish without any fuss. The herb crust is made with a mixture of breadcrumbs, parsley, dill, and thyme, which pairs beautifully with the cod’s tender texture. Once baked to perfection, the cod is juicy and flavorful, with the herb crust providing a delightful contrast in texture.
Serve this Herb-Crusted Baked Cod with a side of roasted vegetables or a fresh salad for a complete and wholesome meal that the whole family will love.
Ingredients (Serves 4-6):
- 4-6 cod fillets (about 6 ounces each)
- 1 cup breadcrumbs
- 1/4 cup fresh parsley, finely chopped
- 1 tablespoon fresh dill, finely chopped
- 1 tablespoon fresh thyme, finely chopped
- Zest of 1 lemon
- 1/2 cup grated Parmesan cheese
- Salt and pepper to taste
- 1/4 cup olive oil
- 1 lemon, cut into wedges
Cooking Instructions:
- Preheat the Oven: Preheat your oven to 400°F (200°C). Line a baking sheet with parchment paper or lightly grease it with olive oil to prevent sticking.
- Prepare the Herb Crust: In a medium-sized bowl, combine the breadcrumbs, chopped parsley, dill, thyme, lemon zest, and grated Parmesan cheese. Season the mixture with salt and pepper to taste. Stir in the olive oil until the mixture is evenly coated and resembles damp sand.
- Coat the Cod Fillets: Pat the cod fillets dry with paper towels to remove any excess moisture. This helps the herb crust adhere better. Place the fillets on the prepared baking sheet. Press the herb mixture onto the top of each fillet, ensuring an even coating.
- Bake the Cod: Place the baking sheet in the preheated oven and bake the cod for 15-20 minutes, or until the fish flakes easily with a fork and the crust is golden brown. The internal temperature of the cod should reach 145°F (63°C).
- Serve: Once baked, remove the cod from the oven and let it rest for a few minutes. Serve it hot, garnished with lemon wedges for squeezing over the top, which adds a bright, fresh flavor.
Extra Tips****:
For an even crispier crust, you can toast the breadcrumb mixture in a skillet for a few minutes before applying it to the cod. If fresh herbs aren’t available, you can substitute with dried herbs, but be sure to reduce the quantity as dried herbs are more potent.
Pair this dish with a light white wine, such as Sauvignon Blanc, to complement the fresh, herbaceous notes of the crust. Finally, if you’re cooking for a smaller group, this recipe is easily halved without affecting the quality of the dish.
Thai Basil Scallop Stir-Fry
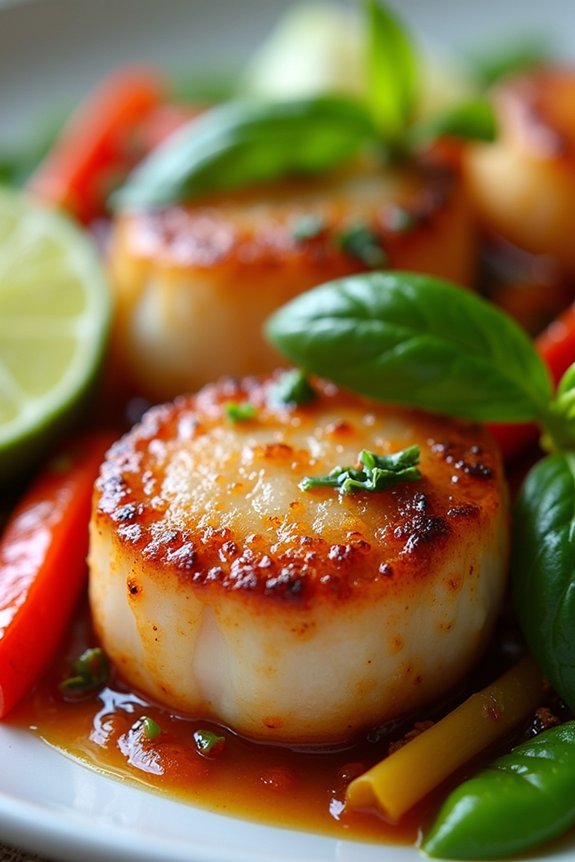
Thai Basil Scallop Stir-Fry is a delightful pescatarian dish that’s perfect for family dinners. Packed with the fresh flavors of basil, garlic, and ginger, this stir-fry brings the exotic taste of Thailand right to your dining table. The tender, juicy scallops are beautifully complemented by the crispness of vegetables, making this dish not only delicious but also nutritious.
It’s a quick and easy meal that can be whipped up in under 30 minutes, making it ideal for busy weeknights. This dish serves 4-6 people and is perfect for those who enjoy a balance of bold flavors and the delicate taste of seafood. The key to a successful Thai Basil Scallop Stir-Fry lies in timing and preparation, ensuring that all ingredients are ready to go before you start cooking.
With a few simple steps, you can create a vibrant meal that’s sure to be a hit with family and friends.
Ingredients:
- 1 1/2 pounds sea scallops
- 2 tablespoons vegetable oil
- 4 cloves garlic, minced
- 1-inch piece of ginger, grated
- 1 red bell pepper, sliced
- 1 yellow bell pepper, sliced
- 1 small red onion, sliced
- 1 cup sugar snap peas
- 1/4 cup soy sauce
- 2 tablespoons fish sauce
- 2 tablespoons oyster sauce
- 1 tablespoon brown sugar
- 2 cups fresh Thai basil leaves
- 1 lime, cut into wedges
Cooking Instructions:
- Prepare the Scallops: Pat the scallops dry with paper towels to remove excess moisture. This step is essential to achieve a good sear when cooking.
- Mix the Sauce: In a small bowl, combine the soy sauce, fish sauce, oyster sauce, and brown sugar. Stir until the sugar is dissolved and set aside.
- Cook the Scallops: Heat 1 tablespoon of vegetable oil in a large skillet or wok over medium-high heat. Add the scallops in a single layer and sear for about 2 minutes on each side until they’re golden brown. Remove them from the skillet and set aside.
- Sauté Vegetables: In the same skillet, add the remaining tablespoon of oil. Add the garlic and ginger, and sauté for about 30 seconds until fragrant. Then add the red and yellow bell peppers, red onion, and sugar snap peas. Stir-fry for 3-4 minutes until the vegetables are tender-crisp.
- Combine and Cook: Return the scallops to the skillet, pouring in the sauce mixture. Toss everything thoroughly and let it cook for another 2-3 minutes, allowing the scallops to soak up the flavors and the sauce to thicken slightly.
- Add Thai Basil: Turn off the heat and stir in the Thai basil leaves. The residual heat will wilt the basil just enough to release its aromatic essence.
- Serve: Transfer the stir-fry to a serving dish and garnish with lime wedges for an extra zing. Serve with steamed jasmine rice or noodles.
Extra Tips:
When preparing Thai Basil Scallop Stir-Fry, be sure to use fresh scallops for the best taste and texture. If fresh Thai basil isn’t available, sweet basil can be used as a substitute, although the flavor will be slightly different.
The key to this dish is quick cooking at high heat, so make sure to have all your ingredients prepped and ready before you start. Adjust the level of saltiness by tweaking the amount of soy and fish sauce according to your taste preference. Enjoy this delightful and aromatic dish with your loved ones!
Savory Clam Chowder With Sweet Potatoes

Savory Clam Chowder With Sweet Potatoes is a delightful twist on the classic clam chowder, bringing a hint of sweetness with the addition of sweet potatoes. This pescatarian-friendly dish is perfect for a cozy family dinner. The blend of tender clams, creamy broth, and the natural sweetness of sweet potatoes creates a comforting bowl of chowder that’s both hearty and flavorful.
Ideal for those chilly nights, this chowder isn’t only delicious but also a nutritious option packed with vitamins and minerals from the seafood and vegetables.
This recipe is designed to serve 4-6 people and can be easily adjusted for larger gatherings. The preparation is straightforward, making it accessible even for novice cooks. By using fresh ingredients and following each step carefully, you can create a dish that will impress your family and leave them asking for seconds.
With this recipe, you’ll be able to enjoy a classic chowder with a unique twist, bringing something new to the dinner table that everyone can enjoy.
Ingredients:
- 2 tablespoons olive oil
- 1 medium onion, diced
- 2 cloves garlic, minced
- 2 large sweet potatoes, peeled and diced
- 4 cups vegetable broth
- 2 cups water
- 1 bay leaf
- 1 teaspoon dried thyme
- 1/2 teaspoon smoked paprika
- Salt and pepper to taste
- 2 cups canned clams with juice
- 1 cup heavy cream
- 2 tablespoons all-purpose flour
- 2 tablespoons butter
- Fresh parsley, chopped (for garnish)
Cooking Instructions:
- Prepare the Base: In a large pot, heat the olive oil over medium heat. Add the diced onion and cook until translucent, about 5 minutes. Add the minced garlic and cook for another minute, stirring frequently to prevent burning.
- Add Sweet Potatoes and Broth: Stir in the diced sweet potatoes, vegetable broth, and water. Add the bay leaf, dried thyme, smoked paprika, salt, and pepper. Bring the mixture to a boil, then reduce the heat to a simmer. Cover and cook until the sweet potatoes are tender, about 20 minutes.
- Add Clams and Thicken: Stir in the canned clams with their juice. In a separate small bowl, mix the heavy cream with the all-purpose flour until smooth. Add this mixture to the pot and stir well. Increase the heat slightly and cook until the chowder thickens, about 5-7 minutes.
- Finish and Serve: Stir in the butter until melted and fully incorporated. Remove the bay leaf. Taste and adjust seasoning if necessary. Serve hot, garnished with fresh parsley for a pop of color and extra flavor.
Extra Tips:
For a richer flavor, you can substitute some of the vegetable broth with clam juice. If you prefer a thicker chowder, you can mash a few sweet potatoes directly in the pot before adding the clams and cream mixture.
Always taste and adjust the seasoning at the end to ascertain the flavors are balanced. For a touch of heat, consider adding a pinch of cayenne pepper. This chowder pairs beautifully with crusty bread or a simple green salad to complete the meal.
Crispy Fish Tacos With Mango Salsa

Crispy Fish Tacos With Mango Salsa are a delightful pescatarian option that brings together the crunch of perfectly cooked fish and the invigorating taste of mango salsa. This dish is ideal for a family dinner, as it combines flavors and textures that appeal to both adults and children. The fish, coated in a crispy batter, is perfectly complemented by the sweet and tangy mango salsa, creating a balance that’s both satisfying and delicious.
These tacos aren’t only flavorful but also a healthy choice, bringing a variety of nutrients to your family’s table.
The preparation of Crispy Fish Tacos With Mango Salsa is simple and straightforward, making it a great option for a busy weeknight. The fish is lightly battered and fried to a golden brown, providing a satisfying crunch. Meanwhile, the mango salsa is quickly assembled with fresh ingredients that add a burst of color and flavor to each bite.
This dish is perfect for 4-6 people, making it a great family meal that can be enjoyed together, with everyone assembling their own tacos to taste.
Ingredients for 4-6 servings:
- 1 ½ pounds white fish fillets (such as cod or tilapia)
- 1 cup all-purpose flour
- 1 teaspoon paprika
- 1 teaspoon garlic powder
- 1 teaspoon salt
- ½ teaspoon black pepper
- 2 large eggs
- 1 cup panko breadcrumbs
- Vegetable oil for frying
- 8-12 corn tortillas
- 2 ripe mangos, diced
- 1 small red onion, finely chopped
- 1 red bell pepper, diced
- 1 jalapeño, seeded and minced
- ¼ cup fresh cilantro, chopped
- Juice of 2 limes
- Salt to taste
- Optional toppings: sour cream, avocado slices, lime wedges
Cooking Instructions:
- Prepare the Fish: Cut the fish fillets into strips about 1 inch wide. Pat them dry with a paper towel to remove excess moisture, which will help the coating stick better.
- Set Up the Breading Station: In three separate shallow bowls, place the flour (mixed with paprika, garlic powder, salt, and pepper), beaten eggs, and panko breadcrumbs.
- Coat the Fish: Dip each fish strip first into the flour mixture, shaking off any excess, then into the egg, and finally into the panko breadcrumbs, pressing gently to adhere.
- Fry the Fish: In a large skillet, heat about ½ inch of vegetable oil over medium-high heat. Once the oil is hot, carefully add the fish strips in batches, frying for about 3-4 minutes per side or until golden brown and cooked through. Remove and drain on a paper towel-lined plate.
- Make the Mango Salsa: In a mixing bowl, combine diced mango, red onion, red bell pepper, jalapeño, and cilantro. Add lime juice and salt to taste, then mix well.
- Warm the Tortillas: Lightly toast the corn tortillas in a dry skillet over medium heat for about 30 seconds per side until warm and pliable.
- Assemble the Tacos: Place a few pieces of crispy fish onto each tortilla, top with a generous spoonful of mango salsa, and add any additional toppings you like, such as sour cream or avocado slices.
Extra Tips:
For an even crispier texture, double-dip the fish in the egg and panko mixture before frying. If you prefer a milder salsa, you can omit the jalapeño or replace it with a milder pepper.
Make sure to serve the tacos immediately after assembling to enjoy the full crunch of the fish. Prepping the mango salsa ahead of time and refrigerating it allows the flavors to meld together, enhancing the taste.
Roasted Veggie and Tuna Niçoise Salad
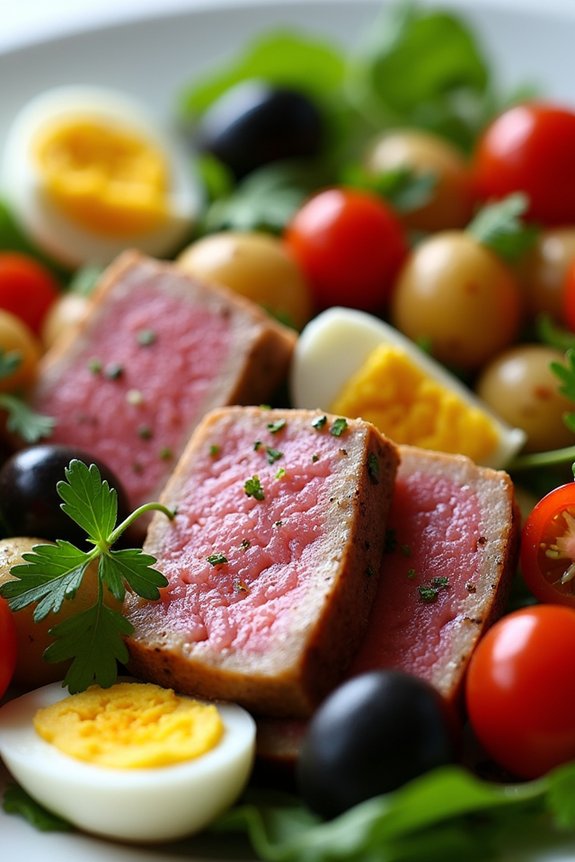
The Roasted Veggie and Tuna Niçoise Salad is a fresh, vibrant meal perfect for families looking to enjoy a nutritious pescatarian dinner. This dish combines the classic flavors of a Niçoise salad with the added depth and warmth of roasted vegetables, making it a hearty option that satisfies even the pickiest of eaters.
The salad isn’t only packed with flavors but also rich in nutrients, providing a wholesome meal that can be enjoyed either as a main course or a substantial side dish. This recipe is designed to serve 4-6 people, making it ideal for family dinners or gatherings.
Fresh tuna steaks are seared to perfection and paired with a colorful array of roasted vegetables, such as bell peppers, cherry tomatoes, and green beans. The dish is finished with a simple yet flavorful dressing, elevating the natural taste of the ingredients. The combination of textures and flavors guarantees each bite is a delightful experience, highlighting the best of Mediterranean cuisine.
Ingredients (for 4-6 servings):
- 2 fresh tuna steaks (about 1 inch thick)
- 1 pound baby potatoes
- 1 red bell pepper
- 1 yellow bell pepper
- 1 cup cherry tomatoes
- 1/2 pound green beans
- 1/2 cup black olives, pitted
- 4 hard-boiled eggs
- 1/4 cup olive oil
- 3 tablespoons lemon juice
- 1 tablespoon Dijon mustard
- Salt and pepper to taste
- Fresh parsley for garnish
Cooking Instructions:
1. Prepare the Vegetables:
Preheat your oven to 400°F (200°C). Wash and halve the baby potatoes, then cut the bell peppers into strips. Trim the green beans and halve the cherry tomatoes.
2. Roast the Vegetables:
Place the potatoes, bell peppers, and green beans on a baking sheet. Drizzle with olive oil and season with salt and pepper. Roast in the preheated oven for 25-30 minutes, or until the vegetables are tender and slightly caramelized. Add the cherry tomatoes in the last 10 minutes of roasting.
3. Cook the Tuna:
While the vegetables are roasting, season the tuna steaks with salt and pepper. Heat a grill pan or skillet over medium-high heat. Add a touch of olive oil and sear the tuna steaks for about 2-3 minutes on each side, or until cooked to your preferred level of doneness. Remove from heat and let rest.
4. Prepare the Dressing:
In a small bowl, whisk together the lemon juice, Dijon mustard, and remaining olive oil. Season with salt and pepper to taste.
5. Assemble the Salad:
On a large serving platter, arrange the roasted vegetables, sliced hard-boiled eggs, and black olives. Slice the seared tuna steaks and lay them over the salad. Drizzle with the prepared dressing.
6. Garnish and Serve:
Sprinkle fresh parsley over the salad for a burst of color and serve immediately while the vegetables are warm.
Extra Tips:
When selecting tuna steaks, opt for sushi-grade quality to guarantee the best flavor and texture, especially if you prefer it slightly pink in the center.
You can customize the salad by adding other seasonal vegetables or incorporating different types of olives for a unique twist. For a touch of sweetness, consider adding roasted red onions or a handful of capers for an extra punch of flavor.
Always taste the dressing before serving and adjust the seasoning if necessary to align with your personal preferences.
Sriracha Honey Glazed Salmon

Sriracha Honey Glazed Salmon is a delightful dish that combines the rich flavors of salmon with a sweet and spicy glaze that will tantalize your taste buds. This pescatarian-friendly meal is perfect for families looking for a healthy, flavorful dinner option that’s both satisfying and easy to prepare.
The combination of sriracha and honey creates a perfect balance of heat and sweetness, while the fresh salmon guarantees that you’re getting a good dose of omega-3 fatty acids. This dish isn’t only delicious but also quick to prepare, making it perfect for busy weeknights.
With just a few simple ingredients, you can have a gourmet meal on the table in no time. The key to achieving the perfect glaze is to allow the honey and sriracha to caramelize slightly, which enhances the natural flavors of the salmon. Paired with a side of steamed vegetables or a light salad, Sriracha Honey Glazed Salmon is sure to become a family favorite.
Ingredients (serves 4-6):
- 4 to 6 salmon fillets (6 oz each)
- 1/4 cup sriracha sauce
- 1/4 cup honey
- 2 tablespoons soy sauce
- 2 tablespoons olive oil
- 1 tablespoon fresh lime juice
- 3 cloves garlic, minced
- Salt and pepper to taste
- Lime wedges for serving
- Chopped fresh cilantro for garnish (optional)
Cooking Instructions:
- Preheat the Oven: Preheat your oven to 400°F (200°C) to verify it’s hot enough for even cooking of the salmon.
- Prepare the Glaze: In a small bowl, whisk together sriracha sauce, honey, soy sauce, olive oil, lime juice, and minced garlic until well combined. This will be your flavorful glaze.
- Season the Salmon: Place the salmon fillets on a baking sheet lined with parchment paper or aluminum foil. Sprinkle salt and pepper over the top of the fillets to your taste preference.
- Apply the Glaze: Using a brush or spoon, generously coat each salmon fillet with the sriracha honey glaze. Make sure the glaze covers the top and sides of each fillet.
- Bake the Salmon: Place the baking sheet in the preheated oven and bake for 12-15 minutes. The salmon should be opaque and flake easily with a fork when it’s done. Keep an eye on the glaze to verify it doesn’t burn.
- Broil for Extra Caramelization (optional): If you desire a more caramelized top, turn the oven to broil for the last 2 minutes of cooking. Watch closely to avoid burning.
- Garnish and Serve: Remove the salmon from the oven. Squeeze fresh lime juice over the top, garnish with chopped cilantro if desired, and serve with lime wedges on the side.
Extra Tips:
For a more intense flavor, you can marinate the salmon in the glaze for about 30 minutes before baking. Adjust the amount of sriracha to suit your family’s spice tolerance.
If you have leftovers, they make for a great addition to a salad or a sandwich the next day. Keep an eye on the salmon as it cooks, as overcooking can lead to a dry texture. Experiment with side dishes, such as jasmine rice or roasted vegetables, to complement the flavors of the salmon.
Linguine With White Wine Clam Sauce

Linguine with white wine clam sauce is a delightful seafood dish that brings the flavors of the ocean to your dinner table. Perfect for a family meal, this dish combines the delicate taste of clams with a rich, aromatic sauce, all served over perfectly cooked linguine. The addition of garlic, white wine, and fresh herbs makes this dish both sophisticated and comforting.
It’s an excellent choice for a pescatarian dinner that’s easy to prepare yet impressive enough for special occasions. This dish isn’t only delicious but also nutritious, providing a healthy dose of protein and omega-3 fatty acids from the clams. When paired with a crisp salad or a side of roasted vegetables, it makes for a well-rounded meal.
Whether you’re a seasoned chef or a beginner in the kitchen, this recipe is straightforward and rewarding. Invite your family to gather around the table and enjoy this tasty pescatarian delight that’s sure to become a family favorite.
Ingredients (Serves 4-6):
- 1 pound linguine
- 3 tablespoons olive oil
- 4 cloves garlic, minced
- 1/4 teaspoon red pepper flakes
- 1 cup dry white wine
- 2 pounds fresh clams, scrubbed and rinsed
- 1 cup clam juice or seafood stock
- 1/4 cup fresh parsley, chopped
- Salt and freshly ground black pepper to taste
- Grated Parmesan cheese, for serving (optional)
- Lemon wedges, for serving
Cooking Instructions:
- Cook the Linguine: In a large pot of boiling salted water, cook the linguine until al dente according to package instructions. Drain and set aside.
- Prepare the Sauce: In a large saucepan, heat olive oil over medium heat. Add the minced garlic and red pepper flakes, sautéing until the garlic is fragrant but not browned, about 1 minute.
- Add the Wine and Clams: Pour in the white wine and bring to a simmer. Add the clams to the pan, cover with a lid, and cook until the clams open, about 5-7 minutes. Discard any clams that don’t open.
- Incorporate the Clam Juice: Add the clam juice or seafood stock to the pan, stirring gently. Allow the mixture to simmer for another 2-3 minutes to enhance the flavors.
- Combine Linguine and Sauce: Add the cooked linguine to the saucepan, tossing gently to coat the pasta in the sauce. Sprinkle with chopped parsley, and season with salt and pepper to taste.
- Serve: Transfer the linguine and clams to serving plates. Garnish with grated Parmesan cheese and lemon wedges, if desired. Serve immediately while hot.
Extra Tips:
When purchasing clams, verify they’re fresh and closed tightly. Discard any clams with broken shells or those that remain open when tapped.
For a more intense flavor, consider adding a splash of clam juice directly to the sauce. If you prefer a thicker sauce, allow it to reduce for a few more minutes before adding the pasta.
Finally, remember to serve this dish with a side of crusty bread to soak up the delicious sauce, making it a complete and satisfying meal.