

As someone who loves keeping family dinners both stress-free and wholesome, I’ve found that having a collection of healthy freezer-friendly meals is a true lifesaver. With a little meal prep, dishes like Chicken and Vegetable Stir-Fry and Zucchini and Turkey Meatballs are ready to go. This means I can enjoy nutritious dinners without the daily hustle. Curious about how to simplify your meal routine while keeping it exciting and delicious? Let’s explore these practical recipes together.
Chicken and Vegetable Stir-Fry
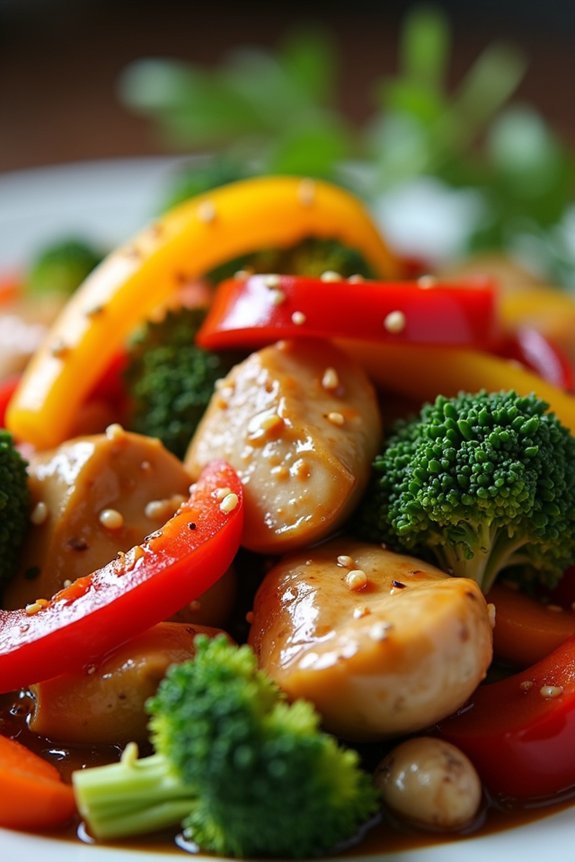
Chicken and Vegetable Stir-Fry is a quick and delicious meal perfect for those busy weeknights when you need something fast yet nutritious. This vibrant dish is packed with lean protein, colorful vegetables, and a savory sauce that ties everything together beautifully. Not only is it a satisfying meal, but it’s also freezer-friendly, making it a convenient option for meal prep and future dinners.
By preparing this stir-fry in advance, you can enjoy a healthy homemade meal straight from the freezer without sacrificing flavor or texture. The key is to slightly undercook the vegetables before freezing, so they maintain their crunchiness upon reheating. This recipe serves 4-6 people, providing a wholesome dinner that everyone will love.
Ingredients:
- 1.5 pounds boneless, skinless chicken breasts, thinly sliced
- 2 tablespoons vegetable oil
- 3 cups mixed vegetables (e.g., bell peppers, broccoli, snap peas, carrots)
- 1 onion, sliced
- 3 garlic cloves, minced
- 1 tablespoon fresh ginger, grated
- 1/4 cup soy sauce
- 2 tablespoons oyster sauce
- 1 tablespoon cornstarch
- 1/2 cup chicken broth
- 1 tablespoon sesame oil
- Cooked rice or noodles (for serving)
Cooking Instructions:
- Prepare the Chicken: Begin by thinly slicing the chicken breasts into bite-sized pieces. This will guarantee they cook evenly and quickly.
- Mix the Sauce: In a small bowl, mix together the soy sauce, oyster sauce, cornstarch, and chicken broth. Stir until the cornstarch is fully dissolved, then set the sauce aside.
- Cook the Chicken: Heat 1 tablespoon of vegetable oil in a large skillet or wok over medium-high heat. Add the sliced chicken to the skillet and cook for about 5-7 minutes, stirring occasionally, until the chicken is cooked through. Remove the chicken from the skillet and set aside.
- Sauté the Vegetables: In the same skillet, add the remaining tablespoon of vegetable oil. Add the sliced onion, garlic, and grated ginger, and sauté for about 1 minute until fragrant. Add the mixed vegetables and stir-fry for another 3-4 minutes, making sure they remain crisp-tender.
- Combine and Sauce: Return the cooked chicken to the skillet with the vegetables. Pour the prepared sauce over the mixture and continue to cook for another 2-3 minutes, stirring frequently, until the sauce thickens and coats the chicken and vegetables evenly.
- Finish with Sesame Oil: Drizzle the sesame oil over the stir-fry, mixing well to incorporate the nutty flavor throughout the dish.
- Serve: Serve the stir-fry hot over a bed of cooked rice or noodles.
Extra Tips:
When preparing this dish for freezing, allow it to cool completely before transferring to airtight containers or freezer bags.
It’s best to freeze the chicken and vegetables separately from the rice or noodles to maintain the best texture upon reheating.
When ready to eat, thaw the stir-fry in the refrigerator overnight and reheat in a skillet over medium heat, adding a splash of water if necessary to loosen the sauce. This will help preserve the flavors and assure a fresh-tasting meal straight from the freezer.
Turkey and Quinoa Stuffed Peppers
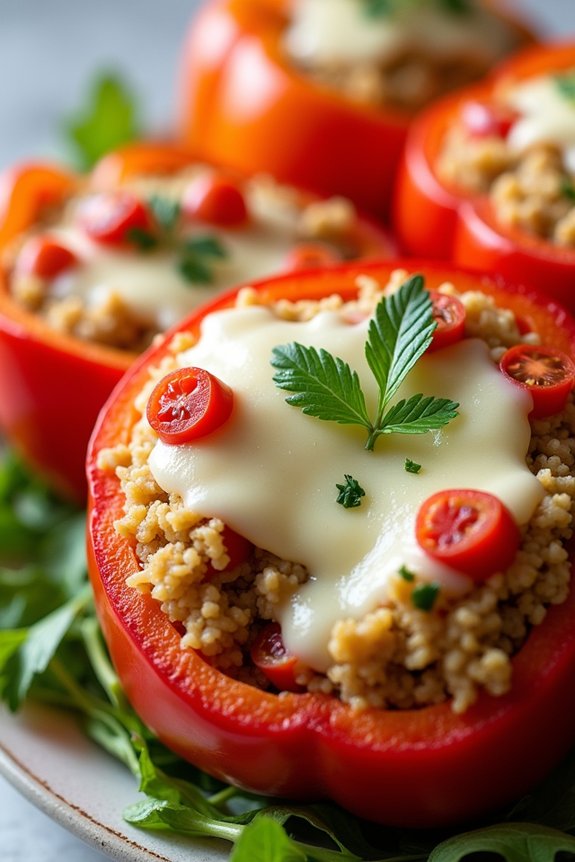
Turkey and Quinoa Stuffed Peppers is a nutritious and delicious meal that’s both satisfying and easy to prepare. This dish combines lean ground turkey with protein-packed quinoa, which is further enhanced by the flavors of garlic, onion, and a blend of spices. Bell peppers serve as colorful, edible vessels that not only add a touch of sweetness but also provide a good dose of vitamins and antioxidants.
Perfect for busy weeknights, this freezer-friendly recipe allows you to prepare a batch ahead of time, guaranteeing a quick and healthy meal is always within reach.
The beauty of this recipe is in its versatility. You can tailor it to your preferences by adding additional vegetables like spinach or mushrooms, or by using a different type of grain such as brown rice or farro. The turkey and quinoa mixture can also be prepared in advance and stored in the refrigerator for a couple of days, making it an ideal option for meal planning.
Once assembled, these stuffed peppers can be frozen individually for future meals, guaranteeing that healthy and satisfying dinners are always ready to go.
Ingredients (Serves 4-6):
- 6 large bell peppers (any color)
- 1 pound ground turkey
- 1 cup quinoa, rinsed and cooked
- 1 small onion, diced
- 2 cloves garlic, minced
- 1 can (14.5 oz) diced tomatoes, drained
- 1 teaspoon dried oregano
- 1 teaspoon ground cumin
- 1/2 teaspoon smoked paprika
- Salt and pepper to taste
- 1 cup shredded mozzarella cheese
- 2 tablespoons olive oil
- Fresh parsley, chopped (optional, for garnish)
Instructions:
- Prepare the Peppers: Preheat your oven to 375°F (190°C). Cut the tops off the bell peppers and remove the seeds and membranes. Place the peppers in a baking dish, cut side up. Drizzle with a tablespoon of olive oil and lightly season with salt and pepper. Bake for 10 minutes to soften them slightly.
- Cook the Quinoa: While the peppers are in the oven, rinse the quinoa under cold water and cook according to package instructions, usually about 15 minutes. Once cooked, set aside.
- Sauté the Aromatics: In a large skillet, heat the remaining tablespoon of olive oil over medium heat. Add the diced onion and minced garlic, cooking until the onion becomes translucent, about 3-4 minutes.
- Brown the Turkey: Add the ground turkey to the skillet with the onions and garlic. Cook, breaking up the meat with a spoon, until it’s fully browned and cooked through, about 6-7 minutes.
- Combine Ingredients: Stir in the cooked quinoa, drained diced tomatoes, oregano, cumin, smoked paprika, salt, and pepper. Mix well and let the flavors meld together, cooking for another 5 minutes.
- Stuff the Peppers: Remove the peppers from the oven. Evenly divide the turkey and quinoa mixture among the peppers. Sprinkle the tops with shredded mozzarella cheese.
- Bake: Return the stuffed peppers to the oven and bake for an additional 20-25 minutes, or until the cheese is melted and bubbly, and the peppers are tender.
- Serve: Remove from the oven and let them cool for a few minutes. Garnish with chopped fresh parsley if desired, and serve warm.
Extra Tips: When selecting bell peppers, look for ones that are uniform in size to guarantee even cooking. If you prefer a spicier kick, consider adding a pinch of red pepper flakes or a chopped jalapeño to the turkey mixture. For a vegetarian version, you can substitute the ground turkey with black beans or chickpeas.
These stuffed peppers can be stored in an airtight container in the freezer for up to 3 months. To reheat, simply bake them straight from the freezer at 350°F (175°C) for about 30-35 minutes, or until heated through.
Beef and Broccoli Casserole
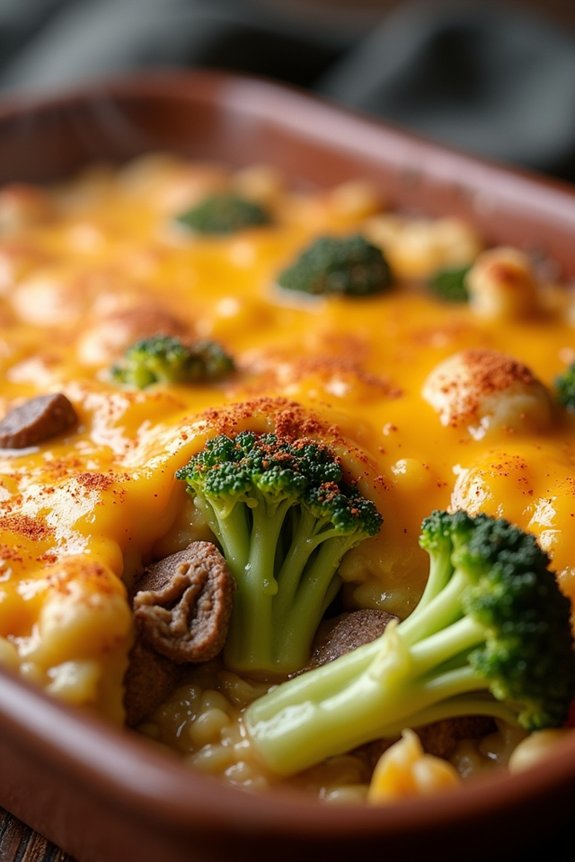
Beef and Broccoli Casserole is a hearty and delicious dish that combines tender beef, crisp broccoli, and a savory sauce, all baked together to perfection. This recipe isn’t only flavorful but also convenient as it can be prepared in advance and stored in the freezer for a quick dinner option on busy nights.
The combination of protein, vegetables, and a creamy base guarantees a balanced meal that satisfies both taste and nutrition. This casserole is an excellent choice for family dinners or gatherings, as it serves 4-6 people.
The rich flavors of the beef meld with the slightly crunchy broccoli, while the sauce adds a comforting creaminess. It’s a dish that brings warmth to the table, making it a favorite choice among those seeking a wholesome yet effortless meal.
Let’s plunge into the recipe and get started on creating this delightful freezer-friendly dinner.
Ingredients (serving size: 4-6 people):
- 1 ½ pounds beef sirloin, thinly sliced
- 1 tablespoon olive oil
- 4 cups broccoli florets
- 1 medium onion, chopped
- 3 cloves garlic, minced
- 1 cup beef broth
- 1 cup sour cream
- 1 tablespoon soy sauce
- 1 tablespoon cornstarch
- 1 cup shredded cheddar cheese
- Salt and pepper to taste
- 1 teaspoon dried thyme
- 1 teaspoon paprika
- 2 cups cooked rice
Cooking Instructions:
- Preheat the Oven: Start by preheating your oven to 375°F (190°C) to make certain it’s ready for baking once the casserole is assembled.
- Cook the Beef: In a large skillet, heat olive oil over medium-high heat. Add the sliced beef and cook until browned on all sides, approximately 5-7 minutes. Remove the beef from the skillet and set aside.
- Sauté Vegetables: In the same skillet, add the chopped onion and minced garlic. Sauté for about 2-3 minutes until the onions become translucent and fragrant.
- Prepare the Sauce: In a bowl, mix the beef broth, sour cream, soy sauce, and cornstarch until well combined. Pour this mixture into the skillet with the onions and garlic, stirring constantly until the sauce begins to thicken.
- Combine Ingredients: Return the cooked beef to the skillet and add the broccoli florets. Stir in the cooked rice, thyme, and paprika. Season with salt and pepper to taste.
- Assemble the Casserole: Transfer the beef and broccoli mixture into a greased baking dish. Sprinkle the shredded cheddar cheese evenly over the top.
- Bake the Casserole: Place the baking dish in the preheated oven and bake for 20-25 minutes, or until the cheese is melted and bubbly.
- Rest and Serve: Allow the casserole to cool for a few minutes before serving. This will help the flavors to settle and make it easier to dish out.
Extra Tips: For an added nutritional boost, consider incorporating additional vegetables such as bell peppers or mushrooms.
If you’re preparing this dish for the freezer, allow it to cool completely before wrapping tightly in foil or placing in an airtight container. It can be stored in the freezer for up to 3 months. To reheat, thaw overnight in the refrigerator and bake at 375°F (190°C) for 30 minutes or until heated through.
Lentil and Vegetable Soup
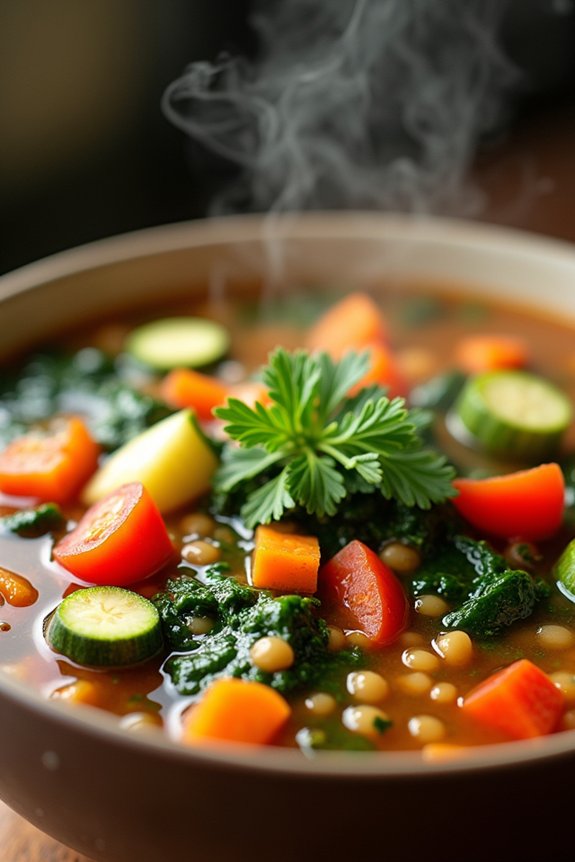
Lentil and Vegetable Soup is a hearty and nutritious dish that’s perfect for those chilly evenings when you crave something warm and comforting. Packed with protein-rich lentils and an array of colorful vegetables, this soup isn’t only delicious but also incredibly healthy. Its rich flavors come together beautifully with the help of simple seasonings and aromatic herbs, making it a delightful meal that can be enjoyed by the whole family.
Best of all, this soup is freezer-friendly, so you can make a large batch and store it for future meals without compromising on taste or nutrition.
This recipe for Lentil and Vegetable Soup serves 4-6 people and is ideal for meal prepping. It’s a versatile dish that can be easily customized with your favorite vegetables or spices. The combination of lentils and vegetables provides a balanced meal that’s both satisfying and nourishing.
Whether you’re a seasoned cook or a kitchen novice, this recipe is simple to follow and will quickly become a staple in your household.
Ingredients:
- 1 cup dried lentils, rinsed and drained
- 1 tablespoon olive oil
- 1 large onion, chopped
- 2 cloves garlic, minced
- 2 carrots, diced
- 2 celery stalks, diced
- 1 red bell pepper, diced
- 1 zucchini, diced
- 1 can (14.5 ounces) diced tomatoes
- 6 cups vegetable broth
- 1 teaspoon dried thyme
- 1 teaspoon dried oregano
- Salt and pepper to taste
- 2 cups fresh spinach leaves
- 1 tablespoon lemon juice
Cooking Instructions:
- Prepare the Ingredients: Begin by rinsing the lentils thoroughly under cold water and set them aside. Chop the onion, garlic, carrots, celery, red bell pepper, and zucchini into small, uniform pieces to guarantee even cooking.
- Sauté the Aromatics: Heat the olive oil in a large pot over medium heat. Add the chopped onion and garlic, and sauté for about 3 minutes until the onion becomes translucent and the garlic is fragrant.
- Add the Vegetables: Stir in the diced carrots, celery, red bell pepper, and zucchini. Cook for another 5 minutes, stirring occasionally, until the vegetables start to soften.
- Combine with Lentils and Tomatoes: Add the rinsed lentils and the can of diced tomatoes (including the juice) to the pot. Stir well to combine all the ingredients.
- Simmer the Soup: Pour in the vegetable broth and add the dried thyme and oregano. Season with salt and pepper to taste. Bring the mixture to a boil, then reduce the heat to low and cover the pot. Let the soup simmer for about 30-35 minutes, or until the lentils are tender.
- Finish with Spinach and Lemon: Once the lentils are cooked through, stir in the fresh spinach leaves until they wilt. Add the lemon juice for a touch of brightness. Taste and adjust seasoning if necessary.
- Serve: Ladle the soup into bowls and serve hot. Enjoy with a side of crusty bread if desired.
Extra Tips: When preparing Lentil and Vegetable Soup, feel free to customize the vegetables based on what you have on hand or what’s in season. Root vegetables like potatoes or turnips can be a great addition for extra heartiness.
If you prefer a spicier kick, consider adding a pinch of red pepper flakes. Also, remember that the soup will thicken as it cools, so if you plan to freeze it, you might want to add a bit more broth or water when reheating. Freezing in individual portions will make it easier to defrost just the right amount for a quick meal.
Spinach and Ricotta Stuffed Shells
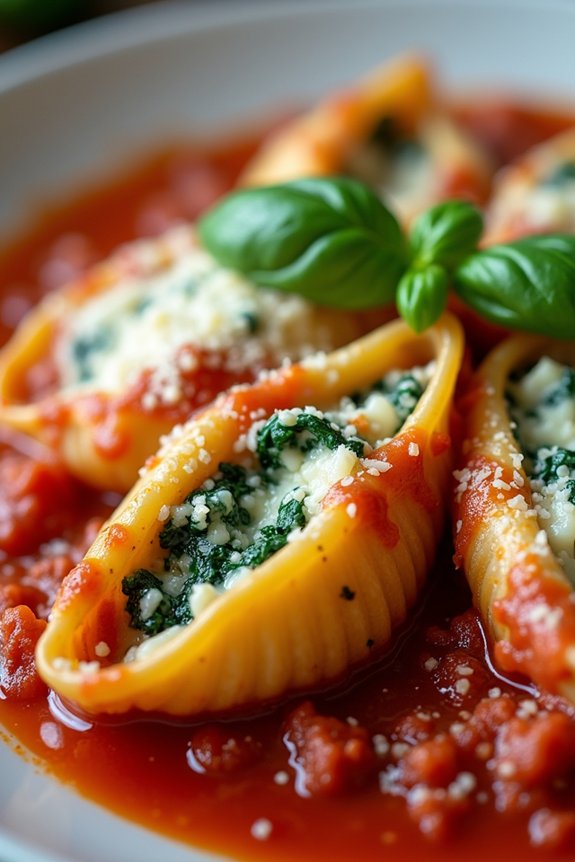
Spinach and Ricotta Stuffed Shells are a comforting and delicious dish that’s both satisfying and easy to prepare. This dish combines the creamy richness of ricotta cheese with the fresh, vibrant flavor of spinach, all encased in tender pasta shells and topped with a savory tomato sauce. It’s perfect for a family dinner or as a make-ahead meal that you can freeze and enjoy at a later date.
The beauty of this recipe lies in its simplicity, yet it delivers a meal that’s hearty and full of flavor. When planning meals that can be prepared in advance, it’s essential to have options that freeze well without sacrificing taste or texture. Spinach and Ricotta Stuffed Shells are an ideal choice because they maintain their flavor and consistency even after freezing and reheating.
This recipe yields enough to serve 4-6 people, making it perfect for a small gathering or for preparing multiple meals at once. Whether you’re cooking for a group or simply planning ahead for busy nights, this dish is sure to be a hit.
Ingredients:
- 20 jumbo pasta shells
- 2 cups ricotta cheese
- 1 cup shredded mozzarella cheese
- 1/2 cup grated Parmesan cheese
- 1 egg
- 2 cups fresh spinach, chopped
- 2 cloves garlic, minced
- 1 teaspoon dried Italian herbs
- Salt and pepper to taste
- 3 cups marinara sauce
- Fresh basil leaves for garnish (optional)
Instructions:
- Preheat the Oven: Begin by preheating your oven to 375°F (190°C) to make sure it’s ready once your shells are assembled.
- Cook the Pasta Shells: In a large pot of salted boiling water, cook the jumbo pasta shells until they’re al dente, following the package instructions. Once cooked, drain and set aside to cool slightly.
- Prepare the Filling: In a large mixing bowl, combine ricotta cheese, shredded mozzarella, grated Parmesan, egg, chopped spinach, minced garlic, Italian herbs, salt, and pepper. Mix everything together until well combined and the spinach is evenly distributed.
- Stuff the Shells: Using a spoon, fill each cooked pasta shell with a generous amount of the spinach and ricotta mixture. Confirm each shell is well filled to maintain their shape during baking.
- Assemble the Dish: Spread one cup of marinara sauce evenly on the bottom of a 9×13 inch baking dish. Place the stuffed shells on top of the sauce in a single layer. Pour the remaining marinara sauce over the shells, making sure each shell is covered with sauce.
- Bake: Cover the baking dish with aluminum foil and bake in the preheated oven for about 25 minutes. Remove the foil and bake for an additional 10 minutes, or until the cheese is melted and the top is golden brown.
- Serve: Once baked, remove from the oven and let it cool for a few minutes. Garnish with fresh basil leaves if desired before serving.
Extra Tips: For an extra boost of flavor, consider adding a pinch of nutmeg to the ricotta mixture, which complements the spinach beautifully. If planning to freeze, allow the baked shells to cool completely before storing them in an airtight container.
To reheat, bake them from frozen at 350°F (175°C) for about 30-35 minutes or until thoroughly heated. This dish pairs wonderfully with a side salad or garlic bread for a complete meal.
Baked Lemon Herb Salmon

Baked Lemon Herb Salmon is a delightful and nutritious dish that’s perfect for any dinner occasion. This recipe combines tender salmon fillets with a blend of fresh herbs, zesty lemon juice, and aromatic garlic, resulting in a mouth-watering meal.
It’s not only delicious but also freezer-friendly, making it a convenient option for those busy weeknights when you want a healthy dinner without the hassle. The vibrant flavors of the herbs and lemon enhance the natural taste of the salmon, providing a revitalizing and satisfying dining experience.
This dish is ideal for serving 4-6 people, and it’s incredibly easy to prepare. Whether you’re cooking for your family or hosting a dinner party, Baked Lemon Herb Salmon will impress everyone at the table. The preparation time is minimal, and the baking process guarantees that the salmon remains juicy and flavorful.
Plus, you can easily freeze any leftovers for a quick meal later on. Pair this delicious salmon with your favorite side dishes, such as roasted vegetables or a fresh salad, to complete the meal.
Ingredients (Serves 4-6):
- 4-6 salmon fillets (about 6 ounces each)
- 2 lemons, juiced and zested
- 3 tablespoons olive oil
- 3 cloves garlic, minced
- 1 tablespoon fresh dill, chopped
- 1 tablespoon fresh parsley, chopped
- Salt and pepper to taste
- Lemon slices for garnish (optional)
Cooking Instructions:
- Preheat the Oven: Begin by preheating your oven to 375°F (190°C). This guarantees that it’s at the right temperature when you’re ready to bake the salmon.
- Prepare the Marinade: In a small bowl, combine the lemon juice, lemon zest, olive oil, minced garlic, chopped dill, chopped parsley, salt, and pepper. Mix well to create a flavorful marinade.
- Marinate the Salmon: Place the salmon fillets in a shallow dish or a resealable plastic bag. Pour the marinade over the salmon, making sure each fillet is well-coated. Allow the salmon to marinate for at least 15-30 minutes in the refrigerator to absorb the flavors.
- Bake the Salmon: Line a baking sheet with parchment paper or lightly grease it with olive oil. Arrange the marinated salmon fillets on the baking sheet, skin-side down. Bake in the preheated oven for 15-20 minutes, or until the salmon is cooked through and flakes easily with a fork.
- Garnish and Serve: Once the salmon is cooked, remove it from the oven and let it rest for a few minutes. Garnish with lemon slices if desired, and serve warm with your choice of side dishes.
Extra Tips:
When preparing Baked Lemon Herb Salmon, it’s important to choose fresh, high-quality salmon fillets for the best results.
If you plan to freeze any leftovers, allow the salmon to cool completely before wrapping it tightly in plastic wrap or aluminum foil. Store the wrapped salmon in an airtight container or freezer bag for up to 2 months.
To reheat, simply thaw the salmon in the refrigerator overnight and bake at a low temperature until warmed through. Adjust the seasoning to your taste, and feel free to experiment with other herbs like thyme or basil for a different flavor profile.
Black Bean and Sweet Potato Enchiladas

Black Bean and Sweet Potato Enchiladas are a delicious and nutritious meal that fits perfectly into a freezer-friendly lifestyle. This dish combines the earthy sweetness of roasted sweet potatoes with the hearty texture of black beans, all wrapped up in soft tortillas and topped with a zesty enchilada sauce. It’s a comforting meal that’s easy to prepare in large batches for future dinners.
Plus, it’s vegetarian, making it an excellent choice for meatless Mondays or anytime you want to enjoy something lighter yet fulfilling.
These enchiladas aren’t only flavorful but also packed with nutrients. Sweet potatoes are a great source of vitamins A and C, while black beans provide protein and fiber. This combination guarantees that you’re getting a balanced meal that will keep you satisfied.
The addition of spices and a rich enchilada sauce brings everything together, creating a dish that’s as tasty as it’s healthy. Whether you’re serving it fresh or pulling it from the freezer, these enchiladas are sure to become a staple in your meal planning.
Ingredients for 4-6 servings:
- 2 large sweet potatoes, peeled and diced
- 1 tablespoon olive oil
- 1 teaspoon ground cumin
- 1 teaspoon chili powder
- Salt and pepper to taste
- 2 cups canned black beans, drained and rinsed
- 1 cup corn kernels (fresh, canned, or frozen)
- 2 cups shredded cheddar cheese
- 8-10 corn tortillas
- 2 cups enchilada sauce
- 1/4 cup chopped fresh cilantro (optional)
- Lime wedges for serving (optional)
Cooking Instructions:
- Preheat and Prepare Sweet Potatoes: Preheat your oven to 400°F (200°C). Place the diced sweet potatoes on a baking sheet. Drizzle with olive oil and sprinkle with cumin, chili powder, salt, and pepper. Toss to coat evenly. Roast in the oven for 20-25 minutes, or until tender and slightly caramelized. Remove from oven and set aside.
- Assemble Filling: In a large mixing bowl, combine the roasted sweet potatoes, black beans, corn, and half of the shredded cheese. Mix until well combined.
- Prepare Baking Dish and Tortillas: Spread 1/2 cup of the enchilada sauce over the bottom of a 9×13-inch baking dish. Warm the corn tortillas slightly in a microwave or on a skillet to make them pliable.
- Fill and Roll Enchiladas: Spoon about 1/3 cup of the sweet potato and bean mixture down the center of each tortilla. Roll up the tortillas and place them seam-side down in the prepared baking dish.
- Top with Sauce and Cheese: Pour the remaining enchilada sauce over the rolled tortillas. Sprinkle the remaining cheese over the top.
- Bake: Cover the dish with foil and bake in the preheated oven for 20 minutes. Remove the foil and bake for an additional 10 minutes, or until the cheese is melted and bubbly.
- Garnish and Serve: Remove from the oven and let cool slightly. Garnish with chopped cilantro and serve with lime wedges, if desired.
Extra Tips:
When preparing these enchiladas for freezing, allow them to cool completely after baking. Wrap the entire baking dish tightly with plastic wrap and a layer of aluminum foil, or transfer individual portions to airtight containers.
They can be stored in the freezer for up to 3 months. When ready to eat, thaw overnight in the refrigerator and reheat in the oven at 350°F (175°C) until warmed through.
This dish can be easily adapted by adding different vegetables or proteins, such as spinach or shredded chicken, depending on your preference.
Quinoa and Vegetable Curry
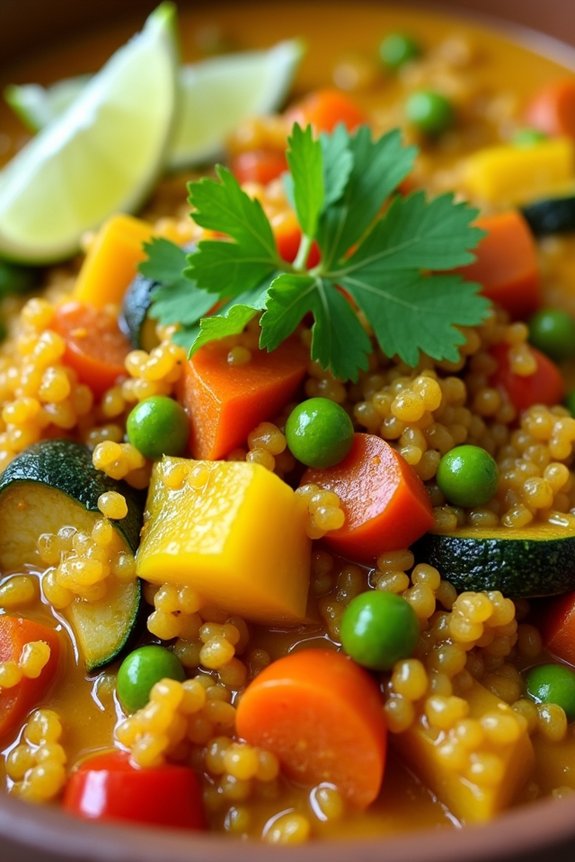
Quinoa and Vegetable Curry is a hearty and delicious plant-based dish that combines the nutty flavor of quinoa with a variety of vibrant vegetables, all simmered in a rich and aromatic curry sauce. This recipe isn’t only packed with nutrients but is also perfect for preparing in advance and storing in the freezer for those busy weekdays when you want a healthy meal without the hassle. Ideal for serving 4-6 people, this dish is sure to delight both vegans and non-vegans alike.
The beauty of this Quinoa and Vegetable Curry lies in its flexibility; you can easily customize it with your favorite vegetables or whatever you have on hand. The quinoa provides a complete protein, making this a satisfying main course that doesn’t require any additional meat. Plus, the colorful array of vegetables contributes a variety of vitamins and minerals, making this dish as nutritious as it’s tasty.
Ingredients
- 1 cup quinoa, rinsed
- 2 tablespoons olive oil
- 1 onion, chopped
- 3 cloves garlic, minced
- 1 tablespoon ginger, grated
- 1 tablespoon curry powder
- 1 teaspoon ground cumin
- 1 teaspoon ground coriander
- 1 teaspoon turmeric
- 1 can (14 oz) coconut milk
- 1 cup vegetable broth
- 2 cups assorted vegetables (such as bell peppers, carrots, and zucchini), chopped
- 1 cup frozen peas
- Salt and pepper to taste
- Fresh cilantro, chopped (for garnish)
- Lime wedges (for serving)
Cooking Instructions
- Prepare the Quinoa: Begin by rinsing the quinoa under cold water in a fine mesh strainer. This helps remove any bitterness from the natural coating, saponin, found on quinoa. Next, cook the quinoa according to package instructions, generally using a ratio of 1 part quinoa to 2 parts water. Once cooked, set it aside.
- Sauté Aromatics: In a large pot or deep skillet, heat the olive oil over medium heat. Add the chopped onion and sauté for about 5 minutes until it becomes translucent. Stir in the minced garlic and grated ginger, cooking for an additional minute until fragrant.
- Add Spices: Sprinkle in the curry powder, ground cumin, ground coriander, and turmeric. Stir well to coat the onions, garlic, and ginger with the spices, allowing them to bloom and release their flavors for about 1-2 minutes.
- Simmer the Curry: Pour in the coconut milk and vegetable broth, stirring to combine with the spices. Bring the mixture to a gentle simmer over medium heat.
- Cook the Vegetables: Add the chopped vegetables and frozen peas to the pot. Stir to ascertain everything is well-coated with the curry sauce. Cover and let it simmer for about 15-20 minutes, or until the vegetables are tender.
- Incorporate the Quinoa: Once the vegetables are cooked, fold in the cooked quinoa. Mix well to confirm the quinoa is evenly distributed throughout the curry. Season with salt and pepper to taste.
- Garnish and Serve: Remove the pot from the heat and stir in half of the chopped cilantro. Serve the curry hot, garnished with the remaining cilantro and lime wedges on the side.
Extra Tips
When making Quinoa and Vegetable Curry, feel free to adjust the spice levels to suit your taste preferences by adding more curry powder or including a pinch of chili flakes for extra heat.
This dish is versatile, so experiment with different vegetables based on what’s in season or what you have available. If you plan to freeze portions, let the curry cool completely before transferring it to airtight containers or freezer bags.
When reheating, you may need to add a splash of vegetable broth or water to bring back some of the creaminess. Enjoy this nutritious meal with a side of naan or over a bed of steamed rice for added heartiness.
Zucchini and Turkey Meatballs
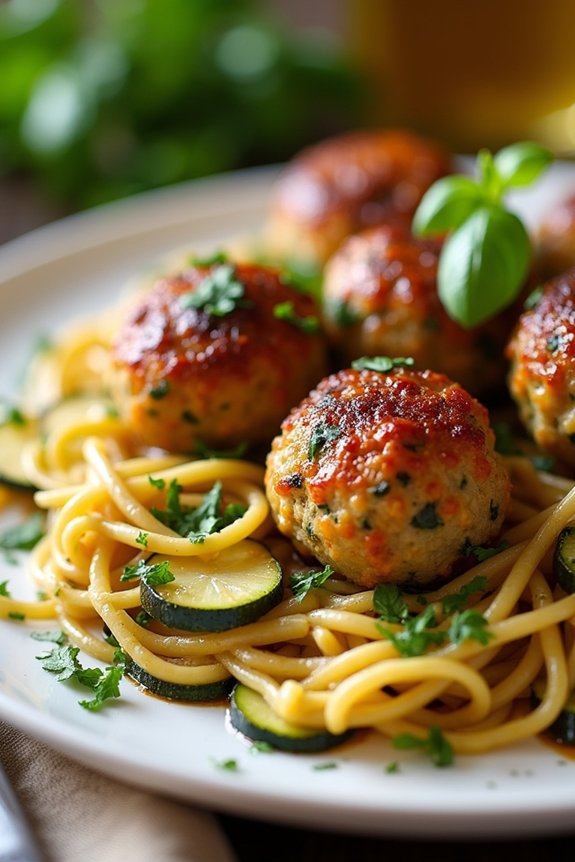
Zucchini and Turkey Meatballs are a delicious and healthy option for those looking to prepare freezer-friendly meals. These meatballs are a fantastic way to incorporate more vegetables into your diet while still satisfying your craving for a hearty dish. The zucchini adds moisture and a subtle sweetness, while the lean turkey provides a good source of protein. Perfect for meal prep, these meatballs can be made in advance and stored in the freezer, making them an excellent choice for busy weeknight dinners.
This recipe yields a serving size for 4-6 people and is both simple to prepare and versatile. You can enjoy these meatballs on their own, with pasta, or tossed in a light tomato sauce. Additionally, they pair well with a side of roasted vegetables or a fresh salad. Whether you’re looking to cut down on red meat or simply want a flavorful and nutritious meal option, these Zucchini and Turkey Meatballs are sure to become a staple in your dinner rotation.
Ingredients:
- 1 pound ground turkey
- 1 medium zucchini, grated
- 1/2 cup breadcrumbs
- 1/4 cup grated Parmesan cheese
- 1 large egg
- 2 cloves garlic, minced
- 1 teaspoon dried oregano
- 1 teaspoon dried basil
- Salt and pepper to taste
- Olive oil for cooking
Instructions:
- Prepare the Ingredients: Preheat your oven to 400°F (200°C). Grate the zucchini using a box grater and place it in a clean kitchen towel. Squeeze out as much moisture as possible to guarantee the meatballs hold together well.
- Mix the Meatball Mixture: In a large mixing bowl, combine the ground turkey, grated zucchini, breadcrumbs, Parmesan cheese, egg, minced garlic, oregano, basil, salt, and pepper. Use your hands to mix the ingredients until just combined, being careful not to overwork the mixture as this can make the meatballs tough.
- Shape the Meatballs: Use a tablespoon or small ice cream scoop to form the mixture into 1.5-inch meatballs. Place each meatball on a baking sheet lined with parchment paper or a silicone baking mat.
- Cook the Meatballs: Heat a drizzle of olive oil in a large ovenproof skillet over medium-high heat. Add the meatballs in batches, searing them on all sides until they’re golden brown. This should take about 5 minutes. Once browned, transfer the skillet to the preheated oven.
- Bake the Meatballs: Allow the meatballs to bake in the oven for 15-20 minutes, or until they’re cooked through and reach an internal temperature of 165°F (74°C).
- Freeze for Later: If you plan to freeze the meatballs, let them cool completely on a wire rack. Once cooled, place them in a single layer on a baking sheet and freeze until solid. Transfer the frozen meatballs to a freezer-safe bag or container for long-term storage.
Extra Tips: When preparing the meatballs, be mindful not to overmix the ingredients as this can lead to a dense texture. If you find the mixture too wet, add a little more breadcrumbs until the desired consistency is achieved.
For added flavor, try incorporating fresh herbs like parsley or cilantro. Additionally, you can experiment with different sauces to accompany the meatballs, such as a spicy marinara or a creamy yogurt dip.
When reheating frozen meatballs, ascertain they’re heated through thoroughly, either in the oven or on the stovetop, before serving.
Chicken and Brown Rice Pilaf
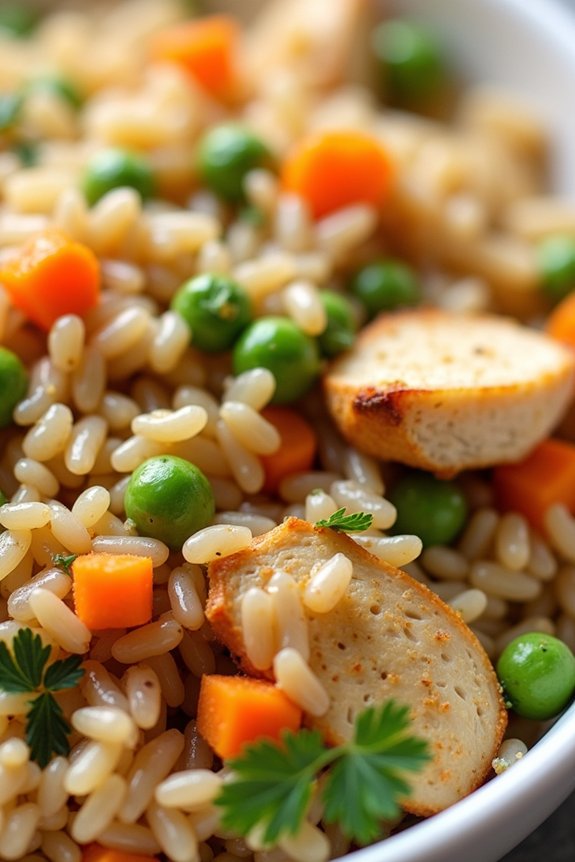
Chicken and Brown Rice Pilaf is a delicious and nutritious meal that’s perfect for those looking for a healthy and freezer-friendly dinner option. This dish combines tender chicken pieces with wholesome brown rice and a variety of vegetables and spices, creating a flavorful and satisfying meal that can be enjoyed fresh or stored for later. The nutty flavor of the brown rice complements the savory chicken, while the vegetables add a burst of color and nutrition.
Ideal for batch cooking, this Chicken and Brown Rice Pilaf recipe is designed to serve 4-6 people, making it a great choice for family dinners or meal prep. Preparing this dish in advance and storing it in the freezer guarantees that you have a quick and healthy meal option ready whenever you need it. With its balanced mix of protein, carbohydrates, and vegetables, this pilaf is sure to become a staple in your meal rotation.
Ingredients (serves 4-6 people):
- 1 1/2 pounds boneless, skinless chicken breasts, diced
- 1 tablespoon olive oil
- 1 medium onion, chopped
- 2 cloves garlic, minced
- 1 cup brown rice
- 2 1/2 cups chicken broth
- 1/2 teaspoon salt
- 1/4 teaspoon black pepper
- 1 teaspoon dried thyme
- 1 cup frozen peas
- 1 cup diced carrots
- 1/4 cup chopped fresh parsley (optional)
- Juice of 1 lemon
Cooking Instructions:
- Prepare the Chicken: Heat the olive oil in a large skillet over medium heat. Add the diced chicken breasts to the skillet and cook until they’re browned on all sides and cooked through, about 6-8 minutes. Remove the chicken from the skillet and set aside.
- Sauté Vegetables: In the same skillet, add the chopped onion and minced garlic. Sauté until the onion is translucent and fragrant, about 3-4 minutes.
- Cook the Rice: Stir in the brown rice and mix well with the onions and garlic. Cook for about 2 minutes to lightly toast the rice.
- Simmer: Add the chicken broth, salt, black pepper, and dried thyme to the skillet. Bring the mixture to a boil, then reduce the heat to low. Cover and simmer for 20 minutes.
- Add Vegetables: After 20 minutes, add the frozen peas and diced carrots to the skillet. Stir to combine, and continue to cook for another 10-15 minutes, or until the rice is tender and the liquid is absorbed.
- Combine and Finish: Return the cooked chicken to the skillet and stir to combine. Add the lemon juice and chopped fresh parsley, if using. Mix well to confirm all the ingredients are evenly distributed.
- Serve: Remove from heat and let the pilaf sit for a few minutes before serving. This allows the flavors to meld together.
Extra Tips:
For best results, use a heavy-bottomed skillet that allows even heat distribution. This helps prevent the rice from sticking or burning. If you prefer a bit of spice, consider adding a pinch of cayenne pepper or red pepper flakes.
When freezing, let the pilaf cool completely before transferring it to airtight containers. To reheat, thaw in the refrigerator overnight and then warm on the stovetop or in the microwave. Adding a splash of chicken broth during reheating can help maintain the dish’s moisture.
Cauliflower and Chickpea Stew
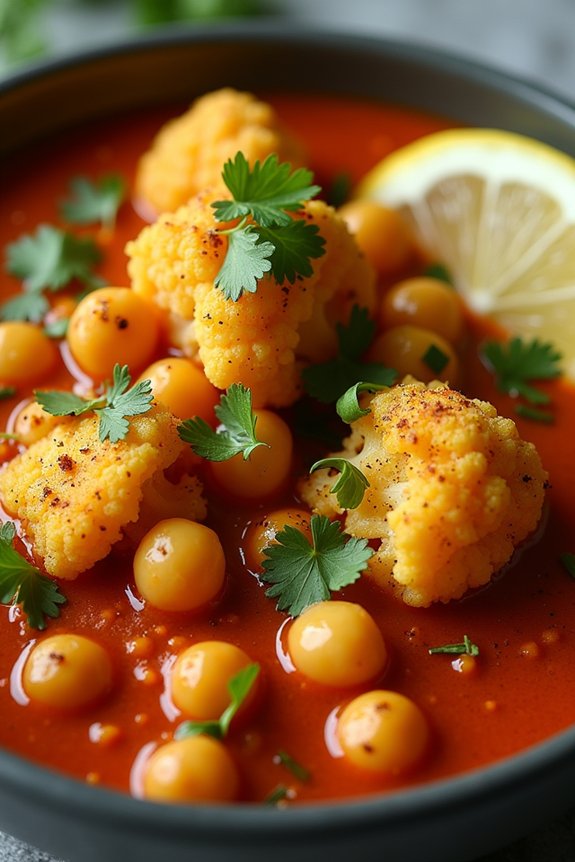
Cauliflower and Chickpea Stew is a hearty and nutritious meal that’s perfect for a cozy dinner and ideal for making ahead and freezing. This dish combines the earthiness of cauliflower with the protein-rich goodness of chickpeas, all simmered in a flavorful tomato-based sauce. It’s a versatile recipe that can be enjoyed on its own or paired with rice, quinoa, or crusty bread. Plus, it’s a great option for meal prep, as it freezes beautifully and can be easily reheated for a quick and healthy dinner.
What makes this Cauliflower and Chickpea Stew even more appealing is its simplicity and the use of wholesome ingredients. This recipe is perfect for those busy weeknights when you want something delicious but don’t have much time to spend in the kitchen. The spices in this stew add depth and warmth, making it a comforting choice that will satisfy both vegetarians and meat lovers alike. With just a few ingredients and some time to simmer, you can create a dish that’s both nourishing and delightful.
Ingredients for 4-6 servings:
- 1 large head of cauliflower, cut into florets
- 2 cans (15 oz each) of chickpeas, drained and rinsed
- 1 large onion, diced
- 3 cloves garlic, minced
- 1 can (28 oz) crushed tomatoes
- 3 cups vegetable broth
- 2 tablespoons olive oil
- 1 teaspoon ground cumin
- 1 teaspoon ground coriander
- 1/2 teaspoon turmeric
- 1/2 teaspoon smoked paprika
- Salt and pepper to taste
- Fresh cilantro, chopped (for garnish)
- Lemon wedges (for serving)
Cooking Instructions:
- Prepare the Ingredients: Begin by preparing all the ingredients. Dice the onion, mince the garlic, drain and rinse the chickpeas, and cut the cauliflower into bite-sized florets.
- Sauté Aromatics: In a large pot, heat the olive oil over medium heat. Add the diced onion and sauté for about 5 minutes until it becomes translucent. Stir in the minced garlic and sauté for another minute until fragrant.
- Add Spices: Sprinkle the cumin, coriander, turmeric, and smoked paprika over the onion and garlic. Stir well to coat the aromatics with the spices, and cook for 1-2 minutes to toast the spices and enhance their flavors.
- Combine Ingredients: Add the cauliflower florets and chickpeas to the pot, stirring to combine. Pour in the crushed tomatoes and vegetable broth, stirring to ascertain everything is well mixed.
- Simmer the Stew: Bring the mixture to a gentle boil, then reduce the heat to low. Cover the pot and let the stew simmer for about 25-30 minutes, or until the cauliflower is tender and the flavors have melded together.
- Season and Serve: Taste the stew and season with salt and pepper as needed. Ladle the stew into bowls, garnishing with fresh cilantro. Serve with lemon wedges on the side for an added burst of freshness.
Extra Tips:
To guarantee the best texture, don’t overcook the cauliflower; it should be tender yet still hold its shape. This stew can be stored in airtight containers and frozen for up to three months. To reheat, simply thaw in the refrigerator overnight and warm on the stove over low heat.
For added flavor, consider adding a pinch of chili flakes if you prefer a bit of heat. If you wish to bulk up the dish, consider serving it over a bed of cooked rice or quinoa. Enjoy your delicious, healthy, and convenient meal!
Mushroom and Barley Risotto

Mushroom and Barley Risotto is a delightful, nutrient-rich dish that combines the earthy flavors of mushrooms with the wholesome goodness of barley. This risotto isn’t only delicious but also a perfect freezer-friendly meal, making it ideal for busy weeknights or when you want to have a comforting meal ready to go.
The chewy texture of barley provides a satisfying bite, while the mushrooms add a savory depth of flavor that makes this dish irresistible.
Whether you’re a seasoned cook or a beginner in the kitchen, this Mushroom and Barley Risotto is an easy-to-follow recipe that will become a staple in your meal rotation. It’s a versatile dish that can be adapted to your taste preferences by adding different vegetables or proteins.
By preparing a larger batch, you can enjoy some now and freeze the rest for later, ensuring you have a healthy, home-cooked meal whenever you need it.
Ingredients (Serves 4-6):
- 2 tablespoons olive oil
- 1 medium onion, finely chopped
- 3 cloves garlic, minced
- 1 pound mushrooms, sliced (button, cremini, or a mix)
- 1 cup pearl barley
- 4 cups vegetable or chicken broth
- 1 cup dry white wine (optional)
- 1 teaspoon dried thyme
- Salt and pepper to taste
- 1 cup grated Parmesan cheese
- 2 tablespoons butter
- 1/4 cup chopped fresh parsley for garnish
Cooking Instructions:
- Prepare the Ingredients: Begin by heating the olive oil in a large skillet or pot over medium heat. Add the chopped onion and minced garlic, sautéing them for about 3-4 minutes until they’re translucent and fragrant.
- Cook the Mushrooms: Add the sliced mushrooms to the skillet and cook for 5-7 minutes until they’re browned and have released their moisture.
- Toast the Barley: Stir in the pearl barley, allowing it to toast for 2-3 minutes. This enhances its nutty flavor and adds depth to the dish.
- Deglaze the Pan: Pour in the white wine (if using) and cook for 2-3 minutes, stirring occasionally, until the liquid has reduced by half. This step adds a wonderful acidity and depth of flavor to the risotto.
- Simmer the Risotto: Gradually add the broth, one cup at a time, stirring frequently. Allow each addition of broth to be absorbed by the barley before adding the next. This process should take about 30-40 minutes. Stir in the dried thyme, and season with salt and pepper to taste.
- Finish the Risotto: Once the barley is tender and the risotto has reached a creamy consistency, stir in the Parmesan cheese and butter. Mix well until the cheese has melted and the risotto is creamy.
- Serve and Garnish: Remove the risotto from the heat and let it sit for a couple of minutes. Serve hot, garnished with fresh parsley.
Extra Tips:
When making Mushroom and Barley Risotto, it’s important to be patient and allow the barley to absorb the broth slowly. This gradual process is key to achieving the creamy texture characteristic of a good risotto.
If you prefer a vegetarian version, use vegetable broth and omit the Parmesan or substitute it with a vegan cheese option. Feel free to add other vegetables like spinach or peas during the last few minutes of cooking for added nutrition and color.
When freezing, let the risotto cool completely before transferring it to airtight containers; it will keep well in the freezer for up to three months. Reheat gently on the stove with a splash of broth or water to return it to its creamy consistency.