

When it comes to holiday family dinners, certain recipes have a magical way of bringing everyone together. From a perfectly roasted turkey to creamy mashed potatoes, these dishes set the festive mood. I fondly recall my first attempt at a honey-glazed ham—it was a big hit! If you’re eager to impress with classic favorites, you’re in the right place. Let’s explore these cherished recipes that everyone loves.
Classic Roast Turkey With Herb Stuffing
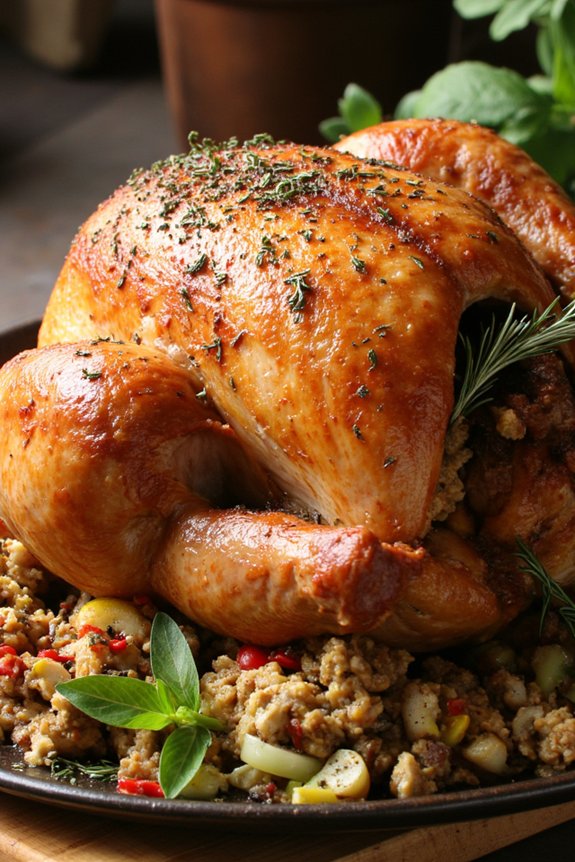
There’s nothing quite like a Classic Roast Turkey with Herb Stuffing to bring family and friends together for a holiday feast. This timeless dish combines the succulent flavors of a perfectly roasted turkey with the savory richness of an aromatic herb stuffing, creating a centerpiece that’s both delicious and visually stunning.
Whether you’re a seasoned chef or a first-time holiday cook, this recipe is designed to guide you through every step, guaranteeing a memorable dining experience for everyone at the table.
Preparing a roast turkey with herb stuffing requires a bit of planning, but the results are well worth the effort. This recipe serves 4-6 people, making it ideal for an intimate holiday gathering. The herb stuffing is packed with fresh herbs, bread cubes, and a medley of vegetables, adding depth and complexity to the juicy turkey.
Follow these simple instructions, and you’ll have a mouth-watering dish that will surely become a family favorite.
Ingredients for Classic Roast Turkey With Herb Stuffing (Serves 4-6):
- Turkey:
- 1 whole turkey (10-12 pounds)
- Salt and pepper
- 1/4 cup olive oil or melted butter
- 1 lemon, halved
- 2 tablespoons fresh thyme leaves
- 2 tablespoons fresh rosemary leaves
- 1 onion, quartered
- 3 cloves garlic, crushed
- Herb Stuffing:
- 8 cups cubed day-old bread
- 1/2 cup unsalted butter
- 1 large onion, diced
- 3 stalks celery, diced
- 2 cloves garlic, minced
- 1/4 cup fresh parsley, chopped
- 2 tablespoons fresh sage, chopped
- 2 tablespoons fresh thyme, chopped
- 2 tablespoons fresh rosemary, chopped
- 1 cup chicken or turkey broth
- Salt and pepper to taste
Cooking Instructions:
- Prepare the Turkey: Preheat your oven to 325°F (165°C). Remove the giblets and neck from the turkey cavity; rinse the turkey inside and out, and pat dry with paper towels. Season the cavity generously with salt and pepper. Stuff the cavity with the lemon halves, onion quarters, garlic, and herbs (thyme and rosemary).
- Season the Turkey: Rub the olive oil or melted butter all over the turkey skin. Season the outside of the turkey thoroughly with salt and pepper, and sprinkle with additional thyme and rosemary leaves for extra flavor.
- Prepare the Stuffing: In a large skillet, melt the butter over medium heat. Add the diced onion and celery, and sauté until softened, about 5 minutes. Stir in the minced garlic and cook for another minute. Remove from heat and add the parsley, sage, thyme, and rosemary.
- Combine Stuffing Ingredients: In a large bowl, combine the sautéed vegetables and herbs with the bread cubes. Gradually add the chicken or turkey broth, stirring until the bread is moistened but not soggy. Season with salt and pepper to taste.
- Stuff the Turkey: Loosely pack the prepared stuffing into the turkey cavity. If you have extra stuffing, you can bake it separately in a greased baking dish.
- Roast the Turkey: Place the stuffed turkey breast-side up on a rack in a roasting pan. Roast in the preheated oven for approximately 3 to 3.5 hours, or until the internal temperature reaches 165°F (74°C) when measured in the thickest part of the thigh. Baste the turkey occasionally with pan juices to keep it moist.
- Rest and Serve: Once cooked, remove the turkey from the oven and let it rest for at least 20 minutes before carving. This allows the juices to redistribute, guaranteeing a juicy and tender turkey. Carve and serve the turkey alongside the herb stuffing.
Extra Tips:
For the best results, verify your turkey is completely thawed before roasting. A brining process can also be applied a day before cooking to enhance the bird’s flavor and moisture.
If you prefer a crispier skin, you can increase the oven temperature to 400°F (200°C) for the last 30 minutes of roasting. Always rest the turkey before carving to allow the juices to settle, which helps in achieving perfectly moist meat.
If you’re baking extra stuffing separately, cover it with foil and bake at 350°F (175°C) for 30 minutes, then uncover and bake for an additional 10-15 minutes to crisp the top.
Honey-Glazed Spiral Ham
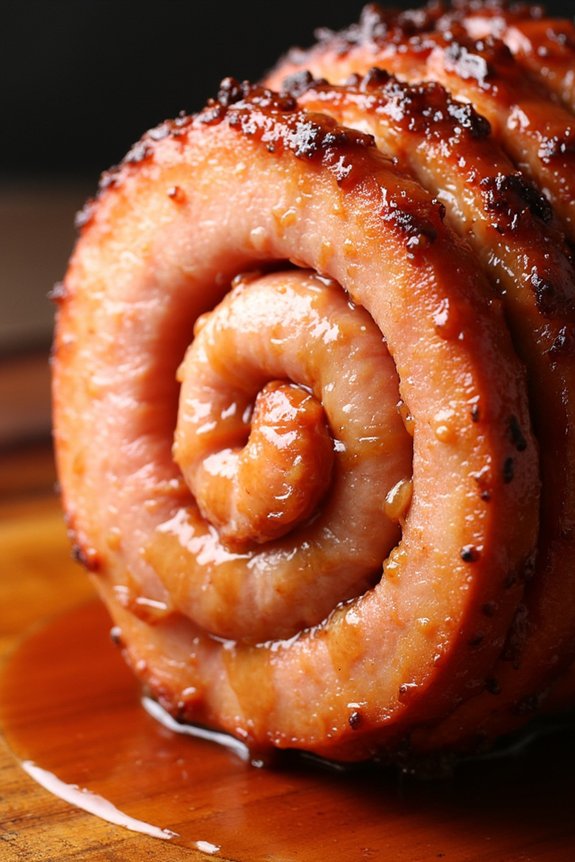
A honey-glazed spiral ham is a classic centerpiece for any holiday family dinner. Its sweet, sticky glaze perfectly complements the savory, smoky flavor of the ham, creating a dish that’s both indulgent and crowd-pleasing.
This recipe is designed to serve 4-6 people, making it an ideal choice for intimate gatherings or as part of a larger holiday feast. The spiral cut of the ham allows the glaze to seep into every slice, guaranteeing each bite is flavorful and moist.
The preparation of this dish is simple but requires a bit of attention to detail to confirm that the glaze is applied evenly and the ham is cooked to perfection. By following these step-by-step instructions, you’ll be able to create a delicious honey-glazed spiral ham that will impress your family and guests.
The combination of honey, brown sugar, and spices creates a glaze that caramelizes beautifully in the oven, resulting in a ham that’s as pleasing to the eye as it’s to the palate.
Ingredients for 4-6 Servings:
- 1 (5-7 pound) spiral-sliced ham
- 1 cup honey
- 1/2 cup brown sugar
- 1/4 cup Dijon mustard
- 1/4 cup apple cider vinegar
- 1/2 teaspoon ground cinnamon
- 1/2 teaspoon ground cloves
Cooking Instructions:
- Preheat the Oven: Begin by preheating your oven to 325°F (165°C). Confirm your oven rack is positioned in the lower third of the oven to accommodate the size of the ham.
- Prepare the Glaze: In a medium saucepan, combine the honey, brown sugar, Dijon mustard, apple cider vinegar, cinnamon, and cloves. Place the saucepan over medium heat and stir until the sugar has dissolved and the mixture is smooth and slightly thickened, about 5-7 minutes. Remove from heat and set aside.
- Prepare the Ham: Place the spiral-sliced ham in a large roasting pan, cut side down. Use a brush to generously coat the entire surface of the ham with the prepared glaze, making sure to get between the slices.
- Cover and Bake: Cover the ham loosely with aluminum foil to prevent it from drying out. Place the roasting pan in the preheated oven and bake for about 10-12 minutes per pound, or until the internal temperature of the ham reaches 140°F (60°C).
- Glaze Again: About 30 minutes before the ham is done, remove the foil and baste the ham with more of the glaze. Return the ham to the oven, uncovered, to allow the glaze to caramelize. Continue to baste the ham every 10 minutes until done.
- Rest and Serve: Once the ham has reached the desired temperature, remove it from the oven and let it rest for 10-15 minutes before slicing. This will allow the juices to redistribute, guaranteeing a moist and flavorful ham.
Extra Tips:
When preparing your honey-glazed spiral ham, confirm that you allow for sufficient cooking time based on the weight of your ham.
Using a meat thermometer is essential to check for doneness without overcooking. If you find that the glaze is becoming too dark towards the end of the cooking time, simply tent the ham with foil to prevent burning.
Creamy Garlic Mashed Potatoes
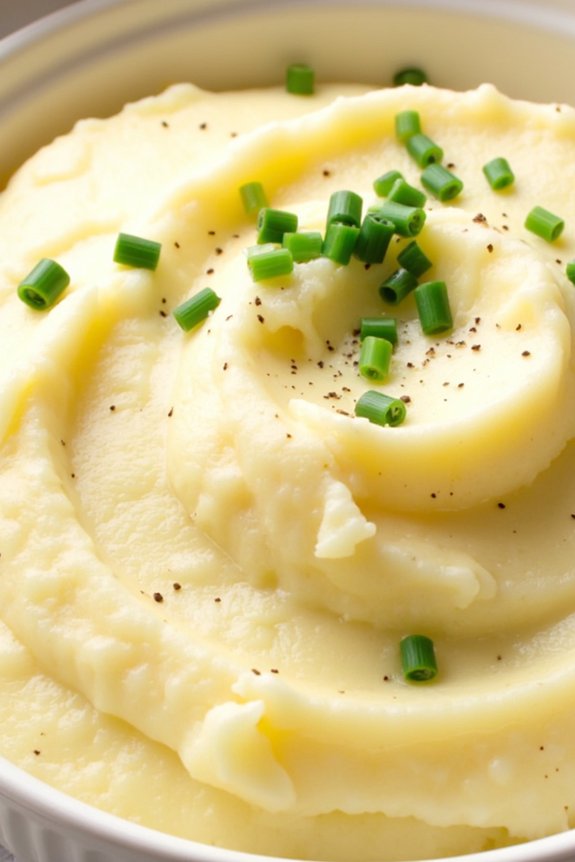
Mashed potatoes are a staple at any holiday family dinner, and adding garlic to the mix elevates them into something truly special. Creamy Garlic Mashed Potatoes are rich, comforting, and full of flavor, making them the perfect side dish to accompany any festive meal. The key to this recipe is the perfect balance of creaminess and garlic, guaranteeing that the potatoes are smooth and flavorful without overpowering the main dishes on the table.
This recipe is designed to serve 4-6 people, making it ideal for a small to medium-sized family gathering. The potatoes are cooked until tender, then mashed to a silky consistency with the help of milk, butter, and roasted garlic. The result is a dish that’s both luscious and satisfying, with just the right amount of garlic to enhance the natural taste of the potatoes. Follow this simple recipe to create a delicious addition to your holiday spread.
Ingredients:
- 3 pounds of Yukon Gold potatoes, peeled and quartered
- 5 cloves of garlic, peeled
- 1 cup of whole milk
- 1/2 cup of unsalted butter
- Salt, to taste
- Freshly ground black pepper, to taste
- Fresh chives, chopped (optional, for garnish)
Instructions:
- Prepare the Potatoes: Place the peeled and quartered potatoes in a large pot. Add the peeled garlic cloves to the pot. Cover the potatoes and garlic with cold water, guaranteeing they’re fully submerged. Add a generous pinch of salt to the water.
- Cook the Potatoes: Bring the pot to a boil over medium-high heat. Once boiling, reduce the heat to medium-low and let the potatoes simmer for about 15-20 minutes, or until they’re fork-tender.
- Drain and Dry: Once the potatoes are tender, drain them and the garlic into a colander. Allow them to sit for a couple of minutes to steam dry, which helps achieve a creamier texture.
- Mash the Potatoes: Return the drained potatoes and garlic to the pot. Add the butter and start mashing with a potato masher until the mixture is mostly smooth.
- Incorporate Milk: Gently heat the milk in a small saucepan or microwave until warm, but not boiling. Gradually add the warm milk to the mashed potatoes, stirring continuously until you reach your desired creamy consistency.
- Season: Season the potatoes with salt and freshly ground black pepper to taste. Mix well to guarantee the seasoning is evenly distributed.
- Serve: Transfer the creamy garlic mashed potatoes to a serving bowl. If desired, garnish with freshly chopped chives for a pop of color and extra flavor.
Extra Tips:
For a smoother texture, you can use a potato ricer instead of a masher. If you prefer a stronger garlic flavor, consider roasting the garlic cloves before adding them to the potatoes. To do this, wrap the cloves in foil with a drizzle of olive oil and roast them in the oven at 400°F (200°C) for about 20-25 minutes, until soft and fragrant. Roasted garlic will add a deeper, sweeter flavor to the dish.
Additionally, consider warming your serving bowl before transferring the potatoes, as this will help keep them warmer for longer during your holiday meal.
Green Bean Casserole With Crispy Onions
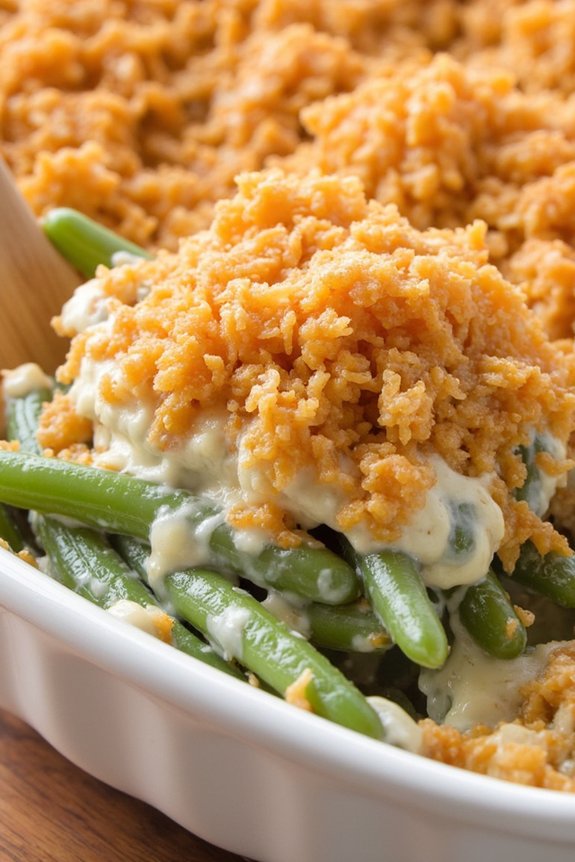
Green Bean Casserole with Crispy Onions is a beloved holiday classic that brings comfort and warmth to the dinner table. This dish combines tender green beans with a creamy, savory sauce and tops it all off with perfectly crispy fried onions for a delightful crunch.
It’s an essential side dish for any festive gathering, enticing both young and old with its rich flavors and textures. Perfect for serving 4-6 people, this recipe is both simple to make and a guaranteed crowd-pleaser.
The casserole isn’t only delicious but also incredibly easy to prepare ahead of time, making it an ideal option for holiday dinners when time is of the essence. Whether you’re hosting a large family gathering or a cozy dinner at home, this Green Bean Casserole with Crispy Onions will surely make your meal memorable.
Ingredients (Serves 4-6):
- 1 1/2 pounds fresh green beans, trimmed and cut into 1-inch pieces
- 2 tablespoons unsalted butter
- 1 small onion, finely chopped
- 2 cloves garlic, minced
- 1 can (10.5 ounces) condensed cream of mushroom soup
- 1/2 cup milk
- 1 teaspoon soy sauce
- Salt and pepper to taste
- 1 1/2 cups crispy fried onions (store-bought or homemade)
Instructions:
- Preheat and Prep: Preheat your oven to 350°F (175°C). Bring a large pot of salted water to a boil. Add the green beans and cook for 3-5 minutes until they’re bright green and just tender. Drain the beans and set them aside.
- Make the Sauce: In a large skillet over medium heat, melt the butter. Add the chopped onion and cook until translucent, about 5 minutes. Stir in the garlic and cook for an additional minute until fragrant.
- Combine Ingredients: Reduce the heat to low and stir in the cream of mushroom soup, milk, and soy sauce. Mix well and season with salt and pepper. Allow the mixture to simmer for 2-3 minutes.
- Assemble the Casserole: Add the cooked green beans to the skillet and stir to coat them evenly with the sauce. Transfer the mixture to a 9×13-inch baking dish, spreading it out evenly.
- Add the Topping: Sprinkle the crispy fried onions evenly over the top of the casserole.
- Bake: Place the casserole in the preheated oven and bake for 25-30 minutes, until the onions are golden brown and the sauce is bubbly.
- Serve: Remove from the oven and let it cool slightly before serving. Enjoy the casserole warm as a delightful side dish.
Extra Tips: To save time during the holiday rush, consider preparing the casserole up to the baking step the day before. Simply cover and refrigerate the assembled dish, then top with crispy onions and bake just before serving.
For added flavor, you can substitute half of the cream of mushroom soup with cream of chicken soup or add a dash of nutmeg to the sauce for a warm, aromatic twist. If you prefer a homemade touch, you can make your own crispy onions by thinly slicing onions, coating them in flour, and frying until golden.
Sweet Potato Casserole With Marshmallow Topping
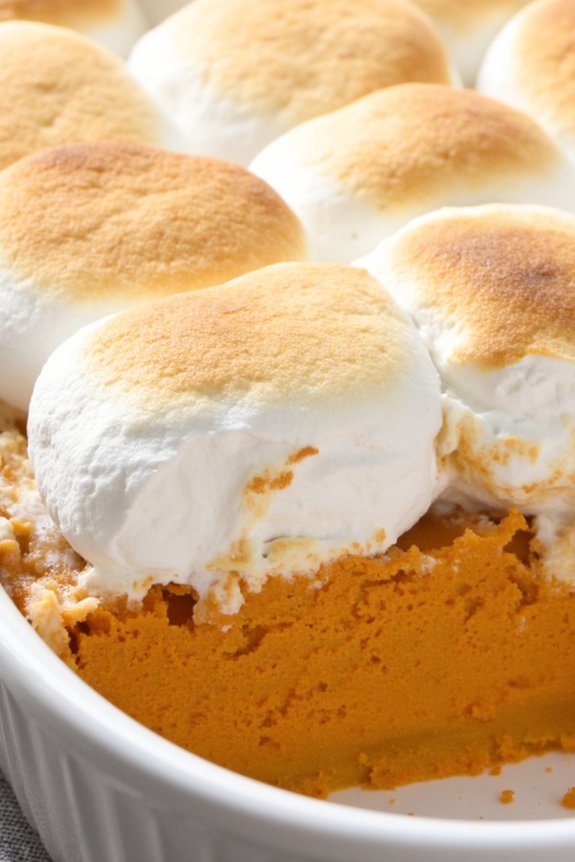
Sweet Potato Casserole With Marshmallow Topping is a classic holiday dish that brings warmth and sweetness to any festive table. This dish combines the rich, earthy flavors of sweet potatoes with a luscious, gooey marshmallow topping, creating a comforting side dish that pairs perfectly with roasted meats, fresh salads, and other holiday staples.
The creamy mashed sweet potatoes are subtly spiced and sweetened, providing a delightful contrast to the toasted marshmallow layer on top, which adds both texture and a touch of whimsy to the dish.
Perfect for a serving size of 4-6 people, this Sweet Potato Casserole is an easy yet impressive dish that can be prepared ahead of time, making it ideal for stress-free holiday entertaining. Whether you’re hosting a large gathering or a cozy family dinner, this recipe is sure to be a hit, delighting both kids and adults alike.
With simple ingredients and straightforward steps, even novice cooks can master this holiday favorite.
Ingredients (serving size: 4-6 people):
- 4 large sweet potatoes
- 1/2 cup unsalted butter
- 1/4 cup brown sugar
- 1/2 cup milk
- 1 teaspoon vanilla extract
- 1 teaspoon ground cinnamon
- 1/2 teaspoon ground nutmeg
- Pinch of salt
- 2 cups mini marshmallows
Cooking Instructions:
- Preheat the Oven: Begin by preheating your oven to 375°F (190°C) to guarantee it’s at the right temperature for baking the casserole.
- Prepare the Sweet Potatoes: Peel and chop the sweet potatoes into large chunks. Place them in a large pot, cover with water, and bring to a boil. Cook for about 15-20 minutes, or until they’re fork-tender.
- Mash the Sweet Potatoes: Drain the cooked sweet potatoes and transfer them to a large mixing bowl. Add the unsalted butter, brown sugar, milk, vanilla extract, cinnamon, nutmeg, and a pinch of salt. Use a potato masher or electric mixer to mash the ingredients together until smooth and creamy.
- Assemble the Casserole: Spoon the mashed sweet potato mixture into a lightly greased baking dish, spreading it evenly. Top with an even layer of mini marshmallows.
- Bake the Casserole: Place the dish in the preheated oven and bake for 20-25 minutes, or until the marshmallows are golden brown and starting to puff up.
- Cool and Serve: Remove the casserole from the oven and let it cool for a few minutes before serving. This will allow the marshmallows to set slightly, making it easier to serve.
Extra Tips: To save time, you can prepare the sweet potato mixture a day in advance and store it in the refrigerator. When ready to bake, simply top it with marshmallows and bake as directed.
For a twist on flavor, consider adding a pinch of ginger or a splash of orange juice to the sweet potato mixture. Additionally, if you prefer a less sweet topping, you can substitute part of the marshmallows with chopped pecans for added crunch and flavor.
Homemade Cranberry Sauce
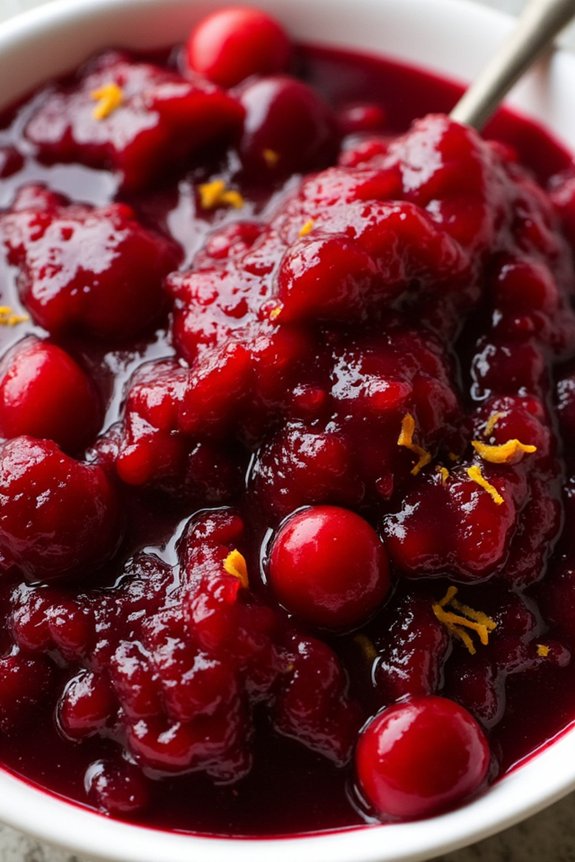
Homemade cranberry sauce is a delightful addition to any holiday family dinner. Its vibrant color and tangy flavor make it a perfect accompaniment to turkey, ham, or any other festive main dish. This recipe brings out the best in cranberries, balancing their natural tartness with the right amount of sweetness and a hint of spice.
With just a few simple ingredients, you can create a sauce that’s far superior to anything from a can. Making cranberry sauce from scratch isn’t only easy but also allows you to customize the flavors to suit your taste. Whether you prefer a classic cranberry sauce or one with additional spices or fruits, this recipe serves as a versatile base.
Plus, it can be made ahead of time, allowing you to focus on other dishes on the day of your gathering. This recipe yields enough sauce to serve 4-6 people, ensuring everyone gets a taste of this holiday staple.
Ingredients (Serves 4-6):
- 12 ounces fresh or frozen cranberries
- 1 cup granulated sugar
- 1 cup water
- 1 teaspoon orange zest
- 1/4 teaspoon ground cinnamon
- 1/4 teaspoon ground nutmeg
- 1 pinch of salt
Cooking Instructions:
- Prepare the Cranberries: Begin by rinsing 12 ounces of fresh or frozen cranberries under cold water. If using fresh cranberries, sort through them and discard any that are soft or damaged.
- Combine Ingredients: In a medium saucepan, combine 1 cup of granulated sugar and 1 cup of water. Stir until the sugar dissolves, creating a simple syrup.
- Add Cranberries and Flavorings: To the simple syrup, add the cranberries, 1 teaspoon of orange zest, 1/4 teaspoon of ground cinnamon, 1/4 teaspoon of ground nutmeg, and a pinch of salt. Stir the mixture well to combine all the ingredients.
- Cook the Sauce: Place the saucepan over medium-high heat and bring the mixture to a boil. Once it reaches a boil, reduce the heat to medium-low and let it simmer. Stir occasionally and allow the cranberries to burst and the sauce to thicken, which should take about 10-15 minutes.
- Cool and Store: Once the sauce has thickened to your desired consistency, remove it from the heat. Allow it to cool to room temperature. The sauce will continue to thicken as it cools. Transfer the cranberry sauce to a serving dish or airtight container and refrigerate until ready to serve.
Extra Tips:
For an added twist, consider incorporating additional ingredients such as chopped apples, pears, or a splash of brandy for a more complex flavor profile.
If you prefer a smoother sauce, you can use an immersion blender to blend it to your desired consistency after cooking. Remember that cranberry sauce can be made up to a week in advance and stored in the refrigerator, allowing the flavors to deepen and meld together beautifully.
Savory Sausage and Apple Stuffing
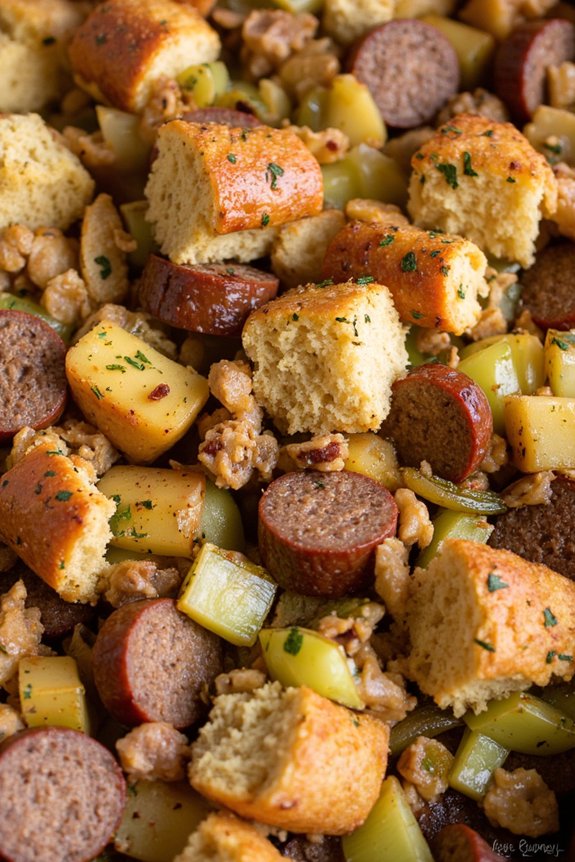
Savory Sausage and Apple Stuffing is a delightful addition to any holiday family dinner, blending the rich flavors of seasoned sausage with the sweet, crisp notes of apples. This dish isn’t only a classic favorite but also brings a unique twist to traditional stuffing recipes. The combination of herbs, succulent sausage, and juicy apples creates a flavorful balance that pairs wonderfully with roasted turkey, chicken, or pork dishes.
Designed to serve 4-6 people, this recipe is perfect for intimate gatherings or as a side dish to complement a larger spread. The stuffing is easy to prepare, making it a great choice for those who want to impress their guests without spending too much time in the kitchen. The following recipe will guide you through the process, guaranteeing a delicious and satisfying result every time.
Ingredients:
- 1 pound ground sausage
- 2 tablespoons unsalted butter
- 1 onion, finely chopped
- 2 celery stalks, finely chopped
- 2 apples, peeled, cored, and diced
- 1 tablespoon fresh sage, chopped
- 1 tablespoon fresh thyme, chopped
- 1/4 cup fresh parsley, chopped
- 1/2 teaspoon salt
- 1/4 teaspoon black pepper
- 8 cups cubed day-old bread
- 1 1/2 cups chicken or vegetable broth
- 2 large eggs, beaten
Instructions:
- Preheat the Oven: Start by preheating your oven to 350°F (175°C). This guarantees that the oven is at the right temperature when you’re ready to bake the stuffing.
- Cook the Sausage: In a large skillet over medium heat, cook the sausage until browned and fully cooked, breaking it into smaller pieces with a spatula as it cooks. Once done, transfer the sausage to a large mixing bowl, leaving the drippings in the skillet.
- Sauté Vegetables: In the same skillet, add the unsalted butter. Once melted, add the chopped onion and celery. Sauté for about 5 minutes or until the vegetables are softened and translucent.
- Add Apples and Herbs: Stir in the diced apples, fresh sage, thyme, parsley, salt, and pepper. Continue to cook for another 3-4 minutes until the apples start to soften and the herbs release their aroma.
- Combine Ingredients: Transfer the sautéed mixture into the large mixing bowl with the cooked sausage. Add the cubed bread to the bowl, gently combining the ingredients so that the bread absorbs the flavors.
- Moisten the Mixture: Pour the chicken or vegetable broth over the bread mixture, stirring well to make sure the liquid is evenly distributed. The bread should be moist but not soggy.
- Incorporate Eggs: Stir in the beaten eggs, which will help bind the stuffing together during baking.
- Bake the Stuffing: Transfer the mixture into a greased 9×13-inch baking dish, spreading it out evenly. Cover the dish with aluminum foil and bake in the preheated oven for 30 minutes. Remove the foil and bake for an additional 10-15 minutes, or until the top is golden brown and crispy.
Extra Tips:
To enhance the flavor, consider using a mix of different bread types, such as sourdough or whole grain. If you prefer a more pronounced apple flavor, opt for a tart variety like Granny Smith.
For a vegetarian version, simply omit the sausage and use vegetable broth. Preparing the stuffing a day ahead can also deepen the flavors, just be sure to refrigerate it and then bake it fresh before serving.
Baked Macaroni and Cheese
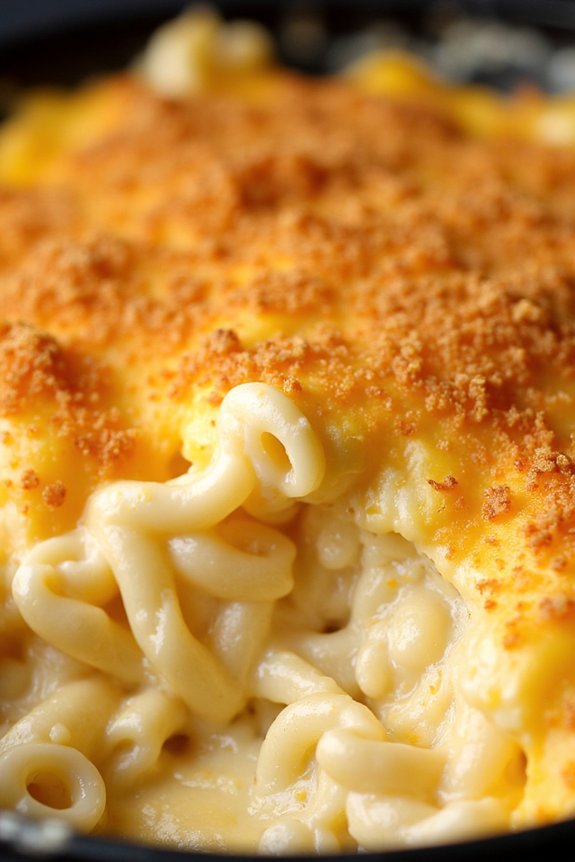
Baked Macaroni and Cheese is a classic comfort dish that has become a staple at holiday family dinners. Its creamy, cheesy goodness combined with a crispy golden top makes it a favorite among both kids and adults. This recipe is perfect for bringing everyone together around the table, sparking conversations and creating lasting memories.
The best part about this dish is its versatility; you can customize it with various types of cheese, seasonings, or even add-ins like bacon or vegetables to suit your family’s taste.
When crafting the perfect Baked Macaroni and Cheese, it’s important to focus on the balance of flavors and textures. The creaminess of the cheese sauce should complement the bite of the pasta and the crispiness of the topping. This recipe serves 4-6 people, making it an ideal size for a family gathering.
Whether you’re a seasoned cook or a beginner, this step-by-step guide will guarantee you create a delicious and satisfying dish that will be the highlight of your holiday meal.
Ingredients for 4-6 servings:
- 1 pound elbow macaroni
- 4 tablespoons unsalted butter
- 1/4 cup all-purpose flour
- 3 cups whole milk
- 2 cups shredded sharp cheddar cheese
- 1 cup shredded mozzarella cheese
- 1/2 teaspoon salt
- 1/2 teaspoon black pepper
- 1/4 teaspoon paprika
- 1/2 cup grated Parmesan cheese
- 1 cup panko breadcrumbs
Cooking Instructions:
- Preheat the Oven: Preheat your oven to 350°F (175°C). This will guarantee the oven is at the right temperature when you’re ready to bake the macaroni and cheese.
- Cook the Macaroni: Bring a large pot of salted water to a boil. Add the elbow macaroni and cook until al dente, about 8-10 minutes. Drain and set aside.
- Prepare the Cheese Sauce: In a large saucepan, melt the butter over medium heat. Stir in the flour and cook for about 1-2 minutes until the mixture is golden and bubbly. Gradually whisk in the milk, making sure there are no lumps, and bring to a simmer. Cook until the sauce thickens, about 3-5 minutes.
- Add Cheese and Seasonings: Remove the saucepan from heat. Stir in the cheddar and mozzarella cheeses until melted and smooth. Season with salt, black pepper, and paprika.
- Combine Macaroni and Cheese Sauce: Add the cooked macaroni to the cheese sauce, stirring until the pasta is evenly coated.
- Prepare for Baking: Transfer the macaroni and cheese mixture to a greased 9×13-inch baking dish. Sprinkle the Parmesan cheese evenly over the top, followed by the panko breadcrumbs for a crunchy topping.
- Bake: Place the baking dish in the preheated oven and bake for 25-30 minutes, or until the top is golden brown and the cheese is bubbly.
- Serve: Remove from the oven and let it cool slightly before serving. Enjoy your delicious Baked Macaroni and Cheese!
Extra Tips:
For an even richer flavor, consider using a combination of different cheeses such as Gruyère or fontina along with cheddar. Adding a pinch of nutmeg to the cheese sauce can also enhance the overall taste.
If you prefer a spicier kick, include a dash of cayenne pepper or hot sauce in the cheese sauce. For an added crunch, mix some melted butter with the panko breadcrumbs before sprinkling them on top.
Finally, remember that allowing the dish to rest for a few minutes after baking will make serving easier, as the cheese sauce will thicken slightly as it cools.
Garlic Butter Roasted Brussels Sprouts
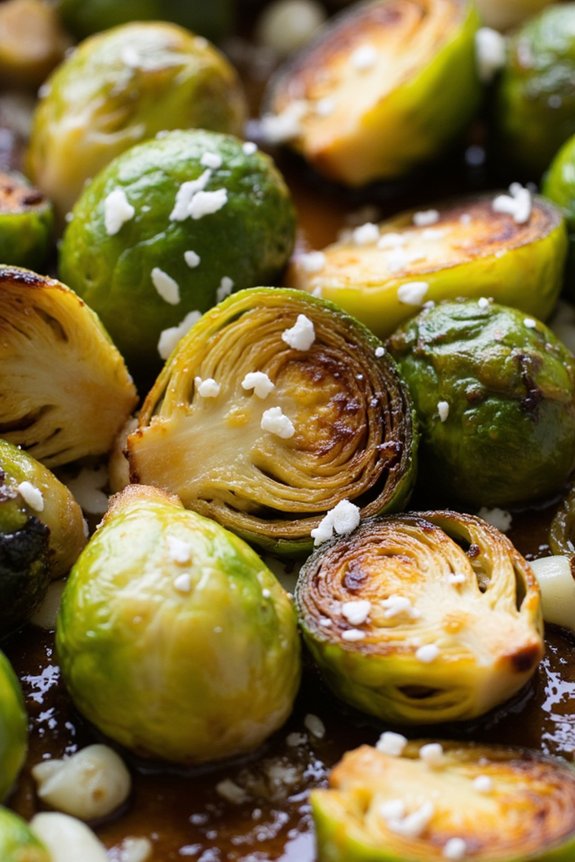
Garlic Butter Roasted Brussels Sprouts is a delightful side dish that adds a touch of elegance to any holiday family dinner. The natural earthiness of Brussels sprouts is elevated by the rich and savory flavors of garlic and butter, making it a perfect accompaniment to main courses like roasted turkey or ham.
This dish isn’t only incredibly simple to prepare but also tends to be a crowd-pleaser, even among those who are typically hesitant about Brussels sprouts. With just a few ingredients, you can transform these small, cabbage-like vegetables into a crispy and flavorful dish that will have your guests reaching for seconds.
The secret to perfect Garlic Butter Roasted Brussels Sprouts lies in achieving that ideal balance of crispiness on the outside and tenderness on the inside. Roasting them at a high temperature guarantees that they caramelize beautifully, while the addition of garlic butter infuses them with a rich, mouth-watering aroma.
This dish serves 4-6 people, making it an excellent option for larger gatherings. Whether you’re a seasoned chef or a novice in the kitchen, this easy-to-follow recipe will guide you through creating a memorable side dish for your holiday feast.
Ingredients (serves 4-6):
- 2 pounds Brussels sprouts
- 4 tablespoons unsalted butter
- 3 garlic cloves, minced
- 1 teaspoon salt
- 1/2 teaspoon freshly ground black pepper
- 1 tablespoon olive oil
- 1 tablespoon lemon juice
- Optional: grated Parmesan cheese for garnish
Cooking Instructions:
- Preheat the Oven: Start by preheating your oven to 425°F (220°C). This high temperature is essential for achieving a crispy exterior on the Brussels sprouts.
- Prepare the Brussels Sprouts: Rinse the Brussels sprouts under cold water and pat them dry with a kitchen towel. Trim the stems and remove any yellow or damaged outer leaves. Cut each Brussels sprout in half to guarantee they cook evenly.
- Make the Garlic Butter: In a small saucepan, melt the butter over medium heat. Once melted, add the minced garlic and cook for about 1-2 minutes until the garlic is fragrant but not browned. Remove from heat and set aside.
- Season the Sprouts: In a large mixing bowl, combine the halved Brussels sprouts, olive oil, salt, and pepper. Drizzle the prepared garlic butter over the top and toss everything together until the sprouts are evenly coated.
- Roast the Brussels Sprouts: Spread the Brussels sprouts in a single layer on a large baking sheet. Make sure they aren’t overcrowded, as this will prevent them from roasting properly. Place the baking sheet in the preheated oven and roast for 20-25 minutes, stirring halfway through, until they’re golden brown and crispy on the edges.
- Finish and Serve: Once roasted, remove the Brussels sprouts from the oven and transfer them to a serving dish. Drizzle with lemon juice for a touch of acidity and garnish with grated Parmesan cheese if desired. Serve immediately for the best texture.
Extra Tips:
To guarantee the Brussels sprouts roast evenly, it’s important not to overcrowd the baking sheet. If necessary, use two baking sheets to give them ample space.
Additionally, for added flavor, consider tossing the sprouts with a few red pepper flakes for a hint of heat or a splash of balsamic glaze for sweetness. When selecting Brussels sprouts, opt for ones that are similar in size to guarantee uniform cooking.
Finally, if you prefer a deeper caramelization, leave the sprouts in the oven for a few extra minutes, keeping a close eye to prevent burning.
Classic Beef Tenderloin With Red Wine Sauce

The Classic Beef Tenderloin with Red Wine Sauce is an elegant and delicious choice for a holiday family dinner. This dish combines the succulent flavors of tender beef with a rich and savory red wine sauce, creating a mouthwatering experience for everyone at the table.
Perfectly cooked beef tenderloin is the star of the show, with a sauce that’s infused with herbs and wine, adding a depth of flavor that perfectly complements the meat. Whether you’re hosting a formal dinner or a cozy family gathering, this dish is sure to impress your guests with its simplicity and sophistication.
Cooking beef tenderloin to perfection requires attention to detail and a few key ingredients. The meat should be tender and juicy, and the sauce should be rich without overpowering the delicate flavor of the beef. By following this recipe, you’ll learn how to achieve the perfect balance.
This dish serves 4-6 people, making it ideal for a small to medium-sized gathering. With the right preparation and execution, your Classic Beef Tenderloin with Red Wine Sauce will become a holiday favorite for years to come.
Ingredients:
- 2-3 pounds of beef tenderloin
- Salt and freshly ground black pepper
- 2 tablespoons olive oil
- 2 tablespoons unsalted butter
- 1 medium shallot, finely chopped
- 2 garlic cloves, minced
- 1 cup red wine (preferably a dry variety like Cabernet Sauvignon or Merlot)
- 1 cup beef stock
- 1 tablespoon fresh thyme leaves
- 1 tablespoon fresh rosemary, finely chopped
- 1 tablespoon Dijon mustard
- 1 tablespoon all-purpose flour
- 1 tablespoon cold butter, cubed
Cooking Instructions:
- Preheat Oven: Begin by preheating your oven to 400°F (200°C) to guarantee it’s ready for the beef tenderloin.
- Season the Beef: Generously season the beef tenderloin with salt and freshly ground black pepper on all sides. This will enhance the flavor of the meat.
- Sear the Beef: In a large oven-safe skillet, heat the olive oil and 2 tablespoons of butter over medium-high heat. Once hot, add the beef tenderloin and sear each side for about 3-4 minutes until a golden crust forms.
- Roast the Beef: Transfer the skillet with the seared beef to the preheated oven. Roast for approximately 20-25 minutes, or until the internal temperature reaches 130°F (54°C) for medium-rare. Adjust the time if you prefer a different doneness.
- Rest the Beef: Remove the beef from the oven and transfer it to a cutting board. Tent with foil and let it rest for about 15 minutes. This allows the juices to redistribute, guaranteeing a juicy tenderloin.
- Prepare the Sauce: While the beef rests, prepare the red wine sauce. In the same skillet, add the chopped shallot and minced garlic. Sauté over medium heat until shallots are translucent.
- Deglaze the Pan: Pour in the red wine, scraping the bottom of the skillet to release any browned bits. Let it simmer until the wine reduces by half.
- Add Stock and Herbs: Add the beef stock, thyme, rosemary, and Dijon mustard. Stir well and let it simmer for another 5-7 minutes until slightly thickened.
- Thicken the Sauce: In a small bowl, mix the flour with a tablespoon of cold water to form a slurry. Slowly whisk this into the sauce to thicken it. Simmer for an additional 2-3 minutes.
- Finish the Sauce: Remove the sauce from heat and stir in the cubed cold butter to give it a glossy finish. Season with salt and pepper to taste.
- Serve: Slice the rested beef tenderloin and generously spoon the red wine sauce over each serving. Serve immediately.
Extra Tips:
To guarantee your beef tenderloin is cooked to perfection, use a meat thermometer to check the internal temperature. Remember that the meat will continue to cook slightly as it rests, so aim for a few degrees below your desired doneness.
Additionally, choose a good quality dry red wine for the sauce, as this will greatly enhance the flavor. Finally, allow the beef to rest before slicing; this step is vital for retaining the meat’s natural juices.
Holiday Bread Rolls With Herb Butter
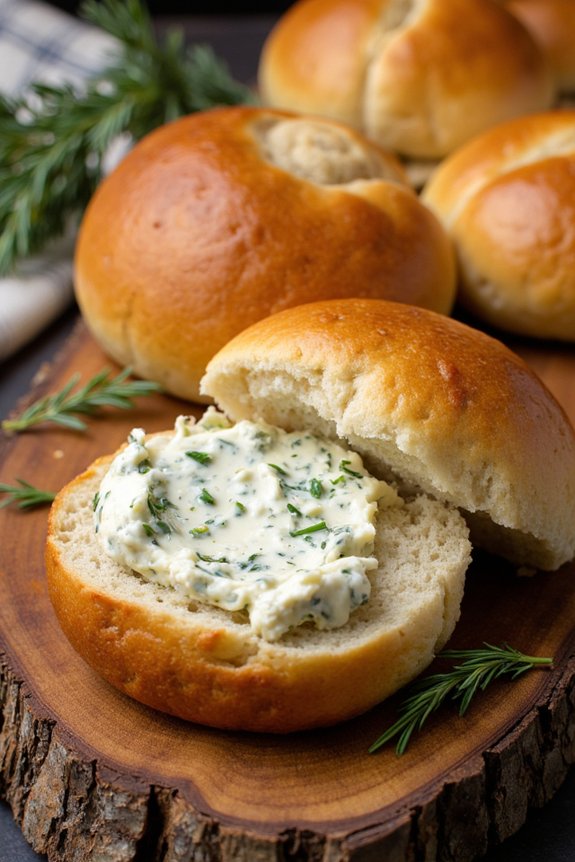
There’s nothing quite like the comforting aroma of freshly baked bread rolls wafting through the house during the holiday season. These Holiday Bread Rolls with Herb Butter are the perfect addition to your festive dinner table, adding a touch of homemade warmth and flavor.
Soft, fluffy, and infused with the rich taste of herbs, these rolls are guaranteed to be a hit with family and friends. Whether you’re serving them alongside a roast or using them to mop up delicious gravies and sauces, these rolls are a versatile and delightful treat.
The secret to these scrumptious rolls lies in the herb butter, which is made with a medley of fresh herbs that infuse the bread with a fragrant and savory taste. The butter is generously brushed on top of the rolls before baking, creating a golden-brown crust that’s irresistible.
Easy to make and even easier to eat, these rolls are a must-have for your holiday gatherings. Here’s how you can make a batch of 12 rolls, perfect for serving 4-6 people.
Ingredients:
- 4 cups all-purpose flour
- 2 ¼ teaspoons instant yeast
- 2 tablespoons sugar
- 1 teaspoon salt
- 1 cup warm milk (110°F/45°C)
- ¼ cup unsalted butter, melted
- 1 large egg
- ¼ cup unsalted butter, softened (for herb butter)
- 2 tablespoons chopped fresh parsley
- 1 tablespoon chopped fresh thyme
- 1 tablespoon chopped fresh rosemary
- 1 teaspoon garlic powder
Cooking Instructions:
- Prepare the Dough:
- In a large mixing bowl, combine the flour, instant yeast, sugar, and salt. Mix well to guarantee the dry ingredients are evenly distributed.
- Add the warm milk, melted butter, and egg to the dry ingredients. Stir until a soft dough begins to form.
- Knead the Dough:
- Transfer the dough to a lightly floured surface and knead it for about 8-10 minutes until it becomes smooth and elastic.
- First Rise:
- Place the dough in a greased bowl, cover it with a clean kitchen towel, and let it rise in a warm area for about 1 hour or until it doubles in size.
- Shape the Rolls:
- Punch down the risen dough to release the air. Divide the dough into 12 equal pieces and shape each piece into a ball.
- Second Rise:
- Arrange the dough balls on a greased baking sheet or in a baking dish, leaving some space between each ball. Cover and let them rise again for about 30 minutes until they puff up.
- Prepare Herb Butter:
- In a small bowl, mix the softened butter with chopped parsley, thyme, rosemary, and garlic powder until well combined.
- Bake the Rolls:
- Preheat your oven to 375°F (190°C). Before placing the rolls in the oven, brush them generously with the herb butter mixture.
- Bake for 15-20 minutes or until the rolls are golden brown and sound hollow when tapped on the bottom.
- Serve:
- Once baked, remove the rolls from the oven and brush them with any remaining herb butter. Serve warm.
Extra Tips:
For the best results, confirm your milk is at the right temperature (110°F/45°C) to activate the yeast without killing it.
If you don’t have fresh herbs, you can substitute with dried herbs, but remember that dried herbs are more potent, so use them sparingly.
Additionally, if you want to prepare these rolls ahead of time, you can freeze the shaped dough balls after the first rise. When ready to bake, let them thaw and rise before proceeding with the recipe.
Enjoy these rolls fresh out of the oven for the ultimate holiday experience!
Traditional Pumpkin Pie With Whipped Cream
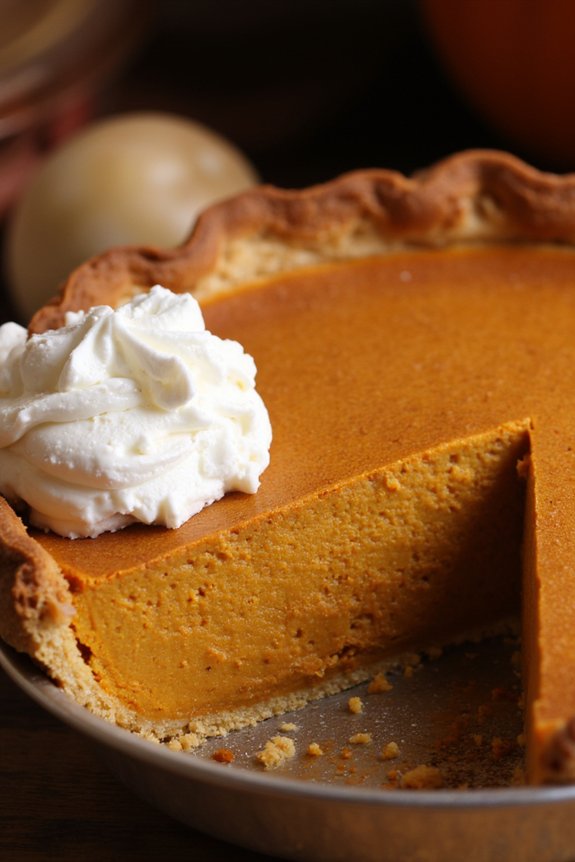
There’s nothing quite like a slice of traditional pumpkin pie to complete your holiday family dinner. Its creamy, spiced filling paired with a perfectly flaky crust makes it a favorite dessert for gatherings. The warm flavors of cinnamon, nutmeg, and cloves infuse each bite, while the whipped cream topping adds an airy and sweet contrast.
Whether you’re an experienced baker or new to the kitchen, this recipe is simple to follow and sure to impress your family and friends. This recipe serves 4-6 people, making it ideal for a small family gathering. The key to a perfect pumpkin pie is balancing the spices and ensuring the crust is golden and crisp.
With some basic ingredients you likely already have in your pantry, you can create a homemade pie that’s both delicious and satisfying. Follow the steps below to make this traditional treat the centerpiece of your holiday dessert table.
Ingredients:
- 1 9-inch pie crust (homemade or store-bought)
- 1 15-ounce can of pumpkin puree
- 3/4 cup packed brown sugar
- 2 large eggs
- 1 cup heavy cream
- 1 teaspoon ground cinnamon
- 1/2 teaspoon ground ginger
- 1/4 teaspoon ground nutmeg
- 1/4 teaspoon ground cloves
- 1/2 teaspoon salt
- 1 teaspoon vanilla extract
For the Whipped Cream:
- 1 cup heavy whipping cream
- 2 tablespoons granulated sugar
- 1 teaspoon vanilla extract
Instructions:
- Preheat and Prepare the Crust: Preheat your oven to 425°F (220°C). If using a homemade pie crust, roll it out and fit it into a 9-inch pie plate. Trim and crimp the edges as desired. Place the prepared crust in the refrigerator to chill while you prepare the filling.
- Make the Pumpkin Filling: In a large mixing bowl, combine the pumpkin puree, brown sugar, eggs, heavy cream, cinnamon, ginger, nutmeg, cloves, salt, and vanilla extract. Whisk the ingredients together until smooth and well mixed.
- Fill the Pie Crust: Pour the pumpkin filling into the chilled pie crust, spreading it evenly with a spatula.
- Bake the Pie: Place the pie on the center rack of the oven and bake for 15 minutes at 425°F (220°C). After 15 minutes, reduce the temperature to 350°F (175°C) and continue baking for 40-50 minutes or until a knife inserted near the center comes out clean. If the crust begins to brown too quickly, cover the edges with foil.
- Cool the Pie: Once baked, remove the pie from the oven and let it cool on a wire rack. The pie will continue to set as it cools. Allow it to reach room temperature before serving.
- Prepare the Whipped Cream: While the pie cools, make the whipped cream. In a chilled mixing bowl, combine the heavy whipping cream, granulated sugar, and vanilla extract. Use an electric mixer to beat the mixture on medium-high speed until soft peaks form.
- Serve: Once the pie has cooled, serve each slice with a generous dollop of whipped cream on top.
Extra Tips:
For an extra flavorful crust, consider brushing it with a beaten egg before baking to achieve a golden sheen. If you prefer a spicier pie, you can adjust the spice quantities to suit your taste.
Be sure to use pure pumpkin puree instead of pumpkin pie filling to control the flavor and sweetness. If you have leftovers, store the pie in the refrigerator for up to three days. Allow it to come to room temperature before serving again, or warm slices slightly in the oven if preferred.