

When I think of Christmas, the cozy image of family gathered around a table filled with traditional dishes always comes to mind. The aroma of a classic roast turkey with herb stuffing fills the air, while the sight of a honey-glazed ham with pineapple is simply irresistible. These recipes are more than just food; they are cherished memories in the making. Curious about the other festive delights that can grace your holiday table? Let’s explore some more.
Classic Roast Turkey With Herb Stuffing

The Classic Roast Turkey With Herb Stuffing is a quintessential centerpiece for a Christmas family dinner. It brings together the rich, savory flavors of a well-roasted turkey with the aromatic and comforting notes of an herb-infused stuffing. This dish not only fills the home with an irresistible aroma but also creates a festive atmosphere that brings family and friends together.
While the turkey remains the star of the show, the herb stuffing complements it perfectly, capturing the essence of a traditional holiday meal. Preparing this dish requires attention to detail and patience, allowing the flavors to meld and create a succulent and flavorful turkey with a moist stuffing. The recipe below is designed for a serving size of 4-6 people, guaranteeing everyone at the table gets a hearty portion.
With the right preparation and technique, your Classic Roast Turkey With Herb Stuffing will be a memorable addition to your Christmas dinner.
Ingredients for 4-6 people:
- 1 whole turkey (10-12 pounds)
- Salt and freshly ground black pepper
- 1/4 cup olive oil or melted butter
- 1 onion, quartered
- 2 carrots, halved
- 2 celery stalks, halved
- 4 sprigs of fresh thyme
- 4 sprigs of fresh rosemary
- 4 sprigs of fresh sage
- 1 lemon, halved
- 1 cup chicken broth
Herb Stuffing Ingredients:
- 1 loaf of day-old bread, cubed
- 1/4 cup unsalted butter
- 1 onion, chopped
- 2 celery stalks, chopped
- 1 tablespoon fresh thyme, chopped
- 1 tablespoon fresh rosemary, chopped
- 1 tablespoon fresh sage, chopped
- 1/2 teaspoon salt
- 1/2 teaspoon black pepper
- 1 1/2 cups chicken broth
- 2 large eggs, beaten
Cooking Instructions:
- Prepare the Turkey: Preheat your oven to 325°F (165°C). Remove the giblets from the turkey and pat it dry with paper towels. Season the cavity with salt and pepper. Stuff the cavity with the quartered onion, carrots, celery, thyme, rosemary, sage, and lemon halves.
- Season and Oil the Turkey: Rub the outside of the turkey with olive oil or melted butter, and season generously with salt and pepper. Truss the legs with kitchen string to guarantee even cooking.
- Roast the Turkey: Place the turkey on a rack in a roasting pan. Pour 1 cup of chicken broth into the bottom of the pan to keep the turkey moist. Roast the turkey in the preheated oven for approximately 3 to 3.5 hours, or until the internal temperature reaches 165°F (74°C) in the thickest part of the thigh.
- Prepare the Herb Stuffing: While the turkey is roasting, prepare the stuffing. In a large pan, melt the butter over medium heat. Add the chopped onion and celery, and sauté until softened. Stir in the thyme, rosemary, sage, salt, and pepper.
- Mix the Stuffing: In a large bowl, combine the sautéed vegetables with the cubed bread. Pour in the chicken broth and beaten eggs, and mix well until the bread is moistened.
- Bake the Stuffing: Transfer the stuffing mixture to a greased baking dish. Cover with foil and bake in the oven during the last 30-40 minutes of the turkey roasting time. Remove the foil for the last 10 minutes to allow the top to crisp.
- Rest and Serve: Once the turkey is done, let it rest for at least 20 minutes before carving. Serve the turkey slices alongside the herb stuffing.
Extra Tips: To guarantee your turkey is juicy and flavorful, baste it every 45 minutes with the pan juices. If the skin is browning too quickly, cover the breast with foil. Allowing the turkey to rest before carving helps the juices redistribute, resulting in tender, moist meat.
For the stuffing, using day-old bread ensures it absorbs the flavors well without becoming soggy. Adjust the seasoning of the stuffing to your taste, and feel free to add nuts or dried fruit for additional texture and flavor.
Honey-Glazed Ham With Pineapple
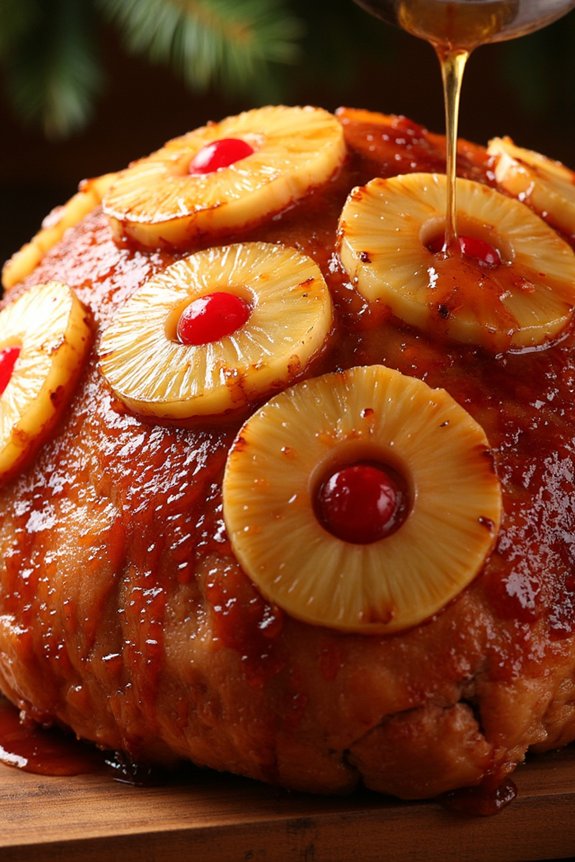
Celebrate this Christmas with a traditional Honey-Glazed Ham With Pineapple, a dish that brings warmth and festivity to your family dinner table. This succulent ham, coated in a golden, sweet glaze and topped with tangy pineapple slices, is sure to be a showstopper. Not only does it taste delicious, but it also fills your home with a mouthwatering aroma that embodies the spirit of the holidays.
This recipe is designed for a serving size of 4-6 people, making it perfect for a family gathering. The combination of honey and pineapple creates a delightful balance of sweetness and acidity, complementing the rich flavor of the ham. With a few simple ingredients and easy-to-follow steps, you can prepare a stunning centerpiece for your Christmas feast that your loved ones will remember.
Ingredients:
- 1 (4-5 pound) fully cooked bone-in ham
- 1 cup honey
- 1/2 cup brown sugar
- 1/4 cup Dijon mustard
- 1/2 teaspoon ground cloves
- 1/4 cup pineapple juice
- 1 (20-ounce) can pineapple slices in juice, drained
- Maraschino cherries (optional)
- Toothpicks
Cooking Instructions:
- Preheat the Oven: Start by preheating your oven to 325°F (165°C). This temperature will guarantee that the ham warms evenly and the glaze caramelizes beautifully.
- Prepare the Glaze: In a medium saucepan over medium heat, combine the honey, brown sugar, Dijon mustard, ground cloves, and pineapple juice. Stir the mixture until the sugar dissolves and the glaze becomes smooth. Let it simmer for about 5 minutes, then remove from heat.
- Prepare the Ham: Place the ham in a shallow roasting pan, cut side down. Using a sharp knife, score the surface of the ham in a diamond pattern, about 1/4-inch deep. This helps the glaze penetrate the meat.
- Apply the Glaze: Brush the ham generously with the prepared glaze, making sure it seeps into the scored cuts. Reserve some glaze for basting later.
- Decorate with Pineapple and Cherries: Arrange the pineapple slices over the ham, securing each with toothpicks. If desired, place a maraschino cherry in the center of each pineapple ring, securing them with additional toothpicks.
- Bake the Ham: Cover the ham loosely with aluminum foil and place it in the preheated oven. Bake for about 1.5 to 2 hours, basting with the reserved glaze every 30 minutes.
- Finish and Serve: Remove the foil during the last 30 minutes of baking to allow the glaze to caramelize and the edges to brown slightly. Once done, remove the ham from the oven and let it rest for about 15 minutes before slicing and serving.
Extra Tips:
For best results, make sure that the ham is at room temperature before you begin glazing and baking it. This allows the ham to heat more evenly.
If the glaze begins to burn or caramelize too quickly, you can tent the ham with foil to prevent it from getting too dark.
Leftovers can be stored in the refrigerator for up to five days or frozen for later use. The sweet and tangy flavors make for fantastic sandwiches or can be added to a hearty soup. Enjoy this classic dish as the centerpiece of your holiday table!
Prime Rib With Garlic and Rosemary

Indulge in the festive spirit with a mouthwatering Prime Rib With Garlic and Rosemary, a show-stopping centerpiece for your Christmas family dinner. This dish promises to impress with its juicy, tender meat seasoned to perfection with aromatic garlic and rosemary. The prime rib, also known as standing rib roast, is a choice cut that embodies both elegance and flavor, making it an ideal choice for those special holiday gatherings.
In this recipe, the rich flavors of the prime rib are enhanced by a simple yet effective seasoning blend of garlic, rosemary, salt, and pepper, creating a savory crust that seals in the juices as it roasts to perfection. Whether you’re hosting a small gathering or a larger family feast, this recipe is designed to serve 4-6 people, guaranteeing everyone has a generous portion to savor. Follow the steps below to create an unforgettable dining experience.
Ingredients:
- 1 (4-5 pound) prime rib roast
- 4 cloves of garlic, minced
- 2 tablespoons fresh rosemary, chopped
- 2 tablespoons olive oil
- 1 tablespoon kosher salt
- 1 teaspoon black pepper
Cooking Instructions:
- Prepare the Prime Rib: Remove the prime rib from the refrigerator at least 2 hours before cooking to allow it to come to room temperature. This guarantees even cooking.
- Preheat the Oven: Preheat your oven to 450°F (232°C).
- Season the Roast: In a small bowl, combine the minced garlic, chopped rosemary, olive oil, kosher salt, and black pepper, mixing until a paste forms. Rub this mixture all over the surface of the prime rib, making sure it’s evenly coated.
- Roast the Prime Rib: Place the prime rib on a rack in a roasting pan, bone-side down. Insert an oven-safe meat thermometer into the thickest part of the roast, away from bone or fat. Roast in the preheated oven for 20 minutes, then reduce the oven temperature to 325°F (163°C).
- Monitor the Temperature: Continue roasting until the internal temperature reaches 120°F (49°C) for rare or 130°F (54°C) for medium-rare, approximately 1.5 to 2 hours. Remember that the temperature will continue to rise slightly as it rests.
- Rest the Meat: Remove the roast from the oven and tent it with foil. Allow it to rest for at least 20 minutes before carving. This resting period lets the juices redistribute throughout the meat, ensuring every slice is juicy and flavorful.
- Carve and Serve: Carve the prime rib into thick slices and serve immediately. Garnish with additional rosemary sprigs if desired.
Extra Tips:
For the best results, make sure your meat thermometer is accurate, as this is essential for determining the doneness of the roast. If you prefer a crustier exterior, consider searing the roast briefly on all sides in a hot pan before roasting. This step can add another depth of flavor and enhance the texture.
Additionally, while fresh rosemary is recommended, dried rosemary can be used in a pinch, though you should reduce the quantity to avoid overpowering the dish. Enjoy your Prime Rib With Garlic and Rosemary as the centerpiece of your Christmas family dinner, accompanied by your favorite sides.
Cranberry Sauce With Orange Zest

Cranberry sauce is a classic staple for any Christmas family dinner, providing a vibrant burst of color and a delightful balance of tart and sweet flavors. This homemade version with a hint of orange zest not only enhances the traditional taste but also adds a rejuvenating citrus note that complements the richness of the main dishes.
Making cranberry sauce from scratch is surprisingly easy and allows you to control the level of sweetness to suit your preference, ensuring that it perfectly complements your festive spread.
This recipe is designed to serve 4-6 people, making it an ideal accompaniment for a small family gathering. The combination of fresh cranberries, sugar, and orange zest creates a sauce that’s both tangy and aromatic, elevating your holiday meal to a new level of deliciousness.
Whether served warm or chilled, this cranberry sauce will surely become a new holiday favorite for its simplicity and burst of flavors.
Ingredients:
- 12 ounces (340 grams) fresh cranberries
- 1 cup granulated sugar
- 1 cup water
- 1 tablespoon orange zest
- 1/4 teaspoon ground cinnamon (optional)
- Pinch of salt
Instructions:
- Prepare the Ingredients: Rinse the cranberries thoroughly under cold water, discarding any that are bruised or damaged. Measure out the sugar, water, and zest the orange to gather all ingredients before beginning the cooking process.
- Combine and Heat: In a medium-sized saucepan, combine the cranberries, granulated sugar, and water. Stir to mix the ingredients evenly. Place the saucepan over medium-high heat and bring the mixture to a boil.
- Simmer the Sauce: Once boiling, reduce the heat to medium-low. Add the orange zest, cinnamon (if using), and a pinch of salt. Stir the mixture occasionally and let it simmer for about 10-15 minutes, or until the cranberries start to burst and the sauce begins to thicken.
- Check Consistency: As the cranberries cook, they’ll release their natural pectin, helping the sauce to thicken. If you prefer a smoother sauce, you can use a wooden spoon or a potato masher to break down the cranberries further.
- Cool and Serve: Once the sauce has reached your desired thickness, remove it from the heat. Allow the sauce to cool slightly, as it will continue to thicken as it cools. Serve warm or transfer to a container and chill in the refrigerator until ready to serve.
Extra Tips:
For a more robust flavor, try adding a splash of orange juice along with the water during the cooking process, which will enhance the citrus notes of the sauce.
If you prefer your sauce less sweet, start with 3/4 cup of sugar and adjust to taste. For an added texture and flavor, consider stirring in a handful of chopped nuts or dried fruits like raisins or currants just before serving.
This cranberry sauce can be made a day ahead of time and stored in the refrigerator, allowing the flavors to meld beautifully before serving.
Creamy Mashed Potatoes
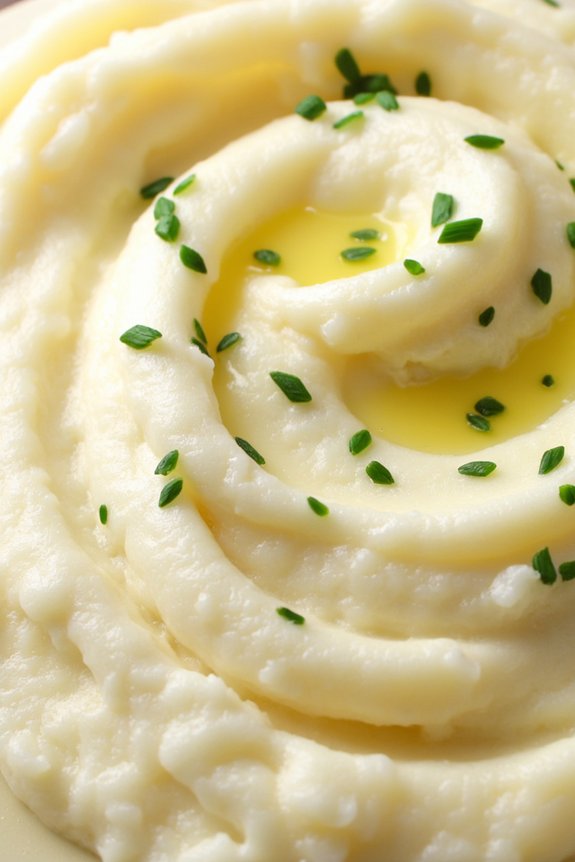
Creamy mashed potatoes are a classic side dish that perfectly complements any Christmas family dinner. Rich, buttery, and smooth, they’re adored by both kids and adults alike. This recipe will guide you through creating the fluffiest, most delicious mashed potatoes, guaranteeing they become a treasured part of your holiday tradition.
Whether paired with turkey, ham, or roast beef, these mashed potatoes will add a touch of comfort and indulgence to your festive spread.
The secret to achieving creamy mashed potatoes lies in the choice of potato and the addition of just the right amount of cream and butter. Russet or Yukon Gold potatoes are ideal for their high starch content, which results in a creamy texture when cooked and mashed.
By carefully following the instructions below, you’ll be able to serve a batch of mashed potatoes that are the perfect accompaniment to your Christmas feast, delighting your guests and family members.
Ingredients (serves 4-6):
- 2 pounds of Russet or Yukon Gold potatoes
- 1/2 cup of unsalted butter
- 1 cup of heavy cream
- Salt to taste
- Black pepper to taste
- Optional: 2 cloves of garlic, minced
- Optional: Fresh chives or parsley for garnish
Cooking Instructions:
- Prepare the Potatoes: Peel and cut the potatoes into evenly-sized chunks, about 1 to 2 inches. This guarantees they cook evenly.
- Boil the Potatoes: Place the potato chunks into a large pot and cover them with cold water. Add a pinch of salt to the water. Bring to a boil over medium-high heat, then reduce to a simmer. Cook until the potatoes are very tender and can be easily pierced with a fork, approximately 15-20 minutes.
- Drain and Dry: Once cooked, drain the potatoes thoroughly in a colander. Return them to the pot over low heat to evaporate any excess moisture, shaking the pot slightly for about 1 minute.
- Mash the Potatoes: Use a potato masher or a ricer to mash the potatoes until smooth. Avoid over-mashing, as this can make the potatoes gluey.
- Add Cream and Butter: In a small saucepan, heat the butter and heavy cream over low heat until the butter is melted. Gradually add this mixture to the mashed potatoes, stirring gently to combine. Mix until the potatoes are creamy and smooth.
- Season: Season the mashed potatoes with salt and black pepper to taste. If using, stir in the minced garlic for additional flavor.
- Serve: Transfer the creamy mashed potatoes to a serving dish. Garnish with fresh chives or parsley if desired. Serve immediately while hot.
Extra Tips:
For the best texture, guarantee that the potatoes are completely dry before mashing. Using a ricer instead of a masher can yield a smoother consistency.
If you prefer a more garlicky flavor, you can add roasted garlic instead of raw minced garlic. To keep your mashed potatoes warm until serving, place the pot in a larger pan filled with simmering water, or use a slow cooker on the warm setting.
Adjust the amount of cream and butter to suit your preference for creaminess and richness.
Green Bean Casserole With Crispy Onions
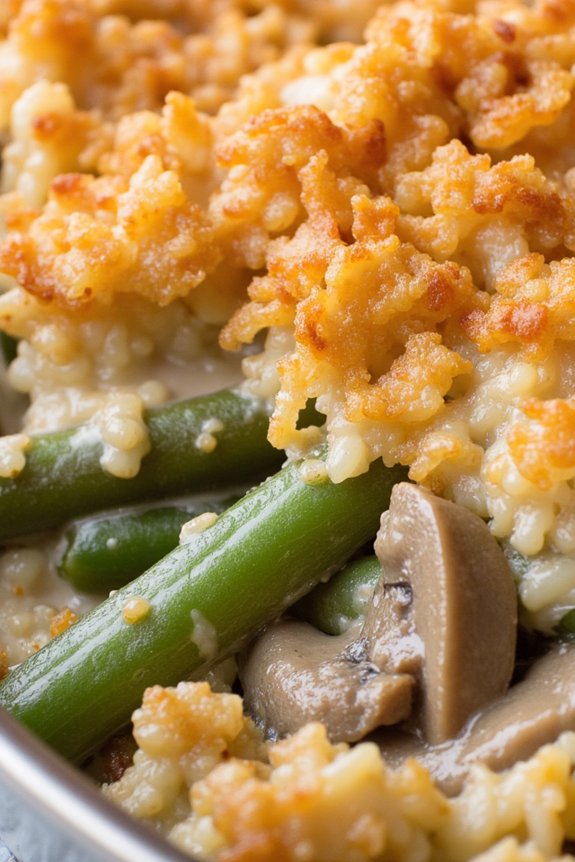
Green Bean Casserole With Crispy Onions is a classic dish that perfectly complements any Christmas family dinner. This delightful casserole combines tender green beans with a creamy mushroom sauce, all topped with crispy fried onions that add a satisfying crunch to every bite.
It’s a comforting and flavorful side dish that pairs wonderfully with roasted meats and other festive dishes, making it a beloved addition to holiday tables.
This recipe is designed to serve 4-6 people, making it ideal for family gatherings. The key to a successful Green Bean Casserole With Crispy Onions is the balance of textures and flavors. The creamy sauce should coat the green beans evenly, while the crispy onions provide a delightful contrast. By following these steps, you’ll create a dish that everyone will enjoy and remember.
Ingredients:
- 1 pound fresh green beans, trimmed and halved
- 1 can (10.5 ounces) condensed cream of mushroom soup
- 1/2 cup milk
- 1 teaspoon soy sauce
- 1/4 teaspoon black pepper
- 1 1/3 cups French fried onions
- Salt to taste
Cooking Instructions:
- Preheat the Oven: Begin by preheating your oven to 350°F (175°C). This guarantees it’s at the right temperature by the time your casserole is ready to bake.
- Prepare the Green Beans: Bring a large pot of salted water to a boil. Add the trimmed and halved green beans and cook for about 5 minutes until they’re tender-crisp. Drain the beans and set them aside.
- Make the Mushroom Sauce: In a large mixing bowl, combine the condensed cream of mushroom soup, milk, soy sauce, and black pepper. Stir until the mixture is smooth and well combined.
- Assemble the Casserole: Add the cooked green beans to the mushroom sauce and mix until the beans are evenly coated. Pour the mixture into a 1 1/2-quart baking dish, spreading it out evenly.
- Add Crispy Onions: Sprinkle 2/3 cup of the French fried onions over the top of the casserole, reserving the remaining onions for later.
- Bake the Casserole: Place the baking dish in the preheated oven and bake for 25 minutes. The sauce should be bubbling and the top lightly browned.
- Add More Onions: Remove the casserole from the oven and give it a gentle stir. Sprinkle the remaining French fried onions over the top.
- Final Bake: Return the casserole to the oven for an additional 5 minutes or until the onions are golden brown.
Extra Tips:
For the best results, use fresh green beans instead of canned or frozen ones to achieve the ideal texture.
Make sure not to overcook the beans during the initial boiling step, as they’ll continue to cook in the oven. If you prefer a richer flavor, consider adding a pinch of garlic powder or a few dashes of Worcestershire sauce to the mushroom mixture.
For an extra crispy topping, you can lightly toast the fried onions in a dry pan before adding them to the casserole. Enjoy this delicious, festive side dish with your loved ones!
Roasted Brussels Sprouts With Bacon
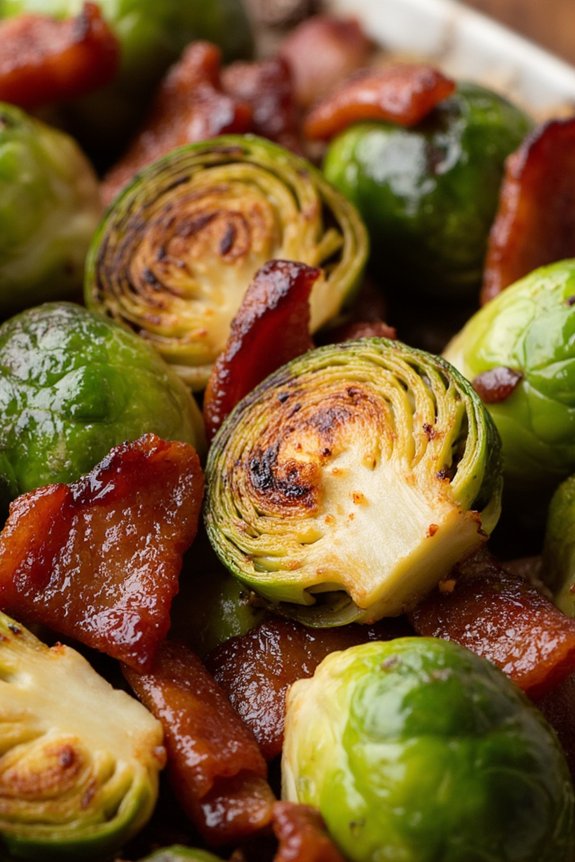
Roasted Brussels Sprouts With Bacon is a delightful side dish that combines the earthy flavor of Brussels sprouts with the savory goodness of crispy bacon. This dish is perfect for a Christmas family dinner, adding a touch of elegance and warmth to your holiday table. The natural bitterness of the Brussels sprouts is beautifully complemented by the smokiness of the bacon, creating a harmonious blend of flavors that even the pickiest of eaters will enjoy.
Whether you’re a seasoned chef or a beginner in the kitchen, this recipe is simple to follow and yields impressive results. The key to refining this dish lies in achieving the right balance between the crispy texture and the caramelized flavor of the Brussels sprouts. Roasting them at a high temperature guarantees that they’re cooked evenly and develop a delightful golden-brown crust.
The addition of bacon not only enhances the taste but also infuses the sprouts with its flavorful oils, making each bite a savory delight. Served hot and fresh out of the oven, Roasted Brussels Sprouts With Bacon is sure to become a favorite holiday tradition in your household.
Ingredients (serving size: 4-6 people):
- 1 1/2 pounds Brussels sprouts
- 6 slices of bacon
- 2 tablespoons olive oil
- 1 teaspoon kosher salt
- 1/2 teaspoon freshly ground black pepper
- 1 tablespoon balsamic vinegar (optional)
Cooking Instructions:
- Preheat the Oven: Begin by preheating your oven to 400°F (200°C). This temperature guarantees that the Brussels sprouts will roast evenly and develop a crispy exterior.
- Prepare the Brussels Sprouts: Wash the Brussels sprouts thoroughly, then trim the ends and remove any yellow or damaged outer leaves. Cut each sprout in half lengthwise for ideal roasting.
- Cook the Bacon: In a medium skillet, cook the bacon over medium heat until it’s crispy, about 5-7 minutes. Once cooked, transfer the bacon to a paper towel-lined plate to drain excess grease. Reserve about 1 tablespoon of the bacon grease in the skillet.
- Toss the Brussels Sprouts: In a large bowl, combine the halved Brussels sprouts, olive oil, salt, and pepper. Add the bacon grease from the skillet and toss the sprouts until they’re evenly coated.
- Arrange on a Baking Sheet: Spread the Brussels sprouts in a single layer on a large baking sheet. This guarantees that they roast evenly without steaming.
- Roast the Brussels Sprouts: Place the baking sheet in the preheated oven and roast for 20-25 minutes, stirring halfway through. You want the Brussels sprouts to be tender inside and caramelized on the outside.
- Finish with Bacon and Balsamic (optional): Remove the baking sheet from the oven, and sprinkle the crispy bacon pieces over the roasted Brussels sprouts. If desired, drizzle with balsamic vinegar for an extra layer of flavor.
- Serve Immediately: Transfer the Brussels sprouts to a serving dish and enjoy them hot as a delicious side dish.
Extra Tips:
For the best results, make sure not to overcrowd the baking sheet. Brussels sprouts need space to roast properly and develop a crispy texture. If necessary, use two baking sheets to guarantee even cooking.
Additionally, if you prefer a touch of sweetness to balance the savory flavors, consider adding a tablespoon of maple syrup or honey when you toss the Brussels sprouts with the olive oil and bacon grease. This dish is versatile and can be customized to your taste, making it a perfect addition to any festive meal.
Yorkshire Pudding With Beef Drippings
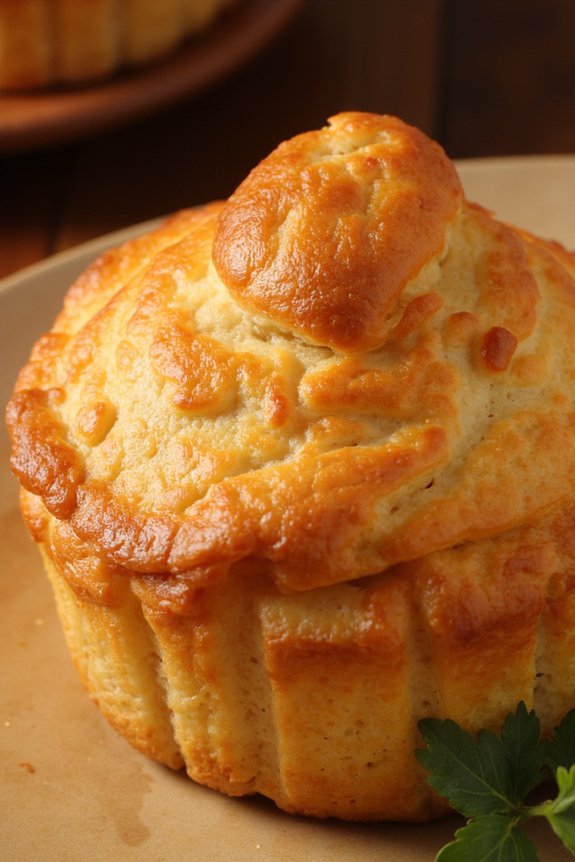
Yorkshire Pudding with Beef Drippings is a classic British side dish that pairs perfectly with roast beef and other hearty meals. Known for its crispy exterior and soft, airy interior, this pudding is traditionally made with beef drippings, which give it a rich, savory flavor.
The secret to a successful Yorkshire pudding lies in creating a batter with the right consistency and baking it at a high temperature to achieve the perfect rise and texture.
This recipe is designed to serve 4-6 people and is ideal for a special Christmas family dinner. While Yorkshire pudding is often associated with roast beef, it can complement a variety of main courses, making it a versatile addition to your holiday feast.
With the right ingredients and techniques, you can create a delicious, golden-brown Yorkshire pudding that will impress your guests and become a beloved part of your festive meal.
Ingredients:
- 1 cup all-purpose flour
- 1 cup whole milk
- 3 large eggs
- 1/2 teaspoon salt
- 1/4 cup beef drippings
Instructions:
1. Preheat the Oven: Begin by preheating your oven to 450°F (230°C). A very hot oven is vital for getting the right rise and texture for your Yorkshire pudding.
2. Make the Batter: In a mixing bowl, whisk together the flour, milk, eggs, and salt until the mixture is smooth and free of lumps. The batter should have a consistency similar to heavy cream. Let it rest at room temperature for about 30 minutes to allow the gluten to relax.
3. Heat the Drippings: Pour the beef drippings into a 12-cup muffin tin or a 9×13-inch baking dish, distributing evenly. Place the tin or dish in the oven and heat until the drippings are smoking hot, about 5-7 minutes.
4. Cook the Pudding: Carefully remove the hot tin or dish from the oven and quickly pour the batter into the drippings, filling each cup or the baking dish about halfway. The sizzling of the batter hitting the hot drippings is essential for the rise. Return to the oven and bake for 20-25 minutes, or until the puddings are puffed up and golden brown.
Don’t open the oven door during baking, as this can cause the puddings to deflate.
5. Serve Immediately: Once baked, serve the Yorkshire pudding immediately, as it’s best enjoyed fresh and crisp.
Extra Tips:
For the best results, make sure your ingredients are at room temperature before you begin. This helps the batter come together smoothly and aids in achieving the right rise.
If beef drippings are unavailable, you can substitute with a high smoke-point oil, such as vegetable or canola oil, but the traditional beef flavor will be missing.
Also, resist the temptation to open the oven door while the puddings are cooking; the sudden drop in temperature can cause them to collapse.
Enjoy your Yorkshire Pudding with Beef Drippings as a delightful accompaniment to your Christmas dinner.
Sweet Potato Casserole With Marshmallows
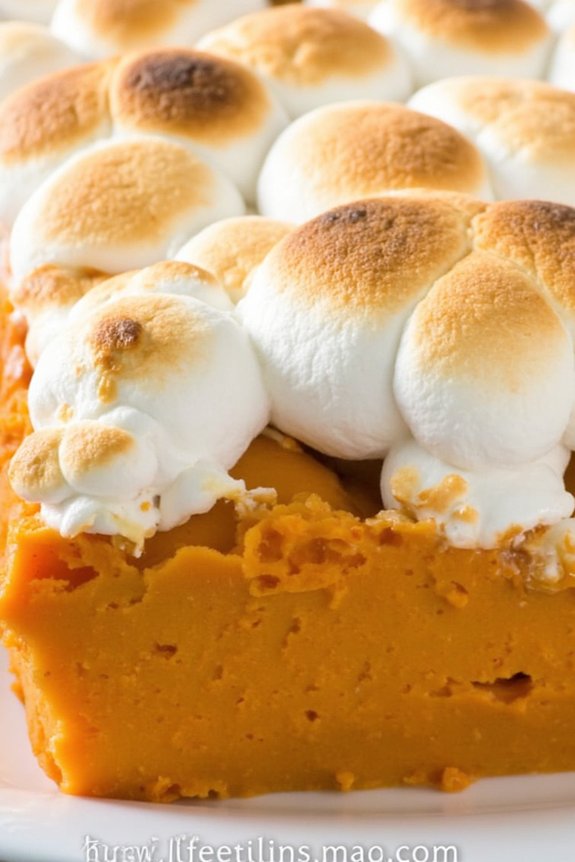
Sweet Potato Casserole With Marshmallows is a timeless classic that makes an appearance on many holiday tables. This dish is the perfect combination of savory and sweet, offering a comforting side that beautifully complements any Christmas dinner spread. The creamy texture of the sweet potatoes, enhanced with warm spices and topped with gooey marshmallows, creates a delightful experience for your taste buds.
Whether you’re hosting a large family gathering or a more intimate dinner, this casserole is sure to be a crowd-pleaser. This recipe isn’t only delicious but also relatively easy to prepare, making it an excellent choice for both novice and experienced cooks. It requires minimal ingredients and can be assembled ahead of time, allowing you to focus on other aspects of your holiday meal.
The sweet potato casserole can be served as a side dish for 4-6 people, making it ideal for a family dinner. Follow the instructions below to create this delectable dish that will surely become a staple in your holiday traditions.
Ingredients for 4-6 servings:
- 4 large sweet potatoes
- 1/2 cup brown sugar
- 1/4 cup unsalted butter, melted
- 1/2 cup milk
- 1 teaspoon vanilla extract
- 1/2 teaspoon ground cinnamon
- 1/4 teaspoon ground nutmeg
- 1/4 teaspoon salt
- 1 cup mini marshmallows
Cooking Instructions:
- Prepare the Sweet Potatoes: Begin by preheating your oven to 350°F (175°C). Peel the sweet potatoes and cut them into large chunks. Place the chunks in a large pot and cover them with water. Bring the water to a boil and cook the sweet potatoes for about 15-20 minutes, or until they’re fork-tender.
- Mash the Sweet Potatoes: Drain the cooked sweet potatoes and transfer them to a large mixing bowl. Use a potato masher or electric mixer to mash the sweet potatoes until smooth.
- Mix the Ingredients: Add the brown sugar, melted butter, milk, vanilla extract, ground cinnamon, ground nutmeg, and salt to the mashed sweet potatoes. Mix well until all ingredients are fully combined and the mixture is creamy.
- Transfer to Baking Dish: Lightly grease a 9×13 inch baking dish. Spread the sweet potato mixture evenly into the dish, smoothing the top with a spatula.
- Add the Marshmallows: Sprinkle the mini marshmallows evenly over the top of the sweet potato mixture, ensuring they cover the entire surface.
- Bake the Casserole: Place the baking dish in the preheated oven and bake for 20-25 minutes, or until the marshmallows are golden brown and slightly puffed.
- Serve and Enjoy: Remove from the oven and let the casserole cool for a few minutes before serving. Enjoy the delicious combination of flavors and textures.
Extra Tips:
To save time on the day of your Christmas dinner, you can prepare the sweet potato mixture a day in advance. Simply cover the baking dish with plastic wrap and store it in the refrigerator. When you’re ready to bake, remove the plastic wrap, add the marshmallows, and bake as instructed.
Additionally, for a crunchy twist, you can sprinkle chopped pecans over the marshmallows before baking. This adds a lovely texture contrast to the creamy sweet potatoes and gooey marshmallows.
Homemade Gravy From Pan Drippings
Homemade Gravy From Pan Drippings is the perfect accompaniment to your Christmas family dinner, adding rich, savory flavor to your meal. This recipe utilizes the flavorful drippings from your roasted meats, such as turkey or beef, to create a silky, delicious gravy that perfectly complements your holiday feast.
Whether you’re a seasoned cook or a beginner, this recipe is straightforward and results in a delightful addition to your Christmas spread. Gravy made from pan drippings not only enhances the flavors of your main dish but also brings a sense of tradition and comfort to the table.
By using the natural juices and fats rendered during roasting, you capture the essence of the meat, which is then transformed into a luscious gravy. This technique guarantees that your gravy is packed with flavor and the perfect consistency, making it a must-have for your holiday menu.
Ingredients (Serves 4-6):
- 1/4 cup of pan drippings
- 1/4 cup all-purpose flour
- 2 cups of chicken, beef, or turkey stock
- Salt, to taste
- Black pepper, to taste
- Optional: one tablespoon of butter for extra richness
Instructions:
- Collect the Drippings: Once your meat is done roasting, carefully pour the pan drippings into a measuring cup. Allow the drippings to sit for a few minutes so the fat rises to the top. Skim off the excess fat, leaving about 1/4 cup of drippings.
- Create a Roux: In a medium saucepan over medium heat, add the 1/4 cup of drippings. Sprinkle the flour over the drippings and whisk continuously to form a smooth paste. Cook the roux for about 2-3 minutes, or until it turns a light brown color, which indicates that the raw flour taste has cooked out.
- Add the Stock: Gradually whisk in the stock of your choice (chicken, beef, or turkey) into the roux. Continue whisking to make sure there are no lumps. Bring the mixture to a simmer and allow it to cook for about 5-7 minutes, or until the gravy thickens to your desired consistency.
- Season and Serve: Season the gravy with salt and black pepper to taste. If you prefer a richer gravy, stir in a tablespoon of butter until melted. Once seasoned, remove the gravy from the heat and serve it warm alongside your Christmas dinner.
Extra Tips:
When making gravy, it’s important to whisk continuously to prevent lumps from forming. If your gravy does become lumpy, you can strain it through a fine-mesh sieve for a smoother texture.
Additionally, taste your gravy before adding salt, as the drippings and stock may already provide enough seasoning. For a more complex flavor, consider adding a splash of white wine or a pinch of herbs like thyme or sage during the simmering process.
Enjoy your homemade gravy as it brings warmth and flavor to your Christmas meal!
Baked Macaroni and Cheese
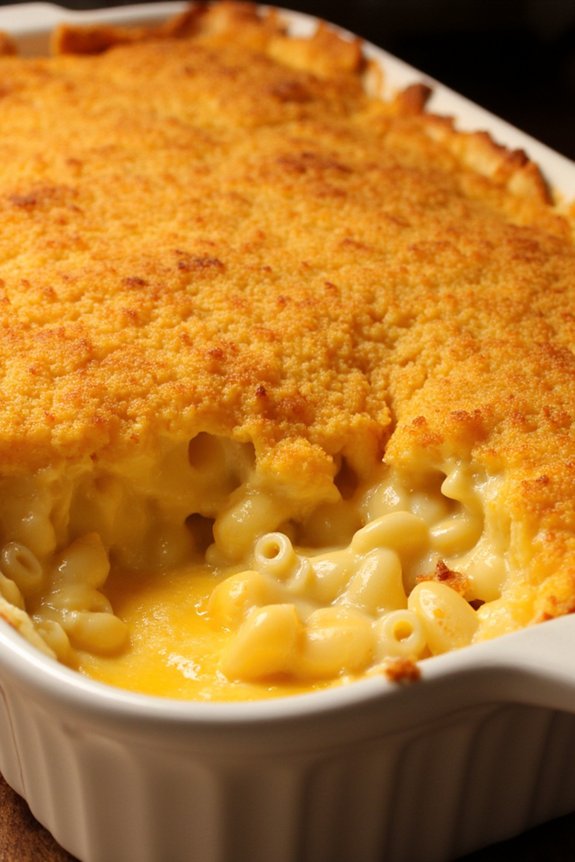
There’s something incredibly comforting about a warm, gooey dish of Baked Macaroni and Cheese, especially during the holiday season. This classic dish is a staple at Christmas family dinners, bringing together rich flavors and creamy textures that everyone loves.
The combination of melted cheese and perfectly cooked pasta, baked to a golden brown crust, makes this dish irresistible. It’s not only a satisfying main course but also a delightful side dish that pairs well with your holiday favorites.
The beauty of this baked macaroni and cheese recipe lies in its simplicity and the ability to customize it according to your taste. Whether you prefer a sharp cheddar or a blend of different cheeses, or even a touch of spice to add some warmth, this dish is incredibly versatile.
For a serving size of 4-6 people, the following recipe will guide you through creating this delicious holiday favorite that promises to be a hit at your Christmas table.
Ingredients:
- 1 pound elbow macaroni
- 4 tablespoons unsalted butter
- 1/4 cup all-purpose flour
- 3 cups milk
- 2 cups shredded sharp cheddar cheese
- 1 cup shredded mozzarella cheese
- 1/2 cup grated parmesan cheese
- 1 teaspoon salt
- 1/2 teaspoon black pepper
- 1/2 teaspoon mustard powder
- 1/4 teaspoon cayenne pepper (optional)
- 1 cup breadcrumbs
- 2 tablespoons melted butter
Instructions:
1. Preheat and Prep: Preheat your oven to 350°F (175°C). Cook the elbow macaroni according to the package instructions until al dente. Drain and set aside.
2. Make the Cheese Sauce: In a large saucepan, melt the 4 tablespoons of butter over medium heat. Once melted, add the flour and whisk continuously for about 1-2 minutes to form a roux.
Gradually add the milk, whisking constantly to prevent lumps. Continue to cook, stirring frequently, until the sauce thickens, about 5-7 minutes.
3. Add Cheese and Seasonings: Reduce the heat to low and stir in the cheddar, mozzarella, and parmesan cheeses. Mix until the cheeses are fully melted and the sauce is smooth.
Add the salt, black pepper, mustard powder, and cayenne pepper (if using), stirring to combine.
4. Combine Pasta and Sauce: Add the cooked macaroni to the cheese sauce, stirring until the pasta is evenly coated with the sauce.
5. Prepare for Baking: Transfer the macaroni and cheese mixture into a greased 9×13 inch baking dish. In a small bowl, combine the breadcrumbs with the melted butter and sprinkle evenly over the top of the macaroni.
6. Bake: Place the dish in the preheated oven and bake for 25-30 minutes, or until the top is golden brown and crispy. Remove from the oven and let it sit for a few minutes before serving.
Extra Tips: For a more flavorful dish, consider using a combination of cheeses, such as Gruyère or Fontina, for a richer taste.
If you like a bit of texture, add cooked bacon bits or a sprinkle of crushed potato chips to the breadcrumb topping. Also, you can make the cheese sauce ahead of time and store it in the refrigerator for up to two days, allowing you to assemble and bake the dish quickly on the day of your Christmas dinner.
Festive Pecan Pie
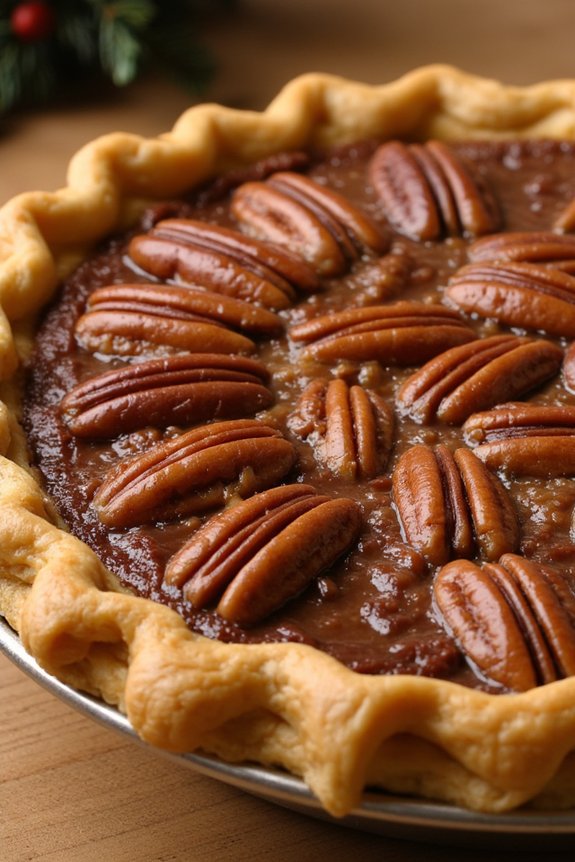
Pecan pie is a classic dessert that brings warmth and sweetness to any holiday gathering, especially during Christmas. This Festive Pecan Pie recipe combines the buttery, nutty flavor of pecans with a rich, gooey filling and a perfectly crisp crust. It’s a beloved tradition on many holiday tables, offering a sweet finish to a hearty Christmas family dinner.
Whether you’re an experienced baker or trying your hand at pie-making for the first time, this recipe is guaranteed to impress your family and friends with its delightful taste and texture.
Ideal for serving 4-6 people, this recipe for Festive Pecan Pie uses simple ingredients that blend together to create a deliciously indulgent dessert. The filling is a luscious mixture of eggs, sugar, and corn syrup, which forms a custard-like consistency that pairs beautifully with the crunchy pecans.
Topped with a buttery crust, this pie isn’t only delectable but also visually appealing, making it a perfect centerpiece for your holiday dessert table.
Ingredients:
- 1 unbaked 9-inch pie crust
- 1 cup granulated sugar
- 1 cup light corn syrup
- 1/2 cup unsalted butter, melted
- 3 large eggs
- 1 teaspoon vanilla extract
- 1/4 teaspoon salt
- 1 1/2 cups pecan halves
Cooking Instructions:
- Prepare the Oven and Crust: Preheat your oven to 350°F (175°C). Roll out your pie crust and fit it into a 9-inch pie plate. Trim the edges and crimp them decoratively. Place the pie plate on a baking sheet to catch any spills during baking.
- Mix the Wet Ingredients: In a large mixing bowl, whisk together the granulated sugar, light corn syrup, and melted butter until well combined. Add the eggs, one at a time, making sure each is fully incorporated before adding the next. Stir in the vanilla extract and salt.
- Combine with Pecans: Gently fold the pecan halves into the mixture, making sure they’re evenly distributed throughout the filling. Pour the filling into the prepared pie crust, spreading it evenly with a spatula.
- Bake the Pie: Place the pie in the preheated oven and bake for about 55-60 minutes. The pie is done when the filling is set but still slightly jiggly in the center. If the crust begins to brown too much, cover the edges with foil to prevent burning.
- Cool and Serve: Remove the pie from the oven and let it cool completely on a wire rack. This allows the filling to set properly. Slice and serve at room temperature, or slightly warm, with a dollop of whipped cream or a scoop of vanilla ice cream if desired.
Extra Tips:
For the best results, make sure your ingredients are at room temperature before you start. This guarantees a smoother mixture and even cooking.
If you prefer a deeper flavor, you can use dark corn syrup instead of light corn syrup. Additionally, toasting the pecans lightly before adding them to the filling can enhance their nutty flavor.
Be careful not to overbake the pie; it should remain slightly soft in the center when you take it out of the oven, as it will continue to set as it cools. Enjoy your festive pecan pie with a cozy holiday beverage for a perfect seasonal treat!
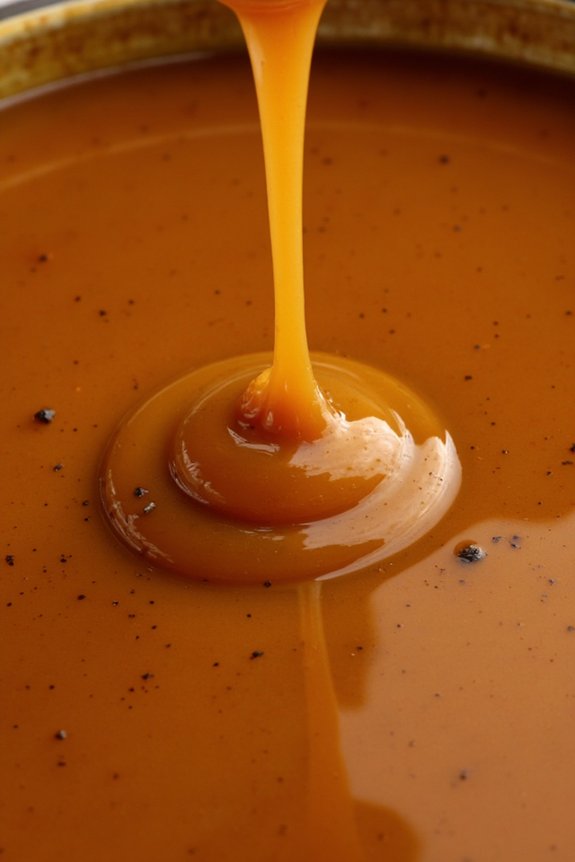
Traditional Bread Pudding With Rum Sauce
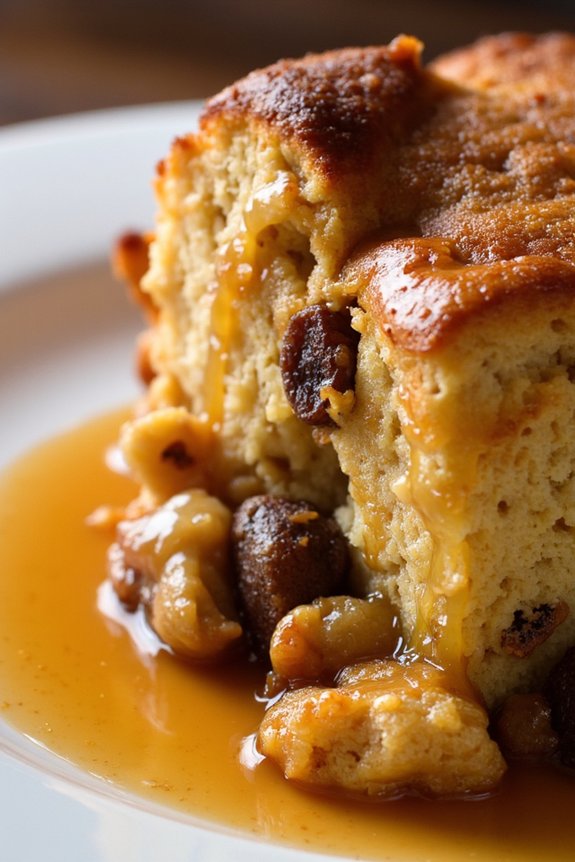
Traditional Bread Pudding with Rum Sauce is a classic, comforting dessert that brings warmth and nostalgia to any Christmas family dinner. This rich and creamy pudding is made with chunks of day-old bread soaked in a mixture of milk, eggs, sugar, and spices, then baked until golden brown. The tantalizing aroma of cinnamon and nutmeg fills the kitchen as it bakes. The star of the show is the luscious rum sauce, which adds a delightful depth of flavor, enhancing the simple elegance of the pudding.
Perfect for serving 4-6 people, this dessert is both indulgent and easy to prepare, making it an ideal choice for the holiday season. The rum sauce, with its smooth and buttery texture, drizzles over the warm pudding, creating a delightful combination of flavors that’s bound to please any crowd. Whether you’re hosting a large family gathering or an intimate dinner, this Traditional Bread Pudding with Rum Sauce will certainly become a holiday favorite.
Ingredients:
- 6 cups day-old bread, cubed
- 2 cups whole milk
- 1/2 cup heavy cream
- 3/4 cup granulated sugar
- 4 large eggs
- 1 teaspoon vanilla extract
- 1 teaspoon ground cinnamon
- 1/2 teaspoon ground nutmeg
- 1/4 teaspoon salt
- 1/2 cup raisins (optional)
- 1/2 cup unsalted butter
- 1 cup brown sugar
- 1/4 cup dark rum
- 1/2 teaspoon vanilla extract
Cooking Instructions:
- Prepare the Bread: Preheat your oven to 350°F (175°C). Lightly grease a 9×9-inch baking dish. Spread the cubed bread evenly in the dish. If using raisins, scatter them over the bread.
- Make the Custard Mixture: In a large bowl, whisk together the whole milk, heavy cream, granulated sugar, eggs, vanilla extract, ground cinnamon, ground nutmeg, and salt until well combined.
- Soak the Bread: Pour the custard mixture over the cubed bread, pressing the bread gently with a spatula to guarantee it absorbs the liquid. Let it sit for about 15 minutes to allow the bread to soak up the mixture thoroughly.
- Bake the Pudding: Place the baking dish in the preheated oven and bake for 45-50 minutes or until the pudding is set and the top is golden brown. A knife inserted into the center should come out clean.
- Prepare the Rum Sauce: While the pudding is baking, melt the butter in a small saucepan over medium heat. Stir in the brown sugar and cook until the sugar is dissolved and the mixture is bubbling, about 2-3 minutes.
- Add the Rum and Vanilla: Carefully stir in the dark rum and vanilla extract, allowing the sauce to simmer for an additional 2 minutes. Remove from heat and set aside to cool slightly.
- Serve: Once the bread pudding is done, let it cool for a few minutes before serving. Drizzle the warm rum sauce generously over each serving of bread pudding.
Extra Tips:
For the best results, use bread that’s slightly stale as it will absorb the custard better, leading to a more cohesive pudding. If you don’t have day-old bread, you can cube fresh bread and lightly toast it in the oven before using.
When making the rum sauce, be careful when adding the rum to the hot sugar mixture, as it may splatter. If you prefer a non-alcoholic version, you can substitute the rum with a teaspoon of rum extract and add a bit more milk to the sauce. Enjoy this comforting dessert warm for the best flavor experience.
Spiced Mulled Wine
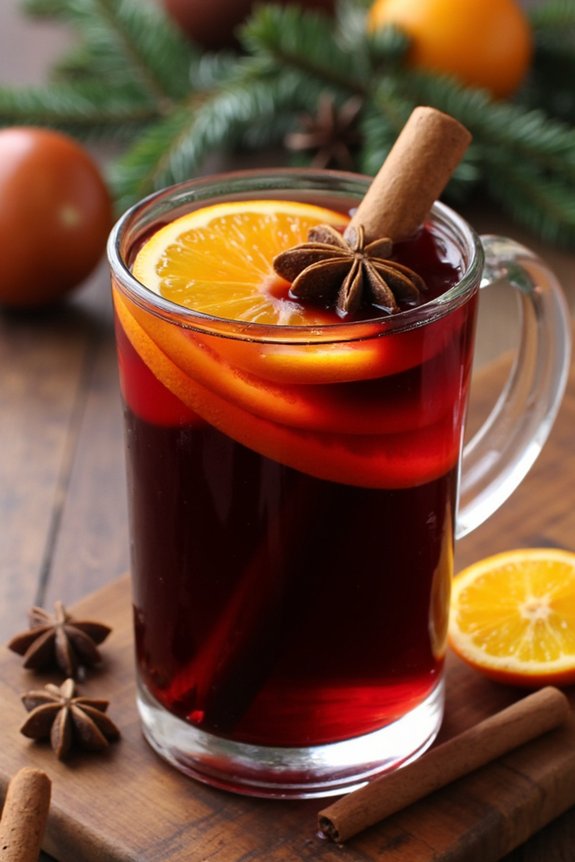
There’s something undeniably magical about the scent of spiced mulled wine wafting through the house during the Christmas season. This warm, aromatic beverage is perfect for gathering family and friends around the table, creating a cozy, festive atmosphere.
Mulled wine, with its origins in ancient Rome, has become a staple in holiday celebrations across Europe and beyond. This recipe elevates the traditional mulled wine with a blend of spices and citrus, making it a delightful addition to your Christmas family dinner.
This spiced mulled wine recipe is designed to serve 4-6 people, making it ideal for small to medium gatherings. The combination of red wine, citrus, and warming spices creates a harmonious blend of sweet and spice, perfect for sipping on a chilly winter evening.
Whether you’re enjoying it as a pre-dinner drink or as a comforting beverage to accompany dessert, this spiced mulled wine is sure to be a hit with your guests.
Ingredients:
- 1 bottle (750 ml) of red wine (preferably Merlot, Cabernet Sauvignon, or Zinfandel)
- 1/4 cup brandy
- 1/4 cup honey or sugar
- 1 orange, sliced
- 1 lemon, sliced
- 2 cinnamon sticks
- 6-8 whole cloves
- 3 star anise
- 1 vanilla pod, split
- 1/4 teaspoon ground nutmeg
- Optional garnishes: additional orange slices, cinnamon sticks, or star anise
Cooking Instructions:
- Prepare the Citrus and Spices: Begin by thinly slicing the orange and lemon. Set aside a few slices for garnish, if desired. In a large pot or slow cooker, combine the orange and lemon slices with the cinnamon sticks, whole cloves, star anise, and split vanilla pod.
- Combine the Ingredients: Pour the bottle of red wine into the pot, followed by the brandy. Add the honey (or sugar) and ground nutmeg. Stir gently to combine the ingredients, ensuring the honey or sugar dissolves into the liquid.
- Heat the Mixture: Place the pot over low heat. Warm the mixture slowly, ensuring it doesn’t reach a boil. Heating the wine too quickly or at too high a temperature can cause the alcohol to evaporate and the flavors to become bitter. Allow the mixture to simmer gently for at least 30 minutes, up to an hour.
- Taste and Adjust: After simmering, taste the mulled wine. If you prefer a sweeter drink, add more honey or sugar. Adjust the spices if desired, adding more nutmeg or additional cinnamon sticks for extra warmth.
- Serve and Garnish: Once the mulled wine is to your liking, remove the pot from heat. Use a ladle to serve the wine into mugs or heatproof glasses, ensuring you don’t include any whole spices. Garnish with reserved orange slices, a cinnamon stick, or a star anise for a festive touch.
Extra Tips:
For an even richer flavor, prepare the mulled wine a day in advance and store it in the refrigerator, allowing the spices to infuse overnight. Simply reheat gently before serving.
Experiment with different types of red wine to find your preferred flavor profile, and feel free to adjust the spices to suit your taste. Always use a low heat setting to prevent boiling, preserving the wine’s delicate flavors and maintaining its alcohol content.
If you’re serving a larger crowd, this recipe can easily be doubled or tripled. Enjoy the warm, comforting embrace of this spiced mulled wine throughout the holiday season.