

Hey there, lovely readers! If you’re like me and always on the hunt for scrumptious yet healthy dinner ideas, I’ve got something exciting for you. I’ve rounded up 13 mild, low sodium family dinners that are perfect for balanced eating. Think Lemon Herb Grilled Chicken for those warm evenings or the comforting aroma of Garlic and Herb Baked Salmon. Let’s explore these heart-healthy and delicious recipes together!
Lemon Herb Grilled Chicken
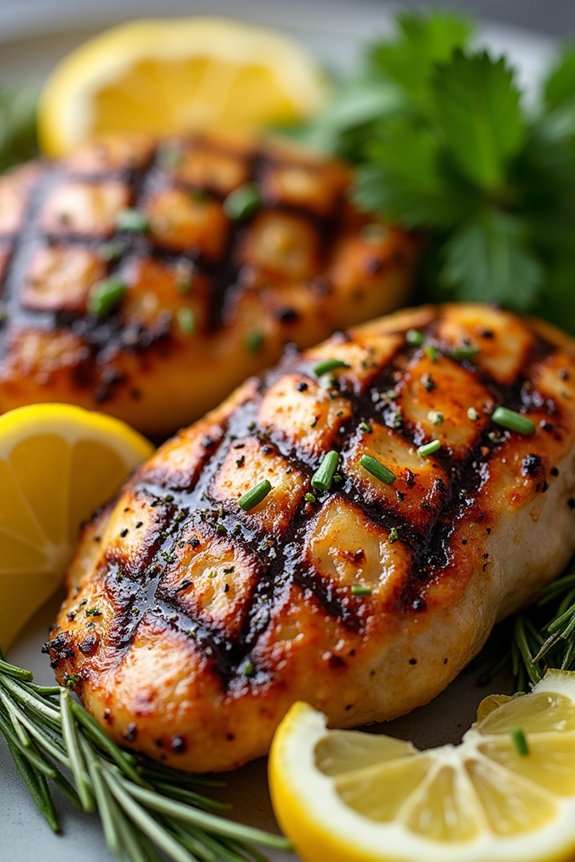
Lemon Herb Grilled Chicken is a delightful, heart-healthy dish perfect for family dinners. This recipe combines the zesty flavor of lemon with aromatic herbs to create a succulent and flavorful chicken dish that’s low in sodium but high in taste. By using fresh ingredients and grilling techniques, you can enjoy a nutritious meal that satisfies without compromising on flavor.
Ideal for gatherings or a simple weeknight dinner, this dish is sure to become a family favorite.
The key to a great Lemon Herb Grilled Chicken is marinating the chicken to infuse it with vibrant flavors. This recipe is designed to serve 4-6 people, making it suitable for a family meal. The combination of lemon juice, olive oil, and a medley of herbs not only enhances the taste but also keeps the chicken moist and tender during grilling.
With minimal prep and cooking time, you can have a delicious meal on the table that everyone will enjoy.
Ingredients (serves 4-6):
- 4-6 boneless, skinless chicken breasts
- 1/4 cup fresh lemon juice
- 1/4 cup olive oil
- 3 cloves garlic, minced
- 1 tablespoon fresh rosemary, chopped
- 1 tablespoon fresh thyme, chopped
- 1 tablespoon fresh parsley, chopped
- 1 teaspoon black pepper
- Lemon slices for garnish
- Fresh herb sprigs for garnish (optional)
Cooking Instructions:
- Prepare the Marinade: In a medium-sized bowl, combine the lemon juice, olive oil, minced garlic, chopped rosemary, thyme, parsley, and black pepper. Whisk together until well blended to create a flavorful marinade.
- Marinate the Chicken: Place the chicken breasts in a large resealable plastic bag or shallow dish. Pour the marinade over the chicken, making certain each piece is well coated. Seal the bag or cover the dish and refrigerate for at least 1 hour, or up to overnight for maximum flavor infusion.
- Preheat the Grill: About 15 minutes before cooking, preheat your grill to medium-high heat. Make sure the grates are clean and lightly oiled to prevent the chicken from sticking.
- Grill the Chicken: Remove the chicken from the marinade and place it on the preheated grill. Discard any remaining marinade. Grill the chicken for 6-7 minutes on each side, or until the internal temperature reaches 165°F (75°C). The chicken should have nice grill marks and be cooked through but still juicy.
- Rest and Serve: Once cooked, remove the chicken from the grill and let it rest for 5 minutes to allow the juices to redistribute. Garnish with lemon slices and fresh herb sprigs before serving.
Extra Tips:
For the best results, try to use fresh herbs as they provide superior flavor compared to dried ones. If fresh herbs aren’t available, you can substitute with half the amount of dried herbs.
Additionally, using a meat thermometer guarantees that the chicken is cooked to the perfect temperature, keeping it safe to eat while maintaining juiciness. If you’re using a charcoal grill, build a two-zone fire so you can move the chicken to a cooler side if it starts to char too quickly.
Serve this dish with a side of grilled vegetables or a fresh green salad for a complete, nutritious meal.
Garlic and Herb Baked Salmon
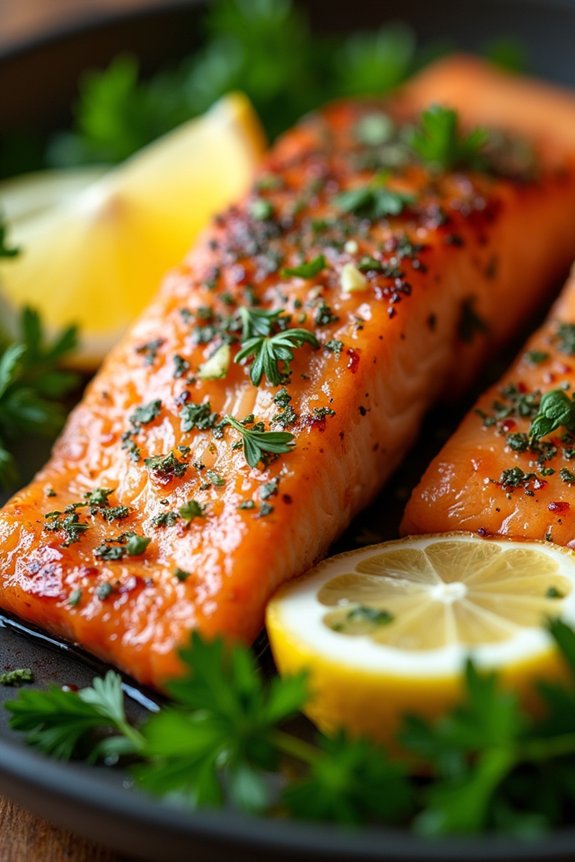
Garlic and Herb Baked Salmon is a delightful, flavorful dish perfect for a healthy, low sodium family dinner. This dish combines the aromatic flavors of garlic and herbs with the rich taste of salmon, offering a nutritious meal that’s both satisfying and heart-healthy. Salmon is an excellent source of omega-3 fatty acids, which are beneficial for heart health, and using fresh herbs and garlic enhances the natural flavors without relying on salt. This recipe is designed to serve 4-6 people, making it ideal for a family gathering or a cozy dinner with friends.
This recipe is easy to prepare, requiring minimal time in the kitchen while delivering maximum flavor. By baking the salmon, you preserve its natural moisture, guaranteeing a tender and juicy result. The combination of garlic and herbs infuses the fish with a savory aroma that will fill your kitchen. Serve this delicious baked salmon with a side of roasted vegetables or a fresh green salad for a complete, balanced meal that everyone will enjoy.
Ingredients:
- 2 lbs salmon fillet
- 4 cloves garlic, minced
- 2 tablespoons olive oil
- 1 tablespoon lemon juice
- 1 tablespoon fresh dill, chopped
- 1 tablespoon fresh parsley, chopped
- 1 teaspoon dried oregano
- 1 teaspoon black pepper
- Lemon slices, for garnish
- Fresh parsley sprigs, for garnish
Cooking Instructions:
- Preheat the Oven: Preheat your oven to 375°F (190°C). This guarantees that your oven is at the correct temperature when you’re ready to bake the salmon.
- Prepare the Baking Dish: Lightly grease a baking dish with a little olive oil to prevent the salmon from sticking. Place the salmon fillet in the dish, skin-side down.
- Make the Herb Mixture: In a small bowl, combine the minced garlic, olive oil, lemon juice, chopped dill, chopped parsley, dried oregano, and black pepper. Mix well to guarantee the ingredients are fully combined.
- Season the Salmon: Spread the herb mixture evenly over the top of the salmon fillet. Use the back of a spoon or your fingers to press the herbs gently into the fish to guarantee they adhere well.
- Bake the Salmon: Place the prepared baking dish in the preheated oven. Bake for 15-20 minutes, or until the salmon flakes easily with a fork and is cooked through. Cooking time may vary depending on the thickness of your fillet, so check the fish at the 15-minute mark.
- Garnish and Serve: Once baked, remove the salmon from the oven and let it rest for a few minutes. Garnish with fresh lemon slices and parsley sprigs before serving. This adds a fresh, zesty flavor to the dish.
Extra Tips:
When selecting salmon, opt for wild-caught if possible, as it tends to have a better flavor and is more sustainable. If you’re using frozen salmon, make sure it’s fully thawed before cooking for even baking.
For an extra burst of flavor, you can add a sprinkle of lemon zest to the herb mixture. Also, be sure not to overcook the salmon; it should be just opaque in the center and flake easily with a fork. If you find the top browning too quickly, cover it loosely with foil. Enjoy your healthy, flavorful meal!
Quinoa and Black Bean Stuffed Peppers
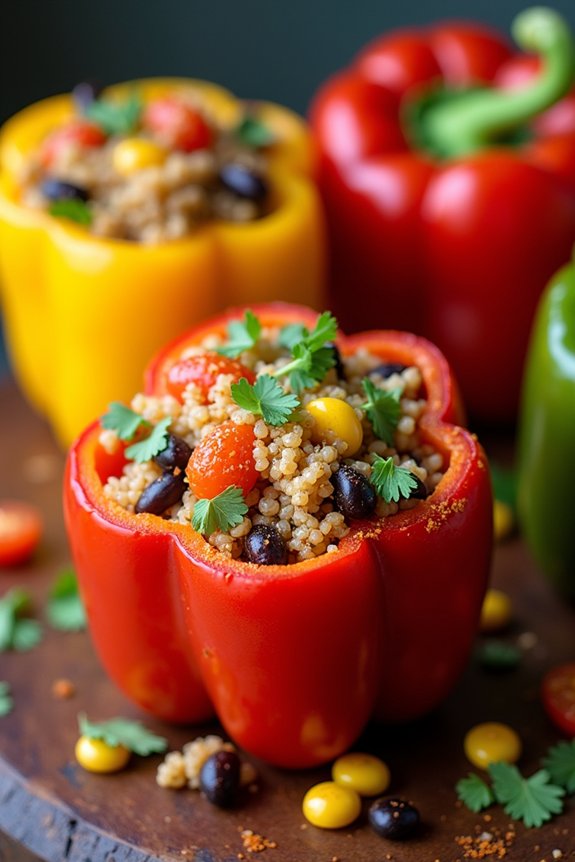
Quinoa and Black Bean Stuffed Peppers are a delicious and nutritious option for those seeking a healthy, low-sodium family dinner. This dish combines vibrant bell peppers with a flavorful mixture of quinoa, black beans, and spices, resulting in a satisfying meal that’s both filling and packed with nutrients.
Perfect for a family of 4-6, this dish not only looks impressive but also delivers on taste without the need for excessive salt, keeping it heart-healthy and suitable for all ages.
These stuffed peppers are versatile and can be easily adapted to include your family’s favorite vegetables or flavors. The quinoa and black bean filling provides a good source of plant-based protein and fiber, making it a wholesome dish that keeps everyone satisfied.
Whether you’re looking for a meatless Monday option or simply aiming to incorporate more vegetables into your family’s diet, these stuffed peppers are a fantastic choice.
Ingredients (serves 4-6):
- 6 large bell peppers (red, yellow, or green)
- 1 cup quinoa, rinsed
- 2 cups low-sodium vegetable broth or water
- 1 (15 oz) can black beans, drained and rinsed
- 1 cup corn kernels (fresh, frozen, or canned)
- 1 small onion, diced
- 2 cloves garlic, minced
- 1 teaspoon ground cumin
- 1 teaspoon smoked paprika
- 1 teaspoon dried oregano
- 1 tablespoon olive oil
- 1 cup diced tomatoes (fresh or canned)
- 1/4 cup chopped fresh cilantro
- Juice of 1 lime
- 1 cup shredded low-sodium cheese (optional)
- Salt and pepper to taste
Cooking Instructions:
- Prepare the Quinoa: In a medium saucepan, combine the rinsed quinoa and vegetable broth (or water). Bring to a boil over medium-high heat, then reduce the heat to low, cover, and simmer for about 15 minutes, or until the quinoa is cooked and all the liquid is absorbed. Fluff with a fork and set aside.
- Prepare the Peppers: While the quinoa is cooking, preheat your oven to 375°F (190°C). Cut the tops off the bell peppers and remove the seeds and membranes. Place them upright in a baking dish.
- Sauté the Vegetables: In a large skillet, heat the olive oil over medium heat. Add the diced onion and garlic, sautéing until the onion becomes translucent, about 3-4 minutes. Stir in the cumin, smoked paprika, and oregano, cooking for another minute until fragrant.
- Combine the Filling: Add the black beans, corn, and diced tomatoes to the skillet with the onion and spices. Stir well to combine, then add the cooked quinoa. Mix in the lime juice and chopped cilantro. Season with salt and pepper to taste.
- Stuff the Peppers: Spoon the quinoa and black bean mixture into each bell pepper, filling them generously. If desired, sprinkle a bit of shredded cheese on top of each stuffed pepper.
- Bake: Cover the baking dish with foil and bake in the preheated oven for 30 minutes. Remove the foil and bake for an additional 10 minutes, or until the peppers are tender and the cheese (if using) is melted and slightly golden.
- Serve: Once done, let the peppers cool for a few minutes before serving. Garnish with additional cilantro and a squeeze of lime if desired.
Extra Tips:
For an added burst of flavor, consider adding a pinch of cayenne pepper or chili flakes to the filling if your family enjoys a bit of heat.
If you want to add more vegetables, chopped zucchini or spinach can be mixed into the filling. Additionally, for a vegan version, omit the cheese or substitute with a plant-based alternative.
These stuffed peppers can be made ahead of time and stored in the refrigerator for up to two days, making them a convenient option for meal prep.
Vegetable Stir-Fry With Tofu

Vegetable Stir-Fry With Tofu is a delightful and healthy low sodium family dinner option that’s both flavorful and nourishing. This dish combines the vibrant colors and textures of fresh vegetables with the satisfying protein of tofu, all brought together in a simple stir-fry that’s quick to prepare. Perfect for busy weeknights, this meal isn’t only easy to make but also guarantees that your family enjoys a healthy, low sodium dinner that doesn’t compromise on taste.
By using a variety of vegetables, you can customize the stir-fry to your family’s preferences while guaranteeing a well-rounded nutritional profile. The tofu adds a wonderful texture and absorbs the flavors of the seasonings and vegetables, making each bite a delicious experience. Whether you’re a seasoned home cook or new to stir-frying, this recipe is straightforward and will quickly become a household favorite.
Ingredients (Serves 4-6):
- 1 block (14 oz) firm tofu
- 2 tablespoons low sodium soy sauce
- 2 tablespoons olive oil
- 1 tablespoon sesame oil
- 1 tablespoon corn starch
- 2 cloves garlic, minced
- 1 inch ginger, grated
- 1 red bell pepper, sliced
- 1 yellow bell pepper, sliced
- 1 cup broccoli florets
- 1 cup sugar snap peas
- 1 carrot, thinly sliced
- 1 small zucchini, sliced
- 1 tablespoon rice vinegar
- 1 teaspoon honey
- Cooked brown rice, for serving (optional)
Instructions:
- Prepare the Tofu: Drain the tofu and press it gently with paper towels to remove excess moisture. Cut the tofu into 1-inch cubes. In a bowl, toss the tofu cubes with corn starch until evenly coated.
- Sauté the Tofu: Heat 1 tablespoon of olive oil in a large non-stick skillet or wok over medium-high heat. Add the tofu cubes in a single layer and cook, turning often, until golden brown on all sides, about 8-10 minutes. Remove from the skillet and set aside.
- Cook the Vegetables: In the same skillet, add the remaining 1 tablespoon of olive oil and sesame oil. Add the minced garlic and grated ginger, sauté for about 30 seconds until fragrant. Add the bell peppers, broccoli, sugar snap peas, carrot, and zucchini. Stir-fry the vegetables for about 5-7 minutes or until they’re crisp-tender.
- Combine Ingredients: In a small bowl, mix together the low sodium soy sauce, rice vinegar, and honey. Return the cooked tofu to the skillet with the vegetables. Pour the soy sauce mixture over the tofu and vegetables. Stir to combine and heat through, about 2-3 minutes.
- Serve: Remove the stir-fry from heat and serve immediately, either on its own or over a bed of cooked brown rice for a more filling meal.
Extra Tips:
For the best results, make sure to use firm tofu and press it well to remove as much moisture as possible before cooking; this helps achieve a better texture.
Feel free to add or substitute any of your favorite vegetables such as mushrooms or baby corn. To enhance the flavor without adding sodium, consider adding a squeeze of fresh lime juice and a sprinkle of sesame seeds before serving.
Keep the vegetables at a high heat to maintain their vibrant colors and crispness. Adjust the seasoning and sweetness according to your family’s taste preferences. Enjoy your healthy and delicious Vegetable Stir-Fry With Tofu!
Roasted Sweet Potato and Chickpea Salad
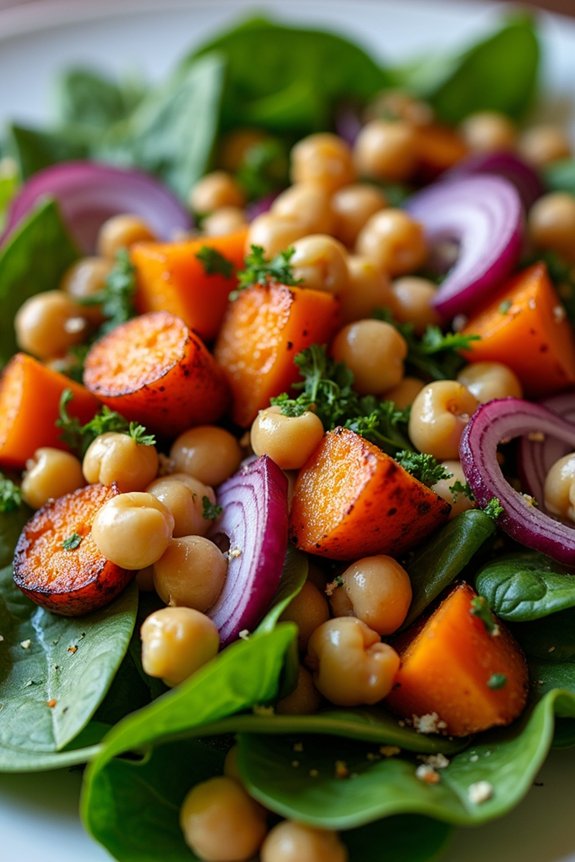
Roasted Sweet Potato and Chickpea Salad is a delightful and nutritious dish that brings together the earthiness of sweet potatoes and the protein-packed goodness of chickpeas. This salad isn’t only delicious but also incredibly healthy, making it perfect for families looking to enjoy a low sodium meal.
With a combination of roasted vegetables, fresh greens, and a zesty dressing, this dish is sure to become a family favorite. This recipe serves 4-6 people, making it ideal for a family dinner. The preparation involves roasting the sweet potatoes and chickpeas until they’re perfectly tender and slightly caramelized.
The addition of fresh spinach, red onion, and a tangy lemon dressing elevates the flavors, resulting in a satisfying meal that’s both filling and nutritious.
Ingredients:
- 3 medium sweet potatoes, peeled and diced
- 1 can (15 oz) chickpeas, drained and rinsed
- 2 tablespoons olive oil
- 1 teaspoon ground cumin
- 1 teaspoon smoked paprika
- 1/2 teaspoon black pepper
- 1/4 teaspoon garlic powder
- 6 cups fresh baby spinach
- 1 small red onion, thinly sliced
- 1/4 cup fresh cilantro, chopped
- 1/4 cup pepitas (pumpkin seeds), toasted
- Juice of 2 lemons
- 1 tablespoon honey or maple syrup
- 1 tablespoon Dijon mustard
Instructions:
- Preheat Oven: Start by preheating your oven to 425°F (220°C). This will guarantee that the sweet potatoes and chickpeas roast evenly and develop a nice caramelization.
- Prepare Sweet Potatoes and Chickpeas: In a large bowl, combine the diced sweet potatoes and drained chickpeas. Add olive oil, cumin, smoked paprika, black pepper, and garlic powder. Toss everything together until the sweet potatoes and chickpeas are well coated with oil and spices.
- Roast Vegetables: Spread the sweet potato and chickpea mixture evenly on a large baking sheet. Roast in the preheated oven for about 25-30 minutes, or until sweet potatoes are tender and chickpeas are crispy, stirring halfway through to guarantee even roasting.
- Prepare Salad Base: While the vegetables are roasting, arrange the fresh baby spinach on a large serving platter or in a salad bowl. Scatter the thinly sliced red onion over the spinach.
- Make Dressing: In a small bowl, whisk together the lemon juice, honey or maple syrup, and Dijon mustard. Adjust the seasoning to taste with additional black pepper if desired.
- Assemble Salad: Once the sweet potatoes and chickpeas are done roasting, remove them from the oven and allow them to cool slightly. Add them to the spinach and onions, then sprinkle with chopped cilantro and toasted pepitas.
- Dress the Salad: Drizzle the lemon dressing over the salad and gently toss everything together to promote even distribution of ingredients and dressing.
- Serve: Serve immediately while the roasted vegetables are still warm for the best flavor and texture.
Extra Tips:
For an added burst of flavor, consider adding a sprinkle of feta cheese or crumbled goat cheese to the salad just before serving. If you prefer a bit of heat, a pinch of red pepper flakes can be incorporated into the dressing.
This salad can also be prepared in advance; simply store the roasted sweet potatoes and chickpeas separately from the greens and assemble just before serving to maintain freshness. Adjust the seasoning according to your taste preferences, keeping in mind the low sodium theme.
Spinach and Mushroom Frittata

Start your day with a nutritious and satisfying meal by preparing a delicious Spinach and Mushroom Frittata. This hearty dish is perfect for a family dinner, offering a blend of flavors and textures that everyone will love. The combination of fresh spinach and savory mushrooms, enveloped in fluffy eggs, provides a wholesome and balanced meal.
This frittata isn’t only easy to prepare but also health-conscious, keeping in line with a low sodium diet without sacrificing taste. The Spinach and Mushroom Frittata is a versatile dish that can be enjoyed at any time of the day. Whether it’s a simple weeknight dinner or a weekend brunch, this frittata is your go-to recipe.
It’s packed with nutrients, low in sodium, and can be served either hot or cold. With minimal ingredients and simple steps, it’s a perfect recipe for any home cook looking to create a delicious, healthy meal for a family of 4-6 people.
Ingredients:
- 8 large eggs
- 1/4 cup low-fat milk
- 1 tablespoon olive oil
- 1 small onion, finely chopped
- 2 cups fresh spinach, chopped
- 1 cup mushrooms, sliced
- 1/4 cup low-sodium feta cheese, crumbled
- 1/4 teaspoon ground black pepper
- 1/4 teaspoon garlic powder
Cooking Instructions:
- Preheat the Oven: Start by preheating your oven to 350°F (175°C). This will guarantee that the frittata cooks evenly once it’s placed inside.
- Prepare the Egg Mixture: In a large bowl, whisk together the eggs, milk, ground black pepper, and garlic powder until well combined. This mixture will form the base of your frittata.
- Sauté the Vegetables: Heat olive oil in a non-stick, oven-safe skillet over medium heat. Add the chopped onion and sauté for about 2-3 minutes until it becomes translucent. Then, add the sliced mushrooms and continue to cook for another 5 minutes until they’re soft.
- Add the Spinach: Stir in the chopped spinach and cook until it wilts, which should take about 1-2 minutes. Make sure to mix everything well, so the flavors combine nicely.
- Combine and Cook: Pour the egg mixture over the sautéed vegetables in the skillet. Gently stir to distribute the vegetables evenly throughout the eggs.
- Add the Cheese: Sprinkle the crumbled feta cheese evenly over the top of the egg mixture. This will add a delicious creamy texture to the frittata.
- Bake the Frittata: Transfer the skillet to the preheated oven and bake for 20-25 minutes, or until the eggs are fully set and the top is lightly golden.
- Cool and Serve: Once baked, remove the frittata from the oven and let it cool for a few minutes. Slice into wedges and serve warm or at room temperature.
Extra Tips:
When making a frittata, using an oven-safe skillet is essential to avoid transferring the mixture to another dish, which could disrupt the layers.
Feel free to add other vegetables like bell peppers or zucchini for added flavor and nutrition. If you prefer a creamier texture, substitute a portion of the milk with low-fat cream.
Finally, be sure to adjust the seasonings to your taste, keeping in mind the low sodium goal of the dish.
Zucchini Noodles With Pesto and Cherry Tomatoes
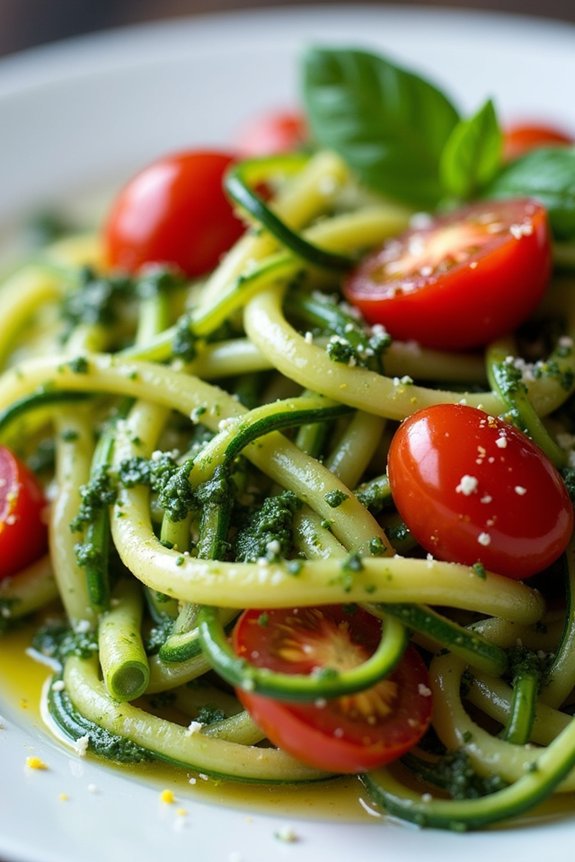
Zucchini Noodles With Pesto and Cherry Tomatoes is a revitalizing and healthy dish that makes a perfect low sodium family dinner. This dish combines the lightness of zucchini noodles with the rich, savory flavors of homemade pesto and the burst of sweetness from cherry tomatoes. Not only is it a colorful addition to your dinner table, but it’s also packed with nutrients and is low in sodium, making it ideal for those watching their salt intake.
The zucchini noodles serve as an excellent substitute for traditional pasta, reducing the carbohydrate content while still providing a satisfying texture. The pesto, made from fresh basil, garlic, and nuts, brings a fragrant aroma and depth of flavor to the dish. Cherry tomatoes add a juicy pop that complements the pesto beautifully. This meal is quick to prepare and requires minimal cooking, making it perfect for busy weeknights.
Ingredients for 4-6 servings:
- 4 medium zucchini
- 2 cups fresh basil leaves
- 1/2 cup pine nuts or walnuts
- 2 cloves garlic
- 1/2 cup grated Parmesan cheese
- 1/2 cup olive oil
- 1 pint cherry tomatoes, halved
- Salt and pepper to taste (optional)
- Grated lemon zest (optional)
Cooking Instructions:
- Prepare the Zucchini Noodles: Using a spiralizer, turn the zucchini into noodles. If you don’t have a spiralizer, you can use a vegetable peeler to create long, thin strips. Set the noodles aside.
- Make the Pesto: In a food processor, combine the basil leaves, pine nuts, and garlic. Pulse until the ingredients are finely chopped. Add the Parmesan cheese and pulse again to combine. With the processor running, slowly drizzle in the olive oil until the pesto reaches your desired consistency. Taste and adjust seasoning with salt and pepper if needed.
- Sauté the Zucchini Noodles: In a large skillet, heat a tablespoon of olive oil over medium heat. Add the zucchini noodles and sauté for about 3-4 minutes, just until they’re tender but still firm. Be careful not to overcook, as they can become mushy.
- Combine Ingredients: Add the pesto to the skillet with the zucchini noodles, tossing to coat the noodles evenly. Add the halved cherry tomatoes and gently mix until everything is well combined and warmed through, about 1-2 minutes.
- Serve: Transfer the zucchini noodles to serving plates. Top with additional Parmesan cheese and a sprinkle of grated lemon zest if desired. Serve immediately.
Extra Tips:
When cooking zucchini noodles, it’s important not to overcook them to maintain their crunchy texture. You can also make the pesto in advance and store it in the refrigerator for up to a week, which can save time on busy evenings.
If you prefer a nut-free version, you can substitute the nuts with sunflower seeds or simply omit them. Additionally, to enhance the flavor without adding salt, consider using freshly cracked black pepper or a squeeze of lemon juice right before serving.
Lentil and Vegetable Soup
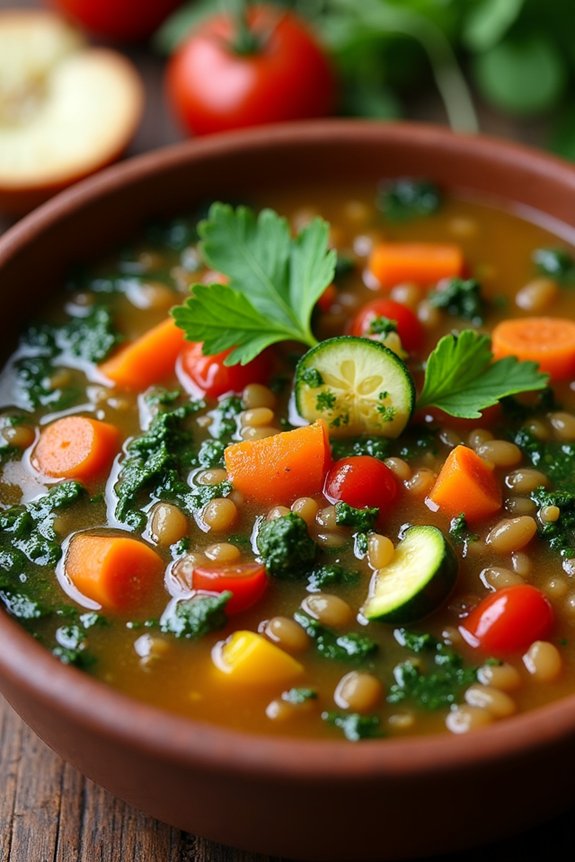
Lentil and Vegetable Soup is a hearty and nutritious option for those looking to enjoy a healthy, low sodium family dinner. Packed with fiber-rich lentils and a medley of fresh vegetables, this soup is both satisfying and nourishing. It offers a robust flavor profile without the need for excessive salt, making it an ideal choice for families seeking to maintain a balanced diet while keeping sodium intake at bay.
This recipe is perfect for a cozy evening meal, providing warmth and comfort with every spoonful. The combination of lentils, vegetables, and herbs creates a harmonious blend that’s both wholesome and delicious. Not only is it easy to prepare, but it also allows for flexibility in using whatever vegetables you have on hand, making it a versatile dish that can adapt to the seasons and your pantry supplies.
Ingredients (Serves 4-6):
- 1 cup dried lentils, rinsed and drained
- 2 tablespoons olive oil
- 1 large onion, chopped
- 2 carrots, sliced
- 2 celery stalks, sliced
- 3 cloves garlic, minced
- 1 large potato, peeled and diced
- 1 zucchini, sliced
- 1 red bell pepper, chopped
- 1 can (14 oz) diced tomatoes, no salt added
- 6 cups low sodium vegetable broth
- 1 teaspoon dried thyme
- 1 teaspoon dried oregano
- 1/2 teaspoon black pepper
- 1/4 teaspoon crushed red pepper flakes (optional)
- 2 cups fresh spinach leaves
- Juice of 1 lemon
- Fresh parsley for garnish
Cooking Instructions:
- Prepare the Base: In a large pot, heat the olive oil over medium heat. Add the chopped onion, carrots, and celery. Sauté for about 5 minutes, stirring occasionally, until the vegetables start to soften.
- Add Garlic and Vegetables: Stir in the minced garlic and cook for another minute until fragrant. Add the diced potato, zucchini, and red bell pepper to the pot, mixing well with the sautéed vegetables.
- Incorporate Lentils and Tomatoes: Add the rinsed lentils and the can of diced tomatoes (including the juice) to the pot. Stir to combine all the ingredients evenly.
- Pour in Broth and Seasonings: Pour in the low sodium vegetable broth and add the dried thyme, oregano, black pepper, and crushed red pepper flakes if using. Stir everything together and bring the mixture to a boil.
- Simmer the Soup: Once boiling, reduce the heat to low, cover the pot, and let the soup simmer for about 25-30 minutes, or until the lentils are tender and the flavors have melded together.
- Add Spinach and Lemon: Stir in the fresh spinach leaves and cook for an additional 5 minutes until the spinach is wilted. Squeeze in the juice of one lemon, stirring to distribute the citrus flavor throughout the soup.
- Serve and Garnish: Ladle the soup into bowls, garnish with fresh parsley, and serve warm.
Extra Tips:
For enhanced flavor, consider adding a bay leaf to the pot while the soup simmers, removing it before serving. Adjust the level of spice by altering the amount of black pepper and red pepper flakes to suit your taste.
If you prefer a thicker consistency, you can blend a portion of the soup using an immersion blender. Feel free to swap or add seasonal vegetables to the mix, such as squash or kale, for variety.
This soup pairs wonderfully with a slice of whole-grain bread or a side salad for a complete, balanced meal.
Oven-Baked Cod With Lemon and Dill
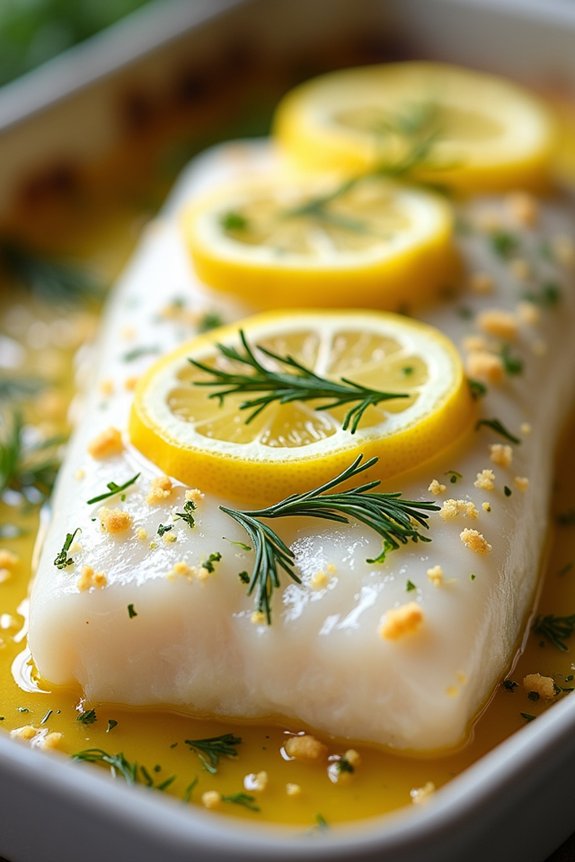
Oven-Baked Cod With Lemon and Dill is a delicious and healthy option for those looking to enjoy a flavorful meal without the added sodium. Cod is a lean, flaky fish that pairs beautifully with the fresh, zesty taste of lemon and the aromatic hint of dill. This dish isn’t only easy to prepare but also packed with essential nutrients like omega-3 fatty acids, making it a perfect choice for a family dinner.
The method of oven-baking guarantees the fish retains its moisture and tenderness without needing excessive seasoning. This recipe is ideal for serving 4-6 people, making it a great option for a family meal or when entertaining guests. The ingredients are simple, allowing the natural flavors of the fish and herbs to shine through.
With minimal preparation and a short cooking time, this dish is perfect for a weeknight dinner that feels special yet remains healthy and low in sodium.
Ingredients (Serves 4-6):
- 4-6 cod fillets (approximately 5-6 ounces each)
- 2 tablespoons olive oil
- Juice of 2 lemons
- Zest of 1 lemon
- 3 tablespoons fresh dill, chopped
- 2 cloves garlic, minced
- Black pepper, to taste
- 1 lemon, sliced into rounds
- Fresh dill sprigs, for garnish (optional)
Cooking Instructions:
- Preheat the Oven: Start by preheating your oven to 400°F (200°C). This guarantees the oven is hot enough to cook the fish evenly and quickly.
- Prepare the Baking Dish: Lightly grease a baking dish with a little olive oil to prevent the cod fillets from sticking. Arrange the cod fillets in a single layer in the baking dish.
- Create the Marinade: In a small bowl, combine the olive oil, lemon juice, lemon zest, chopped dill, minced garlic, and black pepper. Mix well to create a fragrant marinade.
- Marinate the Cod: Pour the marinade over the cod fillets, ensuring each piece is coated evenly. Allow the fish to marinate for at least 10 minutes to absorb the flavors.
- Add Lemon Slices: Place the lemon rounds on top of the cod fillets. This not only adds flavor but also keeps the fish moist during baking.
- Bake the Cod: Place the baking dish in the preheated oven and bake for 12-15 minutes, or until the cod is opaque and flakes easily with a fork. Be careful not to overcook the fish to maintain its tender texture.
- Garnish and Serve: Once cooked, remove the dish from the oven and let it rest for a few minutes. Garnish with fresh dill sprigs if desired, and serve immediately with your choice of sides.
Extra Tips:
When selecting cod, look for fillets that are firm and have a mild, fresh scent. If fresh dill is unavailable, you can substitute with dried dill, but reduce the amount as dried herbs are more concentrated.
Pair this dish with steamed vegetables or a light salad for a complete meal. For added flavor, consider serving with a side of low-sodium tartar sauce or a yogurt-based dill dip.
Turkey and Vegetable Skillet
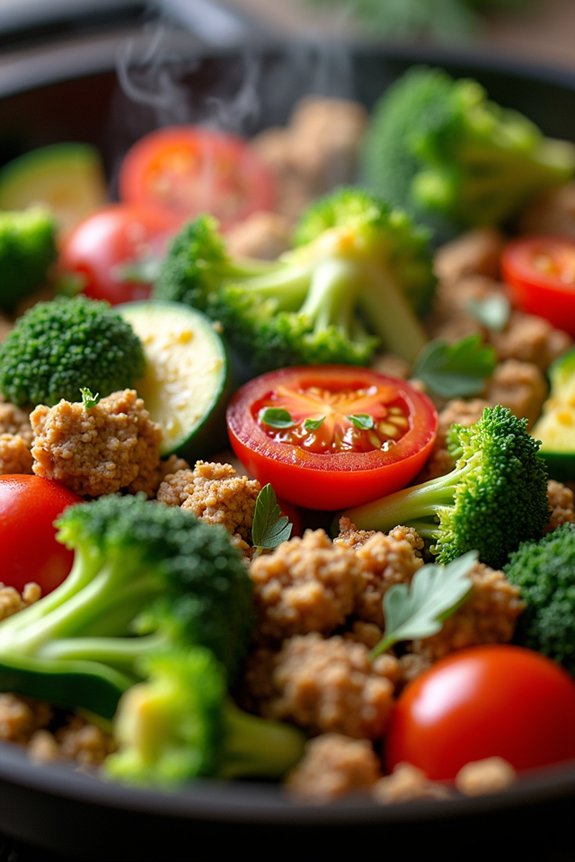
The Turkey and Vegetable Skillet is a delightful and healthy option for a family dinner, perfect for those looking to reduce their sodium intake without sacrificing flavor. This one-pan dish combines lean ground turkey with a medley of fresh vegetables, guaranteeing a balanced meal packed with nutrients. The combination of herbs and spices enhances the natural flavors of the ingredients, making it a satisfying and wholesome choice for everyone around the table.
This recipe is designed to serve 4-6 people, making it ideal for a family meal or for meal prepping for the week ahead. The simplicity of the dish, requiring minimal preparation and cleanup, makes it a go-to choice for busy weeknights. With a focus on fresh produce and lean protein, this Turkey and Vegetable Skillet not only supports a healthy lifestyle but also proves that eating well can be both delicious and convenient.
Ingredients:
- 1 pound ground turkey
- 1 tablespoon olive oil
- 1 medium onion, diced
- 2 cloves garlic, minced
- 1 red bell pepper, diced
- 1 zucchini, sliced
- 1 cup broccoli florets
- 1 cup cherry tomatoes, halved
- 1 teaspoon dried oregano
- 1 teaspoon dried basil
- 1/2 teaspoon black pepper
- 1/4 teaspoon crushed red pepper flakes (optional)
- 1/2 cup low-sodium chicken broth
- 1 tablespoon lemon juice
- 1/4 cup chopped fresh parsley
Instructions:
- Prepare the Ingredients: Begin by washing all fresh vegetables thoroughly. Dice the onion and red bell pepper, slice the zucchini, and halve the cherry tomatoes. Mince the garlic and chop the fresh parsley. Set the prepared ingredients aside.
- Cook the Turkey: In a large skillet over medium heat, add the olive oil. Once heated, add the ground turkey, breaking it apart with a spatula. Cook until the turkey is browned and cooked through, about 5-7 minutes. Remove the turkey from the skillet and set aside.
- Sauté the Vegetables: In the same skillet, add the diced onion and minced garlic. Sauté for about 2 minutes until fragrant. Add the red bell pepper, zucchini, and broccoli florets. Cook for an additional 5 minutes, stirring occasionally, until the vegetables are tender-crisp.
- Combine Ingredients: Return the cooked turkey to the skillet with the vegetables. Stir in the cherry tomatoes, dried oregano, dried basil, black pepper, and crushed red pepper flakes (if using). Mix well to combine all ingredients.
- Simmer with Broth: Pour in the low-sodium chicken broth and lemon juice. Stir to combine, then reduce the heat to low. Let the mixture simmer for about 5 minutes, allowing the flavors to meld together and the liquid to reduce slightly.
- Finish and Serve: Remove the skillet from heat and sprinkle the chopped fresh parsley over the dish. Serve hot, garnished with additional fresh parsley if desired.
Extra Tips:
When cooking the Turkey and Vegetable Skillet, feel free to use any seasonal vegetables you have on hand to add variety and additional nutrients to the dish. If you prefer a spicier flavor, increase the amount of crushed red pepper flakes.
For a complete meal, consider serving the skillet with a side of whole grain rice or quinoa. To further reduce sodium, verify that the chicken broth used is low-sodium or make your own homemade broth. Enjoy this versatile dish as part of a healthy dinner routine that the whole family will appreciate.
Cauliflower Rice With Grilled Shrimp
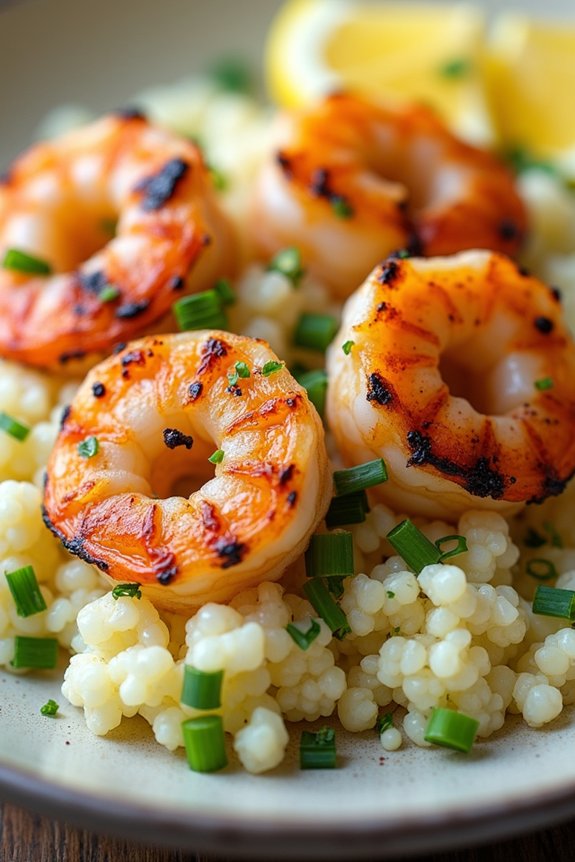
Cauliflower Rice with Grilled Shrimp is a delightful and healthy low sodium family dinner that combines the fresh taste of the sea with the nutritious benefits of cauliflower. This dish is perfect for those looking to reduce their sodium intake without sacrificing flavor. The grilled shrimp provides a lean source of protein, while the cauliflower rice offers a low-carb, fiber-rich alternative to traditional rice. This recipe is designed to serve 4-6 people, making it an ideal option for family dinners or small gatherings.
The subtle flavors of the cauliflower rice are enhanced with hints of garlic and lemon, complementing the succulent grilled shrimp perfectly. The dish isn’t only quick and easy to prepare but also visually appealing, making it a great choice for impressing guests or enjoying a cozy dinner with loved ones. Incorporate this recipe into your meal rotation for a satisfying and health-conscious dinner option.
Ingredients (Serves 4-6):
- 1 large head of cauliflower
- 1 pound large shrimp, peeled and deveined
- 2 tablespoons olive oil
- 3 cloves garlic, minced
- 1 teaspoon lemon zest
- 2 tablespoons lemon juice
- 1/2 teaspoon black pepper
- 1/4 cup fresh parsley, chopped
- 1/4 cup chopped scallions
- Lemon wedges for serving
Cooking Instructions:
- Prepare the Cauliflower Rice: Remove the leaves and core from the cauliflower. Cut it into florets and place them in a food processor. Pulse until the cauliflower resembles rice grains. Set aside.
- Marinate the Shrimp: In a large bowl, combine the shrimp, 1 tablespoon of olive oil, minced garlic, lemon zest, lemon juice, and black pepper. Mix well to guarantee the shrimp are evenly coated. Allow the shrimp to marinate for at least 15 minutes to absorb the flavors.
- Cook the Cauliflower Rice: Heat the remaining tablespoon of olive oil in a large skillet over medium heat. Add the cauliflower rice and cook for about 5-7 minutes, stirring occasionally, until it’s tender. Stir in the chopped scallions and parsley, and remove from heat.
- Grill the Shrimp: Preheat a grill or a grill pan over medium-high heat. Once hot, place the shrimp on the grill and cook for 2-3 minutes on each side until they’re opaque and have grill marks. Remove from the grill and set aside.
- Assemble the Dish: Divide the cauliflower rice among the serving plates. Top with the grilled shrimp and garnish with additional parsley and lemon wedges. Serve immediately and enjoy!
Extra Tips: For an extra burst of flavor, consider adding a pinch of red pepper flakes to the shrimp marinade for a slight kick. Be sure not to over-process the cauliflower in the food processor to avoid it becoming mushy. If you prefer, you can also prepare the shrimp using a cast-iron skillet instead of a grill, which will work just as well. Remember to taste the cauliflower rice before serving, adjusting the seasoning if necessary, since everyone’s palate for salt might vary slightly.
Butternut Squash and Kale Casserole

The Butternut Squash and Kale Casserole is a delightful and nutritious option for a family dinner that’s low in sodium but rich in flavor. This dish combines the natural sweetness of butternut squash with the earthy taste of kale, creating a comforting and satisfying meal. The casserole isn’t only delicious but also packed with vitamins and minerals, making it an excellent choice for those looking to maintain a healthy lifestyle.
The creamy texture, enhanced by wholesome ingredients, guarantees that this dish will be a family favorite. This casserole is perfect for a serving size of 4-6 people, making it ideal for family gatherings or a cozy weeknight dinner. With the addition of aromatic herbs and spices, the dish offers a wonderful depth of flavor without relying on excess salt.
The recipe is simple to follow, allowing even beginner cooks to create a restaurant-quality dish at home. By focusing on fresh, seasonal ingredients, this Butternut Squash and Kale Casserole isn’t just a meal but a celebration of wholesome eating.
Ingredients for 4-6 servings:
- 1 medium butternut squash, peeled and diced
- 1 bunch of kale, stems removed and chopped
- 1 large onion, diced
- 3 cloves of garlic, minced
- 1 cup low-sodium vegetable broth
- 1 cup unsweetened almond milk
- 2 tablespoons olive oil
- 1 tablespoon nutritional yeast
- 1 teaspoon dried thyme
- 1 teaspoon dried rosemary
- 1/2 teaspoon black pepper
- 1/4 teaspoon nutmeg
- 1 cup whole wheat breadcrumbs
- 1/2 cup chopped walnuts (optional)
Cooking Instructions:
- Preheat the Oven: Begin by preheating your oven to 375°F (190°C). This guarantees that the casserole will cook evenly.
- Prepare the Butternut Squash: In a large pot, bring water to a boil. Add the diced butternut squash and cook for about 10 minutes, or until tender. Drain and set aside.
- Sauté the Vegetables: In a large skillet, heat the olive oil over medium heat. Add the diced onion and minced garlic, sautéing for about 5 minutes until the onion becomes translucent.
- Cook the Kale: Add the chopped kale to the skillet with the onions and garlic. Cook for an additional 5 minutes until the kale is wilted.
- Combine Ingredients: In a large mixing bowl, combine the cooked butternut squash, sautéed vegetables, low-sodium vegetable broth, almond milk, nutritional yeast, thyme, rosemary, black pepper, and nutmeg. Mix well to ensure all ingredients are evenly distributed.
- Assemble the Casserole: Transfer the mixture into a greased baking dish. Evenly sprinkle the whole wheat breadcrumbs over the top. If using walnuts, scatter them on top of the breadcrumbs for added crunch.
- Bake: Place the casserole in the preheated oven and bake for 25-30 minutes, or until the top is golden brown and the casserole is bubbling.
- Serve: Allow the casserole to cool slightly before serving. Enjoy it warm for the best experience.
Extra Tips:
For an added layer of flavor, consider roasting the butternut squash instead of boiling it. Roasting can enhance the natural sweetness of the squash.
Additionally, you can prepare the casserole a day ahead and store it in the refrigerator. When ready to enjoy, simply reheat it in the oven until warm. Feel free to experiment with different herbs and spices to suit your taste preferences, and remember that the walnuts provide a delightful crunch, but can be omitted for a nut-free version.
Balsamic Glazed Chicken With Roasted Vegetables
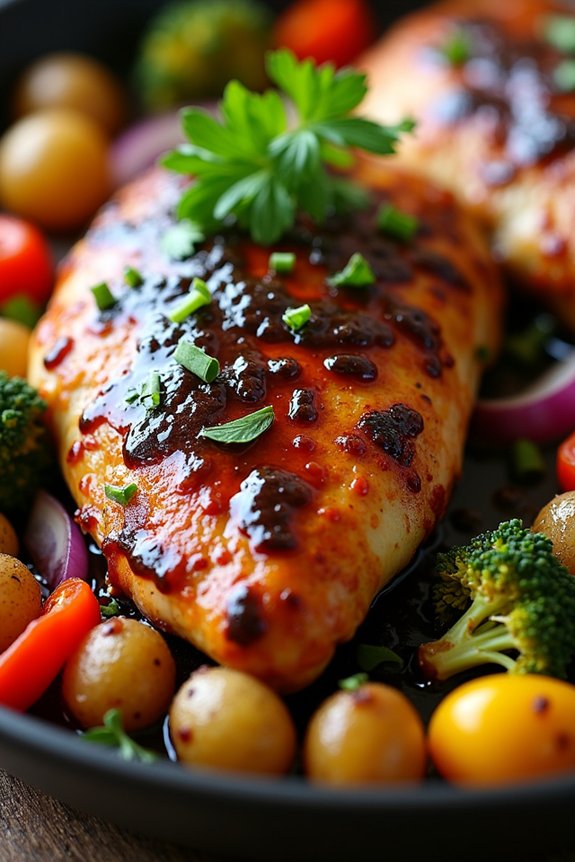
Balsamic Glazed Chicken With Roasted Vegetables is a delightful and healthy dinner option that promises to satisfy your taste buds without compromising on nutrition. This dish combines juicy chicken breasts with a rich balsamic glaze, paired with a medley of colorful roasted vegetables. The sweet and tangy balsamic glaze enhances the natural flavors of the chicken, while the roasted vegetables provide a hearty and nutritious complement.
Perfect for a family dinner, this meal is both low in sodium and high in flavor, offering a balanced and wholesome dining experience. This recipe is designed to serve 4-6 people, making it suitable for a family gathering or a small dinner party.
The preparation involves marinating the chicken in a balsamic sauce and roasting it alongside a selection of seasonal vegetables. By using a variety of vegetables, you can guarantee a diverse range of nutrients while keeping the dish vibrant and appealing. The roasting process brings out the natural sweetness in the vegetables, creating a harmonious blend of flavors that pairs beautifully with the glazed chicken.
Ingredients:
- 4-6 boneless, skinless chicken breasts
- 1/2 cup balsamic vinegar
- 1/4 cup honey
- 2 tablespoons olive oil
- 4 cloves garlic, minced
- 1 teaspoon dried thyme
- 1 teaspoon black pepper
- 1 pound baby potatoes, halved
- 2 cups broccoli florets
- 2 cups bell peppers, sliced (use a mix of colors)
- 1 red onion, cut into wedges
- 1 tablespoon fresh parsley, chopped (for garnish)
Cooking Instructions:
- Prepare the Marinade: In a bowl, combine the balsamic vinegar, honey, olive oil, minced garlic, dried thyme, and black pepper. Whisk until well mixed.
- Marinate the Chicken: Place the chicken breasts in a large resealable plastic bag or a shallow dish. Pour half of the marinade over the chicken, guaranteeing they’re well coated. Seal the bag or cover the dish and refrigerate for at least 30 minutes, allowing the flavors to infuse.
- Preheat the Oven: Preheat your oven to 425°F (220°C). Line a baking sheet with parchment paper for easy cleanup.
- Prepare the Vegetables: On the prepared baking sheet, spread out the baby potatoes, broccoli florets, bell peppers, and red onion. Drizzle with olive oil and season with a bit of black pepper. Toss to coat evenly.
- Bake the Vegetables: Place the baking sheet with vegetables in the preheated oven and roast for 15 minutes.
- Cook the Chicken: While the vegetables are roasting, heat a large skillet over medium-high heat. Remove the chicken from the marinade and sear each breast for about 3-4 minutes per side, until browned.
- Combine and Roast: Remove the baking sheet from the oven and nestle the seared chicken breasts among the vegetables. Pour the remaining marinade over the chicken and vegetables.
- Final Roasting: Return the baking sheet to the oven and roast for an additional 15-20 minutes, or until the chicken is cooked through and the vegetables are tender.
- Garnish and Serve: Remove from the oven, let rest for a few minutes, then garnish with fresh parsley before serving.
Extra Tips:
For the best flavor, marinate the chicken overnight if possible. This allows the balsamic glaze to penetrate the meat thoroughly.
Be sure to cut the vegetables into uniform sizes to guarantee even cooking. If you prefer, you can swap in other vegetables such as zucchini or carrots, depending on your family’s preference.
Additionally, using a meat thermometer can help guarantee the chicken is perfectly cooked, aiming for an internal temperature of 165°F (74°C). Enjoy your meal with a side salad or some crusty bread for a complete, satisfying dinner.