

As the crisp autumn air settles in, my heart feels a tug towards the kitchen. The comforting scents of seasonal ingredients fill my home, wrapping us in warmth. There’s something truly lovely about sharing a meal that captures the flavors of fall with those we love. From hearty soups to savory one-pan dishes, each recipe in this listicle brings a sense of nostalgia and togetherness. Let’s explore these cozy dinners and create cherished family moments.
Hearty Butternut Squash and White Bean Soup
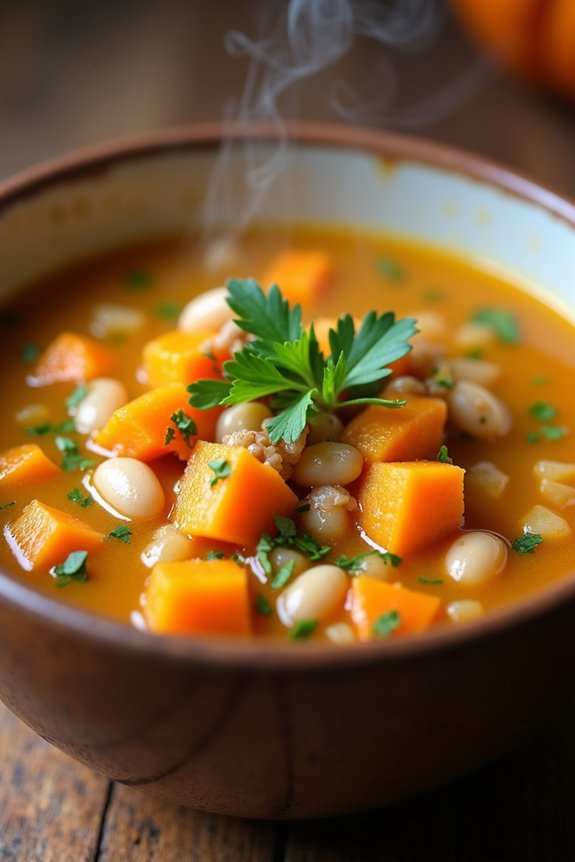
As the weather cools down, there’s nothing quite like a warm, comforting bowl of soup to share with loved ones. This Hearty Butternut Squash and White Bean Soup is perfect for a wholesome fall family dinner. It’s packed with nutritious ingredients and brimming with flavors that will make everyone at the table feel cozy and satisfied.
Not only is this soup delicious, but it’s also easy to prepare and fits perfectly into a busy fall schedule. This particular recipe combines the natural sweetness of butternut squash with the creamy texture of white beans, creating a delightful harmony of flavors. The addition of aromatic herbs and spices elevates the soup, making it both fragrant and inviting.
This dish is designed to serve 4-6 people, making it ideal for a family meal or a small gathering. With minimal preparation and cooking time, you can have this delectable soup on the table in no time, allowing you more time to enjoy the company of your loved ones.
Ingredients (Serves 4-6):
- 1 medium butternut squash, peeled and diced
- 2 tablespoons olive oil
- 1 large onion, chopped
- 3 cloves garlic, minced
- 2 carrots, diced
- 2 stalks celery, diced
- 1 teaspoon ground cumin
- 1 teaspoon dried thyme
- 1/2 teaspoon ground cinnamon
- 4 cups vegetable broth
- 2 cans (15 oz each) white beans, drained and rinsed
- Salt and black pepper to taste
- Fresh parsley, chopped (for garnish)
Cooking Instructions:
- Prepare the Vegetables: Start by peeling and dicing the butternut squash. Chop the onion, mince the garlic, and dice the carrots and celery. This will guarantee all components are ready to go when it’s time to cook.
- Sauté the Aromatics: In a large pot, heat the olive oil over medium heat. Add the chopped onion and sauté for about 5 minutes until it becomes translucent. Stir in the minced garlic and cook for an additional 1 minute until fragrant.
- Add the Vegetables: Add the diced carrots and celery to the pot, stirring occasionally. Cook for about 3 minutes until they begin to soften.
- Incorporate the Spices: Sprinkle the ground cumin, dried thyme, and ground cinnamon over the vegetables. Stir well to coat the veggies with the spices, allowing the flavors to meld together for about 2 minutes.
- Simmer the Soup: Pour in the vegetable broth, then add the diced butternut squash and drained white beans. Bring the mixture to a boil, then reduce the heat to low. Cover the pot and let the soup simmer for about 25-30 minutes, or until the butternut squash is tender.
- Season and Serve: Taste the soup and season with salt and black pepper to your liking. Serve hot, garnished with freshly chopped parsley.
Extra Tips:
For an even creamier texture, you can use an immersion blender to partially blend the soup before serving, leaving some chunks for added texture. If you prefer a bit of heat, consider adding a pinch of red pepper flakes when incorporating the spices.
To save time, you can buy pre-cut butternut squash from the store. This soup pairs wonderfully with crusty bread or a side salad for a complete meal. Enjoy the flavors of fall with this hearty and heartwarming dish!
Spaghetti Squash With Turkey Marinara
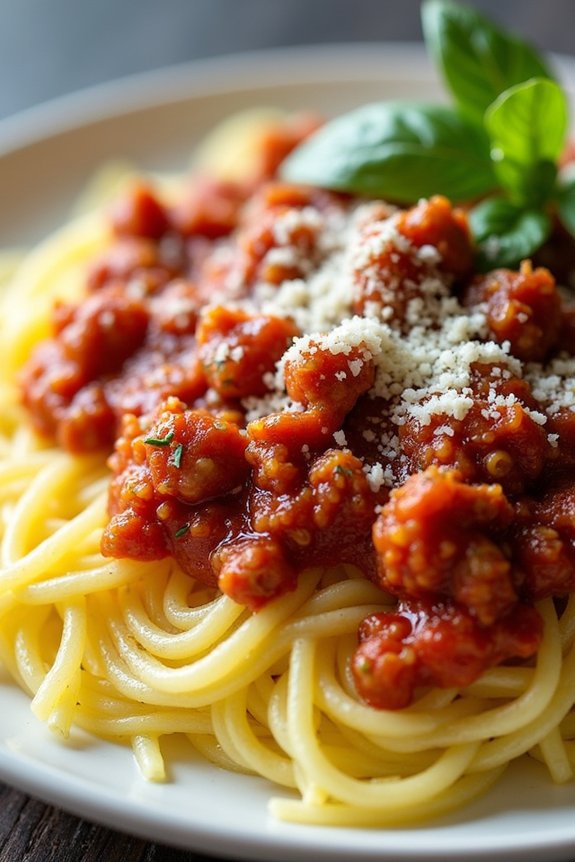
Spaghetti Squash With Turkey Marinara is a delightful and healthy twist on the classic spaghetti dish, perfect for fall family dinners. This recipe utilizes spaghetti squash as a nutritious and low-carb substitute for traditional pasta, paired with a flavorful turkey marinara sauce. The combination offers a comforting meal that’s both filling and wholesome, making it an ideal choice for families looking to enjoy a healthy dinner without compromising on taste.
The preparation of Spaghetti Squash With Turkey Marinara involves roasting the squash to bring out its natural sweetness and creating a savory marinara sauce with lean ground turkey. The result is a satisfying dish that’s rich in protein and fiber, making it suitable for a balanced diet. This recipe serves 4-6 people, guaranteeing everyone in your family can enjoy a generous portion.
Ingredients for 4-6 servings:
- 2 medium spaghetti squashes
- 1 tablespoon olive oil
- Salt and pepper to taste
- 1 pound ground turkey
- 1 small onion, chopped
- 3 cloves garlic, minced
- 1 (28-ounce) can crushed tomatoes
- 1 teaspoon dried basil
- 1 teaspoon dried oregano
- 1/2 teaspoon red pepper flakes (optional)
- Salt and pepper to taste
- Fresh basil leaves for garnish (optional)
- Grated Parmesan cheese for serving (optional)
Cooking Instructions:
- Prepare the Spaghetti Squash:
- Preheat your oven to 400°F (200°C).
- Cut the spaghetti squashes in half lengthwise and scoop out the seeds.
- Drizzle the inside of each squash half with olive oil and season with salt and pepper.
- Place the squash halves cut-side down on a baking sheet and roast for 35-40 minutes, or until tender and strands easily pull away from the skin.
- Cook the Turkey Marinara:
- While the squash is roasting, heat a tablespoon of olive oil in a large skillet over medium heat.
- Add the chopped onion and sauté for about 5 minutes, until translucent.
- Stir in the minced garlic and cook for an additional 1 minute, until fragrant.
- Add the ground turkey to the skillet, breaking it up with a spoon, and cook until browned and no longer pink.
- Pour in the crushed tomatoes, and stir in the dried basil, oregano, red pepper flakes, salt, and pepper.
- Let the sauce simmer for 15-20 minutes, allowing the flavors to meld together.
- Combine and Serve:
- Remove the squash from the oven and let it cool slightly.
- Use a fork to scrape the strands of squash into a serving bowl.
- Spoon the turkey marinara sauce over the spaghetti squash.
- Garnish with fresh basil leaves and grated Parmesan cheese if desired.
Extra Tips:
When selecting spaghetti squash, choose ones that are firm and free of soft spots for the best texture. If you’re short on time, the squash can be microwaved instead of roasted; simply pierce it with a fork and cook on high for about 10-12 minutes.
To add more flavor depth to your marinara sauce, consider adding a splash of balsamic vinegar or a teaspoon of sugar to balance the acidity of the tomatoes. Finally, make sure to taste and adjust the seasoning of the sauce before serving to confirm it aligns with your family’s preference.
One-Pan Chicken and Autumn Vegetables
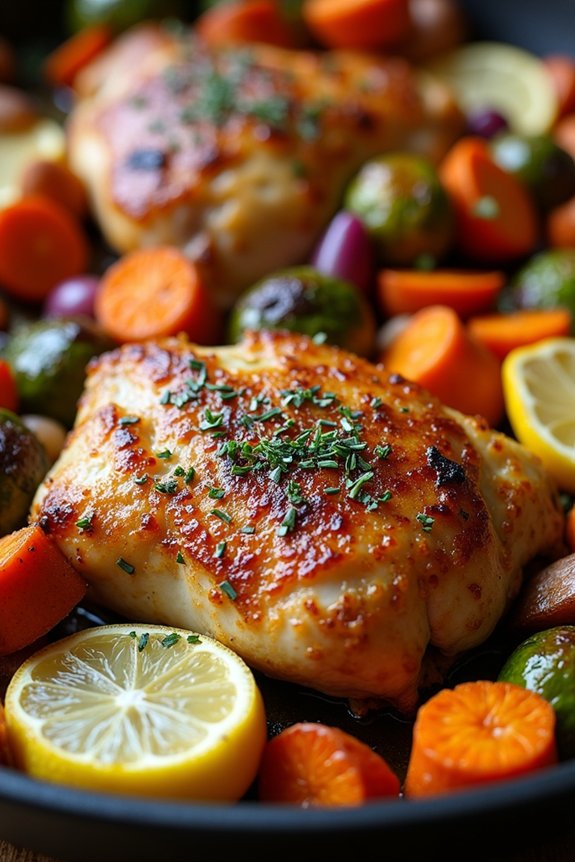
As the weather cools down and the leaves begin to change, there’s nothing quite like gathering the family around the table for a hearty, comforting meal. One-Pan Chicken and Autumn Vegetables is the perfect dish to celebrate the flavors of fall while keeping things simple and mess-free. This recipe combines juicy, tender chicken with a medley of seasonal vegetables, all roasted to perfection in a single pan. The result is a delicious, balanced meal that’s both nourishing and satisfying.
The beauty of this recipe lies in its versatility and ease. By using a variety of colorful autumn vegetables like sweet potatoes, Brussels sprouts, and carrots, you not only enhance the nutritional value but also create a visually appealing dish. The chicken is seasoned with a blend of herbs and spices that complement the natural sweetness of the vegetables, creating a harmonious burst of flavors.
Best of all, with everything cooked on one pan, cleanup is a breeze, making it an ideal choice for busy weeknights or a leisurely weekend dinner.
Ingredients (Serves 4-6):
- 4-6 boneless, skinless chicken thighs
- 2 large sweet potatoes, peeled and cubed
- 1 pound Brussels sprouts, halved
- 4 large carrots, peeled and sliced
- 1 large red onion, sliced
- 4 tablespoons olive oil
- 3 cloves garlic, minced
- 1 teaspoon dried thyme
- 1 teaspoon dried rosemary
- 1/2 teaspoon paprika
- Salt and pepper to taste
- 1 lemon, sliced
Cooking Instructions:
- Preheat the Oven: Start by preheating your oven to 425°F (220°C) to guarantee it’s hot enough to roast the chicken and vegetables properly.
- Prepare the Vegetables: In a large mixing bowl, combine the cubed sweet potatoes, halved Brussels sprouts, sliced carrots, and red onion. Drizzle with 2 tablespoons of olive oil, and add the minced garlic, thyme, rosemary, paprika, salt, and pepper. Toss the vegetables until they’re evenly coated with oil and seasonings.
- Season the Chicken: Place the chicken thighs in a separate bowl. Drizzle the remaining 2 tablespoons of olive oil over the chicken and season with salt, pepper, thyme, and rosemary. Rub the seasonings into the chicken to confirm each piece is well coated.
- Arrange on a Baking Sheet: Spread the seasoned vegetables evenly across a large baking sheet. Nestle the seasoned chicken thighs among the vegetables, confirming everything is in a single layer for even cooking. Place lemon slices on top of the chicken and vegetables for added flavor.
- Roast in the Oven: Transfer the baking sheet to the preheated oven. Roast for about 30-35 minutes, or until the chicken is cooked through and the vegetables are tender and caramelized. The internal temperature of the chicken should reach 165°F (75°C).
- Serve and Enjoy: Remove the baking sheet from the oven and allow it to cool for a few minutes. Serve the chicken and vegetables straight from the pan for a rustic and cozy presentation.
Extra Tips:
For extra crispiness, you can broil the dish for an additional 2-3 minutes at the end of the cooking time. Keep a close eye on it to prevent burning.
You can also customize the vegetables based on what you have available or what your family prefers. Adding a drizzle of balsamic glaze or a sprinkle of Parmesan cheese before serving can enhance the flavors even more.
Confirm the vegetables are cut into similar sizes for even cooking, and feel free to experiment with different herbs and spices to suit your taste.
Lentil and Sweet Potato Shepherd’s Pie

Lentil and Sweet Potato Shepherd’s Pie is a delicious and hearty dish that’s perfect for family dinners during the fall. This comforting and nutritious meal is a vegetarian twist on the classic shepherd’s pie, featuring a rich and savory lentil filling topped with a creamy sweet potato mash. The combination of earthy lentils and sweet potatoes creates a delightful balance of flavors, while the addition of herbs and vegetables adds depth and texture to the dish.
It’s a great way to enjoy seasonal produce and is certain to be a hit with both kids and adults alike. This recipe is designed to serve 4-6 people, making it an ideal choice for a cozy family dinner. The preparation time is roughly an hour, making it a manageable option for a weekday meal or a leisurely weekend dinner.
Whether you’re a seasoned cook or a beginner in the kitchen, this Lentil and Sweet Potato Shepherd’s Pie is straightforward to prepare and will leave your home filled with the inviting aroma of baked goodness. Gather your ingredients and let’s get started on creating this wholesome and satisfying dish.
Ingredients (Serves 4-6):
- 2 cups sweet potatoes, peeled and diced
- 1 tablespoon olive oil
- 1 onion, finely chopped
- 2 cloves garlic, minced
- 1 carrot, diced
- 1 stalk celery, diced
- 1 cup dried green or brown lentils, rinsed
- 2 cups vegetable broth
- 1 tablespoon tomato paste
- 1 teaspoon dried thyme
- 1 teaspoon dried rosemary
- Salt and pepper to taste
- 1/2 cup frozen peas
- 1/4 cup milk (dairy or non-dairy)
- 2 tablespoons butter or vegan alternative
- 1/2 cup grated cheddar cheese (optional)
Cooking Instructions:
1. Prepare the Sweet Potato Mash: Begin by boiling the diced sweet potatoes in a large pot of salted water. Cook for about 15-20 minutes or until the sweet potatoes are tender when pierced with a fork. Drain the water and return the sweet potatoes to the pot.
Add the milk and butter, then mash until smooth and creamy. Season with salt and pepper to taste. Set aside.
2. Cook the Filling: In a large skillet, heat the olive oil over medium heat. Add the chopped onion and minced garlic, sautéing until the onion becomes translucent. Add the diced carrot and celery, cooking for an additional 5 minutes until the vegetables begin to soften.
3. Add the Lentils and Broth: Stir in the rinsed lentils, vegetable broth, and tomato paste. Add the thyme, rosemary, salt, and pepper. Bring the mixture to a boil, then reduce the heat to a simmer. Cover and cook for 25-30 minutes, or until the lentils are tender and have absorbed most of the liquid.
4. Incorporate the Peas: Once the lentils are cooked, stir in the frozen peas. Cook for another 2 minutes until the peas are heated through. Adjust seasoning if necessary.
5. Assemble the Pie: Preheat your oven to 400°F (200°C). Spread the lentil and vegetable mixture evenly in a baking dish. Spoon the mashed sweet potatoes over the top and spread it out evenly. If using, sprinkle the grated cheddar cheese over the sweet potatoes.
6. Bake: Place the baking dish in the preheated oven and bake for about 20-25 minutes, or until the top is lightly browned and the cheese (if used) is melted and bubbly.
7. Serve: Remove from the oven and allow to cool for a few minutes before serving. Enjoy your Lentil and Sweet Potato Shepherd’s Pie warm.
Extra Tips:
For a creamier sweet potato mash, consider using a hand mixer for a smoother texture. Feel free to customize the filling by adding other vegetables such as mushrooms or bell peppers for added flavor and nutrition.
If you prefer a more traditional shepherd’s pie, you can substitute half of the sweet potatoes with white potatoes for a mixed mash. Make sure to taste and adjust the seasoning before assembling the pie to confirm it’s to your liking.
This dish can be prepared a day in advance and simply baked before serving, making it a convenient option for busy nights.
Wild Mushroom and Barley Risotto
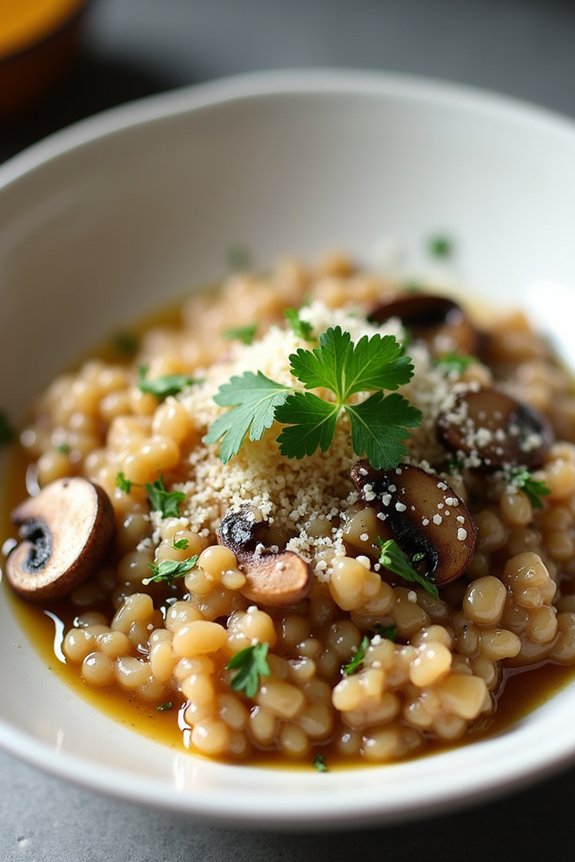
Wild Mushroom and Barley Risotto is a comforting and hearty dish perfect for cozy fall family dinners. This recipe combines the earthy flavors of wild mushrooms with the nutty texture of barley, creating a wholesome and satisfying meal. Unlike traditional risotto made with Arborio rice, this version uses barley, which not only adds a unique flavor but also enhances the nutritional value of the dish. The mushrooms add depth and richness, making it a perfect vegetarian option that’s both delicious and nutritious.
Preparing Wild Mushroom and Barley Risotto is a wonderful way to bring the family together, as it requires a bit of time and attention. The gentle stirring of the barley as it absorbs the flavorful broth is a soothing ritual, while the aroma of the mushrooms fills the kitchen with a warm, inviting scent. Serve this risotto with a fresh green salad and a side of crusty bread, and you have a wholesome meal that will delight everyone at the table.
Ingredients (Serves 4-6)
- 1 cup pearled barley
- 1 tablespoon olive oil
- 1 medium onion, finely chopped
- 3 cloves garlic, minced
- 2 cups mixed wild mushrooms, cleaned and sliced
- 1/2 cup dry white wine
- 4 cups vegetable broth
- 1/2 cup grated Parmesan cheese
- 2 tablespoons unsalted butter
- Salt and freshly ground black pepper, to taste
- 1/4 cup chopped fresh parsley
- 1 teaspoon fresh thyme leaves
Cooking Instructions
- Prepare the Ingredients: Begin by gathering all your ingredients and preparing them. Finely chop the onion and garlic, clean and slice the wild mushrooms, and measure out the barley, wine, and broth. Having everything ready will make the cooking process smoother.
- Cook the Onions and Garlic: In a large saucepan or skillet, heat the olive oil over medium heat. Add the chopped onion and garlic, and sauté for about 5 minutes, or until the onion becomes translucent and aromatic. Be careful not to let the garlic brown.
- Add the Mushrooms: Increase the heat slightly and add the sliced wild mushrooms to the pan. Cook for 5-7 minutes, stirring occasionally until the mushrooms have released their moisture and are golden brown.
- Toast the Barley: Stir the barley into the mushroom mixture, letting it toast for about 2 minutes. This will bring out the nutty flavor of the barley and help it absorb the flavors from the pan.
- Deglaze with Wine: Pour in the white wine, and stir continuously as it comes to a simmer. Allow the wine to reduce by half. This will add a depth of flavor to the risotto.
- Simmer the Barley: Begin adding the vegetable broth, one cup at a time. Allow each addition of broth to be absorbed by the barley before adding the next. Stir frequently to guarantee even cooking and to prevent sticking. This process will take about 30-40 minutes until the barley is tender.
- Finish with Cheese and Butter: Once the barley is cooked and the risotto is creamy, stir in the grated Parmesan cheese and butter. Season with salt and freshly ground black pepper to taste.
- Garnish and Serve: Remove the pan from heat, and stir in the chopped fresh parsley and thyme leaves. Serve the risotto hot, garnished with additional Parmesan cheese if desired.
Extra Tips
When making Wild Mushroom and Barley Risotto, patience is key. The slow cooking process allows the flavors to meld beautifully, so don’t rush it.
If you find the risotto too thick, you can add a little more broth or water to achieve your desired consistency. Feel free to experiment with different types of wild mushrooms, such as shiitake, cremini, or oyster, to create a unique flavor profile.
Also, remember that the quality of the wine and cheese can greatly impact the final taste, so choose something you enjoy drinking and eating.
Maple Glazed Pork Tenderloin With Roasted Apples
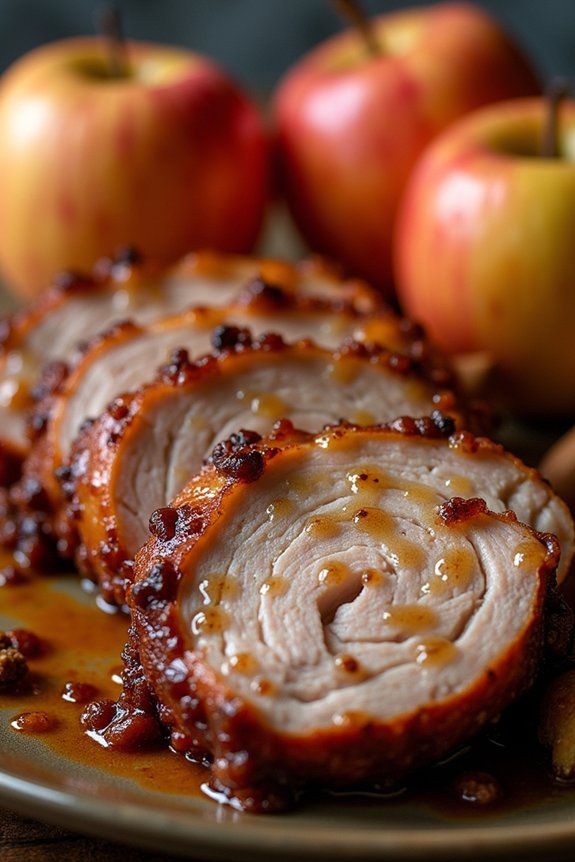
As the leaves turn and the air becomes crisp, fall is the perfect time to enjoy hearty and comforting meals that bring the family together. One such dish is the Maple Glazed Pork Tenderloin With Roasted Apples. This delightful recipe combines the savory flavors of pork tenderloin with the natural sweetness of apples and a rich maple glaze, creating a symphony of flavors that encapsulate the essence of autumn.
It’s not only a feast for the taste buds but also a nourishing meal that can be prepared for a cozy family dinner or a special occasion. The pork tenderloin is first seared to lock in its juices, then coated with a luscious maple glaze that caramelizes beautifully in the oven. Paired with roasted apples, which add a burst of tartness, this dish is a harmonious blend of sweet and savory.
The aroma of maple and apples roasting fills the kitchen with an inviting warmth, making this dish a perfect centerpiece for your fall family dinners. Serve this dish to 4-6 people and watch as your loved ones savor each bite.
Ingredients (serving size: 4-6 people):
- 2 pork tenderloins (about 1 lb each)
- Salt and pepper to taste
- 2 tablespoons olive oil
- 1/2 cup pure maple syrup
- 2 tablespoons Dijon mustard
- 1 tablespoon apple cider vinegar
- 4 large apples, cored and quartered
- 1 teaspoon ground cinnamon
- 1 tablespoon brown sugar
- 1 tablespoon butter
Cooking Instructions:
- Preheat Oven: Preheat your oven to 375°F (190°C) to guarantee it’s ready for roasting.
- Prepare Pork: Season the pork tenderloins generously with salt and pepper. This will help enhance the flavor of the meat.
- Sear Pork: In a large ovenproof skillet, heat olive oil over medium-high heat. Sear the tenderloins on all sides until they’re golden brown, about 3-4 minutes per side.
- Make Maple Glaze: In a small bowl, whisk together the maple syrup, Dijon mustard, and apple cider vinegar. This mixture will serve as the glaze for the pork.
- Glaze Pork: Pour the maple glaze over the seared pork tenderloins, ensuring they’re well-coated.
- Prepare Apples: In a separate bowl, toss the apple quarters with cinnamon, brown sugar, and melted butter. Ensure each apple piece is evenly coated.
- Roast in Oven: Arrange the glazed pork and the prepared apples in the same skillet or a baking dish. Place the skillet in the preheated oven and roast for 20-25 minutes, or until the internal temperature of the pork reaches 145°F (63°C).
- Rest and Serve: Allow the pork to rest for 5 minutes before slicing. Serve the pork slices with the roasted apples on the side, drizzled with any additional glaze from the skillet.
Extra Tips:
When selecting apples for roasting, choose varieties that hold their shape well during cooking, such as Granny Smith or Honeycrisp. These apples provide a nice contrast to the tender pork with their firm texture and tart flavor.
Additionally, when searing the pork, guarantee your pan is hot enough to achieve a good crust, which will lock in the juices and add depth to the flavor. If you prefer a thicker glaze, you can reduce the syrup mixture on the stove before applying it to the pork.
Finally, using a meat thermometer guarantees the pork is cooked to perfection without overcooking, keeping it juicy and tender.
Quinoa and Black Bean Stuffed Peppers
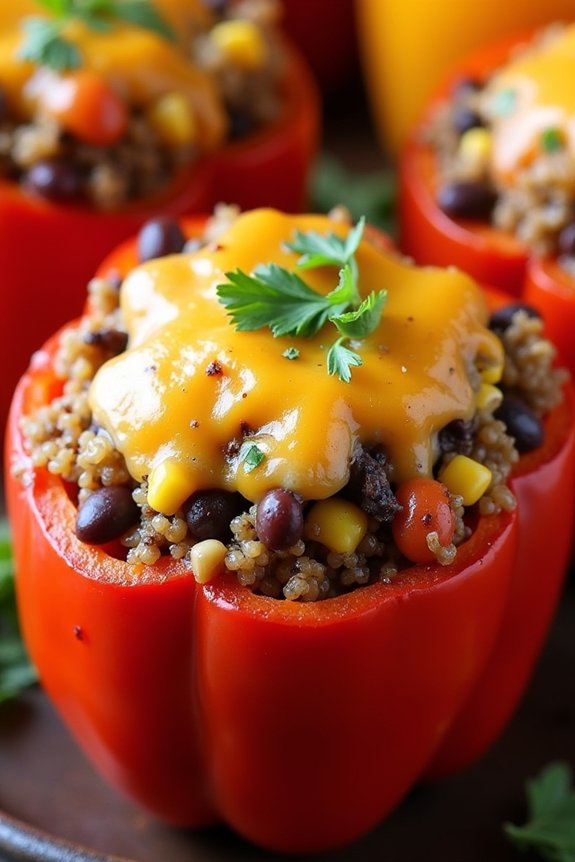
Quinoa and Black Bean Stuffed Peppers are a delightful and nutritious option for a healthy fall family dinner. Packed with protein-rich quinoa and black beans, these stuffed peppers aren’t only filling but also bursting with flavors and colors. The dish combines the earthiness of black beans and the nutty flavor of quinoa with the sweetness of bell peppers, creating a harmonious balance that’s both satisfying and nourishing.
This recipe is perfect for a family meal, providing a hearty and delicious option that everyone will enjoy. The peppers are roasted to perfection, giving them a tender texture while maintaining their vibrant color. The filling is a wholesome mix of quinoa, black beans, corn, tomatoes, and spices, offering a nutritious and protein-packed meal. This dish serves 4-6 people, making it ideal for a family gathering or a cozy dinner at home.
Ingredients:
- 6 large bell peppers (any color)
- 1 cup quinoa, rinsed
- 2 cups vegetable broth
- 1 can (15 oz) black beans, drained and rinsed
- 1 cup corn kernels (fresh, frozen, or canned)
- 1 can (14.5 oz) diced tomatoes
- 1 small onion, chopped
- 2 cloves garlic, minced
- 1 teaspoon cumin
- 1 teaspoon chili powder
- 1/2 teaspoon smoked paprika
- Salt and pepper to taste
- 1 cup shredded cheese (cheddar or your choice)
- 2 tablespoons olive oil
- Fresh cilantro or parsley for garnish
Instructions:
- Prepare the Quinoa: In a medium saucepan, bring the vegetable broth to a boil. Add the rinsed quinoa, reduce the heat to low, cover, and let it simmer for about 15 minutes, or until the liquid is absorbed and the quinoa is fluffy. Once cooked, fluff the quinoa with a fork and set aside.
- Prepare the Peppers: Preheat your oven to 375°F (190°C). Cut the tops off the bell peppers and remove the seeds and membranes. Lightly brush the outside with olive oil and place them upright in a baking dish.
- Sauté the Vegetables: In a large skillet, heat the olive oil over medium heat. Add the chopped onion and garlic, and sauté until the onion becomes translucent, about 3-4 minutes.
- Mix the Filling: Add the cooked quinoa, black beans, corn, diced tomatoes, cumin, chili powder, smoked paprika, salt, and pepper to the skillet. Stir well to combine and let it cook for another 5 minutes, allowing the flavors to meld together.
- Stuff the Peppers: Spoon the quinoa and black bean mixture into each bell pepper, filling them generously. Top each pepper with shredded cheese.
- Bake the Peppers: Cover the baking dish with aluminum foil and bake in the preheated oven for 30 minutes. Remove the foil and bake for another 10-15 minutes, or until the cheese is melted and bubbly, and the peppers are tender.
- Garnish and Serve: Once done, remove the peppers from the oven and let them cool slightly. Garnish with fresh cilantro or parsley before serving.
Extra Tips:
For an added depth of flavor, consider roasting the bell peppers for a few minutes before stuffing them. This can enhance their sweetness and add a slight charred flavor.
If you’re looking to make this dish vegan, simply omit the cheese or use a plant-based cheese alternative. Additionally, feel free to customize the filling by adding other vegetables like zucchini or mushrooms to suit your family’s preference. Enjoy your healthy fall dinner!
Savory Pumpkin and Sage Pasta

Savory Pumpkin and Sage Pasta is a delightful dish that perfectly encapsulates the flavors of fall. This comforting meal combines the earthy essence of pumpkin with the aromatic notes of fresh sage, creating a beautifully balanced dish that’s both hearty and satisfying. Ideal for a family dinner, it serves as a wonderful centerpiece to enjoy the cozy season.
The creamy pumpkin sauce clings to the pasta, while the crispy sage leaves add a touch of sophistication and crunch to the meal. This recipe is designed to serve 4-6 people, making it perfect for a family gathering or a small dinner party. The preparation and cooking process is straightforward, ensuring that even beginner cooks can confidently create this dish.
With just a few simple ingredients, you can bring the warmth and taste of autumn to your dining table. The following ingredients and instructions will guide you through the process of making a Savory Pumpkin and Sage Pasta that’s sure to impress your loved ones.
Ingredients:
- 1 pound of pasta (such as fettuccine or tagliatelle)
- 2 tablespoons olive oil
- 1 medium onion, finely chopped
- 3 cloves garlic, minced
- 1 can (15 ounces) pumpkin puree
- 1 cup heavy cream
- 1/2 cup grated Parmesan cheese
- 1 teaspoon ground nutmeg
- Salt and pepper to taste
- 12 fresh sage leaves
- 1/4 cup unsalted butter
Cooking Instructions:
- Cook the Pasta: Begin by bringing a large pot of salted water to a boil. Add the pasta and cook according to the package instructions until al dente. Drain the pasta, reserving about 1 cup of the pasta water, and set it aside.
- Sauté Aromatics: In a large skillet, heat the olive oil over medium heat. Add the chopped onion and sauté until it becomes translucent, about 5 minutes. Stir in the minced garlic and cook for an additional 1-2 minutes until fragrant.
- Prepare the Pumpkin Sauce: Add the pumpkin puree to the skillet with the onions and garlic, stirring to combine. Slowly add the heavy cream, stirring continuously to create a smooth sauce. Mix in the grated Parmesan cheese and ground nutmeg, then season with salt and pepper to taste.
- Crisp the Sage Leaves: In a small pan, melt the unsalted butter over medium heat. Once it begins to foam, add the fresh sage leaves. Fry the sage leaves for about 1-2 minutes until they’re crispy, then remove them from the pan and set aside on a paper towel to drain.
- Combine Pasta and Sauce: Add the cooked pasta to the pumpkin sauce in the skillet, tossing to coat the pasta evenly. If the sauce is too thick, gradually add some of the reserved pasta water until the desired consistency is reached.
- Serve: Divide the pasta into serving bowls, and garnish each with the crispy sage leaves. Sprinkle additional Parmesan cheese on top if desired.
Extra Tips: For an added depth of flavor, try roasting fresh pumpkin instead of using canned puree. Simply cut the pumpkin into cubes, roast them until tender, and blend until smooth.
Additionally, you can experiment with different types of pasta, such as whole wheat or gluten-free, to suit dietary preferences. If you prefer a bit of heat, consider adding a pinch of red pepper flakes to the sauce. Remember, the key to a perfect dish is tasting and adjusting the seasoning as you go along to match your personal preferences.
Baked Chicken Thighs With Root Vegetables
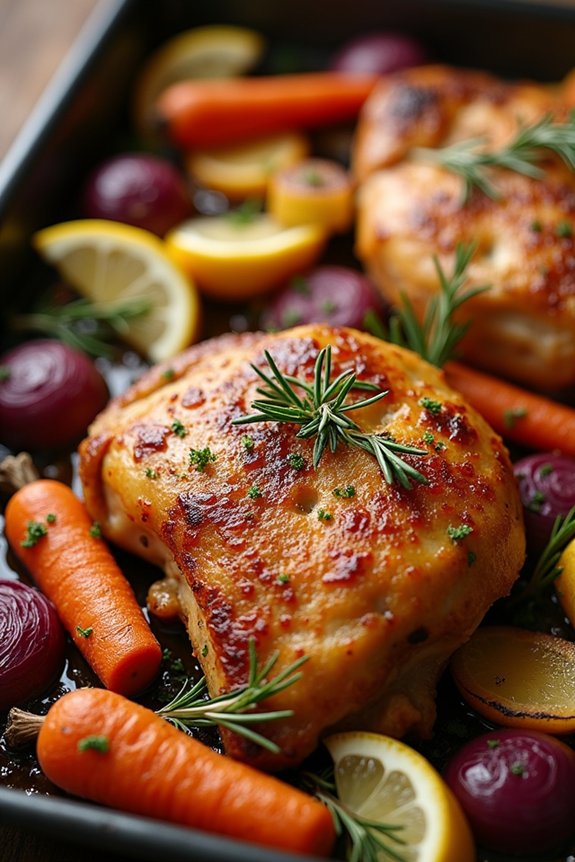
Baked Chicken Thighs With Root Vegetables is a comforting and nutritious dish, perfect for a cozy fall dinner with the family. This recipe combines the rich flavors of tender chicken thighs with the earthy taste of seasonal root vegetables, offering a hearty meal that satisfies both the heart and the palate. As the chicken bakes, it releases its juices, infusing the vegetables with a delicious savory flavor. The result is a beautifully caramelized and aromatic dish that’s bound to become a family favorite.
This dish isn’t only delicious but also incredibly easy to prepare, making it ideal for busy weeknights. The recipe requires minimal preparation time, allowing you to focus on spending quality time with your loved ones. With just a few simple ingredients and a single baking dish, you can create a wholesome meal that nourishes the body and warms the soul. The combination of protein-rich chicken and fiber-packed vegetables makes this dish a balanced and satisfying option for any dinner table.
Ingredients (Serves 4-6):
- 6 bone-in, skin-on chicken thighs
- 2 large carrots, peeled and cut into chunks
- 2 large parsnips, peeled and cut into chunks
- 1 large sweet potato, peeled and cut into chunks
- 1 large red onion, cut into wedges
- 4 cloves of garlic, minced
- 3 tablespoons olive oil
- 1 tablespoon fresh rosemary, chopped
- 1 tablespoon fresh thyme, chopped
- 1 teaspoon salt
- 1/2 teaspoon black pepper
- 1 lemon, sliced
Cooking Instructions:
- Preheat the Oven: Preheat your oven to 425°F (220°C). This guarantees that the chicken and vegetables cook evenly and develop a nice roasted exterior.
- Prepare the Vegetables: In a large mixing bowl, combine the carrots, parsnips, sweet potato, and red onion. Add the minced garlic, olive oil, rosemary, thyme, salt, and black pepper. Toss everything together until the vegetables are well-coated with the seasoning.
- Arrange in Baking Dish: Spread the seasoned vegetables uniformly in a large baking dish or a roasting pan. This will help them cook evenly and absorb the flavors of the chicken.
- Season the Chicken: Pat the chicken thighs dry with a paper towel to guarantee a crispy skin. Season both sides with a bit more salt and pepper if desired.
- Add Chicken to Dish: Place the chicken thighs skin-side up on top of the vegetables. Make sure they aren’t overlapping to allow proper roasting.
- Add Lemon Slices: Distribute the lemon slices over the chicken and vegetables. The lemon will add a fresh aroma and subtle tanginess to the dish.
- Bake the Dish: Place the baking dish in the preheated oven and bake for 40-45 minutes or until the chicken is cooked through and reaches an internal temperature of 165°F (74°C). The skin should be golden brown and the vegetables tender.
- Rest and Serve: Allow the dish to rest for a few minutes after removing it from the oven. This resting time allows the juices to redistribute throughout the chicken, guaranteeing it remains juicy.
Extra Tips:
For best results, try to cut the vegetables into similar-sized pieces to guarantee even cooking. You can also experiment with different herbs such as sage or oregano for a different flavor profile. If you prefer a bit of heat, add a pinch of red pepper flakes to the vegetable mixture before roasting.
To save on prep time, this dish can be assembled ahead of time and stored in the refrigerator until ready to bake. Just bring it to room temperature before placing it in the oven. Enjoy the warm, comforting flavors of fall with this easy and delicious meal!
Kale and Sausage Frittata

Kale and Sausage Frittata is a delightful dish that combines the robust flavors of savory sausage and the earthy notes of kale, all enveloped in a fluffy egg base. Perfect for a cozy family dinner during the fall season, this frittata not only satisfies the taste buds but also provides a nutritious and hearty meal.
The combination of ingredients offers a perfect balance of protein, greens, and savory goodness, making it a favorite among both adults and children. This recipe is designed to serve 4-6 people, making it an excellent choice for a family meal or a friendly gathering.
The frittata is versatile and can easily be adapted to suit different dietary preferences by swapping ingredients or adding others like mushrooms, bell peppers, or cheese for added flavor. Enjoy it fresh out of the oven or save leftovers for a convenient breakfast or lunch the next day.
Ingredients
- 8 large eggs
- 1/4 cup milk
- 1/2 teaspoon salt
- 1/4 teaspoon black pepper
- 1 tablespoon olive oil
- 1/2 pound Italian sausage, casings removed
- 1 small onion, diced
- 2 cups kale, chopped
- 1/2 cup cherry tomatoes, halved
- 1/4 cup grated Parmesan cheese
Cooking Instructions
- Preheat the Oven: Start by preheating your oven to 375°F (190°C). This guarantees that the oven is ready for the frittata once it’s assembled.
- Prepare the Egg Mixture: In a large bowl, whisk together the eggs, milk, salt, and black pepper until well combined. Set the mixture aside.
- Cook the Sausage: Heat the olive oil in an oven-safe skillet over medium heat. Add the sausage and cook until browned and cooked through, breaking it into small pieces with a spoon as it cooks.
- Sauté the Vegetables: Add the diced onion to the skillet with the sausage and cook until the onion is translucent. Stir in the chopped kale and cook for about 3-4 minutes until it’s wilted.
- Combine Ingredients: Pour the egg mixture over the sausage and vegetables in the skillet. Gently stir in the halved cherry tomatoes. Sprinkle the grated Parmesan cheese evenly over the top.
- Bake the Frittata: Transfer the skillet to the preheated oven and bake for 20-25 minutes, or until the frittata is set and lightly golden on top. You can check for doneness by inserting a toothpick in the center; it should come out clean.
- Serve: Once cooked, remove the frittata from the oven and let it cool slightly before slicing. Serve warm and enjoy!
Extra Tips
For the best results, make sure to use a well-seasoned cast-iron skillet or an oven-safe non-stick skillet to prevent sticking.
You can add a splash of hot sauce or a sprinkle of fresh herbs like parsley or chives for an extra kick of flavor. If you prefer a vegetarian version, simply omit the sausage and add more vegetables of your choice.
Leftover frittata can be stored in the refrigerator for up to three days and can be enjoyed cold or reheated in the oven or microwave.
Roasted Cauliflower and Chickpea Curry

Roasted Cauliflower and Chickpea Curry is a hearty, flavorful dish that’s perfect for a cozy family dinner during the fall. This dish combines the earthy taste of roasted cauliflower with the nutty texture of chickpeas, all enveloped in a rich, aromatic curry sauce. It’s not only delicious but also packed with nutrients, making it an ideal choice for a healthy family meal.
The combination of spices, vegetables, and protein-rich chickpeas makes this curry a complete, satisfying dish for everyone to enjoy. This recipe is designed to serve 4-6 people, guaranteeing there’s plenty to go around your family table. The preparation is straightforward, and once you get the hang of it, you can easily adapt the spices to suit your family’s taste preferences.
Serve this curry with basmati rice or warm naan bread for a complete meal. The warm, inviting flavors of this dish are sure to become a family favorite during the cooler months.
Ingredients:
- 1 large head of cauliflower, cut into florets
- 1 can (15 oz) of chickpeas, drained and rinsed
- 2 tablespoons olive oil
- 1 onion, finely chopped
- 3 cloves garlic, minced
- 1 tablespoon fresh ginger, grated
- 1 can (14 oz) of diced tomatoes
- 1 can (14 oz) of coconut milk
- 2 tablespoons curry powder
- 1 teaspoon ground cumin
- 1 teaspoon ground coriander
- Salt and pepper to taste
- Fresh cilantro, chopped (for garnish)
- Cooked basmati rice or naan bread (for serving)
Instructions:
- Prepare the Cauliflower and Chickpeas: Preheat your oven to 400°F (200°C). Place the cauliflower florets and chickpeas on a baking sheet. Drizzle with 1 tablespoon of olive oil, and season with salt and pepper. Toss to coat evenly. Roast in the oven for 20-25 minutes until the cauliflower is tender and golden brown. Stir halfway through the cooking time for even roasting.
- Cook the Aromatics: While the cauliflower and chickpeas are roasting, heat the remaining tablespoon of olive oil in a large pot over medium heat. Add the chopped onion and sauté for about 5 minutes, or until the onion is translucent. Stir in the minced garlic and grated ginger, cooking for an additional 1-2 minutes until fragrant.
- Add Spices and Tomatoes: Sprinkle the curry powder, cumin, and coriander over the onion mixture. Stir well to coat the onions, and cook for 1 minute to release the flavors of the spices. Then, add the diced tomatoes to the pot, stirring to combine.
- Simmer the Curry: Pour in the coconut milk, stirring to mix everything together. Bring the mixture to a gentle simmer, then reduce the heat to low. Let the curry simmer for about 10 minutes to allow the flavors to meld together.
- Combine and Serve: Once the cauliflower and chickpeas are roasted, add them to the pot of curry. Stir well to guarantee everything is coated in the sauce. Let it simmer for another 5 minutes. Taste and adjust the seasoning with salt and pepper as needed. Serve hot, garnished with fresh cilantro, alongside basmati rice or naan bread.
Extra Tips:
For a deeper flavor, you can prepare the curry base a day ahead and let it sit in the refrigerator overnight. This allows the spices to infuse more thoroughly.
Additionally, if you prefer a spicier curry, consider adding a pinch of cayenne pepper or a sliced chili to the aromatics. For a creamier texture, use full-fat coconut milk and blend a portion of the sauce before adding back to the pot.
Keep in mind that the roasted cauliflower should be tender yet retain a slight crunch for the best texture contrast in the curry.
Apple Cider Glazed Salmon
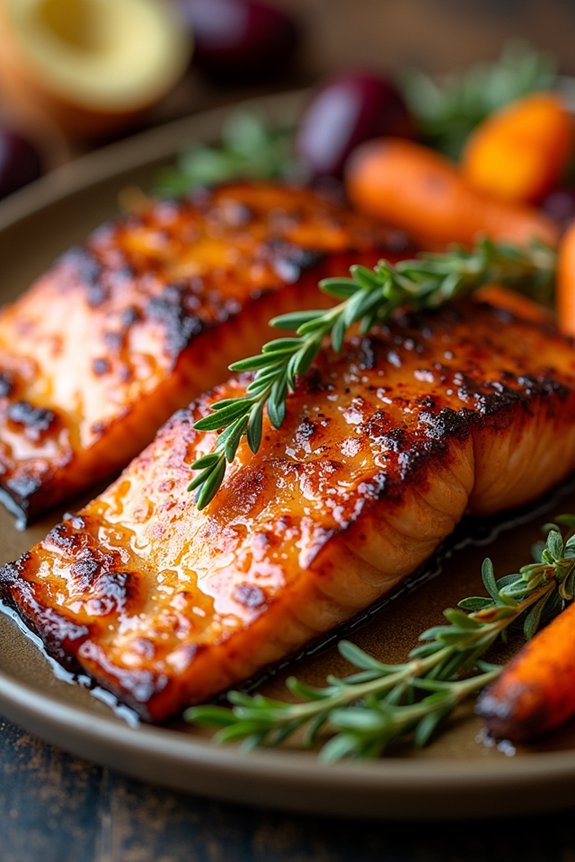
Healthy Fall Family Dinners are a wonderful way to bring the family together while enjoying the rich flavors of the season. One standout dish that perfectly embodies the essence of fall is Apple Cider Glazed Salmon. This delightful recipe combines the sweet and tangy notes of apple cider with the rich, savory flavor of salmon, creating a harmonious blend that’s both nutritious and satisfying.
Perfectly suited for a cozy family dinner, this dish not only provides a healthy dose of omega-3 fatty acids but also offers an array of vitamins and minerals from the fresh ingredients used.
Apple Cider Glazed Salmon is an ideal choice for those looking to enjoy a balanced meal without compromising on taste. The glaze, made from apple cider, brown sugar, and a hint of Dijon mustard, caramelizes beautifully over the salmon, infusing it with an irresistible sweetness and a subtle hint of spice.
Served alongside roasted fall vegetables or a fresh green salad, this dish is sure to become a family favorite. Below, you’ll find the necessary ingredients and step-by-step instructions to prepare this delicious dish for a serving size of 4-6 people.
Ingredients for 4-6 servings:
- 4-6 salmon fillets (approximately 6 ounces each)
- 1 cup apple cider
- 2 tablespoons brown sugar
- 1 tablespoon Dijon mustard
- 2 tablespoons olive oil
- 2 cloves garlic, minced
- Salt and pepper to taste
- Fresh thyme or parsley for garnish (optional)
Cooking Instructions:
- Preheat the Oven: Start by preheating your oven to 400°F (200°C). This will guarantee that the salmon cooks evenly.
- Prepare the Glaze: In a small saucepan, combine the apple cider, brown sugar, and Dijon mustard. Heat over medium heat, stirring occasionally, until the mixture reduces by half and thickens into a glaze. This should take about 10-15 minutes. Set aside to cool slightly.
- Season the Salmon: Pat the salmon fillets dry with a paper towel. Season both sides with salt and pepper to taste. This will enhance the natural flavors of the fish.
- Sear the Salmon: In a large oven-safe skillet, heat olive oil over medium-high heat. Add the minced garlic and sauté for 1 minute until fragrant. Place the salmon fillets skin-side down in the skillet and sear for 3-4 minutes until the skin is crispy.
- Apply the Glaze: Brush the apple cider glaze generously over the top of each salmon fillet. Make sure to reserve some glaze for basting.
- Bake the Salmon: Transfer the skillet to the preheated oven and bake for 10-12 minutes, or until the salmon is cooked through and flakes easily with a fork.
- Baste and Garnish: Remove the salmon from the oven and brush with any remaining glaze. Garnish with fresh thyme or parsley if desired before serving.
Extra Tips:
When cooking Apple Cider Glazed Salmon, be sure to choose fresh, high-quality salmon for the best flavor and texture. If you prefer a more intense apple flavor, you can add a splash of apple cider vinegar to the glaze.
Additionally, keep an eye on the glaze while reducing; it should be thick enough to coat the back of a spoon but not too sticky. If you don’t have an oven-safe skillet, you can transfer the salmon to a baking dish after searing.
Enjoy this dish with seasonal sides such as roasted sweet potatoes or a crisp autumn salad for a complete and balanced meal.