

Looking for some quick and easy dinner ideas that are healthy too?
I’ve found an amazing collection of 14 Instant Pot recipes that are perfect for busy weeknights.
Think hearty stews and vibrant veggie dishes that the whole family will love.
Each recipe is both nutritious and delicious, making mealtime stress-free.
Can’t wait for you to explore these wonderful options!
Hearty Chicken and Vegetable Stew
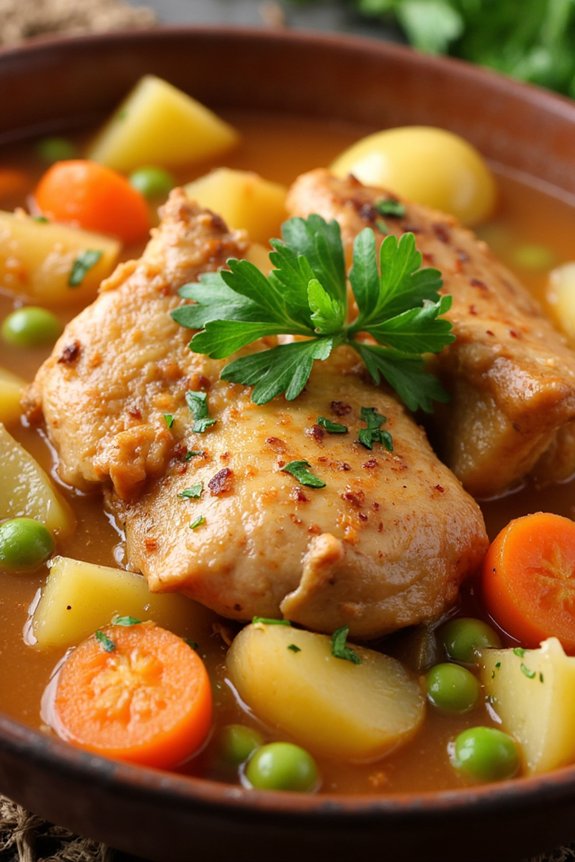
Hearty Chicken and Vegetable Stew is a comforting and nourishing dish that’s perfect for any time of year. This recipe combines tender pieces of chicken with a medley of colorful vegetables, all simmered together in a savory broth. The Instant Pot makes it incredibly easy to prepare, reducing the cooking time considerably without compromising on the rich flavors developed in traditional stews.
Whether you’re looking for a warming meal on a chilly evening or a wholesome dinner packed with nutrients, this stew is sure to satisfy.
The beauty of this dish lies not only in its taste but also in its versatility. You can adjust the vegetables based on what’s in season or what you have in your pantry, making it a great option for using up leftover produce. The addition of herbs and spices further enhances the stew’s depth of flavor, creating a harmonious blend that will have everyone coming back for seconds.
With the Instant Pot, you can enjoy this hearty stew with minimal effort and maximum flavor.
Ingredients for 4-6 servings:
- 1.5 pounds boneless, skinless chicken thighs, cut into bite-sized pieces
- 2 tablespoons olive oil
- 1 large onion, chopped
- 3 cloves garlic, minced
- 4 carrots, sliced
- 3 potatoes, diced
- 2 stalks celery, sliced
- 1 red bell pepper, chopped
- 1 cup frozen peas
- 4 cups chicken broth
- 1 teaspoon dried thyme
- 1 teaspoon dried rosemary
- 1 bay leaf
- Salt and pepper to taste
- 2 tablespoons cornstarch
- 2 tablespoons water
- Fresh parsley for garnish
Cooking Instructions:
- Prepare the Ingredients: Begin by chopping all the vegetables and cutting the chicken into bite-sized pieces. This guarantees that everything cooks evenly and is ready to go once you start cooking.
- Sauté the Aromatics: Set your Instant Pot to the sauté setting and add the olive oil. Once heated, add the chopped onion and minced garlic. Sauté for about 3 minutes until the onion becomes translucent and fragrant.
- Brown the Chicken: Add the chicken pieces to the pot and cook for about 5 minutes until they’re browned on all sides. This step helps to lock in the flavors of the chicken.
- Add the Vegetables and Broth: Stir in the carrots, potatoes, celery, red bell pepper, and frozen peas. Pour in the chicken broth and add the thyme, rosemary, bay leaf, salt, and pepper. Give everything a good stir to combine.
- Pressure Cook: Secure the lid on the Instant Pot and set it to high pressure for 15 minutes. This will cook the chicken and vegetables to tender perfection.
- Release Pressure and Thicken Stew: Once the cooking time is complete, allow a natural pressure release for 10 minutes before quick-releasing any remaining pressure. In a small bowl, mix the cornstarch and water to create a slurry. Set the Instant Pot to sauté and stir in the slurry to thicken the stew. Let it cook for a few more minutes until it reaches your desired consistency.
- Serve and Garnish: Remove the bay leaf and serve the stew hot, garnished with fresh parsley for a burst of color and flavor.
Extra Tips:
For an even richer flavor, consider adding a splash of white wine to the stew before pressure cooking. Additionally, if you prefer a thicker stew, you can adjust the amount of cornstarch slurry as needed.
This stew can also be made in advance and stored in the fridge for up to three days, allowing the flavors to meld even further. When reheating, you may need to add a bit more chicken broth to maintain the desired consistency. Enjoy this versatile and hearty dish with crusty bread or over a bed of rice for a complete meal.
Creamy Tuscan Garlic Chicken

Creamy Tuscan Garlic Chicken is a delightful and comforting dish that showcases a harmonious blend of flavors and textures. This recipe brings together tender chicken breasts, a rich and creamy garlic-infused sauce, and a vibrant mix of sun-dried tomatoes and spinach. It’s a perfect dish for a family dinner, offering a satisfying meal that feels both elegant and indulgent.
Using an Instant Pot not only speeds up the cooking process but also guarantees that the chicken remains juicy and flavorful. The magic of this dish lies in its robust flavors and ease of preparation, making it ideal for both busy weeknights and relaxed weekend gatherings.
The creaminess of the sauce pairs beautifully with the savory garlic and the slight tanginess of sun-dried tomatoes, while the spinach adds a fresh and nutritious component. In about 30 minutes, you can have a gourmet-style meal ready to serve, all thanks to the efficiency of the Instant Pot.
Ingredients (Serving Size: 4-6 people)
- 4 boneless, skinless chicken breasts
- 2 tablespoons olive oil
- 1 teaspoon salt
- 1/2 teaspoon black pepper
- 1 teaspoon Italian seasoning
- 4 cloves garlic, minced
- 1 cup chicken broth
- 1/2 cup heavy cream
- 1/2 cup grated Parmesan cheese
- 1/2 cup sun-dried tomatoes, chopped
- 2 cups fresh spinach
- 1 tablespoon cornstarch
- 1 tablespoon water
Cooking Instructions
- Prepare the Chicken: Season the chicken breasts on both sides with salt, black pepper, and Italian seasoning.
- Sauté in the Instant Pot: Set the Instant Pot to ‘Sauté’ mode and add olive oil. Once hot, add the chicken breasts and sear each side for about 2-3 minutes until golden brown. Remove the chicken and set aside.
- Sauté Garlic: In the same pot, add the minced garlic and sauté for about 30 seconds until fragrant.
- Deglaze and Add Liquids: Pour in the chicken broth, scraping up any browned bits from the bottom of the pot. This adds flavor to the sauce. Stir in the heavy cream and sun-dried tomatoes.
- Pressure Cook: Return the chicken to the Instant Pot, making sure it’s submerged in the sauce. Seal the lid, set the Instant Pot to ‘Pressure Cook’ on high for 8 minutes.
- Natural Release: Once the cooking time is up, allow the pressure to release naturally for 5 minutes, then perform a quick release for any remaining pressure.
- Thicken the Sauce: In a small bowl, mix cornstarch with water to create a slurry. Set the Instant Pot back to ‘Sauté’ mode and stir in the slurry to thicken the sauce to your desired consistency.
- Finish with Spinach: Add the fresh spinach and Parmesan cheese, stirring until the spinach wilts and the cheese melts into the sauce.
- Serve: Serve the Creamy Tuscan Garlic Chicken hot, garnished with additional Parmesan cheese if desired.
Extra Tips
For best results, use high-quality sun-dried tomatoes packed in oil for maximum flavor. If you prefer a thicker sauce, simply add a bit more cornstarch slurry and let it cook for an additional minute.
This dish pairs wonderfully with pasta, rice, or crusty bread, which can soak up the delicious sauce. If you’re watching your calorie intake, consider swapping heavy cream with half-and-half, though the sauce will be slightly less creamy.
Lemon Herb Salmon With Quinoa
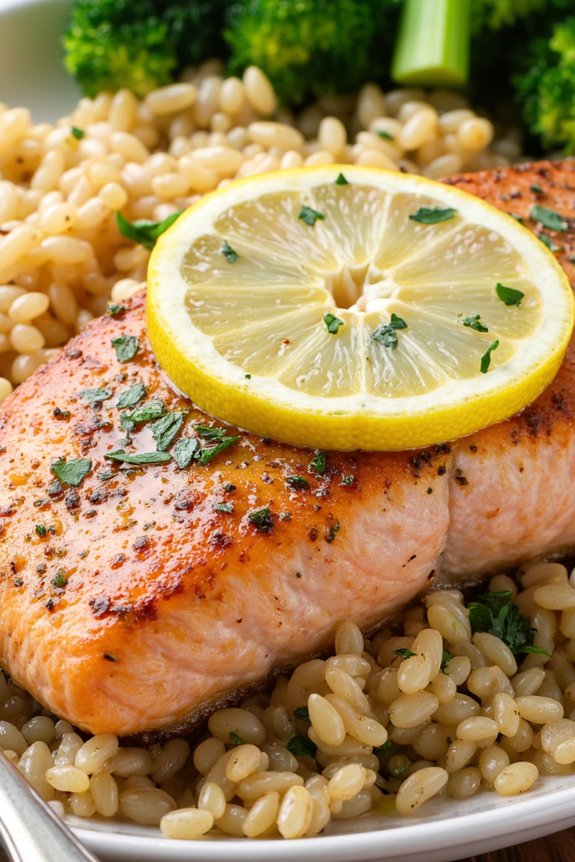
Lemon Herb Salmon With Quinoa is a delicious and nutritious meal that can be easily prepared in an Instant Pot, making it an ideal option for a healthy dinner. This dish combines the rich flavors of salmon seasoned with lemon and herbs, nestled on a bed of fluffy quinoa. The use of an Instant Pot guarantees that the salmon is perfectly cooked, remaining moist and tender, while the quinoa absorbs the savory flavors of the dish.
This recipe is perfect for those looking for a quick yet satisfying meal that doesn’t compromise on taste or health benefits. The combination of salmon and quinoa not only provides a high dose of protein but also includes essential nutrients such as omega-3 fatty acids, fiber, and various vitamins and minerals. This makes it a wholesome choice for families, catering to both adults and children.
By cooking these ingredients in an Instant Pot, you save time and effort, making it an excellent choice for weeknight dinners. The lemon and herb seasoning adds a zesty and fresh touch to the dish, complementing the natural flavors of the salmon and quinoa.
Ingredients for 4-6 servings:
- 1 ½ pounds salmon fillets
- 1 cup quinoa
- 2 cups vegetable or chicken broth
- 1 lemon, thinly sliced
- 2 tablespoons olive oil
- 3 cloves garlic, minced
- 1 teaspoon dried thyme
- 1 teaspoon dried rosemary
- Salt and pepper to taste
- Chopped fresh parsley for garnish
Cooking Instructions:
- Prepare the Quinoa: Rinse the quinoa under cold water to remove any bitterness. Drain well. Set your Instant Pot to sauté mode, add 1 tablespoon of olive oil, and sauté the minced garlic until fragrant. Add the rinsed quinoa and stir for about 2 minutes.
- Add Broth: Pour in the vegetable or chicken broth into the Instant Pot. Stir to confirm the quinoa is submerged. Cancel the sauté mode and set the Instant Pot to manual high pressure for 1 minute.
- Prepare Salmon: While the quinoa is cooking, season the salmon fillets with salt, pepper, dried thyme, and dried rosemary. Drizzle with the remaining olive oil and place lemon slices on top of each fillet.
- Cook Salmon: Once the Instant Pot timer goes off, perform a quick release of the pressure. Carefully open the lid and place the seasoned salmon fillets on top of the cooked quinoa. Close the lid and set the Instant Pot to steam mode for 3 minutes.
- Release Pressure and Serve: After the steam cycle is complete, perform a quick release. Carefully open the lid and check that the salmon is cooked through and flakes easily with a fork. Adjust seasoning if necessary.
- Garnish and Serve: Transfer the quinoa and salmon to a serving dish. Garnish with chopped fresh parsley before serving.
Extra Tips:
To confirm the salmon doesn’t overcook, make sure to use fillets that are uniform in thickness. If you prefer a more intense lemon flavor, squeeze fresh lemon juice over the salmon before steaming.
For added flavor, you can also include vegetables such as asparagus or broccoli, placing them on top of the quinoa before adding the salmon. Adjust the cooking time slightly if you add more ingredients to confirm everything is cooked to perfection.
Beef and Broccoli Stir-Fry
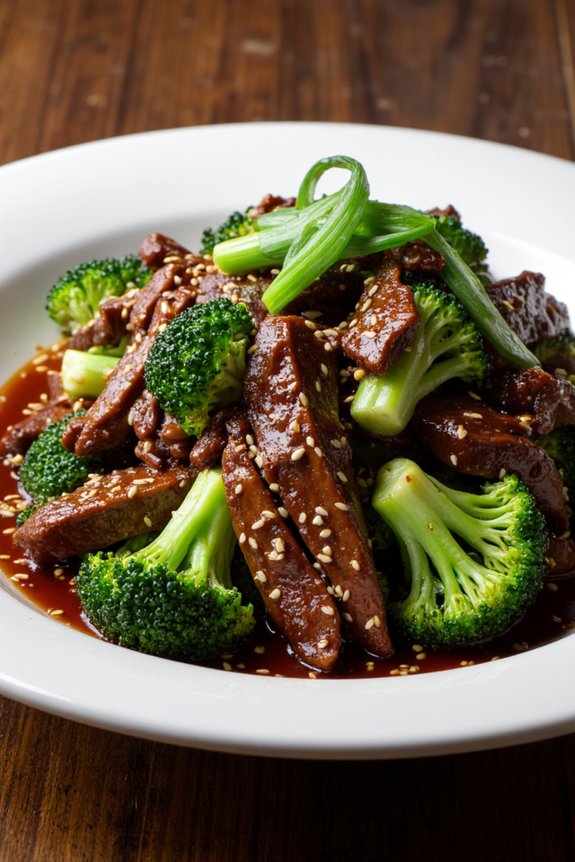
Beef and Broccoli Stir-Fry is a classic Chinese-American dish that combines tender beef with vibrant, crisp broccoli, all enveloped in a savory sauce. When made in an Instant Pot, this dish becomes even more convenient, as it drastically cuts down on cooking time while still delivering all the delicious flavors. This version of Beef and Broccoli is healthy, packed with protein and fiber, and perfect for a quick weeknight dinner.
The beauty of using an Instant Pot for this recipe is the ease of cooking and the ability to infuse the meat with rich flavors in a fraction of the time it would normally take. This dish pairs perfectly with steamed rice or cauliflower rice for a low-carb alternative. Its flavorful sauce, made from soy sauce, garlic, and ginger, coats the beef and broccoli beautifully, guaranteeing each bite is as tasty as the last.
Ingredients for Beef and Broccoli Stir-Fry (serves 4-6):
- 1 1/2 pounds flank steak, thinly sliced against the grain
- 4 cups broccoli florets
- 1 tablespoon vegetable oil
- 3 cloves garlic, minced
- 1 tablespoon fresh ginger, minced
- 1/2 cup low-sodium soy sauce
- 1/4 cup beef broth
- 1/4 cup honey
- 2 tablespoons cornstarch
- 2 tablespoons water
- 1 teaspoon sesame oil
- Salt and pepper, to taste
- Sesame seeds and green onions, for garnish (optional)
Cooking Instructions:
- Prepare the Ingredients: Begin by thinly slicing the flank steak against the grain. Mince the garlic and ginger, and set aside. In a small bowl, mix together the soy sauce, beef broth, and honey. In another bowl, combine the cornstarch and water to create a slurry, which will be used to thicken the sauce later.
- Sauté the Aromatics: Set your Instant Pot to the ‘Sauté’ function and add the vegetable oil. Once hot, add the minced garlic and ginger, sautéing for about 1 minute until fragrant.
- Cook the Beef: Add the sliced beef to the Instant Pot. Cook for about 3-4 minutes, stirring occasionally, until the beef is browned but not fully cooked through.
- Pressure Cook: Pour the soy sauce mixture over the beef. Close the lid of the Instant Pot, making sure the valve is set to ‘Sealing.’ Select the ‘Pressure Cook’ or ‘Manual’ setting and set the timer for 10 minutes.
- Quick Release & Thicken Sauce: Once the cooking time is complete, do a quick release of the pressure by carefully moving the valve to ‘Venting.’ Open the lid and set the Instant Pot back to ‘Sauté.’ Stir in the cornstarch slurry and sesame oil, allowing the sauce to thicken for about 2-3 minutes.
- Add Broccoli: Stir in the broccoli florets, cover with the lid (not sealing), and let them steam in the heat of the sauce for about 5 minutes until they’re tender-crisp.
- Serve: Season with salt and pepper to taste. Serve the Beef and Broccoli Stir-Fry over rice or your preferred side, garnishing with sesame seeds and sliced green onions if desired.
Extra Tips:
For best results, make sure to slice the beef thinly against the grain as this guarantees it remains tender. If you prefer a thicker sauce, feel free to use additional cornstarch slurry. Remember to adjust the salt according to your taste preference, especially if you’re using regular soy sauce instead of low-sodium.
If you’re short on time, frozen broccoli can be used, but be sure not to overcook it to maintain its texture. Enjoy your flavorful, healthy meal!
Vegetarian Lentil Curry
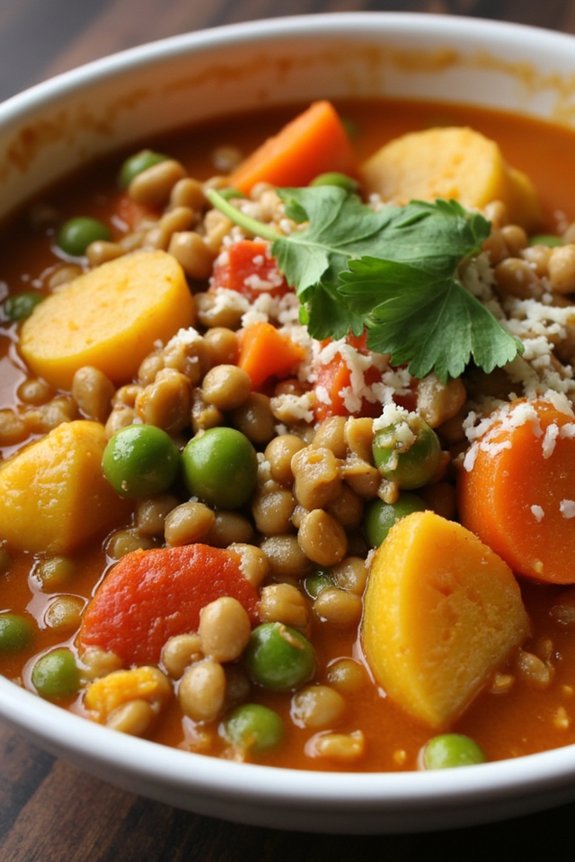
This Vegetarian Lentil Curry is a hearty and nutritious dish that’s perfect for a healthy weeknight dinner. Packed with protein-rich lentils, vibrant vegetables, and aromatic spices, this curry isn’t only delicious but also incredibly easy to prepare in an Instant Pot. The pressure cooking method allows the flavors to meld beautifully, resulting in a rich and satisfying meal that even non-vegetarians will love.
Whether you’re a seasoned curry enthusiast or trying it for the first time, this recipe is sure to become a staple in your dinner rotation.
The beauty of this Vegetarian Lentil Curry lies in its simplicity and versatility. You can tweak the spice levels to suit your taste or add different vegetables to the mix. Serve it over rice or with warm naan bread to soak up the flavorful sauce. It’s a perfect meal for feeding a crowd or meal-prepping for the week, as it stores and reheats well. Let’s explore the recipe for a serving size of 4-6 people.
Ingredients:
- 1 cup green or brown lentils, rinsed
- 1 tablespoon olive oil
- 1 large onion, chopped
- 3 cloves garlic, minced
- 1 tablespoon fresh ginger, grated
- 2 tablespoons curry powder
- 1 teaspoon ground cumin
- 1 teaspoon ground coriander
- 1/2 teaspoon turmeric
- 1/2 teaspoon cayenne pepper (optional)
- 1 can (14 oz) diced tomatoes
- 1 can (14 oz) coconut milk
- 2 cups vegetable broth
- 1 medium carrot, diced
- 1 red bell pepper, diced
- 1 cup frozen peas
- Salt and pepper to taste
- Juice of 1 lime
- Fresh cilantro for garnish
Cooking Instructions:
- Prepare the Instant Pot: Set your Instant Pot to the sauté function and add the olive oil. Once the oil is hot, add the chopped onion and sauté for about 3-4 minutes until it’s soft and translucent.
- Add Aromatics: Stir in the minced garlic and grated ginger. Sauté for another minute until fragrant, being careful not to burn the garlic.
- Spice It Up: Add the curry powder, ground cumin, ground coriander, turmeric, and cayenne pepper (if using). Stir the spices into the onion mixture, allowing them to toast for about 30 seconds to release their aromas.
- Mix in the Lentils and Liquids: Add the rinsed lentils, diced tomatoes (with their juices), coconut milk, and vegetable broth. Stir everything together to combine well.
- Add Vegetables: Stir in the diced carrot and red bell pepper. Season with salt and pepper to taste.
- Pressure Cook: Secure the lid on the Instant Pot and confirm the valve is set to the sealing position. Set the Instant Pot to Manual or Pressure Cook mode on high pressure for 15 minutes.
- Natural Release: Once the cooking time is complete, allow the pressure to release naturally for 10 minutes, then carefully turn the valve to the venting position to release any remaining pressure.
- Final Touches: Open the lid and stir in the frozen peas, allowing them to heat through. Add the lime juice and give the curry one final stir. Adjust the seasoning with more salt and pepper if needed.
- Serve and Garnish: Serve the curry hot, garnished with fresh cilantro on top. Pair it with rice or naan for a complete meal.
Extra Tips:
When cooking this Vegetarian Lentil Curry, you can experiment with different types of lentils if you prefer, but keep in mind that cooking times may vary. Red lentils, for example, cook faster and will result in a softer texture.
If you like your curry spicier, feel free to increase the cayenne pepper or add a chopped fresh chili. Additionally, if the curry is too thick for your liking after cooking, simply stir in a bit more vegetable broth or water to reach the desired consistency.
This dish can be stored in the refrigerator for up to 5 days or frozen for longer storage, making it perfect for meal prep.
Honey Garlic Chicken Thighs
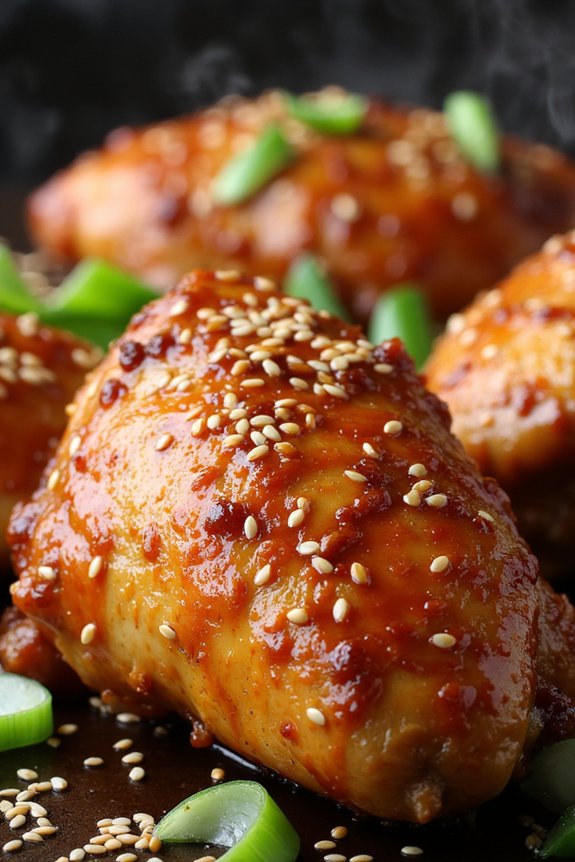
Honey Garlic Chicken Thighs is a delightful and savory dish that combines the natural sweetness of honey with the rich, umami flavor of soy sauce and the pungent aroma of garlic. This recipe takes advantage of the Instant Pot‘s pressure-cooking capabilities to create a meal that isn’t only quick to prepare but also incredibly tender and flavorful.
Ideal for busy weeknights, this dish is sure to become a family favorite due to its simplicity and its crowd-pleasing taste. The beauty of using an Instant Pot is that it allows you to lock in all the flavors while notably reducing cooking time. The chicken thighs become perfectly cooked, absorbing the sweet and tangy sauce, resulting in a mouthwatering experience.
This recipe is designed to serve 4-6 people, making it perfect for a family dinner or a small gathering of friends. Here’s how to make this delicious dish:
Ingredients (serving size of 4-6 people):
- 6 bone-in, skin-on chicken thighs
- 1/3 cup soy sauce
- 1/3 cup honey
- 5 cloves garlic, minced
- 1 tablespoon rice vinegar
- 1 tablespoon sesame oil
- 1 teaspoon ginger, grated
- 1 teaspoon cornstarch
- 2 tablespoons water
- 1 tablespoon sesame seeds (for garnish)
- 2 green onions, sliced (for garnish)
Instructions:
- Prepare the Sauce: In a medium bowl, combine soy sauce, honey, minced garlic, rice vinegar, sesame oil, and grated ginger. Mix well until the honey is completely dissolved and the ingredients are fully combined to form a smooth sauce.
- Sear the Chicken: Set your Instant Pot to the ‘Sauté’ function. Once hot, add the chicken thighs skin-side down and sear until the skin is golden brown and crispy, about 3-4 minutes per side. You may need to do this in batches to avoid overcrowding. Remove the chicken and set aside.
- Deglaze the Pot: Pour a little bit of the prepared sauce into the pot to deglaze, using a wooden spoon to scrape up any bits stuck to the bottom. This step is essential to avoid triggering the burn warning on your Instant Pot.
- Pressure Cook: Place the seared chicken thighs back into the Instant Pot. Pour the remaining sauce over the top. Secure the lid and set the Instant Pot to ‘Pressure Cook’ on high for 10 minutes.
- Natural Release: After the cooking cycle is complete, allow the pressure to release naturally for 5 minutes before performing a quick release to let out any remaining pressure.
- Thicken the Sauce: Remove the chicken thighs and set aside. Switch the Instant Pot back to ‘Sauté’. In a small bowl, mix the cornstarch with 2 tablespoons of water to create a slurry. Add this mixture to the sauce in the pot, stirring constantly until the sauce thickens.
- Serve: Return the chicken thighs to the pot to coat them in the thickened sauce. Serve immediately, garnished with sesame seeds and sliced green onions.
Extra Tips: To promote the best flavor and texture, use bone-in, skin-on chicken thighs. The bone helps retain moisture, while the skin adds a delightful crispiness when seared.
If you prefer a slightly spicier dish, consider adding a pinch of red pepper flakes to the sauce. For a healthier option, you can remove the skin before cooking or opt for skinless thighs. Additionally, if you find the sauce too thick, you can thin it out with a bit more water or chicken broth.
Serve this dish with steamed rice or sautéed vegetables to complete the meal.
Spaghetti Bolognese
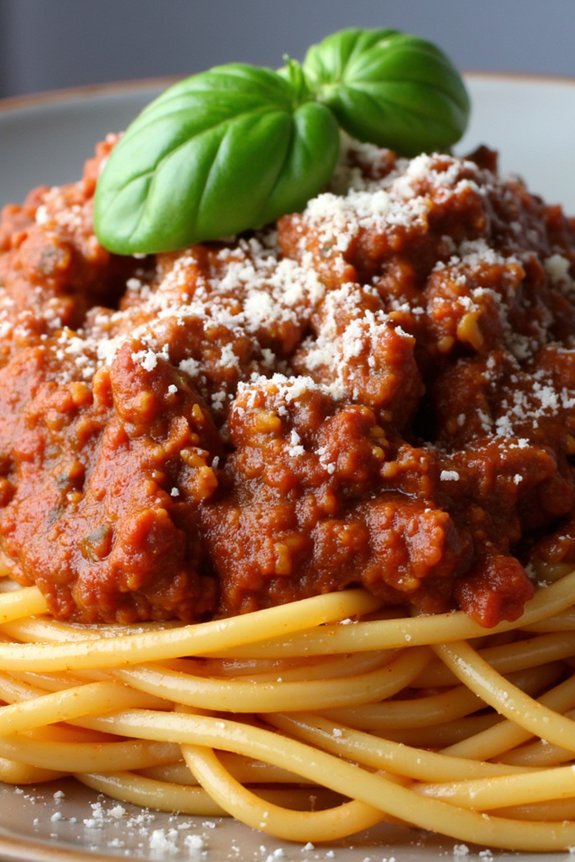
Spaghetti Bolognese is a classic Italian dish that combines rich, savory flavors with a comforting, hearty texture. Using an Instant Pot to prepare this meal not only speeds up the cooking process but also enhances the depth of flavors as the ingredients meld together under pressure. This recipe is perfect for busy weeknights when you crave a homemade meal without the hassle of extensive preparation or cleanup.
Made with lean ground beef, aromatic vegetables, and a robust tomato sauce, this Instant Pot Spaghetti Bolognese will satisfy your craving for Italian cuisine while keeping things healthy. The Instant Pot allows you to brown the meat and simmer the sauce all in one pot, making it a convenient option for families looking to enjoy a delicious dinner with minimal effort. This recipe yields enough to serve 4-6 people, making it ideal for family dinners or small gatherings.
Ingredients for 4-6 Servings:
- 1 tablespoon olive oil
- 1 pound lean ground beef
- 1 onion, finely chopped
- 2 cloves garlic, minced
- 1 carrot, finely diced
- 1 celery stalk, finely diced
- 1 teaspoon dried oregano
- 1 teaspoon dried basil
- 1/2 teaspoon salt
- 1/4 teaspoon black pepper
- 1/2 cup red wine (optional)
- 1 can (28 ounces) crushed tomatoes
- 2 tablespoons tomato paste
- 1 cup beef broth
- 8 ounces spaghetti, broken in half
- Grated Parmesan cheese for serving
- Fresh basil leaves for garnish
Cooking Instructions:
- Prepare the Instant Pot: Set the Instant Pot to the ‘Sauté’ function and add the olive oil. Allow it to heat up slightly, then add the chopped onion, garlic, carrot, and celery. Sauté the vegetables for about 5 minutes until they become soft and fragrant.
- Brown the Meat: Add the ground beef to the Instant Pot. Cook it with the vegetables, stirring frequently, until the beef is browned and no longer pink. This should take about 5-7 minutes.
- Season the Mixture: Stir in the dried oregano, dried basil, salt, and black pepper. If using, pour in the red wine and let it simmer for about 2 minutes to allow the alcohol to evaporate and the flavors to meld.
- Add Tomatoes and Broth: Pour in the crushed tomatoes, tomato paste, and beef broth. Stir well to combine all ingredients.
- Add Spaghetti: Break the spaghetti in half and gently layer it on top of the sauce in a crisscross pattern to prevent clumping. Don’t stir the pasta into the sauce. Instead, gently press it down with a spatula just enough so it’s submerged in the liquid.
- Cook Under Pressure: Secure the lid on the Instant Pot and set the valve to the ‘Sealing’ position. Select the ‘Manual’ or ‘Pressure Cook’ function and set the cooking time for 8 minutes.
- Release Pressure: After the cooking cycle is complete, carefully perform a quick release of the pressure by turning the valve to the ‘Venting’ position. Once the pressure is fully released and the pin drops, open the lid.
- Finish and Serve: Stir the spaghetti into the sauce to guarantee it’s evenly coated. Let it sit for a few minutes to absorb more flavor. Serve hot, topped with grated Parmesan cheese and fresh basil leaves.
Extra Tips:
For an even deeper flavor, you can add a bay leaf to the sauce before pressure cooking. If you prefer a spicier kick, consider adding a pinch of red pepper flakes when seasoning.
It’s important to layer the spaghetti on top of the sauce without stirring to avoid sticking or clumping. If you find the sauce too thick after cooking, you can add a little more beef broth or water to reach your desired consistency.
Finally, leftovers can be stored in the fridge for up to 3 days, making it a great meal prep option.
Teriyaki Chicken and Rice
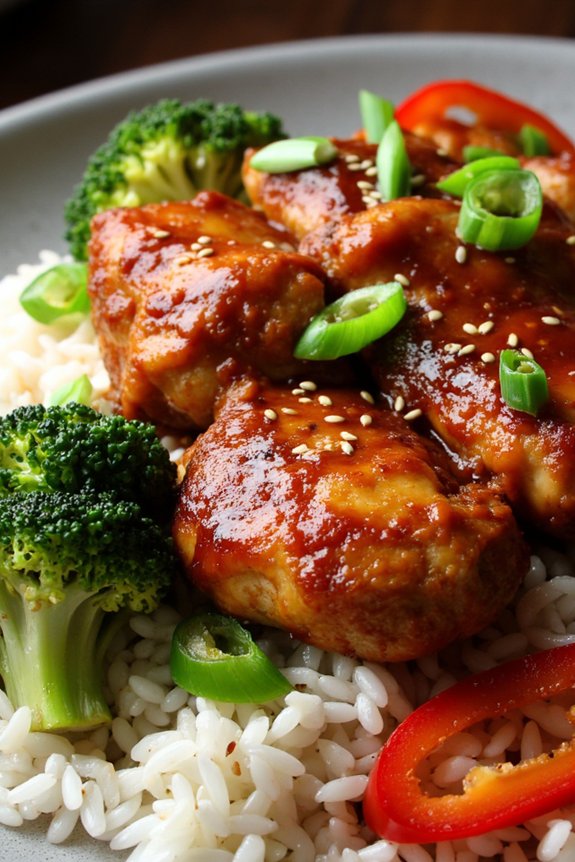
Teriyaki Chicken and Rice is a delightful and healthy meal that can be prepared effortlessly using an Instant Pot. This dish combines juicy chicken, flavorful teriyaki sauce, and perfectly cooked rice to create a meal that’s both satisfying and nutritious. The pressure cooking method not only speeds up the cooking process but also helps in infusing the chicken with the rich flavors of the teriyaki sauce.
Whether you’re preparing a quick weeknight dinner or meal prepping for the week, this recipe is sure to become a family favorite.
The beauty of this Teriyaki Chicken and Rice recipe lies in its simplicity and the ability to deliver a restaurant-quality meal in the comfort of your home. The Instant Pot guarantees that the chicken remains tender and the rice absorbs the savory sauce, creating a harmonious blend of taste and texture.
This one-pot wonder saves time on both cooking and cleaning, making it an ideal choice for busy individuals who still want to enjoy a homemade meal. Let’s explore the ingredients and steps to prepare this delicious dish for a serving size of 4-6 people.
Ingredients:
- 1 1/2 pounds boneless, skinless chicken thighs
- 1 cup jasmine rice
- 1 cup low-sodium chicken broth
- 1/2 cup teriyaki sauce
- 2 tablespoons soy sauce
- 1 tablespoon honey
- 2 cloves garlic, minced
- 1 teaspoon ginger, grated
- 1 tablespoon olive oil
- 1 cup broccoli florets
- 1 red bell pepper, sliced
- 2 green onions, sliced
- Sesame seeds (optional, for garnish)
Cooking Instructions:
- Prepare the Ingredients: Begin by cutting the chicken thighs into bite-sized pieces. Rinse the jasmine rice under cold water until the water runs clear, then drain it well. Gather all other ingredients and keep them ready for easy access.
- Sauté the Chicken: Set your Instant Pot to the ‘Sauté’ mode and heat the olive oil. Add the chicken pieces and cook them until they’re lightly browned on all sides. This step seals in the juices of the chicken. Remove the chicken from the pot and set aside.
- Make the Sauce: In the same pot, add minced garlic and grated ginger, sautéing for about 30 seconds until fragrant. Stir in the teriyaki sauce, soy sauce, and honey, mixing well to combine all the flavors.
- Add Rice and Liquid: Pour in the chicken broth and add the rinsed jasmine rice to the pot. Ascertain the rice is evenly distributed in the liquid. Place the browned chicken pieces back into the pot on top of the rice.
- Pressure Cook: Secure the Instant Pot lid and set it to ‘Sealing’. Select the ‘Pressure Cook’ or ‘Manual’ mode and set the timer for 10 minutes. After cooking, allow the pressure to naturally release for 5 minutes, then carefully perform a quick release for any remaining pressure.
- Add Vegetables: Open the lid and add the broccoli florets and sliced red bell pepper. Stir gently to combine and close the lid again. Let the vegetables steam in the residual heat for about 5 minutes until they’re just tender.
- Finish and Serve: Once the vegetables are cooked to your liking, give everything a final stir. Transfer the Teriyaki Chicken and Rice to serving plates, garnishing with sliced green onions and sesame seeds if desired. Enjoy your meal warm.
Extra Tips:
For an extra depth of flavor, you can marinate the chicken in teriyaki sauce for at least 30 minutes before cooking. If you prefer a thicker sauce, you can remove the cooked chicken and rice, then set the Instant Pot to ‘Sauté’ mode and let the sauce reduce for a few minutes.
Adjust the seasoning to your taste by adding more soy sauce or honey. Feel free to substitute the broccoli and bell pepper with other vegetables like snap peas or carrots depending on your preference.
Moroccan Chickpea Tagine
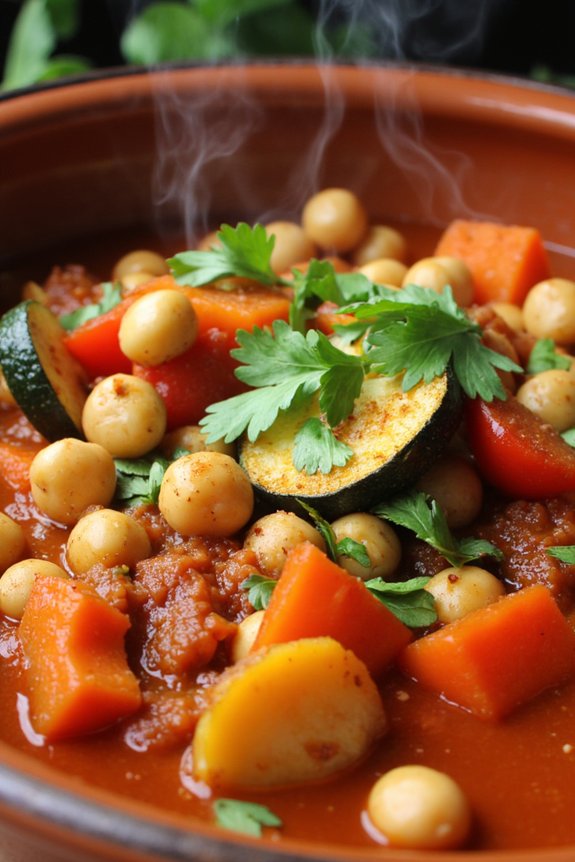
Moroccan Chickpea Tagine is a vibrant and aromatic dish that brings the exotic flavors of North Africa straight to your table. This dish is perfect for those who are looking to enjoy a hearty, plant-based meal that’s both nutritious and satisfying. The Instant Pot makes it easy to prepare, ensuring that the traditional slow-cooked flavors are achieved in a fraction of the time.
This tagine is packed with chickpeas, vegetables, and a delightful blend of spices that will warm your soul and tantalize your taste buds. The beauty of this Moroccan Chickpea Tagine lies in its simplicity and versatility. It’s a one-pot wonder that can be served over couscous, rice, or with warm flatbread to soak up the rich sauce.
Whether you’re a seasoned vegan or simply looking to add more plant-based meals to your diet, this dish is a perfect choice. It’s not only delicious but also incredibly nutritious, providing a good source of protein and fiber from the chickpeas, along with a variety of vitamins and minerals from the vegetables and spices.
Ingredients (Serves 4-6)
- 1 tablespoon olive oil
- 1 large onion, chopped
- 3 cloves garlic, minced
- 1 teaspoon ground cumin
- 1 teaspoon ground coriander
- 1 teaspoon ground cinnamon
- 1/2 teaspoon ground ginger
- 1/2 teaspoon cayenne pepper
- 1 (14-ounce) can diced tomatoes
- 4 cups vegetable broth
- 2 (15-ounce) cans chickpeas, drained and rinsed
- 2 carrots, sliced
- 1 red bell pepper, chopped
- 1 zucchini, sliced
- 1/2 cup dried apricots, chopped
- Salt and pepper to taste
- Fresh cilantro, chopped, for garnish
Cooking Instructions
- Prepare the Instant Pot: Set your Instant Pot to the sauté setting and add the olive oil. Once the oil is hot, add the chopped onion and sauté for about 3 minutes until it becomes translucent. Add the minced garlic and sauté for another minute.
- Add Spices: Stir in the ground cumin, ground coriander, ground cinnamon, ground ginger, and cayenne pepper. Cook for about 1 minute, stirring constantly, until the spices are fragrant.
- Add Liquids and Chickpeas: Pour in the diced tomatoes and vegetable broth, scraping the bottom of the pot to loosen any brown bits. Add the chickpeas, carrots, red bell pepper, zucchini, and dried apricots. Stir well to combine.
- Pressure Cook: Secure the lid of the Instant Pot and set it to high pressure for 10 minutes. Once the cooking time is complete, allow the pressure to release naturally for 10 minutes before performing a quick release to let out any remaining pressure.
- Season and Serve: Open the lid carefully and season the tagine with salt and pepper to taste. Stir well and let it sit for a few minutes to allow the flavors to meld. Serve hot, garnished with fresh cilantro.
Extra Tips
For a richer flavor, you can toast the spices for a few minutes before adding them to the pot. This will enhance their aroma and depth.
If you prefer a thicker tagine, you can use less vegetable broth or simmer the finished dish on sauté mode for a few extra minutes to reduce the liquid. To add some extra protein, consider adding some cubed tofu or tempeh along with the vegetables.
This dish can also be made a day in advance, as the flavors will continue to develop, making it even more delicious when reheated.
Thai Red Curry With Tofu
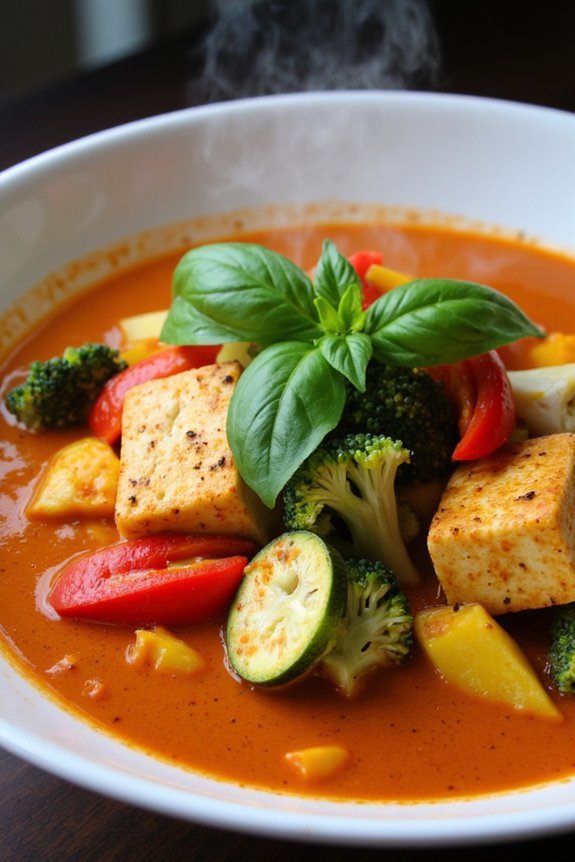
Thai Red Curry With Tofu is a delightful and healthy dish that can be easily prepared using an Instant Pot. The combination of rich and aromatic Thai red curry paste with coconut milk creates a creamy and flavorful sauce that perfectly complements the tender tofu cubes and crisp vegetables. This dish isn’t only delicious but also nutritious, providing a great source of plant-based protein and essential vitamins.
Whether you’re a fan of Thai cuisine or simply looking for a quick and healthy dinner option, this Instant Pot recipe will surely satisfy your taste buds.
Cooking Thai Red Curry With Tofu in an Instant Pot greatly reduces the time needed to infuse the flavors while guaranteeing the tofu and vegetables maintain their texture. The pressure cooking method helps meld the spices into the coconut milk, creating a harmonious and spicy sauce.
Additionally, this one-pot meal makes for an easy cleanup, making it an ideal choice for busy weeknights. Serve it over jasmine rice or with a side of steamed vegetables for a complete meal that will transport you to the streets of Thailand.
Ingredients (serving size: 4-6 people):
- 1 block (14 oz) firm tofu, drained and pressed
- 2 tablespoons vegetable oil
- 1 onion, sliced
- 2 cloves garlic, minced
- 1 red bell pepper, sliced
- 1 zucchini, sliced
- 1 cup broccoli florets
- 2 tablespoons Thai red curry paste
- 1 can (13.5 oz) coconut milk
- 1 tablespoon soy sauce
- 1 tablespoon brown sugar
- 1 tablespoon lime juice
- 1 cup vegetable broth
- Fresh basil leaves for garnish
Cooking Instructions:
- Prepare the Tofu: Start by cutting the drained and pressed tofu into bite-sized cubes. Set aside.
- Sauté Aromatics: Set your Instant Pot to ‘Sauté’ mode and add the vegetable oil. Once hot, add the sliced onion and minced garlic. Sauté for about 2 minutes until the onion becomes translucent and fragrant.
- Add Vegetables: Add the red bell pepper, zucchini, and broccoli florets to the pot. Stir frequently and sauté for an additional 3-4 minutes until the vegetables begin to soften.
- Incorporate the Curry Paste: Stir in the Thai red curry paste, ensuring that all the vegetables are well-coated. Cook for another 1-2 minutes to release the flavors of the curry paste.
- Add Liquid Ingredients: Pour in the coconut milk, soy sauce, brown sugar, lime juice, and vegetable broth. Stir well to combine all the ingredients.
- Pressure Cook: Add the cubed tofu to the pot, gently mixing it into the curry. Secure the lid of the Instant Pot and set the valve to ‘Sealing’. Select the ‘Pressure Cook’ or ‘Manual’ setting and cook on high pressure for 5 minutes.
- Release Pressure: Once cooking is complete, perform a quick release by carefully turning the valve to ‘Venting’. Once all the pressure has been released, open the lid.
- Final Touches: Stir the curry gently to combine all the flavors. Taste and adjust seasoning if necessary. Garnish with fresh basil leaves before serving.
Extra Tips:
For the best results, guarantee that the tofu is well-pressed to remove excess moisture before cooking. This will help it absorb the flavors of the curry better and maintain its shape.
If you prefer a spicier curry, you can increase the amount of Thai red curry paste or add a pinch of chili flakes. This dish can also be customized with your choice of vegetables, such as baby corn or snap peas, to suit your taste.
Additionally, for a protein variation, consider adding chickpeas or edamame for an extra boost of nutrition.
Mexican Quinoa Casserole
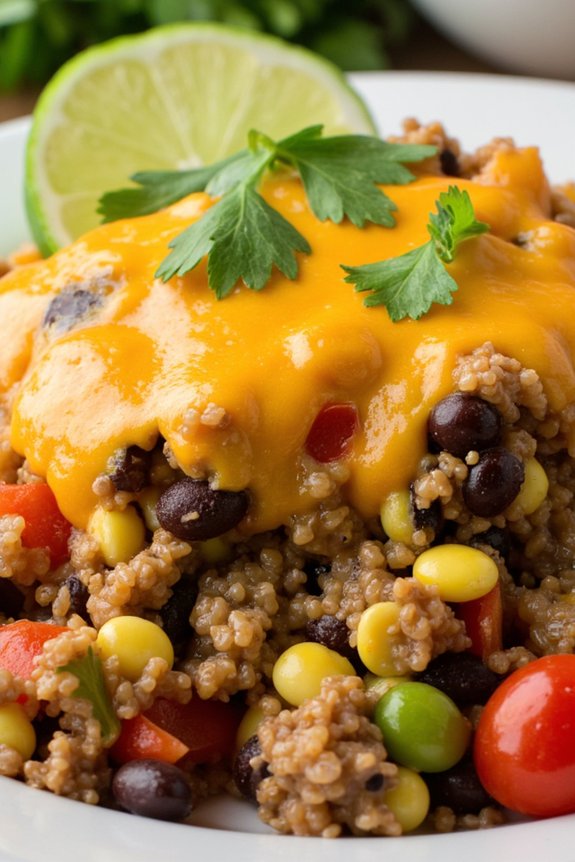
Mexican Quinoa Casserole is a vibrant and flavorful dish that’s perfect for a healthy dinner option. Combining protein-rich quinoa with beans, vegetables, and a blend of Mexican spices, this casserole is both satisfying and nutritious. Cooked entirely in an Instant Pot, it isn’t only quick to prepare but also minimizes clean-up, making it an ideal choice for busy weeknights. The result is a hearty casserole that the whole family will love, packed with flavor and a subtle kick from the spices.
The beauty of this Mexican Quinoa Casserole lies in its versatility and ease. With a few simple ingredients and spices, you can create a meal that isn’t only delicious but also nourishing and filling. It’s a great way to incorporate more plant-based proteins into your diet, and you can easily adjust the spice level to suit your taste. Perfect for serving 4-6 people, this dish is sure to become a staple in your dinner rotation, offering a delightful taste of Mexico in every bite.
Ingredients:
- 1 cup quinoa, rinsed
- 1 can (15 oz) black beans, drained and rinsed
- 1 can (15 oz) corn, drained
- 1 can (15 oz) diced tomatoes with green chiles
- 1 bell pepper, diced
- 1 small onion, diced
- 2 cloves garlic, minced
- 2 teaspoons chili powder
- 1 teaspoon cumin
- 1 teaspoon paprika
- 1/2 teaspoon salt
- 1/2 teaspoon black pepper
- 1 cup vegetable broth
- 1/2 cup shredded cheddar cheese
- 1/4 cup chopped fresh cilantro, for garnish
- Lime wedges, for serving
Instructions:
- Prepare the Ingredients: Start by thoroughly rinsing the quinoa under cold water. This step is essential to remove any bitterness from the quinoa’s natural coating.
- Sauté Vegetables: Set the Instant Pot to sauté mode. Add a small amount of oil, then add the diced onion and bell pepper. Sauté for about 3-4 minutes until the vegetables begin to soften. Add the minced garlic and sauté for an additional 1 minute until fragrant.
- Combine Ingredients: Turn off the sauté mode and add the rinsed quinoa, black beans, corn, diced tomatoes with green chiles, chili powder, cumin, paprika, salt, and pepper to the Instant Pot. Pour in the vegetable broth and stir to combine all ingredients evenly.
- Cook the Casserole: Secure the lid on the Instant Pot and set it to manual high pressure for 8 minutes. Once the cooking time is complete, allow the pressure to release naturally for about 5 minutes, then carefully perform a quick release to remove any remaining pressure.
- Add Cheese and Serve: After opening the lid, give the casserole a good stir. Sprinkle the shredded cheddar cheese on top and let it melt into the casserole. Serve hot, garnished with fresh cilantro and lime wedges on the side for an extra burst of flavor.
Extra Tips: To enhance the flavor, you can add some chopped jalapeños if you enjoy a spicier dish. Additionally, if you prefer a creamier texture, consider stirring in a dollop of sour cream or Greek yogurt before serving. For a smoky flavor, try using smoked paprika instead of regular paprika. This dish can also be made ahead of time and stored in the refrigerator for up to 3 days, making it a great option for meal prep.
Spinach and Mushroom Risotto
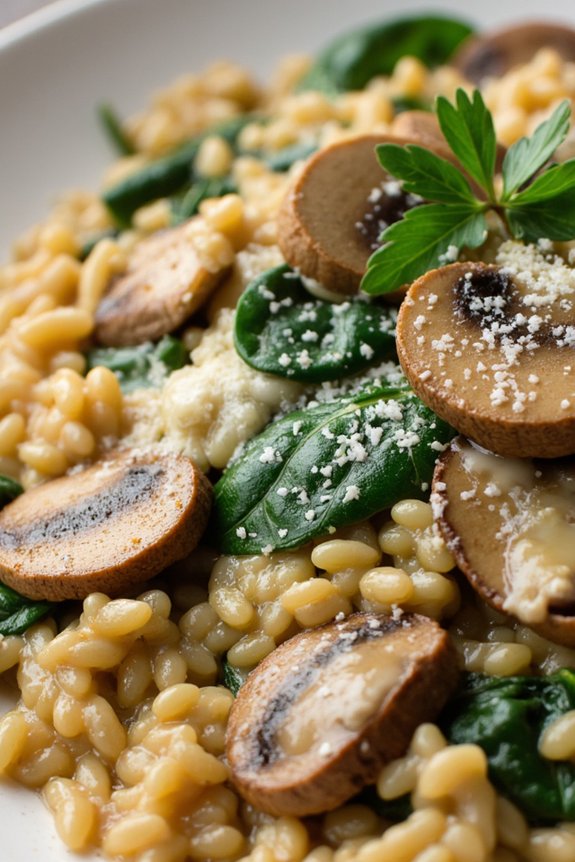
If you’re looking for a comforting and healthy dinner option, Spinach and Mushroom Risotto is a fantastic choice. This creamy, flavorful dish combines earthy mushrooms with the vibrant freshness of spinach, all nestled in a bed of perfectly cooked arborio rice.
Using an Instant Pot makes this recipe not only quick and convenient but also guarantees a rich and creamy texture without the need for constant stirring. It’s a perfect one-pot meal that will satisfy your taste buds and provide a nutritious dinner option for the whole family.
This risotto is packed with nutrients from the spinach and mushrooms, which are both excellent sources of vitamins and minerals. The Instant Pot locks in flavors and nutrients, making it an ideal cooking method for a wholesome meal.
The dish can be served as a main course or a side dish, and it’s sure to be a hit with everyone at the table. Whether you’re a risotto aficionado or a beginner, this recipe is straightforward and foolproof, promising a restaurant-quality meal at home.
Ingredients (Serves 4-6):
- 1 tablespoon olive oil
- 1 small onion, finely chopped
- 3 cloves garlic, minced
- 1 cup arborio rice
- 1/2 cup dry white wine
- 4 cups vegetable broth
- 8 ounces mushrooms, sliced
- 5 ounces fresh spinach
- 1/2 cup grated Parmesan cheese
- Salt and pepper to taste
- Optional: fresh parsley for garnish
Cooking Instructions:
- Prepare the Instant Pot: Set your Instant Pot to the sauté function. Once it’s hot, add the olive oil and allow it to heat up.
- Sauté the Aromatics: Add the chopped onion and minced garlic to the pot, stirring frequently until the onion becomes translucent and fragrant, about 2-3 minutes.
- Cook the Rice: Add the arborio rice to the pot, stirring continuously for about 1-2 minutes until the rice is lightly toasted and coated in the oil.
- Deglaze with Wine: Pour in the white wine and stir until it’s mostly evaporated. This step adds depth and dimension to the risotto’s flavor.
- Add the Broth and Mushrooms: Stir in the vegetable broth and sliced mushrooms. Close the lid and set the Instant Pot to high pressure for 5 minutes.
- Release Pressure: Once the cooking time is up, carefully perform a quick release of the pressure. Be cautious of the steam.
- Finish the Risotto: Open the lid and stir in the fresh spinach until it wilts. Add the grated Parmesan cheese, stirring until the risotto is creamy and well-combined. Season with salt and pepper to taste.
- Serve: Serve the risotto hot, garnished with fresh parsley if desired.
Extra Tips:
For an extra burst of flavor, you can sauté the mushrooms separately in a bit of butter before adding them to the pot. This will enhance their earthy taste.
If you prefer a non-alcoholic version, you can substitute the white wine with an equal amount of extra broth. Remember, risotto is best enjoyed fresh, so try to serve it immediately after cooking for the creamiest texture.
If you have leftovers, add a splash of broth when reheating to restore its creamy consistency.
Paleo Beef Chili
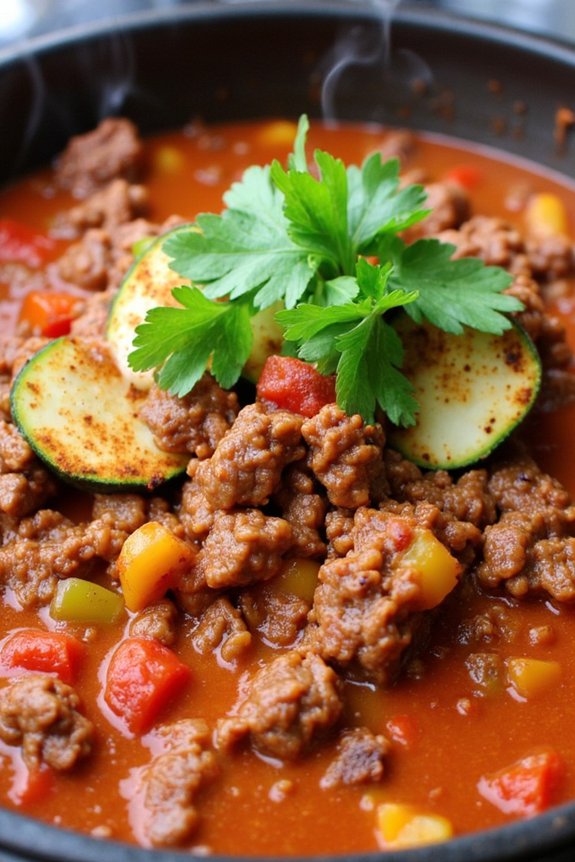
Paleo Beef Chili is a hearty and nutritious dish that brings a delightful combination of flavors and textures to your dinner table. Perfect for those following a paleo diet, this chili is made without beans, focusing instead on a rich blend of vegetables, ground beef, and spices that will satisfy your taste buds without compromising on your dietary goals.
The Instant Pot makes it incredibly easy to prepare, allowing the flavors to meld together beautifully while saving you time in the kitchen. This recipe is perfect for a cozy family dinner, serving 4-6 people. As the chili cooks, it fills your home with an irresistible aroma that will have everyone enthusiastically waiting for dinner.
The combination of tender beef, vibrant vegetables, and a perfect balance of spices makes this dish a wholesome and delicious option for any night of the week.
Ingredients:
- 2 tablespoons olive oil
- 1 large onion, diced
- 3 cloves garlic, minced
- 1 pound ground beef
- 1 large red bell pepper, diced
- 1 large green bell pepper, diced
- 1 medium zucchini, diced
- 1 (14.5 oz) can diced tomatoes
- 3 tablespoons tomato paste
- 1 cup beef broth
- 2 tablespoons chili powder
- 1 teaspoon ground cumin
- 1 teaspoon paprika
- 1/2 teaspoon cayenne pepper (optional, for heat)
- Salt and pepper to taste
- Fresh cilantro, chopped (for garnish)
Cooking Instructions:
- Sauté the Aromatics: Set your Instant Pot to the ‘Sauté’ function and heat the olive oil. Add the diced onion and minced garlic, cooking until the onion becomes translucent and fragrant, about 3-4 minutes.
- Brown the Beef: Add the ground beef to the Instant Pot. Cook, breaking it apart with a wooden spoon, until it’s no longer pink. This should take about 5-7 minutes. Drain any excess fat if necessary.
- Add Vegetables: Stir in the diced red and green bell peppers and zucchini. Cook for an additional 2-3 minutes.
- Incorporate the Base: Add the diced tomatoes, tomato paste, and beef broth to the pot. Stir well to combine all the ingredients.
- Season the Chili: Add the chili powder, ground cumin, paprika, cayenne pepper (if using), salt, and pepper. Stir to evenly distribute the spices throughout the mixture.
- Pressure Cook: Secure the lid on the Instant Pot and set it to ‘Pressure Cook’ or ‘Manual’ mode on high pressure for 15 minutes.
- Release Pressure: Once the cooking time is complete, allow the pressure to release naturally for 10 minutes, then quick release any remaining pressure.
- Serve: Open the lid carefully, give the chili a good stir, and taste for seasoning adjustments. Serve hot, garnished with fresh cilantro.
Extra Tips: For an even richer flavor, consider letting the chili sit for a few hours after cooking to allow the flavors to deepen and meld together.
You might also want to try adding a squeeze of fresh lime juice just before serving for a hint of brightness. If you prefer a thicker chili, you can use the ‘Sauté’ function after cooking to simmer off any excess liquid.
Adjust the level of heat by varying the amount of cayenne pepper or adding some diced jalapeños while sautéing the vegetables.
Shrimp and Asparagus Stir-Fry
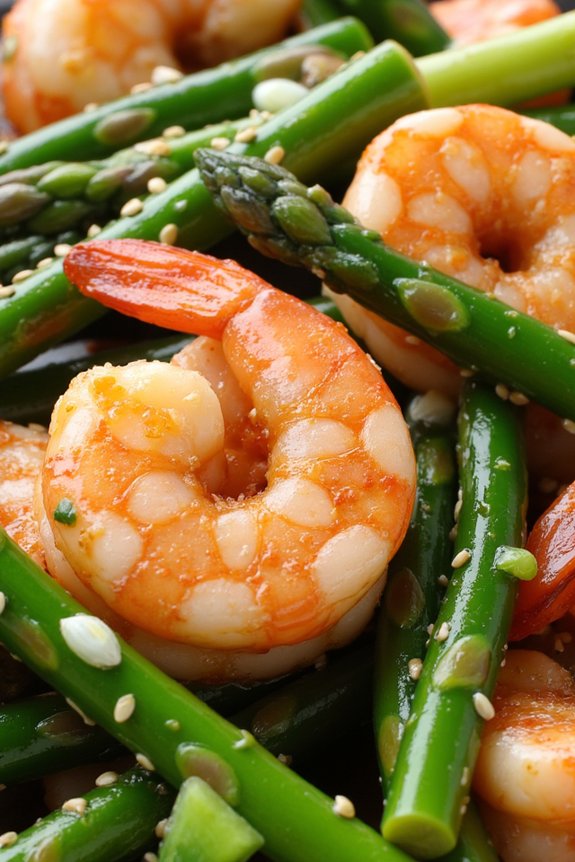
Indulge in a quick and healthy dinner with this Shrimp and Asparagus Stir-Fry, perfectly suited for busy weeknights. This delightful dish combines the succulent flavors of fresh shrimp with the crispness of asparagus, all cooked to perfection in your Instant Pot. The beauty of this recipe lies in its simplicity, allowing you to prepare a nutritious meal without sacrificing taste or time.
With a harmonious blend of garlic, ginger, and soy sauce, this stir-fry brings a touch of Asian-inspired flavor to your dinner table. This Shrimp and Asparagus Stir-Fry isn’t just delicious but also packed with proteins and vitamins, making it an ideal choice for a wholesome family meal.
Designed to serve 4-6 people, this recipe guarantees everyone gets a taste of its deliciousness. Whether you’re a seasoned cook or new to the Instant Pot, this recipe is easy to follow and assures a satisfying result every time.
Ingredients (Serving Size: 4-6 people):
- 1 pound large shrimp, peeled and deveined
- 1 bunch asparagus, trimmed and cut into 2-inch pieces
- 2 tablespoons olive oil
- 1 tablespoon fresh ginger, minced
- 3 cloves garlic, minced
- 1/4 cup low-sodium soy sauce
- 1 tablespoon oyster sauce
- 1 tablespoon cornstarch
- 1/4 cup water
- 1 tablespoon sesame oil
- Salt and pepper to taste
- Optional: sesame seeds and chopped green onions for garnish
Cooking Instructions:
- Prep the Ingredients: Begin by preparing all your ingredients. Peel and devein the shrimp, then trim and cut the asparagus into 2-inch pieces. Mince the garlic and ginger to enhance the flavor profile of your stir-fry.
- Sauté Aromatics: Turn your Instant Pot to the sauté setting. Add the olive oil, allowing it to heat up slightly. Add the minced garlic and ginger, stirring frequently until they become aromatic, about 1 minute.
- Cook the Shrimp: Add the shrimp to the Instant Pot. Sauté them for 2-3 minutes until they start to turn pink. They don’t need to be fully cooked at this stage as they’ll continue cooking in the next steps.
- Add Asparagus and Sauces: Add the asparagus pieces to the pot, followed by the soy sauce and oyster sauce. Stir well to guarantee all ingredients are coated with the sauces.
- Thicken the Sauce: In a small bowl, mix the cornstarch with water to create a slurry. Pour this slurry into the Instant Pot, stirring continuously to thicken the sauce. Allow the mixture to cook for an additional 2 minutes.
- Finish the Dish: Drizzle sesame oil over the stir-fry and give a final stir. Season with salt and pepper to taste. Switch off the sauté function and let the dish sit for a minute to allow the flavors to meld together.
- Serve and Garnish: Transfer the stir-fry to a serving platter. Garnish with sesame seeds and chopped green onions if desired. Serve hot and enjoy!
Extra Tips:
When cooking shrimp, be careful not to overcook them, as they can become rubbery. They should be just pink when you add the asparagus.
If you prefer a spicier kick, add a dash of red pepper flakes during the sauté stage. For a gluten-free option, confirm you use gluten-free soy sauce and oyster sauce.
This dish pairs well with steamed rice or quinoa for a complete meal. Finally, always adjust the seasoning to your preference, especially the salt, as soy sauce can vary in saltiness.