

When it comes to creating a delicious meal on a budget, I’ve gathered some of my favorite recipes just for you. Picture the delightful scent of beef and bean chili or the satisfying crunch of a vegetable stir-fry. Each recipe is designed to be simple yet full of flavor, with a touch of my personal style. Are you ready to transform everyday ingredients into something special? There’s plenty of tasty inspiration waiting to be explored.
One-Pot Creamy Chicken Alfredo
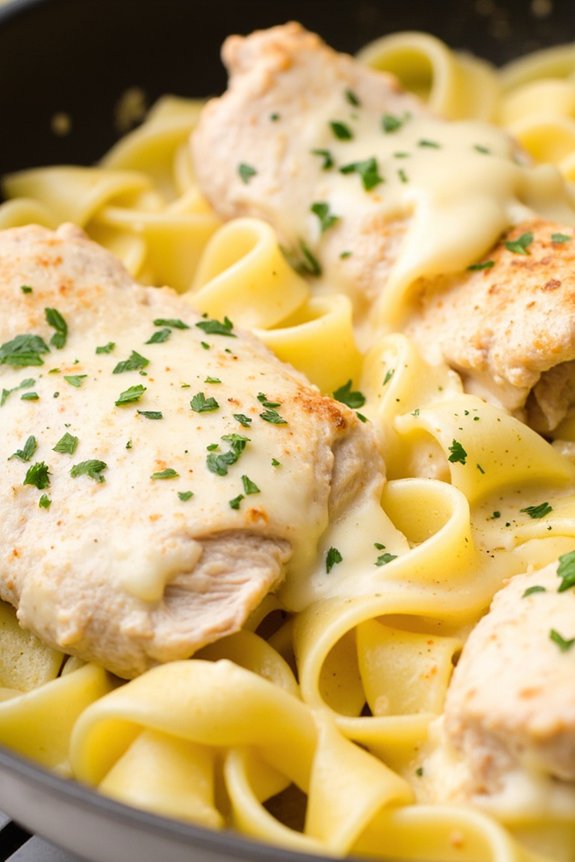
One-Pot Creamy Chicken Alfredo is a delightful and budget-friendly meal that brings comfort and satisfaction to your dinner table. This dish combines tender pieces of chicken with a rich, creamy Alfredo sauce, all cooked together with pasta in a single pot. The result is a deliciously creamy dish that saves you time on both preparation and cleanup, making it perfect for busy weeknights.
The simplicity of this recipe, paired with its luxurious taste, makes it a favorite among families looking for a satisfying meal without the fuss. The beauty of this One-Pot Creamy Chicken Alfredo lies in its ability to bring out the flavors of each ingredient without requiring a lot of effort. The chicken is cooked to perfection, and the pasta absorbs the creamy sauce while cooking, resulting in a dish where each bite is packed with flavor.
With just a handful of ingredients, you can whip up this delightful dish that will have everyone coming back for seconds. Whether you’re a seasoned cook or a beginner, this recipe is easy to follow and guarantees a delicious outcome every time.
Ingredients for Serving Size: 4-6 People:
- 1 pound boneless, skinless chicken breasts, cut into bite-sized pieces
- 2 tablespoons olive oil
- 4 cloves garlic, minced
- 4 cups chicken broth
- 1 cup heavy cream
- 12 ounces fettuccine pasta
- 1 cup grated Parmesan cheese
- Salt and pepper to taste
- 1 teaspoon Italian seasoning
- Fresh parsley, chopped (for garnish)
Cooking Instructions:
- Prepare the Chicken: In a large pot over medium heat, add the olive oil. Once the oil is hot, add the chicken pieces. Season them with salt, pepper, and Italian seasoning. Cook the chicken until it’s no longer pink, about 5-6 minutes. Remove the chicken from the pot and set it aside.
- Sauté the Garlic: In the same pot, add the minced garlic. Sauté for about 1 minute, or until fragrant. Be careful not to burn the garlic as it can become bitter.
- Combine Broth and Cream: Pour in the chicken broth and heavy cream, stirring to combine with the garlic.
- Cook the Pasta: Add the fettuccine to the pot, ensuring it’s submerged in the liquid. Bring the mixture to a boil, then reduce the heat to medium-low. Cover the pot and let it simmer for 15 minutes, stirring occasionally, until the pasta is cooked al dente.
- Add the Cheese and Chicken: Once the pasta is cooked, stir in the Parmesan cheese until melted and the sauce is creamy. Return the cooked chicken to the pot and mix well to guarantee the chicken is heated through.
- Final Seasoning: Taste the pasta and adjust the seasoning with more salt and pepper if needed.
- Garnish and Serve: Turn off the heat, and garnish the dish with freshly chopped parsley before serving.
Extra Tips:
To ascertain your One-Pot Creamy Chicken Alfredo is perfectly creamy, make sure not to overcook the pasta. It should be al dente with a slight bite to it, as it will continue to absorb the sauce even after the heat is turned off.
If you find the sauce too thick, you can add a little more chicken broth or cream to reach your desired consistency. For added flavor, consider adding a pinch of nutmeg to the sauce for a subtle, earthy flavor that complements the creamy texture.
Beef and Bean Chili

If you’re looking for a satisfying and hearty meal that won’t break the bank, this Beef and Bean Chili is the perfect choice. It’s a comforting dish that’s easy to prepare and packed with flavor, making it ideal for feeding a hungry family.
This recipe is designed to serve 4-6 people, making it a great option for a cozy family dinner or a casual get-together with friends. The combination of tender beef, nutritious beans, and a rich tomato-based broth creates a delicious, filling dish that everyone will love.
Chili is a versatile dish that allows for creativity with ingredients, but this classic version sticks to the essentials for a traditional taste. The recipe calls for simple pantry staples, making it an economical choice that’s easy to whip up even on busy weeknights.
With a cooking time of under an hour, this Beef and Bean Chili is a winner when you need a quick and satisfying meal.
Ingredients for 4-6 servings:
- 1 tablespoon olive oil
- 1 pound ground beef
- 1 onion, chopped
- 3 cloves garlic, minced
- 1 red bell pepper, chopped
- 1 can (14.5 ounces) diced tomatoes
- 1 can (15 ounces) kidney beans, drained and rinsed
- 1 can (15 ounces) black beans, drained and rinsed
- 1 1/2 cups beef broth
- 2 tablespoons chili powder
- 1 teaspoon cumin
- 1/2 teaspoon paprika
- Salt and pepper to taste
- Optional toppings: shredded cheese, sour cream, chopped green onions, or cilantro
Cooking Instructions:
- Heat the Oil: In a large pot or Dutch oven, heat the olive oil over medium heat. Once hot, add the chopped onion and minced garlic. Sauté for about 3 minutes until the onion becomes translucent and fragrant.
- Brown the Beef: Add the ground beef to the pot. Cook, stirring occasionally, until the beef is browned and cooked through, about 5-7 minutes. Break up any large chunks with a wooden spoon as it cooks. Drain any excess fat if necessary.
- Add Vegetables: Stir in the chopped red bell pepper and cook for another 2-3 minutes until it begins to soften.
- Incorporate Tomatoes and Beans: Add the diced tomatoes, kidney beans, and black beans to the pot. Stir well to combine all the ingredients.
- Season: Pour in the beef broth, then add the chili powder, cumin, paprika, salt, and pepper. Stir everything together, ensuring that the spices are evenly distributed.
- Simmer: Bring the chili to a boil, then reduce the heat to low. Cover and let it simmer for about 20-25 minutes, stirring occasionally. This allows the flavors to meld together and the chili to thicken slightly.
- Serve: Taste and adjust seasoning if needed. Serve the chili hot, garnished with optional toppings like shredded cheese, sour cream, chopped green onions, or fresh cilantro.
Extra Tips:
For an even richer flavor, consider cooking the chili a day in advance. Chili often tastes better the next day as the flavors have more time to develop.
If you’re short on time, you can substitute canned beans with pre-cooked or canned lentils for a faster cook time. Additionally, if you prefer a spicier chili, feel free to add a pinch of cayenne pepper or a chopped jalapeño to the pot.
Remember to taste as you go and adjust the seasoning to your preference. Enjoy this comforting meal with a side of cornbread or over rice for a complete dinner experience.
Vegetable Stir-Fry With Rice

Vegetable Stir-Fry With Rice is a quick, nutritious, and budget-friendly meal that’s perfect for feeding a family. The vibrant colors of the vegetables combined with the fluffy texture of rice make this dish not only visually appealing but also deliciously satisfying.
It’s a versatile recipe that allows you to use whatever vegetables you have on hand, making it a great way to incorporate a variety of nutrients into your family’s diet. Plus, it’s all cooked in one pan, which means minimal clean-up after dinner.
This dish is particularly appealing because it can be customized to suit different tastes and dietary preferences. Whether your family enjoys a hint of spice or prefers a milder flavor, the recipe can be easily adjusted.
Additionally, adding a protein source like tofu, chicken, or shrimp can turn this side dish into a complete meal. It’s an excellent option for busy weeknights when time is of the essence but you still want to provide a wholesome meal for your loved ones.
Ingredients (Serves 4-6):
- 2 cups of jasmine or basmati rice
- 4 cups of assorted vegetables (such as bell peppers, broccoli, carrots, snap peas)
- 2 tablespoons vegetable oil
- 3 cloves garlic, minced
- 1 tablespoon fresh ginger, grated
- 3 tablespoons soy sauce
- 1 tablespoon sesame oil
- 1 teaspoon chili flakes (optional)
- Salt and pepper to taste
- Green onions, chopped for garnish
- Sesame seeds for garnish
Cooking Instructions:
- Prepare the Rice: Begin by rinsing the rice under cold water to remove excess starch. Cook the rice according to the package instructions. Once cooked, fluff with a fork and set aside.
- Prep the Vegetables: While the rice is cooking, wash and chop your vegetables into bite-sized pieces. Aim for uniform sizes to promote even cooking.
- Heat the Oil: In a large wok or frying pan, heat the vegetable oil over medium-high heat. Add the minced garlic and grated ginger, stirring frequently for about 30 seconds until fragrant.
- Cook the Vegetables: Add the chopped vegetables to the pan. Stir-fry for about 5-7 minutes, or until the vegetables are tender-crisp. If you’re using harder vegetables like carrots or broccoli, you may want to add them first and give them a head start.
- Add Flavorings: Pour in the soy sauce, sesame oil, and chili flakes if using. Stir everything together so the vegetables absorb the flavors. Continue cooking for another 2 minutes.
- Combine with Rice: Add the cooked rice to the vegetable mixture. Stir well to combine, ensuring the rice is evenly coated with the sauce. Season with salt and pepper to taste.
- Garnish and Serve: Transfer the stir-fry to a serving dish. Garnish with chopped green onions and sesame seeds before serving.
Extra Tips:
For an extra protein boost, consider adding cooked chicken, tofu, or shrimp to the stir-fry. If you prefer a saucier dish, you can add a tablespoon of oyster sauce or hoisin sauce for more depth of flavor.
Remember to taste and adjust the seasoning before serving, as different soy sauces have varying levels of saltiness. To save time, you can use pre-chopped vegetables or even frozen stir-fry mixes. Enjoy your meal with a side of spring rolls or a simple green salad for a complete dinner experience.
Baked Ziti With Ground Turkey

Baked Ziti With Ground Turkey is a delicious and budget-friendly meal that’s perfect for feeding a family of 4-6 people. This hearty dish combines tender pasta with savory ground turkey, marinara sauce, and a blend of creamy cheeses, all baked to perfection. The flavors meld together beautifully, creating a comforting and satisfying meal that’s sure to please both kids and adults alike.
Plus, it’s an excellent way to introduce lean protein into your family’s diet without sacrificing taste. This recipe isn’t only affordable but also incredibly easy to prepare, making it a great option for busy weeknights or casual gatherings with friends. With minimal prep work and straightforward instructions, you’ll have a delicious dinner on the table in no time.
The best part? You can customize it with your family’s favorite ingredients or whatever you have on hand, making it a versatile dish that’s bound to become a staple in your meal rotation.
Ingredients (serving size: 4-6 people):
- 1 pound ground turkey
- 1 pound ziti pasta
- 1 jar (24 oz) marinara sauce
- 1 cup ricotta cheese
- 2 cups shredded mozzarella cheese
- 1/2 cup grated Parmesan cheese
- 1 tablespoon olive oil
- 1 medium onion, chopped
- 3 cloves garlic, minced
- 1 teaspoon dried oregano
- 1 teaspoon dried basil
- Salt and pepper to taste
Cooking Instructions:
- Cook the Pasta: Preheat your oven to 375°F (190°C). Bring a large pot of salted water to a boil. Add the ziti pasta and cook according to package instructions until al dente. Drain the pasta and set it aside.
- Prepare the Turkey Mixture: In a large skillet, heat the olive oil over medium heat. Add the chopped onion and minced garlic, and sauté for about 3-4 minutes until the onion is translucent. Add the ground turkey to the skillet, and cook until browned and fully cooked through, breaking it up with a spoon as it cooks. Season with dried oregano, dried basil, salt, and pepper.
- Combine with Sauce: Stir in the marinara sauce with the cooked turkey mixture, and let it simmer for about 5 minutes to allow the flavors to meld together.
- Assemble the Dish: In a large mixing bowl, combine the cooked pasta, turkey and sauce mixture, ricotta cheese, and half of the mozzarella cheese. Stir until everything is well combined.
- Bake the Ziti: Transfer the mixture into a 9×13-inch baking dish. Spread it evenly, and then sprinkle the remaining mozzarella cheese and Parmesan cheese over the top.
- Bake in the Oven: Place the baking dish in the preheated oven and bake for 25-30 minutes, or until the cheese is melted and bubbly, and the edges are slightly golden.
- Cool and Serve: Remove the baked ziti from the oven and let it cool for a few minutes. Serve warm, garnished with additional Parmesan cheese or fresh herbs if desired.
Extra Tips:
For a little extra flavor, consider adding red pepper flakes to the turkey mixture if you enjoy a bit of heat. You can also mix in some fresh spinach or mushrooms for added nutrition.
If you’re looking to save time, prepare the turkey and pasta mixture a day in advance, then assemble and bake when you’re ready to serve. This dish also freezes well, so feel free to make a double batch and save one for a future meal.
Chicken and Broccoli Casserole

Chicken and Broccoli Casserole is a classic, comforting dish that’s perfect for a family dinner, especially when you’re looking for an affordable yet delicious meal. This casserole combines tender chicken, fresh broccoli, and a creamy cheese sauce all baked to perfection, creating a delightful combination that appeals to both kids and adults.
The preparation is straightforward and can be completed in under an hour, making it an ideal choice for busy weeknights. Not only is it budget-friendly, but it also guarantees a nutritious meal with its wholesome ingredients.
The beauty of this dish lies in its versatility. You can easily adjust the ingredients to suit your family’s taste preferences or dietary needs. For instance, you can swap the cheese or add other vegetables to provide a different flavor profile.
This Chicken and Broccoli Casserole can serve as a complete meal on its own or be paired with a simple side dish like a green salad or garlic bread for a more elaborate dinner. Let’s explore the recipe and get cooking!
Ingredients (Serves 4-6):
- 2 cups cooked chicken, shredded or cubed
- 4 cups broccoli florets, fresh or frozen
- 1 can (10.5 oz) cream of chicken soup
- 1 cup sour cream
- 1 cup shredded cheddar cheese
- 1/2 cup milk
- 1 teaspoon garlic powder
- 1/2 teaspoon salt
- 1/2 teaspoon black pepper
- 1 cup breadcrumbs
- 2 tablespoons butter, melted
Cooking Instructions:
- Preheat the Oven: Begin by preheating your oven to 350°F (175°C). This guarantees that it reaches the right temperature for even cooking.
- Prepare the Broccoli: If you’re using fresh broccoli, cut it into small florets. If frozen, make sure it’s thawed. Blanch the broccoli in boiling water for about 2-3 minutes to soften it slightly, then drain and set aside.
- Combine the Sauce: In a large mixing bowl, combine the cream of chicken soup, sour cream, milk, garlic powder, salt, and black pepper. Stir until the ingredients are well mixed and smooth.
- Assemble the Casserole: In a 9×13 inch baking dish, spread the cooked chicken evenly. Add the blanched broccoli on top of the chicken. Pour the soup mixture over the chicken and broccoli, spreading it evenly with a spatula. Sprinkle the shredded cheddar cheese evenly over the top.
- Add the Breadcrumb Topping: In a small bowl, combine the breadcrumbs with the melted butter. Mix until the breadcrumbs are evenly coated. Sprinkle the breadcrumb mixture over the cheese layer for a crispy topping.
- Bake the Casserole: Place the dish in the preheated oven and bake for 25-30 minutes, or until the casserole is bubbly and the top is golden brown.
- Cool and Serve: Once done, remove the casserole from the oven and let it cool for about 5 minutes before serving. This allows the flavors to settle and makes it easier to serve.
Extra Tips:
For a healthier twist, consider using low-fat or reduced-sodium versions of the soup and cheese. Adding other vegetables like sliced mushrooms or bell peppers can also enhance the nutritional value and flavor.
If you prefer a crunchier topping, try adding a handful of sliced almonds or crushed cornflakes to the breadcrumb mixture. This dish can also be prepared a day in advance and stored in the refrigerator; just bake it right before serving for a fresh, hot meal.
Lentil Soup With Spinach
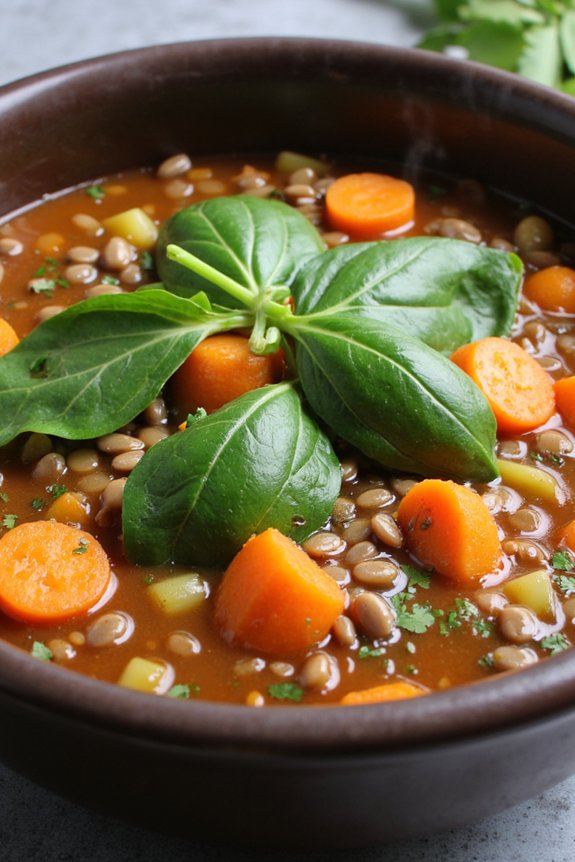
Lentil Soup With Spinach is a nourishing, budget-friendly meal that’s perfect for feeding a family of 4-6 people. This comforting dish is packed with nutrients and flavors, making it a great choice for a hearty dinner. Lentils are a wonderful source of protein and fiber, while spinach adds a dose of vitamins and minerals. The combination of fragrant spices and aromatic vegetables creates a rich and satisfying soup that’s sure to please everyone at the table.
This dish isn’t only economical but also incredibly easy to prepare, even on a busy weeknight. With just a few simple steps, you can have a pot of delicious Lentil Soup With Spinach ready to enjoy. It’s a versatile recipe that can be adapted to suit your taste preferences by adding various spices or additional vegetables. Whether you’re looking for a warming meal on a chilly evening or a nutritious option for meal prepping, this lentil soup is an excellent choice.
Ingredients for 4-6 servings:
- 1 tablespoon olive oil
- 1 medium onion, chopped
- 2 cloves garlic, minced
- 2 carrots, diced
- 2 celery stalks, diced
- 1 teaspoon ground cumin
- 1 teaspoon ground coriander
- 1 teaspoon smoked paprika
- 1 cup dried lentils, rinsed
- 6 cups vegetable broth
- 1 can (14 ounces) diced tomatoes
- Salt and pepper to taste
- 4 cups fresh spinach
- Juice of 1 lemon
Instructions:
- Heat the Oil: In a large pot, heat the olive oil over medium heat. Once the oil is hot, add the chopped onion and sauté for about 5 minutes, or until the onion becomes translucent.
- Add Vegetables and Spices: Stir in the minced garlic, diced carrots, and diced celery. Cook for another 3 minutes, allowing the vegetables to soften slightly. Add the ground cumin, ground coriander, and smoked paprika, stirring well to coat the vegetables with the spices.
- Combine Lentils and Broth: Add the rinsed lentils to the pot, followed by the vegetable broth and diced tomatoes (with their juice). Stir everything together, then bring the mixture to a boil.
- Simmer the Soup: Once boiling, reduce the heat to a simmer. Cover the pot and let the soup cook for about 25-30 minutes, or until the lentils are tender.
- Season and Add Spinach: Taste the soup and season with salt and pepper as needed. Stir in the fresh spinach and let it wilt into the soup, which should take about 2-3 minutes.
- Finish with Lemon Juice: Just before serving, stir in the juice of one lemon to brighten the flavors of the soup.
Extra Tips:
For the best results, use fresh spinach and add it at the end to preserve its vibrant color and nutrients. If you prefer a thicker soup, use a blender or immersion blender to puree a portion of the soup before adding the spinach. This will give the soup a creamier texture without needing any added cream.
Additionally, feel free to customize this recipe by adding other vegetables such as bell peppers or zucchini, or even a sprinkle of fresh herbs like parsley or cilantro for garnish.
Spaghetti Aglio E Olio
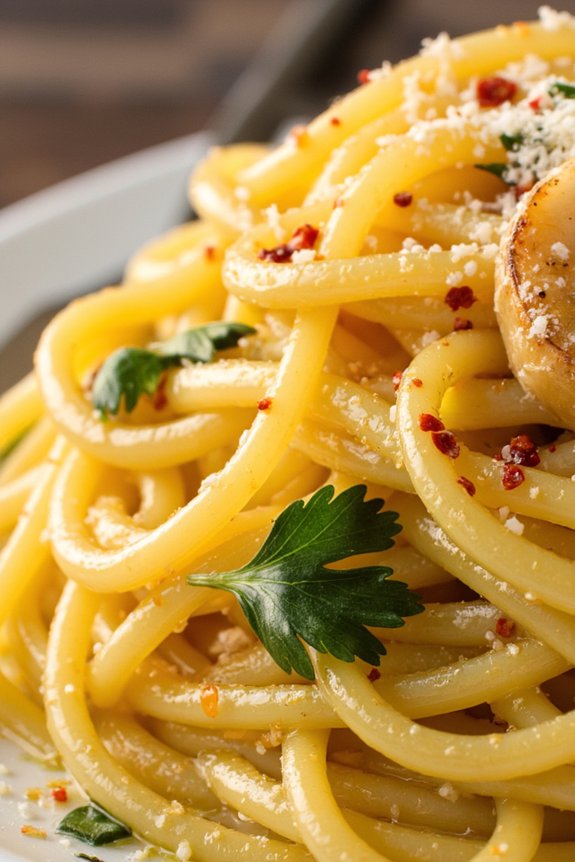
Spaghetti Aglio E Olio is a classic Italian pasta dish that’s both simple and cost-effective, making it perfect for a family dinner. This dish, originating from Naples, is renowned for its minimalistic combination of flavors and ingredients. The main components are spaghetti, garlic, olive oil, and red pepper flakes, which work together to create a deliciously aromatic and satisfying meal. Its simplicity doesn’t compromise its taste, and it’s an excellent example of how a few quality ingredients can come together to create a delightful dish.
Preparing Spaghetti Aglio E Olio is a quick and straightforward process, making it ideal for busy weeknights when time is of the essence. This dish can be easily adapted to suit your family’s tastes; you can add a sprinkle of parsley for freshness or a dash of Parmesan cheese for a richer flavor. Whether you’re a seasoned cook or a beginner, Spaghetti Aglio E Olio is a great recipe to have in your repertoire, offering a taste of authentic Italian cuisine right in your home.
Ingredients for 4-6 servings:
- 1 pound (450g) spaghetti
- 6 large cloves garlic, thinly sliced
- 1/2 cup extra-virgin olive oil
- 1 teaspoon crushed red pepper flakes
- Salt, to taste
- 1/4 cup fresh parsley, chopped (optional)
- Grated Parmesan cheese, for serving (optional)
Cooking Instructions:
- Cook the Spaghetti: Fill a large pot with water and bring it to a boil. Add a generous amount of salt to the boiling water, then add the spaghetti. Cook according to the package instructions until al dente. Reserve about 1 cup of the pasta water, then drain the spaghetti.
- Prepare the Garlic and Oil: While the pasta is cooking, heat the olive oil in a large skillet over medium heat. Add the sliced garlic and cook gently, stirring frequently, until the garlic is golden brown and fragrant. Be careful not to burn the garlic as it can turn bitter.
- Add the Red Pepper Flakes: Once the garlic is golden, add the crushed red pepper flakes to the skillet. Stir for about 30 seconds to release the flavor of the pepper flakes into the oil.
- Combine Pasta and Sauce: Add the cooked spaghetti to the skillet with the garlic and oil. Toss the pasta to coat it evenly in the oil, adding some reserved pasta water a little at a time to achieve the desired consistency.
- Season and Serve: Taste the pasta and season with salt to your preference. If using, add the chopped parsley and toss again. Serve the Spaghetti Aglio E Olio hot with grated Parmesan cheese on the side for those who wish to add it.
Extra Tips:
When cooking Spaghetti Aglio E Olio, it’s crucial to keep a close eye on the garlic as it cooks. Garlic can quickly go from perfectly golden to burnt, which will affect the flavor of your dish.
If you want to enhance the depth of flavor, consider adding a splash of white wine or lemon juice after you add the pasta to the skillet. Additionally, using high-quality olive oil can make a significant difference in the overall taste of the dish.
If you prefer a milder heat, reduce the amount of red pepper flakes, or omit them entirely for a less spicy version.
Tuna Noodle Casserole

Tuna Noodle Casserole is a classic, budget-friendly dish that’s perfect for a family dinner. This comforting casserole is a delightful mix of tender noodles, creamy sauce, and protein-packed tuna, all brought together with a crispy topping.
It’s a meal that’s both delicious and economical, making it an excellent choice for those busy weeknights when you need to whip up something quick yet satisfying for the whole family. The beauty of this dish lies in its simplicity and the capacity to adapt to different tastes with easy additions or substitutions.
This recipe serves 4-6 people and requires minimal preparation time, making it a go-to option for families looking to enjoy a wholesome meal without breaking the bank. With just a few pantry staples, you can create a dish that’s not only filling but also packed with flavor.
Whether you’re new to cooking or an experienced home chef, Tuna Noodle Casserole is a reliable recipe that everyone can enjoy.
Ingredients:
- 12 ounces of egg noodles
- 2 cans (5 ounces each) of tuna, drained
- 1 can (10.5 ounces) of cream of mushroom soup
- 1 cup of frozen peas
- 1 cup of milk
- 1 cup of shredded cheddar cheese
- 1/2 cup of bread crumbs
- 2 tablespoons of butter, melted
- Salt and pepper to taste
Cooking Instructions:
- Preheat the Oven: Start by preheating your oven to 375°F (190°C) to guarantee it’s hot enough to bake the casserole evenly.
- Cook the Noodles: Bring a large pot of salted water to a boil. Add the egg noodles and cook according to package instructions until al dente. Drain and set aside.
- Prepare the Sauce: In a large mixing bowl, combine the cream of mushroom soup, milk, and shredded cheddar cheese. Stir until the mixture is smooth and the cheese is well incorporated.
- Combine Ingredients: Add the drained tuna, frozen peas, and cooked noodles to the sauce mixture. Gently fold the ingredients until they’re evenly coated with the sauce.
- Season the Mixture: Taste and season with salt and pepper according to your preference.
- Transfer to Baking Dish: Pour the mixture into a greased 9×13-inch baking dish, spreading it out evenly.
- Prepare the Topping: In a small bowl, mix the bread crumbs with the melted butter until the crumbs are evenly coated. Sprinkle the bread crumbs over the top of the casserole.
- Bake: Place the baking dish in the preheated oven and bake for 25-30 minutes, or until the topping is golden brown and the casserole is bubbling.
- Cool and Serve: Once baked, remove from the oven and let it cool for a few minutes before serving.
Extra Tips:
For a little extra flavor, consider adding a teaspoon of garlic powder or onion powder to the sauce mixture.
You can also customize your Tuna Noodle Casserole by incorporating other vegetables such as chopped bell peppers or mushrooms. If you prefer a crunchier topping, try using crushed potato chips instead of bread crumbs.
For a healthier version, use whole grain noodles and low-fat cheese. Remember, this dish is highly adaptable, so feel free to experiment with ingredients you have on hand.
Chickpea Curry With Rice

Chickpea Curry With Rice is a delicious and budget-friendly meal perfect for feeding a family of 4-6 people. This savory dish combines the rich flavors of chickpeas, tomatoes, and a blend of aromatic spices, served over a bed of fluffy rice. It’s a comforting and satisfying meal that’s both nutritious and easy to prepare, making it an ideal choice for busy weeknights.
The creamy texture of the chickpeas paired with the fragrant spices creates a delightful experience for your taste buds and provides a wholesome meal that everyone will enjoy. This recipe isn’t only economical but also packed with protein and fiber, making it a healthy option for family dinners.
Chickpeas are a great source of plant-based protein and when paired with rice, they form a complete protein source. The spices used in this curry provide depth and warmth, adding an exotic touch to a meal that’s simple to make. Whether you’re looking for a meatless Monday option or simply want to try something different, Chickpea Curry With Rice is a fantastic choice that will leave your family satisfied and asking for seconds.
Ingredients (serving size: 4-6 people):
- 2 cups basmati rice
- 2 tablespoons vegetable oil
- 1 large onion, finely chopped
- 3 cloves garlic, minced
- 1 tablespoon fresh ginger, grated
- 2 teaspoons ground cumin
- 2 teaspoons ground coriander
- 1 teaspoon turmeric powder
- 1 teaspoon garam masala
- 1 teaspoon chili powder
- 2 cans (15 oz each) chickpeas, drained and rinsed
- 1 can (14 oz) diced tomatoes
- 1 cup coconut milk
- Salt and pepper to taste
- Fresh cilantro for garnish
Cooking Instructions:
- Prepare the Rice: Rinse the basmati rice under cold water until the water runs clear. In a medium saucepan, combine the rice with 4 cups of water and a pinch of salt. Bring to a boil, then reduce the heat to low, cover, and let it simmer for about 15 minutes or until the rice is cooked and the water is absorbed. Remove from heat and let it sit, covered, for 5 minutes. Fluff with a fork before serving.
- Sauté Aromatics: In a large pot or deep skillet, heat the vegetable oil over medium heat. Add the chopped onion and sauté for about 5 minutes until it becomes translucent. Stir in the minced garlic and grated ginger, and cook for another 2 minutes until fragrant.
- Add Spices: Sprinkle the ground cumin, coriander, turmeric, garam masala, and chili powder over the onion mixture. Cook for 1-2 minutes, stirring constantly to release the spices’ aroma and toast them slightly.
- Cook Curry Base: Pour in the diced tomatoes (with juices) and stir to combine with the spices and onions. Let it simmer for 5 minutes, allowing the flavors to meld together.
- Add Chickpeas and Coconut Milk: Stir in the drained chickpeas, making sure they’re well coated with the tomato and spice mixture. Pour in the coconut milk and bring the mixture to a gentle simmer. Let it cook for about 15 minutes, stirring occasionally, until the curry thickens and the chickpeas are heated through.
- Season and Serve: Taste the curry and season with salt and pepper as needed. Serve the chickpea curry over the prepared basmati rice, garnished with fresh cilantro.
Extra Tips:
To enhance the flavor of this dish, consider toasting the spices in a dry pan for a minute or two before adding them to the onion mixture. This will release more of their essential oils and deepen their flavors.
If you prefer a spicier curry, adjust the amount of chili powder to your liking or add a pinch of cayenne pepper. For a creamier curry, you can increase the amount of coconut milk or use full-fat coconut milk. Make sure to taste and adjust the seasoning before serving to guarantee the balance of flavors suits your preference.
Homemade Sloppy Joes

Homemade Sloppy Joes are a classic American comfort food that brings back memories of family gatherings and hearty meals. This dish is perfect for a weeknight dinner when you want something delicious yet easy to prepare. The combination of savory beef, tangy tomato sauce, and just the right amount of sweetness makes Sloppy Joes a favorite among both kids and adults.
Not only are they quick to make, but they’re also budget-friendly, making them an ideal choice for feeding a family of 4-6 people without breaking the bank.
The beauty of Homemade Sloppy Joes lies in their versatility. You can customize them to suit your family’s taste preferences, adding more vegetables or spices according to what you have on hand. Plus, they’re perfect for batch cooking and can easily be doubled to guarantee you have leftovers for the next day.
Serve these Sloppy Joes on fresh buns, with a side of coleslaw or salad, for a complete meal that everyone will enjoy.
Ingredients (Serves 4-6)
- 1 1/2 pounds ground beef
- 1 medium onion, diced
- 1 green bell pepper, diced
- 2 cloves garlic, minced
- 1 cup ketchup
- 2 tablespoons brown sugar
- 1 tablespoon Worcestershire sauce
- 1 tablespoon yellow mustard
- 1 teaspoon smoked paprika
- Salt and pepper to taste
- 4-6 hamburger buns
Cooking Instructions
- Prepare the Ingredients: Begin by finely dicing the onion and green bell pepper, and mincing the garlic. This will guarantee they cook evenly and blend well into the Sloppy Joe mixture.
- Cook the Beef: In a large skillet over medium-high heat, add the ground beef. Cook the beef until it’s browned and cooked through, about 6-8 minutes. Be sure to break the meat apart as it cooks to guarantee it browns evenly.
- Sauté the Vegetables: Once the beef is cooked, add the diced onion, green bell pepper, and minced garlic to the skillet. Stir everything together and cook for another 4-5 minutes, or until the vegetables are tender.
- Combine the Sauce Ingredients: Reduce the heat to medium and stir in the ketchup, brown sugar, Worcestershire sauce, yellow mustard, smoked paprika, salt, and pepper. Mix everything thoroughly to guarantee the ingredients are well combined.
- Simmer the Mixture: Allow the mixture to simmer on low heat for 10-15 minutes. This will help the flavors meld together and slightly thicken the sauce, giving the Sloppy Joes their signature texture.
- Toast the Buns: While the mixture simmers, lightly toast the hamburger buns in a separate pan or in the oven. This will give them a nice crispy texture that complements the saucy filling.
- Assemble and Serve: Spoon the Sloppy Joe mixture generously onto each toasted bun. Serve immediately while hot, optionally with a side of coleslaw or a simple green salad.
Extra Tips
For an extra depth of flavor, try adding a splash of apple cider vinegar or a dash of hot sauce to the sauce mixture. If you prefer a leaner option, substitute the ground beef with ground turkey or chicken.
To make the dish more nutritious, consider adding finely diced carrots or mushrooms to the mixture. If you find the sauce too thick, you can thin it out with a bit of beef broth or water.
Finally, for a fun twist, serve the Sloppy Joes open-faced with a slice of cheddar cheese melted on top.
Vegetable and Cheese Quesadillas

Vegetable and Cheese Quesadillas are a delightful and budget-friendly dinner option that the whole family will enjoy. These quesadillas are packed with nutritious vegetables and gooey melted cheese, making them both satisfying and delicious. Perfect for a quick weekday meal, they can be made with ingredients you probably already have at home. Not only are they easy to prepare, but they also allow for flexibility—you can customize them based on the vegetables you have on hand or your family’s preferences.
This recipe serves 4-6 people and is ideal for those who are looking to incorporate more veggies into their meals without compromising on taste. Whether you’re serving them as a main dish or a delicious appetizer, these quesadillas are sure to become a household favorite. Pair them with a side salad or a dollop of sour cream and salsa for a complete meal experience.
Ingredients:
- 8 large flour tortillas
- 2 cups shredded cheddar cheese
- 1 cup shredded Monterey Jack cheese
- 1 red bell pepper, diced
- 1 green bell pepper, diced
- 1 small onion, finely chopped
- 1 cup fresh spinach leaves, chopped
- 1 cup canned black beans, drained and rinsed
- 1 tablespoon olive oil
- 1 teaspoon ground cumin
- 1 teaspoon chili powder
- Salt and pepper to taste
- Non-stick cooking spray or additional olive oil for cooking
Instructions:
- Prepare the Vegetables: Begin by washing and chopping all the vegetables. Dice the red and green bell peppers, finely chop the onion, and roughly chop the spinach leaves. Drain and rinse the black beans thoroughly.
- Cook the Vegetables: Heat the olive oil in a large skillet over medium heat. Add the chopped onion and sauté for 2-3 minutes until it becomes translucent. Add the diced bell peppers and continue to sauté for another 4-5 minutes until they start to soften.
- Season the Vegetables: Stir in the ground cumin, chili powder, salt, and pepper. Add the chopped spinach and drained black beans to the skillet. Cook for an additional 2 minutes, stirring occasionally, until the spinach wilts and the beans are heated through. Remove the skillet from the heat and set aside.
- Assemble the Quesadillas: Lay out the tortillas on a clean surface. Sprinkle a generous amount of shredded cheddar and Monterey Jack cheese on one half of each tortilla. Spoon the cooked vegetable mixture over the cheese. Fold the empty half of each tortilla over the filling to create a half-moon shape.
- Cook the Quesadillas: Heat a non-stick skillet over medium heat and lightly coat it with non-stick cooking spray or a little olive oil. Carefully place a folded quesadilla in the skillet and cook for 2-3 minutes on each side until the tortillas are golden brown and the cheese has melted. Repeat with the remaining quesadillas.
- Serve: Slice the cooked quesadillas into wedges and serve them warm. They can be accompanied by sour cream, salsa, or guacamole for added flavor.
Extra Tips:
For an added layer of flavor, consider adding a pinch of smoked paprika or a splash of lime juice to the vegetable mix. If you prefer a spicier quesadilla, include some chopped jalapeños or a dash of hot sauce. Feel free to experiment with different cheese blends or add additional protein by including cooked chicken or beef.
To guarantee even cooking, adjust the heat as needed and monitor the quesadillas closely to prevent burning.
Egg Fried Rice
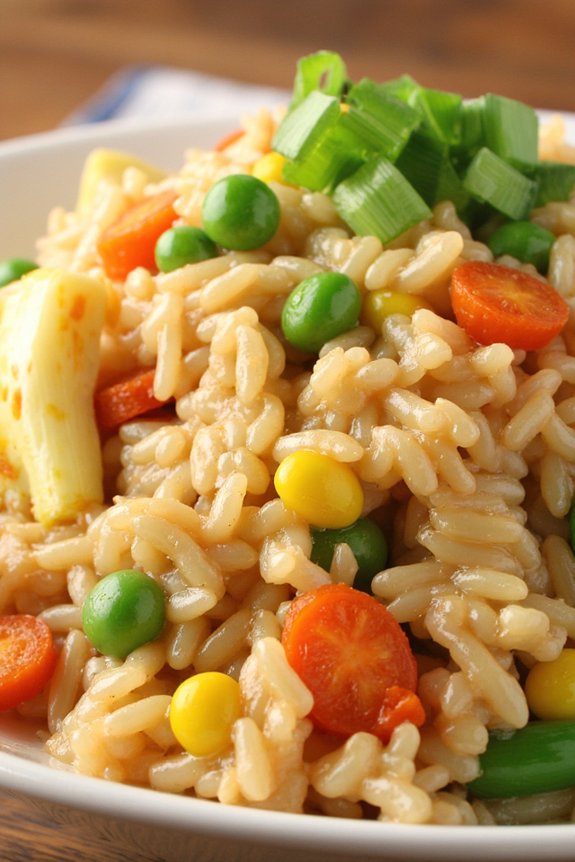
Egg Fried Rice is a versatile and delicious dish that can be easily prepared at home for a family meal. It’s not only a crowd-pleaser but also incredibly budget-friendly, making it an ideal choice for families looking to enjoy a nutritious and satisfying dinner without breaking the bank.
This dish combines fluffy rice with scrambled eggs and a mix of vegetables, all stir-fried in savory soy sauce for a harmonious blend of flavors. Perfect for using up leftover rice and vegetables, Egg Fried Rice can be customized to suit your family’s taste preferences and dietary needs.
This recipe for Egg Fried Rice serves 4-6 people, making it perfect for a family meal. It’s quick to prepare and requires minimal ingredients, many of which you might already have in your pantry.
The key to perfecting this dish lies in the preparation of the ingredients and the order in which they’re cooked. By following these simple steps, you can create a delicious and wholesome meal that your family will love.
Ingredients:
- 3 cups of cooked and cooled rice (preferably day-old)
- 3 large eggs
- 2 tablespoons vegetable oil
- 1 cup frozen mixed vegetables (carrots, peas, and corn)
- 1 small onion, finely chopped
- 2 cloves garlic, minced
- 3 tablespoons soy sauce
- 1 teaspoon sesame oil
- Salt and pepper to taste
- 2 green onions, chopped (optional for garnish)
Cooking Instructions:
- Prepare the Rice: Confirm your rice is cooked and cooled, ideally using rice from the previous day. This prevents the rice from becoming mushy during frying.
- Scramble the Eggs: In a large non-stick skillet or wok, heat 1 tablespoon of vegetable oil over medium heat. Crack the eggs into the pan, scrambling them with a spatula until they’re fully cooked. Remove the scrambled eggs from the skillet and set them aside.
- Cook the Vegetables: Add the remaining tablespoon of vegetable oil to the skillet. Add the chopped onion and minced garlic, sautéing until they become fragrant and the onion is translucent, about 2-3 minutes. Stir in the frozen mixed vegetables and cook for another 2-3 minutes until they’re heated through.
- Combine Rice and Vegetables: Increase the heat to high and add the cooked rice to the skillet. Use a spatula to break up any clumps of rice. Stir-fry the rice with the vegetables for 3-4 minutes, ensuring everything is well combined and heated through.
- Season the Rice: Pour the soy sauce and sesame oil over the rice mixture, stirring well to distribute the flavors evenly. Return the scrambled eggs to the skillet, mixing them into the rice until everything is well combined.
- Adjust Seasoning: Taste the fried rice and add salt and pepper to your liking. Cook for an additional 2 minutes to allow the flavors to meld together.
- Serve: Transfer the Egg Fried Rice to a serving dish. Garnish with chopped green onions, if desired, and serve hot.
Extra Tips:
For the best results, always use cold, day-old rice, as freshly cooked rice can be too moist and lead to a clumpy texture.
Feel free to customize your Egg Fried Rice by adding cooked chicken, shrimp, or tofu for extra protein. Additionally, you can experiment with different vegetables depending on what you have on hand.
Remember to keep the skillet on high heat during the final cooking stages to achieve a slight crispiness in the rice, which enhances the overall texture of the dish.
Black Bean Tacos

If you’re looking for a delicious yet affordable meal for your family, Black Bean Tacos are the perfect choice. This dish isn’t only budget-friendly but also packed with flavor and nutrition. Black beans are a great source of protein and fiber, making them a healthy alternative to meat. With a few simple ingredients, you can whip up a satisfying meal that will please even the pickiest eaters.
These Black Bean Tacos are versatile and easy to customize to your family’s tastes. You can add a variety of toppings to suit everyone’s preferences, from fresh veggies to creamy avocado slices. Plus, they can be prepared in under 30 minutes, making them an ideal option for busy weeknights. This recipe serves 4-6 people, ensuring there’s plenty to go around.
Ingredients:
- 2 cans (15 oz each) black beans, drained and rinsed
- 1 tablespoon olive oil
- 1 medium onion, chopped
- 2 cloves garlic, minced
- 1 teaspoon ground cumin
- 1 teaspoon chili powder
- Salt and pepper to taste
- 8-10 corn tortillas
- 1 cup shredded lettuce
- 1 cup diced tomatoes
- 1 cup shredded cheddar cheese
- 1/2 cup sour cream
- 1 avocado, sliced
- Fresh cilantro leaves (optional)
- Lime wedges (optional)
Cooking Instructions:
- Prepare the Black Beans: Heat the olive oil in a large skillet over medium heat. Add the chopped onion and sauté until it becomes translucent, about 5 minutes. Stir in the minced garlic and cook for an additional 1 minute until fragrant.
- Season the Beans: Add the drained black beans to the skillet along with the ground cumin, chili powder, salt, and pepper. Stir to combine the ingredients, and cook for 5-7 minutes, allowing the beans to heat through and absorb the flavors. Use a fork or a potato masher to slightly mash the beans, leaving a few whole for texture.
- Warm the Tortillas: While the beans are cooking, warm the corn tortillas. You can do this by heating them in a dry skillet over medium heat for about 30 seconds on each side until they’re pliable. Alternatively, wrap them in a damp paper towel and microwave for about 20-30 seconds.
- Assemble the Tacos: Lay the warmed tortillas flat and evenly distribute the black bean mixture onto each one. Top with shredded lettuce, diced tomatoes, and shredded cheddar cheese. Add a dollop of sour cream, a few slices of avocado, and a sprinkle of fresh cilantro if desired.
- Serve and Enjoy: Serve the tacos with lime wedges on the side for an added burst of flavor. Encourage your family to squeeze a bit of lime juice over their tacos before enjoying.
Extra Tips:
For a spicier kick, consider adding a diced jalapeño to the onion and garlic mixture when sautéing. You can also incorporate other toppings such as pickled onions, salsa, or hot sauce for an extra burst of flavor.
If you’re preparing this dish for a larger crowd, simply double the ingredients. To make the tacos even more nutritious, you can use whole wheat tortillas or add additional vegetables like bell peppers or corn to the filling.
Baked Chicken Thighs With Potatoes
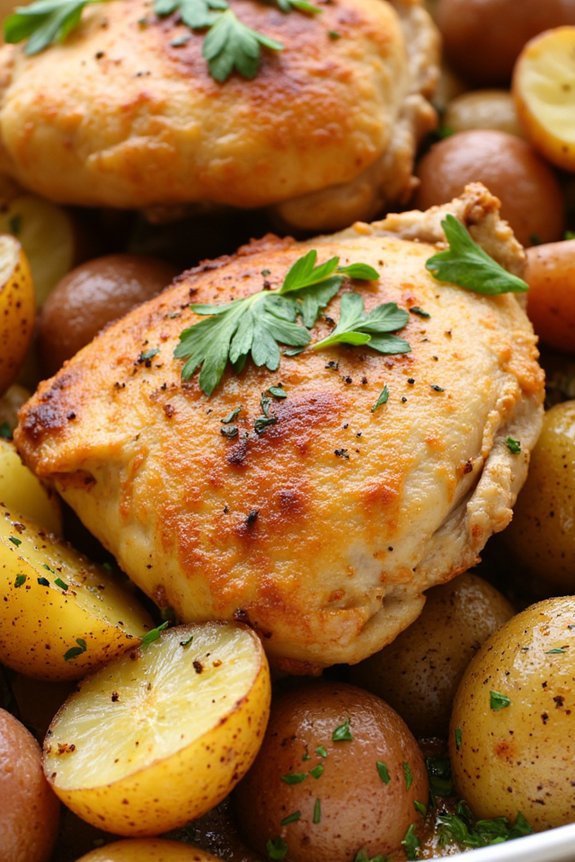
Baked Chicken Thighs With Potatoes is a hearty, comforting dish that’s perfect for a family dinner. It’s a simple recipe that combines juicy chicken with tender potatoes, all baked together to create a deliciously savory meal. The flavors meld beautifully as the chicken juices seep into the potatoes during baking, creating a harmonious balance of taste and texture.
This dish isn’t only easy to prepare but also economical, making it ideal for families looking to enjoy a satisfying meal without breaking the bank. The beauty of Baked Chicken Thighs With Potatoes lies in its simplicity and the use of minimal ingredients that are often found in your pantry.
The chicken thighs are seasoned to perfection, while the potatoes absorb all the flavors, resulting in a delightful combination that’s pleasing to the palate. This recipe is designed to serve 4-6 people, making it perfect for a family gathering or even for leftovers that can be enjoyed the next day. With this dish, you’ll have a wholesome, homemade meal that’s sure to become a family favorite.
Ingredients for 4-6 servings:
- 6 chicken thighs, bone-in and skin-on
- 4 large potatoes, peeled and quartered
- 3 tablespoons olive oil
- 4 cloves garlic, minced
- 1 tablespoon dried thyme
- 1 tablespoon dried rosemary
- Salt and pepper to taste
- Juice of 1 lemon
- Fresh parsley for garnish (optional)
Cooking Instructions:
- Preheat the Oven: Start by preheating your oven to 400°F (200°C). This guarantees that the dish will cook evenly and thoroughly.
- Prepare the Ingredients: While the oven is heating, wash and peel the potatoes, then quarter them. Pat the chicken thighs dry with a paper towel to guarantee the skin becomes crispy during baking.
- Season the Chicken and Potatoes: In a large bowl, combine the olive oil, minced garlic, thyme, rosemary, salt, and pepper. Add the chicken thighs and potatoes to the bowl and toss everything until well-coated with the seasoning mixture.
- Arrange in Baking Dish: Place the seasoned chicken thighs skin-side up in a large baking dish or roasting pan. Arrange the potatoes around the chicken, ensuring they’re evenly distributed.
- Bake the Dish: Squeeze the lemon juice over the chicken and potatoes. Place the dish in the preheated oven and bake for about 45-50 minutes, or until the chicken skin is golden and crispy and the potatoes are tender.
- Check for Doneness: Use a meat thermometer to confirm the chicken has reached an internal temperature of 165°F (75°C) for safety. The potatoes should be easily pierced with a fork.
- Rest and Serve: Once done, let the dish rest for a few minutes before serving. Garnish with fresh parsley if desired for added flavor and color.
Extra Tips: For extra flavor, consider marinating the chicken thighs in the seasoning mixture for an hour before baking. This allows the flavors to penetrate deeper into the meat.
To guarantee even cooking, try to use potatoes of similar size or cut them as uniformly as possible. If you enjoy a crispy finish on the chicken skin, broil the dish for the last 3-5 minutes of cooking, but keep a close eye to prevent burning.