

Isn’t it wonderful when a busy evening turns into a delightful family meal with little fuss? My collection of 15 quick and golden air fryer recipes is here to make that possible. From crispy chicken tenders to savory shrimp tacos, there’s something to satisfy even the pickiest eaters. Picture the comforting aroma of garlic Parmesan broccoli filling your kitchen. Ready to make dinnertime less stressful and more enjoyable?
Crispy Air Fryer Chicken Tenders

Crispy Air Fryer Chicken Tenders are a delightful and healthier alternative to their deep-fried counterparts, perfect for a family dinner that everyone will love. This recipe offers the same satisfying crunch and juicy interior without the excess oil, making it a guilt-free option. The air fryer guarantees even cooking and a golden-brown finish, while the simple yet flavorful seasoning brings out the best in the chicken.
Ideal for a quick weeknight meal or a weekend gathering, these chicken tenders are sure to become a family favorite.
The beauty of this recipe lies in its simplicity and versatility. With just a few basic ingredients, you can create a delicious main course that pairs well with a variety of sides. Whether served with a fresh salad, crisp vegetables, or classic fries, these chicken tenders are a hit with both kids and adults.
The use of an air fryer allows for a speedy cooking process, meaning you can spend less time in the kitchen and more time enjoying the meal with your loved ones. Here’s how to make Crispy Air Fryer Chicken Tenders for 4-6 people.
Ingredients:
- 2 pounds boneless, skinless chicken breast tenders
- 1 cup all-purpose flour
- 2 teaspoons salt
- 1 teaspoon black pepper
- 1 teaspoon garlic powder
- 1 teaspoon onion powder
- 1 teaspoon paprika
- 2 large eggs
- 1 tablespoon water
- 2 cups panko breadcrumbs
- Cooking spray
Cooking Instructions:
- Prepare the Chicken: Begin by patting the chicken tenders dry with paper towels. This step is essential for making sure that the coating adheres properly.
- Set Up Breading Station: In a shallow dish, combine the flour, salt, pepper, garlic powder, onion powder, and paprika. In another bowl, whisk together the eggs and water. Place the panko breadcrumbs in a third dish.
- Coat the Chicken: Dredge each chicken tender in the flour mixture, making sure it’s completely coated. Shake off any excess flour. Dip the floured chicken into the egg mixture, then press into the panko breadcrumbs, guaranteeing an even coating.
- Preheat the Air Fryer: Preheat your air fryer to 400°F (200°C) for about 5 minutes.
- Arrange in Air Fryer Basket: Lightly spray the air fryer basket with cooking spray. Place the breaded chicken tenders in a single layer in the basket, making sure they don’t touch. You may need to cook in batches depending on the size of your air fryer.
- Cook the Chicken: Spray the top of the chicken tenders lightly with cooking spray. Air fry for 10-12 minutes, flipping halfway through, until the chicken is cooked through and the coating is golden brown and crispy. The internal temperature should reach 165°F (74°C).
- Serve: Once cooked, remove the chicken tenders from the air fryer and serve them hot with your choice of dipping sauces and sides.
Extra Tips:
To guarantee maximum crispiness, avoid overcrowding the air fryer basket. Cook in batches if necessary, as this allows hot air to circulate effectively around each piece.
Additionally, for a bit of heat, consider adding a pinch of cayenne pepper to the flour mixture. Always check the chicken tenders for doneness by using a meat thermometer to prevent undercooking.
Finally, for a gluten-free version, substitute the flour and breadcrumbs with gluten-free alternatives.
Quick Air Fryer Salmon Fillets
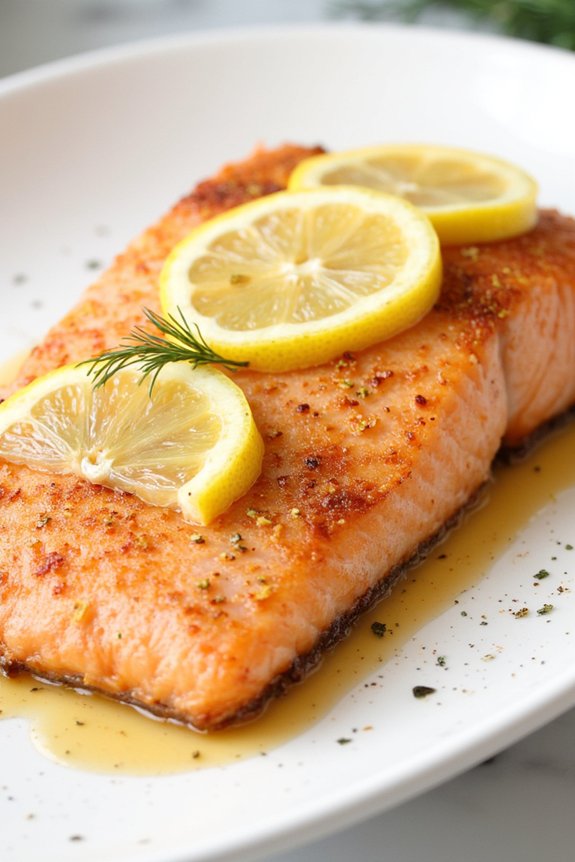
Salmon is a delicious and nutritious choice for a family dinner, and cooking it in an air fryer makes the process quick and easy. The air fryer locks in moisture while creating a beautiful, crisp exterior. This recipe for Quick Air Fryer Salmon Fillets is perfect for a family of 4-6, offering a healthy and satisfying meal that can be prepared in under 30 minutes.
With simple ingredients and minimal cleanup, it’s an ideal option for busy weeknights or a relaxed weekend dinner. The key to perfectly cooked salmon in the air fryer is to start with high-quality, fresh fillets and season them simply to let the natural flavors shine.
This recipe uses a classic combination of lemon, garlic, and herbs to enhance the salmon’s taste without overpowering it. Serve with your choice of side dishes, such as roasted vegetables, a fresh salad, or steamed rice, to complete the meal. The following recipe outlines everything you need to create this delicious dish.
Ingredients (serving size: 4-6 people):
- 4-6 salmon fillets, skinless (approximately 6 ounces each)
- 2 tablespoons olive oil
- 2 teaspoons garlic powder
- 1 teaspoon salt
- 1 teaspoon black pepper
- 2 teaspoons dried dill or parsley
- 1 lemon, thinly sliced
- Lemon wedges, for serving
Cooking Instructions:
- Prepare the Salmon Fillets: Rinse the salmon fillets under cold water and pat them dry with paper towels. This helps the seasoning adhere better and guarantees a crispy exterior.
- Season the Fillets: In a small bowl, mix the olive oil, garlic powder, salt, pepper, and dried dill or parsley. Brush this mixture evenly over both sides of the salmon fillets. Place a thin slice of lemon on top of each fillet for added flavor.
- Preheat the Air Fryer: Set your air fryer to 400°F (200°C) and allow it to preheat for about 3-5 minutes. This guarantees even cooking of the salmon fillets.
- Arrange the Fillets: Place the seasoned salmon fillets in the air fryer basket in a single layer. Make sure they aren’t overlapping to guarantee even cooking.
- Cook the Salmon: Air fry the salmon fillets for 8-10 minutes, depending on their thickness. Check for doneness by confirming the internal temperature reaches 145°F (63°C) and that the salmon flakes easily with a fork.
- Serve and Enjoy: Carefully remove the salmon from the air fryer and transfer to a serving platter. Serve with lemon wedges on the side for an extra burst of citrus flavor.
Extra Tips:
For the best results, use fillets of equal thickness to guarantee even cooking in the air fryer. If your fillets have skin and you prefer not to eat it, you can easily peel it off after cooking.
If you want to add more flavor, consider marinating the salmon in the olive oil mixture for 15-30 minutes before cooking. Adjust the cooking time if you have particularly thick or thin fillets. Always remember to preheat your air fryer; this step is vital for achieving that perfect crispy texture.
Air Fryer Shrimp Tacos

Air Fryer Shrimp Tacos are a delightful and easy-to-make dish that brings the taste of the ocean right to your dinner table.
These tacos are a perfect blend of crispy shrimp, vibrant toppings, and creamy sauce, all wrapped in warm tortillas. Using an air fryer not only makes the shrimp perfectly crispy without the need for excessive oil but also speeds up the cooking process, making this dish an ideal choice for a quick family dinner.
The beauty of these tacos lies in their simplicity and the fresh flavors they deliver. The shrimp are seasoned with a mix of spices that enhance their natural sweetness, while the toppings add a burst of color and texture.
Whether you’re a seasoned cook or a beginner, this recipe is straightforward and requires minimal preparation. Within minutes, you’ll be serving up a meal that’s not only delicious but also nutritious.
Ingredients for 4-6 servings:
- 1 1/2 pounds large shrimp, peeled and deveined
- 1 tablespoon olive oil
- 1 teaspoon chili powder
- 1 teaspoon garlic powder
- 1/2 teaspoon smoked paprika
- 1/2 teaspoon cumin
- Salt and pepper to taste
- 8-12 small corn or flour tortillas
- 1 cup shredded cabbage
- 1/2 cup diced tomatoes
- 1/4 cup chopped fresh cilantro
- 1 avocado, sliced
- 1/4 cup sour cream
- 1 tablespoon lime juice
Cooking Instructions:
- Prepare the Shrimp: In a large bowl, combine the shrimp with olive oil, chili powder, garlic powder, smoked paprika, cumin, salt, and pepper. Mix well until the shrimp are evenly coated with the seasoning.
- Preheat the Air Fryer: Set your air fryer to 400°F (200°C) and let it preheat for about 3 minutes to guarantee even cooking.
- Cook the Shrimp: Place the seasoned shrimp in a single layer in the air fryer basket. Cook for 6-8 minutes, turning halfway through, until the shrimp are pink and cooked through. Avoid overcrowding the basket; cook in batches if necessary.
- Prepare the Sauce: In a small bowl, mix the sour cream and lime juice. Add a pinch of salt and adjust the lime to taste. Set aside.
- Assemble the Tacos: Warm the tortillas in a skillet or microwave. Fill each tortilla with a layer of cabbage, a few pieces of shrimp, diced tomatoes, avocado slices, and a sprinkle of cilantro. Drizzle with the lime cream sauce.
- Serve Immediately: Serve the tacos immediately for the best flavor and texture, accompanied by lime wedges if desired.
Extra Tips:
For an extra kick, you can add a few dashes of hot sauce to the lime cream sauce or sprinkle some red pepper flakes over the shrimp before cooking.
If you prefer a more charred taste, lightly grill the tortillas before assembling the tacos. When buying shrimp, opt for fresh or sustainably sourced options for the best flavor and environmental impact.
Finally, feel free to customize your toppings based on what’s in season or your family’s preferences.
Easy Air Fryer Pork Chops

Air frying has revolutionized the way we prepare our favorite meals, making them healthier without sacrificing flavor. If you’re seeking a simple yet delicious family dinner idea, these Easy Air Fryer Pork Chops are sure to impress. The air fryer creates a perfectly crispy exterior while keeping the pork chops juicy and tender on the inside. This dish is perfect for busy weeknights or a casual weekend dinner with family and friends.
These pork chops are seasoned with a blend of herbs and spices that enhance their natural flavor, making them a hit with both kids and adults. They pair wonderfully with a variety of side dishes, from roasted vegetables to mashed potatoes, making them a versatile choice for any meal plan. Best of all, this recipe is quick to prepare and cook, allowing you to spend more time enjoying your meal and less time in the kitchen.
Ingredients (Serves 4-6):
- 4-6 boneless pork chops (1-inch thick)
- 2 tablespoons olive oil
- 1 teaspoon garlic powder
- 1 teaspoon onion powder
- 1 teaspoon paprika
- 1 teaspoon dried thyme
- 1 teaspoon salt
- 1/2 teaspoon black pepper
- Cooking spray
Instructions:
- Prepare the Pork Chops: Start by patting the pork chops dry with paper towels to remove any excess moisture. This helps the seasoning adhere better and promotes even browning.
- Season the Pork Chops: In a small bowl, mix together the garlic powder, onion powder, paprika, dried thyme, salt, and black pepper. Rub each pork chop with olive oil, then generously coat them with the seasoning mixture on both sides.
- Preheat the Air Fryer: Preheat your air fryer to 400°F (200°C) for about 5 minutes. This guarantees that the pork chops start cooking immediately upon entering the fryer, resulting in a nice crisp exterior.
- Arrange the Pork Chops in the Air Fryer: Lightly spray the air fryer basket with cooking spray to prevent sticking. Place the pork chops in a single layer in the basket, ensuring they don’t overlap. You may need to cook in batches depending on the size of your air fryer.
- Cook the Pork Chops: Air fry the pork chops at 400°F (200°C) for 12-15 minutes, flipping them halfway through the cooking time. Pork chops should be golden brown and reach an internal temperature of 145°F (63°C) when cooked through.
- Rest and Serve: Once cooked, remove the pork chops from the air fryer and let them rest for 3-5 minutes. This allows the juices to redistribute, guaranteeing tender and juicy meat. Serve with your favorite sides and enjoy!
Extra Tips:
For best results, choose pork chops that are evenly cut and similar in size to guarantee even cooking. If your pork chops are thicker or thinner than 1 inch, you may need to adjust the cooking time slightly.
Additionally, experiment with different seasoning blends to suit your taste preferences; for a spicier kick, consider adding a pinch of cayenne pepper. Remember, the air fryer basket can be quite hot, so use tongs to flip and remove the pork chops to avoid burns.
Air Fryer Veggie Medley
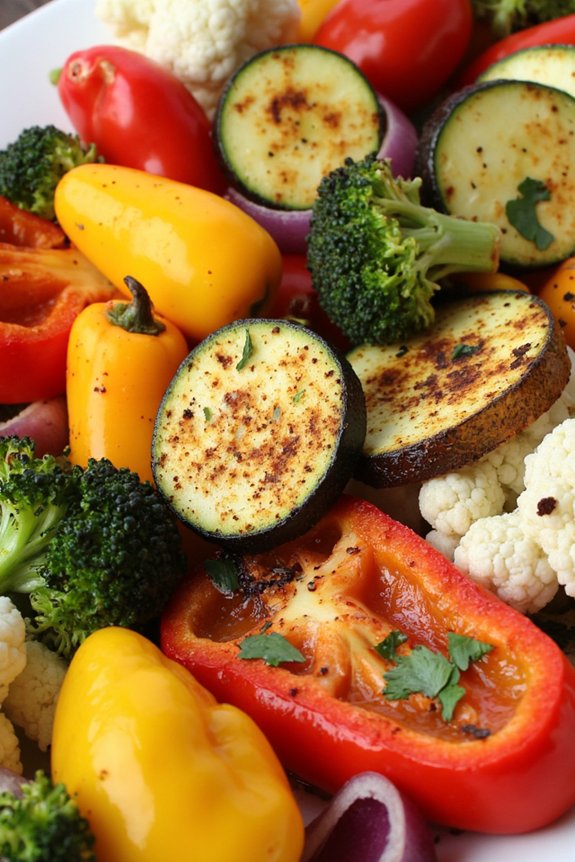
The Air Fryer Veggie Medley is a delightful and nutritious dish that brings together a vibrant array of vegetables, perfectly roasted to crispy perfection. This recipe is ideal for those looking to incorporate more vegetables into their family dinners without compromising on flavor or texture. The air fryer helps to lock in the natural flavors of the vegetables while giving them a satisfying crunch that even picky eaters will love.
This dish is versatile and can be customized to suit your family’s taste preferences. Whether you’re serving it as a main course or a side dish, the Air Fryer Veggie Medley is a quick and easy way to add a pop of color and a burst of nutrients to your meal. The combination of fresh vegetables and simple seasonings creates a wholesome dish that’s both healthy and delicious, making it a perfect choice for busy weeknights.
Ingredients for 4-6 people:
- 2 cups broccoli florets
- 2 cups cauliflower florets
- 1 red bell pepper, sliced
- 1 yellow bell pepper, sliced
- 1 zucchini, sliced into half-moons
- 1 red onion, sliced
- 3 tablespoons olive oil
- 1 teaspoon garlic powder
- 1 teaspoon onion powder
- 1 teaspoon smoked paprika
- Salt and black pepper to taste
- 1 tablespoon lemon juice
- Optional: fresh herbs like parsley or basil for garnish
Cooking Instructions:
- Preparation: Start by washing and drying all the vegetables. This step is essential to guarantee that the vegetables roast evenly and achieve a crispy texture. Cut the broccoli and cauliflower into bite-sized florets, slice the bell peppers, and cut the zucchini into half-moons. Slice the red onion thinly.
- Season the Vegetables: In a large mixing bowl, combine the broccoli, cauliflower, bell peppers, zucchini, and red onion. Drizzle with olive oil, then sprinkle with garlic powder, onion powder, smoked paprika, salt, and black pepper. Toss everything together until the vegetables are evenly coated with the seasonings and oil.
- Preheat the Air Fryer: Set your air fryer to 375°F (190°C) and allow it to preheat for about 3-5 minutes. This step guarantees that the vegetables start roasting immediately when placed inside, enhancing their crispiness.
- Cook the Vegetables: Place the seasoned vegetables in the air fryer basket, spreading them out in a single layer to guarantee even cooking. You may need to cook in batches depending on the size of your air fryer. Cook for 15-18 minutes, shaking the basket halfway through to ensure all sides are evenly cooked.
- Finish with Lemon Juice: Once the vegetables are cooked to your desired level of crispiness, remove them from the air fryer and transfer them to a serving dish. Drizzle with lemon juice to add a fresh, zesty flavor.
- Garnish and Serve: If desired, garnish the Air Fryer Veggie Medley with fresh herbs like parsley or basil before serving. This adds a touch of color and an extra layer of flavor.
Extra Tips:
For best results, make sure to cut the vegetables into similar-sized pieces to guarantee even cooking. If you prefer your vegetables less crispy, reduce the cooking time slightly.
You can also experiment with different vegetables such as carrots, asparagus, or Brussels sprouts to suit your taste. Additionally, if you want a spicier kick, consider adding a pinch of red pepper flakes or a dash of cayenne pepper to the seasoning mix.
Remember to adjust the seasonings according to your family’s preferences for a customized dish everyone will enjoy.
Air Fryer Meatballs

Air fryer meatballs are a delightful twist on the classic comfort food, offering a healthier alternative without compromising on flavor. These juicy meatballs are crisp on the outside and tender on the inside, making them perfect for a family dinner that everyone will love. The air fryer reduces the amount of oil needed, providing a guilt-free way to enjoy this savory dish.
Whether served with pasta, as a sub, or as an appetizer, these meatballs are sure to be a hit at your next meal. Using an air fryer not only speeds up the cooking process but also guarantees even cooking, resulting in perfectly browned meatballs every time.
With just a few simple ingredients, you can whip up these mouthwatering air fryer meatballs in no time, making them an ideal choice for busy weeknights. Follow this recipe to create delicious meatballs for a serving size of 4-6 people.
Ingredients:
- 1 pound ground beef
- 1/2 pound ground pork
- 1/2 cup breadcrumbs
- 1/4 cup grated Parmesan cheese
- 1/4 cup milk
- 1 egg
- 2 cloves garlic, minced
- 2 tablespoons fresh parsley, chopped
- 1 teaspoon salt
- 1/2 teaspoon black pepper
- 1 teaspoon Italian seasoning
- Cooking spray
Cooking Instructions:
- Prepare the Meatball Mixture: In a large mixing bowl, combine the ground beef, ground pork, breadcrumbs, Parmesan cheese, milk, egg, minced garlic, chopped parsley, salt, black pepper, and Italian seasoning. Mix the ingredients well using your hands or a spatula until fully combined, making certain that the seasonings are evenly distributed throughout the mixture.
- Shape the Meatballs: Using your hands, shape the mixture into meatballs approximately 1.5 inches in diameter. This should yield around 20-24 meatballs, depending on the exact size. Place the shaped meatballs on a plate or baking sheet lined with parchment paper.
- Preheat the Air Fryer: Preheat your air fryer to 375°F (190°C) for about 3-5 minutes. This step guarantees that the meatballs will start cooking immediately upon being placed inside, helping to achieve that nice, crisp exterior.
- Cook the Meatballs: Lightly spray the air fryer basket with cooking spray to prevent sticking. Arrange the meatballs in a single layer in the basket, making sure not to overcrowd them. You may need to cook in batches depending on the size of your air fryer. Cook the meatballs for 10-12 minutes, shaking the basket halfway through to guarantee even cooking. The meatballs should be golden brown and reach an internal temperature of 160°F (71°C).
- Serve and Enjoy: Once cooked, remove the meatballs from the air fryer and let them rest for a few minutes before serving. They can be served with your favorite pasta, in a sub sandwich, or as a standalone dish with a simple dipping sauce.
Extra Tips:
To guarantee the meatballs hold their shape during cooking, avoid overmixing the ingredients, as this can make the meatballs dense. If you’re looking for a flavor variation, consider adding a small amount of chopped onion or using different herbs, such as basil or oregano.
Additionally, for those who prefer a spicier kick, a pinch of red pepper flakes can be added to the mixture. If you need to keep the cooked meatballs warm while preparing the rest of your meal, they can be placed in a low oven at 200°F (93°C) until ready to serve.
Fast Air Fryer Steak Bites
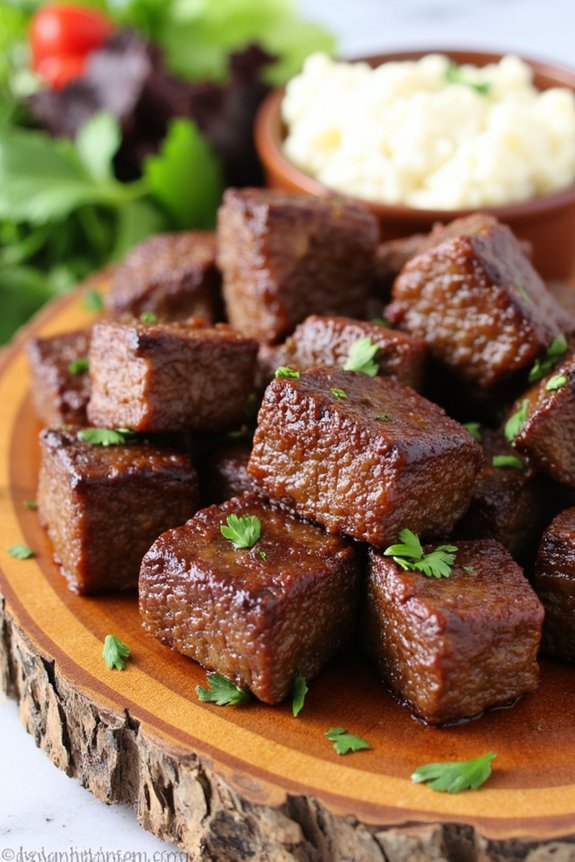
Air Fryer steak bites are a quick and delicious way to prepare a satisfying protein-packed meal for the whole family. By using an air fryer, you can achieve perfectly cooked steak bites that are tender on the inside and crispy on the outside in just a fraction of the time it would take using traditional methods. This recipe is perfect for a family dinner, offering a savory and flavorful dish that pairs well with a variety of sides.
This recipe is designed to serve 4-6 people, making it ideal for family gatherings or a regular weeknight meal. The steak bites are seasoned with a simple yet delicious blend of spices that enhance the natural flavors of the beef. The use of an air fryer guarantees that the steak is cooked evenly, while also allowing excess fat to drip away, resulting in a healthier dish.
Whether served with mashed potatoes, a fresh salad, or a side of vegetables, these air fryer steak bites are sure to be a hit.
Ingredients:
- 2 pounds of sirloin steak, cut into 1-inch cubes
- 2 tablespoons of olive oil
- 1 teaspoon of garlic powder
- 1 teaspoon of onion powder
- 1 teaspoon of smoked paprika
- 1 teaspoon of salt
- 1/2 teaspoon of black pepper
- Optional: fresh parsley for garnish
Instructions:
- Prepare the Steak: Start by cutting the sirloin steak into 1-inch cubes. Confirm the pieces are uniform in size for even cooking.
- Season the Steak: In a large bowl, combine the olive oil, garlic powder, onion powder, smoked paprika, salt, and black pepper. Add the steak cubes to the bowl and toss them until they’re well coated with the spice mixture.
- Preheat the Air Fryer: Preheat your air fryer to 400°F (200°C) for about 5 minutes. This step is essential to confirm the steak bites cook evenly and achieve a crispy exterior.
- Cook the Steak Bites: Place the seasoned steak cubes in the air fryer basket in a single layer, ensuring they aren’t overcrowded. You may need to cook them in batches depending on the size of your air fryer.
- Air Fry the Steak: Cook the steak bites for 8-10 minutes, shaking the basket halfway through cooking to confirm even browning. The steak should reach an internal temperature of 135°F (57°C) for medium-rare or 145°F (63°C) for medium doneness.
- Garnish and Serve: Once cooked, remove the steak bites from the air fryer and let them rest for a couple of minutes. Garnish with freshly chopped parsley if desired, and serve alongside your favorite sides.
Extra Tips:
For the best results, choose a high-quality cut of sirloin steak, as it will be more tender and flavorful. When cutting the steak into cubes, confirm your knife is sharp to maintain clean cuts and prevent tearing the meat fibers.
If you’re cooking multiple batches, keep the cooked steak bites warm in a low oven while you finish the rest. Finally, remember that cooking times may vary slightly depending on the air fryer’s brand and model, so always check the steak’s internal temperature to confirm it’s cooked to your liking.
Air Fryer BBQ Chicken Wings

Air Fryer BBQ Chicken Wings are a delicious and healthier alternative to traditional deep-fried wings, offering all the flavors and crispiness without the excess oil. Perfect for family dinners or gatherings, these wings are coated in a sweet and tangy barbecue sauce that caramelizes beautifully in the air fryer, giving you that irresistible sticky glaze.
Whether you’re planning a weekend feast or looking for a quick weeknight meal, these wings are sure to satisfy everyone at the table.
Cooking chicken wings in an air fryer isn’t only quicker but also results in perfectly crispy skin while keeping the meat tender and juicy inside. The air fryer circulates hot air around the food, which helps to achieve that deep-fried texture without needing a lot of oil.
Plus, the convenience of easy clean-up makes this recipe a go-to option for busy families. Serve these wings with a side of veggies or your favorite dipping sauce for a complete meal.
Ingredients (Serves 4-6)
- 2 pounds chicken wings, tips removed and separated into drumettes and flats
- 1 tablespoon vegetable oil
- 1 teaspoon garlic powder
- 1 teaspoon onion powder
- 1 teaspoon smoked paprika
- Salt and pepper, to taste
- 1 cup barbecue sauce
- 2 tablespoons honey
- 1 tablespoon apple cider vinegar
Cooking Instructions
- Preheat the Air Fryer: Start by preheating your air fryer to 380°F (193°C) for about 5 minutes. This helps to guarantee even cooking and a crispy texture.
- Prepare the Wings: Pat the chicken wings dry with paper towels to remove excess moisture. This step is essential for achieving crispy skin.
- Season the Wings: In a large bowl, toss the wings with vegetable oil, garlic powder, onion powder, smoked paprika, salt, and pepper until they’re evenly coated.
- Arrange in Air Fryer: Place the wings in a single layer in the air fryer basket. Don’t overcrowd them to allow proper air circulation. You may need to cook in batches depending on the size of your air fryer.
- Cook the Wings: Cook the wings at 380°F (193°C) for 25 minutes, flipping them halfway through the cooking time. This guarantees both sides are evenly cooked and crispy.
- Prepare the Sauce: While the wings are cooking, mix the barbecue sauce, honey, and apple cider vinegar in a small saucepan. Simmer over low heat until slightly thickened, about 5 minutes.
- Coat with Sauce: Once the wings are cooked, transfer them to a large bowl and pour over the prepared barbecue sauce. Toss the wings until they’re well coated.
- Final Crisp: Return the sauce-coated wings to the air fryer and cook at 400°F (204°C) for an additional 5 minutes. This helps set the sauce and adds extra crispiness to the wings.
- Serve: Remove the wings from the air fryer and let them rest for a few minutes before serving. Enjoy with your choice of side dishes or dipping sauces.
Extra Tips
For the crispiest wings, make sure they’re as dry as possible before seasoning. If you prefer spicier wings, add a pinch of cayenne pepper or a dash of hot sauce to the barbecue sauce mixture.
Also, keep an eye on the wings during the final cooking stage to prevent the sauce from burning, as sugar can caramelize quickly at high temperatures. If you have leftover wings, reheat them in the air fryer to maintain their crispy texture.
Simple Air Fryer Fish Sticks

Creating delicious homemade fish sticks has never been easier, thanks to the versatility of the air fryer. This method not only guarantees a crispy exterior but also keeps the fish tender and juicy on the inside. Perfect for a family dinner, these air fryer fish sticks are a healthier alternative to the traditionally deep-fried version, allowing you to enjoy this classic comfort food without the guilt.
With just a handful of ingredients and minimal preparation time, you can have these tasty fish sticks ready in no time, making them an ideal choice for busy weeknights or a fun family meal. This recipe is designed to serve 4-6 people and uses fresh fish fillets coated in a seasoned breadcrumb mixture for maximum flavor.
Whether you serve these fish sticks with a tangy tartar sauce, a squeeze of lemon, or your favorite dipping condiment, they’re sure to be a hit with both kids and adults alike. Let’s explore the ingredients and the step-by-step instructions to make these scrumptious air fryer fish sticks.
Ingredients for 4-6 Servings:
- 1.5 pounds of white fish fillets (such as cod, haddock, or pollock)
- 1 cup all-purpose flour
- 2 teaspoons salt
- 1 teaspoon black pepper
- 2 large eggs
- 2 cups panko breadcrumbs
- 1 teaspoon garlic powder
- 1 teaspoon onion powder
- 1 teaspoon paprika
- Cooking spray or a light drizzle of olive oil
- Lemon wedges (optional, for serving)
Cooking Instructions:
- Prepare the Fish: Start by patting the fish fillets dry with paper towels and cutting them into strips about 1 inch wide and 4 inches long. This will guarantee they cook evenly and fit nicely in the air fryer basket.
- Set Up Breading Station: In a shallow dish, mix the flour with salt and black pepper. In a separate bowl, beat the eggs. In a third dish, combine the panko breadcrumbs with garlic powder, onion powder, and paprika.
- Coat the Fish: Dredge each fish strip in the flour mixture, shaking off any excess. Then dip it into the beaten eggs, guaranteeing it’s fully coated. Finally, roll it in the panko mixture, pressing gently so the crumbs adhere well.
- Preheat the Air Fryer: Preheat your air fryer to 400°F (200°C) for about 3 minutes.
- Arrange in Air Fryer: Lightly spray the air fryer basket with cooking spray. Arrange the fish sticks in a single layer without overcrowding. You may need to cook in batches depending on the size of your air fryer.
- Cook the Fish Sticks: Cook the fish sticks at 400°F (200°C) for 10-12 minutes, flipping them halfway through the cooking time. They should be golden brown and crispy on the outside.
- Serve: Once cooked, remove the fish sticks from the air fryer and serve immediately with lemon wedges on the side, if desired.
Extra Tips:
For the best results, make sure that the fish sticks aren’t touching each other in the air fryer basket. This allows the hot air to circulate evenly and guarantees a crispy crust.
If you prefer a spicier kick, consider adding a pinch of cayenne pepper to the breadcrumb mixture. Additionally, you can experiment with different seasonings to suit your taste preferences.
Finally, if you have leftovers, these fish sticks can be reheated in the air fryer at 350°F (175°C) for about 3-4 minutes to regain their crispiness.
Air Fryer Stuffed Bell Peppers

Air Fryer Stuffed Bell Peppers are a delightful and healthy family dinner option that will have everyone asking for seconds. This dish combines the vibrant flavors of bell peppers with a savory filling of ground meat, rice, vegetables, and spices, all cooked to perfection in an air fryer.
The air fryer method not only speeds up the cooking process but also guarantees that the peppers are perfectly tender, with a slight crispiness on the outside, while the inside remains juicy and flavorful.
This recipe is perfect for busy weeknights, as it requires minimal preparation and cooking time. With the air fryer doing most of the work, you’ll have a delicious and satisfying meal on the table without the hassle of traditional oven baking.
Plus, the filling can be easily customized to suit your family’s tastes, making it a versatile option for picky eaters or those with dietary restrictions. Serve these stuffed bell peppers with a side salad or crusty bread for a complete and nutritious meal.
Ingredients for 4-6 servings:
- 4-6 large bell peppers (any color)
- 1 pound ground beef or turkey
- 1 cup cooked rice
- 1 small onion, chopped
- 2 cloves garlic, minced
- 1 cup canned diced tomatoes, drained
- 1 cup shredded cheese (cheddar or mozzarella)
- 1 tablespoon olive oil
- 1 teaspoon dried oregano
- 1 teaspoon ground cumin
- Salt and pepper to taste
Cooking Instructions:
- Prepare the Bell Peppers: Begin by washing the bell peppers thoroughly. Cut the tops off and remove the seeds and membranes from the inside. Set aside the tops for later use.
- Cook the Filling: In a large skillet, heat olive oil over medium heat. Add the chopped onion and minced garlic, sautéing until the onion becomes translucent. Add the ground beef or turkey, cooking until browned and fully cooked.
- Mix the Filling: Once the meat is cooked, stir in the cooked rice, drained diced tomatoes, oregano, cumin, salt, and pepper. Mix well to combine all ingredients. Remove the skillet from heat.
- Stuff the Peppers: Fill each bell pepper with the meat and rice mixture, pressing down gently to pack it in. Top each stuffed pepper with shredded cheese, and place the tops back on the peppers.
- Preheat the Air Fryer: Set your air fryer to 350°F (175°C) and allow it to preheat for about 3-5 minutes.
- Air Fry the Peppers: Arrange the stuffed peppers in the air fryer basket, guaranteeing they’re upright and not touching each other. Cook for 15-20 minutes, or until the peppers are tender and the cheese is melted and bubbly.
- Serve: Carefully remove the stuffed peppers from the air fryer using tongs or a spatula. Allow them to cool slightly before serving.
Extra Tips:
For a vegetarian version, substitute the ground meat with crumbled tofu or a mix of black beans and corn.
You can also experiment with different spices and herbs, such as adding a dash of paprika or chili powder for extra heat.
If you prefer a softer pepper, cook the stuffed peppers for a few additional minutes in the air fryer.
Finally, if you have leftover filling, it can be stored in the refrigerator for up to two days and used as a tasty addition to salads or wraps.
Air Fryer Teriyaki Tofu
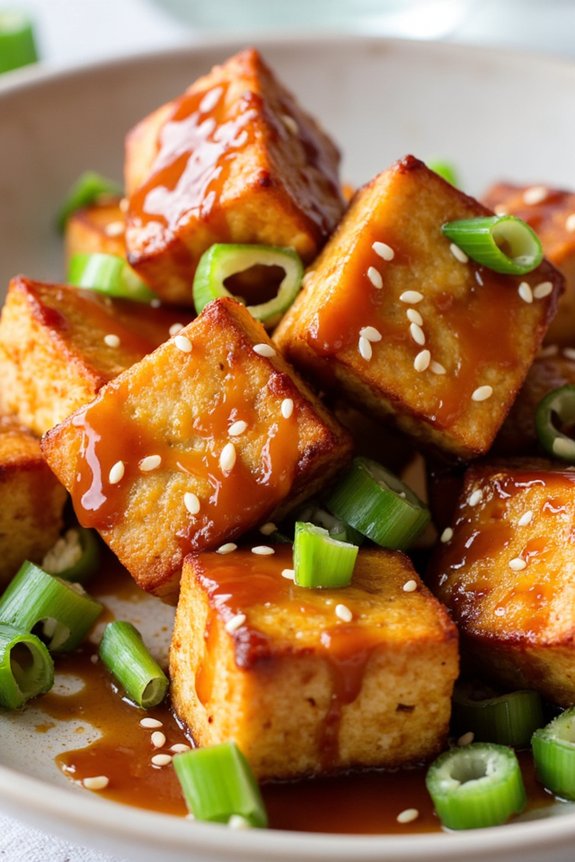
Air Fryer Teriyaki Tofu is a delicious and healthy family meal that brings together the savory flavors of teriyaki sauce with the satisfying texture of tofu. This dish is perfect for those nights when you want something quick and easy but still packed with flavor.
By using an air fryer, you can achieve a crispy exterior on the tofu without the need for excessive oil, making it a healthier alternative to traditional frying methods. The teriyaki sauce adds a delightful sweetness, balanced by a hint of umami, making this dish a hit with both adults and kids alike.
This recipe is ideal for serving 4-6 people, making it a great option for family dinners or small gatherings. Whether you’re a long-time fan of tofu or a newcomer looking to experiment with plant-based meals, this recipe is sure to impress.
Serve it with a side of steamed rice and your choice of vegetables for a complete meal that’s both nourishing and satisfying.
Ingredients:
- 2 blocks of firm tofu, drained and pressed
- 1 cup teriyaki sauce
- 2 tablespoons soy sauce
- 1 tablespoon sesame oil
- 1 tablespoon cornstarch
- 2 tablespoons water
- 1 tablespoon sesame seeds
- 2 green onions, sliced
- Cooking spray
Instructions:
- Prepare the Tofu: Start by draining and pressing the tofu blocks to remove excess moisture. This can be done by wrapping the tofu in a clean kitchen towel, placing it on a flat surface, and setting a heavy object on top for about 15-20 minutes.
- Cut and Marinate: Once pressed, cut the tofu into 1-inch cubes. In a large bowl, combine the teriyaki sauce, soy sauce, and sesame oil. Add the tofu cubes to the bowl and gently toss to coat them in the marinade. Let the tofu marinate for at least 30 minutes to absorb the flavors.
- Preheat the Air Fryer: While the tofu is marinating, preheat your air fryer to 375°F (190°C).
- Coat with Cornstarch: In a small bowl, mix the cornstarch and water to create a slurry. Drain the tofu from the marinade (reserving the marinade) and gently toss the tofu cubes in the cornstarch mixture. This will help the tofu become crispy in the air fryer.
- Air Fry the Tofu: Lightly spray the air fryer basket with cooking spray. Arrange the tofu cubes in a single layer in the basket, confirming they aren’t touching each other. Air fry for 15-20 minutes, shaking the basket halfway through to guarantee even cooking, until the tofu is golden brown and crispy.
- Thicken the Sauce: Pour the reserved marinade into a small saucepan and bring it to a simmer over medium heat. Allow it to reduce and thicken slightly, about 3-5 minutes.
- Serve: Once the tofu is cooked, transfer it to a serving dish. Drizzle the thickened teriyaki sauce over the tofu cubes. Garnish with sesame seeds and sliced green onions.
Extra Tips:
When preparing Air Fryer Teriyaki Tofu, verify the tofu is thoroughly pressed and dry before marinating. This helps it absorb more flavor and achieve a better texture.
If you prefer a spicier version, add a pinch of red pepper flakes to the marinade. For an extra touch of flavor, consider adding a splash of rice vinegar to the sauce.
Always preheat the air fryer for the best results, and don’t overcrowd the basket to guarantee the tofu crisps up evenly. Enjoy your delicious and easy-to-make family dinner!
Air Fryer Garlic Parmesan Broccoli
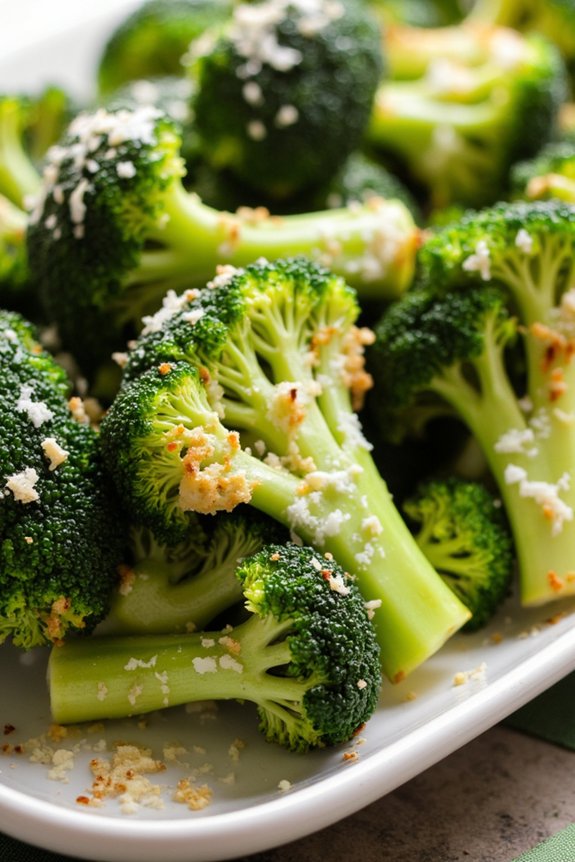
Air Fryer Garlic Parmesan Broccoli is a delightful and nutritious addition to any family dinner. This dish combines the earthy flavors of broccoli with the rich, savory taste of garlic and the salty, nutty goodness of Parmesan cheese. It’s a fantastic side dish that pairs well with a wide range of main courses, from roasted chicken to grilled steak.
Plus, using an air fryer guarantees that the broccoli turns out perfectly crispy on the outside while remaining tender on the inside, providing a satisfying texture that will please even the pickiest eaters.
This recipe for Air Fryer Garlic Parmesan Broccoli isn’t only delicious but also simple to prepare. With just a few basic ingredients, you can create a healthy, flavorful side dish that will have your family asking for seconds. The air fryer notably reduces cooking time compared to traditional methods, making it an excellent option for busy weeknights when you need to get dinner on the table quickly.
Follow this easy recipe to serve a delicious serving size for 4-6 people.
Ingredients:
- 1 1/2 pounds of fresh broccoli florets
- 3 tablespoons of olive oil
- 4 cloves of garlic, minced
- 1/2 cup of grated Parmesan cheese
- 1 teaspoon of salt
- 1/2 teaspoon of black pepper
- 1 teaspoon of lemon juice (optional)
Cooking Instructions:
- Prepare the Broccoli: Start by washing the broccoli florets thoroughly under cold water. Pat them dry with a clean kitchen towel or paper towels to remove any excess moisture. Make sure the florets are evenly sized for consistent cooking.
- Season the Broccoli: In a large mixing bowl, combine the olive oil, minced garlic, salt, and black pepper. Add the broccoli florets to the bowl and toss everything together, making sure that each piece of broccoli is well coated with the olive oil mixture.
- Preheat the Air Fryer: Set your air fryer to 375°F (190°C) and allow it to preheat for about 3-5 minutes. This step is essential for achieving that perfect crispy texture.
- Cook the Broccoli: Place the seasoned broccoli florets in the air fryer basket in a single layer, making sure not to overcrowd them. Cook the broccoli for 8-10 minutes, shaking the basket halfway through to ensure even cooking.
- Add Parmesan Cheese: After 8-10 minutes, open the air fryer and sprinkle the grated Parmesan cheese over the broccoli. Continue to cook for an additional 2-3 minutes, or until the cheese is melted and the broccoli is golden brown.
- Finish and Serve: Once the broccoli is cooked to your desired level of crispiness, remove it from the air fryer. If desired, drizzle with a teaspoon of lemon juice for a fresh, zesty finish. Serve immediately as a delicious side dish.
Extra Tips:
For an even more flavorful dish, consider adding a pinch of red pepper flakes to the seasoning mixture for a subtle kick. If you prefer your broccoli well-done, you can increase the cooking time by a minute or two, keeping a close eye to prevent burning.
For a variation, try adding a sprinkle of Italian seasoning or replacing Parmesan with Pecorino Romano for a different flavor profile. Remember to always preheat the air fryer for the best results, and avoid overcrowding the basket to guarantee the broccoli cooks evenly.
Air Fryer Chicken Fajitas

Air Fryer Chicken Fajitas are a delicious and healthier alternative to the traditional skillet-cooked version. By using an air fryer, you can achieve perfectly cooked, juicy chicken with a crispy exterior, while keeping the vegetables tender and flavorful. This dish is perfect for a family dinner, as it combines colorful bell peppers, onions, and well-seasoned chicken strips wrapped in warm tortillas. The air fryer not only cuts down on cooking time but also uses less oil, making this a guilt-free meal that everyone will enjoy.
The beauty of making Chicken Fajitas in an air fryer is the simplicity and convenience it brings to your kitchen. In just a few easy steps, you can have a restaurant-quality meal ready to serve. This recipe serves 4-6 people, making it ideal for family gatherings or a cozy dinner with friends. With a handful of ingredients and minimal preparation, you’ll find yourself coming back to this recipe time and time again. Plus, the vibrant colors and aromatic spices will surely impress your family and guests alike.
Ingredients (Serves 4-6):
- 1 ½ lbs boneless, skinless chicken breasts
- 1 red bell pepper
- 1 yellow bell pepper
- 1 green bell pepper
- 1 large onion
- 2 tablespoons olive oil
- 2 teaspoons chili powder
- 1 teaspoon cumin
- 1 teaspoon garlic powder
- 1 teaspoon smoked paprika
- ½ teaspoon salt
- ½ teaspoon black pepper
- 8-12 flour tortillas
- Optional toppings: sour cream, guacamole, salsa, shredded cheese, chopped cilantro, lime wedges
Instructions:
- Prepare the Chicken and Vegetables:
- Slice the chicken breasts into thin strips, approximately 1/2 inch thick. This guarantees they cook evenly and quickly in the air fryer.
- Cut the bell peppers and onion into similar-sized strips. Keeping the vegetable strips uniform helps them cook consistently.
- Season the Ingredients:
- In a large mixing bowl, combine the chicken strips, bell pepper strips, and onion strips.
- Drizzle the olive oil over the mixture and add the chili powder, cumin, garlic powder, smoked paprika, salt, and black pepper. Toss everything well to make sure that the chicken and vegetables are evenly coated with the seasoning.
- Preheat the Air Fryer:
- Preheat your air fryer to 390°F (200°C) for about 3-5 minutes. Preheating guarantees that the chicken and vegetables will start cooking immediately, which helps lock in moisture and flavor.
- Cook the Chicken Fajitas:
- Place the seasoned chicken and vegetable mixture into the air fryer basket. Spread them out into an even layer, avoiding overcrowding. You may need to cook in batches depending on the size of your air fryer.
- Cook for 15-18 minutes, shaking the basket halfway through to make certain of even cooking. The chicken should be cooked through, and the vegetables should be tender with a slight char.
- Warm the Tortillas:
- While the fajita mixture is cooking, wrap the flour tortillas in aluminum foil and place them in a preheated oven at 300°F (150°C) for about 5 minutes. Alternatively, you can warm them individually in a dry skillet over medium heat for 30 seconds on each side.
- Assemble and Serve:
- Once the chicken and vegetables are cooked, remove them from the air fryer and let them rest for a minute.
- Serve the warm tortillas alongside the chicken fajita mixture and let everyone build their own fajitas. Provide optional toppings such as sour cream, guacamole, salsa, shredded cheese, chopped cilantro, and lime wedges for added flavor.
Extra Tips:
For best results, don’t skip preheating the air fryer as it helps achieve a nice sear on the chicken and vegetables. If you prefer spicier fajitas, feel free to add a pinch of cayenne pepper or some sliced jalapeños to the seasoning mix. Additionally, you can substitute the flour tortillas with corn tortillas for a gluten-free option.
Finally, if you have leftovers, they can be stored in the refrigerator for up to three days and reheated in the air fryer or microwave for a quick meal.
Air Fryer Zucchini Chips

Air Fryer Zucchini Chips make for a healthy and delicious snack or side dish that’s perfect for family dinners. These crispy chips are a fantastic alternative to traditional fried snacks, offering a lighter option that doesn’t compromise on flavor. The air fryer guarantees that the zucchini chips come out perfectly crispy with minimal oil, making them a guilt-free indulgence.
Whether you’re serving them as an appetizer or a side dish, these zucchini chips are sure to be a hit with both kids and adults alike. This recipe yields a serving size suitable for 4-6 people, making it ideal for family gatherings or an evening meal.
With just a few simple ingredients and a little time, you can whip up these tasty zucchini chips in your air fryer. The preparation is straightforward, and the cooking process is quick, making it a convenient option for busy weeknights. So, gather your ingredients and get ready to enjoy a batch of crunchy, flavorful zucchini chips that everyone will love.
Ingredients:
- 2 large zucchinis
- 1 cup all-purpose flour
- 2 large eggs
- 1 cup breadcrumbs (preferably Panko)
- 1/2 cup grated Parmesan cheese
- 1 teaspoon garlic powder
- 1 teaspoon Italian seasoning
- Salt and pepper to taste
- Cooking spray or olive oil spray
Cooking Instructions:
- Prepare the Zucchini: Wash the zucchinis thoroughly and slice them into thin, even rounds, about 1/4 inch thick. Pat them dry with paper towels to remove excess moisture.
- Set Up Breading Station: Arrange three shallow bowls for the breading process. In the first bowl, place the flour. In the second bowl, beat the eggs. In the third bowl, combine the breadcrumbs, Parmesan cheese, garlic powder, Italian seasoning, salt, and pepper.
- Bread the Zucchini: Start by coating each zucchini slice in flour, shaking off any excess. Then, dip the slices into the beaten eggs, guaranteeing they’re well-coated. Finally, press the slices into the breadcrumb mixture, making sure each piece is evenly coated.
- Preheat the Air Fryer: Preheat your air fryer to 400°F (200°C) for about 5 minutes to guarantee even cooking.
- Arrange in Air Fryer: Lightly spray the air fryer basket with cooking spray. Place the breaded zucchini slices in a single layer in the basket. Be sure not to overcrowd them to allow for proper air circulation.
- Cook the Zucchini Chips: Cook the zucchini chips at 400°F (200°C) for 8-10 minutes, flipping halfway through the cooking time. They should be golden brown and crispy when done.
- Serve: Remove the zucchini chips from the air fryer and serve immediately. They’re best enjoyed fresh and hot, possibly with a dipping sauce of your choice.
Extra Tips:
For the best results, try to slice the zucchini uniformly to guarantee even cooking. If your air fryer basket is small, cook the chips in batches rather than overcrowding them, which can lead to uneven cooking.
If you prefer a spicier kick, consider adding a pinch of cayenne pepper to the breadcrumb mixture. Additionally, experiment with different seasonings or dipping sauces to customize the flavor to your family’s taste. Enjoy your crispy, flavorful zucchini chips as a delightful addition to your family dinner!
Air Fryer Spicy Cauliflower Bites

Air Fryer Spicy Cauliflower Bites are a delightful and healthy alternative to traditional fried snacks. These bites are perfect for a family dinner, offering a flavorful kick with a satisfying crunch that even picky eaters will love.
The air fryer method guarantees the cauliflower is cooked to perfection, maintaining its nutritional value while providing that crispy texture we all crave. Whether you’re serving them as an appetizer, side dish, or a main component of a vegetarian meal, these spicy cauliflower bites are sure to be a hit.
This recipe is designed to serve 4-6 people, making it a great choice for a family meal or a small gathering. The combination of spices in the batter gives these cauliflower bites a bold and fiery taste, while the air fryer guarantees they’re cooked evenly and quickly.
You’ll find that this dish isn’t only delicious but also quick to prepare, allowing you to spend more time enjoying your meal and less time in the kitchen.
Ingredients:
- 1 large head of cauliflower, cut into bite-sized florets
- 1 cup all-purpose flour
- 1 cup water
- 1 tablespoon garlic powder
- 1 tablespoon onion powder
- 1 teaspoon smoked paprika
- 1 teaspoon cayenne pepper
- 1 teaspoon salt
- 1/2 teaspoon black pepper
- 2 cups panko breadcrumbs
- Cooking spray
- 1/2 cup hot sauce
- 2 tablespoons melted butter
Cooking Instructions:
- Prepare the Cauliflower: Wash and dry the cauliflower thoroughly. Cut the cauliflower into bite-sized florets, ensuring they’re all roughly the same size for even cooking.
- Make the Batter: In a large mixing bowl, combine the flour, water, garlic powder, onion powder, smoked paprika, cayenne pepper, salt, and black pepper. Whisk together until you have a smooth batter without lumps.
- Coat the Cauliflower: Dip each cauliflower floret into the batter, making sure it’s fully coated. Allow any excess batter to drip off, then roll the florets in the panko breadcrumbs, pressing gently to guarantee the breadcrumbs adhere well.
- Preheat the Air Fryer: Set your air fryer to 400°F (200°C) and let it preheat for about 5 minutes.
- Cook the Cauliflower: Spray the air fryer basket with cooking spray to prevent sticking. Place the coated cauliflower florets in a single layer in the basket. Cook for 15-20 minutes, shaking the basket halfway through to guarantee even cooking, until the cauliflower is golden brown and crispy.
- Prepare the Sauce: While the cauliflower is cooking, combine the hot sauce and melted butter in a small saucepan over low heat. Stir until the mixture is smooth and well combined.
- Toss and Serve: Once the cauliflower bites are cooked, transfer them to a large bowl. Drizzle the hot sauce mixture over the cauliflower and toss gently to coat. Serve immediately with your favorite dipping sauce.
Extra Tips:
When preparing Air Fryer Spicy Cauliflower Bites, make sure the cauliflower florets are evenly sized to guarantee they cook at the same rate.
For added crunch, double-coat the florets by repeating the batter and breadcrumb process. Adjust the level of heat by varying the amount of cayenne pepper or hot sauce to suit your preference.
If you have leftovers, reheat them in the air fryer for a few minutes to maintain their crispiness.