

Gathering my family around the table is one of my favorite things to do. There’s something special about serving dishes that evoke memories and warmth. Classic beef stroganoff or creamy chicken and broccoli casserole always bring smiles and stories. The aroma of garlic and herb roasted chicken fills the house with comfort. These recipes feel like a warm hug, ready to be shared. Curious about what else could be on the menu?
Classic Beef Stroganoff
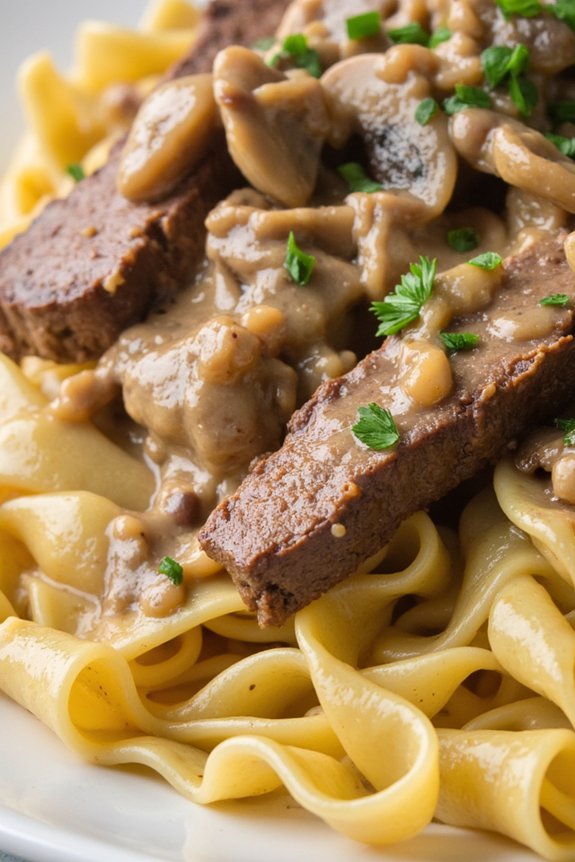
Classic Beef Stroganoff is a comforting and hearty dish that has been a family favorite for generations. Originating from 19th-century Russia, this dish combines tender beef with a creamy, savory sauce, traditionally served over egg noodles or rice. The balance of flavors comes from sautéed mushrooms, onions, and garlic, with a hint of tanginess from sour cream. Perfect for a cozy family dinner, this recipe delivers a satisfying meal that pleases both adults and children alike.
This version of Beef Stroganoff is designed to serve 4-6 people, making it ideal for a family gathering or a small dinner party. The dish is simple to prepare and requires just a few key ingredients, most of which you might already have in your pantry. With tender strips of beef and a luscious sauce, it’s a meal that stands out for its rich taste yet straightforward preparation. Gather your ingredients and enjoy a classic dish that brings warmth and comfort to your dining table.
Ingredients (Serving Size: 4-6 people)
- 1 1/2 pounds beef sirloin, cut into thin strips
- 2 tablespoons olive oil
- 1 medium onion, chopped
- 2 cloves garlic, minced
- 8 ounces mushrooms, sliced
- 1 cup beef broth
- 1 tablespoon Worcestershire sauce
- 1 teaspoon Dijon mustard
- 1 cup sour cream
- 1 tablespoon all-purpose flour
- Salt and pepper to taste
- 12 ounces egg noodles
- 2 tablespoons fresh parsley, chopped (optional, for garnish)
Cooking Instructions
- Prepare the Beef: Season the beef strips with salt and pepper. Heat 1 tablespoon of olive oil in a large skillet over medium-high heat. Add the beef strips and cook until browned on all sides, about 4-5 minutes. Remove the beef from the skillet and set aside.
- Sauté Vegetables: In the same skillet, add the remaining tablespoon of olive oil. Add the chopped onion and sauté until translucent, about 3 minutes. Add the garlic and sliced mushrooms, continuing to sauté until the mushrooms are browned and tender, about 5 minutes.
- Create the Sauce: Sprinkle the flour over the vegetables and stir to coat. Gradually add the beef broth, stirring constantly to avoid lumps. Add the Worcestershire sauce and Dijon mustard, stirring to combine. Bring the mixture to a simmer and cook for about 2 minutes until the sauce begins to thicken.
- Incorporate Sour Cream: Lower the heat and stir in the sour cream. Mix until the sauce is smooth and creamy. Return the beef strips to the skillet and cook until heated through, about 3-4 minutes. Adjust seasoning with salt and pepper as needed.
- Cook the Noodles: While the sauce is simmering, cook the egg noodles according to package instructions. Drain and set aside.
- Serve: Serve the beef stroganoff over the cooked egg noodles. Garnish with chopped fresh parsley if desired.
Tips for Cooking Beef Stroganoff
When cooking beef stroganoff, it’s important to not overcook the beef strips to keep them tender. Quickly searing them on high heat ensures they stay juicy. Additionally, when adding the sour cream, do so at a lower temperature to prevent curdling, guaranteeing a smooth and creamy sauce.
If you prefer a thicker sauce, you can increase the flour slightly or simmer longer until the desired consistency is reached. Finally, feel free to experiment with different types of mushrooms or add a splash of brandy for an extra depth of flavor.
Creamy Chicken and Broccoli Casserole

There’s something incredibly comforting about a warm, hearty casserole fresh from the oven. This Creamy Chicken and Broccoli Casserole is a homestyle family dinner favorite that’s both satisfying and easy to make. The tender chunks of chicken and crisp-tender broccoli are smothered in a creamy, cheesy sauce and topped with a golden breadcrumb crust.
It’s a dish that brings everyone to the table, making it perfect for busy weeknights or a cozy Sunday dinner. This casserole not only delivers on taste but also on nutrition, thanks to the inclusion of broccoli, a powerhouse of vitamins and minerals. The creaminess of the sauce is achieved with a blend of cream of chicken soup and sour cream, guaranteeing that each bite is rich and flavorful.
This recipe serves 4-6 people, making it ideal for family gatherings or for having leftovers for the next day.
Ingredients (Serves 4-6):
- 2 cups cooked chicken breast, cubed
- 4 cups broccoli florets
- 1 can (10.5 oz) cream of chicken soup
- 1 cup sour cream
- 1 cup shredded cheddar cheese
- 1/2 teaspoon garlic powder
- 1/2 teaspoon onion powder
- Salt and pepper to taste
- 1 cup bread crumbs
- 2 tablespoons melted butter
- Cooking spray
Cooking Instructions:
- Preheat the Oven: Start by preheating your oven to 375°F (190°C). This will guarantee that your casserole cooks evenly and gets that perfect golden crust.
- Prepare the Broccoli: Bring a large pot of water to boil. Add the broccoli florets and cook for about 3-4 minutes until just tender. Drain and set aside to cool slightly.
- Mix the Creamy Sauce: In a large mixing bowl, combine the cream of chicken soup, sour cream, garlic powder, onion powder, salt, and pepper. Mix until smooth and well incorporated.
- Combine Ingredients: Add the cooked chicken and broccoli to the creamy sauce mixture. Stir in the shredded cheddar cheese, guaranteeing that everything is well coated with the sauce.
- Assemble the Casserole: Lightly spray a 9×13-inch baking dish with cooking spray. Pour the chicken and broccoli mixture into the prepared dish, spreading it evenly.
- Prepare the Topping: In a small bowl, mix together the bread crumbs and melted butter until the crumbs are evenly coated. Sprinkle this mixture over the top of the casserole.
- Bake: Place the casserole in the preheated oven and bake for 25-30 minutes or until the top is golden brown and the casserole is bubbly around the edges.
- Serve: Remove from the oven and let it cool for a few minutes before serving. Enjoy this creamy, cheesy delight with your family!
Extra Tips:
For an added flavor boost, consider adding a teaspoon of Dijon mustard to the creamy sauce. If you prefer a slightly crunchier topping, use panko breadcrumbs instead of regular ones. To save time, use rotisserie chicken or leftover chicken from a previous meal.
Finally, feel free to experiment with different types of cheese, such as mozzarella or gouda, to suit your taste preferences.
Slow-Cooked Pot Roast With Vegetables
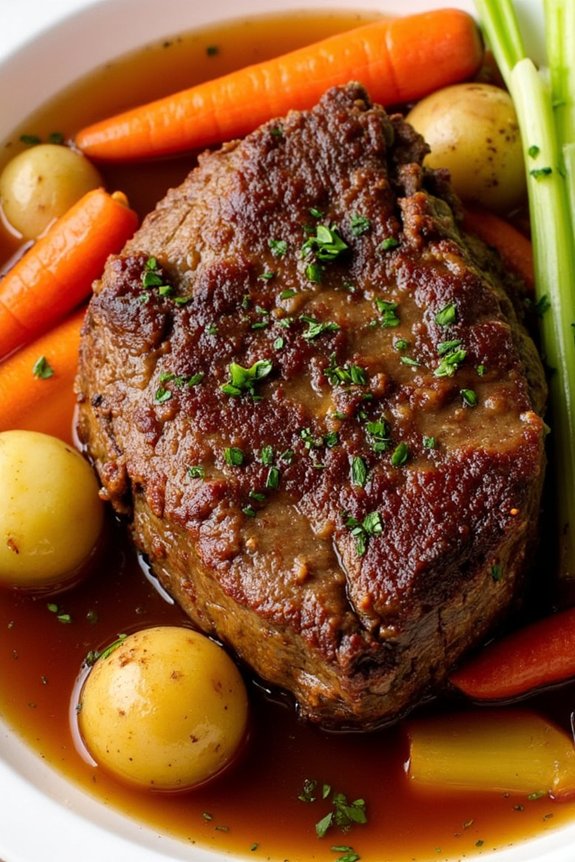
There’s nothing quite like gathering around the table with family and enjoying a hearty meal that has been simmering away, filling the house with comforting aromas. Slow-Cooked Pot Roast With Vegetables is the ultimate homestyle family dinner that brings warmth and satisfaction to any occasion. This dish features a tender pot roast cooked to perfection with an array of vegetables that absorb the savory flavors, creating a delightful blend of tastes and textures.
The slow-cooking process allows the beef to become melt-in-your-mouth tender, while carrots, potatoes, and onions soak up the rich broth, making it a complete meal in one pot. Perfect for serving 4-6 people, this recipe is ideal for a cozy evening or a special family gathering. The preparation is relatively simple, requiring just a little bit of prep work before letting the slow cooker do the rest.
Whether you’re an experienced cook or a beginner in the kitchen, this dish is straightforward to make and is sure to impress your family and friends with its delicious, homey flavors.
Ingredients (Serves 4-6 people)
- 3 to 4 pounds beef chuck roast
- Salt and black pepper, to taste
- 2 tablespoons olive oil
- 1 large onion, sliced
- 4 cloves garlic, minced
- 4 cups beef broth
- 2 tablespoons tomato paste
- 2 tablespoons Worcestershire sauce
- 1 teaspoon dried thyme
- 1 teaspoon dried rosemary
- 3 large carrots, peeled and cut into chunks
- 4 medium potatoes, quartered
- 3 stalks celery, chopped
- 2 bay leaves
- 2 tablespoons cornstarch (optional, for thickening)
Cooking Instructions
- Prepare the Meat: Season the beef chuck roast generously with salt and black pepper on all sides. This will help to develop a flavorful crust once seared.
- Sear the Roast: In a large skillet, heat the olive oil over medium-high heat. Add the roast and sear each side for about 4-5 minutes until browned. This step locks in the juices and adds depth to the flavor.
- Prepare the Slow Cooker: Place the sliced onion and minced garlic at the bottom of the slow cooker. These will infuse the meat with aromatic flavors as it cooks.
- Assemble the Dish: Transfer the seared roast to the slow cooker, placing it on top of the onions and garlic. Pour in the beef broth, then add tomato paste, Worcestershire sauce, thyme, rosemary, and bay leaves.
- Add the Vegetables: Arrange the carrots, potatoes, and celery around the meat. Make sure they’re submerged in the liquid to guarantee even cooking.
- Cook Slowly: Cover the slow cooker and cook on low for 8-9 hours, or until the meat is fork-tender and the vegetables are cooked through. Alternatively, you can cook on high for 4-5 hours.
- Thicken the Sauce (Optional): If you prefer a thicker sauce, remove about 1 cup of the cooking liquid and mix it with cornstarch in a small bowl. Return the mixture to the slow cooker and stir well. Let it cook for an additional 15-20 minutes to thicken.
Extra Tips
For the best results, try to use a beef chuck roast, as it becomes tender and flavorful when slow-cooked over several hours. If you need to save time, you can prepare the vegetables and sear the meat the night before, placing everything in the refrigerator until ready to cook.
Additionally, feel free to add other root vegetables, like parsnips or turnips, for more variety. Always remember to taste and adjust the seasonings before serving to suit your preference. Enjoy your hearty Slow-Cooked Pot Roast With Vegetables with crusty bread or a side of your favorite salad for a complete meal.
Hearty Baked Ziti With Italian Sausage

Hearty Baked Ziti With Italian Sausage is a comforting and delicious dish that’s perfect for a family dinner. This classic Italian-American recipe combines ziti pasta, rich tomato sauce, and savory Italian sausage, all topped with a generous layer of melted cheese.
It’s a meal that’s not only satisfying but also easy to prepare, making it an ideal choice for busy weeknights or a cozy weekend gathering. Whether you’re feeding a small crowd or looking for leftovers that taste even better the next day, this baked ziti is sure to be a hit.
The combination of flavors and textures in this dish makes it irresistible. The robust Italian sausage adds a depth of flavor to the tomato sauce, while the creamy cheese creates a delightful contrast to the al dente pasta.
The baked ziti is completed with a golden, bubbly cheese topping that makes every bite savory and satisfying. Rich in taste and simple to prepare, this hearty baked ziti will quickly become a family favorite.
Ingredients (Serves 4-6):
- 1 pound ziti pasta
- 1 pound Italian sausage, casings removed
- 1 jar (24 ounces) marinara sauce
- 1 can (15 ounces) tomato sauce
- 1 teaspoon dried Italian seasoning
- 1/2 teaspoon garlic powder
- 1/4 teaspoon crushed red pepper flakes (optional)
- Salt and black pepper to taste
- 1 cup ricotta cheese
- 2 cups shredded mozzarella cheese
- 1/2 cup grated Parmesan cheese
- Fresh basil leaves for garnish (optional)
Instructions:
- Preheat Oven: Preheat your oven to 375°F (190°C) to guarantee it’s hot and ready for baking.
- Cook Pasta: Bring a large pot of salted water to a boil. Add the ziti pasta and cook according to package instructions until al dente. Drain and set aside.
- Cook Sausage: In a large skillet over medium heat, add the Italian sausage. Cook until browned, breaking it apart with a spatula as it cooks, about 5-7 minutes. Drain excess fat if necessary.
- Prepare Sauce: Stir in the marinara sauce, tomato sauce, Italian seasoning, garlic powder, and crushed red pepper flakes (if using) into the sausage. Let it simmer for about 10 minutes, allowing the flavors to meld. Season with salt and pepper to taste.
- Combine Ingredients: In a large mixing bowl, combine the cooked pasta, sausage sauce mixture, and ricotta cheese. Stir until everything is evenly coated.
- Assemble the Dish: In a 9×13 inch baking dish, spread half of the ziti mixture. Top with half of the mozzarella cheese. Add the remaining ziti mixture and finish with the rest of the mozzarella and all of the Parmesan cheese.
- Bake: Place the baking dish in the preheated oven and bake for 25-30 minutes, or until the cheese is bubbly and golden brown on top.
- Serve: Remove from the oven and let cool for a few minutes. Garnish with fresh basil leaves if desired before serving.
Extra Tips:
For an added layer of flavor, consider adding sautéed onions and bell peppers to the sausage mixture. If you prefer a spicier kick, increase the amount of crushed red pepper flakes.
When cooking pasta, make sure it’s al dente as it will continue to cook in the oven. To make ahead, assemble the dish and refrigerate it for up to 24 hours before baking, allowing for an easy meal prep option.
Serve with a side of garlic bread and a fresh green salad for a complete, satisfying meal.
Savory Chicken Pot Pie
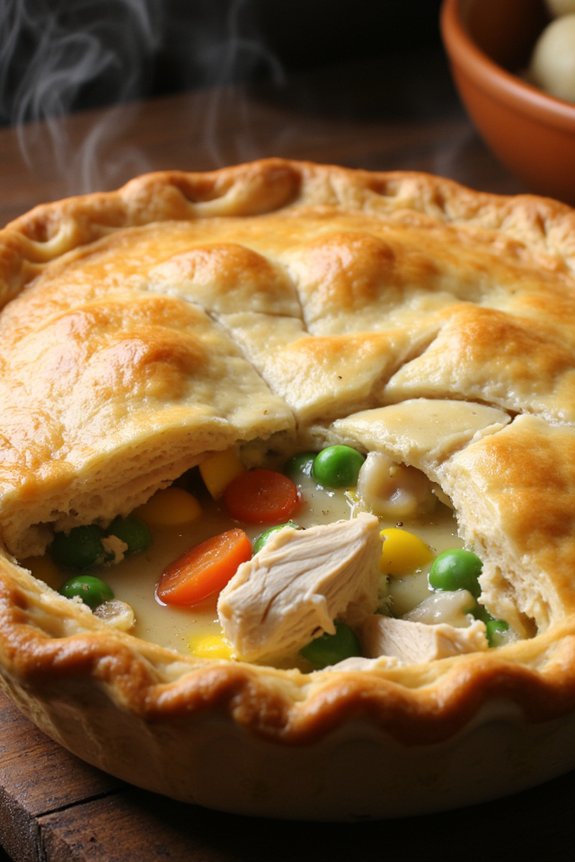
There’s nothing quite like a warm, hearty Savory Chicken Pot Pie to bring the family together around the dinner table. This classic comfort food is filled with tender chunks of chicken, vibrant mixed vegetables, and a creamy, flavorful gravy all encased in a flaky, golden crust. Perfect for a cozy family dinner, this dish is sure to leave everyone feeling satisfied and asking for seconds.
Its combination of textures and rich, savory flavors makes it a beloved staple in many households, especially during the colder months.
Preparing a Savory Chicken Pot Pie may seem intimidating at first, but with a little time and care, you’ll have a homemade masterpiece that’s well worth the effort. This recipe is designed to serve 4-6 people, making it an ideal choice for a family meal or a small gathering.
The key to a successful pot pie is balancing the richness of the filling with the lightness of the crust while guaranteeing every ingredient is cooked to perfection. With the following instructions and ingredients, you’ll be able to recreate this timeless dish with ease.
Ingredients (Serving Size: 4-6 people):
- 1 1/2 pounds boneless, skinless chicken breasts
- Salt and pepper, to taste
- 2 tablespoons olive oil
- 1 medium onion, chopped
- 2 cloves garlic, minced
- 2 cups mixed vegetables (such as peas, carrots, and corn)
- 1/4 cup all-purpose flour
- 2 cups chicken broth
- 1 cup milk
- 1 teaspoon dried thyme
- 1 teaspoon dried rosemary
- 1 package (14 oz) refrigerated pie crusts (2 crusts)
- 1 egg, beaten (for egg wash)
Cooking Instructions:
- Prepare the Chicken:
- Preheat your oven to 400°F (200°C). Season the chicken breasts with salt and pepper on both sides. In a large skillet over medium heat, heat the olive oil. Add the chicken breasts and cook until golden brown and cooked through, about 6-7 minutes per side. Remove the chicken from the skillet and set it aside to cool slightly.
- Cook the Vegetables:
- In the same skillet, add the chopped onion and minced garlic. Sauté for about 3 minutes until the onion is translucent and fragrant. Add the mixed vegetables and cook for another 5 minutes until they’re tender.
- Make the Gravy:
- Sprinkle the flour over the vegetables in the skillet and stir to coat. Gradually pour in the chicken broth and milk, stirring constantly to prevent lumps. Add the thyme and rosemary, and bring the mixture to a simmer. Cook for 5-7 minutes until the sauce has thickened.
- Combine the Ingredients:
- Shred or chop the cooked chicken into bite-sized pieces and add it to the skillet with the gravy and vegetables. Stir well to guarantee everything is evenly coated in the sauce. Taste and adjust the seasoning with salt and pepper as needed.
- Assemble the Pie:
- Unroll one of the pie crusts and fit it into the bottom of a 9-inch pie dish. Pour the chicken and vegetable mixture into the crust. Unroll the second pie crust and place it over the filling. Crimp the edges of the crusts together to seal, and use a sharp knife to cut a few slits in the top to allow steam to escape.
- Bake the Pie:
- Brush the top crust with the beaten egg to achieve a golden-brown finish. Place the pie in the preheated oven and bake for 30-35 minutes, or until the crust is golden and the filling is bubbling. Let the pie cool for at least 10 minutes before serving.
Extra Tips:
For the best results, make sure the filling isn’t too watery before adding it to the pie crust, as this could result in a soggy bottom.
If you don’t have refrigerated pie crusts, you can make your own from scratch for an even more homemade touch. Additionally, feel free to customize the vegetables used in the filling based on your family’s preferences or seasonal availability.
If you’re short on time, rotisserie chicken can be used as a quick alternative to cooking the chicken breasts. Finally, always let the pie rest before slicing to guarantee the filling sets and doesn’t spill out when served.
Traditional Meatloaf With a Twist
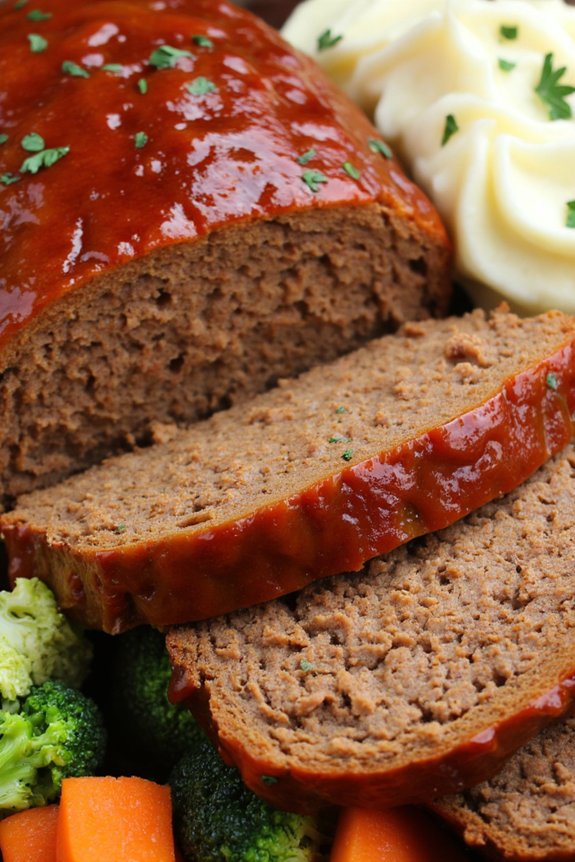
Meatloaf is a classic comfort food that brings back memories of cozy family dinners. This traditional dish, typically made with ground beef, breadcrumbs, and an assortment of spices, is elevated in this version with a few creative twists to make it truly unforgettable. By incorporating unique ingredients such as tangy Worcestershire sauce and a savory glaze made with brown sugar and Dijon mustard, this meatloaf offers a delightful combination of flavors that will have everyone asking for seconds.
This recipe serves 4-6 people, making it perfect for a family meal or a small gathering. The meatloaf is moist, flavorful, and easy to prepare, requiring minimal prep work and cooking time. Plus, the additional ingredients are likely already in your pantry, making this a convenient dish to whip up any night of the week. Serve it with mashed potatoes and steamed vegetables for a complete meal that’s sure to satisfy.
Ingredients:
- 1 ½ pounds ground beef
- 1 cup breadcrumbs
- 1 small onion, finely chopped
- 2 cloves garlic, minced
- 1 large egg, beaten
- ½ cup milk
- 2 tablespoons Worcestershire sauce
- 1 tablespoon Dijon mustard
- 1 tablespoon fresh parsley, chopped
- 1 teaspoon salt
- ½ teaspoon ground black pepper
- ½ cup ketchup
- 2 tablespoons brown sugar
Cooking Instructions:
- Preheat the Oven: Start by preheating your oven to 350°F (175°C). This guarantees the oven is at the right temperature when you’re ready to bake the meatloaf.
- Prepare the Meat Mixture: In a large mixing bowl, combine the ground beef, breadcrumbs, chopped onion, minced garlic, beaten egg, milk, Worcestershire sauce, Dijon mustard, parsley, salt, and pepper. Mix everything thoroughly until all the ingredients are well incorporated. It’s best to use your hands to make sure an even mix.
- Shape the Loaf: Transfer the meat mixture into a loaf pan or shape it into a loaf on a lined baking sheet. Press it gently to confirm it holds its shape but avoid compacting it too tightly, as this can make the meatloaf dense.
- Prepare the Glaze: In a small bowl, mix together the ketchup and brown sugar. Spread this glaze evenly over the top of the meatloaf. The glaze will add a sweet and tangy flavor and help keep the meatloaf moist.
- Bake the Meatloaf: Place the meatloaf in the preheated oven and bake for about 55-60 minutes, or until the internal temperature reaches 160°F (70°C). If you notice the top browning too quickly, cover it loosely with aluminum foil to prevent burning.
- Rest Before Serving: Once baked, let the meatloaf rest for about 10 minutes. This allows the juices to redistribute, making it easier to slice without falling apart.
Extra Tips:
For additional flavor, consider adding a pinch of dried thyme or rosemary to the meat mixture. You can also swap out the ground beef for a mixture of beef and pork for a richer taste. If you prefer a spicier kick, add a dash of hot sauce to the glaze.
Finally, leftovers can be stored in the refrigerator for up to three days and make for a delicious sandwich filling. Enjoy your Traditional Meatloaf With a Twist!
Cheesy Scalloped Potatoes and Ham

Cheesy Scalloped Potatoes and Ham is a comforting and satisfying dish that makes a perfect centerpiece for a homestyle family dinner. This classic recipe blends layers of tender potatoes and savory ham with a rich, creamy cheese sauce, resulting in a delectable combination of flavors and textures.
It’s a wonderful way to use leftover ham or to incorporate a hearty protein into a meal that’s sure to please both kids and adults alike. This dish can be served on its own or as a side to complement other family favorites.
The preparation of Cheesy Scalloped Potatoes and Ham may seem intricate at first, but with a little patience and care, you’ll have a delightful casserole that looks and tastes like it was made with love.
The key to achieving those perfectly tender potatoes and a creamy, cheesy sauce is in the layering and baking process. By preparing this dish, you’ll not only create a delicious meal but also create memories with your loved ones around the dinner table.
Ingredients (Serves 4-6):
- 4 cups thinly sliced potatoes (about 5 medium potatoes)
- 2 cups diced cooked ham
- 1 medium onion, finely chopped
- 3 tablespoons butter
- 3 tablespoons all-purpose flour
- 2 cups milk
- 1 ½ cups shredded cheddar cheese
- Salt and pepper to taste
- ½ teaspoon garlic powder
- ¼ teaspoon paprika
- Cooking spray
Instructions:
1. Preheat the Oven: Start by preheating your oven to 350°F (175°C). This allows the oven to reach the desired temperature by the time you’re ready to bake the casserole.
2. Prepare the Baking Dish: Lightly coat a 9×13 inch baking dish with cooking spray. This will prevent the potatoes and cheese from sticking to the dish, making it easier to serve later.
3. Cook the Onion: In a medium-sized saucepan, melt the butter over medium heat. Add the chopped onion and sauté until it becomes translucent and tender, about 3-4 minutes.
4. Make the Cheese Sauce: Sprinkle the flour over the onions, stirring constantly for about 1 minute to form a roux. Gradually whisk in the milk, making sure there are no lumps. Continue stirring until the mixture thickens, about 5 minutes.
Add the shredded cheddar cheese, garlic powder, paprika, salt, and pepper. Stir until the cheese is completely melted and the sauce is smooth.
5. Layer the Ingredients: In the prepared baking dish, arrange half of the sliced potatoes in an even layer. Top with half of the diced ham and then pour half of the cheese sauce over the top.
Repeat the layering process with the remaining potatoes, ham, and cheese sauce.
6. Bake the Casserole: Cover the baking dish with aluminum foil and bake in the preheated oven for 45 minutes. Remove the foil, and bake for an additional 15-20 minutes or until the potatoes are tender and the top is golden and bubbly.
7. Rest and Serve: Once baked, allow the dish to rest for about 10 minutes before serving. This resting period helps the sauce to set and makes it easier to cut and serve.
Extra Tips:
For the best results, try to slice the potatoes as evenly as possible. This guarantees they cook at the same rate and prevents any undercooked slices. A mandoline slicer can be a helpful tool for achieving uniform slices.
Additionally, if you prefer a stronger cheese flavor, feel free to use a sharp cheddar or mix in other cheeses like Gruyere or Monterey Jack. Finally, if you have the time, let the dish sit for longer than 10 minutes after baking; the flavors will meld together more, and the dish will firm up nicely, making serving even easier.
Rustic Shepherd’s Pie
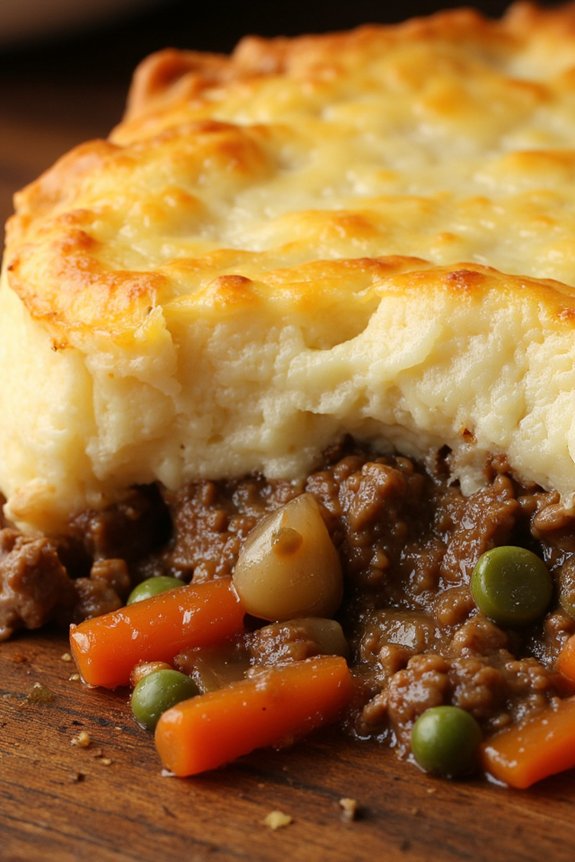
Rustic Shepherd’s Pie is a classic comfort dish that combines a flavorful meat filling with a creamy mashed potato topping. This hearty meal is perfect for family dinners, offering a satisfying blend of textures and tastes. The dish traditionally uses lamb, but it can also be made with beef or a vegetarian filling for a different twist.
The savory base is enriched with vegetables and rich gravy, while the mashed potato layer is baked to a golden brown, creating a delicious contrast. This homestyle recipe serves 4-6 people and is ideal for those colder days when a warm, nourishing meal is just what you need.
The recipe is straightforward and can be adapted to suit your taste preferences, whether you prefer more spice or a touch of sweetness. With its roots in rustic cooking, Shepherd’s Pie is a versatile dish that can be prepared in advance and enjoyed by the whole family.
Ingredients:
- 1 tablespoon olive oil
- 1 large onion, diced
- 2 cloves garlic, minced
- 1 ½ pounds ground lamb (or beef)
- 2 carrots, peeled and diced
- 1 cup frozen peas
- 2 tablespoons tomato paste
- 1 tablespoon Worcestershire sauce
- 1 cup beef stock
- Salt and pepper to taste
- 2 pounds potatoes, peeled and quartered
- 4 tablespoons butter
- ½ cup milk
- 1 cup shredded cheddar cheese (optional)
Instructions:
- Prepare the Potatoes: Place the peeled and quartered potatoes in a large pot of salted water. Bring to a boil and cook until tender, about 15-20 minutes. Drain and return to the pot.
- Make the Mashed Potatoes: Add butter and milk to the cooked potatoes. Mash until smooth and creamy. Season with salt and pepper to taste. Set aside.
- Cook the Meat Filling: Heat olive oil in a large skillet over medium heat. Add the diced onion and minced garlic, cooking until softened, about 5 minutes.
- Brown the Meat: Add the ground lamb (or beef) to the skillet. Cook until browned, breaking up any large chunks with a spoon. Drain excess fat if necessary.
- Add Vegetables and Sauce: Stir in the diced carrots, peas, tomato paste, Worcestershire sauce, and beef stock. Bring to a simmer and cook until the sauce has thickened slightly, about 10 minutes. Season with salt and pepper.
- Assemble the Pie: Preheat the oven to 400°F (200°C). Spoon the meat filling into a baking dish, spreading it evenly. Top with the mashed potatoes, spreading them out smoothly with a spatula. If desired, sprinkle shredded cheddar cheese over the top.
- Bake the Shepherd’s Pie: Place the baking dish in the preheated oven. Bake for 25-30 minutes, or until the top is golden brown and the filling is bubbling.
- Serve: Allow the Shepherd’s Pie to cool for a few minutes before serving. Enjoy this hearty dish with a side of crusty bread or a simple green salad.
Extra Tips:
For the best flavor, let the meat filling simmer longer if you have time; this will allow the flavors to meld better. If you’re short on time, you can use instant mashed potatoes, but homemade mash will offer a creamier texture.
Additionally, feel free to experiment with the vegetables and seasonings to suit your family’s preferences, such as adding corn or using rosemary for extra flavor. If making ahead, Shepherd’s Pie can be prepared up to the baking step and refrigerated; just increase the baking time by 10 minutes if baking from cold.
Herb-Crusted Pork Tenderloin
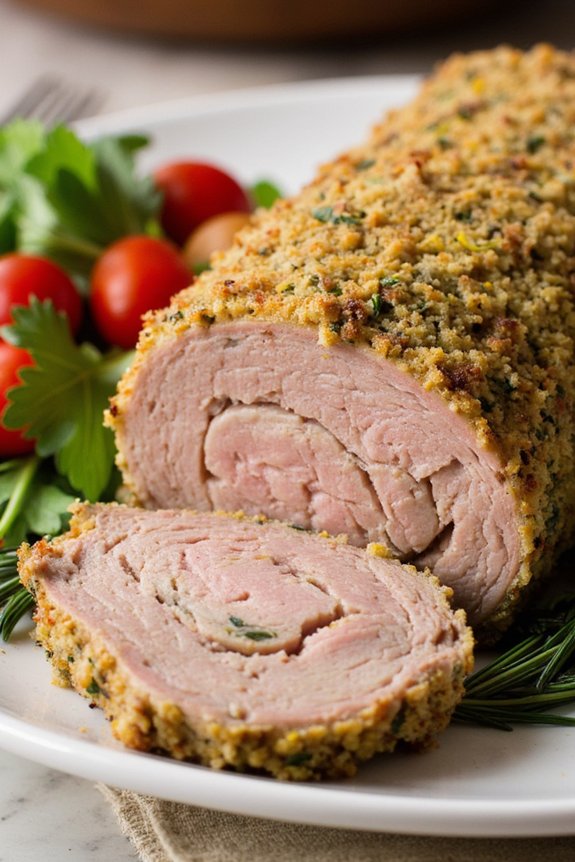
Herb-Crusted Pork Tenderloin is a delightful dish that combines the succulent tenderness of pork with a flavorful herb crust, creating a perfect centerpiece for your family dinner. This dish isn’t only delicious but also surprisingly easy to prepare, making it an ideal choice for both weeknight meals and special occasions.
With a simple preparation process and a quick cooking time, you can have this impressive meal ready in no time, allowing you to spend more time with your loved ones.
The key to the success of this dish lies in the herb crust, which adds a burst of flavor and a delightful texture to the tenderloin. The combination of fresh herbs, garlic, and a hint of lemon zest creates a fragrant and savory coating that perfectly complements the juicy pork.
By following these steps, you’ll be able to create a mouthwatering Herb-Crusted Pork Tenderloin that will have your family asking for seconds.
Ingredients (Serving Size: 4-6 people)
- 2 pork tenderloins (about 1-1.5 pounds each)
- 2 tablespoons olive oil
- 3 cloves garlic, minced
- 1 tablespoon fresh rosemary, chopped
- 1 tablespoon fresh thyme, chopped
- 1 tablespoon fresh parsley, chopped
- 1 teaspoon lemon zest
- 1 teaspoon salt
- 1/2 teaspoon black pepper
Cooking Instructions
1. Preheat the oven: Start by preheating your oven to 400°F (200°C). This guarantees that it’s hot enough to cook the pork tenderloins evenly.
2. Prepare the herb mixture: In a small bowl, combine the minced garlic, chopped rosemary, thyme, parsley, lemon zest, salt, and pepper. Mix well to create a fragrant herb blend.
3. Rub the tenderloins: Pat the pork tenderloins dry with paper towels to remove excess moisture. Rub each tenderloin with olive oil, making sure they’re well-coated.
Then, evenly spread the herb mixture over the tenderloins, pressing gently so the herbs adhere well to the meat.
4. Sear the tenderloins: Heat a large oven-safe skillet over medium-high heat. Once hot, place the tenderloins in the skillet and sear for about 2-3 minutes on each side, or until they’re golden brown.
This step helps to lock in the juices and adds a lovely crust to the pork.
5. Roast in the oven: Transfer the skillet to the preheated oven. Roast the pork tenderloins for 15-20 minutes or until the internal temperature reaches 145°F (63°C) when checked with a meat thermometer.
6. Rest and slice: Once cooked, remove the skillet from the oven and let the tenderloins rest for about 5 minutes before slicing.
This allows the juices to redistribute, guaranteeing a moist and tender result.
Extra Tips
When preparing Herb-Crusted Pork Tenderloin, make sure to use fresh herbs for the best flavor. If you don’t have fresh herbs available, you can substitute with dried herbs, but reduce the quantity by half since dried herbs are more concentrated.
Additionally, if you prefer a slightly crispier crust, you can broil the tenderloins for an additional 2-3 minutes after roasting. Just be sure to keep a close eye on them to avoid burning.
Finally, pairing this dish with roasted vegetables or a fresh salad creates a well-rounded and satisfying meal for your family.
Homemade Chicken and Dumplings
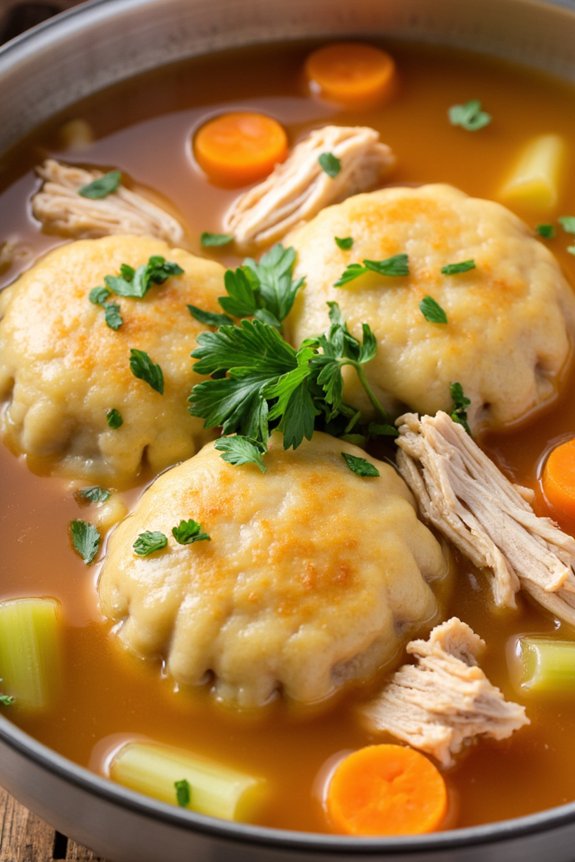
There’s nothing quite like a hearty, comforting bowl of homemade chicken and dumplings to warm you up on a chilly evening. This classic dish, with its tender chicken pieces, fluffy dumplings, and rich, savory broth, is a staple in many households. It brings together the nostalgic flavors of a bygone era with the heartwarming feeling of a home-cooked meal. Perfect for family dinners, this recipe isn’t only delicious but also a wonderful way to bring everyone together around the table.
The beauty of chicken and dumplings lies in its simplicity and versatility. With just a few basic ingredients, you can create a meal that feels both indulgent and wholesome. The key to a great dish is in its preparation, balancing the flavors, and cooking the dumplings just right so they’re light and airy, yet satisfying. This recipe serves 4-6 people, making it ideal for a family dinner or for leftovers the next day.
Ingredients:
- 4 boneless, skinless chicken breasts
- 1 tablespoon olive oil
- 1 medium onion, chopped
- 2 cloves garlic, minced
- 3 medium carrots, sliced
- 3 celery stalks, sliced
- 8 cups chicken broth
- 2 teaspoons salt
- 1 teaspoon black pepper
- 2 teaspoons dried thyme
- 2 cups all-purpose flour
- 1 tablespoon baking powder
- 1 teaspoon salt (for dumplings)
- 1 cup whole milk
- 1/3 cup unsalted butter, melted
- 2 tablespoons chopped fresh parsley
Cooking Instructions:
- Prepare the Chicken: In a large pot, heat the olive oil over medium heat. Add the chicken breasts and cook until browned on both sides, about 5-7 minutes per side. Remove the chicken from the pot and set aside.
- Cook the Vegetables: In the same pot, add the chopped onion, garlic, carrots, and celery. Sauté for about 5 minutes, or until the onion becomes translucent and the vegetables start to soften.
- Make the Broth: Return the chicken to the pot. Pour in the chicken broth, and add salt, black pepper, and dried thyme. Bring the mixture to a boil, then reduce the heat and let it simmer for about 30 minutes, guaranteeing the chicken is fully cooked through.
- Shred the Chicken: Remove the chicken from the pot once again and shred it using two forks. Return the shredded chicken to the pot and continue to simmer.
- Prepare the Dumplings: In a large bowl, combine the flour, baking powder, and salt. Add the milk and melted butter, stirring until a thick dough forms. Be careful not to overmix.
- Cook the Dumplings: Drop spoonfuls of the dough into the simmering pot, making sure they don’t touch. Cover the pot and let the dumplings cook for about 15 minutes. Don’t lift the lid as the steam is essential for the dumplings to cook properly.
- Finish and Serve: Once the dumplings are cooked through, sprinkle the dish with fresh parsley. Serve the chicken and dumplings hot, spooning plenty of broth over each serving.
Extra Tips:
Achieving perfect dumplings requires some attention to detail. Be cautious not to overmix the dumpling dough, as this can lead to tough dumplings.
When placing the dumplings in the pot, guarantee they’ve enough space to expand. Maintaining a gentle simmer is important; too high a heat can cause the dumplings to disintegrate.
If you prefer a thicker broth, mix a tablespoon of cornstarch with cold water and add it to the broth before serving. Enjoy the heartiness of this dish, and don’t hesitate to customize it with your favorite herbs and spices.
Garlic and Herb Roasted Chicken
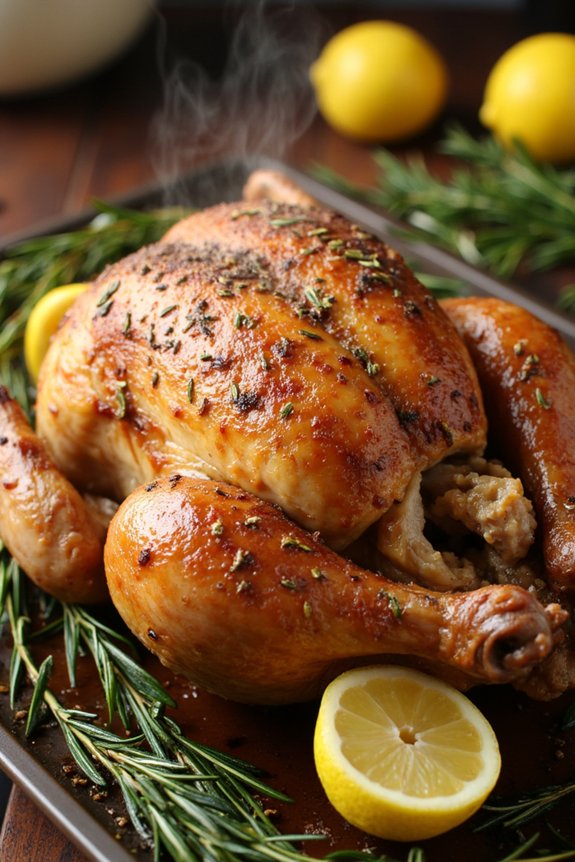
Garlic and Herb Roasted Chicken is a classic dish that brings warmth and comfort to any family dinner table. This recipe combines the savory flavors of garlic and fresh herbs with the succulent taste of roasted chicken, creating a meal that’s both hearty and satisfying. Ideal for a cozy evening gathering, this dish fills your home with an irresistible aroma that will have everyone keenly waiting at the table.
Not only is it delicious, but it also offers a beautifully browned and crispy skin that contrasts perfectly with the tender meat inside.
The key to mastering Garlic and Herb Roasted Chicken lies in the preparation and the balance of flavors. By marinating the chicken ahead of time, you allow the garlic and herbs to infuse deeply into the meat, guaranteeing every bite is bursting with flavor. This recipe is designed to serve 4-6 people, making it perfect for a family meal or a small dinner party. Pair it with your favorite side dishes, like mashed potatoes or a fresh garden salad, to create a complete and satisfying meal.
Ingredients (serves 4-6):
- 1 whole chicken (4-5 pounds)
- 4 tablespoons olive oil
- 6 cloves garlic, minced
- 1 tablespoon fresh rosemary, chopped
- 1 tablespoon fresh thyme, chopped
- 1 lemon, halved
- Salt and pepper to taste
- 1 cup chicken broth
Cooking Instructions:
- Preheat the Oven: Preheat your oven to 425°F (220°C). This high heat will help to achieve a crispy skin while guaranteeing the meat remains juicy.
- Prepare the Marinade: In a small bowl, combine the olive oil, minced garlic, chopped rosemary, and thyme. Mix well to form a fragrant herb marinade.
- Season the Chicken: Pat the chicken dry with paper towels to guarantee crispy skin. Rub the marinade all over the chicken, including under the skin and inside the cavity. Season generously with salt and pepper.
- Stuff and Truss: Squeeze the juice of one lemon half over the chicken, then place both halves inside the cavity. Truss the chicken by tying the legs together with kitchen twine to guarantee even cooking.
- Roast the Chicken: Place the chicken breast-side up in a roasting pan. Pour the chicken broth into the bottom of the pan to keep the meat moist. Roast in the preheated oven for 1 hour and 15 minutes, or until the internal temperature reaches 165°F (74°C).
- Rest and Serve: Remove the chicken from the oven and let it rest for 10-15 minutes before carving. This allows the juices to redistribute, guaranteeing moist and tender meat.
Extra Tips: For an extra burst of flavor, consider adding additional herbs like sage or parsley to the marinade. If you prefer your chicken extra crispy, you can broil it for the last 5 minutes of cooking time. Always use a meat thermometer to check the internal temperature to avoid undercooking. Finally, save the pan drippings to make a delicious, savory gravy to serve alongside the chicken.
Beef and Vegetable Stew
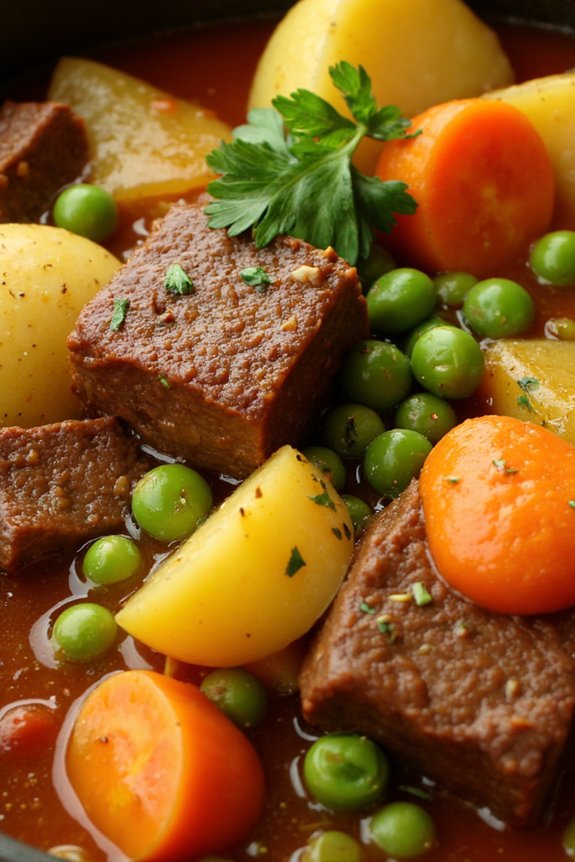
Imagine coming home on a chilly evening to the comforting aroma of a hearty beef and vegetable stew simmering away in your kitchen. This homestyle dish, rich with flavors of tender beef, earthy vegetables, and a medley of aromatic herbs, is a classic family favorite that brings warmth and satisfaction to the dinner table.
Perfect for family gatherings or a cozy night in, this stew isn’t only delicious but also nutritious, packed with vitamins and minerals from the vegetables and protein from the beef.
This recipe is designed to serve 4-6 people, making it ideal for a family meal or for having leftovers that taste even better the next day. The slow-cooked beef becomes melt-in-your-mouth tender, while the vegetables absorb all the savory broth, creating a complex and deeply satisfying flavor profile.
Follow the simple steps below to create a meal that will surely become a staple in your family’s recipe collection.
Ingredients for 4-6 servings:
- 2 pounds beef chuck, cut into 1-inch cubes
- 3 tablespoons vegetable oil
- 2 large onions, chopped
- 4 cloves garlic, minced
- 4 cups beef broth
- 1 cup red wine (optional)
- 3 large carrots, sliced
- 4 medium potatoes, peeled and cubed
- 2 stalks celery, chopped
- 2 bay leaves
- 1 teaspoon dried thyme
- 1 teaspoon dried rosemary
- Salt and pepper to taste
- 2 tablespoons all-purpose flour
- 1 cup frozen peas (optional)
- 2 tablespoons fresh parsley, chopped (for garnish)
Cooking Instructions:
- Prepare the Beef: Begin by seasoning the beef cubes generously with salt and pepper. In a large pot or Dutch oven, heat the vegetable oil over medium-high heat. Add the beef in batches, making sure not to overcrowd the pot, and sear until browned on all sides. Remove the beef from the pot and set aside.
- Sauté the Aromatics: In the same pot, reduce the heat to medium and add the chopped onions. Sauté until they become translucent, about 5 minutes. Add the minced garlic and cook for an additional 1 minute until fragrant.
- Create the Base: Sprinkle the flour over the onion and garlic mixture, stirring constantly until the flour begins to brown slightly. This will help thicken the stew.
- Deglaze and Simmer: Pour in the red wine, if using, and scrape up any browned bits from the bottom of the pot, known as deglazing. Add the beef broth, bay leaves, thyme, and rosemary. Return the beef to the pot and bring to a boil.
- Add the Vegetables: Once boiling, reduce the heat to low and add the carrots, potatoes, and celery. Cover the pot and let the stew simmer gently for about 1.5 to 2 hours, or until the beef is tender and the vegetables are cooked through.
- Finish with Peas and Seasoning: In the last 10 minutes of cooking, stir in the frozen peas. Taste and adjust the seasoning with more salt and pepper if needed.
- Serve: Remove the bay leaves and discard. Ladle the stew into bowls, garnish with fresh parsley, and serve hot.
Extra Tips:
For an even richer flavor, consider marinating the beef in the wine and herbs for a few hours before cooking. This can enhance the depth of the stew’s flavor.
If you prefer a thicker stew, remove the lid for the last 30 minutes of cooking to allow some of the liquid to evaporate. Additionally, this stew can be made in advance and tastes even more delicious the next day, as the flavors have time to meld together.
Serve with crusty bread for a complete, satisfying meal.
Rich and Creamy Macaroni and Cheese

There’s nothing quite like a homestyle family dinner that warms the heart and satisfies the taste buds, and Rich and Creamy Macaroni and Cheese is one of those quintessential comfort foods that does just that. This recipe elevates the classic macaroni and cheese with a perfect blend of cheeses, creating a velvety, indulgent sauce that clings to each piece of pasta.
Whether it’s a standalone main dish or a side accompanying your favorite meat, this macaroni and cheese is bound to become a family favorite, bringing everyone to the table with smiles.
This version of macaroni and cheese is ideal for serving 4-6 people, making it perfect for a cozy family dinner or a small gathering. With its rich, cheesy flavor and creamy texture, it’s hard to resist going back for seconds. The preparation is simple, yet the results are luxurious and comforting, making it a dish that both novice and experienced cooks can prepare with ease and confidence.
Ingredients:
- 12 oz elbow macaroni
- 3 cups shredded sharp cheddar cheese
- 1 cup shredded mozzarella cheese
- 1/2 cup grated Parmesan cheese
- 4 tablespoons unsalted butter
- 1/4 cup all-purpose flour
- 3 cups whole milk
- 1 teaspoon salt
- 1/2 teaspoon black pepper
- 1/2 teaspoon paprika
- 1/4 teaspoon garlic powder
- 1/4 teaspoon onion powder
- 1 tablespoon Dijon mustard
- 1/2 cup panko breadcrumbs
- 2 tablespoons melted butter (for topping)
Instructions:
- Cook the Pasta: Bring a large pot of salted water to a boil. Add the elbow macaroni and cook until al dente, according to package instructions. Drain and set aside.
- Prepare the Cheese Sauce: In a large saucepan, melt 4 tablespoons of butter over medium heat. Stir in the flour and cook for about 1 minute until it forms a paste. Gradually whisk in the milk, making certain there are no lumps. Continue stirring until the mixture thickens and begins to simmer.
- Add the Cheeses: Lower the heat to medium-low. Add the cheddar, mozzarella, and Parmesan cheeses to the sauce, stirring continuously until the cheeses are completely melted and the sauce is smooth.
- Season the Sauce: Stir in the salt, black pepper, paprika, garlic powder, onion powder, and Dijon mustard. Mix well to combine all the flavors.
- Combine Pasta and Sauce: Add the drained macaroni to the cheese sauce, stirring gently to ascertain every piece of pasta is well-coated with the sauce.
- Prepare the Topping: In a small bowl, mix the panko breadcrumbs with the melted butter until evenly coated.
- Bake the Macaroni and Cheese: Preheat your oven to 350°F (175°C). Transfer the macaroni and cheese to a greased baking dish. Evenly sprinkle the breadcrumb mixture over the top. Bake for 20-25 minutes, or until the top is golden brown and crispy.
- Serve: Remove from the oven and let it cool for a few minutes before serving. Enjoy this creamy, cheesy delight with your loved ones.
Extra Tips:
For a richer flavor, you can experiment by adding other types of cheese such as Gruyère or Gouda. To add a hint of spice, consider a pinch of cayenne pepper or a dash of hot sauce.
If you prefer a creamier sauce, use half-and-half instead of whole milk. For added texture and flavor, you can also incorporate cooked bacon bits or caramelized onions into the macaroni and cheese before baking.