

As a mom, I totally get the struggle of finding meals that are both healthy and kid-friendly. Think about a Cheesy Chicken Alfredo Bake with gooey cheese or Taco Stuffed Bell Peppers full of flavor. These recipes can make dinnertime exciting and fun. With dishes like Creamy Mac and Cheese with Hidden Veggies, serving dinner feels more like a joy than a task. Ready to discover more tasty options?
Cheesy Chicken Alfredo Bake
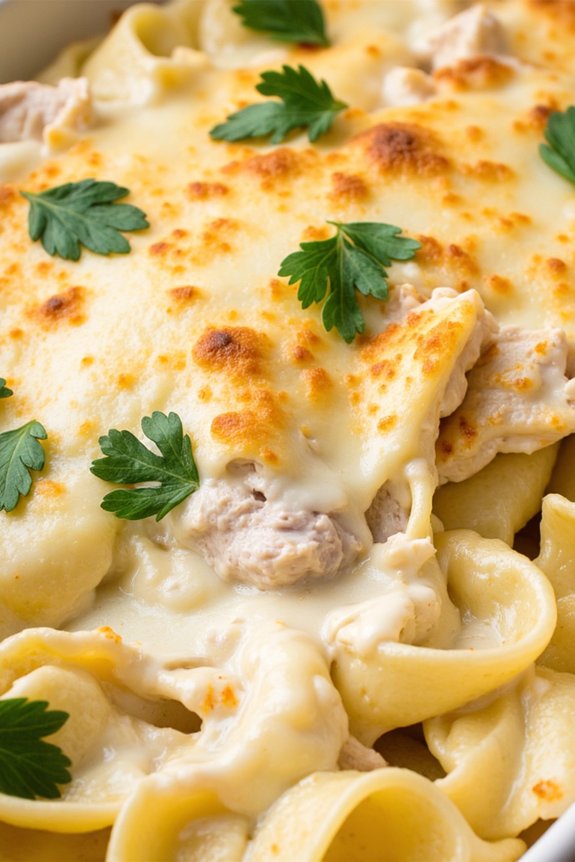
Cheesy Chicken Alfredo Bake is a delightful twist on a classic Italian favorite that your whole family will adore. This dish combines tender pieces of chicken with a creamy Alfredo sauce, all smothered in cheese and baked to perfection. It’s a comfort food that’s both rich in flavor and easy to prepare, making it an ideal choice for a family dinner.
Whether you’re cooking for a busy weeknight or a special weekend meal, this recipe will certainly become a staple in your household. The beauty of this Cheesy Chicken Alfredo Bake lies in its simplicity and the capacity to customize it to suit your family’s tastes. You can add vegetables like broccoli or spinach for extra nutrition or swap out the type of pasta to keep things interesting.
Plus, with a serving size that comfortably feeds 4-6 people, it’s perfect for family gatherings or even for planning leftovers. This dish is a guaranteed crowd-pleaser that will have everyone asking for seconds.
Ingredients (serving size: 4-6 people):
- 2 cups cooked chicken, shredded or cubed
- 12 ounces fettuccine pasta
- 3 cups Alfredo sauce
- 2 cups mozzarella cheese, shredded
- 1 cup Parmesan cheese, grated
- 1 cup heavy cream
- 2 tablespoons unsalted butter
- 1 tablespoon garlic, minced
- 1 teaspoon Italian seasoning
- Salt and pepper to taste
- Chopped parsley for garnish (optional)
Cooking Instructions:
- Preheat the oven: Set your oven to 350°F (175°C) to confirm it’s ready for baking once you’ve assembled the dish.
- Cook the pasta: In a large pot of boiling salted water, cook the fettuccine pasta until al dente, according to package instructions. Drain the pasta and set it aside.
- Prepare the Alfredo sauce: In a medium saucepan over medium heat, melt the butter. Add the minced garlic and sauté for about 1 minute until fragrant. Stir in the heavy cream and bring to a gentle simmer.
- Add cheeses to the sauce: Gradually add the Parmesan cheese to the saucepan, stirring continuously until melted and smooth. Season the sauce with Italian seasoning, salt, and pepper to taste.
- Combine ingredients: In a large bowl, combine the cooked pasta, shredded chicken, Alfredo sauce, and half of the mozzarella cheese. Mix everything together until well combined.
- Assemble the bake: Transfer the pasta mixture into a greased 9×13-inch baking dish. Spread it out evenly, then sprinkle the remaining mozzarella cheese on top.
- Bake the dish: Place the baking dish in the preheated oven and bake for 25-30 minutes, or until the cheese is bubbly and golden brown on top.
- Garnish and serve: Once baked, remove the dish from the oven and let it cool for a few minutes. Garnish with chopped parsley if desired, and serve warm.
Extra Tips:
To make this Cheesy Chicken Alfredo Bake even more flavorful, consider using a rotisserie chicken for added convenience and taste. If you prefer a lighter version, substitute the heavy cream with half-and-half or milk.
Additionally, you can enhance the dish by incorporating vegetables such as steamed broccoli, spinach, or peas, which add a nutritious boost. Leftovers can be stored in an airtight container in the refrigerator for up to 3 days and reheated for a quick meal.
Enjoy this dish with a side of garlic bread or a fresh green salad for a complete family dinner experience.
Taco Stuffed Bell Peppers

Taco Stuffed Bell Peppers are a delightful twist on traditional tacos, offering a nutritious and colorful meal that’s sure to be a hit with the whole family. By using bell peppers as a natural edible bowl, this dish not only adds a vibrant touch to your dinner table but also packs in extra nutrients.
These stuffed peppers are filled with a savory mixture of seasoned ground beef, rice, beans, and cheese, making them a hearty and satisfying meal. Perfect for busy weeknights, Taco Stuffed Bell Peppers are easy to prepare and can be customized to suit your family’s taste preferences.
This recipe is designed to serve 4-6 people, making it ideal for family dinners or small gatherings. The combination of flavors and textures will have everyone coming back for seconds. Plus, it’s a great way to sneak in some veggies for the kids! With a few simple ingredients and straightforward steps, you’ll have a deliciously cheesy and flavorful dish that’s both kid-approved and nutritious.
Ingredients:
- 4-6 large bell peppers (any color)
- 1 lb ground beef
- 1 cup cooked rice
- 1 can (15 oz) black beans, drained and rinsed
- 1 packet taco seasoning
- 1 can (10 oz) diced tomatoes with green chilies, drained
- 1 cup shredded cheddar cheese
- 1 small onion, chopped
- 2 cloves garlic, minced
- 2 tablespoons olive oil
- Salt and pepper to taste
- Fresh cilantro, for garnish (optional)
Cooking Instructions:
- Preheat the Oven: Preheat your oven to 375°F (190°C) to guarantee it’s ready for baking the stuffed peppers.
- Prepare the Bell Peppers: Cut the tops off the bell peppers and remove the seeds and membranes. Lightly oil a baking dish and place the bell peppers upright in the dish.
- Cook the Beef Mixture: In a large skillet, heat the olive oil over medium heat. Add the chopped onion and garlic and sauté until the onion is translucent. Add the ground beef to the skillet and cook until browned, breaking it apart with a spatula as it cooks.
- Season and Combine Ingredients: Drain any excess fat from the skillet, then stir in the taco seasoning, cooked rice, black beans, and diced tomatoes. Mix well to combine all ingredients and cook for another 2-3 minutes to blend the flavors. Season with salt and pepper to taste.
- Stuff the Peppers: Spoon the beef and rice mixture evenly into each bell pepper, packing it down gently. Top each filled pepper with a generous sprinkle of cheddar cheese.
- Bake the Peppers: Cover the baking dish with foil and bake in the preheated oven for about 30 minutes. Remove the foil and bake for an additional 10-15 minutes, or until the peppers are tender and the cheese is bubbly and golden.
- Serve and Garnish: Remove the peppers from the oven and let them cool slightly before serving. Garnish with fresh cilantro if desired.
Extra Tips:
For added flavor, you can substitute ground turkey or chicken for the beef. If you’re looking for a vegetarian option, omit the meat and increase the amount of beans and rice.
You can also add other vegetables such as corn or zucchini to the filling for extra nutrition. If your family prefers spicier dishes, consider adding a pinch of cayenne pepper or chopped jalapeños to the beef mixture for a little kick.
Enjoy your Taco Stuffed Bell Peppers with a side of sour cream or guacamole for an extra delicious touch!
Mini Meatloaf Muffins

Mini Meatloaf Muffins are a delightful twist on the classic meatloaf, perfectly portioned into individual servings and ideal for family dinners. These savory muffins are packed with flavor and are certain to be a hit with both kids and adults. The smaller size makes them fun to eat and provides the perfect opportunity to introduce some nutritious ingredients without anyone being the wiser.
Plus, they cook faster than a traditional meatloaf, making them a convenient option for busy weeknights.
These Mini Meatloaf Muffins are made with a mix of ground beef and pork, which adds richness and depth to the flavor. The addition of vegetables like onions and bell peppers not only boosts the nutritional value but also enhances the taste and texture. Topped with a tangy ketchup glaze, these muffins are juicy, tender, and utterly satisfying.
Served alongside a simple salad or some mashed potatoes, they make a complete and comforting meal that everyone will enjoy.
Ingredients (Serves 4-6)
- 1 pound ground beef
- 1/2 pound ground pork
- 1/2 cup breadcrumbs
- 1/4 cup milk
- 1 egg
- 1 small onion, finely chopped
- 1 small bell pepper, finely chopped
- 2 cloves garlic, minced
- 1 tablespoon Worcestershire sauce
- 2 teaspoons Italian seasoning
- Salt and pepper to taste
- 1/2 cup ketchup
- 2 tablespoons brown sugar
- 1 tablespoon mustard
Cooking Instructions
- Preheat the Oven: Start by preheating your oven to 375°F (190°C). Prepare a muffin tin by greasing it lightly or lining it with cupcake liners for easy removal of the meatloaf muffins.
- Prepare the Meat Mixture: In a large mixing bowl, combine the ground beef, ground pork, breadcrumbs, milk, egg, onion, bell pepper, garlic, Worcestershire sauce, Italian seasoning, salt, and pepper. Mix everything together until all the ingredients are well incorporated, but avoid over-mixing as it can make the meatloaf tough.
- Form the Muffins: Divide the meat mixture evenly among the muffin tin cups, pressing down gently to guarantee each cup is packed but not overly tight. This recipe should fill about 10-12 muffin cups, depending on their size.
- Make the Glaze: In a small bowl, mix together the ketchup, brown sugar, and mustard. Stir until the sugar has dissolved and the glaze is smooth.
- Top with Glaze: Spoon a generous amount of the glaze over each meatloaf muffin, spreading it evenly over the top.
- Bake: Place the muffin tin in the preheated oven and bake for 25-30 minutes, or until the meat is cooked through and the tops are nicely glazed and caramelized. You can use a meat thermometer to check that the internal temperature reaches 160°F (71°C).
- Rest and Serve: Once baked, remove the muffins from the oven and let them rest in the tin for about 5 minutes before gently removing them. Serve hot.
Extra Tips
For a healthier spin, consider substituting ground turkey for the beef and pork, or mix in some finely grated carrots or zucchini for added moisture and nutrition.
If you prefer a spicier kick, add a dash of hot sauce or a pinch of red pepper flakes to the meat mixture. Remember to taste and adjust the seasoning before forming the muffins.
These Mini Meatloaf Muffins can also be made ahead of time and frozen; simply reheat them in the oven when ready to serve.
Creamy Mac and Cheese With Hidden Veggies
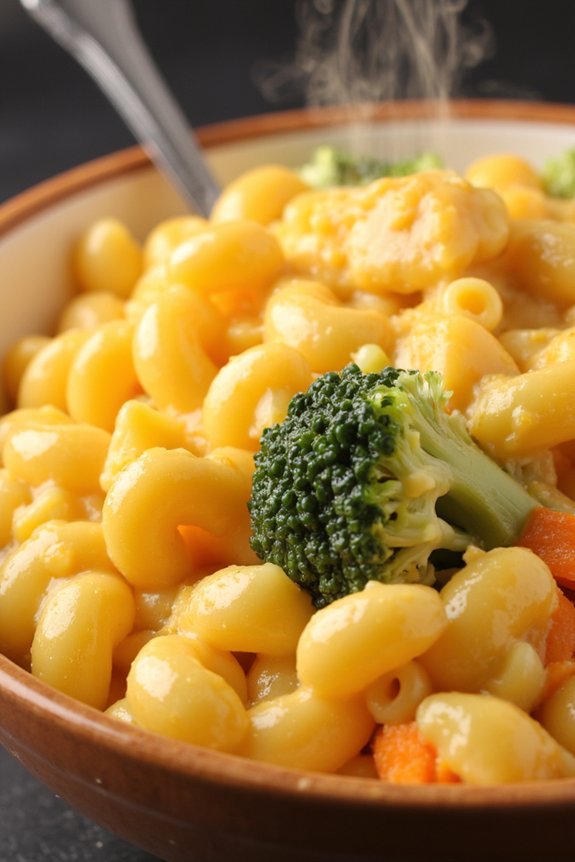
Creamy Mac and Cheese With Hidden Veggies is a delightful twist on the classic comfort food that kids adore. By incorporating nutritious vegetables into the creamy cheese sauce, parents can guarantee their children enjoy a wholesome meal without sacrificing taste.
This dish is perfect for dinner time, providing essential nutrients while satisfying the whole family’s cravings for something cheesy and delicious.
This recipe serves 4-6 people, making it ideal for a family meal. The hidden veggies are blended smoothly into the sauce, maintaining the rich and creamy consistency that makes mac and cheese so beloved. Even the pickiest eaters won’t suspect they’re getting a dose of healthy vegetables with each bite.
Ingredients:
- 8 oz elbow macaroni
- 2 cups broccoli florets
- 1 cup cauliflower florets
- 1 cup shredded carrots
- 2 cups shredded cheddar cheese
- 2 tablespoons butter
- 2 tablespoons all-purpose flour
- 2 cups milk
- 1 teaspoon salt
- 1/2 teaspoon garlic powder
- 1/2 teaspoon onion powder
- 1/4 teaspoon black pepper
Cooking Instructions:
- Cook the Pasta and Vegetables: Bring a large pot of salted water to a boil. Add the elbow macaroni and cook according to the package instructions until al dente. In the last 4 minutes of cooking, add the broccoli, cauliflower, and carrots to the same pot. Drain and set aside.
- Prepare the Vegetable Puree: Transfer the cooked vegetables to a blender or food processor. Add a splash of milk and blend until smooth. This will be the base for your creamy sauce.
- Make the Cheese Sauce: In a large saucepan, melt the butter over medium heat. Stir in the flour, whisking constantly, until it forms a paste and bubbles, about 1 minute. Gradually whisk in the milk and continue to cook, stirring frequently, until the sauce thickens, about 5 minutes.
- Combine the Ingredients: Stir the vegetable puree into the sauce, mixing until well combined. Add the shredded cheddar cheese, salt, garlic powder, onion powder, and black pepper. Continue stirring until the cheese is completely melted and the sauce is smooth.
- Mix with Pasta: Add the drained macaroni to the sauce, stirring until the pasta is thoroughly coated. Taste and adjust seasoning if necessary.
- Serve: Serve the creamy mac and cheese hot, garnished with additional shredded cheese or chopped fresh herbs if desired.
Extra Tips:
For a smoother sauce, guarantee the vegetables are blended thoroughly. You can also experiment with different vegetables such as spinach or squash for additional flavors.
If you prefer a baked version, transfer the mac and cheese to a baking dish, sprinkle with breadcrumbs, and bake at 350°F (175°C) for 15 minutes until the top is golden and crispy.
This dish is versatile and can easily be adapted to include your family’s favorite vegetables or cheeses.
Oven-Baked Chicken Tenders

Oven-Baked Chicken Tenders are a fantastic choice for a family dinner that kids will absolutely love. These crispy, golden tenders aren’t only delicious but also healthier than their fried counterparts. Perfectly seasoned and baked to perfection, they offer a delightful crunch with every bite while remaining juicy and tender on the inside.
Whether served with a side of vegetables, a fresh salad, or classic fries, these chicken tenders are sure to be a hit.
Preparing Oven-Baked Chicken Tenders at home is a simple and quick process, making it ideal for busy weeknights. By baking instead of frying, you can enjoy a guilt-free meal that doesn’t compromise on flavor.
Plus, with just a few ingredients and minimal prep time, you can have this kid-approved dish on the table in no time. The whole family will enjoy these tenders, and you can even get the kids involved in the preparation process for some fun in the kitchen.
Ingredients (Serves 4-6)
- 1.5 pounds boneless, skinless chicken breasts
- 1 cup all-purpose flour
- 1 teaspoon salt
- 1 teaspoon black pepper
- 2 large eggs
- 2 tablespoons milk
- 2 cups panko bread crumbs
- 1 teaspoon garlic powder
- 1 teaspoon onion powder
- 1 teaspoon paprika
- Cooking spray or olive oil
Cooking Instructions
- Preheat the Oven: Preheat your oven to 400°F (200°C). Line a baking sheet with parchment paper or lightly grease it with cooking spray to prevent sticking.
- Prepare the Chicken: Cut the chicken breasts into strips, about 1 inch wide. Try to keep them uniform in size to guarantee even cooking.
- Set Up Breading Station: In one bowl, mix the flour, salt, and black pepper. In a second bowl, whisk together the eggs and milk until well combined. In a third bowl, combine the panko bread crumbs, garlic powder, onion powder, and paprika.
- Bread the Chicken: Dredge each chicken strip in the flour mixture, shaking off any excess. Dip it into the egg mixture, then coat it thoroughly with the panko mixture. Confirm each strip is evenly coated.
- Arrange Chicken on Baking Sheet: Place the breaded chicken strips on the prepared baking sheet. Leave a little space between each piece to confirm they cook evenly.
- Bake the Chicken Tenders: Lightly spray the tops of the chicken tenders with cooking spray or drizzle with olive oil to help them crisp up in the oven. Bake in the preheated oven for 15-20 minutes, flipping halfway through, until the chicken is cooked through and the coating is golden brown and crispy.
- Check for Doneness: Use a meat thermometer to verify the internal temperature of the chicken reaches at least 165°F (74°C), indicating it’s safe to eat.
Extra Tips
For even crispier tenders, consider using a wire rack on top of your baking sheet. This allows heat to circulate around the chicken, enhancing the crispiness on all sides.
If you prefer a touch of spice, add a pinch of cayenne pepper to the panko mixture. These chicken tenders are versatile and can be served with a variety of dipping sauces such as honey mustard, barbecue sauce, or ranch dressing.
Enjoy experimenting with different seasonings to cater to your family’s taste preferences.
BBQ Pulled Pork Sliders
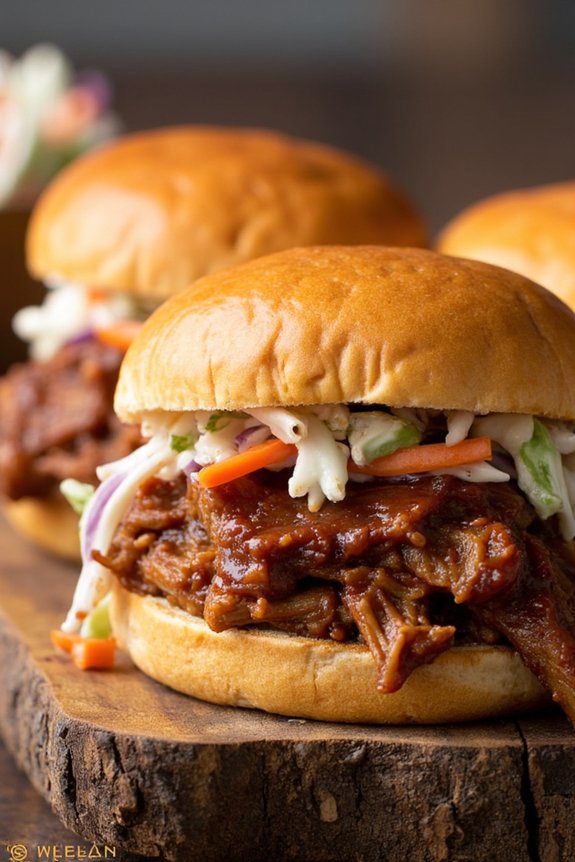
There’s something universally satisfying about sinking your teeth into a perfectly crafted slider, and BBQ Pulled Pork Sliders are no exception. These delightful mini sandwiches pack all the smoky, tangy, and savory flavors of a backyard barbecue into a compact, kid-friendly form. Perfect for family dinners, these sliders are sure to be a hit with both adults and children alike, offering a comforting and delicious meal that’s easy to prepare and even easier to enjoy.
The beauty of BBQ Pulled Pork Sliders lies in their versatility and ease of preparation. You can use a slow cooker to effortlessly tenderize the pork throughout the day, allowing the meat to absorb the rich barbecue flavors. Once the pork is fall-apart tender, it’s shredded and piled high on soft slider buns, then topped with a crisp, tangy slaw that adds the perfect crunch.
Whether it’s a busy weeknight or a relaxed weekend gathering, these sliders will become a family favorite in no time.
Ingredients (serves 4-6 people):
- 2 pounds boneless pork shoulder (or pork butt)
- 1 cup barbecue sauce (store-bought or homemade)
- 1 tablespoon brown sugar
- 1 teaspoon smoked paprika
- 1 teaspoon garlic powder
- 1 teaspoon onion powder
- 1 teaspoon salt
- 1/2 teaspoon black pepper
- 1/4 teaspoon cayenne pepper (optional, for a kick)
- 12 slider buns
- 1 cup coleslaw mix (pre-packaged or homemade)
- 1/4 cup coleslaw dressing
- 2 tablespoons unsalted butter, melted
Cooking Instructions:
- Prepare the Pork: Begin by trimming any excess fat from the pork shoulder. In a small bowl, mix together the brown sugar, smoked paprika, garlic powder, onion powder, salt, black pepper, and cayenne pepper. Rub this spice mixture all over the pork shoulder, ensuring it’s evenly coated.
- Cook the Pork: Place the seasoned pork shoulder in a slow cooker. Pour the barbecue sauce over the pork, covering it completely. Set the slow cooker to low heat and cook for 8-10 hours, or until the pork is tender and easily pulls apart with a fork.
- Shred the Pork: Once the pork is fully cooked, remove it from the slow cooker and place it on a cutting board. Use two forks to shred the meat, discarding any large pieces of fat. Return the shredded pork to the slow cooker, mixing it with the sauce to keep it moist and flavorful.
- Prepare the Coleslaw: In a mixing bowl, combine the coleslaw mix with the coleslaw dressing, tossing until the cabbage is evenly coated. Adjust seasoning to taste, if necessary.
- Assemble the Sliders: Preheat your oven to 350°F (175°C). Place the slider buns on a baking sheet and brush the tops with melted butter. Toast in the oven for about 5 minutes, or until the buns are slightly golden.
- Serve: To assemble, spoon a generous portion of pulled pork onto the bottom half of each slider bun. Top with a scoop of coleslaw, then place the other half of the bun on top. Serve the sliders warm and enjoy!
Extra Tips:
For a deeper flavor profile, consider marinating the pork shoulder with the spice rub overnight in the refrigerator before cooking. If you’re short on time, you can use a pressure cooker to greatly reduce the cooking time.
Additionally, feel free to experiment with different barbecue sauces to find one that suits your family’s taste preferences. If you have leftovers, the pulled pork can be stored in an airtight container in the refrigerator for up to three days, or frozen for up to three months.
Veggie-Packed Spaghetti
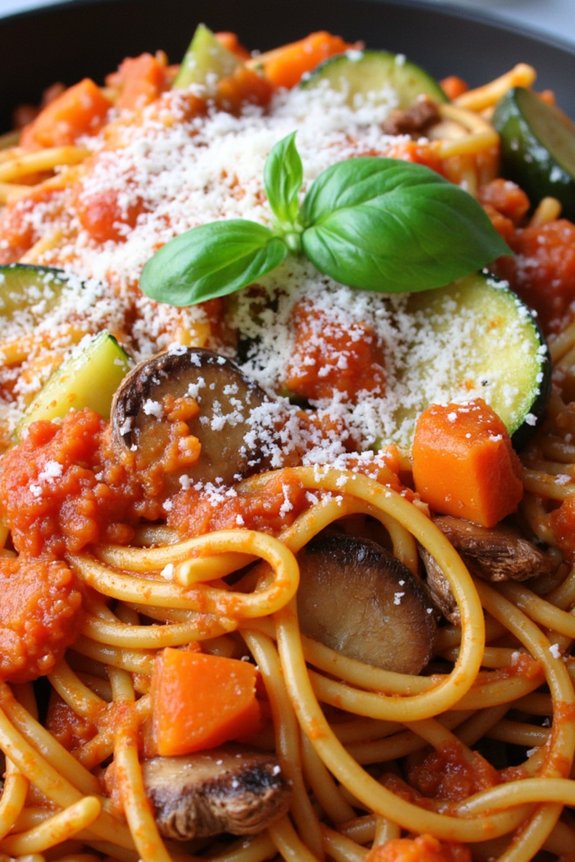
Veggie-Packed Spaghetti is an ideal family dinner recipe that combines the classic comfort of spaghetti with the nutritious goodness of fresh vegetables. This dish isn’t only delicious but also packed with essential vitamins and minerals, making it a perfect choice for parents who want to guarantee their kids are getting a balanced meal.
The colorful medley of vegetables adds texture and a burst of flavor, which can make even the pickiest eaters excited about dinner time. This recipe is designed to serve 4-6 people, making it suitable for a family dinner or a small gathering. By incorporating a variety of vegetables, you can adjust the flavors to suit your family’s preferences.
The rich tomato sauce clings to the spaghetti, creating a hearty dish that satisfies both hunger and taste. Whether you’re a seasoned cook or a beginner, this easy-to-follow recipe will help you create a meal that everyone will love.
Ingredients:
- 1 pound spaghetti
- 2 tablespoons olive oil
- 1 medium onion, diced
- 3 cloves garlic, minced
- 1 zucchini, diced
- 1 bell pepper, diced
- 1 cup mushrooms, sliced
- 1 carrot, grated
- 1 can (14.5 ounces) diced tomatoes
- 1 cup tomato sauce
- 1 teaspoon dried oregano
- 1 teaspoon dried basil
- Salt and pepper to taste
- Freshly grated Parmesan cheese (optional)
- Fresh basil leaves for garnish (optional)
Instructions:
- Cook the Spaghetti: Begin by bringing a large pot of salted water to a boil. Add the spaghetti and cook according to the package instructions until al dente. Once cooked, drain the spaghetti and set it aside.
- Prepare the Vegetables: While the spaghetti is cooking, heat the olive oil in a large skillet over medium heat. Add the diced onion and minced garlic to the skillet, and sauté for about 2-3 minutes until the onion becomes translucent and the garlic is fragrant.
- Cook the Vegetables: Add the diced zucchini, bell pepper, sliced mushrooms, and grated carrot to the skillet. Stir well and cook for about 5-7 minutes, or until the vegetables are tender.
- Make the Sauce: Pour the can of diced tomatoes and the tomato sauce into the skillet with the vegetables. Stir in the dried oregano and basil, and season with salt and pepper to taste. Let the sauce simmer for about 10 minutes, allowing the flavors to meld together.
- Combine Spaghetti and Sauce: Add the cooked spaghetti to the skillet, tossing it with the sauce and vegetables until everything is well combined and heated through.
- Serve: Transfer the Veggie-Packed Spaghetti to serving plates. If desired, sprinkle freshly grated Parmesan cheese over the top and garnish with fresh basil leaves.
Extra Tips:
To enhance the nutritional value of this dish, feel free to add your favorite vegetables or replace any that your kids mightn’t prefer. You can also use whole wheat spaghetti for a healthier option, which adds fiber to the meal.
If you want to add some protein, consider incorporating cooked chicken, turkey, or even chickpeas into the sauce. This dish is very versatile, so don’t hesitate to experiment with different herbs and spices to suit your taste.
Enjoy your Veggie-Packed Spaghetti with a side of garlic bread or a fresh green salad for a complete meal.
One-Pan Sausage and Potatoes

Looking for a quick and tasty dinner option that the whole family will enjoy? This One-Pan Sausage and Potatoes recipe is an ideal choice. It’s a simple yet hearty dish that combines savory sausage with tender potatoes and a blend of colorful vegetables.
With minimal prep and cleanup, it’s perfect for busy weeknights when you want something satisfying without spending hours in the kitchen. This recipe serves 4-6 people and is designed to be cooked all in one pan, making it both convenient and flavorful as the ingredients meld together.
The secret to its deliciousness lies in the combination of spices and the natural juices from the sausage, which enhance the taste of the potatoes and veggies. It’s a meal that’s sure to be a hit with kids and adults alike.
Ingredients:
- 1 1/2 pounds of baby potatoes, halved
- 1 pound of smoked sausage, sliced into 1/2-inch pieces
- 1 red bell pepper, diced
- 1 green bell pepper, diced
- 1 large onion, diced
- 3 tablespoons olive oil
- 1 teaspoon garlic powder
- 1 teaspoon paprika
- 1/2 teaspoon dried oregano
- 1/2 teaspoon dried thyme
- Salt and pepper to taste
- Fresh parsley, chopped (for garnish)
Instructions:
- Preheat the Oven: Start by preheating your oven to 400°F (200°C). This will guarantee the oven is hot and ready for baking once you’ve prepped your ingredients.
- Prepare the Ingredients: While the oven is heating up, wash and halve the baby potatoes. Slice the smoked sausage into 1/2-inch pieces. Dice the red and green bell peppers, as well as the onion.
- Mix Ingredients: In a large mixing bowl, combine the halved potatoes, sausage slices, diced peppers, and onion. Drizzle with olive oil and sprinkle with garlic powder, paprika, oregano, thyme, salt, and pepper. Toss everything together until well-coated with the oil and spices.
- Arrange in a Baking Dish: Transfer the mixture into a large baking dish or sheet pan, spreading it out evenly to guarantee even cooking.
- Bake the Dish: Place the baking dish in the preheated oven and bake for about 35-40 minutes, or until the potatoes are tender and lightly browned. Stir the mixture halfway through the cooking time to guarantee even roasting.
- Garnish and Serve: Once done, remove the dish from the oven and let it cool for a few minutes. Garnish with freshly chopped parsley before serving to add a pop of color and freshness.
Extra Tips:
For additional flavor, consider adding a splash of balsamic vinegar or a sprinkle of grated Parmesan cheese before serving. If you prefer a spicier dish, add a pinch of red pepper flakes or use a spicy variety of sausage.
Homemade Pizza Night

There’s nothing quite like a homemade pizza night to bring the family together for a fun and delicious meal. Making pizza at home allows everyone to customize their toppings, making it a kid-approved favorite that can cater to even the pickiest eaters. By preparing everything from the dough to the sauce, you not only enjoy fresher flavors but also create an interactive dining experience that everyone will remember.
Whether you prefer classic cheese or adventurous toppings, this homemade pizza recipe offers a versatile base for creativity. For a serving size of 4-6 people, this recipe will provide enough dough and sauce for two medium-sized pizzas. The ingredients are simple and easy to find, ensuring that you can whip up a pizza night at home without a hassle.
Gather your family around, assign everyone a task, and let the fun begin as you roll out the dough, spread the sauce, and pile on your favorite toppings. Here’s what you’ll need:
Ingredients:
- 4 cups all-purpose flour
- 1 packet (2 1/4 teaspoons) active dry yeast
- 1 1/2 cups warm water (about 110°F)
- 2 tablespoons olive oil
- 1 tablespoon sugar
- 1 teaspoon salt
- 1 1/2 cups pizza sauce
- 3 cups shredded mozzarella cheese
- Optional toppings: pepperoni, mushrooms, bell peppers, onions, olives, etc.
Instructions:
- Prepare the Dough: In a large bowl, dissolve the yeast and sugar in warm water. Let it sit for about 5 minutes until it becomes frothy. This indicates that the yeast is active.
- Mix the Dough: Add olive oil, salt, and 2 cups of flour to the yeast mixture. Stir until well combined. Gradually add the remaining flour, 1/2 cup at a time, until a dough begins to form.
- Knead the Dough: Turn the dough out onto a floured surface and knead for about 8-10 minutes, until smooth and elastic. If the dough is too sticky, sprinkle a little more flour as needed.
- Let the Dough Rise: Place the dough in a lightly oiled bowl, turning it to coat all sides with oil. Cover it with a damp cloth and let it rise in a warm area for about 1 hour, or until it doubles in size.
- Preheat the Oven: Preheat your oven to 475°F (245°C). If using a pizza stone, place it in the oven while it preheats.
- Shape the Dough: Punch down the dough and divide it into two equal parts. Roll each half into a circle on a floured surface, about 12 inches in diameter.
- Assemble the Pizza: Transfer the rolled dough to a pizza peel or baking sheet lined with parchment paper. Spread a layer of pizza sauce over the dough, leaving a 1-inch border for the crust. Sprinkle mozzarella cheese and add your choice of toppings.
- Bake the Pizza: If using a pizza stone, carefully slide the pizza onto the stone. Bake for 12-15 minutes, or until the crust is golden brown and the cheese is bubbly and slightly browned.
- Serve: Remove the pizza from the oven and let it cool for a few minutes before slicing. Serve hot and enjoy!
Extra Tips:
For a crispier crust, consider pre-baking the dough for 5 minutes before adding the sauce and toppings. If you don’t have a pizza stone, using an inverted baking sheet preheated in the oven can yield similar results.
Encourage kids to get creative with toppings—try adding fun shapes with pepperoni, or use vegetables to create faces. Remember, the key to a successful pizza night isn’t just in the taste, but in the joy of making it together.
Slow Cooker Beef Stroganoff
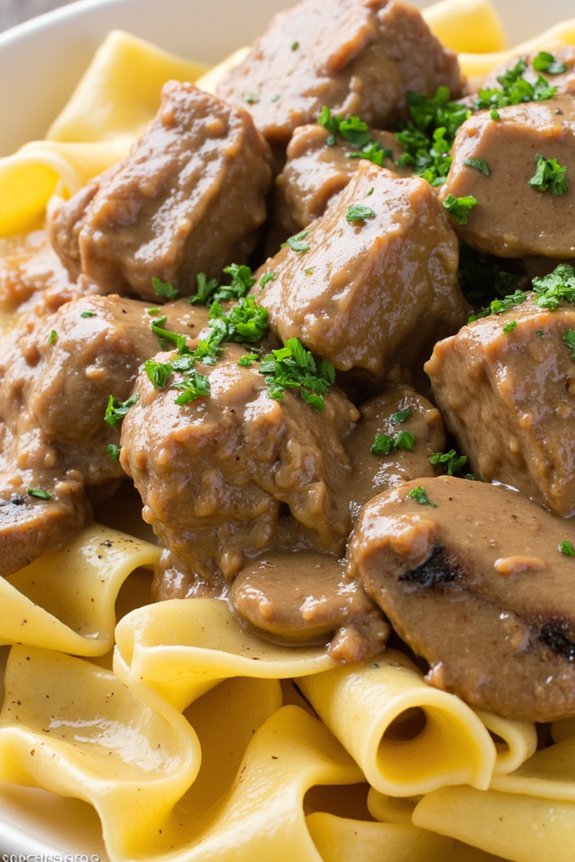
Beef Stroganoff is a classic comfort dish that seamlessly blends tender beef with a creamy, savory sauce. When prepared in a slow cooker, you not only free up time but also enhance the flavors as the ingredients meld together over hours of cooking. This recipe is kid-approved, making it a perfect choice for family dinners where everyone, from the picky eater to the adventurous palate, can find joy in every bite.
The magic of this Slow Cooker Beef Stroganoff is in its simplicity and the way the slow cooking process tenderizes the beef, infusing it with the deep flavors of the sauce. With minimal prep time, you’ll set your slow cooker and let it do the work, returning to a meal that’s ready to be served with minimal fuss. Ideal for 4-6 people, this dish is perfect for a cozy family gathering.
Ingredients (Serves 4-6):
- 2 pounds beef stew meat, cubed
- 1 medium onion, chopped
- 3 cloves garlic, minced
- 8 ounces mushrooms, sliced
- 1 cup beef broth
- 1 tablespoon Worcestershire sauce
- 1 tablespoon Dijon mustard
- 1 teaspoon salt
- 1/2 teaspoon pepper
- 1 teaspoon paprika
- 1 cup sour cream
- 2 tablespoons cornstarch
- 8 ounces egg noodles
- Fresh parsley, chopped (for garnish)
Cooking Instructions:
- Prepare the Ingredients: Begin by chopping the onion and slicing the mushrooms. Mince the garlic and cube the beef stew meat if not already done.
- Layer the Ingredients in the Slow Cooker: Place the cubed beef at the bottom of the slow cooker. Add chopped onions, minced garlic, and sliced mushrooms on top of the beef.
- Mix the Sauce: In a medium bowl, whisk together the beef broth, Worcestershire sauce, Dijon mustard, salt, pepper, and paprika. Pour this mixture over the beef and vegetables in the slow cooker.
- Cook the Stroganoff: Cover the slow cooker and set it on low heat. Cook for 7-8 hours, or until the beef is tender and fully cooked through.
- Thicken the Sauce: Once the beef is tender, in a separate bowl, mix the sour cream and cornstarch until smooth. Stir this mixture into the slow cooker. Cover and cook on high heat for an additional 15-30 minutes, or until the sauce has thickened.
- Cook the Noodles: While the sauce is thickening, cook the egg noodles according to the package instructions. Drain and set aside.
- Combine and Serve: Once the sauce is thickened, serve the beef stroganoff over the cooked egg noodles. Garnish with freshly chopped parsley for a pop of color and added flavor.
Extra Tips:
For an even richer flavor, consider browning the beef cubes in a skillet with a bit of oil before placing them in the slow cooker. Although this step is optional, it adds depth to the dish.
You can also add a splash of brandy or white wine to the sauce mixture for a more sophisticated taste. If you prefer a thicker sauce, adjust the cornstarch according to your preference.
Finally, make sure to taste and adjust the seasoning before serving, as the slow cooking process can sometimes mellow the flavors.
Teriyaki Chicken Stir-Fry
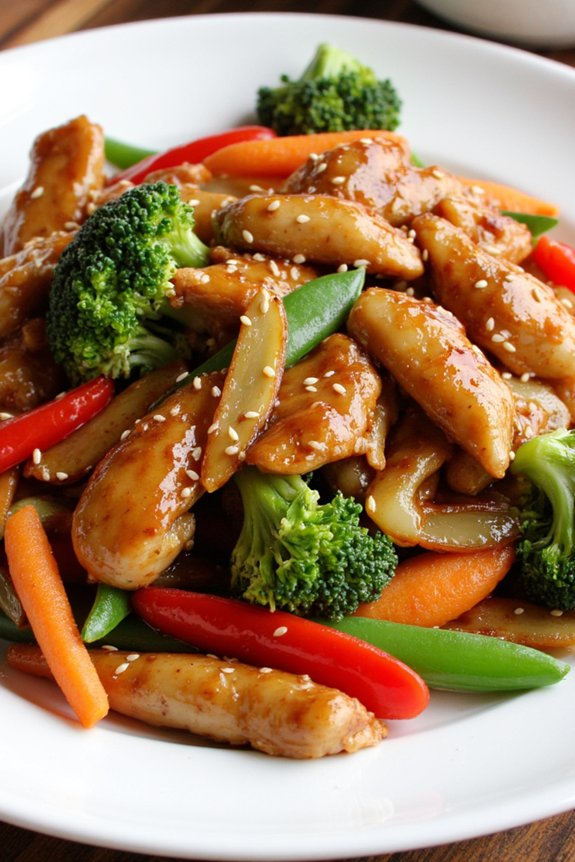
Teriyaki Chicken Stir-Fry is a delightful and flavorful dish that’s perfect for family dinners. This recipe combines tender pieces of chicken with a medley of fresh vegetables, all coated in a savory and slightly sweet teriyaki sauce. The vibrant colors and enticing aroma make it an appealing choice for kids, while the balanced flavors will satisfy the taste buds of adults.
This dish isn’t only delicious but also quick to prepare, making it an ideal option for busy weeknights when you want to serve something wholesome and satisfying.
The beauty of Teriyaki Chicken Stir-Fry lies in its versatility. You can easily adjust the types of vegetables used according to your family’s preferences or what you have on hand. Additionally, this dish pairs wonderfully with steamed rice or noodles, allowing you to create a complete meal that everyone at the table will enjoy.
With its simple ingredients and straightforward preparation, Teriyaki Chicken Stir-Fry is sure to become a go-to recipe in your family’s dinner rotation.
Ingredients (Serves 4-6):
- 1 1/2 pounds boneless, skinless chicken breasts, cut into bite-sized pieces
- 2 tablespoons vegetable oil
- 1 cup broccoli florets
- 1 red bell pepper, sliced
- 1 cup sugar snap peas
- 2 carrots, julienned
- 3 cloves garlic, minced
- 1 tablespoon fresh ginger, grated
- 1/2 cup soy sauce
- 1/4 cup honey
- 2 tablespoons rice vinegar
- 2 tablespoons cornstarch
- 1/4 cup water
- 2 tablespoons sesame seeds (optional)
- Cooked rice or noodles, for serving
Cooking Instructions:
- Prepare the Sauce: In a small bowl, mix together the soy sauce, honey, and rice vinegar. In a separate bowl, dissolve the cornstarch in water to create a slurry. Set both aside.
- Cook the Chicken: Heat 1 tablespoon of vegetable oil in a large skillet or wok over medium-high heat. Add the chicken pieces and cook until they’re golden brown and cooked through, about 5-7 minutes. Remove the chicken from the skillet and set aside.
- Stir-Fry the Vegetables: In the same skillet, add the remaining tablespoon of oil. Add the minced garlic and grated ginger, and sauté for about 30 seconds until fragrant. Add the broccoli, bell pepper, sugar snap peas, and carrots. Stir-fry the vegetables for 3-4 minutes until they’re tender-crisp.
- Combine Chicken and Sauce: Return the cooked chicken to the skillet with the vegetables. Pour in the soy sauce mixture and cook for another 2 minutes, stirring constantly.
- Thicken the Sauce: Stir the cornstarch slurry into the skillet, mixing well until the sauce thickens, about 1-2 minutes. Confirm all ingredients are evenly coated with the sauce.
- Serve: Remove from heat and sprinkle with sesame seeds if desired. Serve hot over cooked rice or noodles.
Extra Tips:
For the best flavor, marinate the chicken in a little soy sauce and ginger before cooking, though it isn’t necessary. If you prefer a spicier dish, add a pinch of red pepper flakes to the sauce.
You can also substitute or add other vegetables such as zucchini, mushrooms, or baby corn based on your family’s preference. Remember to cut all vegetables to a uniform size to guarantee even cooking.
Enjoy experimenting with this dish and adjust it to suit your family’s tastes!
Baked Ziti With Spinach
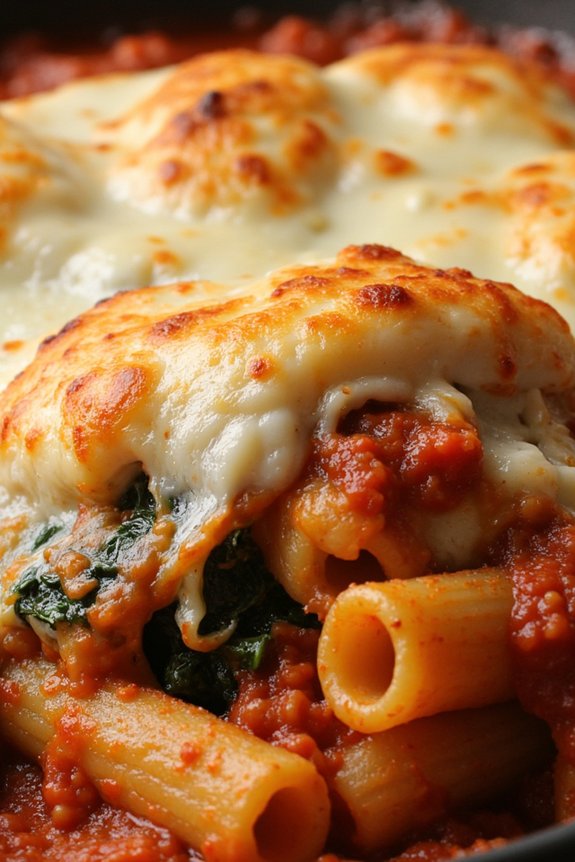
Baked Ziti With Spinach is a delightful and nutritious twist on the classic Italian-American dish that’s certain to become a family favorite. This comforting casserole is layered with tender pasta, rich tomato sauce, creamy cheese, and fresh spinach, making it a wholesome meal that both kids and adults will enjoy.
Whether you’re preparing for a busy weeknight dinner or a cozy weekend meal, this baked ziti is a great option that can be made ahead of time and easily reheated. The addition of spinach not only boosts the nutritional profile of this dish but also adds a vibrant color and fresh flavor that complements the cheesy goodness.
The creamy ricotta and gooey mozzarella meld beautifully with the robust marinara sauce, creating a satisfying and hearty meal. With only a few simple ingredients and minimal preparation, Baked Ziti With Spinach is an easy yet impressive dish that will have everyone asking for seconds.
Ingredients for 4-6 servings:
- 1 pound ziti pasta
- 2 tablespoons olive oil
- 3 cloves garlic, minced
- 5 cups fresh spinach leaves
- 1 jar (24 ounces) marinara sauce
- 1 cup ricotta cheese
- 2 cups shredded mozzarella cheese
- 1/2 cup grated Parmesan cheese
- Salt and pepper to taste
- 1 teaspoon dried Italian herbs (optional)
Cooking Instructions:
- Preheat the Oven: Begin by preheating your oven to 375°F (190°C). This guarantees the oven is hot enough to bake the ziti evenly.
- Cook the Pasta: Bring a large pot of salted water to a boil. Add the ziti pasta and cook according to package instructions until al dente. Drain the pasta and set aside.
- Sauté the Garlic and Spinach: In a large skillet, heat the olive oil over medium heat. Add the minced garlic and sauté for about 1 minute until fragrant. Add the fresh spinach leaves and cook until wilted, about 2-3 minutes. Season with a little salt and pepper.
- Mix the Ricotta and Spinach: In a mixing bowl, combine the ricotta cheese with the sautéed spinach and garlic mixture. Stir until well blended.
- Assemble the Casserole: In a large baking dish, spread a thin layer of marinara sauce on the bottom. Add half of the cooked ziti, followed by half of the ricotta-spinach mixture, and half of the marinara sauce. Sprinkle with one cup of mozzarella cheese.
- Layer Again: Repeat the layers with the remaining ziti, ricotta-spinach mixture, and marinara sauce. Top with the remaining mozzarella and sprinkle the Parmesan cheese over the top.
- Bake the Ziti: Cover the baking dish with aluminum foil and bake in the preheated oven for 20 minutes. Remove the foil and bake for an additional 10-15 minutes, or until the cheese is melted and bubbly.
- Cool and Serve: Allow the baked ziti to cool for a few minutes before serving. This helps the dish set and makes it easier to serve.
Extra Tips: For added flavor, consider using a marinara sauce with herbs or garlic. Feel free to add a pinch of chili flakes if your family enjoys a bit of heat.
To make this dish even more kid-friendly, you can substitute half of the spinach with chopped kale or other greens your children enjoy. Leftovers can be stored in an airtight container in the refrigerator for up to 3 days, making it perfect for quick lunches or dinners throughout the week.
Crispy Fish Tacos

Crispy Fish Tacos are a delightful and easy-to-make dish that will satisfy both kids and adults alike. The combination of crispy, golden-brown fish fillets nestled in soft tortillas, topped with fresh cabbage slaw and a tangy sauce, makes for a harmonious blend of flavors and textures. This recipe is perfect for a family dinner, offering a fun way to enjoy seafood in a handheld form that even picky eaters will love.
The key to these tacos is achieving the perfect crispiness of the fish while maintaining its moist and tender interior. Served with a simple yet revitalizing slaw, these tacos aren’t only delicious but also packed with nutrients. In just a few steps, you can create a restaurant-quality meal at home that serves 4-6 people. Gather your ingredients and follow the instructions below to bring these mouthwatering Crispy Fish Tacos to your dinner table.
Ingredients for 4-6 servings:
- 1 ½ pounds white fish fillets (such as cod or tilapia)
- 1 cup all-purpose flour
- 1 teaspoon salt
- 1 teaspoon black pepper
- 1 teaspoon paprika
- 2 large eggs
- 1 cup panko breadcrumbs
- Vegetable oil, for frying
- 12 small corn tortillas
- 2 cups shredded green cabbage
- 1 cup shredded red cabbage
- ½ cup mayonnaise
- 2 tablespoons lime juice
- 1 tablespoon honey
- 1 teaspoon garlic powder
- ½ teaspoon cayenne pepper (optional)
- Fresh cilantro, chopped, for garnish
- Lime wedges, for serving
Instructions:
- Prepare the Fish: Rinse and pat dry the fish fillets. Cut them into strips about 1 inch wide. Season the strips with salt, pepper, and paprika to make sure they’re flavorful.
- Set Up Breading Station: In three separate shallow bowls, add flour in the first bowl, beat the eggs in the second, and place panko breadcrumbs in the third. This assembly line will help coat the fish evenly.
- Bread the Fish: Dredge each fish strip first in flour, shaking off any excess, then dip into the beaten eggs, and finally coat with panko breadcrumbs, pressing gently to adhere well. Set aside on a plate.
- Fry the Fish: Heat about 1 inch of vegetable oil in a large skillet over medium-high heat. Once the oil is hot (about 350°F), fry the fish strips in batches, making sure not to overcrowd the pan. Cook for about 3-4 minutes on each side until golden brown and cooked through. Remove and drain on paper towels.
- Prepare the Slaw: In a large bowl, combine shredded green and red cabbage. In a separate small bowl, whisk together mayonnaise, lime juice, honey, garlic powder, and cayenne pepper. Pour the dressing over the cabbage and toss to combine.
- Assemble the Tacos: Warm the corn tortillas either in a skillet or microwave. Place a few pieces of crispy fish on each tortilla, top with the cabbage slaw, and garnish with fresh cilantro. Serve with lime wedges on the side for an extra burst of flavor.
Extra Tips:
For the crispiest fish, make sure that the oil is at the correct temperature before frying, as oil that’s too cool will result in greasy fish. You can test the oil by dropping in a small piece of bread – if it sizzles and browns within 60 seconds, the oil is ready.
Additionally, to save time, the slaw can be prepared in advance and stored in the refrigerator; this also allows the flavors to meld together beautifully. Finally, feel free to add your favorite toppings such as avocado slices or a sprinkle of queso fresco for a personalized touch.
Loaded Baked Potato Soup

Loaded Baked Potato Soup is the perfect comfort food for the whole family. This creamy and hearty soup is packed with all the flavors you love from a loaded baked potato, including crispy bacon, sharp cheddar cheese, and fresh green onions.
It’s an ideal dish for cooler evenings when you want something warm and satisfying. Not only is it easy to prepare, but it’s also a hit with both kids and adults alike, making it a fantastic choice for a family dinner.
This dish serves 4-6 people, ensuring everyone gets a hearty portion. The combination of tender potatoes, savory bacon, and rich cheese creates a delightful texture and taste that will have everyone asking for seconds.
For those looking to sneak in some extra veggies, consider adding broccoli or cauliflower into the mix for additional nutrition. Whether served as a main dish or a starter, this Loaded Baked Potato Soup is sure to become a family favorite.
Ingredients:
- 6 medium russet potatoes, peeled and cubed
- 1 medium onion, finely chopped
- 4 cups chicken broth
- 2 cups milk
- 1 cup heavy cream
- 8 slices bacon, cooked and crumbled
- 2 cups sharp cheddar cheese, shredded
- 1/2 cup sour cream
- 4 tablespoons unsalted butter
- 3 tablespoons all-purpose flour
- Salt and pepper to taste
- 1/4 cup green onions, sliced
- Optional: broccoli or cauliflower florets
Cooking Instructions:
- Prepare the Potatoes: Begin by peeling and cubing the potatoes. Place them in a large pot with the chicken broth and bring to a boil. Reduce the heat and let them simmer until they’re tender, about 15 minutes.
- Cook the Bacon: While the potatoes are cooking, cook the bacon in a separate skillet over medium heat until crispy. Once done, remove from the skillet, crumble, and set aside.
- Sauté the Onions: In the same skillet used for the bacon, reserve about 2 tablespoons of the bacon grease. Add the chopped onion and sauté until translucent.
- Make the Roux: In a separate large pot, melt the butter over medium heat. Stir in the flour to make a roux, cooking for about 1 minute.
- Combine Ingredients: Gradually whisk in the milk and heavy cream into the roux until smooth. Add the cooked potatoes with the broth, and the sautéed onions. Stir to combine.
- Simmer the Soup: Bring the soup to a gentle simmer, allowing it to thicken. Stir occasionally to prevent sticking.
- Add Cheese and Bacon: Stir in the shredded cheddar cheese, crumbled bacon (reserve some for topping), and sour cream. Season the soup with salt and pepper to taste.
- Final Touches: If desired, add broccoli or cauliflower florets and cook until tender. Ladle the soup into bowls and garnish with additional cheese, bacon, and sliced green onions.
Extra Tips:
For a smoother soup, use an immersion blender to blend the soup to your desired consistency before adding the cheese and bacon. If you prefer a chunkier texture, simply mash some of the potatoes with a potato masher.
To save time, you can bake the potatoes in advance and use them in the soup. Additionally, consider using leftover baked potatoes to reduce food waste and speed up the cooking process. Always taste for seasoning before serving, as the flavor can vary based on the broth and bacon used.