

Looking for quick and easy dinner recipes that take the stress out of family mealtimes?
Picture yourself enjoying a comforting One-Pot Cheesy Taco Pasta or a Simple Chicken Fried Rice without hours spent in the kitchen.
These dishes are packed with rich flavors and are gentle on your budget.
With options like a hearty 20-Minute Chili or Creamy Garlic Parmesan Pasta, everyone will leave the table satisfied.
Ready to make your evenings more deliciously efficient?
One-Pot Cheesy Taco Pasta
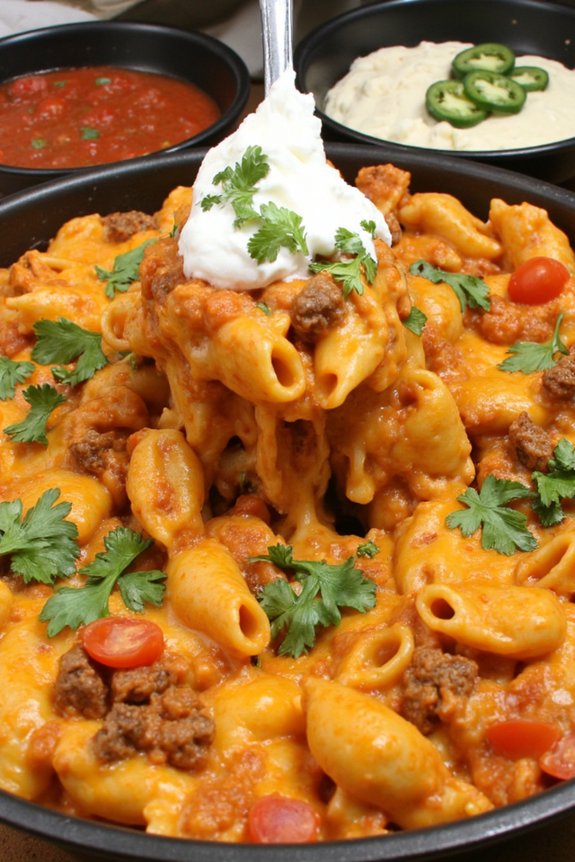
One-Pot Cheesy Taco Pasta is a delightful and easy-to-make dish that brings together the rich flavors of tacos with the comforting texture of pasta. This recipe is perfect for busy weeknights when you want a delicious meal without spending hours in the kitchen. The beauty of this dish lies in its simplicity, as it uses only one pot, making both preparation and cleanup a breeze.
Plus, the combination of seasoned meat, creamy cheese, and tender pasta is sure to please both kids and adults alike. This recipe is designed to serve 4-6 people, making it ideal for family dinners or small gatherings. The ingredients are budget-friendly and can be easily found in most grocery stores.
You can also customize the dish by adding your favorite toppings, such as sour cream, diced tomatoes, or avocado, to create a meal that suits your taste preferences. Let’s explore the ingredients and steps necessary to bring this hearty meal to your table.
Ingredients:
- 1 pound ground beef
- 1 packet taco seasoning
- 2 cups chicken broth
- 1 cup salsa
- 1 can (14.5 oz) diced tomatoes
- 8 ounces pasta (such as shells or rotini)
- 1 cup shredded cheddar cheese
- 1/2 cup cream cheese
- Salt and pepper to taste
- Optional toppings: chopped cilantro, sour cream, diced tomatoes, sliced jalapeños
Instructions:
- Brown the Beef: In a large pot or Dutch oven, cook the ground beef over medium heat until it’s fully browned. Use a wooden spoon to break up the meat as it cooks. Once browned, drain any excess fat from the pot.
- Season the Meat: Add the taco seasoning to the cooked beef, stirring well to coat the meat evenly with the spices. This will add a rich, taco-like flavor to your dish.
- Add Liquids and Pasta: Pour in the chicken broth, salsa, and diced tomatoes (with their juice) into the pot. Stir everything together, then add the pasta. Make sure the pasta is submerged in the liquid to guarantee even cooking.
- Cook the Pasta: Increase the heat to bring the mixture to a gentle boil, then reduce the heat to a simmer. Cover the pot and let the pasta cook for about 10-15 minutes, stirring occasionally, until it’s al dente and most of the liquid has been absorbed.
- Add the Cheese: Once the pasta is cooked, reduce the heat to low and stir in the shredded cheddar cheese and cream cheese. Mix until the cheeses are fully melted and the sauce is creamy and smooth.
- Season and Serve: Taste the pasta and adjust the seasoning with salt and pepper if needed. Serve hot, garnishing with your choice of optional toppings like cilantro, sour cream, or diced tomatoes for added flavor and color.
Extra Tips: To make this dish even more nutritious, consider adding vegetables such as bell peppers, corn, or black beans during the cooking process. These additions will enhance the flavor and add more texture to the dish.
If you prefer a spicier version, opt for hot salsa or add a pinch of cayenne pepper to the meat. This recipe is also easily adaptable for different dietary needs, as you can substitute ground turkey for beef or use gluten-free pasta if needed. Enjoy your One-Pot Cheesy Taco Pasta with your favorite toppings for a satisfying meal.
Simple Chicken Fried Rice
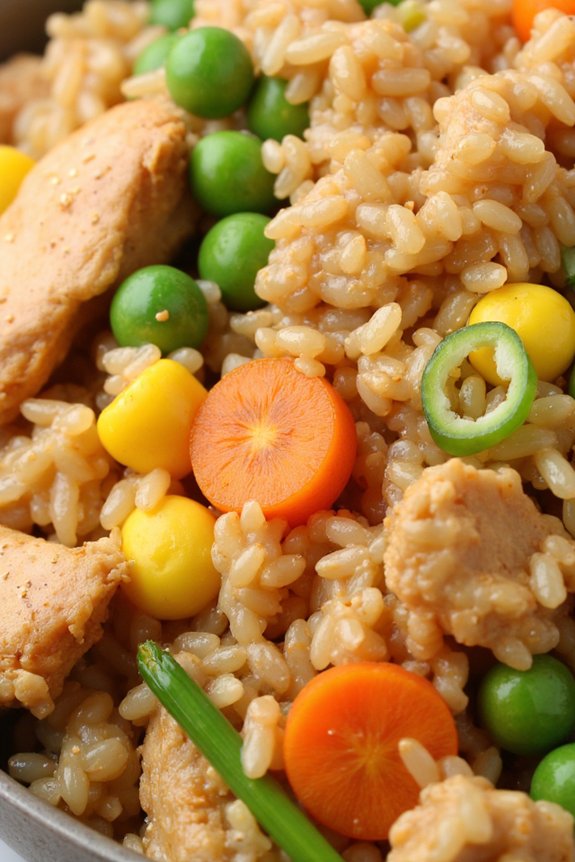
Simple Chicken Fried Rice is a delicious and satisfying meal that’s perfect for a quick dinner. This dish combines tender pieces of chicken with fluffy rice, mixed vegetables, and savory soy sauce, resulting in a flavorful and wholesome meal.
It’s a great way to use up leftover rice and vegetables, making it both economical and efficient. Whether you’re preparing it for a family dinner or meal prepping for the week, this recipe is bound to be a hit.
Cooking Simple Chicken Fried Rice is easy and requires minimal ingredients, most of which you probably already have in your pantry. The beauty of this dish lies in its flexibility, allowing you to adjust and substitute ingredients based on what you have available.
This version serves 4-6 people, making it ideal for serving a small group or having leftovers for the next day.
Ingredients (serving size: 4-6 people):
- 3 cups of cooked white rice (preferably day-old)
- 2 tablespoons vegetable oil
- 1 pound boneless, skinless chicken breast, diced
- 3 eggs, beaten
- 1 cup frozen mixed vegetables (peas, carrots, corn)
- 3 green onions, sliced
- 3 tablespoons soy sauce
- 1 teaspoon sesame oil
- Salt and pepper to taste
Cooking Instructions:
- Prepare the Ingredients: Begin by cooking your rice if you haven’t already. It’s best to use rice that has been cooked and cooled, preferably overnight, as it will better absorb flavors and retain a good texture.
- Cook the Chicken: Heat 1 tablespoon of vegetable oil in a large skillet or wok over medium-high heat. Add the diced chicken and season with salt and pepper. Cook until the chicken is fully cooked and golden brown, about 5-7 minutes. Remove the chicken from the pan and set it aside.
- Scramble the Eggs: In the same pan, add another tablespoon of oil if needed, and pour in the beaten eggs. Stir gently to scramble them. Once cooked, transfer the eggs to the plate with the chicken.
- Cook the Vegetables: Add the frozen mixed vegetables to the skillet, cooking until they’re heated through and tender, about 3-4 minutes.
- Combine Everything: Return the cooked chicken and scrambled eggs to the pan with the vegetables. Add the cooked rice, breaking up any clumps, and stir everything together.
- Add the Flavors: Drizzle the soy sauce and sesame oil over the rice mixture. Stir well to guarantee all ingredients are evenly coated. Continue to cook for an additional 2-3 minutes, allowing the flavors to meld together.
- Finish with Green Onions: Add the sliced green onions to the fried rice, stirring them in just before serving. This will add a fresh and vibrant flavor to the dish.
Extra Tips:
To maximize flavor, use day-old rice, as it’s less sticky and absorbs the sauce better. If you don’t have frozen vegetables, fresh ones like bell peppers or broccoli work well.
Adjust the amount of soy sauce to your taste preference, and for an extra kick, consider adding a sprinkle of chili flakes or a dash of hot sauce. Always taste your fried rice before serving to verify it’s seasoned to your liking.
Easy 20-Minute Chili

Easy 20-Minute Chili is the perfect dish for those busy weeknights when you’re short on time but still want to enjoy a hearty and satisfying meal. This recipe combines the robust flavors of chili with the ease of just a few simple steps, making it an ideal choice for both novice cooks and seasoned chefs looking for a quick fix.
The blend of spices and ingredients in this chili will fill your kitchen with mouthwatering aromas and warm your soul with every spoonful. Designed to be prepared in just 20 minutes, this chili recipe isn’t only quick but also budget-friendly, using ingredients that are likely already in your pantry.
It’s perfect for serving 4-6 people, making it a great option for feeding the whole family or having leftovers for the next day. Whether you’re looking for a quick weeknight meal, or a dish to impress your friends at a casual get-together, this Easy 20-Minute Chili is sure to become a go-to favorite.
Ingredients (Serves 4-6)
- 1 lb ground beef or turkey
- 1 medium onion, diced
- 2 cloves garlic, minced
- 1 can (14.5 oz) diced tomatoes, undrained
- 1 can (15 oz) kidney beans, drained and rinsed
- 1 can (15 oz) black beans, drained and rinsed
- 1 can (8 oz) tomato sauce
- 2 tablespoons chili powder
- 1 teaspoon ground cumin
- 1 teaspoon paprika
- Salt and pepper, to taste
- Optional toppings: shredded cheese, sour cream, chopped green onions
Cooking Instructions
- Prepare the Ingredients: Gather all the ingredients and prepare them by dicing the onion and mincing the garlic. Drain and rinse the beans to remove excess sodium and any liquid they were canned in.
- Cook the Meat: In a large pot or Dutch oven, brown the ground beef or turkey over medium-high heat. Use a wooden spoon to break the meat into small pieces as it cooks. Cook until no pink remains.
- Sauté the Vegetables: Add the diced onion and minced garlic to the pot with the cooked meat. Sauté for about 2-3 minutes, or until the onions become translucent and the garlic is fragrant.
- Combine the Ingredients: Stir in the diced tomatoes, kidney beans, black beans, and tomato sauce. Mix well to combine all the ingredients evenly.
- Season the Chili: Add the chili powder, ground cumin, paprika, salt, and pepper. Stir the mixture thoroughly to guarantee the spices are evenly distributed.
- Simmer the Chili: Reduce the heat to medium-low and let the chili simmer for about 10 minutes. Stir occasionally to prevent sticking and guarantee even cooking.
- Adjust Seasoning and Serve: Taste the chili and adjust the seasoning as needed with more salt and pepper. Serve hot, with optional toppings like shredded cheese, sour cream, or chopped green onions.
Extra Tips
For an extra layer of flavor, consider adding a pinch of cayenne pepper or a dash of hot sauce if you prefer a spicier chili. If you have more time, letting the chili simmer longer will deepen the flavors even further.
This recipe is also versatile, so feel free to substitute or add other beans or vegetables you have on hand, such as bell peppers or corn. Leftovers can be stored in an airtight container in the refrigerator for up to three days or frozen for up to two months.
Budget-Friendly Veggie Stir-Fry
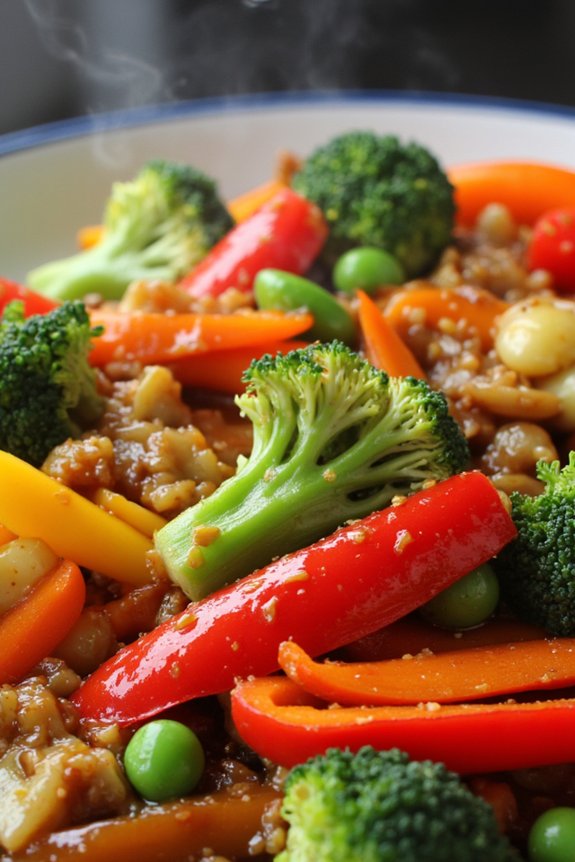
If you’re looking for a quick, easy, and affordable meal, this Budget-Friendly Veggie Stir-Fry is perfect for you. Packed with vibrant, colorful vegetables and a savory sauce, this dish satisfies your taste buds without breaking the bank. Ideal for busy weeknights and guaranteed to be a hit with the whole family, this stir-fry isn’t only economical but also healthy and full of nutrients.
This recipe is designed to serve 4-6 people, making it great for a family meal or leftovers for the next day. The beauty of a veggie stir-fry lies in its versatility; you can easily swap out vegetables based on what you have on hand or what’s in season. The simple sauce ties everything together, providing a delicious glaze that complements the natural flavors of the vegetables.
Ingredients:
- 2 tablespoons vegetable oil
- 3 cloves garlic, minced
- 1 tablespoon fresh ginger, grated
- 1 onion, sliced
- 1 red bell pepper, sliced
- 1 yellow bell pepper, sliced
- 1 head of broccoli, cut into florets
- 2 carrots, thinly sliced
- 1 cup snap peas
- 2 tablespoons soy sauce
- 1 tablespoon oyster sauce
- 1 tablespoon sesame oil
- 2 tablespoons water
- Salt and pepper to taste
- 1 tablespoon cornstarch (optional, for thickening)
- 4 cups cooked rice or noodles, for serving
Cooking Instructions:
- Prepare the Vegetables: Wash and chop all vegetables as specified in the ingredients list. Confirm that the vegetables are cut into uniform sizes for even cooking.
- Heat the Oil: In a large wok or skillet, heat the vegetable oil over medium-high heat. Once hot, add the minced garlic and grated ginger, stirring for about 30 seconds until fragrant.
- Cook the Vegetables: Add the sliced onion to the pan and sauté for 2 minutes until it begins to soften. Follow with the red and yellow bell peppers, broccoli florets, carrots, and snap peas. Stir-fry the vegetables for about 5-7 minutes, or until they’re tender-crisp.
- Make the Sauce: In a small bowl, mix together the soy sauce, oyster sauce, sesame oil, and water. If you prefer a thicker sauce, dissolve the cornstarch in the water before adding it to the sauce mixture.
- Combine and Stir: Pour the sauce over the vegetables in the pan. Stir well to coat all the vegetables evenly. Let the sauce simmer for 2-3 minutes, allowing it to thicken slightly and the flavors to meld. Season with salt and pepper according to taste.
- Serve: Remove the stir-fry from heat and serve immediately over cooked rice or noodles.
Extra Tips:
For a heartier meal, you can add protein such as tofu, chicken, or shrimp, adjusting the cooking time as needed to make sure the protein is cooked through.
If you like a bit of heat, consider adding a pinch of red pepper flakes or a splash of chili oil. This dish is also perfect for meal prep; simply store any leftovers in an airtight container in the refrigerator for up to three days.
Enjoy this versatile stir-fry by customizing it with your favorite vegetables and seasonings.
Quick Sausage and Bean Skillet
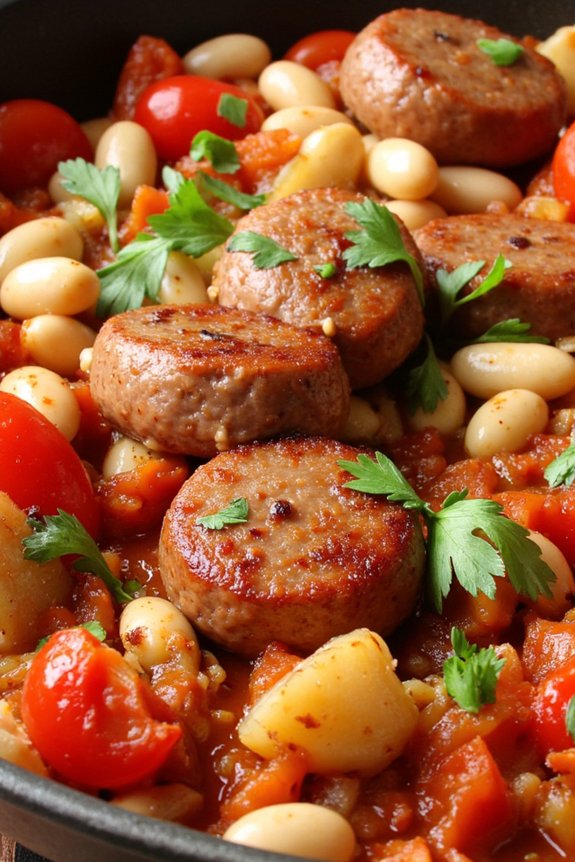
Quick Sausage and Bean Skillet is an ideal meal when you’re short on time but craving something hearty and satisfying. This dish combines the robust flavors of sausage with the creamy texture of beans, all simmered together in a single skillet for convenience.
It’s not only quick to prepare but also incredibly budget-friendly, making it a perfect weeknight dinner for the whole family. Furthermore, this recipe is versatile and can be easily customized with your favorite vegetables and spices, guaranteeing that it never gets boring.
This dish serves 4-6 people, making it a great option for larger families or for meal prepping. With just a few staple ingredients, you can have a delicious and nutritious meal on the table in under 30 minutes.
Whether you’re a beginner or an experienced cook, the Quick Sausage and Bean Skillet is a foolproof recipe that delivers on flavor without the fuss.
Ingredients:
- 1 pound of sausage (your choice of Italian, chicken, or turkey)
- 2 cans (15 ounces each) of cannellini beans, drained and rinsed
- 1 can (14.5 ounces) of diced tomatoes
- 1 medium onion, chopped
- 2 cloves of garlic, minced
- 1 tablespoon olive oil
- 1 teaspoon dried oregano
- 1 teaspoon smoked paprika
- Salt and pepper to taste
- Fresh parsley for garnish (optional)
Instructions:
- Prepare the Ingredients: Start by chopping the onion and mincing the garlic. Drain and rinse the cannellini beans and set aside.
- Cook the Sausage: In a large skillet over medium heat, add the olive oil. Once the oil is hot, add the sausage. Cook until browned and fully cooked through, breaking it into smaller pieces with a spatula. This should take about 5-7 minutes.
- Add the Aromatics: Add the chopped onion to the skillet with the sausage and sauté for about 3 minutes until the onion is translucent. Stir in the minced garlic and continue to cook for an additional minute until fragrant.
- Incorporate the Beans and Tomatoes: Pour in the diced tomatoes (with their juices) and the drained beans. Stir well to combine all ingredients.
- Season the Skillet: Sprinkle the oregano, smoked paprika, salt, and pepper over the mixture. Stir everything together to guarantee the spices are evenly distributed.
- Simmer the Dish: Reduce the heat to low and let the mixture simmer for 10-15 minutes, allowing the flavors to meld together. Stir occasionally to prevent sticking.
- Serve: Once the dish is ready, garnish with freshly chopped parsley if desired. Serve hot straight from the skillet.
Extra Tips:
When selecting sausages, choose one that suits your taste preference, as this will greatly influence the final flavor of the dish. If you prefer a milder flavor, opt for chicken or turkey sausage. For a spicier kick, a hot Italian sausage is a great choice.
If you have leftovers, this dish can be stored in an airtight container in the refrigerator for up to three days. Simply reheat in a skillet over low heat, adding a splash of water or broth if needed to prevent drying out.
Creamy Garlic Parmesan Pasta

Creamy Garlic Parmesan Pasta is a delightful and budget-friendly dish perfect for a simple dinner. This recipe combines the rich flavors of garlic and Parmesan cheese to create a creamy sauce that coats every strand of pasta. Not only is this dish easy to make, but it also requires minimal ingredients, making it an ideal choice for a quick weeknight meal.
With its savory taste and creamy texture, this pasta is sure to become a family favorite. This recipe yields enough to serve 4-6 people, making it an excellent option for a small gathering or a cozy family dinner. The preparation time is approximately 10 minutes, while the cooking time is around 20 minutes, allowing you to have a delicious meal on the table in just 30 minutes.
The simplicity of this dish means you can easily adjust the flavors to suit your taste, whether you prefer extra garlic or more Parmesan cheese.
Ingredients:
- 12 ounces of fettuccine or spaghetti
- 2 tablespoons of olive oil
- 4 cloves of garlic, minced
- 1 1/2 cups of heavy cream
- 1 cup of grated Parmesan cheese
- Salt and pepper to taste
- 1/4 cup of chopped fresh parsley (optional)
- Red pepper flakes (optional)
Cooking Instructions:
1. Cook the Pasta: Begin by bringing a large pot of salted water to a boil. Add the fettuccine or spaghetti and cook according to the package instructions until al dente. Reserve 1 cup of pasta water, then drain the rest and set the pasta aside.
2. Prepare the Garlic: In a large skillet, heat the olive oil over medium heat. Add the minced garlic and sauté for about 1-2 minutes until fragrant, being careful not to burn it.
3. Make the Sauce: Reduce the heat to low and pour in the heavy cream, stirring well to combine with the garlic. Allow the cream to heat through gently, then gradually add the grated Parmesan cheese, stirring continuously until the cheese melts and the sauce thickens.
If the sauce is too thick, add a little reserved pasta water to reach the desired consistency.
4. Combine Pasta and Sauce: Add the cooked pasta to the skillet and toss it in the creamy sauce until well-coated. Season with salt and pepper to taste. If desired, sprinkle red pepper flakes for an extra kick.
5. Garnish and Serve: Transfer the creamy garlic Parmesan pasta to serving plates. Garnish with chopped fresh parsley if desired, and serve immediately.
Extra Tips:
To enhance the flavor of this dish, consider using freshly grated Parmesan cheese instead of pre-grated varieties, as it melts more smoothly into the sauce.
If you prefer a richer sauce, a tablespoon of butter can be added along with the cream. For added protein, you can toss in cooked chicken, shrimp, or sautéed mushrooms.
Remember to keep stirring the sauce to prevent it from sticking to the pan and burning. Enjoy your meal!
Speedy Beef and Broccoli
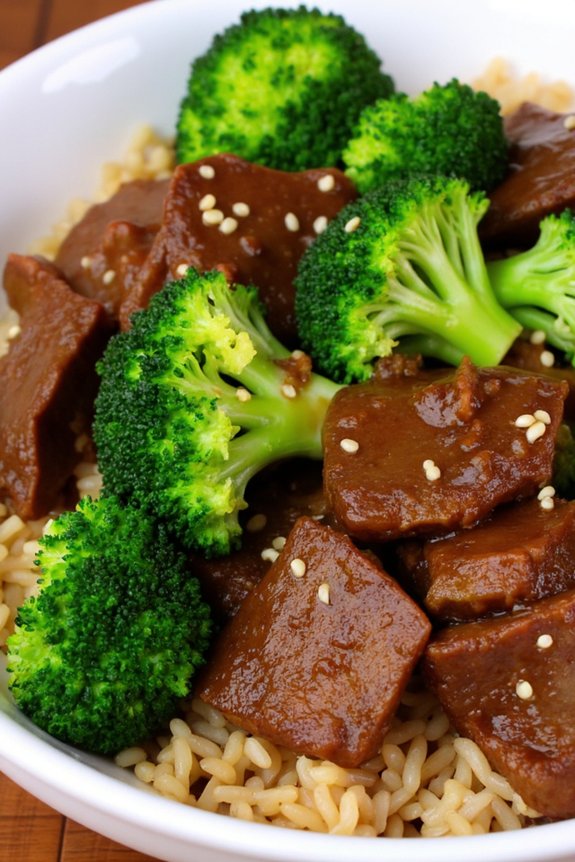
Speedy Beef and Broccoli is a delightful and quick meal perfect for busy weeknights when you’re pressed for time but still want a nutritious and satisfying dish. This recipe brings together tender beef slices with crisp broccoli florets coated in a savory sauce that will have your family asking for seconds. The dish isn’t only delicious but also budget-friendly, making it an excellent choice for those looking to save money without compromising on taste.
The beauty of Speedy Beef and Broccoli lies in its simplicity and the minimal time required to prepare it. With just a few ingredients and steps, you can have a wholesome meal on the table in under 30 minutes. This recipe serves 4-6 people, making it ideal for family dinners or small gatherings.
So, let’s plunge into the ingredients and steps needed to create this flavorful dish.
Ingredients:
- 1 1/2 pounds of beef sirloin, thinly sliced
- 4 cups broccoli florets
- 3 tablespoons vegetable oil
- 1/4 cup soy sauce
- 2 tablespoons oyster sauce
- 1 tablespoon cornstarch
- 1 tablespoon water
- 1 tablespoon minced garlic
- 1 tablespoon minced ginger
- 1 teaspoon sesame oil
- 1 teaspoon sugar
- Cooked rice, for serving
Cooking Instructions:
- Prepare the Beef and Broccoli: Begin by slicing the beef sirloin into thin strips. Wash and cut the broccoli into bite-sized florets, confirming they’re of even size for uniform cooking.
- Make the Sauce: In a small bowl, combine the soy sauce, oyster sauce, sesame oil, sugar, cornstarch, and water. Stir well to dissolve the cornstarch completely and set aside.
- Cook the Broccoli: Heat 1 tablespoon of vegetable oil in a large skillet or wok over medium-high heat. Add the broccoli florets and stir-fry for about 3-4 minutes until they’re bright green and tender-crisp. Remove the broccoli from the skillet and set it aside.
- Cook the Beef: In the same skillet, add the remaining 2 tablespoons of vegetable oil. Add the minced garlic and ginger, cooking for about 30 seconds until fragrant. Add the beef strips to the skillet and stir-fry for 3-4 minutes until they’re browned and cooked through.
- Combine and Finish: Return the broccoli to the skillet with the beef. Pour the prepared sauce over the beef and broccoli, stirring to coat everything evenly. Cook for an additional 2-3 minutes, allowing the sauce to thicken and glaze the ingredients.
- Serve: Remove from heat and serve the Speedy Beef and Broccoli over cooked rice. Enjoy your quick and delicious homemade meal!
Extra Tips:
When slicing the beef, make sure to cut against the grain to promote tenderness. If you want to save even more time, you can pre-slice the beef and prepare the sauce in advance.
Adjust the sauce’s saltiness to your taste by varying the amount of soy sauce. For added flavor, you can sprinkle sesame seeds or chopped green onions as a garnish before serving. If you prefer your broccoli softer, steam it for a couple of minutes before stir-frying.
Fast and Flavorful Shrimp Tacos

Fast and Flavorful Shrimp Tacos are a delightful and quick meal option perfect for busy weeknights or a casual family dinner. These tacos are a wonderful mix of spicy, tangy, and crisp flavors that come together beautifully in just about 30 minutes. The shrimp, seasoned with a blend of spices, are cooked to perfection and paired with a revitalizing and zesty slaw, then wrapped in warm corn tortillas. This dish isn’t only delicious but also visually appealing with its vibrant colors and textures, making it a hit for both kids and adults alike.
Preparing these shrimp tacos is straightforward, requiring minimal ingredients and effort, yet delivering an impressive outcome. The key to these tacos is the balance of flavors; the seasoned shrimp bring the heat, while the creamy slaw cools it down, and fresh lime juice ties everything together with a pop of acidity. Whether you’re looking to impress your guests or simply want a quick and satisfying meal, these Fast and Flavorful Shrimp Tacos are sure to please.
Ingredients (Serves 4-6):
- 1 1/2 lbs large shrimp, peeled and deveined
- 1 tablespoon olive oil
- 1 teaspoon chili powder
- 1/2 teaspoon cumin
- 1/2 teaspoon paprika
- 1/4 teaspoon garlic powder
- Salt and pepper to taste
- 1/2 small red cabbage, thinly sliced
- 1/4 cup mayonnaise
- 1 tablespoon lime juice
- 1 teaspoon honey
- 1/4 cup chopped fresh cilantro
- Corn tortillas
- Lime wedges (for serving)
Cooking Instructions:
- Prepare the Shrimp: In a medium bowl, combine the shrimp with olive oil, chili powder, cumin, paprika, garlic powder, salt, and pepper. Mix until the shrimp are well-coated with the seasoning.
- Cook the Shrimp: Heat a large skillet over medium-high heat. Add the seasoned shrimp to the skillet in a single layer. Cook for 2-3 minutes on each side or until the shrimp are pink and opaque. Remove from heat and set aside.
- Make the Slaw: In a large bowl, whisk together the mayonnaise, lime juice, and honey. Add the sliced cabbage and chopped cilantro to the bowl and toss until the cabbage is well-coated with the dressing. Season with salt and pepper to taste.
- Warm the Tortillas: Heat the corn tortillas in a dry skillet or microwave until they’re warm and pliable.
- Assemble the Tacos: Place a few shrimp in each tortilla, top with a generous spoonful of slaw, and add extra cilantro if desired. Serve with lime wedges on the side for squeezing over the tacos.
Extra Tips:
To add more depth of flavor, consider marinating the shrimp for 15-30 minutes before cooking. This will allow the spices to penetrate the shrimp more thoroughly.
If you prefer a bit more heat, you can add a pinch of cayenne pepper to the spice mix. Additionally, you can substitute the mayonnaise in the slaw with Greek yogurt for a healthier alternative.
Make sure to warm the tortillas properly, as this will prevent them from breaking when filled. Enjoy these vibrant tacos with a side of black beans or rice to complete the meal.
Classic Grilled Cheese and Tomato Soup

There’s something incredibly comforting about the classic combination of grilled cheese sandwiches paired with steaming hot tomato soup. This dish is a perfect choice for a simple yet satisfying dinner that can be whipped up in no time.
Whether it’s a cold winter evening or a breezy spring afternoon, this comforting duo warms the heart and fills the belly. Perfect for families or gatherings, this recipe serves 4-6 people, allowing everyone to enjoy the rich, savory flavors together.
Grilled cheese and tomato soup isn’t only a timeless favorite but also a budget-friendly meal option. With just a handful of ingredients, you can create a delectable dinner that appeals to both children and adults alike.
The creamy, tangy tomato soup perfectly complements the crispy, gooey grilled cheese, making each bite a delightful experience. Let’s plunge into this simple recipe that will quickly become a staple in your dinner rotation.
Ingredients for 4-6 servings:
- 12 slices of bread (such as white or sourdough)
- 12 slices of cheddar cheese
- 4 tablespoons of butter, softened
- 2 tablespoons olive oil
- 1 large onion, chopped
- 4 cloves garlic, minced
- 2 cans (28 ounces each) of crushed tomatoes
- 4 cups chicken or vegetable broth
- 1 teaspoon sugar
- Salt and pepper to taste
- 1/2 cup heavy cream or milk
- Fresh basil leaves for garnish (optional)
Cooking Instructions:
- Prepare the Tomato Soup:
- Heat olive oil in a large pot over medium heat. Add the chopped onion and cook until translucent, about 5 minutes. Stir in the minced garlic and cook for another minute until fragrant.
- Pour in the crushed tomatoes and chicken or vegetable broth. Add sugar, salt, and pepper, stirring to combine. Bring the mixture to a simmer and let it cook for 20 minutes to blend the flavors.
- Once cooked, use an immersion blender to puree the soup until smooth. Alternatively, carefully transfer the soup in batches to a blender and puree. Return the soup to the pot and stir in the heavy cream or milk. Keep the soup warm over low heat.
- Make the Grilled Cheese Sandwiches:
- Preheat a large skillet or griddle over medium heat. Spread softened butter evenly on one side of each slice of bread.
- Place a slice of cheese between two slices of bread, with the buttered sides facing outwards. Repeat this process for all sandwiches.
- Place the sandwiches in the skillet and cook for 3-4 minutes on each side, or until the bread is golden brown and the cheese has melted. Adjust the heat as necessary to avoid burning.
- Serve:
- Ladle the hot tomato soup into bowls and garnish with fresh basil leaves if desired. Slice the grilled cheese sandwiches in half and serve alongside the soup for dipping and enjoyment.
Extra Tips:
For the creamiest tomato soup, verify the heavy cream or milk is added at the end to prevent curdling. If you prefer a thicker soup, reduce the amount of broth or let it simmer longer to evaporate some liquid.
For a twist on the traditional grilled cheese, try adding fillings such as tomato slices, bacon, or a sprinkle of herbs inside the sandwich. Finally, using a mix of cheeses like mozzarella or Swiss along with cheddar can add depth to the flavor of your grilled cheese. Enjoy this comforting meal with your loved ones!
Easy Baked Ziti With Spinach
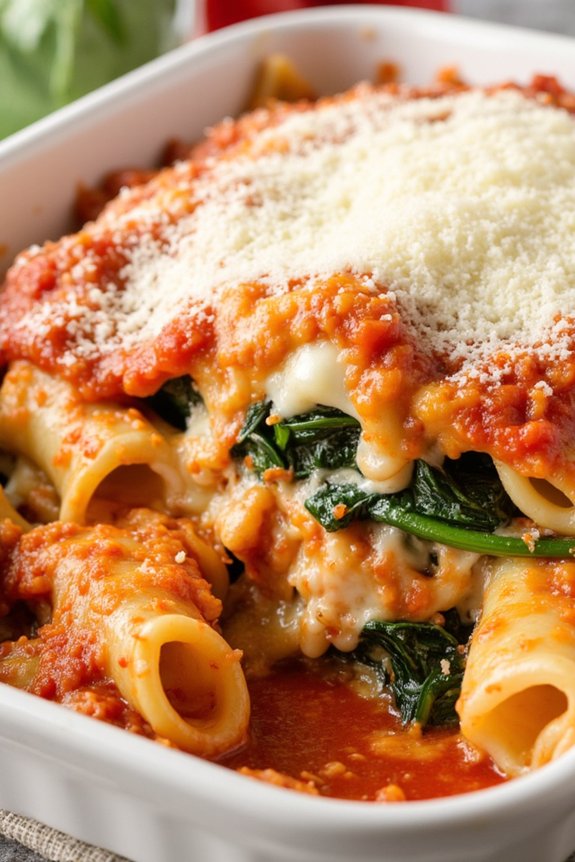
Baked ziti is a classic comfort food that’s perfect for a family dinner or any casual gathering. Adding spinach to the dish not only enhances its nutritional value but also adds a fresh twist to the traditional recipe. This easy baked ziti with spinach is a simple yet delightful dish that can be prepared with minimal ingredients and effort.
With its gooey cheese, hearty pasta, and healthy greens, this meal is certain to satisfy both adults and children alike. This recipe is ideal for busy weeknights when you need to whip up something filling and delicious without spending hours in the kitchen. The steps are straightforward, and the ingredients are budget-friendly, making it a perfect choice for those looking to enjoy a home-cooked meal without breaking the bank.
In just under an hour, you can have a piping hot dish on the table that everyone will love.
Ingredients (Serves 4-6):
- 1 pound ziti pasta
- 2 tablespoons olive oil
- 3 cloves garlic, minced
- 1 jar (24 ounces) marinara sauce
- 2 cups fresh spinach leaves
- 1 teaspoon dried Italian seasoning
- Salt and pepper to taste
- 1 cup ricotta cheese
- 2 cups shredded mozzarella cheese
- 1/2 cup grated Parmesan cheese
Cooking Instructions:
- Preheat the Oven: Begin by preheating your oven to 375°F (190°C) to make certain it’s ready for baking once your ziti is assembled.
- Cook the Pasta: In a large pot, bring salted water to a boil. Add the ziti pasta and cook until al dente, following the package instructions. Drain the pasta and set it aside.
- Sauté the Garlic: In a large skillet, heat the olive oil over medium heat. Add the minced garlic and sauté for about 1 minute until it becomes fragrant, being careful not to let it burn.
- Add the Sauce and Spinach: Pour the marinara sauce into the skillet with the garlic. Stir in the fresh spinach leaves, Italian seasoning, salt, and pepper. Cook for a few minutes until the spinach wilts and the sauce is heated through.
- Mix Pasta and Sauce: In a large mixing bowl, combine the cooked ziti with the sauce and spinach mixture. Add the ricotta cheese and half of the mozzarella cheese. Stir well to evenly distribute the ingredients.
- Assemble the Dish: Transfer the ziti mixture into a greased baking dish. Sprinkle the remaining mozzarella cheese and the Parmesan cheese evenly over the top.
- Bake: Place the baking dish in the preheated oven and bake for 25-30 minutes, or until the cheese is melted and golden brown on top.
- Serve: Remove from the oven and let it cool for a few minutes before serving. Enjoy your easy baked ziti with spinach warm.
Extra Tips:
For an extra burst of flavor, consider adding a pinch of red pepper flakes to the sauce for a subtle kick. You can also substitute whole wheat pasta or gluten-free pasta to accommodate dietary preferences.
If you want to make the dish even more protein-rich, try adding cooked ground turkey or chicken sausage to the sauce. Remember to taste the sauce before combining it with the pasta to adjust the seasoning to your liking.
Quick Chicken Quesadillas

Quick Chicken Quesadillas are a perfect meal for those evenings when you need something delicious and satisfying, yet easy to prepare. This dish combines the savory flavors of chicken, cheese, and spices all melted together inside a crispy tortilla. With minimal preparation and cooking time, these quesadillas are an ideal choice for a family dinner or casual get-together with friends.
This recipe is designed to serve 4-6 people, making it a great option for small gatherings or a family meal. The ingredients are simple and easily accessible, guaranteeing that you can whip up this dish without any hassle. The quesadillas can be served with a variety of dips and sides, such as salsa, guacamole, or sour cream, enhancing their flavor and making them even more enjoyable.
Ingredients:
- 2 cups cooked chicken breast, shredded
- 1 tablespoon olive oil
- 1 teaspoon chili powder
- 1 teaspoon cumin
- Salt and pepper to taste
- 2 cups shredded cheddar cheese
- 8 large flour tortillas
- 1/2 cup chopped bell peppers
- 1/2 cup chopped onions
- 1/4 cup chopped fresh cilantro
- Butter or cooking spray for frying
Cooking Instructions:
- Prepare the Chicken Filling: In a large skillet, heat the olive oil over medium heat. Add the shredded chicken, chili powder, cumin, salt, and pepper. Stir everything together until the chicken is evenly coated with the spices. Cook for about 5 minutes, until the chicken is heated through and fragrant. Remove from heat and set aside.
- Prepare the Tortillas: Lay out the flour tortillas on a clean surface. Evenly distribute the cooked chicken onto one half of each tortilla. Top the chicken with shredded cheese, bell peppers, onions, and cilantro.
- Assemble the Quesadillas: Fold each tortilla in half, pressing gently to secure the filling inside. If necessary, you can use a little bit of cheese on the edges to help seal the tortillas.
- Cook the Quesadillas: Heat a large non-stick skillet over medium heat and add a small amount of butter or cooking spray. Place the assembled quesadillas in the skillet, cooking 2-3 at a time depending on the size of your skillet. Cook each side for about 3-4 minutes, or until the tortillas are golden brown and the cheese has melted.
- Serve and Enjoy: Remove the quesadillas from the skillet and let them cool for a minute. Cut each quesadilla into wedges and serve warm with your favorite dips like salsa, guacamole, or sour cream.
Extra Tips:
For a healthier version, you can use whole wheat tortillas and low-fat cheese. If you prefer a spicier quesadilla, consider adding jalapeños or a dash of hot sauce to the chicken mixture.
Always verify the skillet isn’t too hot to avoid burning the tortillas before the cheese melts. You can also prepare the chicken filling in advance and store it in the refrigerator for up to two days, which makes assembling this dish even quicker.