

As a busy mom, I understand the challenge of finding dinner recipes that are both affordable and delicious for the entire family. Picture a comforting pot of beef and vegetable stew or the mouthwatering allure of cheesy baked ziti. These meals bring everyone together at the table with excitement. It’s not just about feeding hungry tummies—it’s about creating meals that everyone looks forward to. Let’s explore some savory and budget-friendly recipes perfect for big family dinners.
Hearty Beef and Vegetable Stew
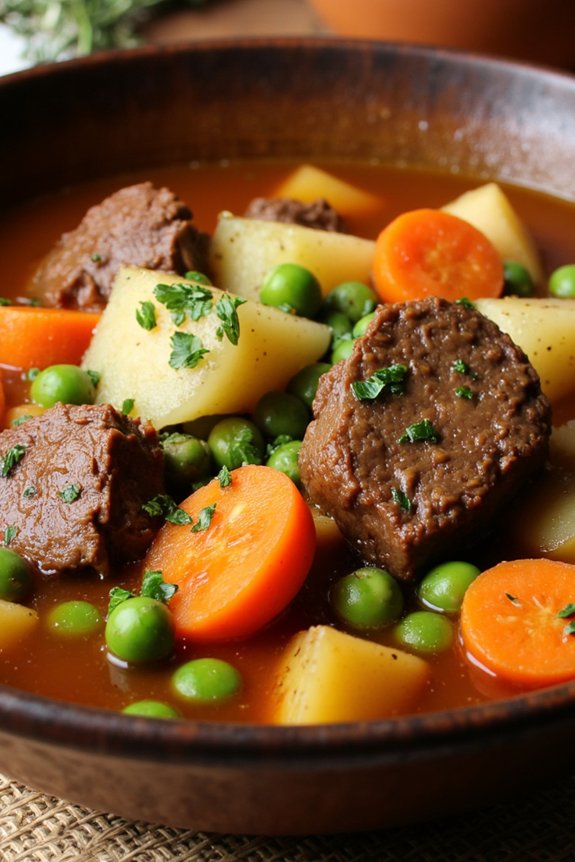
Hearty Beef and Vegetable Stew is a delicious and nourishing meal that’s perfect for feeding big families without breaking the bank. It’s a one-pot dish that combines tender beef, a variety of colorful vegetables, and a blend of savory herbs and spices. This stew isn’t only filling but also packed with nutrients, making it an excellent choice for dinner.
The slow cooking process allows the flavors to meld together beautifully, resulting in a comforting dish that’s perfect for cold evenings or whenever you need a satisfying meal. This recipe is designed to serve 4-6 people, making it ideal for larger households.
The stew’s warm and inviting aroma will fill your kitchen as it simmers, creating a cozy atmosphere that invites everyone to the table. It’s versatile enough that you can adjust the ingredients based on what’s in season or what you have on hand, making it a practical and adaptable choice for families.
Whether served on its own, with crusty bread, or over a bed of rice, this Hearty Beef and Vegetable Stew is sure to become a family favorite.
Ingredients:
- 2 pounds beef chuck, cut into 1-inch cubes
- 2 tablespoons vegetable oil
- 1 large onion, chopped
- 3 cloves garlic, minced
- 4 cups beef broth
- 1 cup water
- 3 large carrots, sliced
- 3 potatoes, peeled and cubed
- 2 stalks celery, chopped
- 1 cup frozen peas
- 2 tablespoons tomato paste
- 1 teaspoon dried thyme
- 1 teaspoon dried rosemary
- 1 bay leaf
- Salt and pepper to taste
- 2 tablespoons flour (optional, for thickening)
- 2 tablespoons fresh parsley, chopped (for garnish)
Instructions:
- Prepare the Beef: Begin by seasoning the beef cubes with salt and pepper. Heat the vegetable oil in a large pot or Dutch oven over medium-high heat. Once hot, add the beef in batches, browning all sides. This step is essential for developing the stew’s depth of flavor. Remove the beef from the pot and set aside.
- Sauté the Aromatics: In the same pot, add the chopped onion and minced garlic. Sauté for about 3-4 minutes until the onion is translucent and the garlic is fragrant.
- Deglaze and Combine Ingredients: Return the beef to the pot. Stir in the tomato paste, ensuring it coats the beef and aromatics. Pour in the beef broth and water, scraping up any browned bits from the bottom of the pot. This deglazing process enhances the stew’s flavor.
- Add Vegetables and Seasonings: Add the carrots, potatoes, celery, thyme, rosemary, and bay leaf to the pot. Bring the mixture to a simmer. Cover the pot and reduce the heat to low. Allow the stew to cook for about 1.5 to 2 hours, or until the beef is tender and the vegetables are cooked through.
- Final Touches: About 15 minutes before the stew is finished, add the frozen peas. Taste and adjust the seasoning with more salt and pepper if necessary. If you prefer a thicker stew, mix the flour with a bit of water to create a slurry and stir it into the pot.
- Serve: Remove the bay leaf before serving. Garnish the stew with fresh parsley, and serve it hot with your choice of side.
Extra Tips:
For an even more flavorful stew, consider marinating the beef cubes in red wine for a few hours before cooking. This adds a rich depth to the dish.
If you want to make this recipe even more budget-friendly, substitute the beef with less expensive cuts or use leftover roast beef. You can also add other vegetables like parsnips or turnips based on what you have available.
For a thicker stew, allow it to simmer uncovered for the last 30 minutes. Enjoy your Hearty Beef and Vegetable Stew with some warm, crusty bread for an unforgettable meal.
Cheesy Baked Ziti With Sausage

Cheesy Baked Ziti With Sausage is a comforting, hearty, and delicious dish perfect for feeding a large family. This recipe combines the rich flavors of Italian sausage, marinara sauce, and a blend of cheeses, all enveloped in tender pasta. It’s an easy-to-make, budget-friendly meal that will satisfy even the pickiest eaters.
Whether you’re planning a weeknight dinner or a family gathering, this dish is certain to become a favorite. The beauty of Cheesy Baked Ziti With Sausage lies in its versatility. You can customize it to suit your family’s taste preferences, making it as cheesy or as spicy as you like.
Plus, it’s a great make-ahead meal; you can prepare it in advance and simply pop it in the oven when you’re ready to eat. This recipe serves 4-6 people, making it ideal for a big family meal with potential for leftovers that taste even better the next day.
Ingredients:
- 1 pound ziti pasta
- 1 pound Italian sausage (mild or spicy, based on preference)
- 2 cups marinara sauce
- 1 cup ricotta cheese
- 2 cups shredded mozzarella cheese
- 1/2 cup grated Parmesan cheese
- 1 teaspoon Italian seasoning
- 2 cloves garlic, minced
- 1 tablespoon olive oil
- Salt and pepper to taste
- Fresh basil leaves for garnish (optional)
Cooking Instructions:
- Preheat Oven: Start by preheating your oven to 375°F (190°C).
- Cook Pasta: Bring a large pot of salted water to a boil. Add the ziti pasta and cook until al dente, according to package instructions. Drain the pasta and set aside.
- Cook Sausage: In a large skillet, heat the olive oil over medium heat. Add the minced garlic and sauté until fragrant, about 1 minute. Add the Italian sausage, breaking it up with a spoon, and cook until browned and cooked through, about 5-7 minutes.
- Combine Ingredients: In a large mixing bowl, combine the cooked pasta, cooked sausage, marinara sauce, ricotta cheese, half of the mozzarella cheese, and Italian seasoning. Mix well, making sure the pasta is evenly coated.
- Assemble Dish: Transfer half of the pasta mixture into a 9×13-inch baking dish. Sprinkle half of the remaining mozzarella cheese over the top. Add the rest of the pasta mixture, then finish with the remaining mozzarella and the Parmesan cheese.
- Bake: Cover the dish with aluminum foil and bake in the preheated oven for 25 minutes. Remove the foil and bake for an additional 10 minutes, or until the cheese is bubbly and golden brown.
- Serve: Remove from the oven and let it cool for a few minutes. Garnish with fresh basil leaves if desired, and serve hot.
Extra Tips:
For a deeper flavor, consider using a mix of sweet and spicy sausage. If you prefer more vegetables in your meal, you can add in chopped bell peppers or mushrooms when cooking the sausage.
Make certain the pasta isn’t overcooked before baking, as it will continue to cook in the oven. Finally, this dish can be made ahead and stored in the refrigerator for up to 24 hours before baking, making it a convenient option for busy days.
Classic Chicken and Rice Casserole

Classic Chicken and Rice Casserole is a timeless and comforting dish that’s perfect for feeding big families on a budget. This hearty casserole combines tender chicken, fluffy rice, and a creamy sauce, all baked together to create a deliciously satisfying meal.
It’s an ideal choice for busy weeknights or when you need to prepare food in advance, as it can easily be assembled and stored in the refrigerator until you’re ready to bake it. This dish isn’t only economical but also versatile, allowing you to adjust the ingredients to suit your family’s taste preferences.
The great thing about Classic Chicken and Rice Casserole is its simplicity. With just a few basic ingredients, you can create a filling and nutritious meal that everyone will love. The creamy sauce ties everything together, while the rice absorbs all the flavors, making each bite irresistible.
Plus, it’s easy to double the recipe if you’re expecting extra guests or want leftovers for the next day. This recipe is designed to serve 4-6 people, making it perfect for larger families.
Ingredients (Serves 4-6):
- 2 cups cooked chicken, shredded or diced
- 1 cup uncooked white rice
- 2 cups chicken broth
- 1 can (10.5 oz) cream of mushroom soup
- 1 can (10.5 oz) cream of chicken soup
- 1 cup milk
- 1 cup shredded cheddar cheese
- 1 small onion, finely chopped
- 1 tablespoon olive oil
- 1 teaspoon garlic powder
- 1 teaspoon onion powder
- Salt and pepper to taste
- 1/2 cup frozen peas (optional)
- 1/2 cup sliced mushrooms (optional)
- Cooking spray
Instructions:
- Preheat the Oven: Start by preheating your oven to 350°F (175°C). This will guarantee it’s hot and ready to bake the casserole once it’s assembled.
- Prepare the Rice: In a medium saucepan, combine the uncooked rice with the chicken broth. Bring it to a boil over medium-high heat, then reduce the heat to low, cover, and let it simmer for about 15 minutes, or until the rice is tender and the liquid has been absorbed.
- Sauté the Onion: While the rice is cooking, heat the olive oil in a small skillet over medium heat. Add the chopped onion and sauté until translucent, about 5 minutes. If you’re using sliced mushrooms, add them to the skillet and sauté until they’re tender.
- Mix the Ingredients: In a large mixing bowl, combine the cooked rice, sautéed onion (and mushrooms, if using), shredded chicken, cream of mushroom soup, cream of chicken soup, milk, garlic powder, onion powder, salt, and pepper. Stir well to confirm everything is evenly mixed.
- Assemble the Casserole: Lightly spray a 9×13-inch baking dish with cooking spray. Pour the mixture into the baking dish, spreading it out evenly.
- Add Cheese: Sprinkle the shredded cheddar cheese evenly over the top of the casserole. If you like, you can also add the frozen peas on top for extra color and nutrition.
- Bake: Place the dish in the preheated oven and bake for 25-30 minutes, or until the cheese is melted and bubbling, and the casserole is heated through.
- Serve: Remove the casserole from the oven and let it cool slightly before serving. Enjoy your Classic Chicken and Rice Casserole with a side salad or steamed vegetables.
Extra Tips:
When preparing this dish, feel free to customize it by adding your family’s favorite vegetables, such as broccoli or bell peppers, for added nutrition and flavor.
You can also use rotisserie chicken to save time on cooking. For a healthier twist, consider using brown rice instead of white rice, but keep in mind that it may require a longer cooking time.
If you prefer a bit of crunch, top the casserole with some crushed crackers or breadcrumbs before baking. This dish is also freezer-friendly; simply assemble it, cover tightly, and freeze, then bake straight from frozen, adding 10-15 minutes to the baking time.
Flavorful Lentil and Sweet Potato Curry
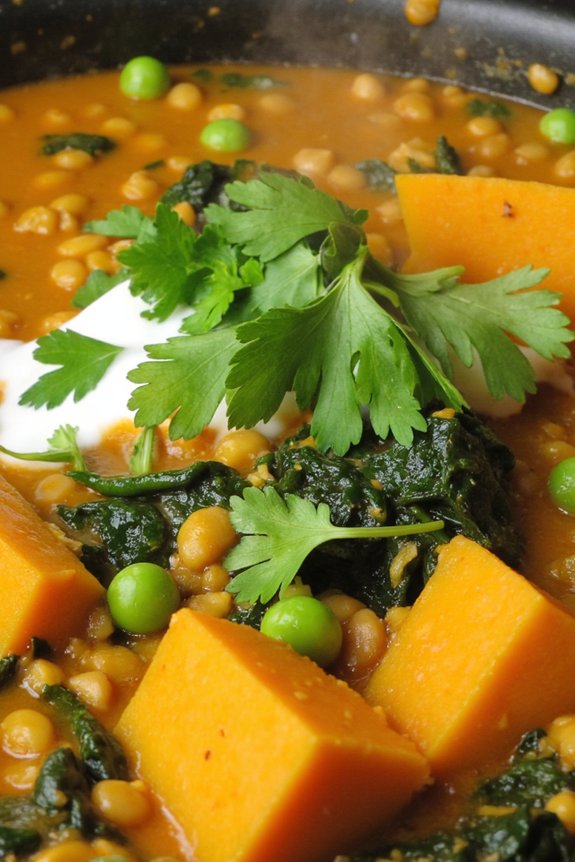
This Flavorful Lentil and Sweet Potato Curry is a perfect choice for big families looking for a hearty, nutritious, and budget-friendly meal. Packed with protein-rich lentils and the natural sweetness of sweet potatoes, this curry isn’t only delicious but also incredibly satisfying.
The combination of spices creates a warming, aromatic dish that’s sure to please even the pickiest eaters. This recipe is designed to serve between 4-6 people, making it an ideal option for larger households or for those who enjoy having leftovers for the next day.
The dish is also versatile and can easily be adjusted to suit different tastes or dietary needs. You can add more vegetables or adjust the level of spice to cater to everyone’s preferences. Additionally, this curry can be cooked in one pot, reducing the amount of cleanup needed after dinner.
Serve it with rice or naan bread for a complete meal that’s sure to become a family favorite.
Ingredients:
- 1 tablespoon vegetable oil
- 1 large onion, finely chopped
- 3 cloves garlic, minced
- 1 tablespoon fresh ginger, grated
- 1 tablespoon curry powder
- 1 teaspoon ground cumin
- 1 teaspoon ground coriander
- 1/2 teaspoon turmeric
- 1/2 teaspoon cayenne pepper (optional)
- 2 medium sweet potatoes, peeled and diced
- 1 cup dried lentils, rinsed and drained
- 1 can (14 oz) coconut milk
- 2 cups vegetable broth
- Salt and pepper to taste
- 1 cup frozen peas
- 1 handful fresh spinach
- Fresh cilantro, chopped (for garnish)
Instructions:
- Prepare the Aromatics: In a large pot, heat the vegetable oil over medium heat. Add the chopped onion and sauté for about 5 minutes until it becomes translucent. Stir in the minced garlic and grated ginger, cooking for an additional 2 minutes until fragrant.
- Add the Spices: Sprinkle in the curry powder, ground cumin, ground coriander, turmeric, and cayenne pepper (if using). Stir the spices into the onion mixture, allowing them to toast for about 1 minute to release their flavors.
- Incorporate the Vegetables and Lentils: Add the diced sweet potatoes and rinsed lentils into the pot. Mix well to coat them with the spice mixture.
- Simmer the Curry: Pour in the coconut milk and vegetable broth, stirring to combine. Season with salt and pepper. Bring the mixture to a boil, then reduce the heat to low and let it simmer uncovered for about 25-30 minutes, or until the sweet potatoes and lentils are tender.
- Finish the Dish: Stir in the frozen peas and fresh spinach, cooking for an additional 5 minutes until the peas are heated through and the spinach is wilted. Adjust the seasoning as needed.
- Serve and Garnish: Ladle the curry into bowls and garnish with freshly chopped cilantro. Serve hot with rice or naan bread on the side.
Extra Tips:
When cooking this curry, feel free to experiment with the level of spices to match your family’s taste preferences. If you prefer a spicier dish, add more cayenne pepper or a dash of chili flakes.
For a creamier texture, consider adding an extra half can of coconut milk. To save time, you can prepare the ingredients in advance, such as chopping the vegetables, so that the cooking process is quicker when you’re ready to make the curry.
This dish also freezes well, so consider making a double batch to have a convenient meal ready for another day.
Savory Shepherd’s Pie With Mashed Potatoes
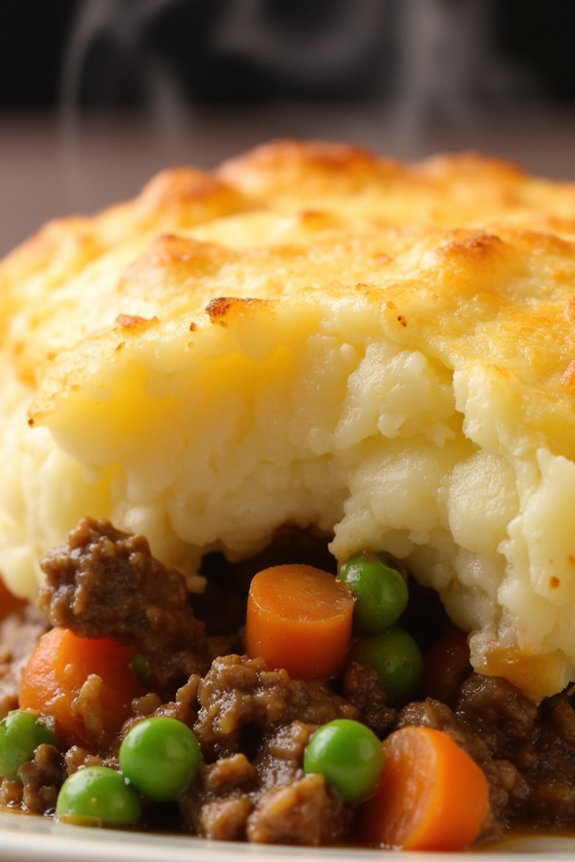
Savory Shepherd’s Pie with Mashed Potatoes is a classic comfort dish that brings warmth and satisfaction to the dinner table. This hearty meal is perfect for big families, combining rich meat flavors with creamy mashed potatoes baked to a golden perfection. Originating from the British Isles, Shepherd’s Pie traditionally uses lamb, but in this recipe, we’ll use ground beef for a delicious twist that’s both accessible and budget-friendly. This dish isn’t only filling but also incredibly easy to prepare, making it an ideal choice for a busy weeknight dinner.
The beauty of Shepherd’s Pie lies in its simplicity and the ability to customize it according to personal taste preferences. The savory meat filling is cooked with a medley of vegetables and seasoned with herbs, creating a deliciously flavorful base. Topping it with a layer of fluffy mashed potatoes adds a comforting element that complements the savory filling. Baked to perfection, each bite offers a delightful combination of textures and flavors. Whether you’re feeding a large family or preparing for a gathering, this dish is sure to be a crowd-pleaser.
Ingredients (Serves 4-6):
- 1 1/2 pounds ground beef
- 1 medium onion, chopped
- 2 cloves garlic, minced
- 1 cup frozen peas
- 1 cup diced carrots
- 1 cup beef broth
- 2 tablespoons tomato paste
- 1 teaspoon Worcestershire sauce
- 1 teaspoon dried thyme
- Salt and pepper to taste
- 4 cups mashed potatoes (prepared or homemade)
- 1/4 cup shredded cheddar cheese (optional)
Cooking Instructions:
- Prepare the Meat Filling: In a large skillet over medium heat, cook the ground beef until it’s browned and cooked through. Drain any excess fat. Add the chopped onion and minced garlic, cooking for an additional 3-5 minutes until the onion becomes translucent.
- Add Vegetables and Seasoning: Stir in the diced carrots and frozen peas. Cook for another 5 minutes. Pour in the beef broth, tomato paste, Worcestershire sauce, and dried thyme. Stir the mixture well, and let it simmer for 10 minutes. Season with salt and pepper to taste.
- Preheat the Oven: While the meat filling is simmering, preheat your oven to 400°F (200°C).
- Assemble the Pie: Transfer the meat and vegetable mixture into a baking dish, spreading it evenly. Spoon the mashed potatoes over the top, smoothing it out to cover the filling completely. If desired, sprinkle shredded cheddar cheese over the potatoes.
- Bake: Place the baking dish in the preheated oven and bake for 25-30 minutes, or until the mashed potatoes are golden brown on top and the filling is bubbling around the edges.
- Serve: Allow the Shepherd’s Pie to cool slightly before serving. This will make it easier to cut and serve.
Extra Tips:
For a richer mashed potato topping, consider mixing in a bit of butter and cream or milk during preparation. You can also add grated cheese, chives, or garlic powder to enhance the flavor. If you prefer a traditional lamb Shepherd’s Pie, simply substitute the ground beef with ground lamb. For added convenience, use leftover mashed potatoes or instant mashed potatoes for a quick fix. Finally, feel free to add other vegetables, such as corn or mushrooms, to customize the dish to your family’s liking.
Budget-Friendly Taco Night With Homemade Toppings

Taco night is a favorite for many families, offering a fun, interactive meal that can easily be adapted to suit everyone’s tastes. However, feeding a large family can sometimes be costly. This budget-friendly taco night recipe focuses on using simple, affordable ingredients while still providing a delicious and satisfying meal. The key is in the homemade toppings, which are both economical and flavorful, allowing you to customize each taco to perfection.
This recipe is designed to serve 4-6 people, making it perfect for a big family dinner. With the use of basic pantry staples and fresh produce, you can whip up a variety of toppings that will make everyone feel like they’re getting a special meal. From seasoned ground beef to a revitalizing salsa, each component is easy to prepare and sure to be a hit at your next taco night.
Ingredients:
- 1 pound ground beef
- 1 packet taco seasoning
- 12 taco shells
- 1 cup shredded lettuce
- 1 cup shredded cheddar cheese
- 2 tomatoes, diced
- 1 small onion, finely chopped
- 1 can (15 oz) black beans, drained and rinsed
- 1 cup corn kernels (fresh, frozen, or canned)
- 1 avocado, sliced
- 1 cup sour cream
- 1 lime, cut into wedges
- Salt and pepper to taste
Instructions:
- Prepare the Ground Beef: In a large skillet, cook the ground beef over medium heat until fully browned, breaking it apart with a spatula as it cooks. Drain excess fat, if necessary. Add the taco seasoning and a little water (about 1/4 cup) to the beef, stirring to combine. Let it simmer for a few minutes until the seasoning is thoroughly mixed in. Remove from heat and set aside.
- Warm the Taco Shells: Preheat the oven to 350°F (175°C). Arrange the taco shells on a baking sheet and heat them in the oven for about 5-7 minutes, or until they’re warm and slightly crispy. Remove from the oven and keep them warm.
- Prepare the Toppings: While the taco shells are warming, prepare the toppings. In a small bowl, combine the diced tomatoes and chopped onion, seasoning with a pinch of salt and pepper. This will be your fresh tomato salsa. In another bowl, mix the black beans and corn, adding a squeeze of lime juice and a bit of salt to taste.
- Assemble the Tacos: Set up a taco assembly station with all the prepared ingredients. Start by filling each taco shell with a spoonful of seasoned ground beef. Add a layer of lettuce, followed by a sprinkle of shredded cheese. Top with tomato salsa, black bean and corn mixture, and sliced avocado. Finish with a dollop of sour cream and a lime wedge on the side for squeezing over the top.
- Serve and Enjoy: Serve the tacos immediately while the shells are still warm. Allow your family to customize their tacos with their preferred toppings, making it a fun and interactive meal experience.
Extra Tips:
To make this meal even more budget-friendly, consider making your own taco seasoning using spices you already have in your pantry, such as chili powder, cumin, garlic powder, and paprika.
Additionally, you can stretch the ground beef further by adding cooked rice or quinoa to the mixture. If you have any leftover toppings, they can easily be repurposed for a salad or a burrito the next day.
Don’t forget to adjust the spice levels to suit your family’s preferences by adding or reducing the amount of chili powder or using a milder taco seasoning mix.
One-Pot Pasta Primavera
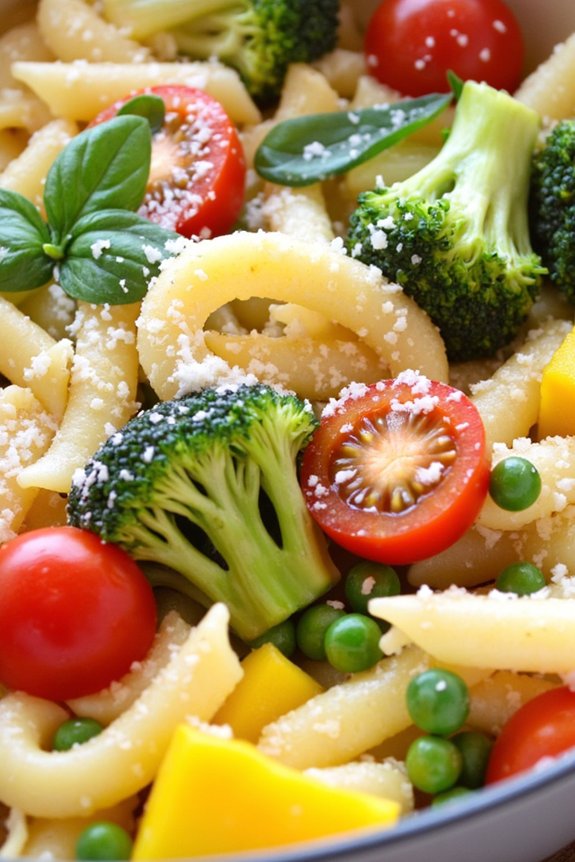
One-Pot Pasta Primavera is a delightful and budget-friendly meal perfect for feeding a big family. This dish combines tender pasta with a variety of colorful, fresh vegetables, all cooked together in one pot for easy preparation and minimal cleanup.
It’s a versatile recipe that allows you to use whatever vegetables you have on hand, making it both convenient and economical. The vibrant flavors and creamy texture of the sauce make it a favorite for both adults and kids alike.
Pasta Primavera is a great way to incorporate more vegetables into your family’s diet without compromising on taste. This dish isn’t only satisfying but also nutritious, providing a good balance of carbohydrates, fiber, and vitamins.
By cooking everything in one pot, you save time and energy, making it an ideal choice for busy weeknights. The following recipe serves 4-6 people, ensuring there’s plenty to go around.
Ingredients:
- 1 pound of penne or fusilli pasta
- 2 tablespoons olive oil
- 1 medium onion, diced
- 3 cloves garlic, minced
- 2 cups broccoli florets
- 1 bell pepper, sliced (any color)
- 1 zucchini, sliced
- 1 yellow squash, sliced
- 1 cup cherry tomatoes, halved
- 1 cup frozen peas
- 4 cups vegetable broth
- 1 cup heavy cream
- 1/2 cup grated Parmesan cheese
- Salt and pepper to taste
- 1/4 cup fresh basil leaves, chopped
Cooking Instructions:
- Prep the Ingredients: Begin by washing and preparing all the vegetables. Dice the onion, mince the garlic, and slice the bell pepper, zucchini, and yellow squash. Halve the cherry tomatoes and set all the vegetables aside.
- Sauté the Aromatics: In a large pot or Dutch oven, heat the olive oil over medium heat. Add the diced onion and minced garlic, and sauté until the onion becomes translucent and fragrant, about 3-4 minutes.
- Add the Vegetables: Add the broccoli, bell pepper, zucchini, yellow squash, cherry tomatoes, and frozen peas to the pot. Stir everything together and cook for about 5 minutes, allowing the vegetables to begin to soften.
- Cook the Pasta: Pour in the vegetable broth and bring the mixture to a boil. Add the pasta, ensuring it’s submerged in the broth. Reduce the heat to a simmer and cook for 10-12 minutes, stirring occasionally, until the pasta is al dente and most of the liquid is absorbed.
- Make the Sauce: Stir in the heavy cream and grated Parmesan cheese. Continue to cook for an additional 2-3 minutes, allowing the sauce to thicken and coat the pasta and vegetables evenly.
- Season and Serve: Season the pasta with salt and pepper to taste. Remove from heat and stir in the fresh basil. Serve the One-Pot Pasta Primavera hot, garnished with extra Parmesan cheese if desired.
Extra Tips: For a more protein-rich version, consider adding cooked chicken or shrimp. If you prefer a vegetarian version, you can substitute the Parmesan cheese with a plant-based alternative.
Feel free to adjust the vegetables based on what’s in season or what you have available in your pantry. Using whole-grain pasta can add extra fiber, and a squeeze of lemon juice just before serving can enhance the flavors beautifully.
Oven-Baked BBQ Chicken Drumsticks

Oven-Baked BBQ Chicken Drumsticks are a delightful and economical choice for big families looking to enjoy a hearty meal without breaking the bank. This recipe is perfect for those weeknight dinners where time is of the essence, yet you want to guarantee everyone leaves the table satisfied.
The succulent chicken drumsticks are marinated in a rich BBQ sauce, allowing the flavors to fully penetrate the meat. When baked, they achieve a crispy exterior while remaining juicy and tender inside, making them irresistible to both kids and adults alike.
The beauty of this dish lies in its simplicity and the way it brings everyone together over a shared love for delicious, home-cooked food. Whether you’re planning a family dinner or a casual gathering, these Oven-Baked BBQ Chicken Drumsticks are sure to be a hit.
The recipe is straightforward and requires minimal prep work, so you can spend less time in the kitchen and more time enjoying the company of loved ones. With a few pantry staples and some fresh chicken drumsticks, you’ll have a crowd-pleasing meal ready in no time.
Ingredients (Serves 4-6):
- 12 chicken drumsticks
- 1 cup BBQ sauce
- 2 tablespoons olive oil
- 1 tablespoon apple cider vinegar
- 1 teaspoon garlic powder
- 1 teaspoon onion powder
- 1 teaspoon smoked paprika
- 1 teaspoon salt
- 1/2 teaspoon black pepper
Cooking Instructions:
- Preheat the Oven: Set your oven to 400°F (200°C) and allow it to preheat while you prepare the drumsticks.
- Prepare the Marinade: In a large mixing bowl, combine the BBQ sauce, olive oil, apple cider vinegar, garlic powder, onion powder, smoked paprika, salt, and black pepper. Mix well to create a smooth and flavorful marinade.
- Marinate the Chicken: Add the chicken drumsticks to the bowl with the marinade. Toss the drumsticks until they’re evenly coated with the sauce. For best results, cover the bowl and let the chicken marinate in the refrigerator for at least 30 minutes to an hour. This allows the flavors to fully infuse into the meat.
- Arrange on Baking Sheet: Line a baking sheet with aluminum foil or parchment paper for easy cleanup. Arrange the drumsticks on the baking sheet in a single layer, guaranteeing they aren’t touching each other.
- Bake the Drumsticks: Place the baking sheet in the preheated oven and bake for 35-45 minutes. Halfway through the cooking time, flip the drumsticks to guarantee even cooking and that they’re nicely browned on all sides.
- Check for Doneness: Use a meat thermometer to check that the internal temperature of the chicken has reached 165°F (74°C). This guarantees that the chicken is fully cooked and safe to eat.
- Serve: Once cooked, remove the drumsticks from the oven and let them rest for a few minutes before serving. This allows the juices to redistribute, keeping the meat moist and flavorful.
Extra Tips:
For an added layer of flavor, consider broiling the drumsticks for the last 5 minutes of cooking. This will caramelize the BBQ sauce and give the chicken an extra crispy finish.
If you prefer a spicier kick, add a dash of cayenne pepper or hot sauce to the marinade. Leftover drumsticks can be stored in an airtight container in the refrigerator for up to three days, making them a convenient option for quick meals later in the week.
Creamy Broccoli and Cheddar Soup

Creamy Broccoli and Cheddar Soup is a delightful, comforting dish that’s perfect for feeding a big family without breaking the bank. This soup combines the hearty goodness of broccoli with the rich, tangy taste of cheddar cheese, creating a warm and satisfying meal that everyone will enjoy. Not only is this soup delicious, but it’s also easy to make, requiring minimal ingredients and time, making it an ideal option for busy weeknights.
When cooking for a larger group, it’s important to keep the dish both cost-effective and filling. This recipe for Creamy Broccoli and Cheddar Soup is designed to serve 4-6 people, guaranteeing there’s plenty to go around. With a few basic ingredients and some simple steps, you’ll have a homemade meal that will leave everyone asking for seconds. This soup can be paired with crusty bread for an even heartier meal.
Ingredients (serves 4-6):
- 4 cups broccoli florets
- 1 medium onion, chopped
- 2 cloves garlic, minced
- 4 cups chicken or vegetable broth
- 2 cups shredded cheddar cheese
- 1 cup heavy cream
- 2 tablespoons butter
- 2 tablespoons all-purpose flour
- Salt and pepper to taste
Cooking Instructions:
- Prepare the Vegetables: Begin by chopping the broccoli into small florets and finely chopping the onion. Mince the garlic cloves.
- Sauté the Onion and Garlic: In a large pot, melt the butter over medium heat. Add the chopped onion and cook until it becomes translucent, about 5 minutes. Stir in the minced garlic and cook for an additional minute until fragrant.
- Add Broccoli and Broth: Add the broccoli florets to the pot and pour in the chicken or vegetable broth. Bring the mixture to a boil, then reduce the heat and let it simmer for about 10-15 minutes, or until the broccoli is tender.
- Make the Roux: In a separate small saucepan, melt 2 tablespoons of butter over medium heat. Whisk in 2 tablespoons of flour and continue to whisk until the mixture turns a pale golden color, about 1-2 minutes. This will help thicken the soup later.
- Blend the Soup: Once the broccoli is tender, use an immersion blender to puree the soup until it reaches your desired consistency. If you prefer a chunkier soup, blend only part of it.
- Incorporate the Cheese and Cream: Stir in the shredded cheddar cheese, a little at a time, until fully melted and combined. Gradually add the heavy cream and the prepared roux, stirring continuously to guarantee everything is well-blended and smooth.
- Season and Serve: Season the soup with salt and pepper to taste. Let it simmer for a few more minutes to allow the flavors to meld. Serve hot with a side of crusty bread.
Extra Tips: For a healthier version, you can substitute the heavy cream with whole milk or a plant-based milk alternative, though this might slightly alter the creaminess. If you don’t have an immersion blender, carefully transfer the soup in batches to a countertop blender to achieve your desired texture. For added depth of flavor, consider adding a pinch of nutmeg or a splash of white wine before blending. Remember to taste and adjust the seasonings before serving to guarantee maximum flavor.
Slow Cooker Pulled Pork Sandwiches
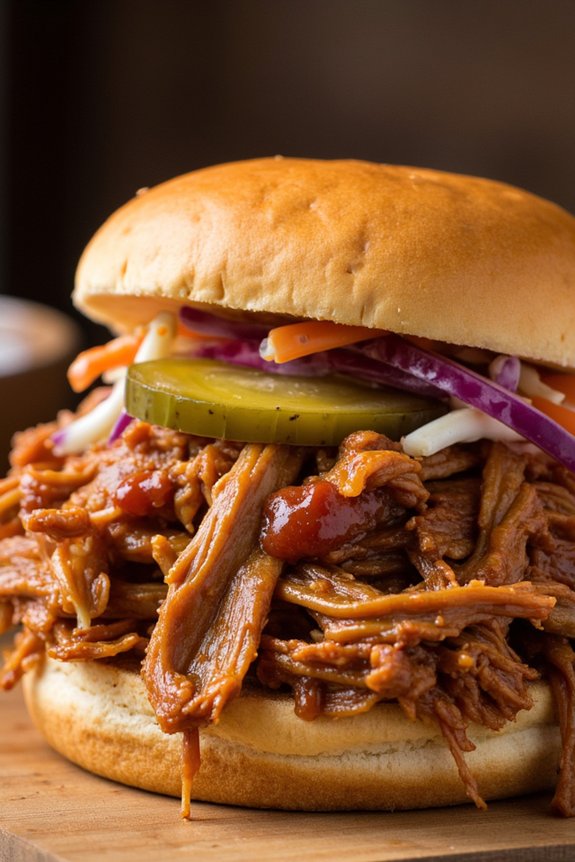
Slow Cooker Pulled Pork Sandwiches are an ideal meal for big families looking for a budget-friendly and delicious dinner option. This dish is perfect for busy days when you want to spend minimal time in the kitchen but still serve a hearty meal. The slow cooker does most of the work, allowing the flavors to meld together, creating tender and juicy pulled pork that’s perfect for sandwiches. Plus, the aroma that fills the house as it cooks is simply irresistible.
This recipe is designed to serve 4-6 people, making it an excellent choice for family dinners or small gatherings. The pulled pork is seasoned with a flavorful blend of spices and slow-cooked to perfection. Once ready, it’s shredded and piled high onto soft sandwich buns, topped with your choice of coleslaw or pickles for added crunch and flavor. Serve these sandwiches with a side of chips or a simple green salad for a complete meal.
Ingredients:
- 3-4 pounds pork shoulder (also known as pork butt)
- 1 cup barbecue sauce
- 1/2 cup apple cider vinegar
- 1/2 cup chicken broth
- 1/4 cup light brown sugar
- 1 tablespoon yellow mustard
- 1 tablespoon Worcestershire sauce
- 1 tablespoon chili powder
- 1 large onion, chopped
- 4-6 sandwich buns
- Salt and pepper to taste
- Optional toppings: coleslaw, pickles
Cooking Instructions:
- Prepare the Pork: Begin by seasoning the pork shoulder generously with salt and pepper on all sides. This will enhance the flavor of the meat as it cooks.
- Mix the Sauce: In a large bowl, combine the barbecue sauce, apple cider vinegar, chicken broth, brown sugar, mustard, Worcestershire sauce, and chili powder. Stir well until the sugar is dissolved and all ingredients are integrated.
- Assemble in the Slow Cooker: Place the chopped onion at the bottom of the slow cooker. This will form a base that keeps the pork elevated slightly for even cooking. Place the seasoned pork shoulder on top of the onions.
- Add the Sauce: Pour the prepared sauce mixture over the pork shoulder. Confirm that the pork is well-coated with the sauce.
- Cook the Pork: Cover the slow cooker with its lid and set it to cook on low for 8-10 hours, or on high for 4-6 hours. The pork is done when it’s tender and easily pulls apart with a fork.
- Shred the Pork: Once cooked, remove the pork from the slow cooker and place it on a large cutting board. Use two forks to shred the meat. Discard any excess fat. Return the shredded pork to the slow cooker and mix it with the sauce until well combined.
- Assemble the Sandwiches: Toast the sandwich buns if desired. Pile the shredded pork onto the buns and top with your choice of coleslaw or pickles. Serve immediately.
Extra Tips:
To add more depth of flavor, consider searing the pork shoulder in a hot pan before placing it in the slow cooker. This step caramelizes the exterior, enhancing the overall taste.
If you prefer a spicier kick, add a teaspoon of cayenne pepper to the sauce mixture. For a slightly smoky flavor, a teaspoon of smoked paprika can also be included.
Leftover pulled pork can be stored in an airtight container in the refrigerator for up to three days or frozen for up to three months, making it a versatile option for future meals.