

As the summer sun shines brightly, I find myself drawn to meals that are both light on the wallet and full of flavor. Picture a table with grilled lemon herb chicken paired with the refreshing taste of summer vegetables. Or how about a chilled cucumber and avocado soup, offering a cool and creamy escape on a warm day? There are plenty of sunny, budget-friendly recipes to explore. Let’s get cooking with these delightful summer dinner ideas.
Grilled Lemon Herb Chicken With Summer Vegetables
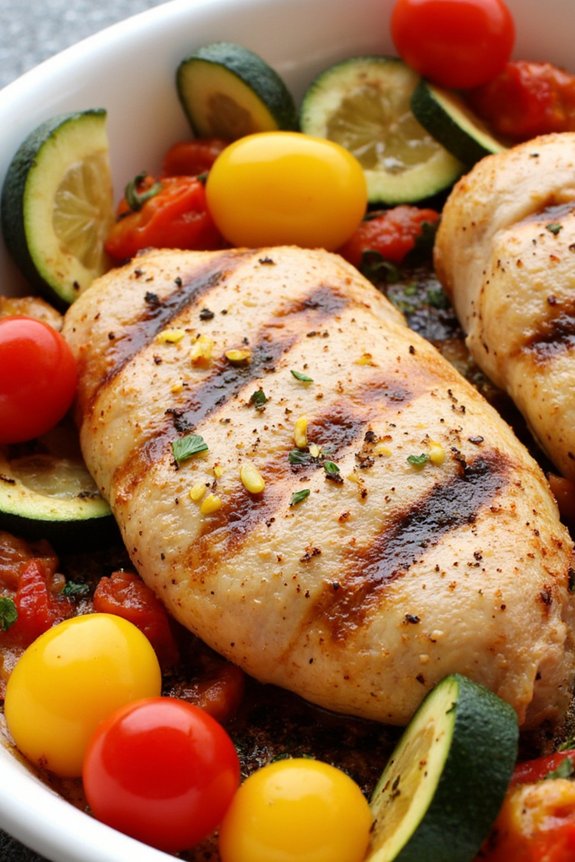
Grilled Lemon Herb Chicken With Summer Vegetables is a delightful and affordable dinner option that brings together the fresh flavors of the season. This dish is perfect for summer evenings when you want something light yet satisfying. The lemon and herbs infuse the chicken with a revitalizing zest, while the medley of summer vegetables adds a burst of color and nutrition to your plate.
It’s not only easy to prepare but also a great way to enjoy the bounty of summer produce. The key to this dish is marinating the chicken in a lemon herb mixture that enhances its natural flavors. The chicken is then grilled to perfection, resulting in a juicy and flavorful main course.
Alongside the chicken, a variety of summer vegetables such as zucchini, bell peppers, and cherry tomatoes are grilled, bringing out their natural sweetness and adding a nice char. This Grilled Lemon Herb Chicken With Summer Vegetables is sure to become a summer favorite for family dinners or outdoor gatherings.
Ingredients (Serves 4-6):
- 4 boneless, skinless chicken breasts
- 1/4 cup olive oil
- 1/4 cup freshly squeezed lemon juice
- Zest of 1 lemon
- 2 cloves garlic, minced
- 2 teaspoons dried oregano
- 1 teaspoon dried thyme
- Salt and pepper to taste
- 2 zucchinis, sliced
- 1 red bell pepper, cut into chunks
- 1 yellow bell pepper, cut into chunks
- 1 pint cherry tomatoes
- 2 tablespoons olive oil (for vegetables)
Cooking Instructions:
- Prepare the Marinade: In a small bowl, combine the olive oil, lemon juice, lemon zest, minced garlic, dried oregano, dried thyme, salt, and pepper. Mix well to make sure all ingredients are evenly distributed.
- Marinate the Chicken: Place the chicken breasts in a large resealable plastic bag or a shallow dish. Pour the marinade over the chicken, making certain each piece is well coated. Seal the bag or cover the dish and refrigerate for at least 30 minutes, or up to 2 hours for more flavor.
- Preheat the Grill: Preheat your grill to medium-high heat. If using a charcoal grill, prepare the coals until they’re covered with white ash.
- Grill the Chicken: Remove the chicken from the marinade, letting any excess drip off. Place the chicken on the grill and cook for 6-7 minutes on each side, or until the internal temperature reaches 165°F (75°C).
- Prepare the Vegetables: While the chicken is grilling, toss the zucchini slices, bell pepper chunks, and cherry tomatoes with the 2 tablespoons of olive oil, salt, and pepper in a bowl.
- Grill the Vegetables: Place the vegetables on the grill, using a grill basket if necessary to prevent them from falling through the grates. Grill for about 8-10 minutes, turning occasionally, until they’re tender and have grill marks.
- Serve: Once the chicken and vegetables are done, transfer them to a serving platter. Allow the chicken to rest for a few minutes before slicing and serving with the grilled vegetables.
Extra Tips:
For the best results, try to use fresh herbs if available, as they can enhance the flavor even more. If you don’t have access to a grill, you can also use a grill pan on your stovetop.
Always make certain the grill is preheated properly to prevent sticking and achieve those desirable grill marks. When marinating the chicken, longer marination times can intensify the flavor, so if time allows, marinate overnight.
Finally, feel free to customize the vegetables based on what’s in season or what you have on hand.
Fresh Tomato and Basil Pasta

Fresh Tomato and Basil Pasta is a light and satisfying dish that perfectly captures the essence of summer. This recipe focuses on using the season’s freshest ingredients, including ripe tomatoes and fragrant basil, to create a simple yet flavorful meal.
It’s not only easy to prepare but also budget-friendly, making it an ideal option for a casual weeknight dinner or a sunny weekend lunch with friends. With minimal cooking time, this pasta dish allows you to enjoy more of those precious daylight hours.
The magic of this dish lies in its simplicity. The key is to let the fresh ingredients shine by using a few quality components. Ripe tomatoes provide a burst of juicy sweetness, while fresh basil adds a touch of aromatic freshness.
The garlic and olive oil tie everything together, and when tossed with your favorite pasta, it becomes a delightful meal that everyone will love. Whether you’re an experienced cook or just starting out, this recipe is easy to follow and guarantees impressive results.
Ingredients for 4-6 servings:
- 1 pound (450g) of pasta (such as spaghetti or linguine)
- 2 pounds (900g) of ripe tomatoes
- 1/4 cup (60ml) of extra virgin olive oil
- 3 cloves of garlic, minced
- 1/2 teaspoon of salt
- 1/4 teaspoon of freshly ground black pepper
- 1/4 cup (packed) of fresh basil leaves, torn into pieces
- 1/4 cup (25g) of grated Parmesan cheese (optional)
- Red pepper flakes (optional, to taste)
Cooking Instructions:
- Prepare the Tomatoes: Start by washing the tomatoes thoroughly. Cut them into small, bite-sized pieces, discarding any tough cores. If desired, you can remove the seeds for a less watery sauce.
- Cook the Pasta: Bring a large pot of salted water to a boil. Add the pasta and cook according to the package instructions until al dente. Reserve 1 cup of the pasta cooking water.
Zucchini and Corn Fritters

Zucchini and Corn Fritters are a delightful summer dish that combines the fresh flavors of zucchini and sweet corn into crispy, golden fritters. These tasty bites aren’t only easy to make but also budget-friendly, making them a perfect meal for families or entertaining guests on a warm summer day.
With a hint of cheese and a touch of spice, these fritters are sure to be a hit at your next meal. This dish can be served as an appetizer, a side dish, or even a light main course. The combination of vegetables provides a great way to sneak in some nutrition, while the crispy texture makes them irresistible.
Pair these fritters with a revitalizing dip or sauce, and you’ve got a satisfying meal that appeals to both kids and adults alike. This recipe serves 4-6 people.
Ingredients:
- 2 medium zucchini, grated
- 1 cup corn kernels (fresh, canned, or frozen)
- 1/2 cup all-purpose flour
- 1/2 cup grated Parmesan cheese
- 2 large eggs
- 1/4 cup chopped green onions
- 1 teaspoon garlic powder
- 1/2 teaspoon paprika
- Salt and pepper to taste
- 2 tablespoons olive oil
Instructions:
1. Prepare the Zucchini:
Begin by grating the zucchini using a box grater. Place the grated zucchini in a clean kitchen towel and squeeze out as much moisture as possible. This step is vital to make sure that the fritters aren’t soggy.
2. Mix the Batter:
In a large mixing bowl, combine the squeezed zucchini, corn kernels, flour, Parmesan cheese, eggs, and green onions. Add the garlic powder, paprika, salt, and pepper, and mix until all ingredients are well incorporated.
3. Heat the Oil:
In a large skillet, heat the olive oil over medium heat. Confirm the oil is hot enough before adding the batter to prevent the fritters from sticking to the pan.
4. Form the Fritters:
Using a spoon or your hands, scoop about 2 tablespoons of the mixture and shape it into a patty. Carefully place the patties into the hot skillet, making sure not to overcrowd the pan.
5. Cook the Fritters:
Cook the fritters for about 3-4 minutes on each side, or until they’re golden brown and crispy. Use a spatula to gently flip them, being careful not to break them apart.
6. Drain and Serve:
Once cooked, transfer the fritters to a plate lined with paper towels to drain any excess oil. Serve immediately with your choice of dipping sauce or a dollop of sour cream.
Extra Tips:
To guarantee your fritters are perfectly crispy, it’s important to remove as much moisture as possible from the zucchini before mixing the batter. If you find the mixture too wet, you can add a little more flour to help bind the ingredients.
For a spicier kick, consider adding a pinch of cayenne pepper or a dash of hot sauce. These fritters are best enjoyed fresh, but if you have leftovers, they can be reheated in an oven to maintain their crispiness.
Summer Vegetable Stir-Fry With Rice

Summer Vegetable Stir-Fry With Rice is a vibrant and flavorful dish that’s perfect for enjoying the bounty of the season. This dish combines a medley of colorful vegetables with aromatic spices, creating a harmonious blend of taste and texture. It’s a quick and easy meal that’s not only satisfying but also light and healthy, making it ideal for warm summer evenings.
Plus, it’s budget-friendly, allowing you to enjoy a delicious meal without breaking the bank. This stir-fry is versatile and can be customized with whatever vegetables you have on hand, making it a great way to clean out the fridge. The key is to use fresh, seasonal produce for the best flavor and nutrition.
Served over a bed of fluffy rice, this dish is a complete meal that can be whipped up in no time, perfect for feeding a family of 4-6 people. With minimal ingredients and simple preparation, this Summer Vegetable Stir-Fry With Rice will quickly become a staple in your summer meal rotation.
Ingredients (serving size: 4-6 people)
- 2 cups of uncooked rice (white or brown)
- 1 tablespoon vegetable oil
- 2 cloves garlic, minced
- 1-inch piece of ginger, grated
- 1 red bell pepper, sliced
- 1 yellow bell pepper, sliced
- 1 zucchini, sliced
- 1 cup snap peas
- 1 cup broccoli florets
- 1 carrot, julienned
- 3 tablespoons soy sauce
- 1 tablespoon oyster sauce (optional)
- 1 tablespoon sesame oil
- Salt and pepper to taste
- 2 tablespoons sesame seeds for garnish
- Fresh cilantro or green onions for garnish
Cooking Instructions
- Cook the Rice: Rinse the rice under cold water until the water runs clear. In a medium saucepan, add the rinsed rice and 4 cups of water. Bring to a boil, reduce heat to low, cover, and simmer for 15-20 minutes until the rice is tender and water is absorbed. Fluff with a fork and set aside.
- Prepare the Vegetables: While the rice is cooking, prepare all the vegetables. Slice the bell peppers, zucchini, and julienne the carrot. Trim the ends of the snap peas and cut broccoli into small florets.
- Heat the Oil: In a large wok or skillet over medium-high heat, add the vegetable oil. Once hot, add the minced garlic and grated ginger, stirring quickly to prevent burning.
- Stir-Fry the Vegetables: Add the red and yellow bell peppers, zucchini, snap peas, broccoli, and carrot to the wok. Stir-fry for about 5-7 minutes, or until the vegetables are tender-crisp.
- Add the Sauces: Pour in the soy sauce, oyster sauce (if using), and sesame oil. Toss the vegetables to coat evenly, cooking for another 2 minutes.
- Season and Serve: Season with salt and pepper to taste. Transfer the stir-fry to a serving dish over a bed of cooked rice. Garnish with sesame seeds and freshly chopped cilantro or green onions.
Extra Tips
For a more protein-packed version, consider adding tofu, chicken, or shrimp to the stir-fry. Simply cook the protein first in the same wok until cooked through, remove, and set aside while you cook the vegetables.
Then, add it back into the wok along with the sauces. Additionally, feel free to experiment with different vegetables based on what you have available; mushrooms, baby corn, and bok choy all make great additions to this dish.
Adjust the seasoning and sauce quantities to suit your taste, and don’t hesitate to add a splash of lime juice for extra zing.
BBQ Pulled Pork Sliders
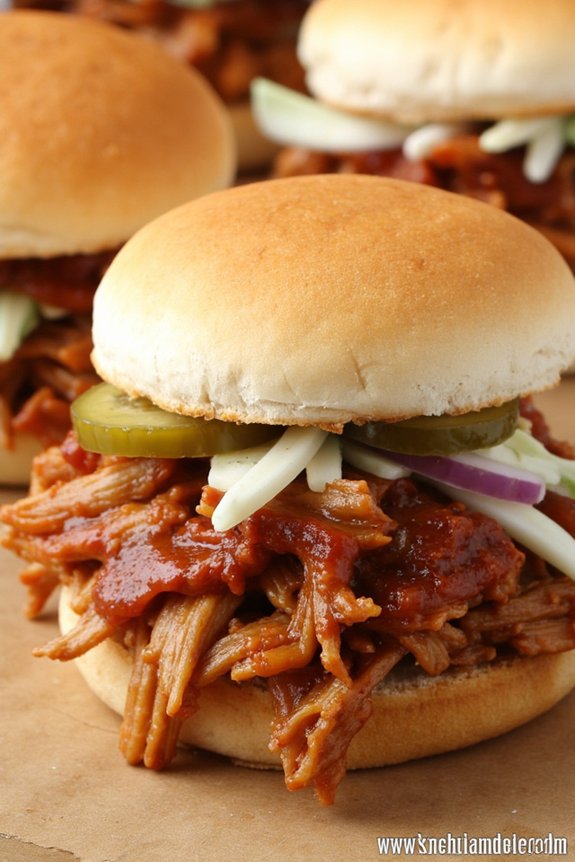
BBQ Pulled Pork Sliders are the perfect way to enjoy a delicious, budget-friendly meal during the summer. These sliders are packed with flavor and are sure to be a hit at any gathering or family dinner. The tender pulled pork is slow-cooked to perfection, then smothered in tangy barbecue sauce and served on soft slider buns.
Simple to make and easy on the wallet, these sliders are a great choice for feeding a crowd without breaking the bank. This recipe is designed to serve 4-6 people, making it ideal for small gatherings or family meals. You can prepare the pulled pork in a slow cooker, which allows the meat to become incredibly tender and flavorful.
Once it’s ready, simply assemble the sliders with your favorite toppings and serve. The combination of savory pork, sweet and tangy barbecue sauce, and soft buns is sure to satisfy everyone’s taste buds.
Ingredients (Serving Size: 4-6 People):
- 2 pounds of pork shoulder or pork butt
- 1 tablespoon of olive oil
- 1 large onion, sliced
- 3 cloves of garlic, minced
- 1 cup of barbecue sauce
- 1 tablespoon of apple cider vinegar
- 1 tablespoon of brown sugar
- 1 teaspoon of smoked paprika
- Salt and pepper to taste
- Slider buns (12-16 buns)
- Optional toppings: coleslaw, pickles, or extra barbecue sauce
Instructions:
- Prepare the Pork: Begin by seasoning the pork shoulder with salt, pepper, and smoked paprika. Rub the seasonings into the meat to guarantee even coverage.
- Sear the Pork: In a large skillet, heat olive oil over medium-high heat. Add the pork shoulder and sear on all sides until browned, about 2-3 minutes per side. This will help to lock in the flavors and juices.
- Slow Cook the Pork: Transfer the seared pork to a slow cooker. Add the sliced onion and minced garlic around the pork. Pour in the barbecue sauce, apple cider vinegar, and brown sugar. Cover and cook on low for 8-10 hours or on high for 4-5 hours, until the pork is tender and can be easily shredded with a fork.
- Shred the Pork: Once cooked, remove the pork from the slow cooker and place it on a cutting board. Use two forks to shred the meat. Discard any excess fat.
- Combine with Sauce: Return the shredded pork to the slow cooker and stir to combine with the sauce. Let it simmer for an additional 15-20 minutes to allow the flavors to meld.
- Assemble the Sliders: Split the slider buns in half and lightly toast them if desired. Spoon a generous portion of pulled pork onto the bottom half of each bun. Add your choice of toppings such as coleslaw or pickles, then top with the other half of the bun.
- Serve and Enjoy: Arrange the sliders on a serving platter and serve immediately while warm. Offer extra barbecue sauce on the side for those who like additional tang.
Extra Tips:
For an added smoky flavor, consider adding a few drops of liquid smoke to the sauce while cooking. If you prefer a spicier kick, you can include a pinch of cayenne pepper or a few dashes of hot sauce to the sauce mixture.
These sliders can also be made ahead of time; simply reheat the pulled pork in the slow cooker on warm before assembling the sliders. Remember, the key to perfect pulled pork is patience, so allow enough time for the pork to become tender and flavorful in the slow cooker.
Caprese Salad With Grilled Balsamic Chicken
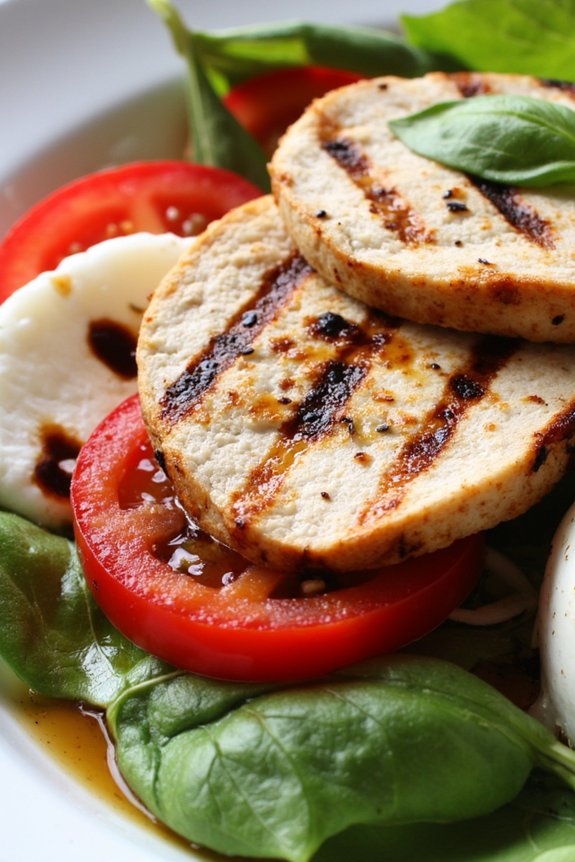
Caprese Salad with Grilled Balsamic Chicken is a delightful and invigorating summer meal that combines the vibrant flavors of a traditional Caprese salad with the savory taste of grilled chicken. This dish is perfect for a light dinner or a family gathering, offering a perfect balance of freshness and heartiness. The juicy tomatoes, creamy mozzarella, and fragrant basil pair beautifully with the tangy balsamic-marinated chicken, making it a crowd-pleaser.
This recipe not only highlights the essence of summer with its fresh ingredients but also emphasizes simplicity and flavor. The grilled balsamic chicken is marinated to perfection, offering a depth of flavor that complements the freshness of the salad. It’s a versatile dish that can be served as a main course or a substantial salad, making it ideal for casual summer dining.
Ingredients (Serves 4-6):
- 4 boneless, skinless chicken breasts
- 1/2 cup balsamic vinegar
- 1/4 cup olive oil
- 2 cloves garlic, minced
- Salt and pepper to taste
- 4 large tomatoes, sliced
- 1 pound fresh mozzarella, sliced
- 1 bunch fresh basil leaves
- 2 tablespoons extra virgin olive oil
- 1 tablespoon balsamic glaze (optional)
Instructions:
- Marinate the Chicken: In a bowl, whisk together the balsamic vinegar, olive oil, minced garlic, salt, and pepper. Place the chicken breasts in a resealable plastic bag or shallow dish and pour the marinade over them. Seal the bag or cover the dish and refrigerate for at least 30 minutes, or up to 4 hours for more flavor.
- Preheat the Grill: Preheat your grill to medium-high heat. If using a grill pan indoors, heat it over medium-high heat on the stove.
- Grill the Chicken: Remove the chicken from the marinade, allowing any excess to drip off. Place the chicken on the grill and cook for about 6-7 minutes on each side, or until the internal temperature reaches 165°F (75°C). Once cooked, remove from the grill and let it rest for a few minutes before slicing.
- Assemble the Salad: On a large serving platter, arrange the tomato and mozzarella slices, alternating between them. Tuck fresh basil leaves between the layers.
- Add the Chicken: Slice the grilled chicken breasts and lay them over the arranged salad.
- Drizzle and Serve: Drizzle extra virgin olive oil and balsamic glaze over the salad and chicken. Season with additional salt and pepper to taste. Serve immediately.
Extra Tips:
To enhance the flavors of this dish, consider using heirloom tomatoes for their rich taste and variety of colors. Fresh mozzarella is key, so try to use high-quality mozzarella for the best texture and flavor.
If you don’t have a grill, a grill pan or even a regular skillet can be used to cook the chicken, though it may not have the same smoky flavor. Finally, let the chicken rest after grilling to guarantee it remains juicy when sliced. Enjoy your Caprese Salad with Grilled Balsamic Chicken with a side of crusty bread or a light pasta dish for a complete meal.
Veggie-Loaded Quesadillas

Veggie-loaded quesadillas are a delicious and budget-friendly option for a summer dinner. These quesadillas are packed with colorful vegetables, making them not only visually appealing but also rich in nutrients. The combination of gooey melted cheese and crisp veggies encased in a toasted tortilla makes for a satisfying and flavorful meal that can be enjoyed by the whole family.
This dish is versatile, allowing you to incorporate any leftover vegetables you have on hand, making it an excellent way to minimize food waste. Perfect for a quick weeknight dinner or a casual get-together, veggie-loaded quesadillas can be paired with a variety of sides such as salsa, guacamole, or a fresh salad.
They’re also incredibly easy to prepare, requiring minimal cooking skills and equipment. Whether you’re looking for a meatless meal or trying to sneak more veggies into your diet, these quesadillas are sure to become a household favorite.
Ingredients for 4-6 servings:
- 8 large flour tortillas
- 2 cups shredded cheese (cheddar, mozzarella, or a blend)
- 1 red bell pepper, sliced
- 1 yellow bell pepper, sliced
- 1 cup corn kernels (fresh, canned, or frozen)
- 1 small red onion, thinly sliced
- 1 zucchini, sliced
- 1 cup black beans, drained and rinsed
- 2 tablespoons olive oil
- 1 teaspoon cumin
- 1 teaspoon chili powder
- Salt and pepper to taste
- Optional: fresh cilantro, chopped
Cooking Instructions:
- Prepare the Vegetables: Begin by washing and slicing the bell peppers, zucchini, and onion. If using fresh corn, remove it from the cob.
- Cook the Vegetables: In a large skillet, heat olive oil over medium heat. Add the sliced onion, bell peppers, and zucchini to the skillet. Sauté the vegetables for about 5-7 minutes or until they’re tender.
- Season the Vegetables: Add the corn and black beans to the skillet, stirring to combine. Season with cumin, chili powder, salt, and pepper. Cook for an additional 2-3 minutes to heat through.
- Assemble the Quesadillas: Place a tortilla on a flat surface or cutting board. Sprinkle a generous amount of shredded cheese over half of the tortilla. Add a layer of the cooked vegetable mixture over the cheese. Sprinkle a little more cheese on top before folding the tortilla over to enclose the filling.
- Cook the Quesadillas: Heat a non-stick skillet or griddle over medium heat. Place the assembled quesadilla onto the skillet. Cook for 2-3 minutes on each side or until the tortilla is golden brown and the cheese has melted. Repeat with the remaining tortillas.
- Serve: Once cooked, transfer the quesadillas to a cutting board. Allow them to cool slightly before cutting them into wedges. Garnish with fresh cilantro if desired and serve with your favorite side dishes.
Extra Tips:
For a healthier version, you can use whole wheat tortillas and reduce the amount of cheese. Feel free to experiment with different types of cheese or add a spicy kick with jalapeños.
If you prefer a crispy texture, consider brushing the tortillas lightly with olive oil before cooking. Remember to adjust the seasoning according to your taste preferences, and enjoy these versatile quesadillas hot or cold.
Spicy Black Bean Tacos
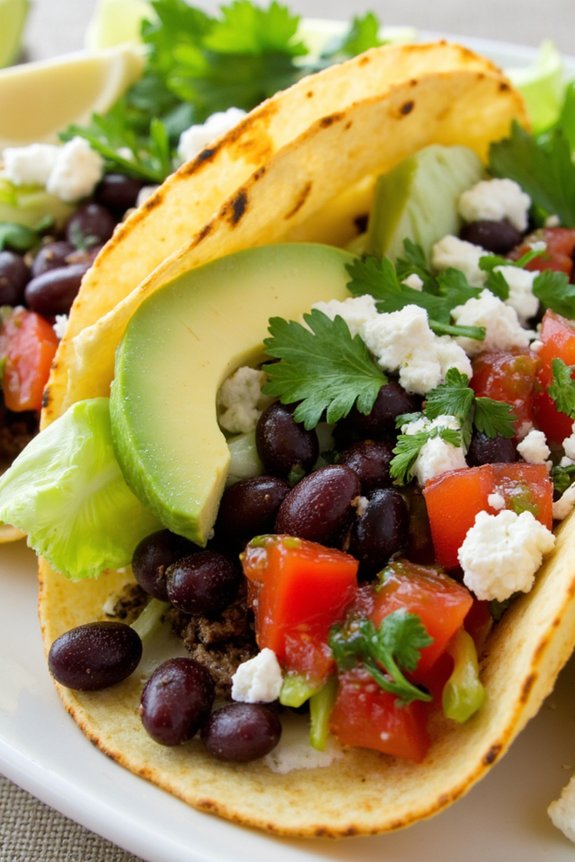
Spicy Black Bean Tacos are a delicious and budget-friendly option for those warm summer evenings. Not only are they easy to prepare, but they also pack a punch of flavor with a hint of spice, making them a hit for family dinners or casual get-togethers.
These tacos aren’t only vegetarian but can also easily be made vegan by choosing plant-based toppings and tortillas, making them a versatile dish that caters to a variety of dietary preferences.
The key to these Spicy Black Bean Tacos is the combination of fresh ingredients and spices that create a satisfying and hearty filling. The black beans, when cooked with spices, develop a rich and savory taste that pairs beautifully with a variety of toppings such as avocado, salsa, and lettuce.
This recipe will make enough to serve 4-6 people, perfect for a small gathering or a family meal with some leftovers for lunch the next day.
Ingredients:
- 2 cans of black beans, drained and rinsed
- 1 tablespoon olive oil
- 1 medium onion, finely chopped
- 2 cloves garlic, minced
- 1 tablespoon chili powder
- 1 teaspoon ground cumin
- 1 teaspoon smoked paprika
- 1/2 teaspoon cayenne pepper (adjust to taste)
- Salt and pepper to taste
- Juice of 1 lime
- 8-12 corn tortillas
- 1 cup shredded lettuce
- 1 avocado, sliced
- 1 cup salsa
- 1/2 cup crumbled feta or plant-based cheese
- Fresh cilantro leaves for garnish
Instructions:
- Prepare the Bean Mixture: Heat the olive oil in a large skillet over medium heat. Add the chopped onion and sauté for about 5 minutes until it becomes translucent. Add the minced garlic and cook for an additional minute until fragrant.
- Season the Beans: Add the drained black beans to the skillet, followed by the chili powder, ground cumin, smoked paprika, cayenne pepper, salt, and pepper. Stir well to coat the beans with the spices. Cook for 5-7 minutes, occasionally stirring, until the beans are heated through and slightly softened.
- Finish with Lime: Remove the skillet from the heat and stir the lime juice into the bean mixture, ensuring even distribution throughout to add a fresh, zesty flavor.
- Warm the Tortillas: While the beans are cooking, heat a separate pan over medium heat. Warm the corn tortillas for about 30 seconds on each side until they’re pliable and slightly charred in spots.
- Assemble the Tacos: Spoon the black bean mixture onto each tortilla, then top with shredded lettuce, sliced avocado, salsa, crumbled feta or plant-based cheese, and fresh cilantro leaves.
- Serve and Enjoy: Arrange the tacos on a serving platter and enjoy them immediately while they’re warm and fresh.
Extra Tips:
For added flavor, consider roasting the black beans in the oven after seasoning to give them a slightly crispy texture.
If you prefer an extra kick, increase the amount of cayenne pepper or add a few dashes of your favorite hot sauce.
For a more filling meal, you can also add cooked quinoa or rice to the bean mixture.
Finally, always taste and adjust the seasoning as needed to suit your personal preference before assembling the tacos.
Chilled Cucumber and Avocado Soup
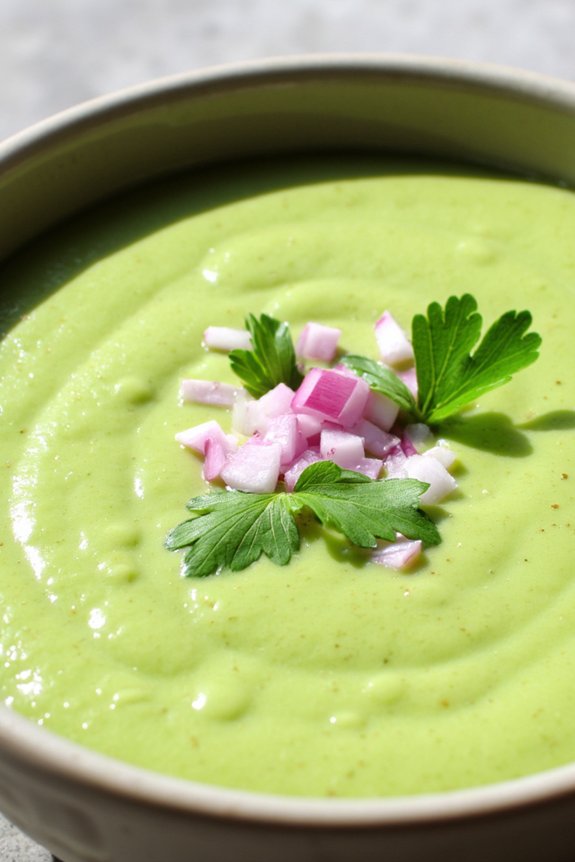
Chilled Cucumber and Avocado Soup is a revitalizing and creamy dish perfect for hot summer days. This soup combines the coolness of cucumbers with the richness of avocados, creating a delightful balance of flavors.
It’s not only easy to make but also budget-friendly, making it an ideal choice for a light lunch or dinner. This recipe serves 4-6 people, and you can prepare it ahead of time for a quick meal that will satisfy everyone at the table.
The key to a perfect Chilled Cucumber and Avocado Soup lies in using fresh ingredients. The cucumbers provide a crisp, hydrating base while the avocados add a smooth, velvety texture. A touch of lemon juice and fresh herbs elevate the flavor profile, making this dish a standout despite its simplicity.
Serve it with some crusty bread or a simple salad for a complete summer meal experience.
Ingredients (serves 4-6):
- 3 large cucumbers, peeled and chopped
- 2 ripe avocados, pitted and peeled
- 1 cup plain Greek yogurt
- 1 cup vegetable broth
- 2 tablespoons fresh lime juice
- 1 garlic clove, minced
- 1/4 cup fresh cilantro leaves
- Salt and black pepper to taste
- Optional: 1/4 cup diced red onion for garnish
Instructions:
1. Prepare the Ingredients:
Start by peeling and chopping the cucumbers. Place them in a blender or food processor. Halve the avocados, remove the pits, and scoop out the flesh. Add the avocado to the blender along with the cucumbers.
2. Blend the Base:
Add the Greek yogurt, vegetable broth, lime juice, and minced garlic to the blender. Blend the mixture on high speed until it’s smooth and creamy. Make sure there are no chunks left.
3. Season the Soup:
Add the fresh cilantro leaves, and blend again. Season with salt and black pepper according to your taste. If you prefer a thinner consistency, you can add a little more vegetable broth or water.
4. Chill the Soup:
Transfer the soup to a large bowl or container, and cover it with a lid or plastic wrap. Refrigerate for at least 2 hours to allow the flavors to meld together and the soup to chill thoroughly.
5. Serve:
Before serving, give the soup a quick stir. Pour it into bowls and garnish with diced red onion if desired. Serve immediately while it’s still cold.
Extra Tips:
For a more robust flavor, consider adding a pinch of cayenne pepper or a dash of hot sauce for a little kick.
If you want to make the soup ahead of time, it can be stored in the refrigerator for up to two days. Just make sure to stir well before serving, as the ingredients may settle.
For a vegan version, substitute the Greek yogurt with a coconut-based yogurt. Adjust the seasoning to your liking, and don’t hesitate to experiment with additional herbs like mint or basil for a different flavor dimension.
Tuna and White Bean Salad
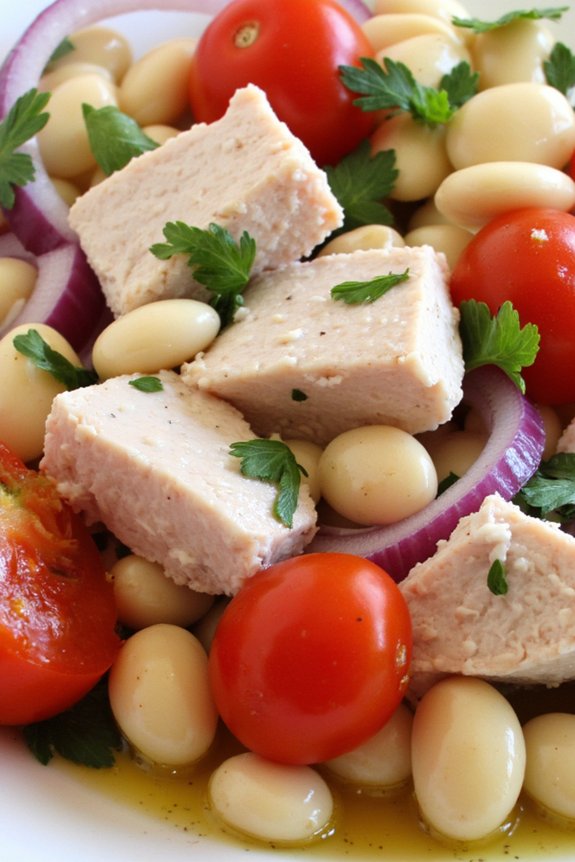
Tuna and White Bean Salad is the perfect choice for a quick, nutritious, and budget-friendly summer meal. This salad is invigorating and light yet packed with protein and fiber, making it filling and satisfying. The combination of tender white beans, rich tuna, and vibrant vegetables creates a delightful taste and texture that can be enjoyed by everyone around the table.
Whether you’re hosting a family dinner or need a quick lunch solution, this dish is versatile enough to fit any occasion. The beauty of Tuna and White Bean Salad lies in its simplicity and the use of pantry staples. It’s a no-cook dish, meaning you can whip it up without breaking a sweat in the summer heat.
The ingredients are easily accessible and affordable, making it an excellent choice for budget-conscious cooks. Plus, it’s a dish that can be prepared ahead of time, allowing the flavors to meld together beautifully before serving.
Ingredients (serving size of 4-6 people):
- 2 cans (5-6 oz each) of tuna in water, drained
- 2 cans (15 oz each) of white beans, rinsed and drained
- 1 cup cherry tomatoes, halved
- 1/2 red onion, thinly sliced
- 1/4 cup fresh parsley, chopped
- 1/4 cup olive oil
- 2 tablespoons lemon juice
- 1 tablespoon red wine vinegar
- Salt and pepper to taste
- Optional: 1/4 cup kalamata olives, pitted and sliced
Cooking Instructions:
- Prepare the Ingredients: Begin by draining the canned tuna and white beans. Rinse the beans under cold water to remove any excess starch and set them aside. Halve the cherry tomatoes, thinly slice the red onion, and chop the fresh parsley. If using, pit and slice the kalamata olives.
- Make the Dressing: In a small bowl, whisk together the olive oil, lemon juice, red wine vinegar, salt, and pepper. Adjust the seasoning to your taste.
- Combine the Ingredients: In a large mixing bowl, add the drained tuna, white beans, cherry tomatoes, red onion, parsley, and olives (if using). Drizzle the dressing over the salad ingredients.
- Mix the Salad: Gently toss all the ingredients together until they’re well combined and coated with the dressing. Be careful not to break apart the tuna too much.
- Chill and Serve: Allow the salad to chill in the refrigerator for at least 30 minutes to let the flavors meld. Serve cold or at room temperature as a main dish or alongside your favorite grilled meats or bread.
Extra Tips:
For added flavor, consider adding a dash of Dijon mustard to the dressing or zesting the lemon before juicing it. If you prefer a bit of heat, a pinch of red pepper flakes can add a pleasant kick to the salad.
Feel free to customize the salad with additional vegetables like cucumber or bell peppers. This salad is also great for meal prep as it holds up well in the refrigerator for a couple of days, making it perfect for quick lunches or dinners throughout the week.
Grilled Sausage and Pepper Skewers
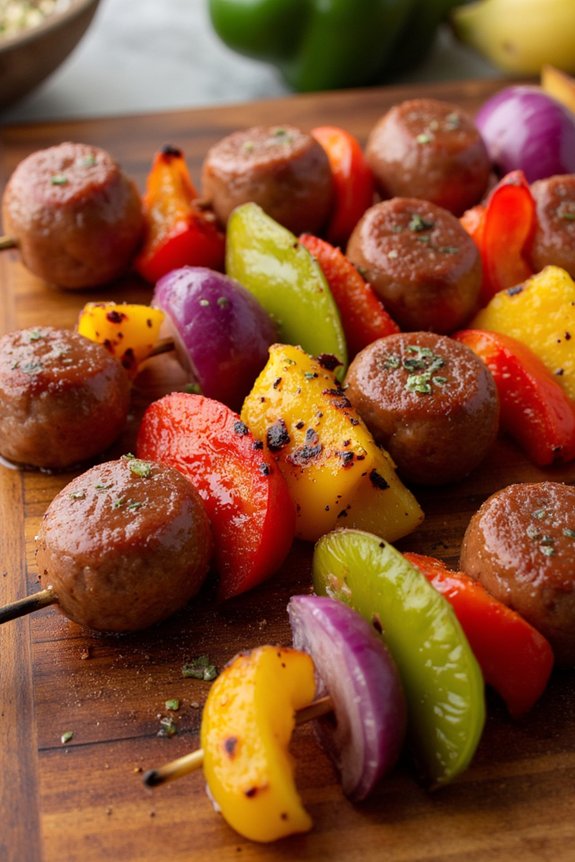
For those warm summer evenings when you want a delicious meal without spending too much time or money, Grilled Sausage and Pepper Skewers are the perfect solution. This dish combines the smoky flavor of grilled sausages with sweet, colorful bell peppers, creating a delightful balance of flavors and textures. The skewers are easy to prepare and cook quickly on the grill, making them an ideal choice for a relaxed summer dinner with family or friends.
Plus, they can be easily adapted to suit your taste preferences by swapping in different types of sausages or adding other vegetables. These skewers are also great for entertaining, as they’re visually appealing and can be served as either a main course or a hearty appetizer. Pair them with a simple side salad or some crusty bread, and you’ll have a complete meal that everyone will enjoy.
Furthermore, using a variety of colorful vegetables not only enhances the presentation but also adds nutritional value to your dish. Gather your ingredients, fire up the grill, and get ready to impress with these tasty and economical skewers.
Ingredients (Serves 4-6):
- 1.5 pounds of sausage (Italian, bratwurst, or your choice)
- 3 large bell peppers (red, yellow, green)
- 1 large red onion
- 2 tablespoons olive oil
- Salt and pepper to taste
- 1 teaspoon garlic powder
- 1 teaspoon dried oregano
- Wooden or metal skewers
Cooking Instructions:
- Prepare the Skewers: If using wooden skewers, soak them in water for at least 30 minutes to prevent burning on the grill. While the skewers soak, cut the sausages into 1-inch pieces.
- Chop the Vegetables: Wash the bell peppers and red onion. Cut the bell peppers into 1-inch pieces and the red onion into similar-sized chunks. This guarantees even cooking on the grill.
- Season the Ingredients: In a large bowl, combine the sausage pieces, bell peppers, and onion chunks. Drizzle with olive oil, and sprinkle with salt, pepper, garlic powder, and dried oregano. Toss everything together until well coated.
- Assemble the Skewers: Thread the sausage pieces and vegetables onto the skewers. Alternate between sausage, bell pepper, and onion pieces to ensure a mix of flavors in every bite.
- Preheat the Grill: Heat your grill to medium-high heat. If you’re using a charcoal grill, wait until the coals are glowing red with a light layer of ash.
- Grill the Skewers: Place the skewers on the grill and cook for about 10-12 minutes, turning occasionally, until the sausages are cooked through and the vegetables are tender and lightly charred.
- Serve: Remove the skewers from the grill and let them rest for a few minutes before serving. Enjoy them hot off the grill with your choice of sides.
Extra Tips:
To enhance the flavor, consider marinating the sausage and vegetables for a few hours before assembling the skewers. You can also add a splash of balsamic vinegar or lemon juice to the marinade for a tangy twist.
When grilling, keep an eye on the skewers to prevent burning; if flare-ups occur, move the skewers to a cooler part of the grill. Finally, for added convenience, prepare the skewers in advance and store them in the refrigerator until you’re ready to grill.
Simple Ratatouille With Crusty Bread
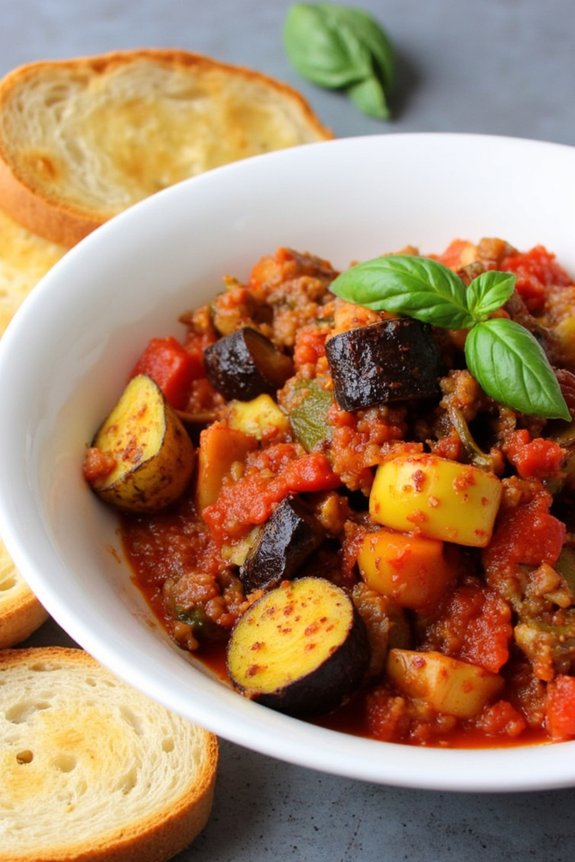
Simple Ratatouille with Crusty Bread is a delightful and budget-friendly summer dinner idea that brings together the vibrant flavors of fresh vegetables. This classic French dish is both hearty and healthy, making it perfect for warm evening meals with family or friends.
The combination of sautéed vegetables in a rich tomato sauce, paired with crusty bread, makes for a satisfying and nourishing meal. Not only is it incredibly flavorful, but it also showcases the bounty of seasonal produce.
Ratatouille is traditionally made with a variety of vegetables, and this version includes zucchini, eggplant, bell peppers, and tomatoes, all simmered to perfection. The key to an excellent ratatouille is to cook each vegetable until it reaches its peak flavor, resulting in a dish that’s greater than the sum of its parts.
Served alongside crusty bread, the ratatouille becomes a complete meal, perfect for soaking up every last bit of the savory sauce. With this simple recipe, you’ll be able to easily prepare a delicious meal for 4-6 people.
Ingredients:
- 2 medium zucchinis
- 1 medium eggplant
- 2 bell peppers (any color)
- 1 large onion
- 4 ripe tomatoes
- 3 cloves garlic
- 3 tablespoons olive oil
- 1 teaspoon dried thyme
- 1 teaspoon dried oregano
- Salt and pepper to taste
- Fresh basil for garnish (optional)
- 1 loaf of crusty bread
Cooking Instructions:
- Prepare the Vegetables: Start by washing all the vegetables thoroughly. Dice the zucchinis, eggplant, bell peppers, and tomatoes into bite-sized pieces. Finely chop the onion and garlic.
- Sauté Onions and Garlic: In a large skillet, heat 3 tablespoons of olive oil over medium heat. Add the chopped onions and garlic, and sauté until they become translucent and fragrant, about 5 minutes.
- Cook the Eggplant: Add the diced eggplant to the skillet and cook for about 8-10 minutes, or until the eggplant begins to soften. Stir frequently to guarantee even cooking.
- Add Bell Peppers and Zucchini: Next, add the bell peppers and zucchini to the skillet. Continue to cook, stirring occasionally, for another 5-7 minutes until the vegetables are tender.
- Simmer with Tomatoes and Seasonings: Add the diced tomatoes, dried thyme, and oregano to the skillet. Season with salt and pepper to taste. Stir everything together and let it simmer for 10-15 minutes, allowing the flavors to meld together.
- Prepare the Bread: While the ratatouille is simmering, preheat your oven to 400°F (200°C). Slice the loaf of crusty bread and place the slices on a baking sheet. Toast in the oven for about 5-7 minutes or until the bread is golden and crispy.
- Serve: Once the ratatouille is cooked to your liking, garnish with fresh basil if desired. Serve hot with slices of the crusty bread on the side for dipping.
Extra Tips:
For the best flavor, use ripe and fresh vegetables. If you prefer a smoother texture, you can cook the ratatouille a bit longer to allow the vegetables to break down further.
Feel free to adjust the herbs to your taste, or add a pinch of red pepper flakes for some heat. If you’re making this dish ahead of time, reheating ratatouille often enhances the flavors, making it even more delicious the next day. Enjoy your meal!