

Thanksgiving is just around the corner, and I’m getting excited to plan a meal that mixes tradition with a little twist.
Visualize a table filled with a perfectly roasted turkey, flavorful stuffing, and mouthwatering pies that fill the air with their cozy aromas.
I’ve put together a list of recipes to make your holiday gathering truly special.
These dishes are designed to create lasting memories with loved ones.
Ready to make this Thanksgiving feast one to remember?
Classic Roast Turkey With Herb Butter
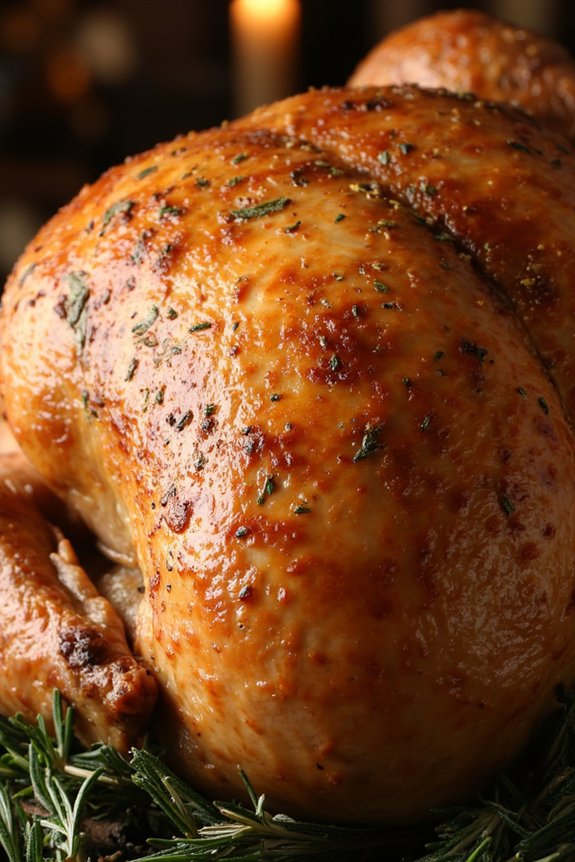
Thanksgiving is a time for family, gratitude, and of course, a delicious feast. Among the most iconic dishes served during this holiday is the Classic Roast Turkey With Herb Butter. This dish is the perfect centerpiece for your Thanksgiving table, offering a succulent and juicy bird with a crispy, flavorful skin. The herb butter infuses the turkey with aromatic flavors, making each bite a savory delight.
Preparing a Classic Roast Turkey with Herb Butter doesn’t have to be intimidating. With a little preparation and the right technique, you can achieve a beautifully roasted turkey that will impress your family and guests. This recipe will guide you through the process, guaranteeing your turkey is cooked to perfection, with a serving size suitable for 4-6 people.
Ingredients:
- 1 whole turkey (10-12 pounds)
- 1/2 cup unsalted butter, softened
- 2 tablespoons olive oil
- 3 tablespoons fresh rosemary, chopped
- 3 tablespoons fresh thyme, chopped
- 3 tablespoons fresh sage, chopped
- 4 cloves garlic, minced
- Salt and freshly ground black pepper
- 1 onion, quartered
- 1 lemon, halved
- 4 cups chicken or turkey broth
Instructions:
- Preheat the Oven: Start by preheating your oven to 325°F (165°C). This moderate temperature guarantees the turkey cooks evenly without drying out.
- Prepare the Herb Butter: In a bowl, combine the softened butter, olive oil, garlic, rosemary, thyme, and sage. Mix well until all the herbs are incorporated into the butter.
- Prepare the Turkey: Remove the turkey from its packaging and pat it dry with paper towels. Confirm the cavity is empty and remove any giblets if included.
- Season the Turkey: Generously season the inside of the turkey cavity with salt and freshly ground black pepper. Stuff the cavity with the quartered onion and halved lemon for additional flavor.
- Apply the Herb Butter: Carefully loosen the skin over the turkey breast by gently sliding your fingers under the skin. Rub half of the herb butter mixture under the skin, spreading it evenly. Rub the remaining butter all over the exterior of the turkey.
- Truss the Turkey: Tie the turkey legs together with kitchen twine to guarantee even cooking.
- Roasting the Turkey: Place the turkey on a rack in a roasting pan. Pour the chicken or turkey broth into the bottom of the pan to keep the turkey moist. Roast in the preheated oven for about 3 to 3.5 hours, or until the internal temperature reaches 165°F (74°C) in the thickest part of the breast and thigh.
- Baste the Turkey: Every 30 minutes, baste the turkey with the pan juices to keep it moist. If the skin is browning too quickly, cover the turkey loosely with aluminum foil.
- Rest Before Carving: Once the turkey is done, remove it from the oven and let it rest for at least 20 minutes before carving. This allows the juices to redistribute throughout the meat.
Extra Tips:
For a beautifully golden and crispy skin, make sure the turkey is thoroughly dry before applying the herb butter.
The resting period is essential, as it guarantees the meat remains juicy and flavorful when carved.
If you’re aiming for a more intense herb flavor, you can prepare the herb butter a day in advance and allow it to infuse overnight.
Finally, remember to save the pan drippings to make a delicious homemade gravy to accompany your turkey.
Savory Sausage and Apple Stuffing
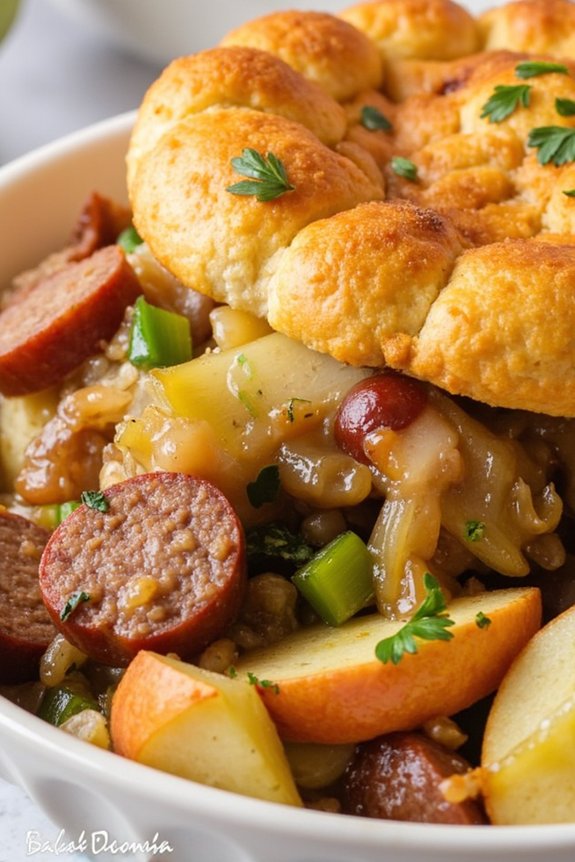
Thanksgiving is a time to gather with family and enjoy a feast of delicious foods, and no Thanksgiving table is complete without a savory stuffing. This Savory Sausage and Apple Stuffing brings a delightful twist to the traditional dish, combining the rich flavors of sausage with the sweetness of apples. This recipe is bound to be a crowd-pleaser, with its perfect balance of savory and sweet, and will leave your guests asking for seconds.
The heartiness of the sausage pairs beautifully with the crispness of the apples, while aromatic herbs like sage and thyme add depth and warmth to this side dish. Whether it’s your first time hosting Thanksgiving or you’re a seasoned pro, this recipe is straightforward and will complement any main course on your holiday table. The serving size is perfect for 4-6 people, making it an ideal choice for a cozy family gathering.
Ingredients (for 4-6 people):
- 1 pound Italian sausage, casings removed
- 1 large onion, diced
- 2 celery stalks, diced
- 2 apples, peeled, cored, and diced
- 8 cups cubed day-old bread
- 1/2 cup unsalted butter
- 2 cups chicken broth
- 1 teaspoon dried sage
- 1 teaspoon dried thyme
- Salt and pepper to taste
- 1/4 cup fresh parsley, chopped
Cooking Instructions:
- Preheat the Oven: Begin by preheating your oven to 350°F (175°C). This will guarantee it’s at the right temperature when your stuffing is ready to bake.
- Cook the Sausage: In a large skillet over medium heat, cook the sausage until it’s browned and fully cooked, breaking it into small pieces with a spoon. Once done, remove the sausage from the skillet and set it aside.
- Sauté the Vegetables and Apples: In the same skillet, add the butter and let it melt. Add the diced onion and celery, cooking until they’re softened and translucent, about 5 minutes. Add the diced apples and cook for another 2-3 minutes until they’re just tender.
- Combine Ingredients: In a large mixing bowl, combine the cooked sausage, sautéed vegetables and apples, cubed bread, sage, thyme, salt, pepper, and fresh parsley. Mix well to guarantee all ingredients are evenly distributed.
- Add Broth and Mix: Gradually add the chicken broth to the mixture, stirring gently to moisten the bread cubes. The mixture should be moist but not soggy.
- Transfer to Baking Dish: Lightly grease a 9×13-inch baking dish. Transfer the stuffing mixture into the dish, spreading it out evenly.
- Bake the Stuffing: Place the baking dish in the preheated oven and bake for 30-35 minutes, or until the top is golden brown and crispy.
Extra Tips:
For the best results, use day-old bread as it will absorb the flavors better without becoming too mushy. If you don’t have day-old bread, you can lightly toast fresh bread cubes in the oven before using them.
Feel free to customize this recipe by adding nuts like walnuts or pecans for an extra crunch, or cranberries for a hint of tartness. Always taste the stuffing before baking and adjust the seasoning as needed to suit your palate.
Creamy Mashed Potatoes With Garlic
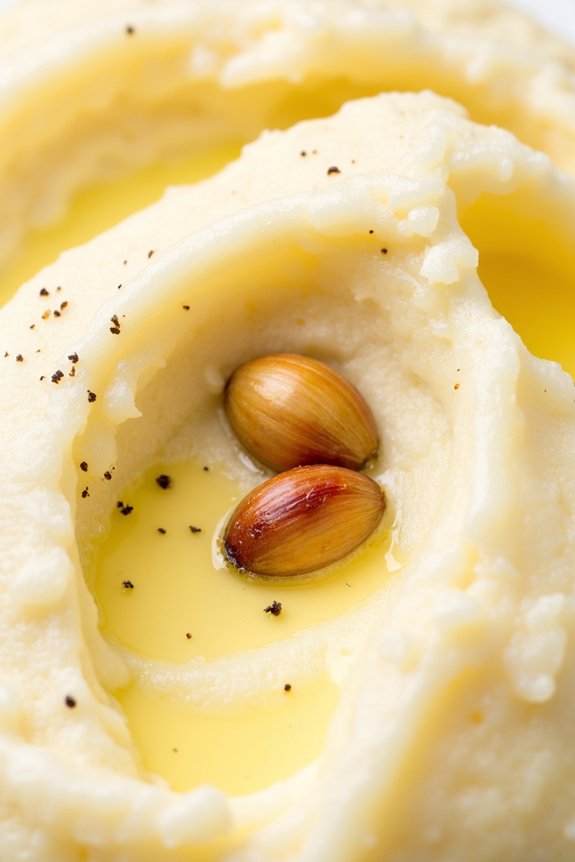
Creamy Mashed Potatoes With Garlic is a classic side dish that perfectly complements any Thanksgiving feast. This dish is known for its velvety texture and rich flavor, thanks to the addition of roasted garlic. The garlic infuses the potatoes with a subtle, nutty taste that elevates the traditional mashed potatoes to a whole new level. Creamy and buttery, these mashed potatoes are sure to be a hit at your holiday table.
The secret to achieving the perfect creamy texture lies in the choice of potatoes and the careful mashing process. Yukon Gold potatoes are ideal for this recipe because of their natural buttery flavor and smooth consistency. Paired with roasted garlic, cream, and butter, these mashed potatoes will melt in your mouth. This recipe serves 4-6 people, making it ideal for an intimate family gathering or as part of a larger Thanksgiving spread.
Ingredients:
- 3 pounds Yukon Gold potatoes
- 1 bulb of garlic
- 1/2 cup unsalted butter
- 1 cup heavy cream
- Salt to taste
- Freshly ground black pepper to taste
- 2 tablespoons olive oil
Instructions:
- Prepare the Garlic: Preheat your oven to 400°F (200°C). Slice the top off the garlic bulb to expose the cloves. Drizzle with olive oil, wrap in aluminum foil, and roast in the oven for about 35-40 minutes until the cloves are soft and golden brown. Once done, set aside to cool.
- Cook the Potatoes: Peel and cut the potatoes into evenly sized chunks. Place them in a large pot, cover with cold water, and add a generous pinch of salt. Bring to a boil over medium-high heat, then reduce to a simmer. Cook until the potatoes are fork-tender, about 20-25 minutes.
- Mash the Potatoes: Drain the potatoes and return them to the pot. Allow them to sit for a minute to let excess moisture evaporate. Add the butter and roasted garlic cloves (squeeze the garlic out of its skin) to the potatoes.
- Add Cream and Seasonings: Heat the heavy cream in a small saucepan until warm, then gradually add it to the potatoes while mashing. Use a potato masher or a ricer for the creamiest texture. Season with salt and freshly ground black pepper to taste.
- Mix and Serve: Continue mashing and stirring until the potatoes reach your desired consistency. If necessary, adjust the seasoning. Serve immediately, garnished with a pat of butter or a sprinkle of chopped fresh herbs if desired.
For extra creamy mashed potatoes, be careful not to overwork them, as this can make the texture gluey. If you prefer a richer flavor, you can substitute some of the heavy cream with sour cream or cream cheese.
You can prepare the roasted garlic a day in advance to save time on the day of the meal. Reheat gently on the stove with a little extra cream or butter to revive the creaminess if needed before serving.
Green Bean Casserole With Crispy Onions
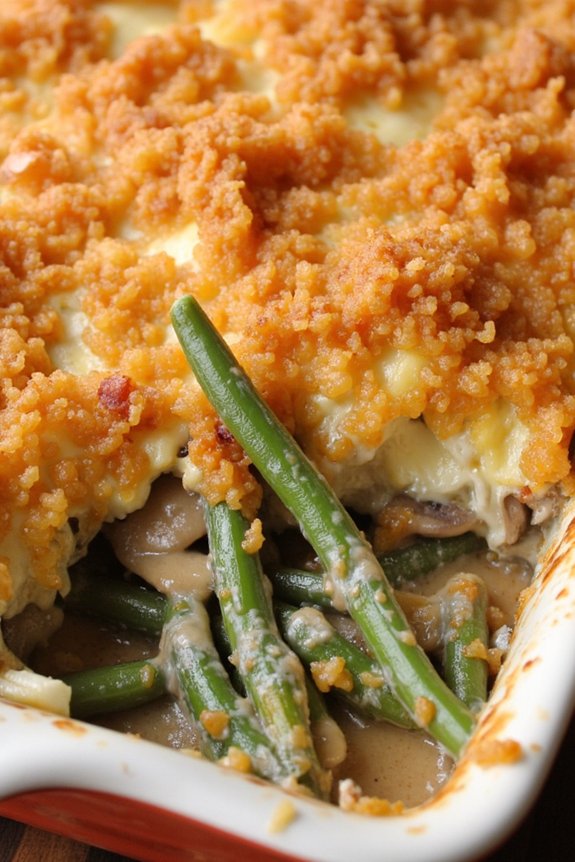
Green Bean Casserole With Crispy Onions is an all-time favorite for Thanksgiving family dinners. This classic dish combines the fresh flavor of green beans with a rich, creamy sauce, all topped with crispy fried onions for an irresistible crunch.
The casserole is simple to prepare and can be made ahead of time, making it the perfect addition to any Thanksgiving spread. Whether you’re hosting a large gathering or a more intimate family meal, this Green Bean Casserole is sure to please everyone at the table.
The origins of Green Bean Casserole date back to the 1950s when it was developed by Campbell Soup Company as a way to promote their cream of mushroom soup. Over the years, this dish has become a staple on Thanksgiving menus across the country, loved for its comforting flavors and ease of preparation.
The combination of tender green beans, savory mushroom sauce, and crispy onions creates a delightful mix of textures and tastes that complement the other traditional Thanksgiving dishes.
Ingredients (serving size: 4-6 people):
- 1 pound fresh green beans, trimmed and cut into 1-inch pieces
- 2 tablespoons unsalted butter
- 1 small onion, finely chopped
- 2 cloves garlic, minced
- 1 cup sliced mushrooms
- 1 can (10.5 ounces) cream of mushroom soup
- 1/2 cup milk
- 1 teaspoon soy sauce
- Salt and pepper to taste
- 1 cup fried crispy onions
Cooking Instructions:
1. Preheat the Oven:
Preheat your oven to 350°F (175°C) to get it ready for baking the casserole.
2. Prepare the Green Beans:
Blanch the green beans in boiling water for 3-4 minutes until they’re bright green and tender-crisp. Drain and immediately transfer them to a bowl of ice water to stop the cooking process. Drain again and set aside.
3. Make the Mushroom Sauce:
In a large skillet, melt the butter over medium heat. Add the chopped onion and sauté for about 2-3 minutes until translucent. Stir in the garlic and mushrooms, cooking for another 5 minutes until the mushrooms are browned and softened.
4. Combine Ingredients:
Stir in the cream of mushroom soup, milk, soy sauce, salt, and pepper to the skillet. Mix well and allow the sauce to simmer for 2 minutes, stirring occasionally.
5. Assemble the Casserole:
In a large mixing bowl, combine the blanched green beans with the mushroom sauce. Transfer the mixture to a greased 9×13-inch baking dish, spreading it out evenly.
6. Top with Crispy Onions:
Sprinkle the fried crispy onions evenly over the top of the green bean mixture.
7. Bake:
Place the casserole in the preheated oven and bake for 25-30 minutes, or until the edges are bubbly and the onions are golden brown.
8. Serve:
Remove the casserole from the oven and let it cool slightly before serving. Enjoy this delicious side dish as part of your Thanksgiving feast.
Extra Tips:
For an even richer flavor, consider adding a handful of grated cheddar cheese to the mushroom sauce before baking. If you’re preparing this dish in advance, assemble the casserole without the crispy onions and store it covered in the refrigerator.
When ready to serve, bake as directed, adding the onions during the last 5 minutes of baking to keep them crunchy. Additionally, you can substitute canned green beans if fresh ones are unavailable, though the texture may be slightly different.
Sweet Potato Casserole With Marshmallow Topping
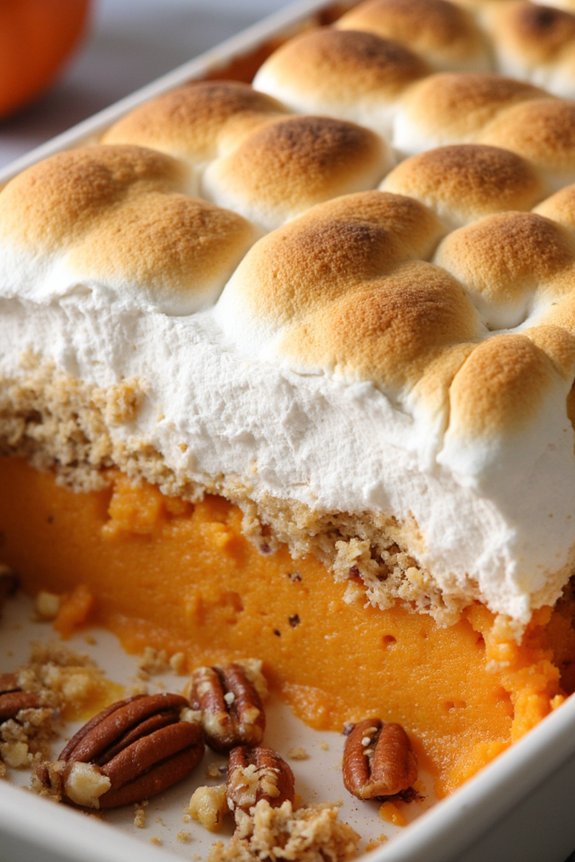
Sweet Potato Casserole With Marshmallow Topping is a classic Thanksgiving side dish that combines the natural sweetness of sweet potatoes with a gooey layer of melted marshmallows. This dish is a delightful blend of flavors and textures, making it a favorite at holiday gatherings.
The creamy sweet potato base is perfectly balanced by a crunchy pecan streusel and a sweet marshmallow topping, creating a comforting and festive treat that everyone will love.
Preparing this dish is a wonderful way to bring family and friends together during the holidays. The sweet potatoes are first cooked until tender, then mashed to create a smooth and flavorful base. The pecan streusel adds a delightful crunch, while the marshmallows melt to form a golden, toasted topping that’s sure to impress.
This recipe serves 4-6 people, making it ideal for a family Thanksgiving dinner.
Ingredients:
- 4 large sweet potatoes
- 1/2 cup brown sugar
- 1/4 cup unsalted butter, melted
- 1/2 cup heavy cream
- 1 teaspoon vanilla extract
- 1/2 teaspoon ground cinnamon
- 1/4 teaspoon ground nutmeg
- 1/4 teaspoon salt
- 1 cup mini marshmallows
- 1/2 cup pecans, chopped
Cooking Instructions:
- Preheat the Oven: Preheat your oven to 350°F (175°C).
- Prepare the Sweet Potatoes: Peel and cut the sweet potatoes into large chunks. Place them in a large pot and cover with water. Bring to a boil over medium-high heat, then reduce the heat and simmer for 20 minutes, or until the sweet potatoes are fork-tender.
- Mash the Sweet Potatoes: Drain the cooked sweet potatoes and return them to the pot. Add the brown sugar, melted butter, heavy cream, vanilla extract, ground cinnamon, ground nutmeg, and salt. Mash until smooth and creamy.
- Assemble the Casserole: Transfer the mashed sweet potatoes to a greased 9×13-inch baking dish. Spread them out evenly.
- Add the Toppings: Sprinkle the chopped pecans evenly over the mashed sweet potatoes. Top with an even layer of mini marshmallows.
- Bake the Casserole: Place the baking dish in the preheated oven and bake for 20-25 minutes, or until the marshmallows are golden brown and the casserole is heated through.
- Serve: Remove from the oven and let it cool for a few minutes before serving. Enjoy your Sweet Potato Casserole With Marshmallow Topping warm.
Extra Tips:
For a deeper flavor, you can roast the sweet potatoes instead of boiling them. Simply place them on a baking sheet and bake at 400°F (200°C) for about 45 minutes, or until tender. This will enhance the natural sweetness of the potatoes.
Additionally, if you prefer a less sweet dish, you can reduce the amount of brown sugar or marshmallows. Feel free to experiment with additional spices, such as a pinch of clove or ginger, to customize the flavor profile to your liking.
Cranberry Sauce With Orange Zest
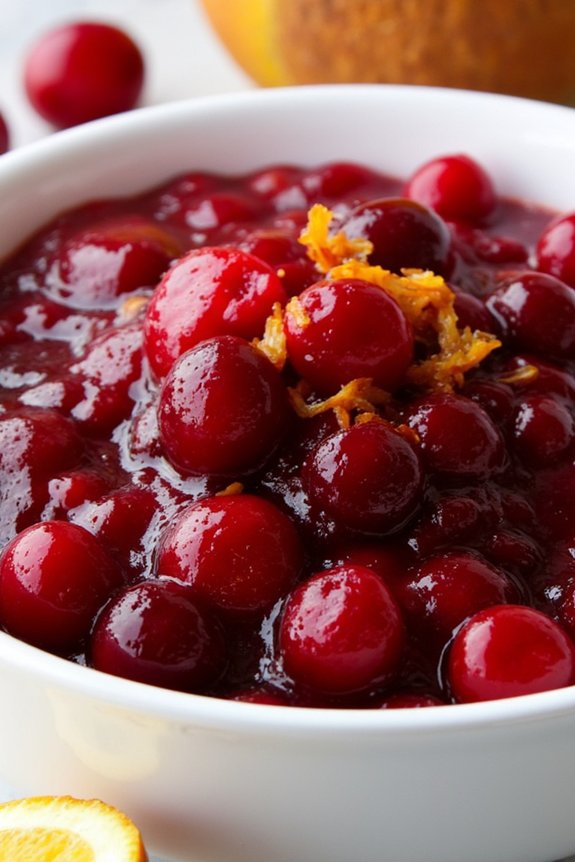
Cranberry Sauce With Orange Zest is a perfect addition to your Thanksgiving family dinner, offering a delightful balance of tartness and sweetness. This vibrant sauce is a classic staple that pairs wonderfully with turkey and other traditional dishes. The addition of orange zest imparts a invigorating citrusy aroma and taste, elevating the overall flavor profile of the sauce.
Not only is this dish simple to prepare, but it also adds a burst of color to your holiday table, making it both a visual and gustatory treat. This recipe yields enough cranberry sauce for 4-6 people, ensuring everyone gets a generous helping. The natural sweetness of the cranberries is complemented by the earthy warmth of cinnamon, and the tangy hint of orange zest adds a invigorating twist.
With its bright, jewel-like appearance, this sauce isn’t just a condiment but a conversation starter, inviting your family and guests to indulge in the quintessential flavors of the season.
Ingredients for 4-6 servings:
- 12 ounces fresh cranberries
- 1 cup granulated sugar
- 1 cup orange juice (preferably fresh)
- 1 tablespoon orange zest
- 1 teaspoon ground cinnamon
- A pinch of salt
- 1/4 cup water
Cooking Instructions:
- Prepare the Ingredients: Rinse the cranberries under cold water and discard any that are bruised or damaged. Zest the orange until you have about 1 tablespoon and set aside.
- Combine the Base Ingredients: In a medium saucepan, combine the orange juice, water, and sugar. Stir over medium heat until the sugar is completely dissolved.
- Add the Cranberries: Once the sugar has dissolved, add the cranberries to the saucepan. Bring the mixture to a boil, then reduce the heat to a simmer.
- Cook the Cranberries: Allow the cranberries to simmer for about 10-15 minutes. You’ll notice the cranberries begin to pop and the mixture thickens. Stir occasionally to prevent sticking.
- Incorporate the Spices: Add the orange zest, cinnamon, and a pinch of salt to the saucepan. Stir well to combine all the flavors, then let the sauce simmer for an additional 5 minutes.
- Cool and Serve: Remove the saucepan from heat and let it cool to room temperature. The sauce will continue to thicken as it cools. Once cooled, transfer it to a serving dish or an airtight container for storage.
Extra Tips:
When preparing Cranberry Sauce With Orange Zest, remember that the longer the sauce sits, the more the flavors meld together, enhancing the taste. If possible, prepare the sauce a day in advance and refrigerate it, allowing the flavors to develop fully.
If you prefer a smoother texture, you can use a potato masher to break down the cranberries further after cooking. Additionally, taste the sauce once cooled; if you find it too tart, you can adjust the sweetness by stirring in a bit more sugar. Enjoy this versatile sauce as part of your Thanksgiving feast or as a delightful accompaniment to other meals.
Homemade Gravy With Pan Drippings
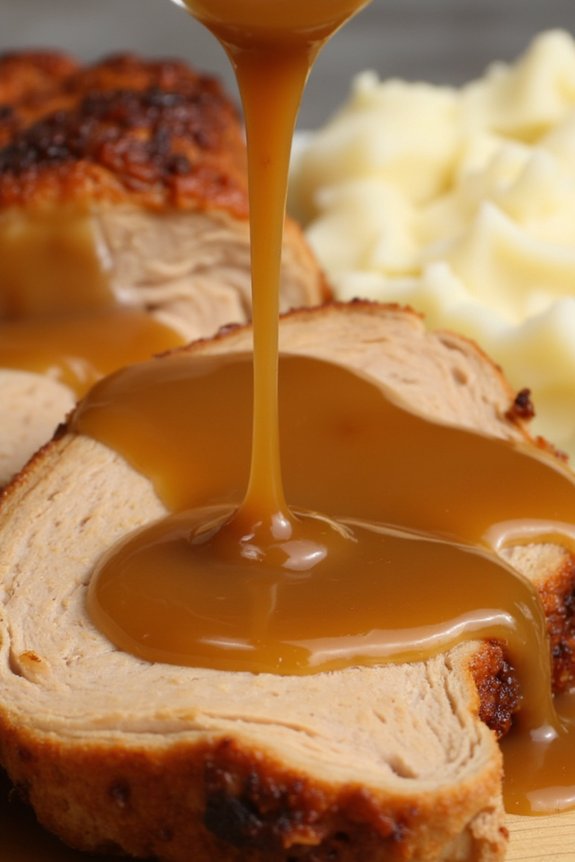
Thanksgiving dinner isn’t complete without a rich, savory gravy to pour over your turkey and mashed potatoes. Homemade gravy made from pan drippings captures the essence of the roasted bird, infusing your meal with an authentic depth of flavor that store-bought alternatives simply can’t match.
This simple yet delicious recipe will guide you through creating a silky, mouth-watering gravy that will enhance every bite of your holiday feast. Making gravy from pan drippings is a straightforward process that requires only a few additional ingredients.
The key to a good gravy is in the preparation of the roux, which thickens the sauce and adds a subtle, nutty flavor. This recipe yields enough gravy for 4-6 people, making it perfect for a family gathering. As you follow these steps, you’ll find that whipping up homemade gravy is both rewarding and satisfying, turning your Thanksgiving dinner into a memorable culinary experience.
Ingredients for 4-6 servings:
- 1/4 cup turkey pan drippings
- 1/4 cup all-purpose flour
- 2 cups turkey or chicken broth
- Salt, to taste
- Black pepper, to taste
- Optional: a splash of white wine or a teaspoon of soy sauce for depth of flavor
Instructions:
- Collect Pan Drippings: After roasting your turkey, carefully pour the drippings from the roasting pan into a heatproof measuring cup or bowl. Allow the drippings to sit for a few minutes so the fat rises to the top.
- Separate Fat: Skim off 1/4 cup of the fat from the top of the drippings and place it in a medium saucepan over medium heat. If you don’t have enough fat, supplement with melted butter.
- Make the Roux: Add the flour to the saucepan with the fat, whisking continuously. Cook for about 2-3 minutes, until the roux is golden brown and emits a nutty aroma.
- Add Broth: Gradually whisk in the turkey or chicken broth, making sure to incorporate it smoothly without lumps forming.
- Incorporate Pan Drippings: Slowly add the remaining drippings from the measuring cup to the saucepan, stirring constantly to blend well.
- Season and Simmer: Season the gravy with salt and black pepper to taste. If desired, add a splash of white wine or a teaspoon of soy sauce for extra depth. Allow the gravy to simmer for about 5-10 minutes until it thickens to your preferred consistency.
- Strain and Serve: For an ultra-smooth gravy, strain it through a fine-mesh sieve into a serving dish. Serve hot over turkey and sides.
Extra Tips:
For a more flavorful gravy, consider adding aromatic herbs such as thyme or rosemary while simmering. If your gravy turns out too thick, simply whisk in a bit more broth until it reaches your desired consistency.
Should it be too thin, continue to simmer to reduce and thicken it. Always taste and adjust the seasoning before serving to guarantee the perfect balance of flavors. Remember, the key to a great gravy is patience and continuous whisking to avoid lumps and achieve a smooth texture.
Honey-Glazed Carrots With Thyme
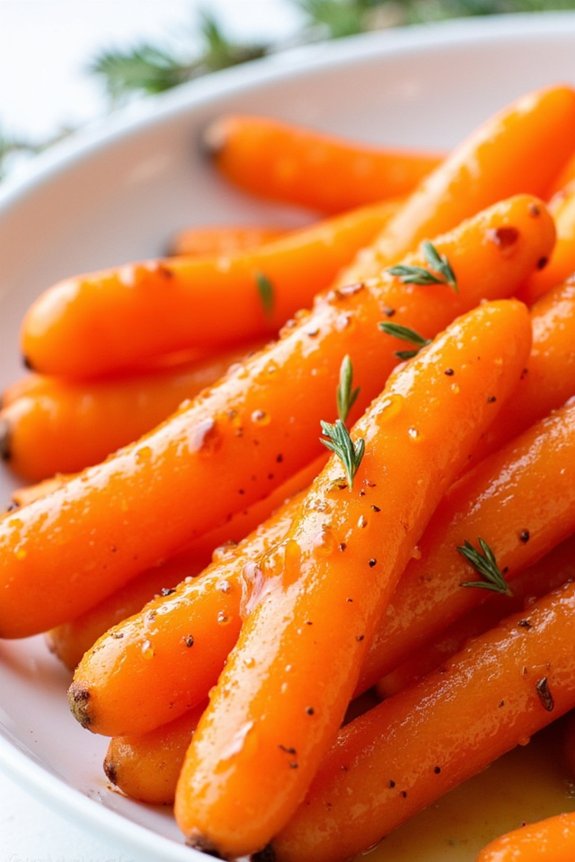
The beauty of this dish lies in its simplicity, requiring minimal ingredients while delivering maximum flavor. Fresh, tender carrots are enhanced with a glaze made from honey, butter, and thyme, creating a subtly sweet and herby coating that caramelizes beautifully in the oven. As the dish roasts, the sweetness of the honey and the earthy notes from the thyme meld together, resulting in a flavorful side that will have guests reaching for seconds.
Here’s how you can create this delightful dish for 4-6 people:
Ingredients:
- 2 pounds of carrots, peeled and cut into sticks
- 3 tablespoons of honey
- 2 tablespoons of unsalted butter
- 1 tablespoon of olive oil
- 1 teaspoon of fresh thyme leaves (or 1/2 teaspoon dried thyme)
- Salt and pepper to taste
Instructions:
- Preheat the Oven: Begin by preheating your oven to 400°F (200°C). This temperature is ideal for roasting the carrots to achieve a tender yet slightly crispy texture.
- Prepare the Carrots: Peel the carrots and cut them into uniform sticks, approximately 2-3 inches long. This guarantees even cooking. If your carrots are particularly thick, you may want to halve them lengthwise as well.
- Make the Glaze: In a small saucepan over low heat, combine the honey, butter, and olive oil. Stir until the butter is melted and the ingredients are well combined. Remove the saucepan from heat and stir in the thyme, salt, and pepper.
- Coat the Carrots: Place the carrot sticks in a large mixing bowl. Pour the honey-thyme glaze over the carrots, using a spatula to toss and verify each carrot is evenly coated.
- Roast the Carrots: Spread the glazed carrots in a single layer on a baking sheet lined with parchment paper or lightly greased. Roast in the preheated oven for 25-30 minutes, or until the carrots are tender and caramelized, stirring halfway through to verify even roasting.
- Serve: Once done, remove the carrots from the oven and transfer them to a serving dish. Garnish with a few additional thyme leaves for presentation if desired.
Extra Tips:
For the best results, try to use fresh thyme as it offers a more vibrant flavor than dried. If using dried thyme, remember to reduce the amount by half to prevent overpowering the dish.
Additionally, if you prefer a deeper caramelization, you can broil the carrots for the last 2-3 minutes of roasting, keeping a close eye to prevent burning. This dish can be prepared a few hours in advance and gently reheated before serving, making it a convenient choice for a busy holiday kitchen.
Pumpkin Pie With Whipped Cream
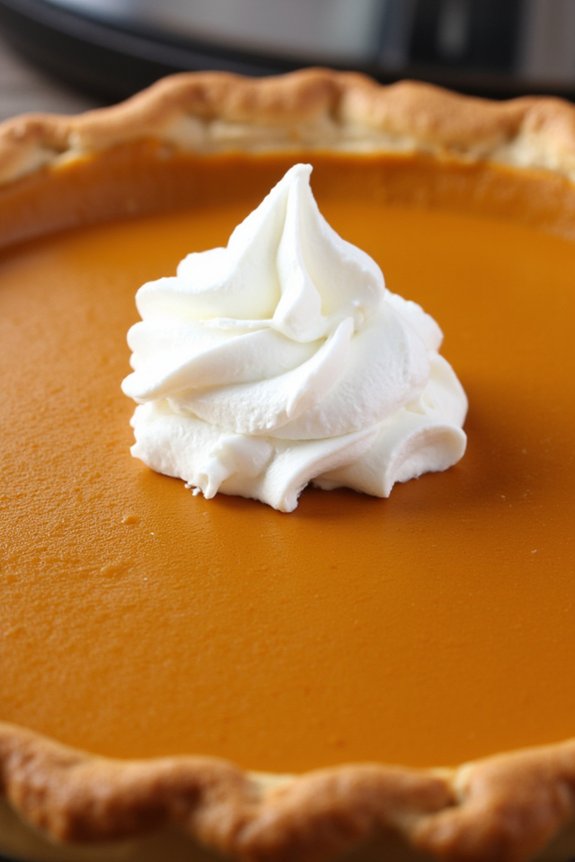
Pumpkin Pie With Whipped Cream is a classic dessert that graces many Thanksgiving tables across America. The smooth, spiced filling of pumpkin pie perfectly complements the flaky crust, making it a beloved treat for both young and old. The addition of a dollop of freshly whipped cream on top elevates the pie, adding a creamy contrast that enhances the warm spices and natural sweetness of the pumpkin.
This dessert isn’t only a feast for the taste buds but also brings a sense of nostalgia and warmth to any family gathering.
Creating the perfect Pumpkin Pie With Whipped Cream involves a few key steps: preparing the crust, mixing the spiced pumpkin filling, baking the pie to perfection, and ultimately, whipping up some homemade cream to crown the pie. Whether you’re an experienced baker or a novice in the kitchen, this recipe will guide you through making a pie that’s both delicious and visually appealing.
The following recipe serves 4-6 people, making it ideal for a small family gathering or an intimate dinner with friends.
Ingredients:
- 1 unbaked 9-inch pie crust
- 2 cups pumpkin puree
- 1 cup evaporated milk
- 3/4 cup granulated sugar
- 2 large eggs
- 1 teaspoon ground cinnamon
- 1/2 teaspoon ground ginger
- 1/4 teaspoon ground nutmeg
- 1/4 teaspoon ground cloves
- 1/2 teaspoon salt
- 1 teaspoon vanilla extract
- 1 cup heavy cream
- 2 tablespoons powdered sugar
- 1 teaspoon vanilla extract (for whipped cream)
Cooking Instructions:
- Preheat the Oven: Set your oven to 425°F (220°C) to preheat while you prepare the pie filling. This guarantees the crust gets a nice initial crisp.
- Prepare the Filling: In a large mixing bowl, combine the pumpkin puree, evaporated milk, and granulated sugar. Stir until the mixture is smooth. Add in the eggs, cinnamon, ginger, nutmeg, cloves, salt, and vanilla extract. Mix well until all ingredients are thoroughly incorporated.
- Fill the Pie Crust: Pour the pumpkin mixture into the unbaked pie crust, spreading it evenly with a spatula to guarantee a smooth surface.
- Bake the Pie: Place the pie in the preheated oven and bake at 425°F (220°C) for 15 minutes. Then, reduce the heat to 350°F (175°C) and continue baking for 40-50 minutes, or until a knife inserted near the center comes out clean.
- Cool the Pie: Remove the pie from the oven and let it cool on a wire rack for at least 2 hours. This allows the filling to set properly.
- Make the Whipped Cream: While the pie cools, prepare the whipped cream. In a cold mixing bowl, combine heavy cream, powdered sugar, and vanilla extract. Whisk or beat with an electric mixer until soft peaks form.
- Serve: Once the pie is cool, slice and serve with a generous dollop of whipped cream on top.
Extra Tips:
For an extra flaky crust, consider chilling your pie crust in the refrigerator for 15-30 minutes before filling it. This helps the butter in the crust stay cold, creating a flakier texture when baked.
When making the whipped cream, verify that your bowl and beaters are cold; this will help the cream whip up more quickly and hold its shape better.
Finally, if you’re making the pie in advance, store it in the refrigerator and add the whipped cream just before serving to keep it fresh and fluffy.
Pecan Pie With Bourbon Infusion
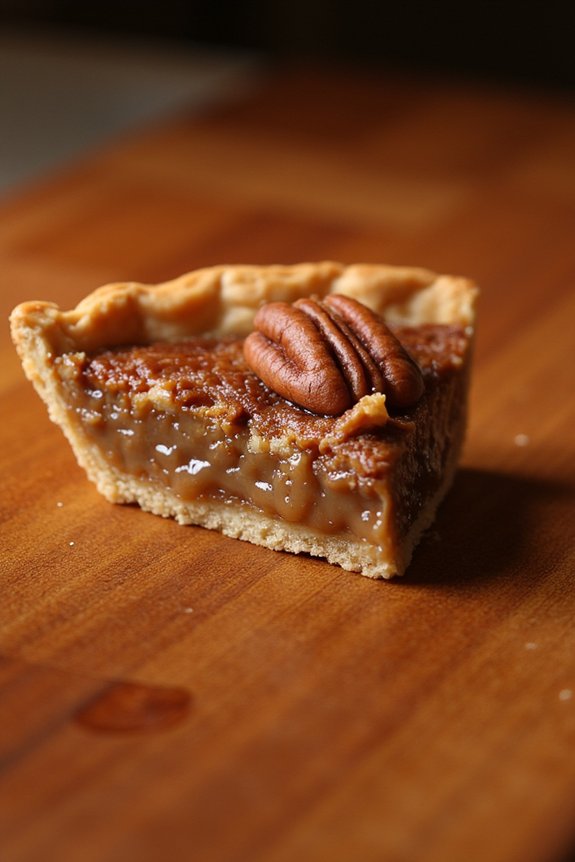
Pecan pie is a classic dessert that graces many Thanksgiving tables, but adding a touch of bourbon brings an extra layer of warmth and depth to this sweet treat. The rich, nutty flavor of the pecans pairs beautifully with the caramel-like filling, while the bourbon enhances the overall taste with its subtle notes of vanilla and oak. This pecan pie with bourbon infusion is sure to become a family favorite, perfect for those who enjoy a sophisticated twist on traditional recipes.
To create this delightful pie, you’ll start by preparing a buttery crust that serves as the foundation for the gooey filling. The filling itself is a blend of corn syrup, sugar, eggs, and melted butter, all brought together with a splash of good-quality bourbon. As the pie bakes, the aroma of toasted pecans and bourbon will fill your kitchen, creating an inviting atmosphere for your Thanksgiving gathering.
Whether served warm with a dollop of whipped cream or at room temperature, this pie is guaranteed to impress your guests.
Ingredients (serves 4-6):
- 1 unbaked 9-inch pie crust
- 1 cup light corn syrup
- 1 cup granulated sugar
- 3 large eggs
- 1/4 cup unsalted butter, melted
- 2 tablespoons bourbon
- 1 teaspoon vanilla extract
- 1/4 teaspoon salt
- 1 1/2 cups pecan halves
Cooking Instructions:
- Preheat the Oven: Set your oven to 350°F (175°C) to guarantee it reaches the right temperature while you prepare the pie.
- Prepare the Pie Crust: Roll out your pie crust and gently press it into a 9-inch pie plate. Trim any excess dough and crimp the edges for a decorative finish. Place the crust in the refrigerator to chill while you make the filling.
- Mix the Filling: In a large mixing bowl, combine the corn syrup, granulated sugar, and melted butter. Stir well until the sugar is dissolved.
- Add the Eggs and Flavorings: Beat the eggs lightly in a separate bowl, then add them to the sugar mixture. Stir in the bourbon, vanilla extract, and salt. Mix until all ingredients are fully incorporated.
- Assemble the Pie: Remove the pie crust from the refrigerator. Evenly distribute the pecan halves over the bottom of the crust. Pour the filling mixture over the pecans, making sure they’re well coated and submerged.
- Bake the Pie: Place the pie on the center rack of your preheated oven. Bake for 50 to 60 minutes, or until the pie is set and the top is a rich golden brown. The center should be slightly jiggly but will firm up as it cools.
- Cool the Pie: Allow the pie to cool on a wire rack for at least 2 hours before slicing. This cooling period helps the filling to set properly.
Extra Tips:
For an extra-crispy crust, you can blind-bake the pie crust for about 10 minutes before adding the filling. If you prefer a stronger bourbon flavor, you can increase the amount slightly, but be cautious as too much liquid can affect the pie’s texture.
Consider toasting the pecans lightly before adding them to the pie for an enhanced nutty flavor. Finally, if you find the edges of the crust browning too quickly during baking, cover them with a pie shield or strips of aluminum foil to prevent over-browning.
Spiced Apple Cider for a Cozy Toast

Spiced Apple Cider for a Cozy Toast is the perfect beverage to warm your guests and set a festive mood for your Thanksgiving family dinner. This delightful drink isn’t only aromatic but also loaded with the comforting flavors of cinnamon, cloves, and nutmeg, making it an ideal companion for chilly autumn evenings.
Whether you’re hosting a large gathering or enjoying a quiet night with family, a pot of spiced apple cider simmering on the stove will fill your home with an inviting aroma that beckons everyone to the table.
This recipe is designed to serve 4-6 people, making it a perfect addition to your Thanksgiving dinner spread. The key to achieving the perfect spiced apple cider is in the balance of spices and sweetness, which can be easily adjusted to suit your taste preferences.
The combination of fresh apple cider, fragrant spices, and a touch of orange and maple syrup creates a harmonious blend that’s both invigorating and soothing. Let’s get started on this cozy toast.
Ingredients for 4-6 servings:
- 8 cups fresh apple cider
- 1 orange, sliced
- 4 cinnamon sticks
- 1 teaspoon whole cloves
- 1/2 teaspoon ground nutmeg
- 1/4 cup maple syrup
- 1 teaspoon vanilla extract
- Optional: additional cinnamon sticks or apple slices for garnish
Cooking Instructions:
- Prepare the Ingredients: Begin by washing and slicing the orange into thin rounds. This will allow the citrus flavors to infuse more effectively into the cider.
- Combine in a Pot: In a large pot, pour in the apple cider. Add the orange slices, cinnamon sticks, whole cloves, and ground nutmeg. Stir in the maple syrup and vanilla extract to integrate all the flavors.
- Simmer the Cider: Place the pot over medium heat. Allow the mixture to come to a gentle simmer. Avoid boiling the cider, as this can reduce the subtle flavors of the spices.
- Infuse the Flavors: Reduce the heat to low and let the cider simmer for at least 30 minutes. This will allow the spices and orange to fully infuse into the cider, creating a rich and aromatic beverage.
- Strain and Serve: After the cider has simmered, remove it from the heat. Use a fine mesh strainer or slotted spoon to remove the orange slices and whole spices. Pour the cider into mugs, and garnish with additional cinnamon sticks or apple slices if desired.
Extra Tips:
For an added layer of flavor, consider adding a splash of your favorite spirit, such as rum or bourbon, to each serving for an adult-friendly version.
If you prefer a sweeter cider, adjust the amount of maple syrup to taste. Additionally, if you have a slow cooker, you can use it to keep the cider warm throughout your gathering. Simply combine all the ingredients in the slow cooker, set it to low, and let it simmer.
This way, your guests can help themselves to a warm cup throughout the evening. Enjoy your Spiced Apple Cider for a Cozy Toast!