

Hey there, fellow food lovers!
I know we all adore those moments when a delicious meal brings the family together.
But let’s be real, we also need to keep an eye on our wallets.
I’ve gathered some easy, budget-friendly dinner recipes that will have your family coming back for seconds.
Think Cheesy Broccoli and Rice Casserole or a cozy One-Pot Chicken Alfredo.
Cheesy Broccoli and Rice Casserole

Cheesy Broccoli and Rice Casserole is a comforting and budget-friendly dish that’s perfect for family meals. This easy-to-make casserole combines tender broccoli, fluffy rice, and a rich, cheesy sauce to create a satisfying dinner that everyone will love.
It’s an excellent way to incorporate vegetables into your meal while keeping the flavors indulgently creamy. This dish can be prepared ahead of time, making it a convenient option for busy weeknights or family gatherings.
Ideal for serving 4-6 people, this casserole is both hearty and versatile. Use it as a main dish or serve it as a side alongside your favorite protein. The ingredients are simple and can often be found in your pantry or fridge, making it an economical choice without compromising on taste.
Whether you’re a seasoned cook or a novice in the kitchen, this recipe is straightforward and guaranteed to become a household favorite.
Ingredients for a serving size of 4-6 people:
- 1 1/2 cups uncooked white rice
- 3 cups broccoli florets
- 2 tablespoons butter
- 1 small onion, diced
- 2 cloves garlic, minced
- 1 can (10.5 oz) cream of mushroom soup
- 1 cup milk
- 2 cups shredded cheddar cheese
- 1/2 teaspoon salt
- 1/4 teaspoon black pepper
- 1/4 teaspoon paprika (optional)
- 1/4 cup grated Parmesan cheese
Cooking Instructions:
- Prepare the Rice: Cook the rice according to the package instructions. Once cooked, set it aside to cool slightly.
- Blanch the Broccoli: Bring a pot of water to a boil and add the broccoli florets. Blanch them for about 2-3 minutes until they’re bright green and slightly tender. Drain and set aside.
- Sauté Aromatics: In a large skillet, melt the butter over medium heat. Add the diced onion and minced garlic, sautéing until the onion is translucent and fragrant, about 5 minutes.
- Mix the Sauce: To the sautéed onions and garlic, add the cream of mushroom soup and milk. Stir until well combined and heated through. Add in the salt, pepper, and optional paprika for seasoning.
- Combine Ingredients: In a large mixing bowl, combine the cooked rice, blanched broccoli, and sauce. Add 1 1/2 cups of shredded cheddar cheese to the mixture and stir until everything is evenly coated.
- Assemble the Casserole: Preheat your oven to 350°F (175°C). Grease a 9×13-inch baking dish and pour the rice and broccoli mixture into the dish. Spread it out evenly.
- Top with Cheese: Sprinkle the remaining 1/2 cup of cheddar cheese and the Parmesan cheese over the top of the casserole.
- Bake: Place the casserole in the preheated oven and bake for 25-30 minutes or until the cheese is melted and bubbly with a golden crust on top.
- Serve: Allow the casserole to cool slightly before serving. Enjoy it warm as a main dish or as a side.
Extra Tips:
For added texture, consider topping the casserole with breadcrumbs or crushed crackers before baking. This will create a crispy layer that contrasts nicely with the creamy interior.
If you prefer a more robust flavor, use a sharper cheddar cheese or mix in other cheeses like mozzarella or Monterey Jack. Additionally, you can customize this recipe by adding cooked chicken or mushrooms for extra protein and flavor.
Adjust the seasoning to your taste, and don’t hesitate to experiment with herbs like thyme or rosemary for an aromatic twist.
One-Pot Chicken Alfredo
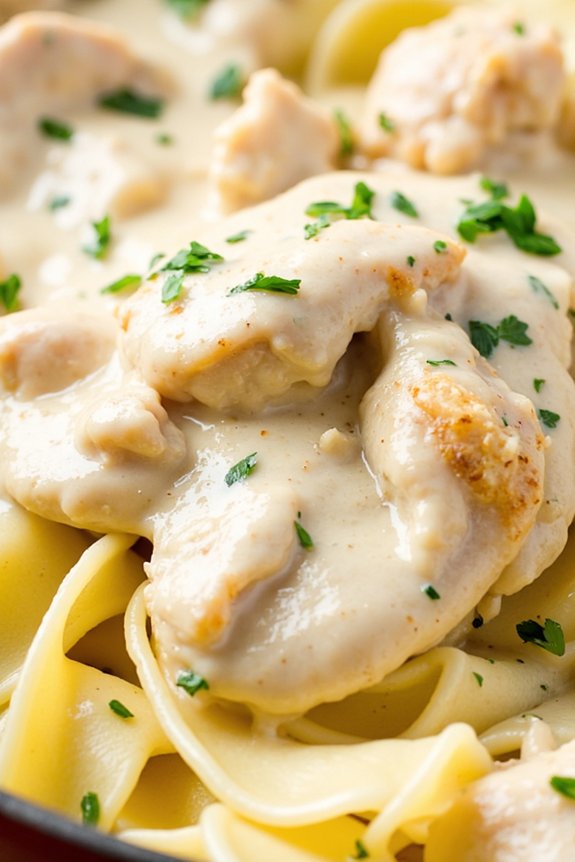
One-Pot Chicken Alfredo is a delightful and creamy dish that satisfies the whole family without breaking the bank or requiring a stack of dirty dishes. This recipe combines tender chicken, savory garlic, and rich Alfredo sauce in a single pot, guaranteeing easy preparation and cleanup.
Perfect for a quick weeknight meal, this dish brings together the comfort of a classic Italian favorite with the simplicity of one-pot cooking. As the pasta cooks in the same pot as the chicken and sauce, it absorbs all the delicious flavors, resulting in a harmonious blend of tastes and textures.
The beauty of this recipe lies not only in its simplicity but also in its versatility. You can easily adapt the dish by adding your favorite vegetables or experimenting with different herbs and spices.
Whether you’re a busy parent juggling family schedules or someone looking for a cozy meal to enjoy at the end of a long day, One-Pot Chicken Alfredo is a winner. With ingredients you likely already have in your kitchen, this dish promises to deliver mouth-watering satisfaction with minimal effort.
Ingredients (serving size: 4-6 people):
- 1 pound of boneless, skinless chicken breasts
- 2 tablespoons of olive oil
- 4 cloves of garlic, minced
- 4 cups of chicken broth
- 1 cup of heavy cream
- 12 ounces of fettuccine pasta
- 1 cup of grated Parmesan cheese
- Salt and pepper to taste
- Chopped parsley for garnish (optional)
Cooking Instructions:
- Prepare the Chicken: Begin by cutting the chicken breasts into bite-sized pieces. Season with salt and pepper to taste.
- Sauté the Chicken: In a large pot or Dutch oven, heat the olive oil over medium-high heat. Add the chicken pieces and cook until they’re golden brown and cooked through, about 5-7 minutes. Remove the chicken from the pot and set aside.
- Cook the Garlic: In the same pot, add the minced garlic and sauté for about 30 seconds until it’s fragrant, being careful not to burn it.
- Add Liquids and Pasta: Pour in the chicken broth and heavy cream, stirring to combine with the garlic. Bring the mixture to a gentle boil.
- Cook the Pasta: Once boiling, add the fettuccine pasta. Make sure the pasta is fully submerged in the liquid. Reduce the heat to medium-low and let it cook for about 10-12 minutes, stirring occasionally to prevent sticking.
- Incorporate the Chicken and Cheese: When the pasta is almost cooked to your desired tenderness, return the chicken to the pot. Add the grated Parmesan cheese, stirring until the sauce is creamy and the cheese is fully melted.
- Season and Serve: Taste and adjust the seasoning with additional salt and pepper if needed. Garnish with chopped parsley before serving, if desired.
Extra Tips:
For a more flavorful dish, consider adding a pinch of nutmeg or a sprinkle of red pepper flakes to the sauce. If you want to incorporate vegetables, broccoli or spinach can be added during the last few minutes of cooking the pasta.
To make the dish even richer, substitute half of the chicken broth with additional heavy cream. Remember, the key to a successful one-pot meal is to keep stirring occasionally to prevent sticking and guarantee even cooking.
Enjoy your One-Pot Chicken Alfredo with a side of garlic bread or a fresh green salad for a complete meal.
Vegetable Stir-Fry With Noodles
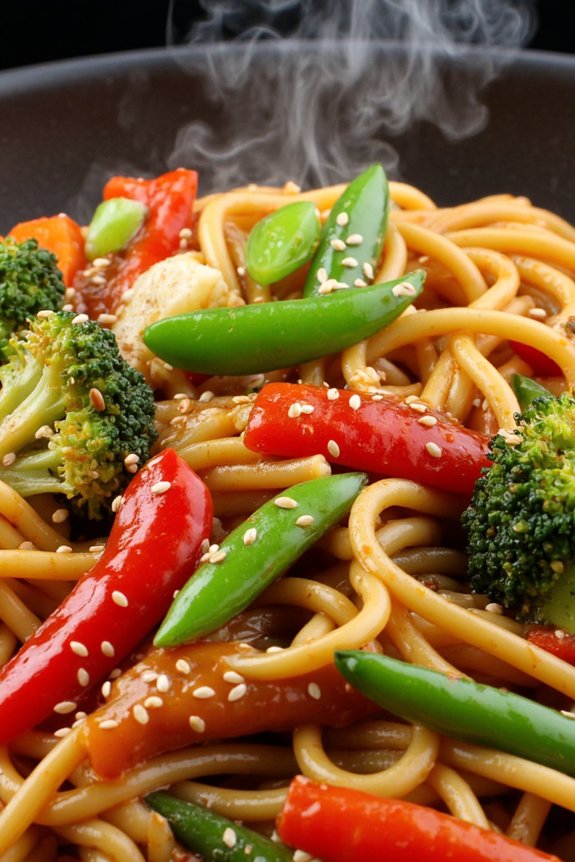
Vegetable Stir-Fry With Noodles is an excellent choice for a quick, healthy, and budget-friendly family meal. This vibrant dish is packed with a variety of colorful vegetables, offering a delightful mix of textures and flavors. The combination of fresh veggies and savory sauce tossed with noodles makes it a satisfying meal that everyone in the family will enjoy.
Plus, it’s an easy way to sneak in more vegetables into your family’s diet without them even realizing it. This recipe is perfect for busy weeknights when you need to get dinner on the table fast. With minimal prep work and a short cook time, you can have a delicious meal ready in under 30 minutes.
The ingredients are flexible, so feel free to use whatever vegetables you have on hand, making this dish not only affordable but also a great way to reduce food waste. Let’s plunge into the ingredients and the step-by-step instructions to create this delicious meal for 4-6 people.
Ingredients:
- 12 ounces of noodles (such as rice noodles or spaghetti)
- 2 tablespoons vegetable oil
- 1 red bell pepper, sliced
- 1 yellow bell pepper, sliced
- 1 cup broccoli florets
- 1 cup snap peas
- 1 large carrot, julienned
- 3 cloves garlic, minced
- 1-inch piece of ginger, minced
- 1/4 cup soy sauce
- 2 tablespoons oyster sauce
- 1 tablespoon sesame oil
- 1 tablespoon cornstarch mixed with 2 tablespoons water
- 2 green onions, chopped
- Sesame seeds for garnish (optional)
Instructions:
1. Cook the Noodles: Begin by cooking the noodles according to the package instructions. Once cooked, drain them and set aside. If using rice noodles, rinse them under cold water to stop the cooking process and prevent them from sticking together.
2. Prepare the Sauce: In a small bowl, mix together soy sauce, oyster sauce, sesame oil, and the cornstarch mixture. Stir well to combine and set aside.
3. Stir-Fry the Vegetables: Heat the vegetable oil in a large wok or skillet over medium-high heat. Add the garlic and ginger, and sauté for about 30 seconds until fragrant.
Then, add the bell peppers, broccoli, snap peas, and carrot. Stir-fry the vegetables for about 5-7 minutes or until they’re just tender but still crisp.
4. Combine with Noodles: Add the cooked noodles to the wok with the vegetables. Pour the prepared sauce over the noodles and vegetables, tossing everything together to guarantee the noodles and vegetables are well-coated with the sauce.
5. Finish and Serve: Continue to stir-fry for another 2-3 minutes until everything is heated through and the sauce has thickened slightly. Remove from heat and sprinkle with chopped green onions and sesame seeds for garnish, if using. Serve hot.
For extra flavor, consider adding a splash of lime juice or a sprinkle of crushed red pepper flakes for a bit of heat. If you want to add some protein, tofu, chicken, or shrimp can be easily incorporated into this dish.
Make sure not to overcook the vegetables; they should remain crispy to maintain their nutritional value and texture. Enjoy your Vegetable Stir-Fry With Noodles as a nutritious and satisfying meal.
Lentil Soup With Crusty Bread

Lentil Soup with Crusty Bread is a hearty and comforting meal that’s perfect for family dinners. This dish isn’t only delicious but also budget-friendly and nutritious, packed with protein, fiber, and essential nutrients from the lentils and vegetables.
The combination of warm, flavorful soup and a loaf of crusty bread makes it a complete and satisfying meal that everyone will love. Whether you’re looking to warm up on a chilly evening or just want a simple, wholesome dinner, this recipe is certain to become a family favorite.
Lentil Soup with Crusty Bread is also incredibly versatile. You can customize it with your favorite vegetables or spices, and it’s easy to adjust the seasoning to suit your family’s taste. Plus, it’s a great way to use up any leftover vegetables you have on hand.
The crusty bread is perfect for dipping and adds a delightful contrast to the smooth texture of the soup. This recipe serves 4-6 people, making it ideal for a family meal or for stocking up on leftovers for the week ahead.
Ingredients (Serves 4-6):
- 1 tablespoon olive oil
- 1 large onion, chopped
- 2 cloves garlic, minced
- 2 carrots, diced
- 2 celery stalks, diced
- 1 teaspoon cumin
- 1 teaspoon paprika
- 1/2 teaspoon dried thyme
- 1 bay leaf
- 1 cup dried green or brown lentils, rinsed
- 6 cups vegetable stock or water
- 1 can (14 oz) diced tomatoes
- Salt and pepper to taste
- 1 loaf of crusty bread
Instructions:
- Prepare the Vegetables: Start by chopping the onion, mincing the garlic, and dicing the carrots and celery. This will guarantee all the vegetables cook evenly and enhance the flavor of the soup.
- Sauté the Aromatics: Heat the olive oil in a large pot over medium heat. Add the chopped onion and sauté for about 5 minutes until it becomes translucent. Stir in the garlic and cook for another minute until fragrant.
- Add Vegetables and Spices: Add the diced carrots and celery to the pot. Stir in the cumin, paprika, dried thyme, and bay leaf. Cook for about 3-4 minutes until the vegetables start to soften.
- Incorporate Lentils and Liquid: Add the rinsed lentils to the pot, followed by the vegetable stock or water and the canned diced tomatoes. Stir everything together and bring the mixture to a boil.
- Simmer the Soup: Once boiling, reduce the heat to low and cover the pot. Let the soup simmer for about 30-40 minutes, or until the lentils are tender and the flavors have melded together. Stir occasionally to prevent sticking.
- Season the Soup: Once the lentils are cooked, remove the bay leaf and season the soup with salt and pepper to taste. Adjust the seasoning according to your preference.
- Serve: Ladle the hot soup into bowls and serve with slices of crusty bread on the side for dipping.
Extra Tips:
For an added depth of flavor, consider including a splash of lemon juice or a sprinkle of fresh herbs like parsley or cilantro before serving.
If you prefer a thicker soup, you can blend a portion of it using an immersion blender, but be sure to leave some texture for a hearty feel. Additionally, if you’re looking to make the soup even more filling, you can add cooked sausage or chicken for extra protein.
Keep in mind that lentil soup often tastes even better the next day, so feel free to make it ahead of time and enjoy it as leftovers.
Baked Ziti With Ground Turkey

Baked Ziti With Ground Turkey is a comforting, family-friendly dish that’s perfect for weeknight dinners. This hearty pasta bake combines tender ziti noodles with a savory ground turkey tomato sauce, all smothered in melted cheese.
It’s an easy-to-make meal that can be made ahead of time and reheated, making it an ideal choice for busy families. The use of ground turkey makes it a healthier option compared to traditional beef ziti, without sacrificing any flavor.
This dish isn’t only budget-friendly but also incredibly versatile. You can customize it by adding vegetables, switching up the cheese, or even using whole-wheat pasta for a more nutritious meal.
It’s a delightful way to gather everyone around the table for a satisfying and delicious dinner. Let’s explore the recipe for Baked Ziti With Ground Turkey to serve 4-6 people.
Ingredients:
- 1 pound ziti pasta
- 1 tablespoon olive oil
- 1 pound ground turkey
- 1 onion, chopped
- 3 cloves garlic, minced
- 1 teaspoon dried oregano
- 1 teaspoon dried basil
- Salt and pepper to taste
- 1 jar (about 24 ounces) marinara sauce
- 2 cups shredded mozzarella cheese
- 1/2 cup grated Parmesan cheese
- Fresh basil leaves for garnish (optional)
Cooking Instructions:
- Preheat the Oven: Start by preheating your oven to 375°F (190°C) to guarantee it’s ready when you finish preparing the dish.
- Cook the Pasta: Bring a large pot of salted water to a boil. Add the ziti pasta and cook according to package instructions until al dente. Drain the pasta and set aside.
- Prepare the Sauce: In a large skillet over medium heat, add the olive oil. Once hot, add the chopped onion and sauté until translucent, about 3-4 minutes.
- Stir in the minced garlic, cooking for another minute until fragrant.
- Cook the Turkey: Add the ground turkey to the skillet. Cook, breaking it up with a spoon, until it’s browned and cooked through, about 5-7 minutes. Season with oregano, basil, salt, and pepper.
- Combine with Marinara Sauce: Pour in the marinara sauce, stirring to combine with the turkey mixture. Let it simmer for about 10 minutes to thicken slightly.
- Assemble the Dish: In a large baking dish, combine the cooked ziti and turkey sauce. Mix well to guarantee the pasta is evenly coated. Spread the mixture out in an even layer.
- Add the Cheese: Sprinkle the mozzarella cheese evenly over the top of the ziti. Follow with the grated Parmesan cheese.
- Bake the Ziti: Place the baking dish in the preheated oven. Bake for about 25-30 minutes, or until the cheese is melted and bubbly, and the edges are lightly browned.
- Serve and Garnish: Let the baked ziti cool for a few minutes before serving. Garnish with fresh basil leaves if desired.
Extra Tips:
For an extra layer of flavor, you can add a pinch of red pepper flakes when cooking the onion and garlic for a slight kick.
If you prefer a creamier texture, consider mixing in a cup of ricotta cheese with the pasta before baking. Additionally, this recipe is freezer-friendly; you can assemble the dish, cover it tightly, and freeze it for up to two months.
When ready to cook, simply thaw and bake as directed.
Shakshuka With Crusty Bread

Shakshuka With Crusty Bread is a delightful Middle Eastern and North African dish that has found its way into kitchens around the world. This vibrant dish consists of poached eggs simmered in a spicy tomato and bell pepper sauce, offering a satisfying meal that’s both nutritious and comforting.
The combination of flavors creates a hearty meal perfect for breakfast, brunch, or dinner. Paired with crusty bread, Shakshuka becomes a complete meal, offering a delightful balance of textures and tastes.
Not only is Shakshuka a delicious meal, but it’s also budget-friendly and easy to prepare, making it perfect for family dinners. The simplicity of its ingredients and the minimal cooking time mean you can have this dish ready in under an hour.
The key to a good Shakshuka is allowing the flavors to meld together to create a rich and aromatic sauce in which the eggs can gently cook. The crusty bread serves as a great accompaniment, perfect for scooping up the delicious sauce and eggs.
Ingredients (Serves 4-6)
- 2 tablespoons olive oil
- 1 large onion, chopped
- 1 red bell pepper, seeded and chopped
- 4 garlic cloves, minced
- 1 teaspoon ground cumin
- 1 teaspoon smoked paprika
- 1/4 teaspoon chili powder (optional)
- 1 can (28 ounces) whole peeled tomatoes with juice
- Salt and pepper, to taste
- 6 large eggs
- 1/4 cup fresh parsley, chopped
- 1/4 cup fresh cilantro, chopped
- 1 loaf crusty bread
Cooking Instructions
- Heat the Oil: In a large skillet or frying pan, heat the olive oil over medium heat. Add the chopped onion and red bell pepper, cooking for about 5-7 minutes until the vegetables are softened.
- Add Garlic and Spices: Stir in the minced garlic, cumin, smoked paprika, and chili powder (if using). Cook for an additional 1-2 minutes until the spices are fragrant.
- Prepare the Sauce: Pour in the canned tomatoes with their juice, breaking them up with a spoon. Season with salt and pepper. Allow the mixture to simmer for about 10-15 minutes, stirring occasionally, until the sauce has thickened.
- Create Wells for Eggs: Using a spoon, make small wells in the sauce. Crack an egg into each well, spacing them evenly across the skillet.
- Cook the Eggs: Cover the skillet and let the eggs poach in the sauce for about 5-8 minutes, or until the whites are set but the yolks remain slightly runny.
- Finish with Herbs: Once cooked, remove from heat and sprinkle the chopped parsley and cilantro over the dish.
- Serve: Serve the Shakshuka hot with slices of crusty bread on the side for dipping.
Extra Tips
When preparing Shakshuka, it’s important to keep an eye on the consistency of the sauce. If it becomes too thick before adding the eggs, you can add a splash of water to achieve the desired consistency.
For a spicier version, consider adding a sliced chili or a dash of cayenne pepper. Additionally, experiment with topping the dish with crumbled feta cheese for added flavor.
Remember to use a pan with a lid to guarantee the eggs poach evenly. Enjoy your Shakshuka as a communal dish, encouraging everyone to dip their bread and savor the rich blend of spices and flavors.
Black Bean Tacos With Salsa

Black Bean Tacos with Salsa are a delicious and budget-friendly option for family meals. This vegetarian dish isn’t only affordable but also packed with nutrients, making it a perfect choice for a healthy and satisfying dinner.
Black beans are a great source of protein and fiber, while the fresh salsa adds a burst of flavor and vitality to the tacos. These tacos can be customized with a variety of toppings, allowing each family member to create their own perfect meal.
The beauty of Black Bean Tacos with Salsa lies in their simplicity and versatility. They’re quick to prepare, making them ideal for busy weeknights when time is of the essence. Additionally, these tacos are a great way to introduce more plant-based meals into your diet without sacrificing flavor.
With just a few ingredients and minimal cooking time, you can have a delicious and nutritious meal on the table that everyone will love. Let’s plunge into the recipe to see how you can make these tacos at home.
Ingredients (serving size 4-6 people)
- 2 cans black beans, drained and rinsed
- 1 tablespoon olive oil
- 1 teaspoon ground cumin
- 1 teaspoon chili powder
- Salt and pepper to taste
- 12 small corn tortillas
- 1 cup shredded lettuce
- 1 cup diced tomatoes
- 1/2 cup diced red onion
- 1/4 cup chopped fresh cilantro
- 1 lime, cut into wedges
- 1 cup shredded cheddar cheese
- 1 cup sour cream (optional)
- Hot sauce (optional)
Cooking Instructions
1. Prepare the Black Beans:
In a medium-sized skillet, heat the olive oil over medium heat. Add the drained and rinsed black beans to the skillet. Sprinkle the ground cumin and chili powder over the beans and stir well to combine.
Cook the beans for about 5-7 minutes, stirring occasionally, until they’re heated through and slightly soft. Season with salt and pepper to taste, then remove from heat.
2. Warm the Tortillas:
While the black beans are cooking, warm the corn tortillas. You can do this by heating them on a dry skillet over medium heat for about 30 seconds on each side until they’re pliable. Alternatively, wrap them in a damp paper towel and microwave for about 30-45 seconds.
3. Prepare the Salsa:
In a medium bowl, combine the diced tomatoes, red onion, and chopped cilantro. Squeeze the juice of half a lime over the mixture and stir well.
Add salt and pepper to taste. This fresh salsa will add a revitalizing touch to your tacos.
4. Assemble the Tacos:
Lay the warm tortillas on a flat surface. Start by adding a generous spoonful of the spiced black beans onto each tortilla. Top with a layer of shredded lettuce, followed by the fresh salsa.
Sprinkle some shredded cheddar cheese over the top. If desired, add a dollop of sour cream and a dash of hot sauce for extra flavor.
5. Serve:
Garnish each taco with a lime wedge for squeezing over the top. Serve immediately while the tacos are warm and the cheese is slightly melted. Enjoy your flavorful and healthy Black Bean Tacos with Salsa!
Extra Tips
When making Black Bean Tacos with Salsa, feel free to experiment with additional toppings such as avocado slices, jalapeños, or roasted corn for extra flavor and texture.
If you prefer a spicier kick, add more chili powder or include a diced jalapeño in the salsa. For a vegan version, simply omit the cheese and sour cream, or replace them with vegan alternatives.
These tacos are incredibly versatile, so adjust the ingredients to suit your taste preferences and dietary needs.
Tuna Pasta Salad
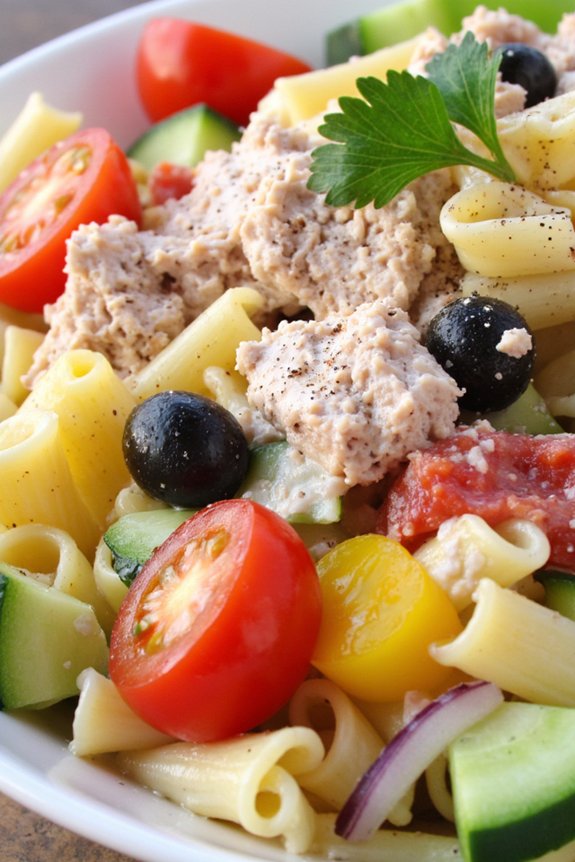
Tuna Pasta Salad is a delightful and budget-friendly dish that’s perfect for family meals. It’s invigorating, easy to make, and can be served as a main course or a side dish. The combination of tender pasta, protein-rich tuna, and crunchy vegetables makes it a nutritious option that everyone at the table will enjoy.
This dish can be prepared in advance, making it a convenient choice for busy weeknights or a quick lunch. The versatility of Tuna Pasta Salad allows you to customize the ingredients to suit your family’s preferences. You can use any pasta shape you have on hand, and the addition of fresh vegetables adds color and texture to the dish.
The creamy and tangy dressing ties all the flavors together, making each bite a delightful experience. This recipe serves 4-6 people and is sure to become a family favorite.
Ingredients:
- 12 ounces of pasta (such as rotini or bowtie)
- 2 cans (5 ounces each) of tuna in water, drained
- 1 cup of cherry tomatoes, halved
- 1 cup of cucumber, diced
- 1/2 cup of red onion, finely chopped
- 1/2 cup of bell pepper, diced
- 1/4 cup of black olives, sliced
- 1/2 cup of mayonnaise
- 2 tablespoons of lemon juice
- 1 tablespoon of Dijon mustard
- Salt and pepper to taste
- Fresh parsley, chopped (optional)
Instructions:
- Cook the Pasta: Begin by bringing a large pot of salted water to a boil. Add the pasta and cook according to the package instructions until al dente. Drain and rinse the pasta under cold water to stop the cooking process and cool it down. Set aside.
- Prepare the Dressing: In a small bowl, whisk together the mayonnaise, lemon juice, Dijon mustard, salt, and pepper. Adjust the seasoning to taste, ensuring the dressing is well-balanced and flavorful.
- Combine Ingredients: In a large mixing bowl, combine the cooked pasta, drained tuna, cherry tomatoes, cucumber, red onion, bell pepper, and black olives. Gently toss the ingredients to distribute them evenly.
- Add the Dressing: Pour the prepared dressing over the pasta and vegetables. Use a spatula to gently fold and mix everything until the pasta and vegetables are well coated with the dressing.
- Chill and Serve: Cover the bowl with plastic wrap or a lid and refrigerate for at least 30 minutes to allow the flavors to meld together. Before serving, taste and adjust the seasoning if necessary. Garnish with freshly chopped parsley, if desired.
Extra Tips:
For the best flavor, let the Tuna Pasta Salad chill for a few hours or overnight. This allows the ingredients to absorb the dressing and enhances the overall taste.
If you prefer a lighter version, you can substitute half of the mayonnaise with Greek yogurt. Additionally, feel free to add other favorite ingredients such as celery, capers, or shredded cheese to customize the dish.
This salad is a great make-ahead option and can be stored in the refrigerator for up to 3 days.
Egg Fried Rice
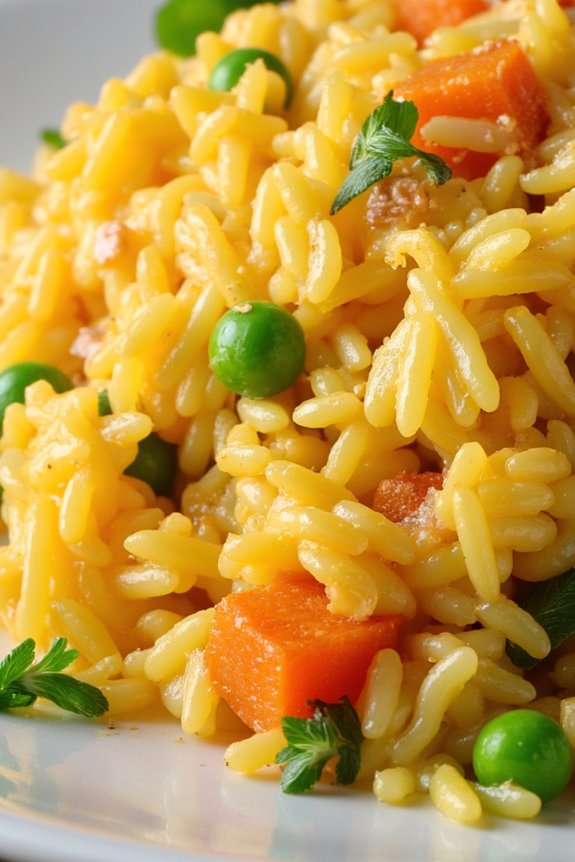
Egg Fried Rice is a classic dish that’s both delicious and easy to make, perfect for family meals. This dish combines the simplicity of fried rice with the richness of scrambled eggs, resulting in a comforting and satisfying meal. With its Asian-inspired flavors, Egg Fried Rice can be a standalone dish or a great side to complement other dishes.
Plus, it’s an excellent way to use up leftover rice and any vegetables you have on hand, making it a budget-friendly option for family dinners. The beauty of Egg Fried Rice lies in its versatility and the ability to customize it according to your family’s tastes. You can add various vegetables, proteins, and seasonings to the basic recipe to create a meal that suits everyone at the table.
This recipe yields enough to serve 4-6 people, making it ideal for a family gathering or a quick weeknight dinner. Let’s explore the ingredients and steps needed to make this delightful dish.
Ingredients:
- 4 cups cooked rice (preferably day-old)
- 4 large eggs
- 2 tablespoons vegetable oil
- 1 cup frozen peas and carrots
- 1 small onion, finely chopped
- 3 cloves garlic, minced
- 3 tablespoons soy sauce
- 2 teaspoons sesame oil
- 2 green onions, chopped
- Salt and pepper to taste
Cooking Instructions:
- Prepare the Ingredients: Begin by verifying that all your ingredients are ready for cooking. If you don’t have day-old rice, cook fresh rice and let it cool completely to prevent it from becoming mushy. Chop the vegetables and onions, and gather all your ingredients.
- Scramble the Eggs: In a large skillet or wok, heat 1 tablespoon of vegetable oil over medium-high heat. Crack the eggs into the skillet and scramble them until fully cooked. Once done, remove the scrambled eggs from the skillet and set them aside.
- Sauté the Vegetables: In the same skillet, add the remaining tablespoon of vegetable oil. Add the chopped onion and garlic, and sauté them for about 1-2 minutes until fragrant. Then, add the frozen peas and carrots and cook for another 3-4 minutes until the vegetables are tender.
- Add the Rice: Increase the heat to high and add the cooked rice to the skillet. Stir-fry the rice with the vegetables, verifying that the rice grains are separated and evenly coated with the oil.
- Incorporate the Eggs and Seasonings: Return the scrambled eggs to the skillet and mix them with the rice and vegetables. Pour in the soy sauce and sesame oil, stirring well to combine all the ingredients. Season with salt and pepper to taste.
- Finish with Green Onions: Ultimately, add the chopped green onions to the fried rice and give it a quick stir. Cook everything together for an additional 1-2 minutes to verify all flavors are well combined.
Extra Tips:
For the best Egg Fried Rice, always use day-old rice as it’s drier and less sticky, which helps achieve the perfect texture. If fresh rice is your only option, spread it on a tray and refrigerate for at least 30 minutes before cooking.
Additionally, feel free to customize this dish by adding other proteins like chicken, shrimp, or tofu, and experiment with different vegetables such as bell peppers or corn. Ultimately, to enhance the flavor, consider adding a dash of fish sauce or oyster sauce along with the soy sauce.
Slow Cooker Chicken Chili

There’s nothing quite like a warm, hearty bowl of chili to bring the family together for a comforting meal. Slow Cooker Chicken Chili is a delicious, easy-to-make dish that’s perfect for busy weeknights or lazy weekends. By allowing the slow cooker to do most of the work, you’ll have more time to focus on other tasks while still preparing a satisfying meal for your family. This recipe combines tender chicken, savory beans, and a medley of spices to create a flavorful chili that everyone will love.
This Slow Cooker Chicken Chili isn’t only economical, but it’s also versatile. You can easily adjust the spice level to suit your family’s taste preferences and even add extra vegetables for added nutrition. With simple ingredients that are likely already in your pantry, this dish is both budget-friendly and convenient. Prepare to enjoy this delightful chili with your loved ones, served with your favorite toppings for a complete, satisfying meal.
Ingredients (Serves 4-6):
- 1 1/2 pounds boneless, skinless chicken breasts
- 2 cans (15 ounces each) of white beans, drained and rinsed
- 1 can (15 ounces) diced tomatoes, with juice
- 1 cup chicken broth
- 1 medium onion, chopped
- 2 cloves garlic, minced
- 1 can (4 ounces) diced green chilies
- 1 tablespoon chili powder
- 1 teaspoon ground cumin
- 1 teaspoon paprika
- 1 teaspoon salt
- 1/2 teaspoon black pepper
- 1/4 teaspoon cayenne pepper (optional, for extra heat)
- 1 cup frozen corn
- Juice of 1 lime
- Fresh cilantro, chopped (for garnish)
Cooking Instructions:
- Prepare the Ingredients: Start by gathering all the ingredients. Chop the onion and mince the garlic. Rinse and drain the white beans. This step will make the cooking process smoother.
- Layer the Slow Cooker: In the slow cooker, place the chicken breasts at the bottom. Add the chopped onion, minced garlic, and drained white beans over the chicken.
- Add Liquids and Spices: Pour the diced tomatoes (with juice) and chicken broth into the slow cooker. Add the diced green chilies, chili powder, cumin, paprika, salt, black pepper, and cayenne pepper if using. Stir gently to combine all the ingredients.
- Cook the Chili: Cover the slow cooker with its lid and set it to cook on low for 6-7 hours or on high for 3-4 hours. This slow-cooking process will allow the flavors to meld beautifully.
- Shred the Chicken: After the cooking time is complete, use two forks to shred the chicken directly in the slow cooker. The chicken should be tender and easy to pull apart.
- Add Corn and Lime Juice: Stir in the frozen corn and the juice of one lime. Allow the chili to cook for an additional 15-20 minutes on low to heat the corn through.
- Serve the Chili: Ladle the chicken chili into bowls and garnish with fresh cilantro. You can also add optional toppings like shredded cheese, sour cream, or avocado slices.
Extra Tips:
For a thicker chili, you can mash some of the beans before adding them to the slow cooker. This will naturally thicken the dish as it cooks.
If you prefer a bit of smokiness, consider adding a teaspoon of smoked paprika or a chipotle pepper in adobo sauce.
Spinach and Feta Quesadillas

Spinach and Feta Quesadillas are a delightful and budget-friendly option for a family meal. The combination of fresh spinach and tangy feta cheese wrapped in a crispy tortilla makes for a satisfying dish that’s both nutritious and delicious. Perfect for a quick weeknight dinner, these quesadillas can be whipped up in no time and are bound to be a hit with both adults and children alike.
Plus, they’re versatile enough to accommodate personal preferences, as you can easily add or substitute ingredients to suit your family’s taste.
In addition to being tasty, Spinach and Feta Quesadillas are a great way to sneak some greens into your family’s diet. Spinach is packed with vitamins and minerals, while feta adds a creamy texture and a burst of flavor. This recipe serves 4-6 people, making it ideal for family gatherings or for enjoying leftovers the next day.
Whether you’re a seasoned cook or a kitchen novice, you’ll find this recipe easy to follow and incredibly rewarding.
Ingredients for 4-6 servings:
- 8 large flour tortillas
- 2 cups fresh spinach leaves, chopped
- 1 1/2 cups crumbled feta cheese
- 1 cup shredded mozzarella cheese
- 1 small red onion, finely chopped
- 2 cloves garlic, minced
- 1 tablespoon olive oil
- Salt and pepper to taste
- Cooking spray or additional olive oil for cooking
Instructions:
- Prepare the Filling: In a large skillet, heat one tablespoon of olive oil over medium heat. Add the minced garlic and red onion, sautéing for about 2-3 minutes until the onion becomes translucent.
- Cook the Spinach: Add the chopped spinach to the skillet. Cook for about 3-4 minutes, or until the spinach is wilted. Season with salt and pepper to taste, stirring to combine. Remove from heat and let the mixture cool slightly.
- Assemble the Quesadillas: Lay out the tortillas on a flat surface. Evenly distribute the spinach mixture over half of each tortilla. Sprinkle the crumbled feta and shredded mozzarella cheese over the spinach mixture.
- Fold and Prepare for Cooking: Fold each tortilla in half to cover the filling. Press down gently to flatten.
- Cook the Quesadillas: Heat a large non-stick skillet or griddle over medium heat. Lightly spray with cooking spray or brush with olive oil. Place the folded quesadillas in the skillet, cooking for about 3-4 minutes on each side, or until the tortillas are golden brown and the cheese has melted.
- Serve: Remove the quesadillas from the skillet and let them cool for a minute or two. Cut into wedges and serve warm.
Extra Tips:
For added flavor, consider incorporating a pinch of crushed red pepper flakes into the spinach mixture for a bit of heat. If you prefer a more substantial meal, you can add cooked chicken or mushrooms to the filling.
To guarantee even cooking and prevent the quesadillas from becoming soggy, avoid overloading them with too much filling. Enjoy these quesadillas with a side of salsa, sour cream, or guacamole for a complete meal.
Beef and Vegetable Stir-Fry
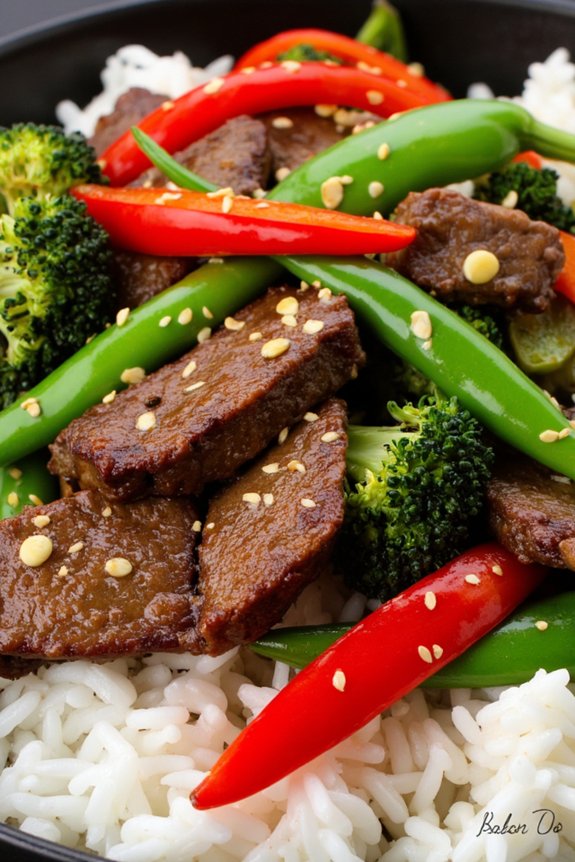
Beef and Vegetable Stir-Fry is a quick and delicious meal that’s perfect for family dinners. It combines tender strips of beef with a variety of colorful vegetables, all coated in a savory sauce. This dish isn’t only affordable but also packed with nutrients, making it an excellent choice for a wholesome meal that can be prepared in less than 30 minutes.
The adaptability of this recipe allows you to use any vegetables you have on hand, making it a great way to clear out the fridge while satisfying everyone at the table.
The key to a successful stir-fry lies in the preparation. By guaranteeing all ingredients are prepped and ready to go before you start cooking, you can maintain the quick pace that’s essential to stir-frying. This method of cooking also helps in retaining the crispness of the vegetables and the juiciness of the beef, providing a lovely contrast in textures.
Once you try this Beef and Vegetable Stir-Fry, it will surely become a staple in your meal rotation.
Ingredients for 4-6 servings:
- 1 pound beef sirloin, thinly sliced
- 2 tablespoons soy sauce
- 1 tablespoon cornstarch
- 2 tablespoons vegetable oil, divided
- 1 onion, sliced
- 1 red bell pepper, sliced
- 1 cup broccoli florets
- 1 cup snap peas
- 1 carrot, thinly sliced
- 3 cloves garlic, minced
- 1 tablespoon fresh ginger, minced
- 1/4 cup beef broth
- 2 tablespoons oyster sauce
- 1 tablespoon sesame oil
- Cooked rice, for serving
Cooking Instructions:
- Marinate the Beef: In a bowl, combine the sliced beef with soy sauce and cornstarch. Mix well and let it marinate for about 10-15 minutes. This will help tenderize the beef and enhance its flavor.
- Prepare the Vegetables: While the beef is marinating, prepare the vegetables. Slice the onion and bell pepper, cut the broccoli into florets, slice the carrot, and snap the peas. Mince the garlic and ginger.
- Heat the Pan: In a large wok or skillet, heat 1 tablespoon of vegetable oil over medium-high heat. Once hot, add the marinated beef in a single layer. Stir-fry until the beef is browned and cooked through, about 3-4 minutes. Remove the beef from the pan and set it aside.
- Cook the Vegetables: In the same pan, add the remaining tablespoon of vegetable oil. Add the onion, bell pepper, broccoli, snap peas, and carrot. Stir-fry for about 3-4 minutes until the vegetables are crisp-tender.
- Add Aromatics: Add the minced garlic and ginger to the vegetables. Stir-fry for another minute until fragrant.
- Combine All Ingredients: Return the cooked beef to the pan. Add the beef broth, oyster sauce, and sesame oil. Stir everything together until the beef and vegetables are well-coated with the sauce and heated through.
- Serve: Once everything is well combined and heated, remove from heat. Serve the stir-fry hot over a bed of cooked rice.
Extra Tips:
When making Beef and Vegetable Stir-Fry, guarantee that your pan is hot enough before adding the beef. This will help to quickly sear the meat and lock in the juices.
It’s important not to overcrowd the pan, as it will cause the ingredients to steam rather than fry, affecting the texture. You can also experiment with different vegetables depending on what you have available.
Consider adding mushrooms, zucchini, or baby corn for variation. Finally, for a touch of heat, sprinkle some red pepper flakes or slice a chili pepper to add to the dish.