

As someone who constantly seeks out new recipes, I was thrilled to find a variety of easy and healthy gluten-free dinner ideas perfect for families with allergies. The vibrant colors of quinoa and black bean stuffed peppers make for a beautiful meal. And there’s nothing quite like the zesty aroma of lemon herb roasted chicken thighs filling the kitchen. These options are both delicious and safe for everyone to enjoy. Let’s explore this list of delightful possibilities together!
Quinoa and Black Bean Stuffed Peppers

Quinoa and Black Bean Stuffed Peppers are a hearty and nutritious meal that satisfies both your taste buds and dietary needs. These colorful bell peppers are filled with a delicious mixture of protein-rich quinoa and black beans, seasoned with aromatic spices and fresh herbs.
This dish not only caters to a gluten-free diet but also serves as a fantastic vegetarian option packed with essential nutrients. Perfect for a family dinner, this recipe is designed to serve 4-6 people, making it ideal for a small gathering or for meal prep throughout the week.
The vibrant presentation of the stuffed peppers is sure to impress, while the savory filling provides a satisfying and wholesome eating experience. Easy to prepare and packed with flavor, Quinoa and Black Bean Stuffed Peppers are a great addition to any healthy meal plan.
Ingredients (Serves 4-6):
- 6 large bell peppers (any color)
- 1 cup quinoa, rinsed
- 2 cups vegetable broth or water
- 1 tablespoon olive oil
- 1 medium onion, finely chopped
- 2 cloves garlic, minced
- 1 teaspoon ground cumin
- 1 teaspoon smoked paprika
- 1 can (15 oz) black beans, drained and rinsed
- 1 cup corn kernels (fresh, frozen, or canned)
- 1 cup diced tomatoes (fresh or canned)
- 1/4 cup chopped fresh cilantro
- 1 tablespoon lime juice
- Salt and pepper to taste
- 1 cup shredded cheese (optional, for topping)
- Avocado slices, sour cream, or extra cilantro for garnish (optional)
Cooking Instructions:
- Preheat the Oven: Begin by preheating your oven to 375°F (190°C). While the oven is heating, prepare the bell peppers by cutting off the tops and removing the seeds and membranes. Set them upright in a large baking dish.
- Cook the Quinoa: In a medium saucepan, bring the quinoa and vegetable broth (or water) to a boil. Reduce the heat to low, cover, and let it simmer for about 15 minutes until the quinoa is cooked and the liquid is absorbed. Fluff with a fork and set aside.
- Prepare the Filling: In a large skillet over medium heat, warm the olive oil. Add the chopped onion and garlic, sautéing until the onion becomes translucent. Stir in the cumin and smoked paprika, cooking for another minute until fragrant.
- Combine Ingredients: Add the black beans, corn, and diced tomatoes to the skillet. Cook for 5 minutes, allowing the flavors to meld. Add the cooked quinoa, cilantro, lime juice, salt, and pepper. Stir everything together until well combined.
- Stuff the Peppers: Spoon the quinoa and black bean mixture into each prepared bell pepper, packing it in gently. If using, sprinkle the tops with shredded cheese.
- Bake: Cover the baking dish with foil and bake in the preheated oven for 30 minutes. Remove the foil and bake for an additional 10-15 minutes, or until the peppers are tender and the cheese is melted and bubbly.
- Garnish and Serve: Once done, remove from the oven and let them cool slightly. Garnish with avocado slices, a dollop of sour cream, or additional cilantro if desired. Serve warm.
Extra Tips:
For an added depth of flavor, consider roasting the bell peppers slightly before stuffing them. Simply place them under a broiler for a few minutes until the skin begins to blister. This will add a smoky taste to the dish.
Additionally, you can customize the spice level by adding chopped jalapeños or a dash of chili powder to the filling. If you’re short on time, canned quinoa can be a quick substitute, allowing you to skip the cooking step.
Enjoy exploring different cheese options such as feta or cotija for a unique twist.
Zucchini Noodles With Pesto and Grilled Chicken
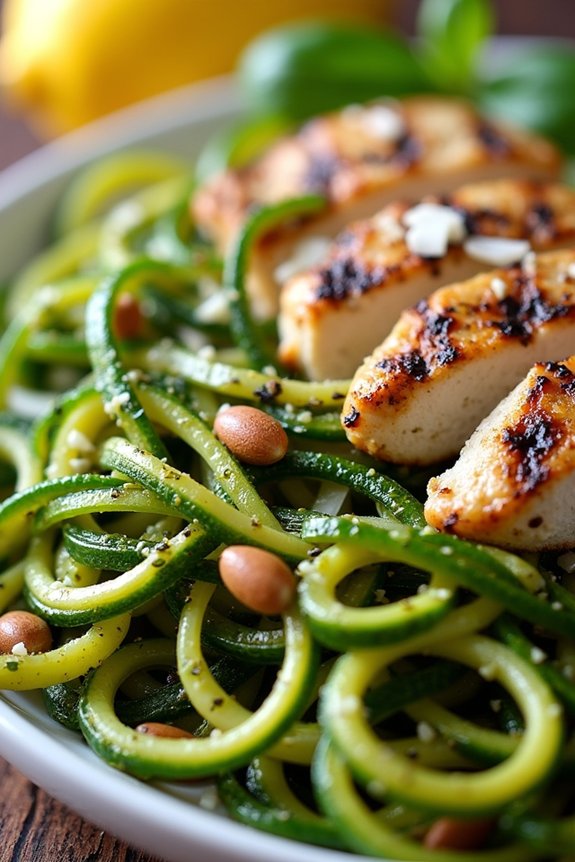
Looking for a light, healthy, and gluten-free dinner option? Zucchini Noodles with Pesto and Grilled Chicken is a perfect choice. This dish combines the fresh, crisp flavors of zucchini noodles with the rich taste of homemade pesto and succulent grilled chicken. Not only is it gluten-free, but it’s also packed with nutrients, making it an ideal meal for anyone looking to enjoy a healthy lifestyle without compromising on flavor.
Zucchini noodles, often referred to as “zoodles,” are a fantastic low-carb alternative to traditional pasta. When paired with the aromatic pesto and juicy grilled chicken, it creates a harmonious blend of textures and flavors that will satisfy your taste buds. Whether you’re cooking for family or hosting a dinner party, this dish is sure to impress and leave everyone feeling nourished and satisfied.
Ingredients for 4-6 servings:
- 4 medium zucchinis
- 1.5 pounds boneless, skinless chicken breasts
- 1 cup fresh basil leaves
- 1/2 cup Parmesan cheese, grated
- 1/3 cup pine nuts
- 2 cloves garlic
- 1/2 cup olive oil
- Salt and pepper to taste
- 1 lemon, cut into wedges
- Olive oil spray or 1 tablespoon olive oil for grilling
Cooking Instructions:
- Prepare the Zucchini Noodles:
- Use a spiralizer or a julienne peeler to create zucchini noodles from the zucchinis. Set aside on paper towels to drain excess moisture.
- Make the Pesto:
- In a food processor, combine the basil leaves, Parmesan cheese, pine nuts, and garlic cloves. Pulse until finely chopped.
- With the processor running, gradually add the olive oil until a smooth pesto forms. Season with salt and pepper to taste.
- Grill the Chicken:
- Preheat your grill or grill pan over medium-high heat. Lightly coat the chicken breasts with olive oil spray or olive oil, and season with salt and pepper.
- Grill the chicken for 5-7 minutes on each side, or until fully cooked and juices run clear. Remove from the grill and let rest for a few minutes before slicing.
- Combine Ingredients:
- In a large bowl, toss the zucchini noodles with the prepared pesto until evenly coated.
- Serve the zucchini noodles topped with slices of grilled chicken. Garnish with extra Parmesan cheese and a squeeze of lemon juice.
- Serve:
- Dish out the zucchini noodles and grilled chicken onto plates and enjoy immediately while warm.
Extra Tips:
When preparing zucchini noodles, it’s important to let them drain on paper towels to remove excess moisture, which helps prevent them from becoming soggy.
If you prefer your chicken with a bit more flavor, consider marinating it in lemon juice and herbs for an hour before grilling.
For variations, you can add cherry tomatoes or pine nuts for extra texture and flavor.
Always taste your pesto before serving to confirm the seasoning is just right, and adjust with salt, pepper, or lemon juice as needed.
Baked Sweet Potato Tacos
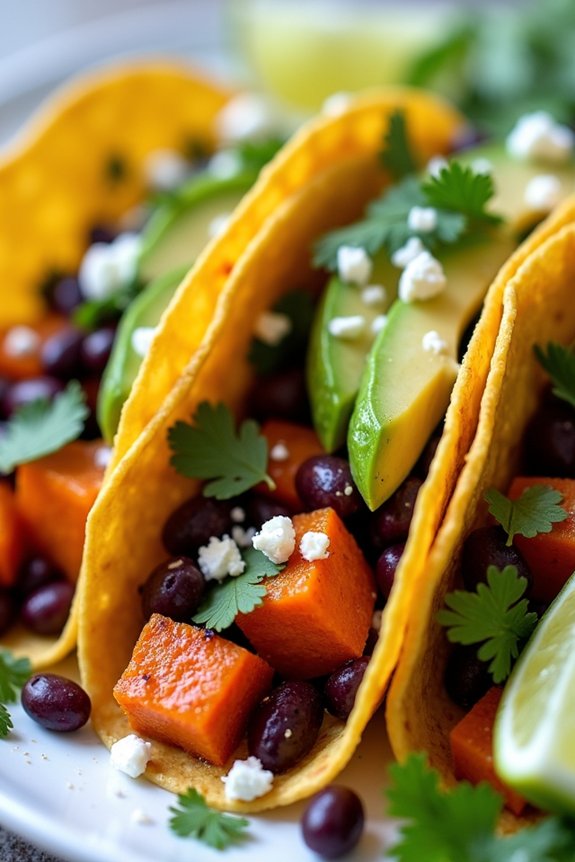
Baked Sweet Potato Tacos offer a vibrant and healthy alternative to traditional tacos, perfect for those following a gluten-free diet. These tacos aren’t only delicious but also packed with nutrients, thanks to the sweet potatoes which are rich in vitamins A and C, fiber, and antioxidants. The natural sweetness of the potatoes is beautifully complemented by a variety of spices, making this dish a flavorful and satisfying meal option.
With a combination of textures and colors, these tacos are sure to be a hit at your dinner table. This recipe serves 4-6 people and is perfect for a cozy dinner or a small gathering with friends and family. The combination of baked sweet potatoes, black beans, and an array of toppings like avocado, fresh cilantro, and lime juice creates a symphony of flavors that will delight your taste buds.
Not only is this meal gluten-free, but it’s also vegetarian, making it a versatile choice for different dietary preferences. With minimal prep time and an easy cooking process, Baked Sweet Potato Tacos are an excellent choice for anyone looking to enjoy a healthy and hearty dinner.
Ingredients:
- 4 medium sweet potatoes
- 1 tablespoon olive oil
- 1 teaspoon ground cumin
- 1 teaspoon paprika
- 1/2 teaspoon chili powder
- Salt and pepper to taste
- 1 can (15 ounces) black beans, drained and rinsed
- 12 small corn tortillas
- 1 avocado, sliced
- 1/4 cup chopped fresh cilantro
- 1/4 cup crumbled feta cheese (optional)
- Lime wedges for serving
Cooking Instructions:
- Preheat the Oven: Preheat your oven to 400°F (200°C) to make sure it’s ready for baking the sweet potatoes.
- Prepare the Sweet Potatoes: Wash and peel the sweet potatoes. Cut them into 1-inch cubes for even cooking. Place the cubes in a large bowl.
- Season the Sweet Potatoes: Add olive oil, cumin, paprika, chili powder, salt, and pepper to the bowl with sweet potatoes. Toss everything together until the potatoes are well-coated with the seasoning.
- Bake the Sweet Potatoes: Spread the seasoned sweet potatoes evenly on a baking sheet lined with parchment paper. Bake for 25-30 minutes, or until the potatoes are tender and slightly caramelized. Stir halfway through to make certain of even cooking.
- Prepare the Black Beans: While the sweet potatoes are baking, warm the black beans in a small saucepan over medium heat. Stir occasionally until heated through, then remove from heat.
- Warm the Tortillas: Wrap the corn tortillas in aluminum foil and place them in the oven during the last 5 minutes of the sweet potato baking time, or until they’re warm and pliable.
- Assemble the Tacos: Once everything is ready, assemble the tacos by placing a generous serving of baked sweet potatoes and black beans on each tortilla. Top with slices of avocado, chopped cilantro, and crumbled feta cheese, if using.
- Serve: Serve the tacos immediately with lime wedges on the side for squeezing over the top.
Extra Tips:
For an added crunch, you can top your tacos with a handful of shredded cabbage or lettuce. If you prefer a bit of heat, add sliced jalapeños or a drizzle of your favorite hot sauce.
To save time, you can prepare the sweet potato cubes and spice mix in advance and store them in an airtight container in the refrigerator until you’re ready to bake. Remember, the key to the perfect taco is in the layering of flavors, so feel free to experiment with additional toppings like pickled onions or roasted corn to suit your taste preferences.
Lentil and Vegetable Stir-Fry
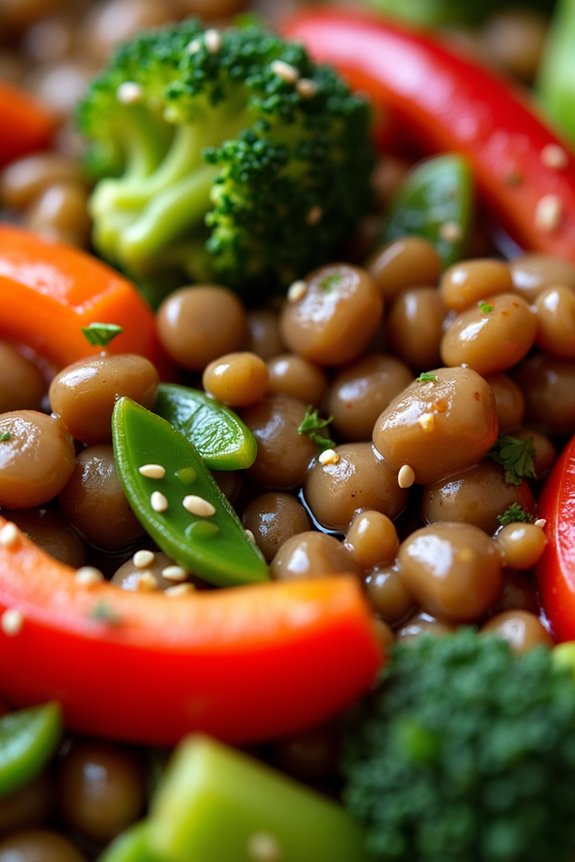
Lentil and Vegetable Stir-Fry is a delicious and nutrient-packed meal that’s perfect for anyone looking to enjoy a wholesome gluten-free dinner. This dish combines the earthy flavors of lentils with the vibrant colors and textures of fresh vegetables, all brought together with a savory sauce that ties everything together.
Ideal for busy weeknight dinners, this recipe is both quick to prepare and satisfying to eat, making it an excellent choice for families or individuals seeking a healthy, balanced meal.
The beauty of this stir-fry lies in its versatility. You can adapt the vegetables based on what you have on hand or what’s in season, guaranteeing that you’re always enjoying the freshest produce possible. Lentils provide a hearty base, rich in protein and fiber, which will keep you full and satisfied.
Paired with a blend of soy sauce, ginger, and garlic, this dish is as flavorful as it’s nutritious. Whether you’re a seasoned chef or a beginner in the kitchen, this Lentil and Vegetable Stir-Fry is a straightforward recipe that anyone can master.
Ingredients (Serves 4-6):
- 1 cup green or brown lentils
- 3 cups water
- 2 tablespoons olive oil
- 1 medium onion, sliced
- 2 cloves garlic, minced
- 1-inch piece of ginger, grated
- 1 red bell pepper, sliced
- 1 cup broccoli florets
- 1 cup snap peas
- 1 medium carrot, julienned
- 2 tablespoons gluten-free soy sauce
- 1 tablespoon sesame oil
- 1 teaspoon sesame seeds
- Salt and pepper to taste
- Fresh cilantro for garnish (optional)
Cooking Instructions:
- Cook the Lentils: Rinse the lentils under cold water. In a medium saucepan, combine the lentils and water. Bring to a boil, then reduce the heat to low and simmer for 20-25 minutes, or until the lentils are tender. Drain any excess water and set aside.
- Prepare the Vegetables: While the lentils are cooking, prepare your vegetables. Slice the onion, mince the garlic, grate the ginger, and slice the bell pepper. Cut the broccoli into small florets, and julienne the carrot.
- Stir-Fry the Vegetables: Heat the olive oil in a large skillet or wok over medium-high heat. Add the onion, garlic, and ginger, and sauté for 2-3 minutes until fragrant.
- Add Remaining Vegetables: Add the bell pepper, broccoli, snap peas, and carrot to the skillet. Stir-fry for about 5-7 minutes, or until the vegetables are tender-crisp.
- Combine and Season: Add the cooked lentils to the skillet. Pour in the gluten-free soy sauce and sesame oil, stirring well to combine all the ingredients. Cook for another 2-3 minutes, allowing the flavors to meld together.
- Finish and Serve: Season with salt and pepper to taste. Sprinkle sesame seeds over the stir-fry and garnish with fresh cilantro if desired. Serve warm.
Extra Tips:
For a little heat, consider adding a pinch of red pepper flakes or a dash of sriracha sauce to the stir-fry. If you prefer a more saucy dish, you can add a splash of vegetable broth or water when stir-frying the vegetables.
Remember to adjust the seasoning according to your taste preference. If you want to add more protein, consider topping the stir-fry with grilled chicken or tofu. Always keep an eye on the vegetables to guarantee they remain crisp and vibrant, avoiding overcooking for the best texture.
Grilled Salmon With Mango Salsa
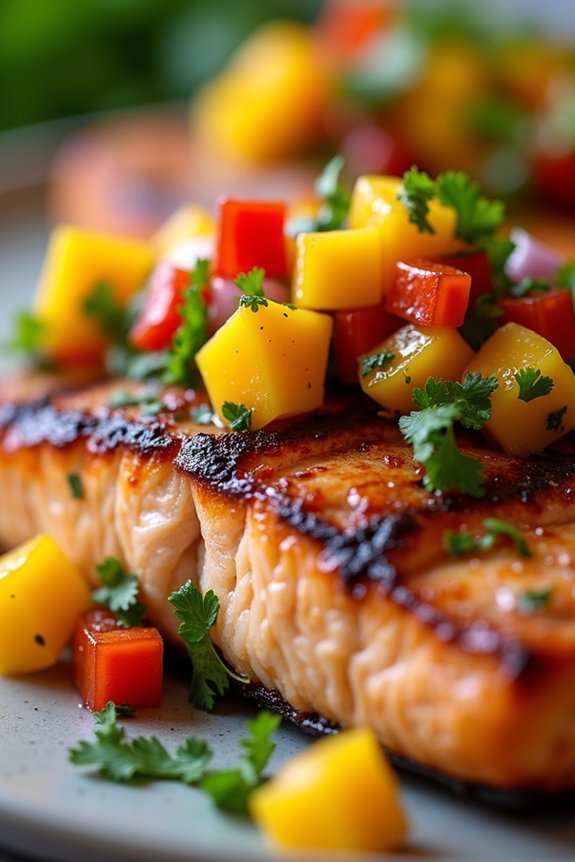
Grilled Salmon With Mango Salsa is a delightful and healthy gluten-free dinner option that’s perfect for a family meal or a small gathering. This dish combines the rich, flavorful taste of grilled salmon with the fresh, sweet, and tangy notes of a homemade mango salsa. The vibrant colors and fresh ingredients make this dish not only a feast for the taste buds but also for the eyes.
This recipe is straightforward and can be prepared in less than 30 minutes, making it ideal for a quick weeknight dinner without compromising on nutrition or taste. The key to this dish lies in the quality of the ingredients and the balance of flavors. Fresh, wild-caught salmon is recommended for the best texture and flavor, while ripe mangoes provide the perfect sweetness to complement the savory salmon.
The salsa also incorporates other fresh ingredients such as red onion, cilantro, and lime juice, which come together to create a rejuvenating topping that enhances the grilled salmon. This recipe serves 4-6 people, ensuring everyone gets a taste of this delicious and healthy combination.
Ingredients:
- 4-6 salmon fillets (about 6 ounces each)
- 2 ripe mangoes, peeled and diced
- 1 small red onion, finely chopped
- 1 red bell pepper, diced
- 1 jalapeño, seeded and minced
- 1/4 cup fresh cilantro, chopped
- 2 limes, juiced
- 2 tablespoons olive oil
- Salt and pepper to taste
- 1 teaspoon smoked paprika
Cooking Instructions:
- Prepare the Salsa: In a medium bowl, combine the diced mangoes, red onion, red bell pepper, jalapeño, and cilantro. Squeeze the juice of the limes over the mixture and gently stir to combine. Season with salt and pepper to taste. Cover and refrigerate until ready to serve.
- Season the Salmon: Pat the salmon fillets dry with a paper towel. Brush each fillet with olive oil and season both sides with salt, pepper, and smoked paprika, ensuring an even coating.
- Preheat the Grill: Heat your grill to medium-high heat, approximately 400°F (200°C). If using a grill pan, preheat it over medium-high heat on the stove.
- Grill the Salmon: Place the salmon fillets on the grill, skin-side down if they’ve skin. Grill for about 4-5 minutes on each side, or until the salmon is cooked through and flakes easily with a fork. Be careful not to overcook to maintain the fish’s moisture.
- Serve: Remove the salmon from the grill and let it rest for a couple of minutes. Serve each salmon fillet with a generous spoonful of mango salsa on top or on the side. Garnish with additional cilantro if desired.
Extra Tips:
When preparing the mango salsa, make sure to choose mangoes that are ripe but still firm for a good texture. If you prefer a milder salsa, you can reduce the amount of jalapeño or omit it entirely.
For added flavor, you can marinate the salmon in olive oil, lime juice, and your choice of herbs for about 30 minutes before grilling. Additionally, be sure to preheat the grill well to achieve those nice grill marks and prevent the salmon from sticking.
Chickpea and Spinach Curry
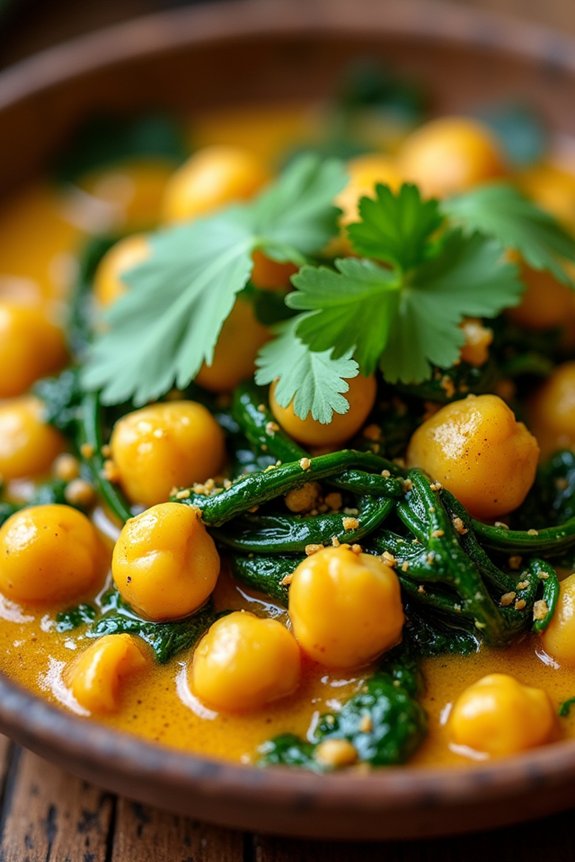
Chickpea and Spinach Curry is a delightful and hearty dish perfect for those seeking a flavorful, gluten-free dinner option. This plant-based curry combines the nutty taste of chickpeas with the earthy flavor of spinach, all enveloped in a creamy, spiced coconut sauce. It’s an excellent choice for a healthy meal that doesn’t compromise on taste, and it’s packed with nutrients, making it ideal for a nutritious dinner.
Whether you’re a fan of Indian cuisine or simply looking to explore new culinary delights, this curry won’t disappoint.
This dish isn’t only rich in flavor but also quite easy to prepare. It requires minimal prep work and cooks relatively quickly, making it suitable for both weeknight dinners and special occasions. The combination of spices such as cumin, coriander, and turmeric infuses the curry with a warm and inviting aroma. The use of coconut milk adds a luscious creaminess, balancing the spices and complementing the chickpeas and spinach perfectly.
Ingredients for 4-6 servings:
- 2 tablespoons olive oil
- 1 large onion, finely chopped
- 3 garlic cloves, minced
- 1 tablespoon fresh ginger, grated
- 1 teaspoon cumin seeds
- 1 teaspoon ground coriander
- 1 teaspoon turmeric
- 1 teaspoon garam masala
- 1/2 teaspoon chili powder (optional)
- 2 cans (15 oz each) chickpeas, drained and rinsed
- 1 can (14 oz) coconut milk
- 1 can (14 oz) diced tomatoes
- 6 cups fresh spinach leaves, washed
- Salt and pepper to taste
- Fresh cilantro leaves for garnish
Cooking Instructions:
- Prepare Aromatics: In a large pan or pot, heat the olive oil over medium heat. Add the chopped onion and sauté until it becomes translucent, about 5-7 minutes. Stir in the minced garlic and grated ginger, and cook for another 1-2 minutes until fragrant.
- Toast the Spices: Add the cumin seeds, ground coriander, turmeric, garam masala, and chili powder to the pan. Toast the spices for 1-2 minutes, stirring constantly to prevent burning, until they release their aromas.
- Add Chickpeas and Tomatoes: Stir in the drained chickpeas and canned tomatoes, mixing well to coat them with the spices. Allow the mixture to simmer for 5 minutes to blend the flavors.
- Incorporate Coconut Milk: Pour in the coconut milk, stirring to combine all ingredients thoroughly. Bring the mixture to a gentle simmer and let it cook for about 10 minutes, allowing it to thicken slightly.
- Add Spinach: Gradually add the spinach to the pan, stirring it into the curry. Cook for another 5 minutes until the spinach is wilted and the curry is well combined. Season with salt and pepper to taste.
- Finish and Serve: Once the curry has reached your desired consistency, remove it from the heat. Serve hot, garnished with fresh cilantro leaves for an added burst of flavor.
Extra Tips:
When making Chickpea and Spinach Curry, you can customize the spice level to suit your taste by adjusting the amount of chili powder. For a creamier texture, you can blend a portion of the chickpeas with some of the coconut milk before adding them back into the curry.
Additionally, feel free to experiment with other leafy greens like kale or Swiss chard if spinach is unavailable. This dish pairs beautifully with basmati rice or gluten-free naan for a complete meal.
Gluten-Free Pasta Primavera
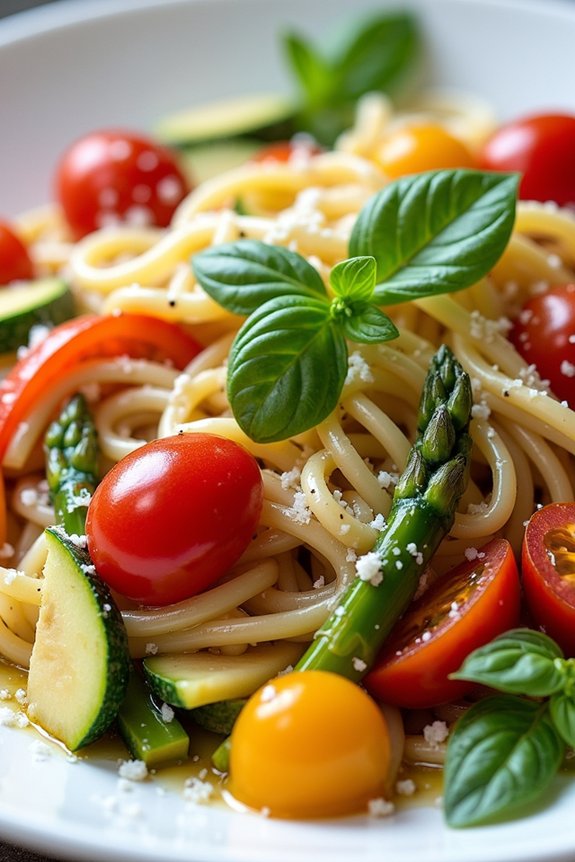
Gluten-Free Pasta Primavera is a vibrant, fresh dish that brings together the best of seasonal vegetables with the comfort of pasta, all without the gluten. This recipe is perfect for those looking for a healthy dinner option that doesn’t compromise on flavor or texture. Using gluten-free pasta as a base, this dish is packed with a colorful assortment of vegetables that are lightly sautéed to retain their crispiness and natural sweetness.
It’s a wholesome meal that can be enjoyed by the entire family, catering to both gluten-sensitive individuals and those simply looking for a nutritious meal. Pasta Primavera is traditionally known for its simplicity and reliance on high-quality ingredients. The key to this dish lies in the selection of fresh and vibrant vegetables such as bell peppers, zucchini, and cherry tomatoes, paired with a light garlic and olive oil sauce.
The gluten-free pasta absorbs these flavors beautifully, resulting in a delightful medley of tastes and textures. Perfect for a weeknight dinner or a weekend gathering, this dish can be on your table in less than 30 minutes, providing a quick yet satisfying meal option.
Ingredients for 4-6 servings:
- 12 ounces gluten-free pasta (e.g., penne or fusilli)
- 2 tablespoons olive oil
- 2 cloves garlic, minced
- 1 large zucchini, sliced
- 1 red bell pepper, sliced
- 1 yellow bell pepper, sliced
- 1 cup cherry tomatoes, halved
- 1 cup asparagus, cut into 1-inch pieces
- Salt and pepper to taste
- 1/2 teaspoon red pepper flakes (optional)
- 1/4 cup grated Parmesan cheese (or dairy-free alternative)
- 2 tablespoons fresh basil, chopped
- Lemon wedges for serving
Instructions:
- Cook the Pasta: Bring a large pot of salted water to a boil. Add the gluten-free pasta and cook according to package instructions until al dente. Drain the pasta and set aside, reserving 1/2 cup of the pasta cooking water.
- Prepare the Vegetables: While the pasta cooks, heat the olive oil in a large skillet over medium heat. Add the minced garlic and sauté for about 1 minute until fragrant.
- Sauté the Vegetables: Add the sliced zucchini, red and yellow bell peppers, and asparagus to the skillet. Cook for 5-7 minutes, stirring occasionally, until the vegetables are tender-crisp.
- Add Tomatoes and Seasonings: Stir in the cherry tomatoes, salt, pepper, and red pepper flakes (if using). Cook for an additional 2 minutes until the tomatoes start to soften.
- Combine with Pasta: Add the cooked pasta to the skillet with the vegetables. Toss everything together, adding reserved pasta water as needed to create a light sauce that coats the pasta and vegetables.
- Finish the Dish: Remove the skillet from the heat and stir in the grated Parmesan cheese and fresh basil. Adjust seasoning to taste.
- Serve: Divide the pasta primavera among serving plates. Garnish with additional Parmesan cheese, fresh basil, and a squeeze of lemon juice from the lemon wedges.
Extra Tips:
For the best results, use the freshest vegetables you can find, as they’ll add more flavor and texture to the dish. Feel free to experiment with other seasonal vegetables like broccoli, peas, or carrots.
If you want to add some protein, grilled chicken or shrimp can be a great addition. Remember to rinse the gluten-free pasta after cooking to prevent it from becoming sticky, and keep it slightly undercooked since it will continue to cook when combined with the vegetables.
Turkey and Vegetable Skillet

If you’re seeking a healthy, gluten-free dinner option that’s both delicious and easy to prepare, the Turkey and Vegetable Skillet is an excellent choice. This dish combines lean protein with a vibrant array of vegetables, offering a well-rounded meal that’s both filling and nutritious.
Perfect for a weeknight dinner, it comes together in just about 30 minutes, making it a convenient option for busy families. The blend of spices and fresh ingredients will tantalize your taste buds, while the colorful presentation is sure to impress anyone you serve it to.
This Turkey and Vegetable Skillet isn’t only flavorful but also flexible. You can easily modify the ingredients based on what you have on hand or what’s in season. The dish is naturally gluten-free, ensuring that those with gluten sensitivities can enjoy without worry.
Plus, with the lean ground turkey as a base, it’s a heart-healthy option that doesn’t compromise on taste. This recipe serves 4-6 people, making it perfect for a family dinner or meal prep for the week.
Ingredients (serves 4-6):
- 1 lb ground turkey
- 2 tablespoons olive oil
- 1 medium onion, diced
- 2 cloves garlic, minced
- 1 red bell pepper, diced
- 1 zucchini, sliced
- 1 cup broccoli florets
- 1 cup cherry tomatoes, halved
- 1 teaspoon smoked paprika
- 1 teaspoon dried oregano
- ½ teaspoon salt
- ¼ teaspoon black pepper
- 2 tablespoons fresh parsley, chopped
- Juice of 1 lemon
Cooking Instructions:
- Prepare the Ingredients: Begin by prepping all your vegetables. Dice the onion, mince the garlic, dice the bell pepper, slice the zucchini, and halve the cherry tomatoes. Chop the broccoli into small florets and set everything aside.
- Cook the Ground Turkey: Heat 1 tablespoon of olive oil in a large skillet over medium heat. Add the ground turkey and cook, breaking it up with a wooden spoon, until it’s browned and cooked through, about 5-7 minutes. Remove the turkey from the skillet and set aside.
- Sauté the Vegetables: In the same skillet, add the remaining tablespoon of olive oil. Add the diced onion and minced garlic, cooking for about 2 minutes until fragrant. Next, add the bell pepper, zucchini, and broccoli. Sauté for about 5 minutes until the vegetables begin to soften.
- Combine Ingredients: Return the cooked turkey to the skillet with the vegetables. Add the cherry tomatoes, smoked paprika, oregano, salt, and pepper. Stir well to combine all ingredients.
- Finish and Serve: Allow the mixture to cook for another 5 minutes, stirring occasionally, until the vegetables are tender and the flavors have melded together. Remove from heat, stir in the fresh parsley and lemon juice. Serve hot, garnished with additional parsley if desired.
Extra Tips:
For added flavor, consider sprinkling some grated Parmesan cheese on top before serving. If you prefer a bit of heat, add a pinch of red pepper flakes to the seasoning mix.
You can also swap out any vegetables you have on hand, such as spinach or mushrooms, to make the dish your own. Remember to taste and adjust the seasoning as you go, ensuring the flavors are balanced to your liking.
Cauliflower Fried Rice

Cauliflower Fried Rice is a delicious and healthy alternative to traditional fried rice that’s perfect for those following a gluten-free diet. This dish substitutes rice with finely chopped cauliflower, providing a nutritious and low-carb base that still packs all the flavor and texture you love in fried rice.
It’s a versatile dish that can be customized with your favorite vegetables and proteins, making it an excellent option for a quick weeknight dinner or a satisfying meal prep.
The beauty of Cauliflower Fried Rice lies in its simplicity and adaptability. With a few basic ingredients and some creativity, you can create a meal that isn’t only healthy but also bursting with flavor. This recipe serves 4-6 people and is perfect for anyone looking to enjoy a hearty meal without gluten.
Let’s explore the ingredients and steps needed to make this delicious dish.
Ingredients for 4-6 servings:
- 1 medium head of cauliflower
- 2 tablespoons of sesame oil
- 2 large eggs
- 1 cup of mixed vegetables (e.g., peas, carrots, bell peppers)
- 3 green onions, sliced
- 2 cloves of garlic, minced
- 1 tablespoon of ginger, minced
- 3 tablespoons of soy sauce (gluten-free)
- Salt and pepper to taste
- Optional: cooked chicken, shrimp, or tofu for added protein
- Optional: sesame seeds for garnish
Cooking Instructions:
- Prepare the Cauliflower: Begin by washing and drying the cauliflower. Cut it into florets and place them in a food processor. Pulse until the cauliflower resembles rice grains. Be careful not to over-process, as you want to maintain the rice-like texture.
- Cook the Eggs: In a large pan or wok, heat 1 tablespoon of sesame oil over medium heat. Crack the eggs into the pan and scramble them until fully cooked. Remove the eggs from the pan and set them aside.
- Stir-Fry the Vegetables: In the same pan, add the remaining tablespoon of sesame oil. Add the garlic and ginger and sauté for about 30 seconds until fragrant. Then, add the mixed vegetables and cook for 3-4 minutes until they’re tender but still crisp.
- Combine the Ingredients: Add the cauliflower rice to the pan with the vegetables. Stir well to combine and cook for an additional 5-7 minutes, or until the cauliflower is tender. Make sure to stir frequently to prevent sticking.
- Add Seasonings and Eggs: Pour the soy sauce over the cauliflower mixture and mix well. Season with salt and pepper to taste. Add the cooked eggs back into the pan and stir everything together. If you’re adding protein like chicken, shrimp, or tofu, now is the time to incorporate it.
- Finish and Serve: Cook for another 2 minutes to verify everything is heated through. Garnish with sliced green onions and sesame seeds before serving.
Extra Tips:
When making Cauliflower Fried Rice, it’s important not to overcook the cauliflower, as it can become mushy. Aim for a tender yet firm texture by keeping a close eye during the cooking process.
Feel free to experiment with different vegetables and proteins to suit your taste preferences. Also, for added flavor, you can incorporate a splash of rice vinegar or a dash of chili sauce to give the dish a bit of a kick. Enjoy your gluten-free culinary creation!
Stuffed Portobello Mushrooms

Quinoa and Spinach Stuffed Portobello Mushrooms are a delicious and nutritious gluten-free dinner option that’s perfect for those looking to enjoy a hearty meal without the gluten. This dish combines the earthy flavors of portobello mushrooms with the wholesomeness of quinoa and the vibrant taste of fresh spinach.
It’s a perfect blend of flavors and textures, making it an ideal main course for anyone seeking a healthy and satisfying dinner option. The portobello mushrooms serve as a natural bowl for the savory filling, which is made from a combination of quinoa, spinach, herbs, and cheese.
This dish isn’t only visually appealing but also rich in nutrients like fiber, protein, and essential vitamins. It’s simple to prepare and is sure to impress your family and friends with its elegant presentation and delightful taste.
Ingredients for 4-6 servings:
- 6 large portobello mushrooms
- 1 cup quinoa
- 2 cups vegetable broth
- 2 tablespoons olive oil
- 1 small onion, diced
- 3 cloves garlic, minced
- 4 cups fresh spinach, chopped
- 1/2 cup sun-dried tomatoes, chopped
- 1 teaspoon dried oregano
- 1 teaspoon dried basil
- Salt and pepper to taste
- 1 cup grated Parmesan cheese
- Fresh parsley for garnish (optional)
Cooking Instructions:
- Preheat the Oven: Preheat your oven to 375°F (190°C).
- Prepare the Mushrooms: Gently clean the portobello mushrooms with a damp cloth and remove the stems. Place the mushrooms on a baking sheet, gill side up, and drizzle with a tablespoon of olive oil, then season with salt and pepper. Set aside.
- Cook the Quinoa: Rinse the quinoa under cold water and drain. In a medium saucepan, bring the vegetable broth to a boil. Add the quinoa, reduce the heat to low, cover, and simmer for about 15 minutes or until the liquid is absorbed and the quinoa is fluffy.
- Sauté the Vegetables: Heat the remaining tablespoon of olive oil in a large skillet over medium heat. Add the diced onion and minced garlic, sautéing until the onion becomes translucent. Stir in the chopped spinach and sun-dried tomatoes, cooking until the spinach wilts.
- Combine Filling Ingredients: In a large bowl, combine the cooked quinoa, sautéed vegetables, dried oregano, dried basil, and half of the grated Parmesan cheese. Mix well and season with salt and pepper to taste.
- Stuff the Mushrooms: Evenly distribute the quinoa and spinach mixture among the prepared portobello mushrooms, pressing down gently to pack the filling.
- Bake the Mushrooms: Place the stuffed mushrooms in the oven and bake for 20-25 minutes. During the last 5 minutes of baking, sprinkle the remaining Parmesan cheese on top and allow it to melt and turn golden.
- Serve: Once baked, remove the mushrooms from the oven and let them cool slightly. Garnish with fresh parsley if desired before serving.
Extra Tips:
When preparing Quinoa and Spinach Stuffed Portobello Mushrooms, make sure to choose firm and fresh mushrooms to guarantee they hold up well during baking.
If you’re looking to add more flavor, consider adding some crumbled feta or goat cheese to the filling. For a vegan version, you can replace the Parmesan cheese with nutritional yeast or a dairy-free cheese option.
Additionally, if you prefer a bit of heat, a pinch of red pepper flakes can add a nice kick to this dish. Serve these stuffed mushrooms with a side salad or some roasted vegetables for a complete meal.
Thai Red Curry With Tofu

Thai Red Curry With Tofu is a fragrant and flavorful dish that brings the vibrant taste of Thailand to your dinner table. This recipe combines aromatic Thai red curry paste with creamy coconut milk, creating a luscious sauce that envelops tender tofu and a medley of fresh vegetables. It’s a perfect gluten-free option that’s both satisfying and nourishing, making it an ideal choice for a healthy dinner.
The dish offers a harmonious balance of spicy, sweet, and savory notes, providing a delightful culinary experience for those who enjoy bold flavors.
To make this dish, you start by selecting high-quality tofu, which serves as the protein-rich base. The tofu is complemented by an assortment of colorful vegetables such as bell peppers, zucchini, and snap peas, adding texture and nutritional value. The red curry paste, easily found at most grocery stores, is the heart of the dish, infusing it with authentic Thai flavors.
The use of coconut milk not only adds richness but also helps to mellow the heat of the curry, making it palatable for a wide range of diners. Paired with steamed jasmine rice or rice noodles, this Thai Red Curry With Tofu is a wholesome meal that will leave you feeling satisfied and energized.
Ingredients for 4-6 servings:
- 2 tablespoons vegetable oil
- 400 grams firm tofu, cubed
- 1 onion, sliced
- 2 cloves garlic, minced
- 2 tablespoons Thai red curry paste
- 1 can (400ml) coconut milk
- 1 tablespoon fish sauce (optional for added flavor)
- 2 tablespoons soy sauce (gluten-free)
- 1 tablespoon brown sugar
- 1 red bell pepper, sliced
- 1 zucchini, sliced
- 1 cup snap peas
- Fresh basil leaves, for garnish
- Lime wedges, for serving
- Cooked jasmine rice or rice noodles, for serving
Cooking Instructions:
- Prepare the Tofu: Begin by pressing the cubed tofu to remove excess moisture. This can be achieved by placing the tofu between paper towels or a clean kitchen cloth and applying gentle pressure with a heavy object for about 15 minutes.
- Cook the Tofu: Heat 1 tablespoon of vegetable oil in a large skillet or wok over medium-high heat. Add the tofu cubes and cook until they’re golden brown on all sides, about 8-10 minutes. Remove the tofu from the skillet and set aside.
- Sauté the Aromatics: In the same skillet, add the remaining 1 tablespoon of oil. Add the sliced onion and minced garlic, sautéing until the onion is translucent and aromatic, approximately 3 minutes.
- Add the Curry Paste: Stir in the Thai red curry paste, cooking for about 1 minute to release its flavors. Confirm the paste is evenly distributed with the onion and garlic.
- Create the Curry Sauce: Pour the coconut milk into the skillet, stirring to combine it with the curry paste. Add the fish sauce, soy sauce, and brown sugar. Bring the mixture to a gentle simmer, allowing the flavors to meld together.
- Cook the Vegetables: Add the sliced bell pepper, zucchini, and snap peas to the sauce. Simmer for 5-7 minutes, or until the vegetables are tender but still vibrant in color.
- Combine Tofu with Curry: Return the browned tofu to the skillet, stirring to coat it in the curry sauce. Cook for an additional 2 minutes to heat the tofu through.
- Garnish and Serve: Remove the skillet from the heat. Garnish the curry with fresh basil leaves and serve with lime wedges on the side. Accompany the dish with steamed jasmine rice or rice noodles for a complete meal.
Extra Tips:
When making Thai Red Curry With Tofu, it’s important to adjust the spice level according to your preference. If you prefer a milder curry, reduce the amount of red curry paste and balance the flavors with additional coconut milk.
For those who enjoy extra heat, consider adding sliced Thai chilies or a dash of chili flakes. Remember to taste the curry before serving and adjust the seasonings as necessary, confirming a perfect balance of flavors. Additionally, using fresh, seasonal vegetables will enhance the overall taste and presentation of the dish.
Lemon Herb Roasted Chicken Thighs

Lemon Herb Roasted Chicken Thighs offer a tantalizing combination of zesty lemon and aromatic herbs, delivering a burst of flavor with every bite. This healthy, gluten-free dish is perfect for a family dinner or a gathering with friends. The tender, juicy chicken thighs are infused with the fresh essence of lemon and a medley of herbs, creating a dish that’s both delightful and easy to prepare.
The crispy skin adds a satisfying texture, making it a favorite among both adults and children. This recipe isn’t only delicious but also quite simple to make, requiring minimal preparation and allowing the oven to do most of the work. Ideal for serving 4-6 people, the Lemon Herb Roasted Chicken Thighs can be paired with a variety of gluten-free sides like roasted vegetables or a fresh salad.
The following recipe provides clear instructions and helpful tips to guarantee your chicken turns out perfectly every time.
Ingredients (serves 4-6):
- 8 bone-in, skin-on chicken thighs
- 3 tablespoons olive oil
- 3 cloves garlic, minced
- 1 tablespoon fresh thyme, chopped
- 1 tablespoon fresh rosemary, chopped
- 1 tablespoon fresh parsley, chopped
- Zest and juice of 1 lemon
- Salt and pepper to taste
- Optional: lemon slices and fresh herbs for garnish
Cooking Instructions:
1. Preheat the Oven:
Preheat your oven to 400°F (200°C). This will guarantee the chicken cooks evenly and develops a beautiful golden-brown skin.
2. Prepare the Marinade:
In a small bowl, combine the olive oil, minced garlic, chopped thyme, rosemary, parsley, lemon zest, and lemon juice. Season with salt and pepper to taste. Mix well to create a flavorful marinade.
3. Marinate the Chicken:
Place the chicken thighs in a large bowl or a resealable plastic bag. Pour the marinade over the chicken, guaranteeing each piece is well-coated. Allow the chicken to marinate for at least 30 minutes, or up to 2 hours in the refrigerator for more intense flavor.
4. Arrange the Chicken:
Remove the chicken from the marinade and place it skin-side up on a baking sheet or in a roasting pan. Arrange the pieces so they aren’t touching, allowing the heat to circulate around them for even cooking.
5. Roast the Chicken:
Place the chicken in the preheated oven and roast for 35-40 minutes, or until the internal temperature reaches 165°F (75°C) and the skin is crispy and golden brown. If desired, add lemon slices to the pan for added flavor during roasting.
6. Rest and Serve:
Once the chicken is cooked, remove it from the oven and let it rest for 5 minutes. This allows the juices to redistribute, guaranteeing tender, juicy meat. Garnish with additional fresh herbs and lemon slices before serving.
Extra Tips:
When preparing Lemon Herb Roasted Chicken Thighs, make sure to pat the chicken dry before applying the marinade. This helps the skin crisp up in the oven.
If you prefer boneless, skinless thighs, adjust the cooking time accordingly, as they’ll cook faster. For added flavor, consider marinating the chicken overnight. Additionally, using a meat thermometer guarantees perfectly cooked chicken every time.
Enjoy this dish with your favorite gluten-free sides for a complete and satisfying meal.
Gluten-Free Pizza With Fresh Veggie Toppings

Indulging in a delicious pizza doesn’t have to mean compromising on dietary restrictions or flavor. This Gluten-Free Pizza with Fresh Veggie Toppings offers a vibrant, satisfying meal option that’s both nourishing and delicious. With a crisp gluten-free crust as the base, this pizza is adorned with a colorful array of fresh vegetables, making it not only tantalizing to the taste buds but also visually appealing.
It’s perfect for a family dinner or a casual gathering with friends, guaranteeing everyone, including those with gluten sensitivities, can enjoy a slice of pizza heaven.
Creating a gluten-free pizza at home allows you to customize your toppings and sauce to suit your taste preferences, making sure you’re using the freshest and healthiest ingredients. The key to this recipe is a well-balanced combination of flavors and textures, with the crust providing a crunchy foundation and the veggies adding a burst of freshness.
This recipe serves 4-6 people, making it an excellent choice for sharing with loved ones while keeping things healthy and gluten-free.
Ingredients:
- 1 pre-made gluten-free pizza crust (or homemade if preferred)
- 1 cup pizza sauce (make sure it’s gluten-free)
- 1 ½ cups shredded mozzarella cheese
- 1 cup cherry tomatoes, halved
- 1 bell pepper, thinly sliced
- 1 small red onion, thinly sliced
- 1 zucchini, thinly sliced
- ½ cup black olives, pitted and sliced
- 1 teaspoon dried oregano
- 1 teaspoon dried basil
- 2 tablespoons olive oil
- Fresh basil leaves for garnish
Instructions:
- Preheat the Oven: Start by preheating your oven to 425°F (220°C). This guarantees that your pizza crust will cook evenly and become nice and crispy.
- Prepare the Pizza Crust: Place the gluten-free pizza crust on a baking sheet or pizza stone. If you’re using a homemade crust, roll it out to your desired thickness, making sure it’s evenly spread out.
- Spread the Sauce: Evenly spread the pizza sauce over the crust, leaving a small border around the edge. This will create a nice edge crust once baked.
- Add Cheese and Vegetables: Sprinkle the shredded mozzarella cheese over the sauce. Arrange the cherry tomatoes, bell pepper slices, red onion, zucchini, and black olives evenly across the pizza.
- Season the Pizza: Sprinkle the dried oregano and basil over the top of the veggies and cheese. Drizzle a bit of olive oil over the pizza for extra flavor and to help the veggies roast nicely.
- Bake the Pizza: Place the pizza in the preheated oven and bake for 15-20 minutes, or until the cheese is melted and bubbly, and the crust is golden brown.
- Garnish and Serve: Once cooked, remove the pizza from the oven and let it cool slightly. Garnish with fresh basil leaves, slice, and serve hot.
Extra Tips:
For the best results, use a pizza stone if you have one. It helps to achieve a crispier crust by distributing heat evenly.
If you prefer a more personal touch, consider making your own gluten-free crust using almond flour or cauliflower for added flavor.
Experiment with different veggies or even add some cooked chicken or turkey for extra protein.
Finally, make sure all your ingredients, especially the sauce, are certified gluten-free to avoid any cross-contamination. Enjoy your homemade gluten-free pizza with a side salad for a complete meal!