

As someone who adores cooking but needs to keep an eye on the budget, discovering these 15 tasty, quick, and easy family dinner recipes has been a game-changer. Picture serving meals like Cheesy Chicken and Rice Casserole or Beef and Bean Taco Skillet without spending too much. These dishes offer flavor and simplicity without sacrificing taste or time. Curious about keeping everyone satisfied while saving some cash? Let’s explore these budget-friendly delights together.
Cheesy Chicken and Rice Casserole
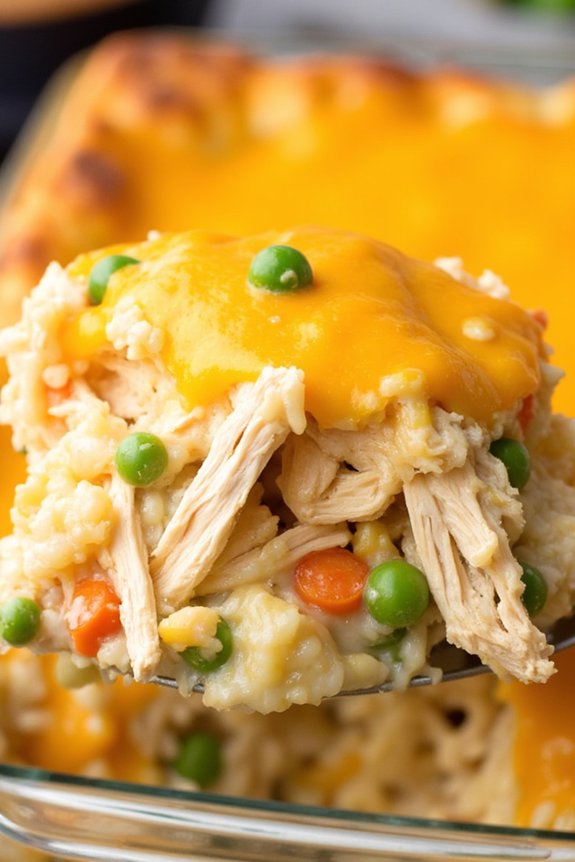
Cheesy Chicken and Rice Casserole is a comforting and budget-friendly meal that’s perfect for family dinners. This recipe combines tender chicken pieces with fluffy rice, all enveloped in a creamy cheese sauce that will delight both kids and adults alike. Not only is it hearty and delicious, but it’s also simple to prepare, making it an excellent choice for busy weeknights.
With minimal ingredients and a one-dish preparation, you’ll have dinner ready in no time, and cleanup will be a breeze. This casserole is versatile, allowing you to adapt it to your family’s tastes by adding vegetables or adjusting the seasonings. It’s also a great way to use up leftover chicken or rice.
The combination of gooey cheese, savory chicken, and perfectly cooked rice creates a satisfying dish that will quickly become a family favorite. Whether you’re hosting a casual get-together or just looking for a quick and easy dinner option, this Cheesy Chicken and Rice Casserole is sure to satisfy.
Ingredients (Serves 4-6):
- 1 1/2 cups uncooked white rice
- 3 cups chicken broth
- 2 cups cooked chicken, diced or shredded
- 1 cup frozen peas and carrots
- 1 can (10.5 oz) cream of chicken soup
- 1 cup shredded cheddar cheese
- 1/2 cup milk
- 1 teaspoon garlic powder
- 1 teaspoon onion powder
- Salt and black pepper to taste
- 1 tablespoon butter
- 1/4 cup breadcrumbs (optional)
Cooking Instructions:
- Preheat the Oven: Begin by preheating your oven to 350°F (175°C) to guarantee it’s ready for baking once the casserole is assembled.
- Cook the Rice: In a medium-sized saucepan, combine the uncooked rice and chicken broth. Bring to a boil over medium-high heat, then reduce the heat to low, cover, and let it simmer for about 15-20 minutes or until the rice is tender and the liquid is absorbed.
- Prepare the Casserole Mixture: In a large mixing bowl, combine the cooked rice, cooked chicken, frozen peas and carrots, cream of chicken soup, shredded cheddar cheese, milk, garlic powder, onion powder, salt, and pepper. Mix everything thoroughly to guarantee the ingredients are evenly distributed.
- Assemble the Casserole: Grease a 9×13 inch baking dish with butter. Transfer the rice and chicken mixture into the prepared dish, spreading it evenly. If you like a crunchy topping, sprinkle the breadcrumbs evenly over the top.
- Bake the Casserole: Place the casserole dish in the preheated oven and bake for 25-30 minutes or until the cheese is melted and bubbly and the top is golden brown.
- Rest and Serve: After removing from the oven, let the casserole cool for a few minutes before serving. This will help the dish set and make it easier to serve.
Extra Tips:
For added flavor, consider sautéing some chopped onions or bell peppers and adding them to the mixture. You can also swap out the cheddar cheese for mozzarella or a Mexican blend for a different taste.
If you prefer a creamier casserole, increase the milk or add a dollop of sour cream. For those who enjoy spice, a pinch of cayenne pepper or a dash of hot sauce can add a nice kick. Remember, this dish is highly adaptable, so feel free to experiment with different vegetables or seasonings based on what you have on hand.
One-Pot Spaghetti With Garlic and Olive Oil
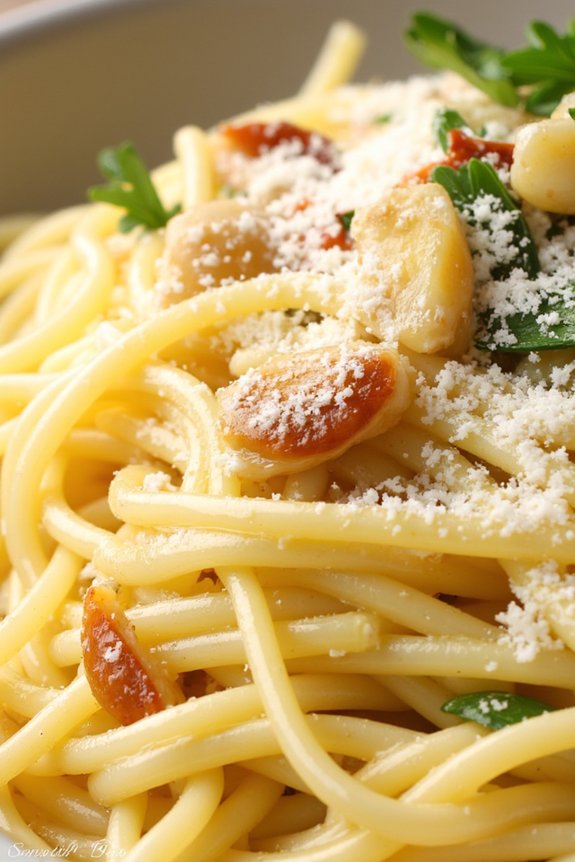
One-Pot Spaghetti With Garlic and Olive Oil is a classic Italian dish that isn’t only delicious but also incredibly simple to make. This dish is perfect for busy weeknights when you want a quick and satisfying meal without the hassle of multiple pots and pans.
The beauty of this recipe is in its simplicity, using just a few ingredients to create a flavorful and comforting dinner that’s sure to please the whole family.
The key to this recipe is the use of good quality olive oil and fresh garlic, which provide a rich and aromatic base for the spaghetti. This dish is all about letting the natural flavors of the ingredients shine through, so it’s important to choose the best you can find.
Not only is this meal budget-friendly, but it also requires minimal cleanup, making it an ideal choice for families looking to enjoy a tasty meal together without spending hours in the kitchen.
Ingredients (serving size: 4-6 people):
- 1 pound spaghetti
- 1/2 cup extra virgin olive oil
- 6 cloves garlic, thinly sliced
- 1/2 teaspoon red pepper flakes (optional)
- Salt, to taste
- 1/4 cup fresh parsley, chopped
- 1/2 cup grated Parmesan cheese (optional)
Cooking Instructions:
- Cook the Spaghetti: In a large pot, bring salted water to a boil. Add the spaghetti and cook according to package instructions until al dente. Reserve 1 cup of pasta water and then drain the spaghetti.
- Prepare the Garlic Oil: In the same pot, heat the olive oil over medium heat. Add the sliced garlic and red pepper flakes (if using). Cook for about 2 minutes, or until the garlic is fragrant and lightly golden. Be careful not to burn the garlic, as this will make it bitter.
- Combine and Cook: Add the drained spaghetti back to the pot with the garlic oil. Toss to coat the spaghetti evenly in the oil. If the pasta seems dry, add a little of the reserved pasta water until you reach the desired consistency.
- Season and Serve: Add salt to taste, and stir in the chopped parsley. Cook for another minute to allow the flavors to meld. Remove from heat and transfer the spaghetti to a serving dish. Top with grated Parmesan cheese if desired and serve immediately.
Extra Tips:
To enhance the flavor of your One-Pot Spaghetti With Garlic and Olive Oil, consider adding a squeeze of fresh lemon juice or a sprinkle of lemon zest just before serving. This will add a bright and fresh note to the dish.
For an added depth of flavor, you can also toast the garlic slices in the olive oil until they’re crispy before adding the pasta. And remember, using high-quality olive oil will make a significant difference in the taste, so choose wisely for the best results.
Beef and Bean Taco Skillet
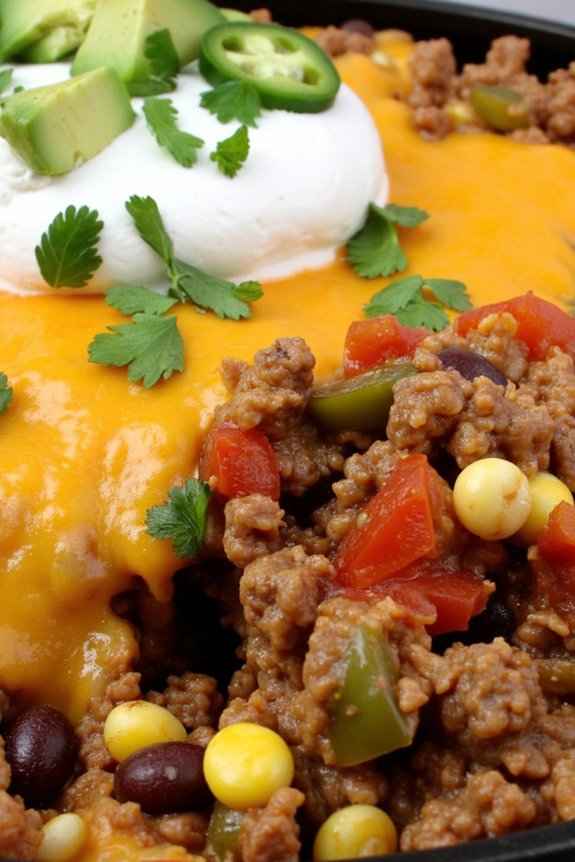
If you’re looking for a budget-friendly yet delicious meal that can feed the whole family, the Beef and Bean Taco Skillet is a perfect choice. This one-pan wonder is packed with flavor and is a breeze to prepare, making it ideal for busy weeknights.
It’s hearty, filling, and satisfies those taco cravings without the need for a lot of ingredients or time in the kitchen. Plus, the combination of beef and beans guarantees that it’s both protein-rich and satisfying.
Not only is this dish quick to prepare, but it also offers the flexibility of customizing toppings to suit everyone’s tastes. Whether you like it spicy, cheesy, or with a touch of freshness from some chopped cilantro or avocado, the Beef and Bean Taco Skillet can be adapted to your preferences.
And since it all comes together in one skillet, cleanup is a breeze! Here’s how you can make this delightful dish for 4-6 people:
Ingredients:
- 1 pound ground beef
- 1 can (15 ounces) black beans, drained and rinsed
- 1 can (10 ounces) diced tomatoes with green chilies
- 1 packet (1 ounce) taco seasoning
- 1 cup frozen corn
- 1 cup shredded cheddar cheese
- 1/2 cup chopped onions
- 1 tablespoon olive oil
- Salt and pepper to taste
- Optional toppings: sour cream, chopped cilantro, diced avocado, sliced jalapeños
Cooking Instructions:
- Prepare the Ingredients: Start by chopping the onions and draining and rinsing the black beans. This will make the cooking process smoother and quicker.
- Cook the Ground Beef: In a large skillet, heat the olive oil over medium-high heat. Add the chopped onions and sauté them until they’re translucent. Then, add the ground beef and cook until it’s browned, breaking it apart with a spoon as it cooks. Drain any excess fat from the skillet.
- Add the Seasoning: Stir in the taco seasoning, making sure that the beef is evenly coated. This step is vital for infusing the meat with that classic taco flavor.
- Mix in the Beans and Tomatoes: Add the black beans and the can of diced tomatoes with green chilies to the skillet. Stir everything together, making sure the ingredients are well combined.
- Incorporate the Corn: Mix in the frozen corn and allow the mixture to simmer for about 5 minutes. This will guarantee all the flavors meld together beautifully.
- Finish with Cheese: Sprinkle the shredded cheddar cheese over the top of the mixture. Cover the skillet with a lid and let it cook for another 2-3 minutes or until the cheese is melted and bubbly.
- Serve and Garnish: Remove from heat and serve immediately. Top with any of your preferred garnishes like sour cream, cilantro, diced avocado, or jalapeños.
Extra Tips:
For a spicier kick, consider adding a pinch of cayenne pepper or a few dashes of hot sauce when cooking the beef.
If you want a healthier option, you can substitute ground turkey or chicken for the ground beef. Additionally, for a more filling meal, serve the skillet mixture with warm tortillas or over a bed of rice.
If you’re cooking for a smaller group, this dish also makes excellent leftovers and can be easily reheated for another meal. Enjoy experimenting with different toppings to find your family’s favorite combination!
Vegetable Stir-Fry With Ramen Noodles
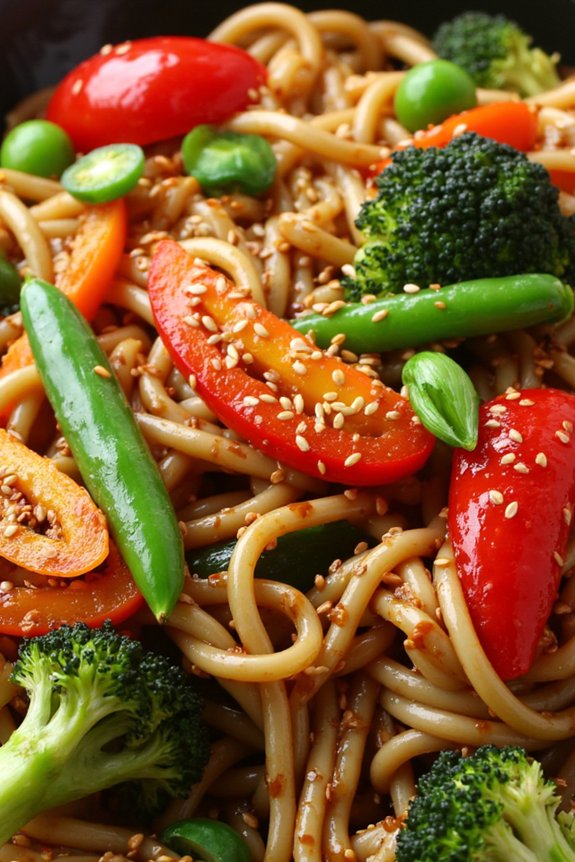
Vegetable Stir-Fry With Ramen Noodles is a quick, delicious, and budget-friendly meal that’s perfect for family dinners. This dish combines the savory flavors of fresh vegetables with the satisfying texture of ramen noodles, creating a meal that’s both nourishing and delightful.
The beauty of this recipe lies in its versatility; you can easily swap out vegetables based on what you have on hand or what’s in season, making it an ideal go-to meal throughout the year.
This simple yet flavorful stir-fry can be made in less than 30 minutes, making it a perfect option for busy weeknights. The addition of soy sauce, garlic, and ginger gives the dish a delicious Asian-inspired flair that will have everyone coming back for seconds.
Serve this hearty dish as is, or pair it with a simple salad or some spring rolls for a more complete meal. Best of all, this recipe is designed to serve 4-6 people, making it perfect for families or small gatherings.
Ingredients (Serves 4-6):
- 2 packs of instant ramen noodles (discard seasoning packets)
- 2 tablespoons vegetable oil
- 1 red bell pepper, sliced
- 1 cup broccoli florets
- 1 cup snap peas
- 1 carrot, julienned
- 3 green onions, sliced
- 3 cloves garlic, minced
- 1 tablespoon ginger, grated
- 1/4 cup soy sauce
- 1 tablespoon sesame oil
- 1 tablespoon honey
- 1 tablespoon sesame seeds (optional)
- Salt and pepper to taste
Instructions:
- Prepare the Noodles: Begin by cooking the ramen noodles according to the package instructions. Drain and set aside. Remember to discard the seasoning packets as they aren’t needed for this recipe.
- Heat the Oil: In a large skillet or wok, heat the vegetable oil over medium-high heat until shimmering.
- Sauté the Aromatics: Add the minced garlic and grated ginger to the skillet. Stir-fry for about 30 seconds, or until fragrant, being careful not to burn them.
- Cook the Vegetables: Add the sliced red bell pepper, broccoli florets, snap peas, and julienned carrot to the skillet. Stir-fry the vegetables for 5-7 minutes, or until they’re tender-crisp.
- Combine Noodles and Sauce: Add the cooked ramen noodles to the skillet with the vegetables. Pour in the soy sauce, sesame oil, and honey. Toss everything together until well combined and the noodles are heated through.
- Add Green Onions and Season: Stir in the sliced green onions. Season with salt and pepper to taste. If using, sprinkle sesame seeds over the top.
- Serve: Transfer the stir-fry to a serving dish and enjoy immediately while hot.
Extra Tips:
For an added protein boost, consider adding cooked chicken, beef, tofu, or shrimp to the stir-fry. If you like a bit of heat, add some red pepper flakes or a splash of sriracha.
Keep in mind that cooking times for vegetables can vary, so adjust accordingly to achieve your desired level of tenderness. To save time, you can also use pre-packaged stir-fry vegetable mixes available in most grocery stores.
Finally, don’t be afraid to experiment with different vegetables to keep the dish interesting and adaptable to your family’s taste preferences.
BBQ Chicken Quesadillas

BBQ Chicken Quesadillas are a delightful, flavorful dish perfect for a family dinner that doesn’t break the bank. These quesadillas offer a delicious blend of smoky BBQ flavors, tender chicken, gooey cheese, and crisp tortillas. They’re easy to prepare and can be a fun, interactive meal to involve the whole family.
Whether you’re hosting a casual get-together or simply want a quick and satisfying meal, BBQ Chicken Quesadillas are sure to impress. This recipe is ideal for serving 4-6 people, making it perfect for family dinners or small gatherings.
The combination of juicy chicken, tangy barbecue sauce, and melted cheese is irresistible, and the crispy tortilla shell adds the perfect crunch. With minimal preparation and cooking time, these quesadillas can be ready to serve in under 30 minutes. Gather your family around the table and enjoy the savory goodness of BBQ Chicken Quesadillas.
Ingredients:
- 2 cups cooked chicken, shredded
- 1 cup barbecue sauce
- 2 cups shredded cheddar cheese
- 8 large flour tortillas
- 1/4 cup chopped red onion
- 1/4 cup chopped fresh cilantro
- 1 tablespoon olive oil
- Sour cream (optional, for serving)
Cooking Instructions:
- Prepare the Chicken: In a large bowl, combine the shredded chicken and barbecue sauce, mixing well to guarantee the chicken is thoroughly coated. Set aside.
- Assemble the Quesadillas: Lay out four tortillas on a flat surface. Evenly distribute the BBQ chicken mixture over each tortilla. Sprinkle the shredded cheddar cheese, chopped red onion, and cilantro evenly over the chicken. Top each with another tortilla to form a sandwich.
- Cook the Quesadillas: Heat a large skillet or griddle over medium heat and add a small amount of olive oil. Carefully place one assembled quesadilla into the skillet. Cook for about 3-4 minutes on each side, or until the tortilla is golden brown and the cheese has melted. Repeat with the remaining quesadillas, adding more oil as needed.
- Serve: Once cooked, remove the quesadillas from the skillet and let them cool slightly. Cut each quesadilla into wedges and serve warm with a side of sour cream, if desired.
Extra Tips:
For the best results, use fresh ingredients, especially the cilantro and onion, to add a burst of flavor to your quesadillas. If you prefer a spicier kick, consider adding sliced jalapeños or a dash of hot sauce to the chicken mixture.
To save time, use rotisserie chicken from your local grocery store. This recipe is versatile, so feel free to add your favorite ingredients, such as bell peppers or mushrooms, to the mix. Finally, remember to keep an eye on your quesadillas while they’re cooking to avoid burning the tortillas.
Sausage and Potato Sheet Pan Dinner
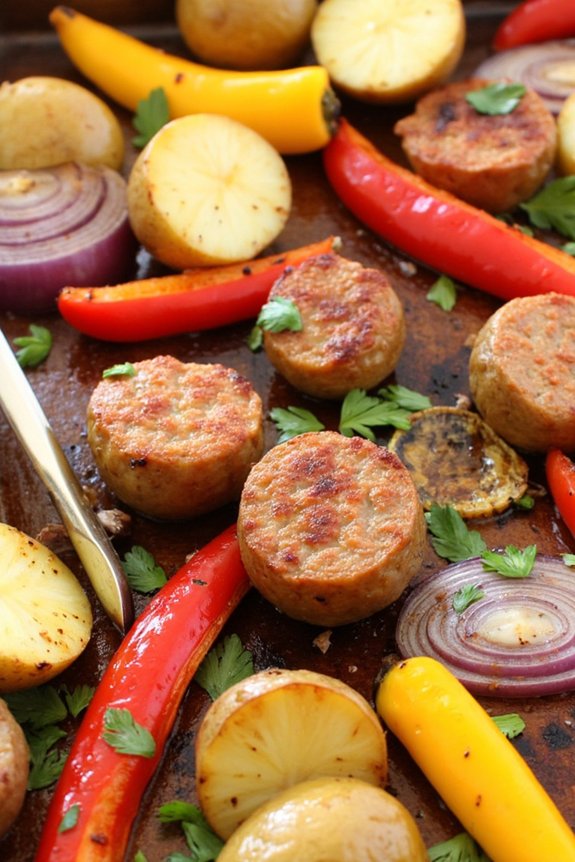
Sausage and Potato Sheet Pan Dinner is a delicious and budget-friendly meal that’s perfect for busy weeknights or cozy family dinners. This recipe combines savory sausage with tender potatoes and a medley of vegetables, all roasted to perfection on a single sheet pan.
It’s a simple, one-pan meal that’s not only easy to prepare but also requires minimal cleanup, making it a go-to option for families looking to save time and money without sacrificing flavor.
This dish is highly customizable, allowing you to use whatever vegetables and sausage you have on hand. The roasted potatoes turn golden and crispy on the outside while remaining soft on the inside, complementing the juicy and flavorful sausage.
The addition of colorful vegetables not only makes the dish visually appealing but also adds a variety of nutrients. This recipe serves 4-6 people, making it an ideal choice for a family meal.
Ingredients:
- 1 pound sausage (Italian or your choice)
- 1.5 pounds baby potatoes, halved
- 1 red bell pepper, sliced
- 1 yellow bell pepper, sliced
- 1 red onion, sliced
- 2 tablespoons olive oil
- 1 teaspoon garlic powder
- 1 teaspoon dried oregano
- 1 teaspoon dried thyme
- Salt and pepper to taste
- Fresh parsley, chopped (optional, for garnish)
Instructions:
- Preheat your oven to 400°F (200°C). This will confirm that the sheet pan dinner cooks evenly and the potatoes and sausages get a nice, crispy exterior.
- Prepare the ingredients by washing and halving the baby potatoes, and slicing the bell peppers and onion. Verify all vegetables are of similar size to promote even cooking.
- Arrange the ingredients on a large sheet pan. Begin by spreading the halved potatoes, sliced peppers, and onion evenly across the pan. Place the sausages on top, spacing them out so they cook evenly.
- Drizzle with olive oil over the sausages and vegetables. Make sure everything is well-coated to help with the roasting process.
- Season generously with garlic powder, dried oregano, dried thyme, salt, and pepper. Toss everything together on the pan to confirm the spices are evenly distributed.
- Roast in the oven for about 35-40 minutes, or until the potatoes are tender and the sausage is cooked through. You may want to flip the ingredients halfway through the cooking time to confirm even browning.
- Remove from oven and let it rest for a couple of minutes. This allows the juices to redistribute within the sausages, making them juicier when served.
- Garnish and serve by sprinkling freshly chopped parsley over the top for a pop of color and extra flavor, if desired. Serve hot and enjoy!
Extra Tips:
For an even more flavorful dish, try using a mix of different types of sausages, such as spicy, sweet, or smoked varieties.
Additionally, you can add or substitute other vegetables like zucchini, carrots, or cherry tomatoes based on what you have available.
If you prefer a bit of heat, sprinkle some crushed red pepper flakes over the vegetables before roasting.
Finally, make sure to spread the ingredients out in a single layer on the sheet pan to confirm they roast rather than steam.
Creamy Tomato Basil Pasta
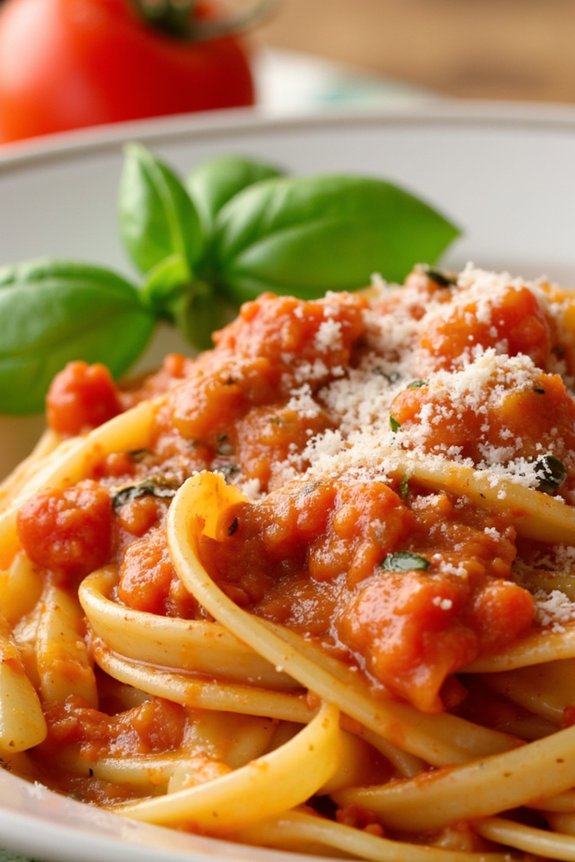
Creamy Tomato Basil Pasta is a delightful dish that combines the rich flavors of tomatoes with the aromatic essence of basil, all enveloped in a luscious creamy sauce. It’s an ideal choice for a cheap family dinner, offering both comfort and sophistication. This recipe is designed to serve 4-6 people, making it perfect for a family meal or a small gathering of friends.
The simplicity of the ingredients guarantees that it won’t break the bank, while the ease of preparation means you’ll have more time to enjoy with your loved ones. The key to this dish lies in balancing the creaminess of the sauce with the acidity of the tomatoes and the freshness of the basil.
By using pantry staples and fresh herbs, you can create a meal that’s not only economical but also bursting with flavor. The creamy tomato basil pasta can be prepared in under 30 minutes, making it a go-to option for busy weeknights or last-minute dinner plans. Follow this recipe to bring a taste of Italy to your dining table without the need for complicated techniques or hard-to-find ingredients.
Ingredients (serves 4-6):
- 12 ounces of pasta (penne or spaghetti)
- 2 tablespoons olive oil
- 4 cloves garlic, minced
- 1 can (28 ounces) crushed tomatoes
- 1 cup heavy cream
- 1/2 cup grated Parmesan cheese
- Salt and pepper to taste
- 1 teaspoon dried oregano
- 1/2 cup fresh basil leaves, chopped
- Optional: Red pepper flakes for heat
Cooking Instructions:
- Cook the Pasta: Start by bringing a large pot of salted water to a boil. Add the pasta and cook according to the package instructions until al dente. Drain and set aside.
- Prepare the Sauce: In a large skillet, heat the olive oil over medium heat. Add the minced garlic and sauté for about 1 minute, or until fragrant. Be careful not to burn the garlic.
- Add Tomatoes: Pour the crushed tomatoes into the skillet with the garlic. Stir in the dried oregano, and season with salt and pepper. Allow the sauce to simmer for about 10 minutes, stirring occasionally, until it begins to thicken.
- Incorporate Cream and Cheese: Reduce the heat to low and slowly stir in the heavy cream, making sure it blends smoothly with the tomato sauce. Add the grated Parmesan cheese, stirring continuously until the cheese has melted completely into the sauce.
- Combine Pasta and Sauce: Add the cooked pasta to the skillet, tossing it gently so that the pasta is evenly coated with the creamy tomato sauce.
- Add Fresh Basil: Just before serving, stir in the chopped fresh basil. If desired, sprinkle red pepper flakes over the top for an added kick.
- Serve: Dish out the pasta onto plates, and if desired, top with additional Parmesan cheese and fresh basil leaves for garnish.
Extra Tips:
To enhance the flavors of this Creamy Tomato Basil Pasta, consider using fresh tomatoes if they’re in season; simply blanch, peel, and crush them for a fresher taste.
For a healthier option, you can substitute heavy cream with half-and-half or a plant-based cream alternative. If you prefer a meatier dish, consider adding cooked chicken or shrimp to the pasta.
Finally, remember that the pasta will continue to absorb the sauce as it sits, so if you make it ahead, you may need to add a splash of cream or pasta water when reheating to restore its creamy consistency.
Black Bean and Corn Enchiladas

Looking for a delicious, budget-friendly family dinner option? Black Bean and Corn Enchiladas are the perfect solution. These enchiladas are a great way to enjoy a meatless meal without skimping on flavor or satisfaction. They’re packed with protein-rich black beans, sweet corn, and topped with a rich, spicy enchilada sauce. Not only are they filling, but they’re also full of nutritious ingredients that will please even the pickiest of eaters in your household.
In addition to being affordable, this dish is incredibly easy to prepare and can be on the table in under an hour. The combination of creamy cheese, tangy sauce, and hearty beans wrapped in a soft tortilla is irresistible. Plus, it can be easily customized with your favorite toppings like avocado, sour cream, or fresh cilantro. This recipe serves 4-6 people, making it an excellent choice for family dinners or meal prep for the week.
Ingredients:
- 12 corn tortillas
- 1 can (15 oz) black beans, drained and rinsed
- 1 cup frozen corn, thawed
- 1 cup shredded cheddar cheese
- 1 cup shredded Monterey Jack cheese
- 1 can (10 oz) enchilada sauce
- 1 small onion, diced
- 2 cloves garlic, minced
- 1 teaspoon ground cumin
- 1 teaspoon chili powder
- 2 tablespoons olive oil
- Salt and pepper to taste
- Fresh cilantro (for garnish, optional)
Instructions:
1. Preheat the Oven: Preheat your oven to 375°F (190°C). This will guarantee that it’s ready for the enchiladas once you have assembled them.
2. Prepare the Filling: In a large skillet, heat the olive oil over medium heat. Add the diced onion and minced garlic, sautéing until the onion becomes translucent, about 3-4 minutes.
Stir in the black beans, corn, cumin, chili powder, salt, and pepper. Cook for an additional 2-3 minutes until the mixture is heated through. Remove from heat.
3. Warm the Tortillas: Wrap the corn tortillas in a damp paper towel and microwave them for 30 seconds. This will make them more pliable and easier to roll without cracking.
4. Assemble the Enchiladas: Spread a thin layer of enchilada sauce in the bottom of a 9×13 inch baking dish. Fill each tortilla with a few tablespoons of the black bean and corn mixture and a sprinkle of both cheddar and Monterey Jack cheese.
Roll the tortilla tightly and place seam side down in the baking dish. Repeat with the remaining tortillas.
5. Top with Sauce and Cheese: Pour the remaining enchilada sauce over the rolled tortillas, ensuring they’re well covered. Sprinkle the remaining shredded cheese on top.
6. Bake: Place the baking dish in the preheated oven and Bake for 20-25 minutes, or until the cheese is melted and bubbly.
7. Serve: Remove from the oven and allow to cool for a few minutes. Garnish with fresh cilantro before serving, if desired.
Extra Tips:
For an extra kick, consider adding chopped jalapeños to the bean mixture or use a spicier enchilada sauce.
You can also substitute flour tortillas if you prefer, though corn tortillas add an authentic touch. To save time, prepare the filling in advance and store it in the refrigerator for up to 3 days.
This will make assembly quick and easy when you’re ready to bake. Finally, feel free to get creative with toppings – sliced avocados, diced tomatoes, or a dollop of sour cream can add great flavor and texture to your dish.
Easy Chicken Alfredo Bake

Easy Chicken Alfredo Bake is a delightful and comforting dish that combines creamy Alfredo sauce with tender chicken and hearty pasta, all baked to perfection in the oven. This recipe is a fantastic choice for a cheap family dinner that doesn’t skimp on flavor or satisfaction.
The creamy sauce, made with a blend of cheeses and cream, envelops the pasta and chicken, creating a dish that’s rich, filling, and sure to please even the pickiest of eaters. With minimal prep time and simple ingredients, this recipe is ideal for busy weeknights when you want to serve a wholesome meal without spending hours in the kitchen.
This Easy Chicken Alfredo Bake isn’t only affordable but also versatile. You can customize it with your family’s favorite vegetables or spices to give it a personal touch. Additionally, the leftovers (if there are any) make for a great next-day lunch or dinner.
Whether you’re looking to impress your family with a delicious home-cooked meal or simply need a quick and easy dinner option, this recipe has you covered. Let’s plunge into the list of ingredients you’ll need to serve 4-6 people.
Ingredients:
- 2 cups cooked chicken breast, shredded or cubed
- 12 oz penne pasta
- 2 cups heavy cream
- 1 cup grated Parmesan cheese
- 1 cup shredded mozzarella cheese
- 1/4 cup unsalted butter
- 3 cloves garlic, minced
- 1 teaspoon Italian seasoning
- Salt and pepper to taste
- 1 tablespoon chopped fresh parsley for garnish (optional)
Cooking Instructions:
- Preheat the oven: Start by preheating your oven to 350°F (175°C). This will make certain it’s ready to go once the dish is assembled.
- Cook the pasta: In a large pot of boiling salted water, cook the penne pasta according to package instructions until al dente. Drain the pasta and set aside.
- Prepare the sauce: In a saucepan over medium heat, melt the unsalted butter. Add the minced garlic and sauté until fragrant, about 1 minute. Stir in the heavy cream and bring to a gentle simmer.
- Add the cheeses: Gradually whisk in the grated Parmesan cheese and half of the shredded mozzarella. Stir constantly until the cheeses are melted and the sauce is smooth. Add Italian seasoning, and season with salt and pepper to taste.
- Combine the ingredients: In a large mixing bowl, combine the cooked pasta, shredded chicken, and the creamy cheese sauce. Mix well to make sure everything is evenly coated with the sauce.
- Assemble the bake: Transfer the pasta and chicken mixture into a greased 9×13 inch baking dish. Sprinkle the remaining mozzarella cheese evenly over the top.
- Bake the dish: Place the baking dish in the preheated oven and bake for 20-25 minutes, or until the cheese on top is bubbly and golden brown.
- Garnish and serve: Remove the dish from the oven and let it cool for a few minutes. Garnish with chopped fresh parsley if desired, and serve hot.
Extra Tips:
For added flavor, consider including vegetables such as broccoli, spinach, or mushrooms in the bake. Simply sauté them along with the garlic before adding the cream to the sauce.
If you’re in a pinch, rotisserie chicken can be used instead of cooking chicken breast from scratch. Additionally, for a lighter version, you can substitute half-and-half for heavy cream, though this may slightly alter the creaminess of the sauce.
Finally, feel free to experiment with different types of pasta or cheese varieties based on your preference.
Lentil and Vegetable Soup
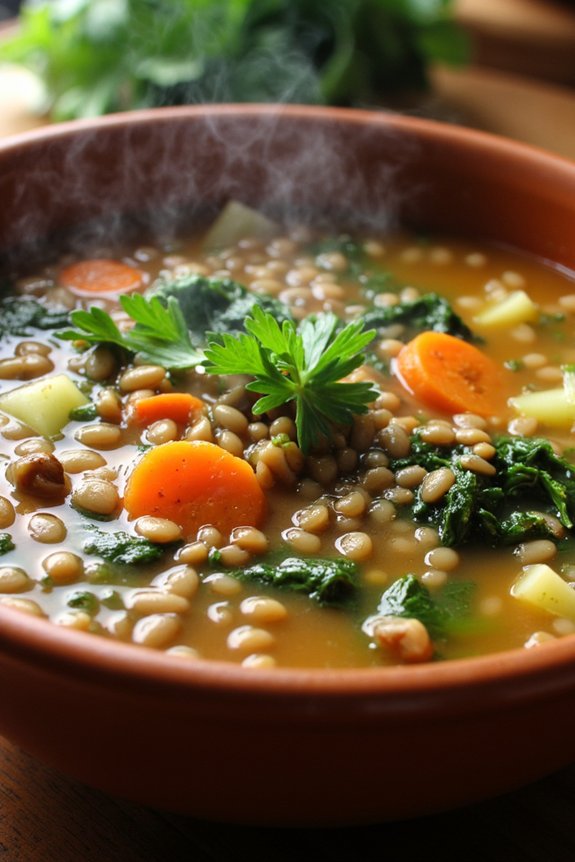
Lentil and Vegetable Soup is a heartwarming dish that’s perfect for family dinners, especially when you’re on a budget. This nutritious soup is packed with protein, fiber, and a variety of vegetables, making it not only economical but also exceptionally healthy.
The beauty of this recipe is in its simplicity and versatility; you can adjust the vegetables based on what’s in season or what you have on hand. It’s a wonderful way to introduce more plant-based meals into your family’s diet without sacrificing flavor or satisfaction.
This recipe yields enough soup to serve 4-6 people and is sure to become a staple in your household. Lentils cook relatively quickly and don’t require soaking, which makes this dish a convenient option for busy weeknights. The combination of aromatic herbs, savory broth, and the natural sweetness of the vegetables creates a deep and satisfying flavor profile that will have everyone asking for seconds.
Plus, it’s easy to make in one pot, minimizing cleanup time and maximizing your enjoyment of the meal.
Ingredients:
- 1 tablespoon olive oil
- 1 medium onion, chopped
- 2 cloves garlic, minced
- 3 carrots, diced
- 2 celery stalks, diced
- 1 teaspoon dried thyme
- 1 teaspoon dried oregano
- 1 cup dried lentils, rinsed and drained
- 6 cups vegetable broth
- 1 can (14.5 oz) diced tomatoes
- 2 cups chopped kale or spinach
- Salt and pepper to taste
- 2 tablespoons lemon juice
- Optional: Fresh parsley for garnish
Instructions:
- Prepare the Vegetables: Start by chopping the onion, mincing the garlic, and dicing the carrots and celery. These will form the aromatic base of your soup.
- Sauté Aromatics: Heat the olive oil in a large pot over medium heat. Add the chopped onion and sauté for about 5 minutes, or until the onion becomes translucent. Stir in the minced garlic and cook for another 1 minute, taking care not to burn the garlic.
- Add Vegetables and Herbs: Stir in the diced carrots, celery, dried thyme, and dried oregano. Cook for an additional 5 minutes, allowing the flavors to meld together.
- Incorporate Lentils and Broth: Add the rinsed lentils to the pot, followed by the vegetable broth and diced tomatoes. Stir to combine, and bring the mixture to a boil.
- Simmer the Soup: Once boiling, reduce the heat to low and let the soup simmer uncovered for about 25-30 minutes, or until the lentils are tender. Stir occasionally to prevent sticking.
- Add Greens and Season: Stir in the chopped kale or spinach and let the soup cook for another 5 minutes, or until the greens are wilted. Season with salt and pepper to taste.
- Finish with Lemon Juice: Remove the pot from heat and stir in the lemon juice, which will brighten the flavors. Taste and adjust seasoning if necessary.
- Serve and Garnish: Ladle the soup into bowls and garnish with fresh parsley if desired. Serve hot with crusty bread or a side salad.
Extra Tips:
For extra depth of flavor, consider adding a bay leaf to the soup while it simmers and remove it before serving. If you prefer a thicker soup, you can blend a portion of it using an immersion blender before adding the greens.
This soup also freezes well, so consider making a double batch and storing leftovers for a quick meal on another day. Adjust the seasoning to your family’s preference, and feel free to experiment with other herbs and spices as desired.
Baked Ziti With Spinach
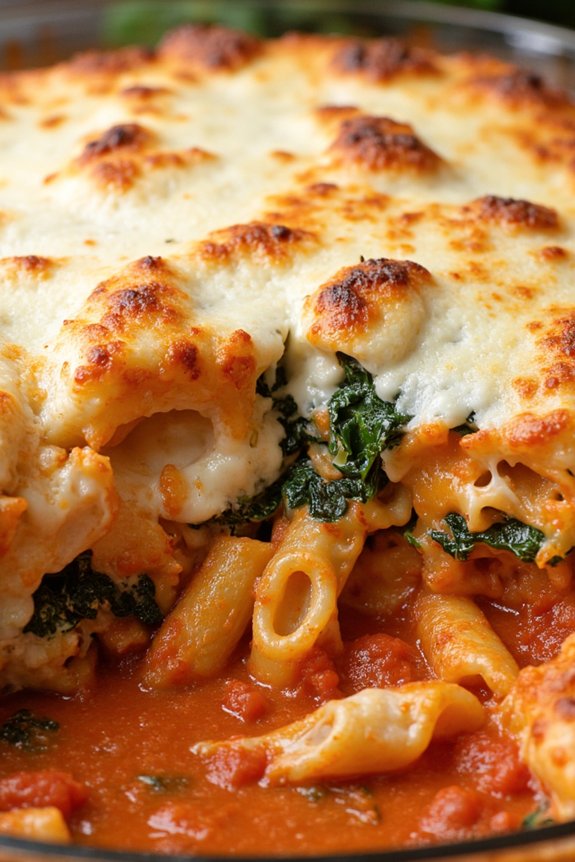
Baked Ziti With Spinach offers a comforting and hearty meal that’s perfect for family dinners. This dish combines tender ziti pasta with a rich tomato sauce, creamy ricotta, and melted mozzarella cheese, all enhanced by the nutritional boost of fresh spinach. It’s an easy-to-make recipe that brings together simple ingredients to create a deliciously satisfying meal that everyone will enjoy.
Ideal for busy weeknights or a cozy weekend gathering, Baked Ziti With Spinach is sure to become a family favorite.
One of the best parts about this recipe is its versatility. You can easily modify it to suit your family’s taste preferences by adding different vegetables, swapping out cheeses, or incorporating your favorite protein such as ground beef or sausage.
Plus, it’s a great make-ahead dish that can be prepared in advance and baked when needed, making it an excellent option for those who love to plan ahead. Let’s explore the ingredients and steps needed to create this delightful dish.
Ingredients (serving size: 4-6 people):
- 1 pound ziti pasta
- 2 tablespoons olive oil
- 3 cloves garlic, minced
- 1 onion, chopped
- 1 (24-ounce) jar marinara sauce
- 1 teaspoon dried oregano
- 1 teaspoon dried basil
- 1/4 teaspoon red pepper flakes (optional)
- 5 cups fresh spinach, roughly chopped
- 1 cup ricotta cheese
- 1 cup grated Parmesan cheese
- 2 cups shredded mozzarella cheese
- Salt and pepper to taste
Instructions:
- Preheat Oven: Begin by preheating your oven to 375°F (190°C). This will guarantee it’s at the right temperature by the time you’re ready to bake the ziti.
- Cook the Pasta: Bring a large pot of salted water to a boil. Add the ziti pasta and cook according to package instructions until al dente. Drain the pasta and set it aside.
- Prepare the Sauce: In a large skillet, heat the olive oil over medium heat. Add the minced garlic and chopped onion, sautéing until the onion becomes translucent. Stir in the marinara sauce, dried oregano, basil, and red pepper flakes, allowing the sauce to simmer for about 5 minutes.
- Add Spinach: Once the sauce is simmering, add the chopped spinach, stirring continuously until the spinach wilts and is fully incorporated into the sauce.
- Mix the Cheese: In a large mixing bowl, combine the ricotta cheese, 1/2 cup of grated Parmesan, and 1 cup of shredded mozzarella. Season the mixture with salt and pepper to taste.
- Combine Ingredients: In the same mixing bowl, add the cooked ziti and pour in the sauce. Mix everything thoroughly to guarantee the pasta is well coated with the sauce and cheese mixture.
- Assemble: Grease a 9×13-inch baking dish. Pour half of the ziti mixture into the dish, then layer with half of the remaining mozzarella cheese. Add the rest of the ziti mixture on top, followed by the remaining mozzarella and Parmesan cheeses.
- Bake: Cover the baking dish with aluminum foil and bake in the preheated oven for 20 minutes. Remove the foil and continue baking for an additional 10-15 minutes, or until the cheese is bubbly and slightly golden brown.
- Serve: Allow the baked ziti to cool for a few minutes before serving. Enjoy!
Extra Tips:
For a richer flavor, consider adding a splash of red wine to the marinara sauce while it simmers. If you prefer a meatier dish, incorporate cooked ground beef or Italian sausage into the sauce mixture.
To save time on busy nights, prepare the dish a day ahead, refrigerate it, and simply bake when ready. For a healthier variation, use whole wheat pasta and low-fat cheeses.
Don’t forget to taste the sauce for seasoning before combining it with the pasta, adding more salt or spices as needed to suit your taste.
Tuna and Pea Casserole
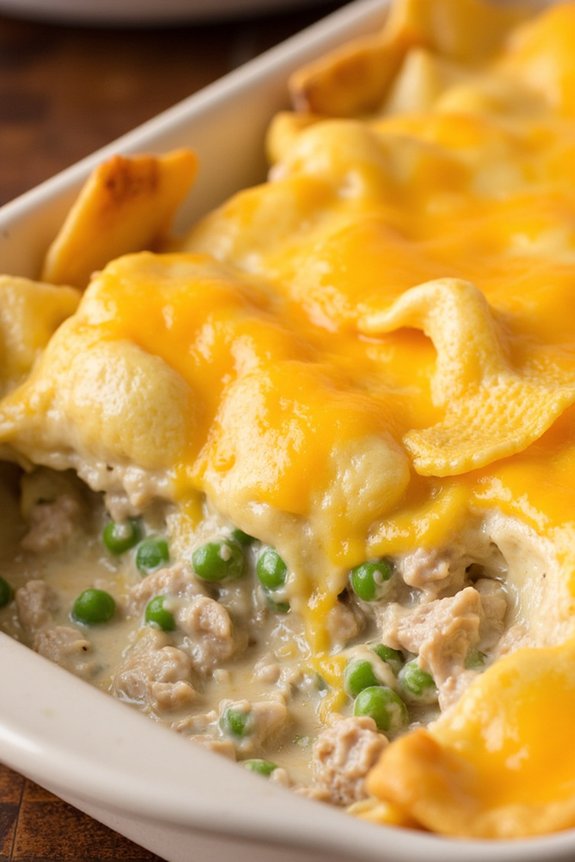
Tuna and Pea Casserole is a classic family dinner dish that combines simple ingredients to create a comforting and satisfying meal. This recipe is perfect for those busy weeknights when you need to prepare something quickly yet delicious. The combination of tender pasta, creamy sauce, savory tuna, and sweet peas offers a delightful contrast of flavors and textures, making it a hit with both kids and adults alike.
Not only is it economical, but it also utilizes pantry staples, guaranteeing you can whip up a tasty meal without a trip to the grocery store. This recipe serves 4-6 people, making it ideal for family dinners or small gatherings. The creamy texture and rich flavors make it a go-to option for those seeking a hearty meal without breaking the bank.
The ingredients are simple and easy to find, and the preparation process is straightforward, allowing even novice cooks to achieve a fantastic result. By following this recipe, you can enjoy a delicious Tuna and Pea Casserole in no time, bringing warmth and comfort to your dinner table.
Ingredients:
- 12 oz egg noodles
- 1 can (10.5 oz) cream of mushroom soup
- 1/2 cup milk
- 1/2 cup mayonnaise
- 1 teaspoon onion powder
- 1 teaspoon garlic powder
- 2 cans (5 oz each) tuna, drained
- 1 cup frozen peas
- 1 cup shredded cheddar cheese
- Salt and pepper to taste
- 1 cup crushed potato chips
Instructions:
- Preheat the Oven: Preheat your oven to 350°F (175°C) to guarantee it’s hot and ready for baking when the casserole is assembled.
- Cook the Noodles: In a large pot, bring water to a boil and cook the egg noodles according to the package instructions until al dente. Drain and set aside.
- Prepare the Sauce: In a large mixing bowl, combine the cream of mushroom soup, milk, mayonnaise, onion powder, and garlic powder. Stir until smooth and well combined.
- Mix the Ingredients: Add the cooked egg noodles, drained tuna, frozen peas, and half of the shredded cheddar cheese to the sauce. Mix thoroughly to ensure all ingredients are evenly coated with the creamy mixture.
- Season and Transfer: Season the mixture with salt and pepper to taste. Transfer the combined ingredients into a greased 9×13 inch baking dish, spreading it out evenly.
- Add Toppings: Sprinkle the remaining cheddar cheese over the top of the casserole. Then, evenly spread the crushed potato chips over the cheese layer for extra crunch.
- Bake the Casserole: Place the baking dish in the preheated oven and bake for 25-30 minutes, or until the top is golden brown and the dish is bubbling around the edges.
- Serve: Once baked, remove from the oven and let it cool for a few minutes before serving. Enjoy your Tuna and Pea Casserole with a side salad or your favorite bread.
Extra Tips: To enhance the flavor, consider adding a pinch of dried thyme or parsley to the sauce mixture. If you prefer a more golden and crisp top, switch the oven to broil for the last 2 minutes of baking. Be sure to keep an eye on it to prevent burning.
Additionally, you can substitute the cheddar cheese with any melting cheese of your choice, such as mozzarella or Monterey Jack, for a different flavor profile.
Quick Beef and Broccoli Stir-Fry
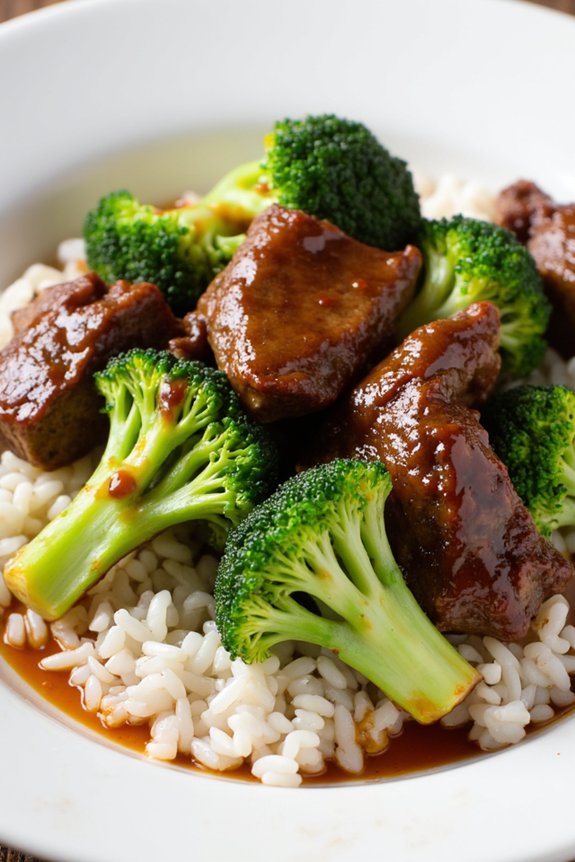
Quick Beef and Broccoli Stir-Fry is a delicious and budget-friendly meal that can be prepared in under 30 minutes, making it an ideal option for busy weeknights.
This dish combines tender slices of beef with crisp broccoli, all tossed in a flavorful sauce that will please even the pickiest eaters in your family. Not only is it simple to make, but it’s also a healthier alternative to take-out, offering a balance of protein and vegetables.
Perfect for a family of 4 to 6, this dish allows you to stretch your ingredients while providing a satisfying meal. The key to success with this recipe is preparing all the ingredients ahead of time, guaranteeing a smooth cooking process.
Whether you’re a seasoned cook or a kitchen novice, this recipe will guide you step-by-step to create a tasty dinner that everyone will love.
Ingredients (serving size: 4-6 people):
- 1 pound flank steak, thinly sliced against the grain
- 4 cups broccoli florets
- 2 tablespoons vegetable oil
- 4 cloves garlic, minced
- 1 tablespoon ginger, minced
- 1/4 cup soy sauce
- 3 tablespoons oyster sauce
- 1 tablespoon cornstarch
- 1 tablespoon water
- 1 teaspoon sugar
- Cooked white rice, for serving
Cooking Instructions:
- Prepare the Beef: Start by slicing the flank steak into thin strips against the grain. This guarantees the beef stays tender during cooking. Set the sliced beef aside.
- Blanch the Broccoli: In a large pot of boiling water, blanch the broccoli florets for about 2 minutes until bright green and slightly tender. Drain and rinse under cold water to stop the cooking process. Set aside.
- Make the Sauce: In a small bowl, combine soy sauce, oyster sauce, cornstarch, water, and sugar. Stir until the cornstarch is fully dissolved to create a smooth sauce.
- Stir-Fry the Beef: Heat 1 tablespoon of vegetable oil in a large skillet or wok over medium-high heat. Add the beef slices in batches, cooking for 2-3 minutes until browned. Remove the beef from the skillet and set aside.
- Cook the Aromatics: In the same skillet, add the remaining 1 tablespoon of oil. Once hot, add minced garlic and ginger. Stir-fry for about 30 seconds until fragrant.
- Combine Ingredients: Return the beef to the skillet, along with the blanched broccoli. Pour the prepared sauce over the beef and broccoli. Stir well to make sure everything is coated with the sauce.
- Finish Cooking: Allow the stir-fry to cook for an additional 2-3 minutes until the sauce thickens and the beef is cooked to your desired doneness.
- Serve: Serve the beef and broccoli stir-fry over cooked white rice for a complete meal.
Extra Tips: For a more robust flavor, marinate the beef in a mixture of soy sauce, ginger, and garlic for 15-30 minutes before cooking.
Make sure to have all your ingredients prepped and ready before you start cooking, as stir-frying happens quickly. If you prefer a spicier dish, add a pinch of red pepper flakes to the sauce.
Also, you can substitute chicken or tofu for the beef if desired.
Chickpea and Quinoa Salad
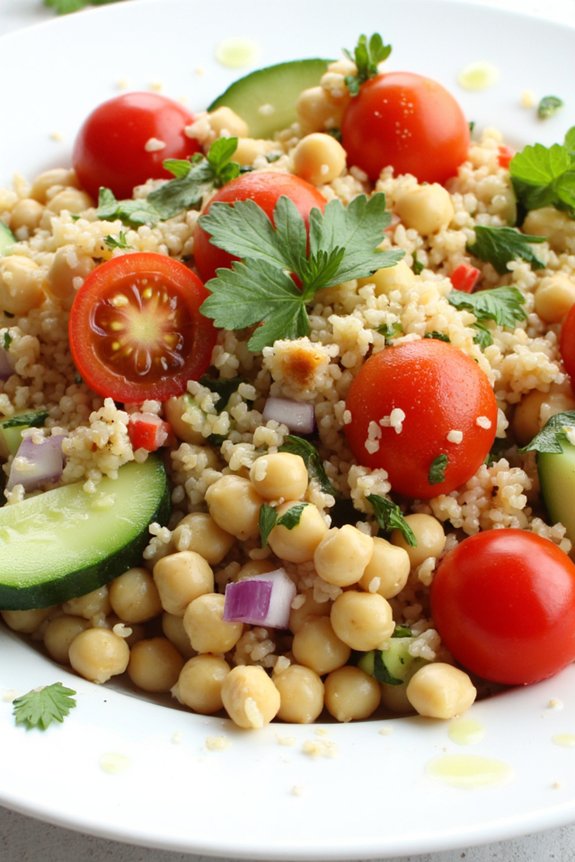
This Chickpea and Quinoa Salad is a nutritious, budget-friendly dish perfect for family dinners. Combining the rich protein of chickpeas with the complete protein of quinoa, this salad isn’t only filling but also packed with essential nutrients. Its fresh vegetables and zesty dressing add vibrant flavors, making it a delightful meal that can be served as a main dish or a side.
Whether you’re hosting a family gathering or looking for a quick weeknight dinner, this salad is a versatile addition to your meal repertoire. Apart from being cost-effective, this salad is also incredibly easy to prepare. With minimal cooking required, it’s a great option for those looking to whip up a healthy meal in no time.
The colorful medley of ingredients guarantees that the dish is both visually appealing and delicious, offering a range of textures and tastes that will satisfy everyone at the table. Plus, it can be made ahead of time, allowing the flavors to meld together beautifully, making it even tastier the next day.
Ingredients (serves 4-6):
- 1 cup quinoa
- 2 cups water
- 1 can (15 oz) chickpeas, drained and rinsed
- 1 cup cherry tomatoes, halved
- 1 cucumber, diced
- 1 red bell pepper, diced
- 1/4 cup red onion, finely chopped
- 1/4 cup fresh parsley, chopped
- 1/4 cup fresh mint, chopped
- 1/4 cup olive oil
- 2 tablespoons lemon juice
- 1 clove garlic, minced
- Salt and pepper to taste
Cooking Instructions:
- Cook the Quinoa: Rinse 1 cup of quinoa under cold water to remove any bitterness. In a medium saucepan, combine the rinsed quinoa and 2 cups of water. Bring to a boil over medium-high heat, then reduce the heat to low, cover, and simmer for about 15 minutes or until the quinoa is fluffy and the water has been absorbed. Remove from heat and let it cool.
- Prepare the Vegetables: While the quinoa is cooking, prepare the vegetables. Rinse and halve the cherry tomatoes, dice the cucumber and red bell pepper, and finely chop the red onion. Chop the fresh parsley and mint as well. Set aside.
- Combine the Ingredients: In a large mixing bowl, combine the cooked and cooled quinoa with the drained chickpeas, cherry tomatoes, cucumber, red bell pepper, red onion, parsley, and mint. Toss everything together gently to guarantee an even mix.
- Make the Dressing: In a small bowl, whisk together the olive oil, lemon juice, minced garlic, salt, and pepper. Adjust the seasoning according to your taste.
- Dress the Salad: Pour the dressing over the quinoa and chickpea mixture. Toss everything together until well combined, guaranteeing the dressing evenly coats all the ingredients.
- Serve and Enjoy: Serve the salad immediately or cover and refrigerate for up to an hour to let the flavors meld together. This salad can be enjoyed chilled or at room temperature.
Extra Tips:
For an added flavor boost, consider roasting the chickpeas before adding them to the salad. Simply spread them on a baking sheet, drizzle with a little olive oil, sprinkle with salt, and bake at 400°F (200°C) for about 20 minutes or until crispy. This adds a delightful crunch and enhances the overall texture of the salad.
Additionally, feel free to customize the salad with other fresh herbs or add-ins such as avocado, olives, or feta cheese to suit your family’s preferences.
Slow Cooker Pulled Pork Sandwiches
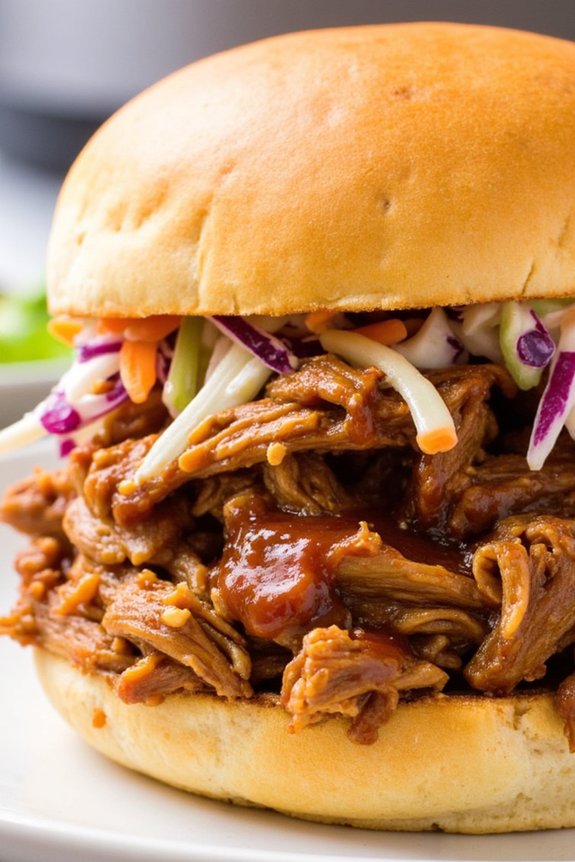
Slow Cooker Pulled Pork Sandwiches are a perfect choice for a budget-friendly and hearty family dinner. This dish offers the convenience of a slow cooker, allowing you to prepare a delicious meal with minimal effort. The slow-cooked pork becomes tender and flavorful, absorbing all the spices and seasonings, making it the perfect filling for sandwiches.
Whether you’re serving it for a family gathering or a weeknight dinner, these sandwiches are sure to be a hit.
The beauty of Slow Cooker Pulled Pork Sandwiches lies in their simplicity and versatility. You can easily modify the flavors to suit your family’s taste by adjusting the spices or adding your favorite barbecue sauce.
The pulled pork can be served on toasted buns with coleslaw for a classic combination, or you can get creative with toppings to make it your own. This recipe is designed to serve 4-6 people, making it an ideal choice for feeding a crowd or ensuring leftovers for the next day.
Ingredients for 4-6 servings:
- 3-4 pounds pork shoulder (also known as pork butt)
- 1 tablespoon brown sugar
- 1 tablespoon smoked paprika
- 1 teaspoon garlic powder
- 1 teaspoon onion powder
- 1 teaspoon ground cumin
- 1 teaspoon salt
- 1/2 teaspoon black pepper
- 1 cup barbecue sauce
- 1/2 cup apple cider vinegar
- 1/2 cup chicken broth
- 6 sandwich buns
- Coleslaw (optional, for topping)
Cooking Instructions:
- Prepare the Pork: Begin by trimming excess fat from the pork shoulder. In a small bowl, mix together the brown sugar, smoked paprika, garlic powder, onion powder, ground cumin, salt, and black pepper. Rub this spice mixture all over the pork shoulder, ensuring it’s evenly coated.
- Setup the Slow Cooker: Place the seasoned pork shoulder in the slow cooker. In a separate bowl, combine the barbecue sauce, apple cider vinegar, and chicken broth. Pour this mixture over the pork in the slow cooker.
- Cook the Pork: Cover the slow cooker with its lid and set it to cook on low for 8-10 hours or on high for 4-5 hours. The pork is ready when it’s fork-tender and easily pulls apart.
- Shred the Pork: Once cooked, remove the pork from the slow cooker and place it on a cutting board. Use two forks to shred the pork, discarding any large pieces of fat. Return the shredded pork to the slow cooker and mix it with the remaining juices for added flavor.
- Assemble the Sandwiches: Toast the sandwich buns if desired. Spoon the pulled pork onto the bottom half of each bun. Top with coleslaw if using, and place the top half of the bun on the sandwich.
- Serve: Serve the sandwiches warm with any additional barbecue sauce on the side for extra flavor.
Extra Tips: For the best results, choose a well-marbled pork shoulder as it will yield juicier pulled pork. Feel free to adjust the spice levels by adding more or less cayenne pepper, or try a touch of liquid smoke for a smoky flavor.
If you have leftovers, the pulled pork can be stored in an airtight container in the refrigerator for up to 3 days or frozen for up to 3 months. Reheat gently to maintain its delicious texture.